Intent--组件通信
组件通信1 获取子活动的返回值
创建Activity时实现自动注册!【Activity必须要注册才能使用】

默认 LinearLayout 布局,注意 xml 中约束布局的使用;
若需要更改 线性布局 只需要将标签更改为 LinearLayout 即可,记得 设置线性布局的方向orientation;
activity_main1中约束布局
<?xml version="1.0" encoding="utf-8"?>
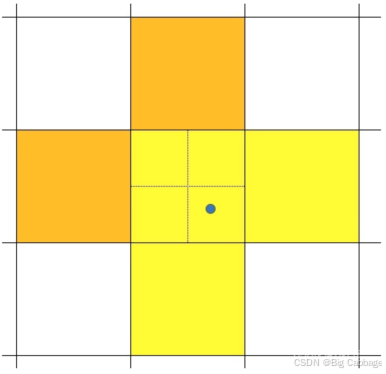
<androidx.constraintlayout.widget.ConstraintLayout xmlns:android="http://schemas.android.com/apk/res/android"xmlns:app="http://schemas.android.com/apk/res-auto"xmlns:tools="http://schemas.android.com/tools"android:id="@+id/main"android:layout_width="match_parent"android:layout_height="match_parent"tools:context=".MainActivity"><Buttonandroid:layout_width="wrap_content"android:layout_height="wrap_content"android:text="登录"app:layout_constraintBottom_toBottomOf="parent"app:layout_constraintEnd_toEndOf="parent"app:layout_constraintStart_toStartOf="parent"app:layout_constraintTop_toTopOf="parent"android:id="@+id/btn_login"/><LinearLayoutandroid:layout_width="match_parent"android:layout_height="wrap_content"android:orientation="horizontal"android:gravity="center"app:layout_constraintTop_toBottomOf="@+id/btn_login"><TextViewandroid:layout_width="wrap_content"android:layout_height="wrap_content"android:text="用户名:" /><EditTextandroid:layout_width="wrap_content"android:layout_height="wrap_content"android:id="@+id/edt_name"/></LinearLayout></androidx.constraintlayout.widget.ConstraintLayout>activity_main2中约束布局
父布局约束_LineayLayout(id值是linear)
app:layout_constraintBottom_toBottomOf="parent" 底部约束
app:layout_constraintEnd_toEndOf="parent" 右边约束
app:layout_constraintStart_toStartOf="parent" 左边约束
app:layout_constraintTop_toTopOf="parent" 顶部约束
子空间约束_Button
app:layout_constraintTop_toBottomOf="@+id/linear" 顶部添加约束到父布局控件的底部
app:layout_constraintEnd_toEndOf="@+id/linear" 右边添加约束到父布局控件右边
app:layout_constraintStart_toStartOf="@+id/linear" 左边添加约束到父布局控件左边
<?xml version="1.0" encoding="utf-8"?>
<androidx.constraintlayout.widget.ConstraintLayout xmlns:android="http://schemas.android.com/apk/res/android"xmlns:app="http://schemas.android.com/apk/res-auto"xmlns:tools="http://schemas.android.com/tools"android:id="@+id/main"android:layout_width="match_parent"android:layout_height="match_parent"tools:context=".MainActivity2"><LinearLayoutandroid:id="@+id/linear"android:layout_width="match_parent"android:layout_height="wrap_content"android:gravity="center"android:orientation="horizontal"app:layout_constraintBottom_toBottomOf="parent"app:layout_constraintEnd_toEndOf="parent"app:layout_constraintStart_toStartOf="parent"app:layout_constraintTop_toTopOf="parent"><TextViewandroid:layout_width="wrap_content"android:layout_height="wrap_content"android:text="用户名:" /><EditTextandroid:id="@+id/edt_name"android:layout_width="wrap_content"android:layout_height="wrap_content" /></LinearLayout><Buttonandroid:id="@+id/btn_return"android:layout_width="wrap_content"android:layout_height="wrap_content"android:gravity="center"android:text="返回"app:layout_constraintTop_toBottomOf="@+id/linear"app:layout_constraintEnd_toEndOf="@+id/linear"app:layout_constraintStart_toStartOf="@+id/linear" />
</androidx.constraintlayout.widget.ConstraintLayout>
MainActivity.java
package com.example.exp4_2;import android.content.Intent;
import android.os.Bundle;
import android.view.View;
import android.widget.Button;
import android.widget.EditText;import androidx.activity.EdgeToEdge;
import androidx.annotation.Nullable;
import androidx.appcompat.app.AppCompatActivity;
import androidx.core.graphics.Insets;
import androidx.core.view.ViewCompat;
import androidx.core.view.WindowInsetsCompat;public class MainActivity extends AppCompatActivity {Button btn_login;EditText edt_name;@Overrideprotected void onCreate(Bundle savedInstanceState) {super.onCreate(savedInstanceState);EdgeToEdge.enable(this);setContentView(R.layout.activity_main);ViewCompat.setOnApplyWindowInsetsListener(findViewById(R.id.main), (v, insets) -> {Insets systemBars = insets.getInsets(WindowInsetsCompat.Type.systemBars());v.setPadding(systemBars.left, systemBars.top, systemBars.right, systemBars.bottom);return insets;});btn_login = findViewById(R.id.btn_login);btn_login.setOnClickListener(new View.OnClickListener() {@Overridepublic void onClick(View view) {//显式启动Intent intent = new Intent(MainActivity.this, MainActivity2.class);//以sub_activity的方式启动子Activity//参数两个 intent int(请求码)startActivityForResult(intent,0);}});}@Overrideprotected void onActivityResult(int requestCode, int resultCode, @Nullable Intent data) {super.onActivityResult(requestCode, resultCode, data);edt_name = findViewById(R.id.edt_name);//得到返回值edt_name.setText(data.getStringExtra("name"));}
}
MainActivity2.java
package com.example.exp4_2;import android.content.Intent;
import android.os.Bundle;
import android.view.View;
import android.widget.Button;
import android.widget.EditText;import androidx.activity.EdgeToEdge;
import androidx.appcompat.app.AppCompatActivity;
import androidx.core.graphics.Insets;
import androidx.core.view.ViewCompat;
import androidx.core.view.WindowInsetsCompat;public class MainActivity2 extends AppCompatActivity {@Overrideprotected void onCreate(Bundle savedInstanceState) {Button btn_return;EditText edt_name;super.onCreate(savedInstanceState);EdgeToEdge.enable(this);setContentView(R.layout.activity_main2);ViewCompat.setOnApplyWindowInsetsListener(findViewById(R.id.main), (v, insets) -> {Insets systemBars = insets.getInsets(WindowInsetsCompat.Type.systemBars());v.setPadding(systemBars.left, systemBars.top, systemBars.right, systemBars.bottom);return insets;});btn_return = findViewById(R.id.btn_return);edt_name = findViewById(R.id.edt_name);btn_return.setOnClickListener(new View.OnClickListener() {@Overridepublic void onClick(View view) {Intent intent = new Intent();intent.putExtra("name",edt_name.getText().toString());//将intent容器中储存的Activity的返回值作为参数传给setResult方法;setResult(0,intent);finish();}});}
}
结果
点击 登录 按钮进入子活动2,在子活动2中点击 返回 按钮,将活动2页面中的用户名作为子活动的返回信息通过 intent 传递给父活动1,并显示在父活动1中的EditText;


组件通信2
题目要求
用户点击“启动Activity1”和“启动Activity2”按钮时,程序将分别启动子SubActivity1和SubActivity2;
SubActivity1提供了一个输入框,以及“接受”和“撤销”两个按钮。如果在输入框中输入信息后点击“接受”按钮,程序会把输入框中的信息传递给其父Activity,并在父Activity的界面上显示。 如果用户点击“撤销”按钮,则程序不会向父Activity传递任何信息。 SubActivity2主要是为了说明如何在父Activity中处理多个子Activity,因此仅提供了用于关闭SubActivity2的“关闭”按钮。
注意:在启动 子Activity 时用的是显式启动;和隐式启动的区别在于 Intent 对象的构造形式不同;
在两个 子Activity 的时候 Requestcode 和 Resultcode 的重要性;
activity_main.xml
<?xml version="1.0" encoding="utf-8"?>
<LinearLayout xmlns:android="http://schemas.android.com/apk/res/android"xmlns:app="http://schemas.android.com/apk/res-auto"xmlns:tools="http://schemas.android.com/tools"android:id="@+id/main"android:layout_width="match_parent"android:layout_height="match_parent"android:orientation="vertical"tools:context=".MainActivity"><Buttonandroid:layout_width="wrap_content"android:layout_height="wrap_content"android:text="启动Activity1"android:id="@+id/btn_1"/><Buttonandroid:layout_width="wrap_content"android:layout_height="wrap_content"android:text="启动Activity2"android:id="@+id/btn_2"/><TextViewandroid:layout_width="wrap_content"android:layout_height="wrap_content"android:id="@+id/txt_result"/>
</LinearLayout>
activity_main2.xml
<?xml version="1.0" encoding="utf-8"?>
<LinearLayout xmlns:android="http://schemas.android.com/apk/res/android"xmlns:app="http://schemas.android.com/apk/res-auto"xmlns:tools="http://schemas.android.com/tools"android:id="@+id/main"android:layout_width="match_parent"android:layout_height="match_parent"android:orientation="vertical"tools:context=".MainActivity2"><TextViewandroid:layout_width="wrap_content"android:layout_height="wrap_content"android:text="sub_activity1"/><EditTextandroid:layout_width="wrap_content"android:layout_height="wrap_content"android:id="@+id/edt_input"/><Buttonandroid:layout_width="wrap_content"android:layout_height="wrap_content"android:text="接受"android:id="@+id/btn_accept"/><Buttonandroid:layout_width="wrap_content"android:layout_height="wrap_content"android:text="撤销"android:id="@+id/btn_conceal"/>
</LinearLayout>
activity_main3.xml
<?xml version="1.0" encoding="utf-8"?>
<LinearLayout xmlns:android="http://schemas.android.com/apk/res/android"xmlns:app="http://schemas.android.com/apk/res-auto"xmlns:tools="http://schemas.android.com/tools"android:id="@+id/main"android:layout_width="match_parent"android:layout_height="match_parent"android:orientation="vertical"tools:context=".MainActivity3"><TextViewandroid:layout_width="wrap_content"android:layout_height="wrap_content"android:text="sub_activity2"/><Buttonandroid:layout_width="wrap_content"android:layout_height="wrap_content"android:text="关闭"android:id="@+id/btn_close"/>
</LinearLayout>
MainActivity.java
package com.example.exp4_3;import android.content.Intent;
import android.os.Bundle;
import android.view.View;
import android.widget.Button;
import android.widget.TextView;import androidx.activity.EdgeToEdge;
import androidx.annotation.Nullable;
import androidx.appcompat.app.AppCompatActivity;
import androidx.core.graphics.Insets;
import androidx.core.view.ViewCompat;
import androidx.core.view.WindowInsetsCompat;public class MainActivity extends AppCompatActivity {Button btn_1,btn_2;TextView txt_result;//必须设置成final 否则switch case 报错static final int request_flag1 = 1;static final int request_flag2 = 2;@Overrideprotected void onCreate(Bundle savedInstanceState) {super.onCreate(savedInstanceState);EdgeToEdge.enable(this);setContentView(R.layout.activity_main);ViewCompat.setOnApplyWindowInsetsListener(findViewById(R.id.main), (v, insets) -> {Insets systemBars = insets.getInsets(WindowInsetsCompat.Type.systemBars());v.setPadding(systemBars.left, systemBars.top, systemBars.right, systemBars.bottom);return insets;});btn_1 = findViewById(R.id.btn_1);btn_2 = findViewById(R.id.btn_2);btn_1.setOnClickListener(new View.OnClickListener() {@Overridepublic void onClick(View view) {Intent intent = new Intent(MainActivity.this, MainActivity2.class);//参数两个 Intent 请求码requestcode-intstartActivityForResult(intent,request_flag1);}});btn_2.setOnClickListener(new View.OnClickListener() {@Overridepublic void onClick(View view) {Intent intent = new Intent(MainActivity.this, MainActivity3.class);//参数两个 Intent 请求码requestcode-intstartActivityForResult(intent,request_flag2);}});}@Overrideprotected void onActivityResult(int requestCode, int resultCode, @Nullable Intent data) {super.onActivityResult(requestCode, resultCode, data);txt_result = findViewById(R.id.txt_result);switch(requestCode){case request_flag1://判断结果码是 接受 还是 撤销if(resultCode==RESULT_OK){txt_result.setText(data.getStringExtra("name"));}else{txt_result.setText("sub_activity1返回空信息");}break;case request_flag2:txt_result.setText("sub_activity2返回空信息");break;}}
}
MainActivity2.java
package com.example.exp4_3;import android.content.Intent;
import android.os.Bundle;
import android.view.View;
import android.widget.Button;
import android.widget.EditText;
import android.widget.TextView;import androidx.activity.EdgeToEdge;
import androidx.appcompat.app.AppCompatActivity;
import androidx.core.graphics.Insets;
import androidx.core.view.ViewCompat;
import androidx.core.view.WindowInsetsCompat;public class MainActivity2 extends AppCompatActivity {Button btn_accept,btn_conceal;EditText edt_input;@Overrideprotected void onCreate(Bundle savedInstanceState) {super.onCreate(savedInstanceState);EdgeToEdge.enable(this);setContentView(R.layout.activity_main2);ViewCompat.setOnApplyWindowInsetsListener(findViewById(R.id.main), (v, insets) -> {Insets systemBars = insets.getInsets(WindowInsetsCompat.Type.systemBars());v.setPadding(systemBars.left, systemBars.top, systemBars.right, systemBars.bottom);return insets;});btn_accept = findViewById(R.id.btn_accept);btn_conceal = findViewById(R.id.btn_conceal);edt_input = findViewById(R.id.edt_input);btn_accept.setOnClickListener(new View.OnClickListener() {@Overridepublic void onClick(View view) {//显式启动Intent intent = new Intent();intent.putExtra("name",edt_input.getText().toString());//参数两个 结果码Result_OK IntentsetResult(RESULT_OK,intent);finish();}});btn_conceal.setOnClickListener(new View.OnClickListener() {@Overridepublic void onClick(View view) {//Intent intent = new Intent();//setResult(RESULT_CANCELED,intent);//参数两个 结果码Result_CANCELED NULLsetResult(RESULT_CANCELED,null);finish();}});}
}
MainActivity3.java
package com.example.exp4_3;import android.os.Bundle;
import android.view.View;
import android.widget.Button;import androidx.activity.EdgeToEdge;
import androidx.appcompat.app.AppCompatActivity;
import androidx.core.graphics.Insets;
import androidx.core.view.ViewCompat;
import androidx.core.view.WindowInsetsCompat;public class MainActivity3 extends AppCompatActivity {Button btn_close;@Overrideprotected void onCreate(Bundle savedInstanceState) {super.onCreate(savedInstanceState);EdgeToEdge.enable(this);setContentView(R.layout.activity_main3);ViewCompat.setOnApplyWindowInsetsListener(findViewById(R.id.main), (v, insets) -> {Insets systemBars = insets.getInsets(WindowInsetsCompat.Type.systemBars());v.setPadding(systemBars.left, systemBars.top, systemBars.right, systemBars.bottom);return insets;});Button btn_close = findViewById(R.id.btn_close);btn_close.setOnClickListener(new View.OnClickListener() {@Overridepublic void onClick(View view) {setResult(RESULT_CANCELED,null);finish();}});}
}
结果

点击 启动Activity1 输入“请输入...”

点击 接受

点击 撤销

点击 启动Activity2 点击 关闭

点击 关闭

相关文章:
Intent--组件通信
组件通信1 获取子活动的返回值 创建Activity时实现自动注册!【Activity必须要注册才能使用】 默认 LinearLayout 布局,注意 xml 中约束布局的使用; 若需要更改 线性布局 只需要将标签更改为 LinearLayout 即可,记得 设置线性布局…...

Android14 OTA升级速度过慢问题解决方案
软件版本:Android14 硬件平台:QCS6115 问题:OTA整包升级接近20min,太长无法忍受。 该问题为Android高版本的虚拟AB分区压缩技术所致,其实就是时间换空间,个人推测AB分区压缩会节约硬件存储空间࿰…...

仓颉语言实战——1. 类型
仓颉语言实战——1. 类型 仓颉语言(Cangjie Language)是一个现代化的、简洁而强大的编程语言,它的类型系统为高效开发提供了极大的支持。本篇文章将围绕仓颉语言中的类型系统展开,结合实战代码,帮助开发者快速掌握这一…...

AWTK 在全志 tina linux 上支持 2D 图形加速
全志 tina linux 2D 图形加速插件。 开发环境为 全志 Tina Linux 虚拟机。 1. 准备 下载 awtk git clone https://github.com/zlgopen/awtk.git下载 awtk-linux-fb git clone https://github.com/zlgopen/awtk-linux-fb.git下载 awtk-tina-g2d git clone https://github.co…...

MySql幻读问题
认识具有反复性。 之前以为理解了幻读,最近看黑马的mysql教程以为再次加深了认识。然而现在认为之前的理解都是错误的,而且网上很多关于幻读的解释,都不太准确。 关于幻读的最佳解释还是要看官网mysql官网幻读解释 脏读和不可重复读比较好理…...

(南京观海微电子)——GH7009开机黑屏案例分析
一、 现象描述: 不良现象: LVDS模组,开机大概2秒后就黑屏。 二、问题分析 等主机进入Kernel 后做以下测试: 1、手动reset LCM 后 可以显示正常; 总结: 1)uboot 部分HS 太窄,仅有4个clk宽度&am…...

【Rust自学】7.4. use关键字 Pt.2 :重导入与换国内镜像源教程
喜欢的话别忘了点赞、收藏加关注哦,对接下来的教程有兴趣的可以关注专栏。谢谢喵!(・ω・) 7.4.1. 使用pub use重新导入名称 使用use将路径导入作用域内后。该名称在词作用域内是私有的。 以上一篇文章的代码为例: m…...

前端学习DAY28(水平)
元素水平方向的布局 元素在其父元素中水平方向的位置有以下几个属性共同决定 margin-left border-left padding-left width padding-right border-right margin-right 一个元素在其父元素中,水平布局必须要满足以下的等式 margin-left border-left …...

【MyBatis】day01搭建MyBatis框架
目录 第一章 初识Mybatis 第二章 搭建Mybatis框架 第三章 Mybatis核心配置详解【mybatis-config.xml】 第一章 初识Mybatis 1.1 框架概述 生活中“框架” 买房子 笔记本电脑 程序中框架【代码半成品】 Mybatis框架:持久化层框架【dao层】 SpringMVC框架&…...
yolov7算法及其改进
yolov7算法及其改进 1、YOLOV7简介2、ELAN架构设计2.1、Partial Residual Networks2.1.1、Masked Residual Layer2.1.2、Asymmetric Residual Layer 2.2、Cross Stage Partial Networks2.2.1、Cross stage partial operation2.2.2、Gradient flow truncate operation 2.3、Effi…...

spring cloud微服务-OpenFeign的使用
OpenFeign的使用 openFeign的作用是服务间的远程调用 ,比如通过OpenFeign可以实现调用远程服务。 已经有了LoadBalancer为什么还要用openFeign? 在微服务架构中,LoadBalancer和OpenFeign虽然都提供了服务间调用的能力,但它们的设计目的和…...

【汇编】关于函数调用过程的若干问题
1. 为什么需要bp指针? 因为bp是栈帧的起始地址,函数内的局部栈变量,采用相对bp的内存寻址。不能相对于sp,sp是一直在变的。 2. 函数调用过程? 函数开始,先压栈bp,保存父函数栈底指针bp&#…...
针对Kali 系统进行分区设置
手动设置分区 Kali 安装之腾讯云经验遇到坑_腾讯云安装kali-CSDN博客 安装过程中的几处关键点,文字总结如下: ①分区--手动 ②是否创建空的分区表 ---yes ③选择---创建一个新的分区 ④大小--默认-----主分区 ⑤分区类型----系统)一个逻辑分区 ⑥是否…...

C语言简单测试总结
前言 在学C语言之前回顾一下C中的一些知识.选用的是中国大学MOOC中C程序设计(面向对象进阶)中的C语言水平评估测试题. 题目 The keyword "unsigned" can modify the keyword [ B ] A.signed B.long C.long double D.float题解:unsigned是无符号的意识,通常在…...

Android OpenGl(二) Shader
一、Shader 1、什么是Shader,为什么要使用Shder (1)shader运行在gpu上的小程序 (2)以前使用固定管线,但缺点是灵活度不够,无法满足复杂需求,为了解决固定管线的缺点,出…...

DevOps实战:用Kubernetes和Argo打造自动化CI/CD流程(1)
DevOps实战:用Kubernetes和Argo打造自动化CI/CD流程(1) 架构 架构图 本设计方案的目标是在一台阿里云ECS服务器上搭建一个轻量级的Kubernetes服务k3s节点,并基于Argo搭建一套完整的DevOps CI/CD服务平台,包括Argo CD…...

【已解决】“Content-Security-Policy”头缺失
1、作用 简称CSP,意为内容安全策略,通过设置约束指定可信的内容来源,降低异源文件攻击,例如:js/css/image等 2、相关设置值 指令名 demo 说明 default-src self cdn.example.com 默认策略,可以应用于js文件/图片…...

win系统B站播放8k视频启用HEVC编码
下载HEVC插件 点击 HEVC Video Extension 2.2.20.0 latest downloads,根据教程下载安装 安装 Random User-Agent 点击 Random User-Agent 安装 配置 Random User-Agent 在youtube中会导致视频无法播放,我选择直接屏蔽了 B站设置...

快速理解24种设计模式
简单工厂模式 建立产品接口类,规定好要实现方法。 建立工厂类,根据传入的参数,实例化所需的类,实例化的类必须实现指定的产品类接口 创建型 单例模式Singleton 保证一个类只有一个实例,并提供一个访问他它的全局…...

为什么深度学习和神经网络要使用 GPU?
为什么深度学习和神经网络要使用 GPU? 本篇文章的目标是帮助初学者了解 CUDA 是什么,以及它如何与 PyTorch 配合使用,更重要的是,我们为何在神经网络编程中使用 GPU。 图形处理单元 (GPU) 要了解 CUDA,我们需要对图…...

10个企业级Windows自动化场景:pywinauto终极应用指南
10个企业级Windows自动化场景:pywinauto终极应用指南 【免费下载链接】pywinauto pywinauto/pywinauto: 一个 Python 库,用于自动化 Windows 应用程序。特点是提供了丰富的函数和类库,可以用于控制鼠标、键盘和菜单等元素,实现自动…...

颠覆式突破限制:五大核心技术实现网盘下载加速革命
颠覆式突破限制:五大核心技术实现网盘下载加速革命 【免费下载链接】Online-disk-direct-link-download-assistant 可以获取网盘文件真实下载地址。基于【网盘直链下载助手】修改(改自6.1.4版本) ,自用,去推广…...

Anthropic公司内容管理系统配置错误致大模型泄露引市场震荡
配置错误:Claude Mythos大模型意外泄露3月30日,据SiliconAngle报道,Anthropic公司内容管理系统发生配置错误,导致正在测试的新一代大语言模型Claude Mythos意外泄露。官方证实,该模型是公司“迄今为止构建的能力最强的…...

从零搭建:4阶段实现wvp-GB28181-pro视频监控平台的容器化部署
从零搭建:4阶段实现wvp-GB28181-pro视频监控平台的容器化部署 【免费下载链接】wvp-GB28181-pro 项目地址: https://gitcode.com/GitHub_Trending/wv/wvp-GB28181-pro 在当今安防监控领域,GB28181协议作为国家标准被广泛应用于视频监控系统中。w…...

BGE-Reranker-v2-m3企业部署:高并发请求压力测试案例
BGE-Reranker-v2-m3企业部署:高并发请求压力测试案例 1. 项目背景与价值 在企业级RAG(检索增强生成)系统中,检索精度直接影响最终的回答质量。传统向量检索虽然快速,但容易受到关键词相似性的干扰,返回大…...
协同探测与可见性分析)
STK 实战:多类型传感器(Sensor)协同探测与可见性分析
1. STK与多传感器协同探测基础 STK(Systems Tool Kit)是航天领域广泛使用的仿真分析软件,它能够对复杂系统中的传感器进行高精度建模。在实际应用中,单个传感器往往难以满足全方位监测需求,这时就需要多传感器协同工作…...

从微信聊天到在线游戏:聊聊UDP和TCP在你手机App里的那些‘小心思’
从微信聊天到在线游戏:聊聊UDP和TCP在你手机App里的那些‘小心思’ 每天我们都在用手机App聊天、打游戏、看视频,但很少有人注意到这些应用背后隐藏的网络协议选择。为什么微信文字消息总能准确送达,而语音通话偶尔会断断续续?为…...
)
别再死记公式了!用Python的SymPy库5分钟搞定雅可比矩阵计算(附机器人学实例)
用SymPy解放双手:5分钟完成雅可比矩阵的符号计算与机器人学应用 记得研究生时期推导机械臂动力学方程,我曾在草稿纸上密密麻麻写满三页偏导数,最后发现一个正负号错误导致全部重算。直到遇见SymPy——这个Python符号计算库彻底改变了我的工作…...

1998-2025年区县政府工作报告文本数据
县域政府工作报告是县级政府向同级人民代表大会汇报年度工作的核心文件,报告既总结上一年度经济社会发展和政府工作成效,也提出当前形势判断、政策取向及下一阶段重点任务,是集中反映政府施政理念、政策重点和发展方向的重要文本 整理了1998…...

run-aspnetcore-microservices 购物车微服务:Redis分布式缓存与Grpc同步通信实现
run-aspnetcore-microservices 购物车微服务:Redis分布式缓存与Grpc同步通信实现 【免费下载链接】run-aspnetcore-microservices aspnetrun/run-aspnetcore-microservices: 是一个用于部署和运行 ASP.NET Core 微服务应用程序的开源项目,提供了一个简单…...