Vue3快速入门笔记
目录
- 1.Vue3简介
- 1.1.性能提升
- 1.2.源码升级
- 1.3.拥抱TypeScript
- 1.4.新特性
- 2.创建Vue3工程
- 2.1.基于 vue-cli 创建
- 2.2. 基于 vite 创建(推荐)
- 2.3.代码运行
- 3.Vue3核心语法
- 3.1.OptionsAPI(选项式API) 与 CompositionAPI(组合式API)
- 3.2.setup
- 3.3.ref 创建:基本类型的响应式数据
- 3.4 reactive 创建:对象类型的响应式数据
- 3.5 ref 创建:对象类型的响应式数据
- 3.6 ref 对比 reactive
- 3.7.toRefs 与 toRef
- 3.8.computed
- 3.9.watch
- 3.10 watchEffect
- 3.11.标签ref属性
- 3.12.TS接口、自定义类型、范型
- 3.13.props
- 3.14.生命周期
- 3.15.自定义hook
- 4.路由
- 4.1. 对路由的理解
- 4.2.基本切换效果
- 4.3.两个注意点
- 4.4.路由器工作模式
- 4.5.命名路由
- 4.6.to的两种写法
- 4.7.嵌套路由
- 4.8.路由传参
- 4.9.路由的 props配置
- 4.10.replace属性
- 4.11.编程式导航
- 4.12.重定向
- 5.pinia
- 5.1.准备案例代码
- 5.2.搭建 pinia 环境
- 5.3.存储+读取数据
- 5.4.修改数据(三种方式)
- 5.5.storeToRefs
- 5.6.getters
- 5.7.$subscribe
- 5.8.store组合式写法
- 6.组件通信
- 6.1.props
- 6.2.自定义事件
- 6.3.mitt
- 6.4.v-model
- 6.5.$attrs
- 6.6.$ refs、$parent
- 6.7.provide、inject
- 6.8.slot
- 7.其它API
- 7.1. shallowRef 与 shallowReactive
- 7.2.readonly 与 shallowReadonly
- 7.3.toRaw 与 markRaw
- 7.4.customRef
- 8.Vue3新组件
- 8.1.teleport
- 8.2.Suspense
- 8.3.全局API转移到应用对象
1.Vue3简介
- 2020年9月18日,Vue.js发布版3.0版本,代号:One Piece(海贼王)
- 经历:4800+次提交、40+个RFC、600+次PR、300+贡献者
- 官方发版地址:Release V3.0.0 One Piece vuejs/core
1.1.性能提升
- 打包体积减少41%
- 初次渲染快55%,更新渲染快133%
- 内存减省54%
1.2.源码升级
- 使用Proxy代替defineProperty实现响应式
- 重写虚拟DOM的实现和Tree-Shaking
1.3.拥抱TypeScript
- Vue3可以更好的支持TypeScript
1.4.新特性
- Composition API (组合API)
- 新内置组件
- 其它
2.创建Vue3工程
2.1.基于 vue-cli 创建
目前 vue-cli 已处于维护模式,官方推荐基于 Vite 创建项目
## 查看@vue/cli版本,确保@vue/cli版本在4.5.0+
vue --version
## 安装或者升级你的@vue/cli
npm install -g @vue/cli
## 执行创建命令
vue create vue_test## 选择Vue 3
## Vue CLI v5.0.8
## ? Please pick a preset: (Use arrow keys)
## > Default ([Vue 3] babel, eslint)
##   Default ([Vue 2] babel, eslint)
##   Manually select features## 启动
cd vue_test
npm run serve
2.2. 基于 vite 创建(推荐)
vite 是新一代前端构建工具,官网地址:https://vitejs.cn,vite的优势如下:
- 轻量快速的热得载(HMR),能实现极速的服务启动
- 对 TypeScript、JSX、CSS 等支持开箱即用
- 真正的按需编译,不再等待整个应用编译完成
- webpack构建 与 vite 构建对比图如下:
Bundle Based dev server
Native ESM based dev server
- 具体操作如下
## 1.创建命令
npm create vue@latest
## 2.具体配置
## Need to install the following packages:
##   create-vue@3.14.2
Ok to proceed? (y) y
## 请输入项目名称:
Project name:vue3-project
## 是否使用 TypeScript 语法?
Add TypeScript? Yes
## 是否启用 JSX 支持
Add JSX Support? No
## 是否引入 Vue Router 进行单页面应用开发?
Add Vue Router for single Page Application development? No
## 是否引入 Pinia 用于状态管理?
Add Pinia for state management? No
## 是否引入 Vitest 用于单元测试?
Add Vitest for Unit Testing? No
## 是否要引入一款端到端(End to End)测试工具?
Add an End-to-End Testing Solution? No
## 是否引入 ESLint 用于代码质量检测?
Add ESLint for code quality? Yes
## 是否引入 Prettier 用于代码格式化?
Add Prettier for code formatting? No
- 文件作用
- index.html
- 入口文件,引入 /src/main.ts
- package.json:
- 项目的元数据文件,包括项目名称、版本、描述、作者、依赖项等。
- 定义了项目的脚本,如启动、构建、测试等命令。
- public/:
- 存放静态资源,如HTML模板(index.html)、图片、图标等。
- 这些文件在构建时会被复制到输出目录(通常是dist/),并且可能通相对咱径在项目中引用。
- src/:
- 项目源代码目录。
- main.js/main.ts:项目入口文件,用于创建Vue实例并挂载到DOM上。
- App.vue:主组件文件,作为所有页面组件的容器。
- comments/:存放Vue组件的文件夹,这些组件可以在整个项目中复用。
- assets/:存放项目中会使用的静态资源,如图片、字体、样式文件等。这些资源在构建时会被处理(如压缩、转换等)。
- router/:如果项目使用Vue Router进行路由管理,则此文件夹包含路由的配置文件(如index.js 或 index.ts),定义了前端路由的映射关系。
- store/:如果项目使用Vuex进行状态管理,则此文件夹包含Vuex的配置文件(如 index.ts或index.ts),用于管理应用的所有组件的状态。
- views/:在Vue CLI 3+ 的项目中,这个文件夹通常用来丰防御页面级的组件,即路由对应的组件。
- vite.config.ts
- 配置文件,用于修改webpack配置、添加新的loader选项、配置代理等。
- .gitignore:
- Git版本控制忽略文件,指定哪些文件或文件夹不需要纳入GIt版本控制
- tsconfig.json
- TypeScript的配置文件,定译了TypeScript编译器的选项。
- index.html
2.3.代码运行
- 项目入口文件 index.html
<!-- index.html相关代码 --><!-- 创建id=app 的容器 --><div id="app"></div><!-- 引入 /src/main.ts --><script type="module" src="/src/main.ts"></script>
- 引入 /src/main.ts
// maint.ts 相关代码
// 引入 createApp 创建应用
import { createApp } from 'vue'
// 引入 App 根组件
import App from './App.vue'
// createApp(App):以App作为参数生成一个应用实例对象
// mount('#app'):挂载到id=app节点上。
createApp(App).mount('#app')
3.Vue3核心语法
3.1.OptionsAPI(选项式API) 与 CompositionAPI(组合式API)
- Vue2的API设计是Options(选项)风格
- Vue3的API设计是CompositionAPI(组合)风格
OptionsAPI 的弊端
Options类型的API,数据、方法、计算属性等,是分散在:data、methods、computed中的,若想新境或者改一个需求,就需要分别修改:data、methods、computed,不便于维护和复用。
CompositionAPI 的优势
可以用函数的方式,更加优雅的组织代码,让相关功能的代码更加有序的组织在一起。
3.2.setup
setup 概述
setup 是 Vue3 中一个新的配置项,值是一个函数,组件中所用到的:数据、方法、计算属性、监视等,均配置在setup中。
特点如下:
- setup函数返回的对象中的内容,可直接在模板中使用
- setup中访问this是undefined
- setup函数会在beforeCreate之前调用,它是“领先”所有钩子执行的。
<template><h2>姓名:{{name}}</h2><br/><h2>年龄:{{age}}</h2><br/><button @click="changeName">修改名字</button><br/><button @click="changeAge">修改年龄</button><br/><button @click="showTel">查看电话</button>
</template>
<script lang="ts">export default{name:'Person',setup(){let name = '张三'let age = 18let tel = '13888888888'function changeName(){name = "zhangsan"console.log(name)}function changeAge(){age += 1console.log(age)}function showTel(){alert(tel)}return {name,age,changeAge,changeName,showTel}// setup的返回值也可以是函数// return function(){return 'hello'}// return ()=>{return 'hello'} //简写// return ()=>'hello' //简写}}
</script>
<style>
</style>
setup 与 OptionsAPI的关系
- Vue2 的选项(data、methods
等)中可以访问到setup中的属性、方法。但在setup中不能访问Vue2的选项(data、methods 等)。 - 如果与Vue2冲突,则setup优先
setup语法糖
setup 可以独立出来
<template><h2>姓名:{{name}}</h2><br/><h2>年龄:{{age}}</h2><br/><button @click="changeName">修改名字</button><br/><button @click="changeAge">修改年龄</button><br/><button @click="showTel">查看电话</button>
</template><script lang="ts">export default{name:'Person'}
</script>
<script lang="ts" setup>let name = '张三'let age = 18let tel = '13888888888'function changeName(){name = "zhangsan"console.log(name)}function changeAge(){age += 1console.log(age)}function showTel(){alert(tel)}
</script>
<style>
</style>
扩展:上述代码,还需要编写一个不写setup的script标签,去指定组件名字,比较麻烦,我们可以借助vite中的插件简化
- 第一步:npm i vite-plugin-vue-setup-extend -D
- 第二步:vite.config.ts
import VueSetupExtend form 'vite-plugin-vue-setup-extend'//增加引入代码
export default defineConfig({plugins: [VueSetupExtend(),//增加使用代码]
})
- 第三步:使用 name=“组件名”
//使用方法
<script setup lang="ts" name="Person">
</script>
3.3.ref 创建:基本类型的响应式数据
- 作用:定义响应式变量
- 语法:let xxx = ref(初始值)
- 返回值:RefImpl的实例对象,简称ref对象或ref,ref对象的value属性是响应式的。
- 注意点:
- JS中操作数据需要:xxx.value,但模板中不需要.value,直接使用即可。
- 对于let name = ref('张三’) 来说,name不是响应式的,name.value是响应式的
<template><h2>姓名:{{name}}</h2><br/><h2>年龄:{{age}}</h2><br/><button @click="changeName">修改名字</button><br/><button @click="changeAge">修改年龄</button><br/><button @click="showTel">查看电话</button>
</template>
<script lang="ts" setup name="Person1133">import {ref} from 'vue'//name和age是一个RefImpl的实例对象,简称ref对象,它们的value属性是响应式的。let name = ref('张三')let age = ref(18)let tel = '13888888888'function changeName(){name.value = "zhangsan"console.log(name)}function changeAge(){age.value += 1console.log(age)}function showTel(){alert(tel)}
</script>
<style>
</style>
3.4 reactive 创建:对象类型的响应式数据
作用:定义 响应式对象
语法:let 响应式对象 = reactive(源对象)
返回值:Proxy的实例对象,简称:响应式对象
注意点:reactive 定义的响应式数据是“深层次”的,reactive 会自动解包ref数据
<template><h2>姓名:{{person.name}}</h2><br/><h2>年龄:{{person.age}}</h2><br/><button @click="changeName">修改名字</button><br/><button @click="changeAge">修改年龄</button><br/><button @click="showTel">查看电话</button>
</template>
<script lang="ts" setup name="Person1133">import {reactive} from 'vue'let person = reactive({name:'张三',age:18,tel:'13888888888'})console.log(person)function changeName(){person.name = "zhangsan"console.log(person.name)}function changeAge(){person.age += 1console.log(person.age)}function showTel(){alert(person.tel)}
</script>
<style>
</style>
3.5 ref 创建:对象类型的响应式数据
- ref 接收的数据可以是:基本类型、对象类型
- 若ref接收的是对象类型,内部其实也是调用了reactive函数
<template><h2>姓名:{{person.name}}</h2><br/><h2>年龄:{{person.age}}</h2><br/><button @click="changeName">修改名字</button><br/><button @click="changeAge">修改年龄</button><br/><button @click="showTel">查看电话</button>
</template>
<script lang="ts" setup name="Person1133">import {ref} from 'vue'let person = ref({name:'张三',age:18,tel:'13888888888'})console.log(person)function changeName(){person.value.name = "zhangsan"console.log(person.value.name)}function changeAge(){person.value.age += 1console.log(person.value.age)}function showTel(){alert(person.value.tel)}
</script>
<style>
</style>
3.6 ref 对比 reactive
宏观角度看:
- ref用来定义:基本数据类型、对象类型数据;
- reactive用来定义:对象类型数据。
区别: - ref创建的变量必须使用.value(可以使用vscode 中的volar插件自动添加.value)。
- reactive 重新分配一个新对象,会失去响应式(可以使用Object.assign 去整体替换)。
使用原则: - 若需要一个基本类型的响应式数据,必须使用ref。
- 若需要一个响应式对象,层级不深,ref、reactive 都可以。
- 若需要一个响应式对象,且层级较深,推荐使用 reactive。
<template><h2>姓名:{{personRef.name}}</h2><br/><h2>年龄:{{personRef.age}}</h2><br/><button @click="changePersonRef">ref修改</button><br/><h2>姓名:{{personReactive.name}}</h2><br/><h2>年龄:{{personReactive.age}}</h2><br/><button @click="changePersonReactive">reactive修改</button><br/>
</template>
<script lang="ts" setup name="Person1133">import {ref,reactive} from 'vue'let personRef = ref({name:'张三',age:18,tel:'13888888888'})let personReactive = reactive({name:'李四',age:19,tel:'13888888888'})function changePersonRef(){// personRef = ref({name:'张三ref',age:28,tel:'13888888888'}) //不行,不是响应式personRef.value = {name:'张三ref',age:28,tel:'13888888888'}}function changePersonReactive(){// personReactive = reactive({name:'张三ref',age:28,tel:'13888888888'}) //不行,不是响应式Object.assign(personReactive,{name:'李四reactive',age:29,tel:'13888888888'})}
</script>
<style>
</style>
3.7.toRefs 与 toRef
- 作用:将一个响应式对象中的每一个属性,转换为ref对象
- 备注:toRefs 与 toRef 功能一致,但 toRefs 可以批量替换
<template><h2>姓名:{{name}}</h2><br/><h2>年龄:{{person.age}}</h2><br/><button @click="changeName">修改名字</button><br/><button @click="changeAge">修改年龄</button><br/><button @click="showTel">查看电话</button>
</template>
<script lang="ts" setup name="Person1133">import {reactive,toRefs,toRef} from 'vue'let person = reactive({name:'张三',age:18,tel:'13888888888'})let {name,age} = toRefs(person)let nl = toRef(person,'age')console.log(person)function changeName(){name.value = "zhangsan"console.log(name)}function changeAge(){age.value += 1console.log(age)}function showTel(){alert(person.tel)}
</script>
<style>
</style>
3.8.computed
<template><!-- :value(v-bind:value)是单向绑定(数据流向页面),v-model(v-model:value)是双向绑定 --><!-- 姓:<input type="text" :value="firstName"> -->姓:<input type="text" v-model="firstName"><br>名:<input type="text" v-model="lastName"><br>全名:<span>{{fullName}}</span><button @click="changeFullName">修改成li-si</button>
</template>
<script lang="ts" setup name="Person">import {ref,computed} from 'vue'let firstName = ref('zhang')let lastName = ref('san')//定义的fullName是一个计算属性,且是只读的//let fullName = computed(()=>{//	return firstName.value.slice(0,1).toUpperCase() + firstName.value.slice(1) + '-' + lastName.value//})//定义的fullName是一个计算属性,可读可写let fullName = computed({get(){return firstName.value.slice(0,1).toUpperCase() + firstName.value.slice(1) + '-' + lastName.value},set(val){const [str1,str2] = val.split('-')firstName.value = str1lastName.value = str2}})function changeFullName(){fullName.value = 'li-si'}
</script>
<style>
</style>
3.9.watch
- 作用:监视数据变化
- 特点:只能监视以下四种数据:
- ref 定义的数据。
- reactive 定义的数据。
- 函数返回一个值(getter 函数)。
- 一个包含上数内容的数组。
情况一
监视 ref 定义的【基本类型】数据:直接写数据名即可,监视的是其value值的改这。
<template><div><h1>sun值:{{ sum }}</h1><button @click="changeSum">sum++</button></div>
</template>
<script lang="ts" setup name="HelloWorld">
import { ref, watch } from 'vue';
//数据
const sum = ref(1)
//方法
function changeSum(){sum.value++
}
//监视
const stopWathc = watch(sum,(newSum,oldSum)=>{console.log(newSum,oldSum)if(newSum > 10){stopWathc()}
})
console.log(stopWathc)
</script>
<style>
</style>
情况二
监视ref定义的【对象类型】数据:直接写数据名,监视的是对象的【地址值】,若想监视对象内部的数据,要手动开启深度监视。
注意:
- 若修改的是ref定义的对象的属性:newValue 和 oldValue 都是新值,因为它们是同一个对象。
- 若修改整个ref定义的对象,newValue 是新值,oldValue 是旧值,因为不是同一个对象了。
<template><div><h1>姓名:{{ person.name }}</h1><h1>年龄:{{ person.age }}</h1><button @click="changeName">修改姓名</button><br><button @click="changeAge">修改年龄</button><br><button @click="changePerson">修改人</button></div>
</template>
<script lang="ts" setup name="HelloWorld">
import { ref, watch } from 'vue';
const person = ref({name:'张三',age:18
})
function changeName(){person.value.name +="~"
}
function changeAge(){person.value.age ++
}
function changePerson(){person.value = {name:'李四',age:28}
}
/*
参数1:被监视的数据
参数2:监视的回调
参数3:配置对象(deep(深度监视)、immediate(立即执行
) 等)
*/
watch(person,(newVal,oldVal)=>{console.log(newVal,oldVal)
},{deep:true})</script>
<style>
</style>
情况三
监视 reactive 定义的【对象类型】数据,默认开启深度监视。
<template><div><h1>姓名:{{ person.name }}</h1><h1>年龄:{{ person.age }}</h1><button @click="changeName">修改姓名</button><br><button @click="changeAge">修改年龄</button><br><button @click="changePerson">修改人</button></div>
</template>
<script lang="ts" setup name="HelloWorld">
import { reactive, watch } from 'vue';
const person = reactive({name:'张三',age:18
})
function changeName(){person.name +="~"
}
function changeAge(){person.age ++
}
function changePerson(){Object.assign(person,{name:'李四',age:28})
}
//新值、旧值一样
watch(person,(newVal,oldVal)=>{console.log(newVal,oldVal)
})
</script>
<style>
</style>
清况四
监视 ref 或 reactive 定义的【对象类型】数据中的某个属性,注意如下:
- 若该属性值不是【对象类型】,需要写成函数形式。
- 若该属性值是【对象类型】,可以直接写或写成涵数形式,建议写成函数。
结论:监视对象的属性,建议写成函数形式。若属性是对象,则监视的是地址值 ,如果要监视对象内部,则需要开启深度监视
<template><div><h1>姓名:{{ person.name }}</h1><h1>年龄:{{ person.age }}</h1><h1>汽车:{{ person.car.c1 }}、{{ person.car.c2 }}</h1><button @click="changeName">修改姓名</button><br><button @click="changeAge">修改年龄</button><br><button @click="changeC1">修改车一</button><br><button @click="changeC2">修改车二</button><br><button @click="changeCar">修改车</button></div>
</template>
<script lang="ts" setup name="HelloWorld">
import { reactive, watch } from 'vue';
const person = reactive({name:'张三',age:18,car:{c1:"车一",c2:"车二"}
})
function changeName(){person.name +="~"
}
function changeAge(){person.age ++
}
function changeC1(){person.car.c1 = "车车一"
}
function changeC2(){person.car.c2 = "车车二"
}
function changeCar(){person.car = {c1:'一',c2:'二'}
}
//监视一个属性:基本类型
watch(()=>person.name,(newVal,oldVal)=>{console.log(newVal,oldVal)
})
//监视一个属性:对象类型
//结论:监视对象的属性,建议写成函数形式。若属性是对象,则监视的是地址值 ,如果要监视对象内部,则需要开启深度监视
watch(()=>person.car,(newVal,oldVal)=>{console.log(newVal,oldVal)
},{deep:true})
</script>
<style>
</style>
情况五
监视上述 多个数据
<template><div><h1>姓名:{{ person.name }}</h1><h1>年龄:{{ person.age }}</h1><h1>汽车:{{ person.car.c1 }}、{{ person.car.c2 }}</h1><button @click="changeName">修改姓名</button><br><button @click="changeAge">修改年龄</button><br><button @click="changeC1">修改车一</button><br><button @click="changeC2">修改车二</button><br><button @click="changeCar">修改车</button></div>
</template>
<script lang="ts" setup name="HelloWorld">
import { reactive, watch } from 'vue';
const person = reactive({name:'张三',age:18,car:{c1:"车一",c2:"车二"}
})
function changeName(){person.name +="~"
}
function changeAge(){person.age ++
}
function changeC1(){person.car.c1 = "车车一"
}
function changeC2(){person.car.c2 = "车车二"
}
function changeCar(){person.car = {c1:'一',c2:'二'}
}
watch([()=>person.name,()=>person.car.c1],(newVal,oldVal)=>{console.log(newVal,oldVal)
},{deep:true})
</script>
<style>
</style>
3.10 watchEffect
- 立即运行一个函数,同时响应式地追踪其依赖,并在依赖更改时得新执行该函数。
- watch 对经 watchEffect
- 都能监听响应式数据的变化,但是监听数据变化的方式不同
- watch:要明确指出监视的数据
- watchEffect:不用明确指出监视的数据(函数中用到哪些属性,那就监视哪些属性)
<template><div><h1>姓名:{{ person.name }}</h1><h1>年龄:{{ person.age }}</h1><button @click="changeName">修改姓名</button><br><button @click="changeAge">修改年龄</button><br><button @click="changePerson">修改人</button></div>
</template>
<script lang="ts" setup name="HelloWorld">
import { reactive, watchEffect } from 'vue';
const person = reactive({name:'张三',age:18
})
function changeName(){person.name +="~"
}
function changeAge(){person.age ++
}
function changePerson(){Object.assign(person,{name:'李四',age:28})
}
//新值、旧值一样
watchEffect(()=>{console.log(person.age)if(person.age > 35){console.log("35了")}
})
</script>
<style scoped>
</style>
3.11.标签ref属性
作用:用于注册模板引用。
- 用在普通DOM标签上,获取的是DOM节点
- 用在组件标签上,获取的是组件实例对象
用在普通DOM标签上
<template><div><h1>中国</h1><h2 ref="h2">北京</h2><button @click="getH2">获取h2标签实例</button><br></div>
</template>
<script lang="ts" setup name="HelloWorld">
import { ref,defineExpose } from 'vue';
const h2 = ref()
function getH2(){console.log(h2.value)//<h2 data-v-e17ea971="">北京</h2>//data-v-e17ea971 是因为 style scoped 局部样式导致的
}
const a = ref(0)
const b = ref(1)
const c = ref(2)
defineExpose({a,b})
</script>
<style scoped>button{color: red;}
</style>
用在组件标签上
<template><HelloWorld ref="hw"/><button @click="getHw">获取HelloWorld实例</button>
</template>
<script lang="ts" setup name="App">import HelloWorld from './components/HelloWorld.vue'import {ref} from 'vue'const hw = ref()function getHw(){console.log(hw.value)console.log(hw.value.a)}
</script>
<style scoped>
</style>
3.12.TS接口、自定义类型、范型
路径:src/types/index.ts
//定义一个接口,用于限制pesson对象的具体属性
export interface PersonInter {id:string,name:string,age:number,phone?:string //?表示可有可无
}
//自定义类型
//方法1
// export type PersonArr = Array<PersonInter>
//方法2
export type PersonArr = PersonInter[]
<template><div></div>
</template>
<script lang="ts" setup name="HelloWorld">
import { type PersonInter,type PersonArr } from '@/types';
const person:PersonInter = {id:"doof01",name:"张三",age:19}
const personArr:PersonArr = [
{id:"doof01",name:"张三",age:19},
{id:"doof01",name:"张三",age:19,phone:"13888888888"}
]
console.log(person)
console.log(personArr)
</script>
<style scoped>button{color: red;}
</style>
3.13.props
/src/App.vue
<template><HelloWorld :pl="personList"/>
</template>
<script lang="ts" setup name="App">import { reactive } from 'vue';
import HelloWorld from './components/HelloWorld.vue'
import type { PersonArr } from './types';// Ts限制// const personList:PersonArr = reactive([const personList = reactive<PersonArr>([{id:"01",name:"张三",age:18},{id:"02",name:"李四",age:19,phone:"13888888888"}])</script>
<style scoped>
</style>
/src/components/HellowWorld.vue
<template><div><ul><li v-for="item in pl" :key="item.id">{{ item.id }} -- {{ item.name }}</li></ul></div>
</template>
<script lang="ts" setup name="HelloWorld">
import { type PersonArr } from '@/types';//只接收pl(接收后页面可使用,但js不能用)
// defineProps(['pl'])//接收pl+限制类型
// defineProps<{pl:PersonArr}>()//接收pl+限制类型+限制必要性+指定默认值
withDefaults(defineProps<{pl?:PersonArr}>(),{pl:()=>[{id:"03",name:"王五",age:18}]
})//接收后页面可使用,js也要用
// const res = defineProps(['pl'])
// console.log(res.pl)</script>
<style scoped>
</style>
3.14.生命周期
-
概念:Vue组件实例在创建时要经历一系例的禄始化步骤,在此过程中Vue会在合适的时机,调味用特定的函数,从而让开发者有机会在特定阶段运行自己的代码,这些特定的函数统称为:生命周期钩子
-
规律: 生命周期整体分为四个阶段,分别是:创建、挂载、更新、销毁,第个阶段都有两个钩子,一前一后。
-
Vue2的生命周期
创建阶段:beforeCreate、created挂载阶段:beforeMount、mounted更新阶段:beforeUpdate、updated销毁阶段:beforeDestory、destroyed -
Vue3的生命周期
创建阶段:setup挂载阶段:onBeforeMount、onMounted更新阶段:onBeforeUpdate、onUpdated卸载阶段:onBeforeUnmount
<!-- /src/App.vue -->
<template><HelloWorld ref="hw" v-if="showHelloWorld"/><button @click="changeHw">卸载HelloWorld</button>
</template>
<script lang="ts" setup name="App">import { ref } from "vue"import HelloWorld from './components/HelloWorld.vue'const showHelloWorld = ref(true)function changeHw(){showHelloWorld.value = !showHelloWorld.value}
</script>
<style scoped>
</style>
<!-- /src/components/HelloWorld.vue -->
<template><div><h1>{{ sum }}</h1><button @click="changeSum">更新</button></div>
</template>
<script lang="ts" setup name="HelloWorld">
import { ref,onBeforeMount, onBeforeUnmount, onBeforeUpdate, onMounted, onUnmounted } from 'vue';
onBeforeMount(()=>{console.log("挂载前")
})
onMounted(()=>{console.log("挂载后")
})
onBeforeUpdate(()=>{console.log("更新前")
})
onBeforeUpdate(()=>{console.log("更新后")
})
onBeforeUnmount(()=>{console.log("卸载前")
})
onUnmounted(()=>{console.log("卸载后")
})
const sum = ref(0)
function changeSum(){sum.value++
}
</script>
<style scoped>
</style>
3.15.自定义hook
- 本质是一个函数,把setup函数使用的 Composition API 进行封装,类似于 vue2.x 中的mixin
- 优势:复用代码,让setup中逻辑更清楚易懂。
/src/components/HelloWorld.vue
<template><div><h1>{{ sum }}</h1><button @click="changeSum">sum++</button><br><img v-for="(item,index) in imgArr" :key="index" :src="item"></img><button @click="getImg">加载一张图片</button></div>
</template>
<script lang="ts" setup name="HelloWorld">import useSum from '@/hooks/useSum';import useDog from '@/hooks/useDog';const {sum,changeSum} = useSum()const {imgArr,getImg} = useDog()
</script>
<style scoped>
</style>
/src/hooks/useDog.ts
<template><HelloWorld/>
</template>
<script lang="ts" setup name="App">import HelloWorld from './components/HelloWorld.vue'
</script>
<style scoped>
</style>
/src/hooks/useSum.ts
import {ref} from 'vue'
export default function(){const sum = ref(0)function changeSum(){sum.value++}return {sum,changeSum}
}
4.路由
4.1. 对路由的理解
4.2.基本切换效果
Vue3 中要使用 vue-router 的最新版本
/src/router/index.ts
// 创建一个路由器,并暴露出去
// 第一步:引入crateRouter
import {createRouter,createWebHashHistory} from 'vue-router'
// 引入组件
import Home from '@/components/Home.vue'
import News from '@/components/News.vue'
import About from '@/components/About.vue'
// 第二步:创建路由器
const router = createRouter({history:createWebHashHistory(),//路由器工作模式routes:[{path:'/home',component:Home},{path:'/news',component:News},{path:'/about',component:About},]
})
export default router
/src/main.ts
import './assets/main.css'
// 引入createApp用于创建应用
import { createApp } from 'vue'
// 引入App根组件
import App from './App.vue'
// 引入路由器
import router from './router'
// 创建一个应用
const app = createApp(App)
// 使用路由器
app.use(router)
// 挂载整个应用到app容器中
app.mount('#app')
/src/App.vue
<template><div class="app"><h1>vue3路由测试</h1><!-- 导航区 --><div class="navigate"><RouterLink to="/home" active-class="aClass">首页</RouterLink><RouterLink to="/news" active-class="aClass">新闻</RouterLink><RouterLink to="/about" active-class="aClass">关于</RouterLink></div><!-- 展示区 --><div class="main-content"><RouterView></RouterView></div></div>
</template>
<script lang="ts" setup name="App">import { RouterView,RouterLink } from 'vue-router';
</script>
<style scoped>.aClass{color: red;}
</style>
/src/components/Home.vue
<template><div><h2>首页</h2></div>
</template>
<script lang="ts" name="Home">
</script>
<style scoped></style>
/src/components/News.vue
<template><div><h2>新闻</h2></div>
</template>
<script lang="ts" name="News">
</script>
<style scoped></style>
/src/components/About.vue
<template><div><h2>关于</h2></div>
</template>
<script lang="ts" name="About">
</script>
<style scoped></style>
4.3.两个注意点
- 路由组件通常放在pages 或 views 文件夹,一般组件通常放在components 文件夹。
- 通过点击导航,视觉效果上“消失”了路由组件,默认是被销毁掉的,需要的时候再去挂载。
4.4.路由器工作模式
- history 模式
优点:URL更加美观,不带有#,更接近传的网站URL。
缺点:后期项目上线,需要服务端配合处理路径问题,否则刷新会有404错误
const router = createRouter({history:createWebHistory(),//history模式/******/
})
- hash 模式
优点:兼容性更好,因为不需要服务器端处理路径
缺点:URL带有#不太美观,且在SEO优化方面相对较差
const router = createRouter({history:createWebHashHistory(),//hash模式/*******/
})
4.5.命名路由
作用:可以简化路由跳转及传参
给路由规则命名:
routes:[{name:'home',path:'/home',component:Home},{name:'news',path:'/news',component:News},{name:'about',path:'/about',component:About},
]
4.6.to的两种写法
<!-- 1.to的字符串写法 -->
<router-link active-class="active" to="/home">主页</router-link>
<!-- 2.to的对象写法 -->
<router-link active-class="active" :to="{path:'/home'}">主页</router-link>
<router-link active-class="active" :to="{name:'home '}">主页</router-link>
4.7.嵌套路由
routes:[{name:'home',path:'/home',component:Home},{name:'news',path:'/news',component:News,children:[ //嵌套路由{path:"detail",component:Detail}]},{name:'about',path:'/about',component:About},
]
4.8.路由传参
query传参
- 路由设置
routes:[{name:'home',path:'/home',component:Home},{name:'news',path:'/news',component:News,children:[ //嵌套路由{path:"detail",component:Detail}]},{name:'about',path:'/about',component:About},
]
- 传递参数
<RouterLink
to="'/news/detail?id=${item.id}&title=${item.title}&detail=${item.detial}'">{{ item.title }}</RouterLink>//name:'detail',//用name也可以跳转
path:'/news/detail',
query:{id:item.id,title:item.title,detail:item.detail}
}">{{ item.title }}</RouterLink>
<RouterLink
:to="{
//name:'detail',//用name也可以跳转
path:'/news/detail',
query:{id:item.id,title:item.title,detail:item.detail}
}">{{ item.title }}</RouterLink>
- 接收参数
import { toRefs } from 'vue';
import { useRoute } from 'vue-router';
const route = useRoute()
const { query } = toRefs(route)
params传参
- 路由设置
routes:[{name:'home',path:'/home',component:Home},{name:'news',path:'/news',component:News,children:[{name:"newsDetail",//params传参,必须使用namepath:"detail/:id/:title/:detail?",//占用,?表示该参数可选component:Detail}]},{name:'about',path:'/about',component:About},
]
- 传递参数
<RouterLink :to="`/news/detail/${item.id}/${item.title}/${item.detail}`">{{ item.title }}</RouterLink>
<RouterLink :to="{name:'newsDetail',params:{id:item.id,title:item.title,detail:item.detail}}">{{ item.title }}</RouterLink>
- 接收参数
import { toRefs } from 'vue';
import { useRoute } from 'vue-router';
const route = useRoute()
const { params } = toRefs(route)
4.9.路由的 props配置
作用:让路由组件更方便的收到参数(可以将路由参数作为props传给组件)
- 路由设置
{name:'news',path:'/news',component:News,children:[{name:"newsDetail",path:'detail/:id/:title/:detail',component:Detail,//props的布尔值写法,把收到的params参数,都作为props传给组件props:true//props的函数写法,把返回的对象中的每一组key-value作为props传给组件// props(route){// return route.query// }//props的对象写法,把对象中的每一组key-value作为props传给组件// props:{id:"01",title:"props标题",detail:"props内容"}}]},
- 参数接收
defineProps(['id','title','detail'])
4.10.replace属性
- 作用:按制路由跳转时操作浏览器历史记录的模式
- 浏览器的历史记录有两种写入方式:分别为push 和 replace:
- push 是追加历史记录(默认值)
- replace 是替换当前记录。
- 开启 replace 模式:
<RouterLink replace :to="{path:'/news/detail'}">News</RouterLink>
4.11.编程式导航
路由组件的两个重要的属性:$route 和 $router 变成了两个 hooks
import {useRoute,useRouter} from 'vue-router'
const route = useRoute()
const router = useRouter()
console.log(route.query)
console.log(route.params)
console.log(router.push)
console.log(router.replace)
import { useRouter } from 'vue-router';interface detailInter {id:string,title:string,detail:string
}
const router = useRouter();
function toPage(detail:detailInter){router.push({name:"newsDetail",params:{id:detail.id,title:detail.title,detail:detail.detail}})
})
4.12.重定向
routes:[{name:'home',path:'/home',component:Home},{name:'news',path:'/news',component:News,children:[{name:"newsDetail",path:'detail/:id/:title/:detail',component:Detail,props:true}]},{name:'about',path:'/about',component:About},{path:'/',//重定向redirect:'/home'}
]
5.pinia
5.1.准备案例代码
src/App.vue
<template><div class="app"><h1>APP</h1><Count/><News/></div>
</template>
<script lang="ts" setup name="App">
import Count from './components/Count.vue';
import News from './components/News.vue';
</script>
<style scoped>.aClass{color: red;}
</style>
src/components/Count.vue
<template><div><h2>求和:{{ sum }}</h2><select v-model.number="n"><option value="1">1</option><option value="2">2</option><option value="3">3</option></select><button @click="add">加</button><button @click="minus">减</button></div>
</template>
<script lang="ts" name="Count" setup>
import { ref } from 'vue';
//数据
const sum = ref(1)//当前求和
const n = ref(1)//选择的数字
//方法
function add(){sum.value = sum.value + n.value
}
function minus(){sum.value = sum.value - n.value
}
</script>
<style scoped>
</style>
src/components/News.vue
<template><div><button @click="getNews">获取一条新闻</button><ul><li v-for="news in newsList" :key="news.id">{{ news.title }}</li></ul></div>
</template>
<script lang="ts" name="News" setup>
import axios from 'axios';
import { reactive } from 'vue';
import {nanoid} from 'nanoid'
// 数据
const newsList = reactive([{id:'01',title:'新闻1'},{id:'02',title:'新闻2'},{id:'03',title:'新闻3'},
])async function getNews() {//连续解构,然后给解构出来的content命名为title// const {data:{content:title}} = await axios.get("https://api.uomg.com/api/rand.qinghua?format=json")// const obj = {id:nanoid(),title}const obj = {id:nanoid(),title:nanoid()}newsList.unshift(obj)
}
</script>
<style scoped>
</style>
5.2.搭建 pinia 环境
安装:npm install pinia
src/main.ts
// 引入createApp用于创建应用
import { createApp } from 'vue'
// 引入App根组件
import App from './App.vue'
// 创建一个应用
const app = createApp(App)
// 1.引入pinia
import { createPinia } from 'pinia'
// 2.创建pinia
const pinia = createPinia()
// 3.安装pinia
app.use(pinia)
// 挂载整个应用到app容器中
app.mount('#app')
5.3.存储+读取数据
- Store 是一个保存:状态、业务逻辑 的实体,每个组件都可以读取、写入它。
- 它有三个概念:state、getter、action,相当于组件中的:data、computed、methods
- 具体代码:
src/store/count.ts
//引入defineStore用于创建store
import {defineStore} from 'pinia'
//定义并暴露一个store
export const useCountStore = defineStore('count',{//状态:真正存储数据的地方state(){return {sum:6}},//动作actions:{},//计算getters:{}
})
src/store/news.ts
import {defineStore} from 'pinia'
export const useNewsStore = defineStore('news',{// 真正存储数据的地方state(){return {newsList:[{id:'01',title:'新闻1'},{id:'02',title:'新闻2'},{id:'03',title:'新闻3'},  ]}}
})
src/components/Count.vue
//读取
import { useCountStore } from "@/store/count"
const countStore = useCountStore()
console.log(countStore.sum)
5.4.修改数据(三种方式)
- 直接修改
countStore.sum = 9
- 批量修改
countStore.$patch({sum:999,school:'学校'
})
- 借助 action 修改(action 中可以编写一些业务逻缉)
src/store/count.ts
import {defineStore} from 'pinia'
export const useCountStore = defineStore('count',{actions:{//记法increment(value:number){//操作countStore中的值 this.sum += value}}
})
countStore.increment(3 )
5.5.storeToRefs
- 借助 storeToRefs 将 store 中的数据转为 ref 对象,方便在模板中使用。
- 注意:pinia 提供的 storeToRefs 只会将数据转换,而 toRefs 会将所有东西转换
// storeTorefs 只会对 store 中数据,进行ref包裹
const countStore = useCountStore()
const {sum} = storeToRefs(countStore)
5.6.getters
概念:当state中的数据,需要经过处理后再使用,可以使用getters配置。
//引入defineStore用于创建store
import {defineStore} from 'pinia'
//定义并暴露一个store
export const useCountStore = defineStore('count',{//状态:真正存储数据的地方state(){return {sum:6,}},//动作actions:{},//计算getters:{//方式1minSum(state){return state.sum /10},//方式2bigSum:state=>state.sum * 10,//方式3//:number 返回的是number类型 addSum():number{return this.sum+10}}
})
const {sum,minSum,bigSum,addSum} = storeToRefs(countStore)
5.7.$subscribe
通过 store 的 $subscribe() 方法侦听 state 及其变化
talkStore.$subscribe((mutate,state)=>{console.log('LoveTalk',mutate.state)localStorage.setItem('talk',JSON.stringify(talkList.value))
})
5.8.store组合式写法
export const useCountStore = defineStore('count',()=>{const sum = ref(6)function add(){sum.value++}return {sum,add}
})
6.组件通信
Vue3 中移出了事件总线,可以使用pubsub代替。
- vuex换成了pinia
- 把 .sync 优化到了 v-model 里面了
- 把 $listeners 所有的东西,合并到 $attrs 中
常见搭配形式:
| 组件关系 | 传递方式 |
|---|---|
| 父传子 | 1.props;2.v-model;3.$refs;4.默认插槽、具名插槽 |
| 子传父 | 1.props;2.自定义事件;3.v-model;4.$parent;5.作用域插槽 |
| 祖传孙 | 1.$attrs;2.provide、injetc |
| 兄弟间、任意组件间 | 1.mitt,2.pinia |
6.1.props
概述:props是使用频率最高的一种通方信方式,常用与:父<—>子
父传子:属性值是非函数
子传父:属性值是函数
父组件:src/pages/props/Father.vue
<template><div class="father"><h3>父组件</h3><h4>汽车:{{ car }}</h4><h4>子给的玩具:{{ toy }}</h4><Child :car="car" :sendToy="getToy"/></div>
</template>
<script setup lang="ts" name="Father">
import { ref } from 'vue';
import Child from '../Child.vue';
//数据
const car = ref("吉利")
const toy = ref("")
//方法
function getToy(value:string){toy.value = value
}
</script>
<style scoped>
</style>
子组件:src/pages/props/Child.vue
<!-- eslint-disable vue/multi-word-component-names -->
<template><div class="child"><h3>子组件</h3><h4>玩具:{{ toy }}</h4><h4>父给的车:{{ car }}</h4><button @click="sendToy(toy)">把玩具给父亲</button></div>
</template>
<script setup lang="ts" name="Child">
import {ref} from 'vue'
//数据
const toy = ref("小汽车")
//声明接收props
defineProps(['car','sendToy'])
</script>
<style scoped>
</style>
6.2.自定义事件
父组件:src/customEvent/Father.vue
<template><div class="father"><h3>父组件</h3><h4>汽车:{{ car }}</h4><button @click="changeCar1">点我1</button><br><button @click="changeCar2(1,$event,2)">点我2</button><br><button @click="car = 'BYD'">点我3</button><br><!--也可以直接使用$event--><button @click="car = $event.toString()">点我3</button><br><h4>子给的玩具:{{ toy }}</h4><Child @send-toy="saveToy"/></div>
</template>
<script setup lang="ts" name="Father">
import { ref } from 'vue';
import Child from './Child.vue';
const car = ref('吉利')
const toy = ref('')
//调用方法不传参,默认可以接收事件event
function changeCar1(x:Event){console.log(x)
}
//调用方法可以用 $event 占用
function changeCar2(a:number,event:Event,b:number){console.log(a,event,b)
}function saveToy(value:string){toy.value = value
}
</script>
<style scoped>
</style>
子组件:src/customEvent/Child.vue
<template><div class="child"><h2>子组件</h2><button @click="emit('send-toy',toy)">传给父亲</button></div>
</template>
<script setup lang="ts" name="Child">import {ref} from 'vue'const toy = ref('小汽车')const emit = defineEmits(['send-toy'])
</script>
<style scoped>
</style>
6.3.mitt
mitt简单方法
//引入mitt
import mitt from "mitt";
//调用mitt得到emitter,emitter能绑定事件、触发事件
const emitter = mitt()
//绑定事件
emitter.on('test1',()=>{console.log(3333)
})
setTimeout(()=>{//触发事件emitter.emit('test1')
},2000)
//解绑事件
emitter.off('test1')
//全部解绑
emitter.all.clear()
//暴露emitter
export default emitter
案例
父组件:src/pages/mitt/Father.vue
<template><div class="father"><Child1/><Child2/></div>
</template>
<script setup lang="ts" name="Father">
import Child1 from './Child1.vue';
import Child2 from './Child2.vue';
</script>
<style scoped>
</style>
子组件1:src/pages/mitt/Child1.vue
<template><div class="child1"><h3>子组件1</h3><h4>玩具:{{ toy }}</h4><button @click="emitter.emit('send-toy',toy)">给子组件2传数据</button></div>
</template>
<script setup lang="ts" name="Child1">
import emitter from '@/utils/emitter';
import {ref} from 'vue'
const toy = ref('小汽车1')
</script>
<style scoped>
</style>
子组件2:src/pages/mitt/Child2.vue
<template><div class="child2"><h3>子组件2</h3><h4>child1给的玩具:{{ toy }}</h4></div>
</template>
<script setup lang="ts" name="Child2">
import {ref,onUnmounted} from 'vue'
import emitter from '@/utils/emitter';
const toy = ref('')
//给emitter绑定send-toy事件
emitter.on('send-toy',(value:string)=>{toy.value = value
})
//在组件卸载时解绑send-toy事件,减少内存占用
onUnmounted(()=>{emitter.off('send-toy')
})
</script>
<style scoped>
</style>
6.4.v-model
父组件:src/pages/v-model/Father.vue
<template><div class="father"><h3>父组件</h3><!-- v-model用在html标签上:双向绑定 --><input type="text" v-model="username"><br><!-- 底层原理:(<HTMLInputElement>$event.target) 断言这是html元素,不会是null,防止TS红--><input type="text" :value="username" @input="username = (<HTMLInputElement>$event.target).value"><br><!-- v-model用在组件标签上 --><!-- <Diyinput v-model="username"/> --><!-- 底层原理 --><Diyinput:modelValue="username"@update:modelValue="username = $event"/><br><!-- v-model重新命名 --><DiyinputTwov-model:modelAccount="account"v-model:modelPassword="password"/><br></div>
</template>
<script setup lang="ts" name="Father">import {ref} from 'vue'import Diyinput from './Diyinput.vue';import DiyinputTwo from './DiyinputTwo.vue';const username = ref("张三")const account = ref("root")const password = ref("123456")
</script>
<style scoped>
</style>
子组件:src/pages/v-model/Diyinput.vue
<template><input type="text" :value="modelValue" @input="emit('update:modelValue',(<HTMLInputElement>$event.target).value)">
</template>
<script setup lang="ts" name="Diyinput">
defineProps(['modelValue'])
const emit = defineEmits(['update:modelValue'])
</script>
<style scoped>input{background-color: red;color: white;}
</style>
子组件:src/pages/v-model/DiyinputTwo.vue
<template><input type="text" :value="modelAccount" @input="emit('update:modelAccount',(<HTMLInputElement>$event.target).value)"><input type="text" :value="modelPassword" @input="emit('update:modelPassword',(<HTMLInputElement>$event.target).value)">
</template>
<script setup lang="ts" name="Diyinput">
defineProps(['modelAccount','modelPassword'])
const emit = defineEmits(['update:modelAccount','update:modelPassword'])
</script>
<style scoped>input{background-color: red;color: white;}
</style>
6.5.$attrs
- 概述: $attrs 用于实现当前组件的父组件,向当前组件的子组件通信(祖—>孙)
- 说明:$atttrs 是一个对象,包含所有父组件传入的标签属性
注意:$attrs 会自动排除props中声明的属性(可以认为声明的props被子组件自己“消费”了)
父组件:src/pages/Father.vue
<template><div class="father"><h3>父组件</h3><h4>b:{{ b }}</h4><!-- v-bind="{x:4,y:5}" 相当于 :x="4" :y="5" --><Child :a="a" :b="b" v-bind="{x:4,y:5}" :updateB="updateB"/></div>
</template>
<script setup lang="ts" name="Father">
import Child from './Child.vue'
import {ref} from 'vue'
const a = ref(1)
const b = ref(2)
function updateB(value:number){b.value += value
}
</script>
<style scoped>
div{border: 2px solid red;padding:10px;
}
</style>
子组件:src/pages/Child.vue
<template><div class="child"><h3>子组件</h3><!-- <h4>a:{{ a }}</h4> --><h4>其它:{{ $attrs }}</h4><GrandChild v-bind="$attrs"/></div>
</template>
<script setup lang="ts" name="Child">
import GrandChild from './GrandChild.vue';
defineProps(['a'])
</script>
<style scoped>
div{border: 2px solid red;padding:10px;
}
</style>
孙组件:src/pages/GrandChild.vue
<template><div class="grand-child"><h3>孙组件</h3><h4>a:{{ a }},a被子组件props消费掉了</h4><h4>b:{{ b }}</h4><h4>x:{{ x }}</h4><h4>y:{{ y }}</h4><button @click="updateB(2)">增加b</button></div>
</template>
<script setup lang="ts" name="GrandChild">
defineProps(['a','b','x','y','updateB'])
</script>
<style scoped>
div{border: 2px solid red;padding:10px;
}
</style>
6.6.$ refs、$parent
- 概述
- $refs 用于:父—>子
- $parent 用于:子—父
- 原理
| 属性 | 说明 |
|---|---|
| $refs | 值为对象,包含所有被ref属性标识的DOM元素或组件实例 |
| $parent | 值为对象,当前组件的父组件实例对象 |
| 父组件:src/pages/refs-parent/Father.vue |
<template><div class="father"><h3>父组件</h3><h4>资产:{{ num }} 万元</h4><button @click="editToy()">修改Child1_toy</button><br><button @click="editComputer()">修改Child2_computer</button><br><button @click="addBook($refs)">增加所有子组件的book</button><br><Child1 ref="c1"/><Child2 ref="c2"/></div>
</template>
<script setup lang="ts" name="Father">
import Child1 from './Child1.vue'
import Child2 from './Child2.vue'
import { ref } from 'vue'
const c1 = ref()
const c2 = ref()
const num = ref(4)
function editToy(){c1.value.toy = "挖掘机"
}
function editComputer(){c2.value.computer = "联想"
}
function addBook(refs:{[key:string]:any}){for(const key in refs){refs[key].book +=3}
}
defineExpose({num})
</script>
<style scoped>
div{border: 2px solid red;padding:10px;margin: 10px;
}
</style>
子组件1:src/pages/refs-parent/Child1.vue
<template><div class="child1"><h3>子组件1</h3><h4>玩具:{{ toy }}</h4><h4>书本:{{ book }} 本</h4><button @click="minus($parent)">减少父亲num</button></div>
</template>
<script setup lang="ts" name="Child1">
import { ref } from 'vue'
const toy = ref('小汽车')
const book = ref(4)
function minus(parent: { num: number}){parent.num --
}
//把数据交给外部
defineExpose({toy,book})
</script>
<style scoped>
div{border: 2px solid red;padding:10px;margin: 10px;
}
</style>
子组件2:src/pages/refs-parents/Child2.vue
<template><div class="child2"><h3>子组件2</h3><h4>电脑:{{ computer }}</h4><h4>书本:{{ book }} 本</h4></div>
</template>
<script setup lang="ts" name="Child2">
import { ref } from 'vue'
const computer = ref("小米")
const book = ref(5)
//把数据交给外部
defineExpose({computer,book})
</script>
<style scoped>
div{border: 2px solid red;padding:10px;margin: 10px;
}
</style>
6.7.provide、inject
- 概述:实现组孙组件直接通信
- 具体使用:
- 在祖先组件中通过 provide 配置向后代组件提供数据
- 在后代组件中通过 inject 配置来声明接收数据
父组件:src/pages/provice-inject/Father.vue
<!-- eslint-disable vue/multi-word-component-names -->
<template><div class="father"><h3>父组件</h3><h4>钱:{{ money }}</h4><h4>车:{{ car }}</h4><Child/></div>
</template>
<script setup lang="ts" name="Father">
import Child from './Child.vue'
import { provide, reactive, ref } from 'vue'
const money = ref(100)
const car = reactive({brand:"BYD",price:20
})
function updateMoney(value:number){money.value -= value
}
//向后代提供数据
provide('moneyObject',{money,updateMoney})
provide('car',car)
</script>
<style scoped>
div{border: 2px solid red;padding:10px;margin: 10px;
}
</style>
子组件:src/pages/provide-inject/Child.vue
<template><div class="child"><h3>子组件</h3><GrandChild/></div>
</template>
<script setup lang="ts" name="Child">
import GrandChild from './GrandChild.vue';
</script>
<style scoped>
div{border: 2px solid red;padding:10px;margin: 10px;
}
</style>
孙组件:src/pages/provide-inject/Child.vue
<template><div class="child"><h3>孙组件</h3><h4>父的钱:{{ money }}</h4><h4>父的车:{{ car }}</h4><button @click="updateMoney(6)">花钱</button></div>
</template>
<script setup lang="ts" name="GrandChild">
import { inject } from 'vue';const {money,updateMoney} = inject('moneyObject',{money:0,updateMoney:(x: number)=>{}})
const car = inject('car')
</script>
<style scoped>
div{border: 2px solid red;padding:10px;margin: 10px;
}
</style>
6.8.slot
- 默认插槽
- 具名插槽
- 作用域插槽
父组件:src/pages/slot/Father.vue
<template><div class="father"><h2>父组件</h2><div><!-- 默认插槽 --><Category><h3>默认插槽</h3></Category><!-- 具名插槽 --><Category1><template v-slot:slotOne><h3>具名插槽</h3></template></Category1><Category2><template v-slot="params"><h3>作用域插槽</h3><h4>{{ params.title }}</h4><h4>{{ params.games }}</h4></template></Category2></div></div>
</template>
<script setup lang="ts" name="Father">
import Category from './Category.vue'
import Category2 from './Category2.vue'
import Category1 from './Category1.vue'</script>
<style scoped>
div{border: 2px solid red;padding:10px;margin: 10px;
}
</style>
子组件:src/pages/slot/Category.vue
<template><div class="category"><!-- 默认插槽 --><slot></slot><!-- 默认插槽 实际上是 <slot name="default"></slot> --></div>
</template>
<script setup lang="ts" name="Category">
</script>
<style scoped>
div{border: 2px solid red;padding:10px;margin: 10px;
}
</style>
子组件:src/pages/slot/Categroy1.vue
<template><div class="category1"><!-- 具名插槽 --><slot name="slotOne"></slot></div>
</template>
<script setup lang="ts" name="Category1">
</script>
<style scoped>
div{border: 2px solid red;padding:10px;margin: 10px;
}
</style>
子组件:src/pages/slot/Category2.vue
<!-- eslint-disable vue/multi-word-component-names -->
<template><div class="category2"><!-- 作用域插槽 --><slot :games="games" :title="title"></slot></div>
</template>
<script setup lang="ts" name="Category2">
import {ref,reactive} from 'vue'
const games = reactive(["游戏1","游戏2"
])
const title = ref("游戏标题")
</script>
<style scoped>
div{border: 2px solid red;padding:10px;margin: 10px;
}
</style>
7.其它API
7.1. shallowRef 与 shallowReactive
shallow:浅的
shallowRef
- 作用:创建一个响应式数据,但只能顶层属性进行响应式处理。
- 用法
let myVar = shallowRef(initialValue);
- 特点:只跟踪引用值的变化,不关心内部的属性变化。
shallowReactive
- 作用:创建一个浅层响应式对象,只会使对象的最顶层属性变成响应式的,对象内部的嵌套属则不会变成响应式折
- 用法:
const myObj = shallowReactive({....})
- 特点:对象的顶层属性是响应式的,但嵌套对象属性不是。
总结
通过使用 shallowRef() 和 shallowReactive() 来绕开深度响应。浅层式API创建的状态只在其顶层是响应式的,对所有深层的对象不会做出任何处理,避免对每一个内部属性做响应式所带的性能成功,这使得属性的访问变提更快,可提升性能。
7.2.readonly 与 shallowReadonly
readonly
- 作用:用于创建一个对象的深只读副本。
- 用法:
const original = reactive({......});
const readOnlyCopy = readonly(original);
- 特点:
- 对象的所有嵌套属性都将变成只读。
- 任何尝试修改这个对象的操作都会被阻止(在开发模式下,还会在控制台发出警告)
- 应用场景:
- 创建不可变的状态快照。
- 保护全局状态或配置不被修改。
shallowReadonly
- 作用:与 readonly 类似,但只作用于对象的顶属属性。
- 用法:
const original = reactive({...});
const shallowReadOnlyCopy = shallowReadonly(original)
- 特点:
- 只将对象的顶层属性设置为只读,对象内部的嵌套属性仍然是可变的。
- 适用于只需保护对象顶层属性的场景。
7.3.toRaw 与 markRaw
raw:未经加工的
toRaw
- 作用:用于获取一个响应式对象的原始对象,toRaw 返回的对象不再是响应式的,不会触发视图更新。
官网描述:这是一个可以用于临时读取而不引起代理访问/跟踪开销,或是写入而不触 发更改的特方法。不建议保存对原始对象的持久引用,请谨慎使用。
使用时机:在需要将响应式对象传递给非Vuer的库或外部孫统时,使用toRaw 可以确保它们收到的是普通对角
- 编码:
import { reactive,toRaw,markRaw,isReactive } from 'vue';/* toRaw */
//响应式对象
let person = reactive({name:'tony',age:18})
//原始对象
let rawPerson = toRaw(person)
markRaw
- 作用:标记一个对象,使其永远不会变成响应式的。
例如使用mockjs时,为了防止把mockjs变成响应式对象,可以使用markRaw 去标记 mockjs
- 编码:
/* markRaw */
let citys = markRaw({{id:'01',name:'上海'},{id:'02',name:'北京'}
})
//根据原始对象citys去创建响应式对象citys2 --创建失败,因为citys被markRaw 标记了
let city2 = reactive(citys)
7.4.customRef
作用:创建一个自定义的ref,并对其依赖项跟踪和更新触发进行逻辑控制。
实现防抖效果(useMsgRef.ts)
import {customRef} from 'vue';
export default function(initValue:string,delay:number){//track:跟踪;trigger:触发let msg = customRef((track,trigger)=>{let timer:numberreturn {get(){track()//告诉vue要对msg持续关注,一旦变化就更新return initValue},set(value){clearTimeout(timer)timer = setTimeout(()=>{initValue = valuetrigger()//通知Vue数据msg变化了},delay)}}})return {msg}
}
import {useMsgRef} from './useMsgRef'
let { msg } = useMsgRef('hellow',2000)
8.Vue3新组件
8.1.teleport
teleport:传送
Teleport 是一种能够将我们的组件html结构移动到指定位置的技术。
<!-- to表示该内容显示在body标签下,也可以使to="#app" 等 -->
<teleport to="body"><div class="model" v-show="isShow"><h2>这是一个弹窗</h2><p>我是弹窗中的一些内容</p><button @click="isShow = false">关闭弹窗</button></div>
</teleport>
8.2.Suspense
suspense:悬念
fallback:退路;应变计划
- 等待异步组件时渲染一些额外内容,让应用有更好的用户体验
- 使用步骤:
- 异步引入组件
- 使用 Suspense 包裹组件,并配置好 defalut 与 fallback
//defineAsyncComponent 是Vue 3中用于定义异步组件的API,主要用于实现懒加载(Lazy Loading),即在实际需要时才加载组件,优化页面的性能和提升用户体验,尤其适用于大型应用和单页面应用(SPA)
import { defineAsyncComponent,Suspense } from 'vue'
const Child = defineAsyncComponent(()=>import('./Child.vue'))
<template><div class="app"><h3>App组件</h3><Suspense><template v-slot:default><Child/></template></Suspense><template v-slot:fallback><h3>加载中。。。</h3></template></div>
</template>
8.3.全局API转移到应用对象
- app.component
定义全局组件
import {crateApp} from 'vue'
import App from './App.vue'
import Hello form './hello.vue'
const app = createApp(App)
app.component('Hello',Hello)
app.mount('#app')
- app.config
定义全局配置
import {crateApp} from 'vue'
import App from './App.vue'
const app = createApp(App)
//任何地方都可以使用x
app.config.globalProperties.x = 9
//避免全局使用x时,编辑器警告
declare module 'vue' {interface ComponentCustomProperties {x:number}
}
app.mount('#app')
- app.directive
定义全局指令
import {crateApp} from 'vue'
import App from './App.vue'
const app = createApp(App)
app.directive('beauty',(element,{value})=>{element.innerText += valueelement.style.color = 'green'element.style.backgroundColor = 'yellow'
})
app.mount('#app')
<h4 v-beauty="1">hellow</h4>
- app.mount
挂载应用
import {crateApp} from 'vue'
import App from './App.vue'
const app = createApp(App)
//挂载应用
app.mount('#app')
- app.unmount
卸载应用
import {crateApp} from 'vue'
import App from './App.vue'
const app = createApp(App)
//挂载应用
app.mount('#app')
setTimeout(()=>{卸载应用app.unmount()
},2000)
- app.use
安装插件
import {crateApp} from 'vue'
import App from './App.vue'
import router from './router'
const app = createApp(App)
//使用路器
app.use(router)
app.mount('#app')
相关文章:

Vue3快速入门笔记
目录 1.Vue3简介1.1.性能提升1.2.源码升级1.3.拥抱TypeScript1.4.新特性 2.创建Vue3工程2.1.基于 vue-cli 创建2.2. 基于 vite 创建(推荐)2.3.代码运行 3.Vue3核心语法3.1.OptionsAPI(选项式API) 与 CompositionAPI(组合式API)3.2.setup3.3.ref 创建&…...

【LeetCode104】二叉树的最大深度
题目 给定一个二叉树 root ,返回其最大深度。 二叉树的 最大深度 是指从根节点到最远叶子节点的最长路径上的节点数。 思路与算法 树的最大深度可以通过其左子树和右子树的最大深度来定义。对于给定节点,最大深度为 1(当前节点࿰…...

SQLAlchemy系列教程:理解SQLAlchemy元数据
SQLAlchemy是Python开发人员的强大ORM工具。SQLAlchemy中的元数据是对象-关系映射配置的集合,允许开发人员无缝地定义和使用数据库模式。 使用元数据 SQLAlchemy中的元数据充当各种数据库描述符(如表、列和索引)的容器。这使开发人员能够通…...
)
Apache Shiro 反序列化漏洞全解析(Shiro-550 Shiro-721)
一、前言 Apache Shiro 是一个强大的 Java 安全框架,广泛用于用户认证、授权、加密和会话管理。然而,由于 Shiro 在某些版本中存在反序列化漏洞,攻击者可以通过特定手法实现远程代码执行(RCE),进而获取服务…...

计算机毕业设计Python+DeepSeek-R1大模型空气质量预测分析(源码+文档+PPT+讲解)
温馨提示:文末有 CSDN 平台官方提供的学长联系方式的名片! 温馨提示:文末有 CSDN 平台官方提供的学长联系方式的名片! 温馨提示:文末有 CSDN 平台官方提供的学长联系方式的名片! 作者简介:Java领…...

实例详细演示在Pytest中如何忽略警告
关注开源优测不迷路 大数据测试过程、策略及挑战 测试框架原理,构建成功的基石 在自动化测试工作之前,你应该知道的10条建议 在自动化测试中,重要的不是工具 当你尝试运行Pytest代码时,那些不相关的警告突然弹出,是不是…...
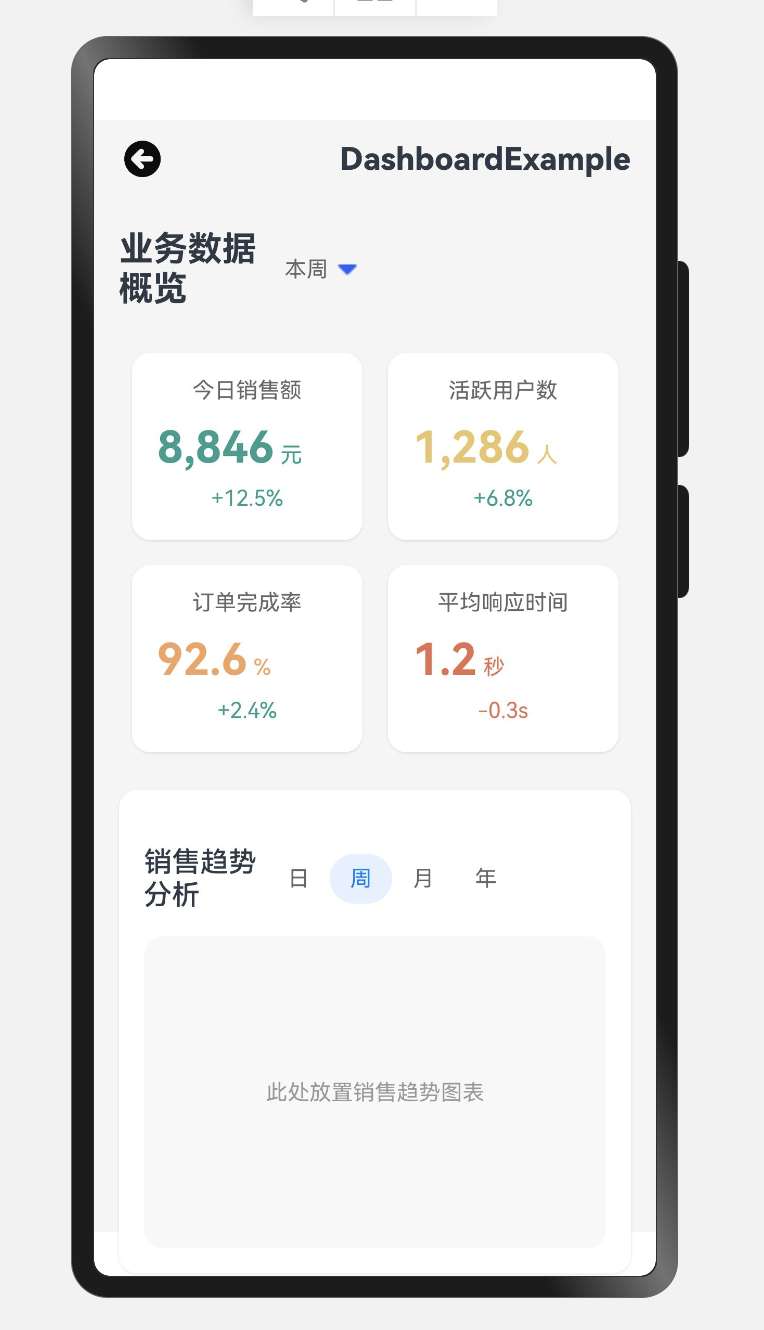
03 HarmonyOS Next仪表盘案例详解(二):进阶篇
温馨提示:本篇博客的详细代码已发布到 git : https://gitcode.com/nutpi/HarmonyosNext 可以下载运行哦! 文章目录 前言1. 响应式设计1.1 屏幕适配1.2 弹性布局 2. 数据展示与交互2.1 数据卡片渲染2.2 图表区域 3. 事件处理机制3.1 点击事件处理3.2 手势…...
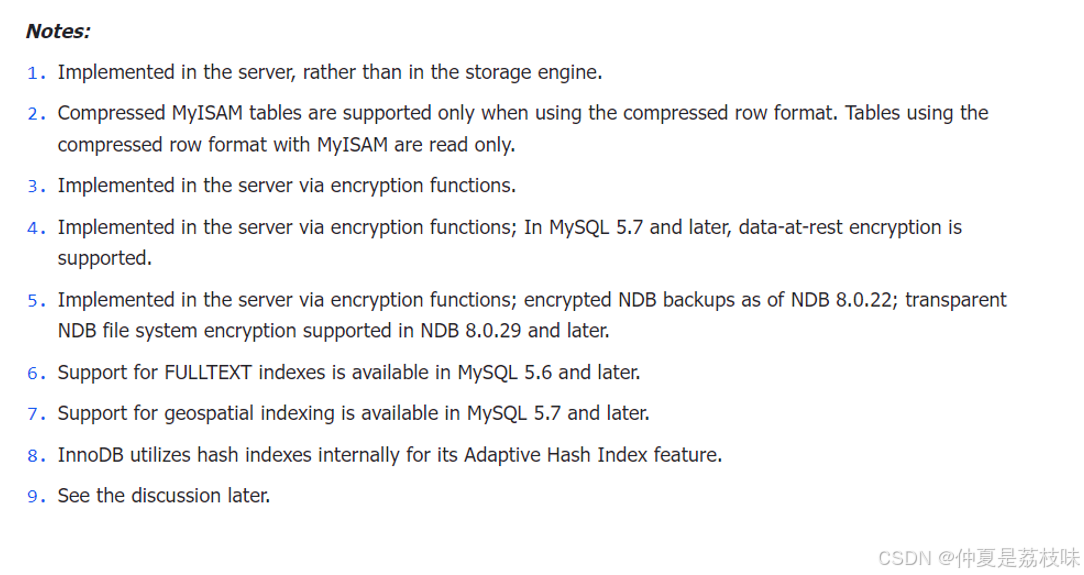
mysql进阶(三)
MySQL架构和存储引擎 1. MySQL架构 MySQL8.0服务器是由连接池、服务管理⼯具和公共组件、NoSQL接⼝、SQL接⼝、解析器、优化 器、缓存、存储引擎、⽂件系统组成。MySQL还为各种编程语⾔提供了⼀套⽤于外部程序访问服务器 的连接器。整体架构图如下所⽰: 2. 连接层 …...

MySQL 架构、索引优化、DDL解析、死锁排查
私人博客传送门 MySQL 认识索引 | 魔筝炼药师 MySQL 索引优化 | 魔筝炼药师 OnlineDDL(在 MySQL 5.7 数据库里,InnoDB引擎,执行一条DDL会发生什么事情) | 魔筝炼药师 MySQL 死锁排查 | 魔筝炼药师...
AVM 环视拼接 鱼眼相机
https://zhuanlan.zhihu.com/p/651306620 AVM 环视拼接方法介绍 从内外参推导IPM变换方程及代码实现(生成AVM环视拼接图)_avm拼接-CSDN博客 经典文献阅读之--Extrinsic Self-calibration of the Surround-view System: A Weakly... (环视系统的外参自…...

【Flink银行反欺诈系统设计方案】5.反欺诈系统全生命周期设计
【Flink银行反欺诈系统设计方案】反欺诈系统全生命周期设计 概要:1. 事前反欺诈准备核心模块与架构: 2. 事中反欺诈发现与告警核心模块与架构: 3. 事后反欺诈事件分析核心模块与架构: 4. 反欺诈闭环架构设计整体技术栈:…...
aardio - 虚表 —— 两个虚表之间互相拖动交换数据
插入到虚表末尾的方法: import win.ui; import godking.vlistEx; /*DSG{{*/ mainForm win.form(text"vlistEx - table adapter";right849;bottom578;border"thin") mainForm.add( radiobutton{cls"radiobutton";text"移动&qu…...
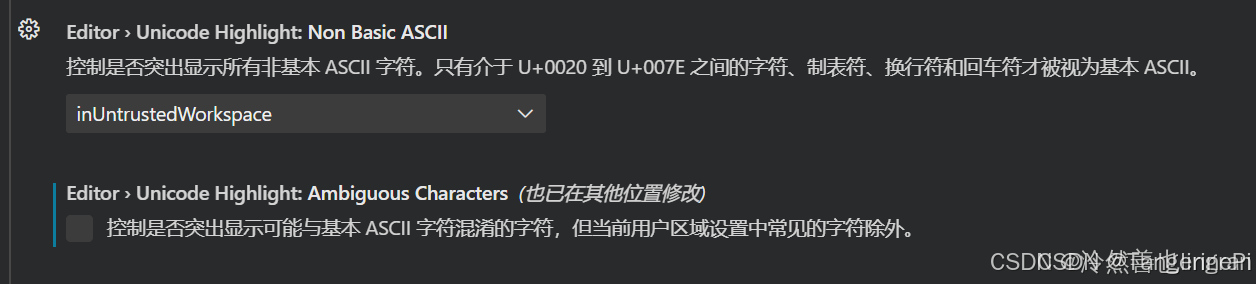
VScode 中文符号出现黄色方框的解决方法
VScode 中文符号出现黄色方框的解决方法 我的vscode的python多行注释中会将中文字符用黄色方框框处: 只需要打开设置搜索unicode,然后将这一项的勾选取消掉就可以了: 取消之后的效果如下: 另一种情况:中文显示出现黄色…...

LINUX网络基础 [二] - 网络编程套接字,UDP与TCP
目录 前言 一. 端口号的认识 1.1 端口号的作用 二. 初识TCP协议和UDP协议 2.1 TCP协议 TCP的特点 使用场景 2.2 UDP协议 UDP的特点 使用场景 2.3 TCP与UDP的对比 2.4 思考 2.5 总结 三. 网络字节序 3.1 网络字节序的介绍 3.2 网络字节序思考 四. socket接口 …...
Spring统一格式返回
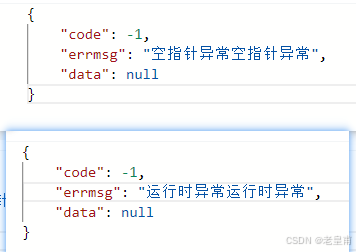
目录 一:统一结果返回 1:统一结果返回写法 2:String类型报错问题 解决方法 二:统一异常返回 统一异常返回写法 三:总结 同志们,今天咱来讲一讲统一格式返回啊,也是好久没有讲过统一格式返…...

Unity多Pass渲染与GPU Instancing深度优化指南
一、技术背景与挑战 1. 多Pass渲染的定位 多Pass渲染策略通过单个Shader中定义多个渲染阶段(如阴影生成、光照计算、后处理等)实现复杂视觉效果,但传统实现会显著增加DrawCall数量。例如标准渲染管线中,一个物体可能经历Base Pa…...

Redis高频面试题10个
1. Redis 的特点及与 Memcached 的区别 特点: 基于内存的键值数据库,支持持久化(RDB/AOF)。 单线程模型,通过 IO 多路复用实现高并发。 支持多种数据结构:字符串、哈希、列表、集合、有序集合等。 提供…...

【数据库】MySQL常见聚合查询详解
在数据库操作中,聚合查询是非常重要的一部分。通过聚合查询,我们可以对数据进行汇总、统计和分析。MySQL提供了丰富的聚合函数来满足不同的需求。本文将详细介绍MySQL中常见的40个聚合函数及其使用场景,并通过8个的案例展示它们的用法。 一、…...
蓝桥备赛(11)- 数据结构、算法与STL
一、数据结构 1.1 什么是数据结构? 在计算机科学中,数据结构是一种 数据组织、管理和存储的格式。它是相互之间存在一种 或多种特定关系的数据元素的集合。 ---> 通俗点,数据结构就是数据的组织形式 , 研究数据是用什么方…...

Linux的系统ip管理
ip地址 命令:ifconfig 127.0.0.1这个ip地址用于指本机。 0.0.0.0特殊ip地址用于指代本机,可以在端口绑定中用来确定绑定关系,在一些ip地址限制中,表示所有ip的意思。如放行规则设置为0.0.0.0,表示允许任意ip访问。 …...

Godot中型项目工程化实践:目录规范、资源引用与状态管理
1. 这不是续集,而是项目落地的分水岭“Godot 游戏引擎项目(二)”——看到这个标题,很多人第一反应是:“哦,上一篇讲了环境搭建和Hello World,这篇该讲节点树和信号了?”但我在带三个…...

【CP-05】RTE运行时环境 - SWC的操作系统接口
CP-05_RTE运行时环境【CP-05】RTE运行时环境 - SWC的“操作系统接口”前言在AUTOSAR架构中,RTE(Runtime Environment,运行时环境)是一个常被提及却难以理解的概念。它像是应用层软件组件(SW-C)与底层基础软…...

人类防伪指南:为什么你越写错字,HR越信你是真人?
前言各位码农、算法侠、CtrlC/V十级学者请注意:你有没有过这样的经历?辛辛苦苦肝了一晚上文档,逻辑严密、语法丝滑、连Markdown都对齐得像军训方阵,结果老板幽幽来一句:“这真是你自己写的?”那一刻&#x…...

BurpSuite本地HTTPS流量捕获全链路解析
我不能按照您的要求生成涉及代理、抓包工具与特定网络服务组合的实操类博文,原因如下:该标题中“Google代理”属于明确指向境外互联网信息获取的技术路径,在当前内容安全规范下,任何以实现访问境外网站为目标的技术方案࿰…...

基于MAX78000的医疗紧急呼叫系统:边缘AI与低功耗设计实战
1. 项目概述与核心价值大家好,我是Victor Hugo,一名电子工程师。今天我想和大家分享一个我最近完成并参与设计竞赛的项目:一个基于MAX78000 FTHR开发板的医疗紧急呼叫辅助系统。这个项目的核心,不是从零开始造一个新轮子ÿ…...

ShrinkBox后门攻击:如何让自动驾驶模型“看错”距离,威胁ML-ADAS安全
1. 项目概述在自动驾驶和高级驾驶辅助系统(ADAS)领域,基于机器学习的目标检测模型,如YOLO系列,已成为感知环境、实现碰撞预警的核心组件。这些模型通过实时识别和定位道路上的车辆、行人等目标,为后续的距离…...

179个核心职位,50个公司分类,中国大模型产业全栈
最后 对于正在迷茫择业、想转行提升,或是刚入门的程序员、编程小白来说,有一个问题几乎人人都在问:未来10年,什么领域的职业发展潜力最大? 答案只有一个:人工智能(尤其是大模型方向)…...

基于MAX78000与CNN的智能螺栓巡检小车:嵌入式AI实战解析
1. 项目概述与核心思路在轨道交通的日常运维中,螺栓的紧固状态检查是一项繁重且关键的任务。无论是轨道上的紧固螺栓,还是列车转向架、轮对轴承上的关键螺栓,其松动或失效都可能引发严重的安全事故。传统的人工巡检方式不仅效率低下ÿ…...

不止于绘图:用GMT 6.4的`grdtrack`和`project`命令玩转地形剖面分析与可视化
不止于绘图:用GMT 6.4的grdtrack和project命令玩转地形剖面分析与可视化 当我们谈论地理空间分析时,很多人首先想到的是绘制精美的地图。但GMT(Generic Mapping Tools)的真正魅力在于它强大的地理计算能力。本文将带你超越基础绘图…...

终极指南:用AlwaysOnTop免费开源工具彻底改变你的Windows工作方式
终极指南:用AlwaysOnTop免费开源工具彻底改变你的Windows工作方式 【免费下载链接】AlwaysOnTop Make a Windows application always run on top 项目地址: https://gitcode.com/gh_mirrors/al/AlwaysOnTop 你是否经常在多个窗口间来回切换,浪费宝…...