什么是QoS?QoS是如何工作的?QoS的实验配置如何进行?
QoS(Quality of Service)是服务质量的简称。对于网络业务来说,服务质量包括哪些方面呢?
从传统意义上来讲,无非就是传输的带宽、传送的时延、数据的丢包率等,而提高服务质量无非也就是保证传输的带宽,降低传送的时延,降低数据的丢包率以及时延抖动等。
广义上讲,服务质量涉及网络应用的方方面面,只要是对网络应用有利的措施,其实都是在提高服务质量。因此,从这个意义上来说,防火墙、策略路由、快速转发等也都是提高网络业务服务质量的措施之一。
服务质量相对网络业务而言,在保证某类业务服务质量的同时,可能就是在损害其它业务的服务质量。因为网络资源总是有限的,只要存在抢夺网络资源的情况,就会出现服务质量的要求。比如,网络总带宽为100Mbps,而BT下载占用了90Mbps,其他业务就只能占用剩下的10Mbps。而如果限制BT下载占用的最大带宽为50Mbps,也就提高了其他业务的服务质量,使其他业务能够占用最少50Mbps的带宽,但这是在损害BT业务的服务质量为前提的。
下面瑞哥将通过实验来给大家讲解Qos的配置。
文章目录
- 一、实验目的
- 二、实验拓扑
- 三、实验场景
- 四、实验步骤
- 4.1 步骤一. 基础配置与 IP 编址
- R1
- R2
- R3
- R4
- R5
- S3
- S4
- 4.2 步骤二. 配置静态路由与 NQA
- 4.3 步骤三. 配置优先级映射
- 4.4 步骤四. 配置整形与监管
- 4.5 步骤五. 配置基于队列的拥塞管理与拥塞避免
- 4.6 步骤六. 配置基于流的拥塞管理与拥塞避免
- 五、附加实验: 思考并验证
- 六、最终设备配置
- R1
- R2
- R3
- R4
- S3
- S4
一、实验目的
- 掌握使用NQA分析SLA的方法
- 掌握进行优先级映射和流量监管的方法
- 掌握配置流量整形的方法
- 掌握实现基于队列和基于流分类的拥塞管理的方法
- 掌握配置WRED实现拥塞避免的方法
二、实验拓扑

三、实验场景
你是公司的网络管理员。公司网络分成两部分,其中R1与S1在公司总部,R2与S2在公司分部,之间通过专线实现互联。
随着网络的发展,内网带宽逐渐增大,而专线的带宽一直没有升级,所以网络中出现了比较严重的重要业务反应较慢,或无法正常使用的情况。
使用QoS的差分服务,你可以调整相应的QoS特性,保证重要的业务数据能更好的发送给目标。
实验中,S3和S4使用NQA相互发送数据,模拟大量数据流的发送。R3、R4与R5模拟客户端和服务器,测试重要应用是否可以正常使用。
四、实验步骤
4.1 步骤一. 基础配置与 IP 编址
给所有路由器和交换机S3,S4配置IP地址和掩码。
配置时需要将R1接口S1/0/0的波特率配置为72000,模拟广域网链路因带宽不足而出现拥塞。
R1
<Huawei>system-view
Enter system view, return user view with Ctrl+Z.
[Huawei]sysname R1
[R1]interface Serial 1/0/0
[R1-Serial1/0/0]ip address 10.0.12.1 255.255.255.0
[R1-Serial1/0/0]baudrate 72000
[R1-Serial1/0/0]interface GigabitEthernet 0/0/1
[R1-GigabitEthernet0/0/1]ip address 10.0.145.1 255.255.255.0
R2
<Huawei>system-view
Enter system view, return user view with Ctrl+Z.
[Huawei]sysname R2
[R2]interface Serial 1/0/0
[R2-Serial1/0/0]ip address 10.0.12.2 255.255.255.0
[R2-Serial1/0/0]interface GigabitEthernet 0/0/2
[R2-GigabitEthernet0/0/2]ip address 10.0.34.2 255.255.255.0
R3
<Huawei>system-view
Enter system view, return user view with Ctrl+Z.
[Huawei]sysname R3
[R3]interface GigabitEthernet 0/0/2
[R3-GigabitEthernet0/0/2]ip address 10.0.34.3 255.255.255.0
R4
<Huawei>system-view
Enter system view, return user view with Ctrl+Z.
[Huawei]sysname R4
[R4]interface GigabitEthernet 0/0/1
[R4-GigabitEthernet0/0/1]ip address 10.0.145.4 255.255.255.0
R5
<Huawei>system-view
Enter system view, return user view with Ctrl+Z.
[Huawei]sysname R5
[R5]interface GigabitEthernet 0/0/1
[R5-GigabitEthernet0/0/1]ip address 10.0.145.5 255.255.255.0
S3
<Huawei>system-view
Enter system view, return user view with Ctrl+Z.
[Huawei]sysname S3
[S3]interface Vlanif 1
[S3-Vlanif1]ip address 10.0.145.3 255.255.255.0
S4
<Huawei>system-view
Enter system view, return user view with Ctrl+Z.
[Huawei]sysname S4
[S4]interface Vlanif 1
[S4-Vlanif1]ip address 10.0.34.4 255.255.255.0
配置完成后,测试直连链路的连通性。
[R1]ping -c 1 10.0.12.2
PING 10.0.12.2: 56 data bytes, press CTRL_C to break
Reply from 10.0.12.2: bytes=56 Sequence=1 ttl=255 time=36 ms
--- 10.0.12.2 ping statistics ---
1 packet(s) transmitted
1 packet(s) received
0.00% packet loss
round-trip min/avg/max = 36/36/36 ms
[R1]ping -c 1 10.0.145.3
PING 10.0.145.3: 56 data bytes, press CTRL_C to break
Reply from 10.0.145.3: bytes=56 Sequence=1 ttl=255 time=35 ms
--- 10.0.145.3 ping statistics ---
1 packet(s) transmitted
1 packet(s) received
0.00% packet loss
round-trip min/avg/max = 35/35/35 ms
[R1]ping -c 1 10.0.145.4
PING 10.0.145.4: 56 data bytes, press CTRL_C to break
Reply from 10.0.145.4: bytes=56 Sequence=1 ttl=255 time=6 ms
--- 10.0.145.4 ping statistics ---
1 packet(s) transmitted
1 packet(s) received
0.00% packet loss
round-trip min/avg/max = 6/6/6 ms
[R1]ping -c 1 10.0.145.5
PING 10.0.145.5: 56 data bytes, press CTRL_C to break
Reply from 10.0.145.5: bytes=56 Sequence=1 ttl=255 time=6 ms
--- 10.0.145.5 ping statistics ---
1 packet(s) transmitted
1 packet(s) received
0.00% packet loss
round-trip min/avg/max = 6/6/6 ms
[R2]ping -c 1 10.0.34.3
PING 10.0.34.3: 56 data bytes, press CTRL_C to break
Reply from 10.0.34.3: bytes=56 Sequence=1 ttl=255 time=5 ms
--- 10.0.34.3 ping statistics ---
1 packet(s) transmitted
1 packet(s) received
0.00% packet loss
round-trip min/avg/max = 5/5/5 ms
[R2]ping -c 1 10.0.34.4
PING 10.0.34.4: 56 data bytes, press CTRL_C to break
Reply from 10.0.34.4: bytes=56 Sequence=1 ttl=255 time=36 ms
--- 10.0.34.4 ping statistics ---
1 packet(s) transmitted
1 packet(s) received
0.00% packet loss
round-trip min/avg/max = 36/36/36 ms
4.2 步骤二. 配置静态路由与 NQA
在所有路由器和交换机S3,S4上配置静态路由。
[R1]ip route-static 10.0.34.0 255.255.255.0 10.0.12.2
[R2]ip route-static 10.0.145.0 255.255.255.0 10.0.12.1
[R3]ip route-static 0.0.0.0 0.0.0.0 10.0.34.2
[R4]ip route-static 0.0.0.0 0.0.0.0 10.0.145.1
[R5]ip route-static 0.0.0.0 0.0.0.0 10.0.145.1
[S3]ip route-static 0.0.0.0 0.0.0.0 10.0.145.1
[S4]ip route-static 0.0.0.0 0.0.0.0 10.0.34.2
配置完成后,测试网络连通性。
[S3]ping -c 1 10.0.34.4
PING 10.0.34.4: 56 data bytes, press CTRL_C to break
Reply from 10.0.34.4: bytes=56 Sequence=1 ttl=252 time=40 ms
--- 10.0.34.4 ping statistics ---
1 packet(s) transmitted
1 packet(s) received
0.00% packet loss
round-trip min/avg/max = 40/40/40 ms
[R4]ping -c 1 10.0.34.3
PING 10.0.145.4: 56 data bytes, press CTRL_C to break
Reply from 10.0.145.4: bytes=56 Sequence=1 ttl=255 time=3 ms
--- 10.0.145.4 ping statistics ---
1 packet(s) transmitted
1 packet(s) received
0.00% packet loss
round-trip min/avg/max = 3/3/3 ms
[R5]ping -c 1 10.0.34.3
PING 10.0.34.3: 56 data bytes, press CTRL_C to break
Reply from 10.0.34.3: bytes=56 Sequence=1 ttl=253 time=44 ms
--- 10.0.34.3 ping statistics ---
1 packet(s) transmitted
1 packet(s) received
0.00% packet loss
round-trip min/avg/max = 44/44/44 ms
S3去往S4,R4和R5去往R3可以连通,证明网络通信正常。
公司总部和分部之间的链路为72K串行链路,因而在实际情况中很容易造成拥塞。
实验中使用NQA在网络中产生流量。S4作为NQA服务器端,S3作为NQA客户端。
定义UDP,Jitter两种NQA测试例,分别用来模拟企业网中的数据流量和语音流量。
通过设置NQA测试例中的一些参数来实现两种流量中任何一种单独存在的情况下不会产生拥塞,二者共存的情况下会产生拥塞,来模拟实际环境。
在S4设上配置NQA服务器端,监听的IP地址设为10.0.34.4,UDP端口号设为6000。
[S4]nqa-server udpecho 10.0.34.4 6000
在S3上配置UDP类型的NQA测试例模拟数据流量,其中tos设为28,包大小为5800字节,包间隔设为1s,周期设为3s,超时设为1s,并开启该测试。
[S3]nqa test-instance admin udp
[S3-nqa-admin-udp]test-type udp
[S3-nqa-admin-udp]destination-address ipv4 10.0.34.4
[S3-nqa-admin-udp]destination-port 6000
[S3-nqa-admin-udp]tos 28
[S3-nqa-admin-udp]datasize 5800
[S3-nqa-admin-udp]interval seconds 1
[S3-nqa-admin-udp]frequency 3
[S3-nqa-admin-udp]timeout 1
[S3-nqa-admin-udp]start now
查看UDP测试结果。
[S3]display nqa results test-instance admin udp
1 . Test 2 result The test is finished
Send operation times: 3 Receive response times: 3
Completion:success RTD OverThresholds number: 0
Attempts number:1 Drop operation number:0
Disconnect operation number:0 Operation timeout number:0
System busy operation number:0 Connection fail number:0
Operation sequence errors number:0 RTT Stats errors number:0
Destination ip address:10.0.34.4
Min/Max/Average Completion Time: 930/950/943
Sum/Square-Sum Completion Time: 2830/2669900
Last Good Probe Time: 2010-10-10 18:10:02.4
Lost packet ratio: 0 %
此时不丢包,链路没有产生拥塞。关闭UDP测试。
[S3]nqa test-instance admin udp
[S3-nqa-admin-udp]stop
在S3上配置Jitter类型的NQA测试例模拟语音流量,其中tos设为46,包大小为90字节,包间隔设为20ms,周期设为3s,超时设为1s,并开启该测试。
[S3]nqa test-instance admin jitter
[S3-nqa-admin-jitter]test-type jitter
[S3-nqa-admin-jitter]destination-address ipv4 10.0.34.4
[S3-nqa-admin-jitter]destination-port 6000
[S3-nqa-admin-jitter]tos 46
[S3-nqa-admin-jitter]datasize 90
[S3-nqa-admin-jitter]interval milliseconds 20
[S3-nqa-admin-jitter]frequency 3
[S3-nqa-admin-jitter]timeout 1
[S3-nqa-admin-jitter]start now
查看Jitter测试结果。
[S3]display nqa results test-instance admin jitter
NQA entry(admin, jitter) :testflag is active ,testtype is jitter
1 . Test 1 result The test is finished
SendProbe:60 ResponseProbe:60
Completion:success RTD OverThresholds number:0
Min/Max/Avg/Sum RTT:40/70/54/3260 RTT Square Sum:179800
NumOfRTT:60 Drop operation number:0
Operation sequence errors number:0 RTT Stats errors number:0
System busy operation number:0 Operation timeout number:0
Min Positive SD:10 Min Positive DS:10
Max Positive SD:10 Max Positive DS:10
Positive SD Number:5 Positive DS Number:11
Positive SD Sum:50 Positive DS Sum:110
Positive SD Square Sum:500 Positive DS Square Sum:1100
Min Negative SD:10 Min Negative DS:10
Max Negative SD:10 Max Negative DS:20
Negative SD Number:4 Negative DS Number:10
Negative SD Sum:40 Negative DS Sum:110
Negative SD Square Sum:400 Negative DS Square Sum:1300
Min Delay SD:20 Min Delay DS:19
Avg Delay SD:27 Avg Delay DS:26
Max Delay SD:35 Max Delay DS:34
Packet Loss SD:0 Packet Loss DS:0
Packet Loss Unknown:0 jitter out value:0.0937500
jitter in value:0.2291667 NumberOfOWD:60
OWD SD Sum:1630 OWD DS Sum:1570
TimeStamp unit: ms
此时不丢包,链路没有产生拥塞。关闭Jitter测试。
[S3]nqa test-instance admin jitter
[S3-nqa-admin-jitter]stop
4.3 步骤三. 配置优先级映射
现在通过ping命令来模拟公司中一些不太重要的流量,并且针对这部分流量,将其DSCP优先级映射为BE,不做QoS保证。
配置R1的接口G0/0/1与S1/0/0信任报文的DSCP优先级。
[R1]interface GigabitEthernet 0/0/1
[R1-GigabitEthernet0/0/1]trust dscp override
[R1-GigabitEthernet0/0/1]interface Serial 1/0/0
[R1-Serial1/0/0]trust dscp
在接口G0/0/1上的trust命令中需要加上override参数,使得接下来在R1上配置优先级映射后,将DSCP值修改为映射后的值。
在R4上使用ping命令产生去往R3的流量,并且将tos设为26。
[R4]ping –tos 26 10.0.34.3
在R1上配置优先级映射关系,将该流量的DSCP报文优先级26映射为0,
[R1]qos map-table dscp-dscp
[R1-maptbl-dscp-dscp]input 26 output 0
查看R1上的优先级映射信息。
[R1]display qos map-table dscp-dscp
Input DSCP DSCP
-------------------
0 0
1 1
2 2
3 3
4 4
5 5
6 6
7 7
8 8
9 9
10 10
11 11
12 12
13 13
14 14
15 15
16 16
17 17
18 18
19 19
20 20
21 21
22 22
23 23
24 24
25 25
26 0
27 27
28 28
29 29
30 30
此时可以观察到,现在已将DSCP优先级为26的报文优先级映射成为了0,而其余DSCP值都是默认映射值。
4.4 步骤四. 配置整形与监管
开启S3上的NQA的UDP与Jitter测试,模拟公司总部与分部之间的72K链路产生拥塞。
[S3]nqa test-instance admin udp
[S3-nqa-admin-udp]start now
[S3-nqa-admin-udp]quit
[S3]nqa test-instance admin jitter
[S3-nqa-admin-jitter]start now
在R4上使用ping命令实现模拟去往R3的流量,设置包大小为700字节,发10个包。
[R4]ping -s 700 -c 10 10.0.34.3
PING 10.0.34.3: 700 data bytes, press CTRL_C to break
Request time out
Request time out
Request time out
Request time out
Request time out
Request time out
Request time out
Request time out
Reply from 10.0.34.3: bytes=700 Sequence=9 ttl=253 time=1944 ms
Request time out
--- 10.0.34.3 ping statistics ---
10 packet(s) transmitted
1 packet(s) received
90.00% packet loss
round-trip min/avg/max = 1944/1944/1944 ms
此时公司总部与分部之间的链路发生了严重拥塞,丢包现象严重。即使有通过的数据包,延迟也非常大。此时R4无法与R3建立正常通信。
下面将介绍分别通过使用流量监管和流量整形的方法来消除链路上的拥塞,使得公司总部的客户端R4与分部的客户端R3能够建立正常通信。
首先通过流量监管来消除拥塞。在S1上,针对拥塞流量在入接口G0/0/13上配置流量监管,CIR设为64kbit/s。
[S1]interface GigabitEthernet 0/0/13
[S1-GigabitEthernet0/0/13]qos lr inbound cir 64
查看S1上流量监管的配置信息。
[S1]display qos lr inbound interface GigabitEthernet 0/0/13
GigabitEthernet0/0/13 lr inbound:
cir: 64 Kbps, cbs: 8000 Byte
现在再回到R4上使用ping命令实现模拟去往R3的流量,设置包大小为700字节,发10个包。
[R4]ping -s 700 -c 10 10.0.34.3
PING 10.0.34.3: 700 data bytes, press CTRL_C to break
Reply from 10.0.34.3: bytes=700 Sequence=1 ttl=253 time=1412 ms
Reply from 10.0.34.3: bytes=700 Sequence=2 ttl=253 time=255 ms
Reply from 10.0.34.3: bytes=700 Sequence=3 ttl=253 time=736 ms
Reply from 10.0.34.3: bytes=700 Sequence=4 ttl=253 time=1746 ms
Reply from 10.0.34.3: bytes=700 Sequence=5 ttl=253 time=246 ms
Reply from 10.0.34.3: bytes=700 Sequence=6 ttl=253 time=746 ms
Reply from 10.0.34.3: bytes=700 Sequence=7 ttl=253 time=1736 ms
Reply from 10.0.34.3: bytes=700 Sequence=8 ttl=253 time=258 ms
Reply from 10.0.34.3: bytes=700 Sequence=9 ttl=253 time=766 ms
Reply from 10.0.34.3: bytes=700 Sequence=10 ttl=253 time=1736 ms
--- 10.0.34.3 ping statistics ---
10 packet(s) transmitted
10 packet(s) received
0.00% packet loss
round-trip min/avg/max = 246/963/1746 ms
此时流量监管产生效果,不丢包,R4和R3之间能够建立起正常通信。删除S1上流量监管配置。
[S1]interface GigabitEthernet 0/0/13
[S1-GigabitEthernet0/0/13]undo qos lr inbound
现在通过流量整形的方式来达到消除拥塞的目的。在S3上,针对拥塞流量在出接口E0/0/13上配置流量整形,CIR设为64kbit/s。
[S3]interface GigabitEthernet0/0/13
[S3-GigabitEthernet0/0/13]qos lr outbound cir 64
在R4上使用ping命令实现模拟去往R3的流量,设置包大小为700字节,发10个包。
[R4]ping -s 700 -c 10 10.0.34.3PING 10.0.34.3: 700 data bytes, press CTRL_C to break
Reply from 10.0.34.3: bytes=700 Sequence=1 ttl=253 time=240 ms
Reply from 10.0.34.3: bytes=700 Sequence=2 ttl=253 time=284 ms
Reply from 10.0.34.3: bytes=700 Sequence=3 ttl=253 time=334 ms
Reply from 10.0.34.3: bytes=700 Sequence=4 ttl=253 time=224 ms
Reply from 10.0.34.3: bytes=700 Sequence=5 ttl=253 time=344 ms
Reply from 10.0.34.3: bytes=700 Sequence=6 ttl=253 time=275 ms
Reply from 10.0.34.3: bytes=700 Sequence=7 ttl=253 time=534 ms
Reply from 10.0.34.3: bytes=700 Sequence=8 ttl=253 time=184 ms
Reply from 10.0.34.3: bytes=700 Sequence=9 ttl=253 time=204 ms
Reply from 10.0.34.3: bytes=700 Sequence=10 ttl=253 time=314 ms
--- 10.0.34.3 ping statistics ---
10 packet(s) transmitted
10 packet(s) received
0.00% packet loss
round-trip min/avg/max = 184/293/534 ms
此时流量监管产生效果,不丢包,R4和R3之间能够建立起正常通信。删除S3上的流量整形配置。
[S3]interface GigabitEthernet0/0/13
[S3-GigabitEthernet0/0/13]undo qos lr outbound
现在再回到R4上使用ping命令实现模拟去往R3的流量,设置包大小为700字节,发10个包。
[R4]ping -s 700 -c 10 10.0.34.3
PING 10.0.34.3: 700 data bytes, press CTRL_C to break
Reply from 10.0.34.3: bytes=700 Sequence=1 ttl=253 time=1918 ms
Request time out
Reply from 10.0.34.3: bytes=700 Sequence=3 ttl=253 time=1762 ms
Request time out
Request time out
Request time out
Request time out
Request time out
Request time out
Request time out
--- 10.0.34.3 ping statistics ---
10 packet(s) transmitted
2 packet(s) received
80.00% packet loss
round-trip min/avg/max = 1762/1840/1918 ms
删除配置之后,丢包严重,并且通过的数据包延迟也非常大。R4与R3之间无法建立起正常通信。
4.5 步骤五. 配置基于队列的拥塞管理与拥塞避免
为了解决公司总部与分部之间产生的网络拥塞,现在通过配置基于队列的拥塞管理和拥塞避免的方式解决。
在R1上创建WRED丢弃模板data,使其基于DSCP优先级进行丢弃,将阀值上限设为90,下限设为50,丢弃概率设为30。
[R1]drop-profile data
[R1-drop-profile-data]wred dscp
[R1-drop-profile-data]dscp af32 low-limit 50 high-limit 90 discard-percentage 30
在R1上创建队列模板queue-profile1,将数据流量放入WFQ队列,并和丢弃模板data绑定,将需要高优先级,低延迟保证的语音流量放入PQ队列。
[R1]qos queue-profile queue-profile1
[R1-qos-queue-profile-queue-profile1]schedule wfq 3 pq 5
[R1-qos-queue-profile-queue-profile1]queue 3 drop-profile data
在R1的S1/0/0上应用队列模板。
[R1]interface Serial 1/0/0
[R1-Serial1/0/0]qos queue-profile queue-profile1
查看配置的队列模板信息。
[R1]display qos queue-profile queue-profile1
Queue-profile: queue-profile1
Queue Schedule Weight Length(Bytes/Packets) Gts(CIR/CBS)
-----------------------------------------------------------------
3 WFQ 10 0/0 -/-
5 PQ - 0/0 -/-
此时数据流量与语音流量分别使用了WFQ与PQ队列。查看配置的丢弃模板信息。
[R1]display drop-profile data
Drop-profile[1]: data
DSCP Low-limit High-limit Discard-percentage
-----------------------------------------------------------------
default 30 100 10
1 30 100 10
2 30 100 10
3  30 100 10
4 30 100 10
5 30 100 10
6 30 100 10
7 30 100 10
cs1 30 100 10
9 30 100 10
af11 30 100 10
11 30 100 10
af12 30 100 10
13 30 100 10
af13 30 100 10
15 30 100 10
cs2 30 100 10
17 30 100 10
af21 30 100 10
19 30 100 10
af22 30 100 10
21 30 100 10
af23 30 100 10
23 30 100 10
cs3 30 100 10
25 30 100 10
af31 30 100 10
27 30 100 10
af32 50 90 30
29 30 100 10
af33 30 100 10
31 30 100 10
cs4 30 100 10
33 30 100 10
af41 30 100 10
可以观察到配置上限,下限阀值与丢弃概率产生的效果,其余没有配置的丢弃模板设置对应的都是默认值。
4.6 步骤六. 配置基于流的拥塞管理与拥塞避免
为了解决公司总部与分部之间产生的网络拥塞,现在通过配置基于流的拥塞管理和拥塞避免的方式解决。
现在将公司总部的客户端R4与分部的客户端R3之间的流量定义为重要流量,通过对其做QoS保证,使得R4与R3能够建立正常的通信。
删除步骤五中R1接口S1/0/0上调用的队列模板。
[R1]interface GigabitEthernet 0/0/1
[R1-GigabitEthernet0/0/1]undo qos queue-profile
在R4上使用ping命令测试去往R3的连通性,设置源地址为10.0.145.4,包大小为700字节,发10个包。
[R4]ping -a 10.0.145.4 -s 700 -c 10 10.0.34.3
PING 10.0.34.3: 700 data bytes, press CTRL_C to break
Reply from 10.0.34.3: bytes=700 Sequence=1 ttl=253 time=1279 ms
Request time out
Reply from 10.0.34.3: bytes=700 Sequence=3 ttl=253 time=1587 ms
Reply from 10.0.34.3: bytes=700 Sequence=4 ttl=253 time=1827 ms
Request time out
Reply from 10.0.34.3: bytes=700 Sequence=6 ttl=253 time=1717 ms
Request time out
Request time out
Request time out
Request time out
--- 10.0.34.3 ping statistics ---
10 packet(s) transmitted
4 packet(s) received
60.00% packet loss
round-trip min/avg/max = 1279/1602/1827 ms
此时公司总部与分部之间的链路发生严重拥塞,丢包现象严重,R4无法与R3建立正常通信。
在R1上创建ACL3001匹配从10.0.145.4去往10.0.34.3的流量。
[R1]acl number 3001
[R1-acl-adv-3001]rule 0 per ip source 10.0.145.4 0.0.0.0 destination 10.0.34.3 0.0.0.0
创建流分类class-ef,匹配ACL3001,创建流行为behavior-ef,配置队列调度方式为EF,带宽为10Kbps。
[R1]traffic classifier class-ef
[R1-classifier-class-ef]if-match acl 3001
[R1-classifier-class-ef]quit
[R1]traffic behavior behavior-ef
[R1-behavior-behavior-ef]queue ef bandwidth 10
创建流分类class-af32,匹配DSCP值为AF32的数据流量,创建流行为behavior-af32,配置队列调度方式为AF,带宽为30Kbps,与丢弃模板data绑定。
[R1]traffic classifier class-af32
[R1-classifier-class-af32]if-match dscp af32
[R1-classifier-class-af32]quit
[R1]traffic behavior behavior-af32
[R1-behavior-behavior-af32]queue af bandwidth 30
[R1-behavior-behavior-af32]drop-profile data
创建流策略policy-1,关联流分类class-ef和流动作behavior-ef,流分类class-af32和流动作behavior-af32,并在R1的接口S1/0/0上应用。
[R1]traffic policy policy-1
[R1-trafficpolicy-policy-1]classifier class-ef behavior behavior-ef
[R1-trafficpolicy-policy-1]classifier class-af32 behavior behavior-af32
[R1-trafficpolicy-policy-1]quit
[R1]interface Serial 1/0/0
[R1-Serial1/0/0]traffic-policy policy-1 outbound
在R4上使用ping命令测试去往R3的连通性,设置每个包大小为700,源地址为10.0.145.4,个数为10。
[R4]ping -a 10.0.145.4 -s 700 -c 10 10.0.34.3
PING 10.0.34.3: 700 data bytes, press CTRL_C to break
Reply from 10.0.34.3: bytes=700 Sequence=1 ttl=253 time=694 ms
Reply from 10.0.34.3: bytes=700 Sequence=2 ttl=253 time=391 ms
Reply from 10.0.34.3: bytes=700 Sequence=3 ttl=253 time=361 ms
Reply from 10.0.34.3: bytes=700 Sequence=4 ttl=253 time=671 ms
Reply from 10.0.34.3: bytes=700 Sequence=5 ttl=253 time=211 ms
Reply from 10.0.34.3: bytes=700 Sequence=6 ttl=253 time=611 ms
Reply from 10.0.34.3: bytes=700 Sequence=7 ttl=253 time=688 ms
Reply from 10.0.34.3: bytes=700 Sequence=8 ttl=253 time=391 ms
Reply from 10.0.34.3: bytes=700 Sequence=9 ttl=253 time=301 ms
Reply from 10.0.34.3: bytes=700 Sequence=10 ttl=253 time=651 ms
--- 10.0.34.3 ping statistics ---
10 packet(s) transmitted
10 packet(s) received
0.00% packet loss
round-trip min/avg/max = 211/497/694 ms
将R4去往R3的流量设置为EF队列后,现在R4可以与R3建立正常通信。
五、附加实验: 思考并验证
QoS是使用差分服务来实现对不同业务服务质量保证的,保证了带宽和延迟。试想一下,不使用QoS,通过增加带宽的方式是否可以彻底解决服务质量问题?
实验完成后,回想理论课程中关于QoS的逻辑处理过程。将路由器实现QoS的过程总结一下。
六、最终设备配置
R1
<R1>display current-configuration
[V200R007C00SPC600]
#
sysname R1
#
acl number 3001
rule 0 permit ip source 10.0.145.4 0 destination 10.0.34.3 0
#
drop-profile data
wred dscp
dscp af32 low-limit 50 high-limit 90 discard-percentage 30
#
qos queue-profile queue-profile1
queue 3 drop-profile data
schedule wfq 3 pq 5
#
qos map-table dscp-dscp
input 26 output 0
#
traffic classifier class-ef operator orif-match acl 3001
traffic classifier class-af32 operator or
if-match dscp af32
#
traffic behavior behavior-ef
queue ef bandwidth 10 cbs 250
traffic behavior behavior-af32
queue af bandwidth 30
drop-profile data
traffic behavior behavir-af32
queue af bandwidth 30
#
traffic policy policy-1
classifier class-ef behavior behavior-ef
classifier class-af32 behavior behavior-af32
#
interface Serial1/0/0
link-protocol ppp
ip address 10.0.12.1 255.255.255.0
trust dscp
traffic-policy policy-1 outbound
baudrate 72000
#
interface GigabitEthernet0/0/1
ip address 10.0.145.1 255.255.255.0
trust dscp override
#
ip route-static 10.0.34.0 255.255.255.0 10.0.12.2
#
return
R2
<R2>display current-configuration
[V200R007C00SPC600]
#
sysname R2
#
interface Serial1/0/0
link-protocol ppp
ip address 10.0.12.2 255.255.255.0
#
interface GigabitEthernet0/0/2
ip address 10.0.34.2 255.255.255.0
#ip route-static 10.0.145.0 255.255.255.0 10.0.12.1
#
return
R3
<R3>display current-configuration
[V200R007C00SPC600]
#
sysname R3
#
interface GigabitEthernet0/0/2
ip address 10.0.34.3 255.255.255.0
#
ip route-static 0.0.0.0 0.0.0.0 10.0.34.2
#
return
R4
<R4>display current-configuration
[V200R007C00SPC600]
#
sysname R4
#
interface GigabitEthernet0/0/1
ip address 10.0.145.4 255.255.255.0
#
ip route-static 0.0.0.0 0.0.0.0 10.0.145.1
#
return
<R5>display current-configuration
[V200R007C00SPC600]
#
sysname R5
#
interface GigabitEthernet0/0/1
ip address 10.0.145.5 255.255.255.0
#
ip route-static 0.0.0.0 0.0.0.0 10.0.145.1
#
return
S3
<S3>display current-configuration
#!Software Version V200R008C00SPC500
sysname S3
#
interface Vlanif1
ip address 10.0.145.3 255.255.255.0
#
ip route-static 0.0.0.0 0.0.0.0 10.0.145.1
#
nqa test-instance admin udp
test-type udp
destination-address ipv4 10.0.34.4
destination-port 6000
tos 28
frequency 3
interval seconds 1
timeout 1
datasize 5800
start now
nqa test-instance admin jitter
test-type jitter
destination-address ipv4 10.0.34.4
destination-port 6000
tos 46
frequency 3
interval milliseconds 20
timeout 1
datasize 90
start now
#
return
S4
<S4>display current-configuration
#
!Software Version V200R008C00SPC500
sysname S4
#
interface Vlanif1
ip address 10.0.34.4 255.255.255.0
#
nqa-server udpecho 10.0.34.4 6000
#
ip route-static 0.0.0.0 0.0.0.0 10.0.34.2
#
return
至此本文结束,大家可以根据此文将QOS基础打夯实!
如果本文对你有帮助,麻烦点赞、在看,有啥问题和建议欢迎在评论区讨论!
相关文章:
什么是QoS?QoS是如何工作的?QoS的实验配置如何进行?
QoS(Quality of Service)是服务质量的简称。对于网络业务来说,服务质量包括哪些方面呢? 从传统意义上来讲,无非就是传输的带宽、传送的时延、数据的丢包率等,而提高服务质量无非也就是保证传输的带宽&…...

AcWing 840. 模拟散列表
题目描述 餐前小菜: 在讨论本题目之前先看一个简单的问题:给出 NNN 个正整数 (a1,a2,...,an)(a_1,a_2,...,a_n)(a1,a2,...,an),再给出 MMM 个正整数 (x1,x2,...,xm)(x_1,x_2,...,x_m)(x1,x2,...,xm),问这 MMM 个数中…...

【网络工程】常见HTTP响应状态码
前言 什么是HTTP响应状态码? HTTP状态码(HTTP Status Code)是表示网页服务器超文本传输协议响应状态的3位数字代码 HTTP响应码被分为五大类 信息响应(100~199)成功响应(200~299)重定向响应&am…...
)
Python之ruamel.yaml模块详解(二)
Python之ruamel.yaml模块详解(二)4 将YAML解析为Python对象并修改5 使用旧API将YAML解析为Python对象并修改6 使用[]和.get()访问合并的键:7 使用insert()方法插入内容8 使用yaml.indent()更改默认缩进9 使用yaml.compact()隔行显示10 同一数…...

若依框架 --- 偶发的el-select无法选择的问题
👏作者简介:大家好,我是小童,Java开发工程师,CSDN博客博主,Java领域新星创作者 📕系列专栏:前端、Java、Java中间件大全、微信小程序、微信支付、若依框架、Spring全家桶 Ǵ…...

【Linux】tmpfile 使用介绍
tmpfile 使用介绍 1 介绍 很多情况下,需要系统自动识别/tmp、/var/tmp下的临时目录,并将其自动清理其中的过期文件。这个工具就是systemd-tmpfiles。 网上很多博客使用tmpwatchcron的方法来管理临时文件和临时存放文件的目录,在后期的版本…...

实现光线追踪重投影的方法
光线追踪重投影方法 重投影这项技术一般用于时间性帧复用技术上,例如TAA(Temporal Anti-Aliasing)反走样或者抗锯齿技术。读这篇文章最好先对TAA这类技术的算法流程有了解。 1.TAA抗锯齿技术简介 先简单介绍下TAA抗锯齿的原理,在游戏中,当前…...

Hyperbolic Representation Learning for CV
Contents Hyperbolic geometry[CVPR 2020] Hyperbolic visual embedding learning for zero-shot recognitionIntroductionApproachHyperbolic Label Embedding LearningHyperbolic Image Embedding LearningExperiment[CVPR 2020] Hyperbolic Image EmbeddingsIntroduction...

In Context Learning 相关分享
个人知乎详见 https://zhuanlan.zhihu.com/p/603650082/edit 1. 前言 随着大模型(GPT3,Instruction GPT,ChatGPT)的横空出世,如何更高效地提示大模型也成了学术界与工业界的关注,因此In-context learning…...
【前端笔试题一】:解析url路径中的query参数
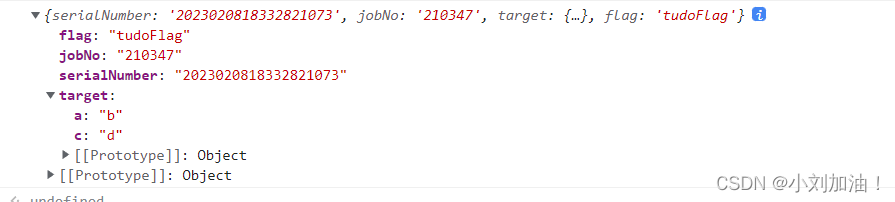
前言 本文记录下在笔试过程中的前端笔试编程题目,会持续更新 1. 题目: 解析 url 路径中的 query 参数,比如:‘http://building/#/skeleton?serialNumber2023020818332821073&jobNo210347&target%7B%22a%22%3A%22b%22%2C…...
K_A12_001 基于STM32等单片机采集火光火焰传感参数串口与OLED0.96双显示
K_A12_001 基于STM32等单片机采集火光火焰传感参数串口与OLED0.96双显示一、资源说明二、基本参数参数引脚说明三、驱动说明IIC地址/采集通道选择/时序对应程序:四、部分代码说明1、接线引脚定义1.1、STC89C52RC火光火焰模块1.2、STM32F103C8T6火光火焰模块五、基础知识学习与相…...
Java基础42 枚举与注解
枚举与注解一、枚举(enumeration)1.1 自定义类实现枚举1.2 enum关键字实现枚举1.2.1 enum的注意事项1.2.2 enum的使用练习1.2.3 enum的常用方法1.2.4 enum的使用细节及注意事项1.2.5 enum练习二、注解(Annotation)2.1 Override&am…...
shell的变量和引用
文章目录二、变量和引用2.1 什么是变量2.2变量的命名2.3 变量的类型2.3.1 根据数据类型分类2.3.2 根据作用域分类2.4 变量的定义2.5 shell中的引用2.6 变量的运算练习:二、变量和引用 在程序设计语言中,变量是一个非常重要的概念。也是初学者在进行Shel…...

基于PHP的招聘网站
摘要在Internet高速发展的今天,我们生活的各个领域都涉及到计算机的应用,其中包括在线招聘的网络应用,在外国在线招聘已经是很普遍的方式,不过国内的在线招聘可能还处于起步阶段。招聘网站具有招聘信息功能的双向选择,…...
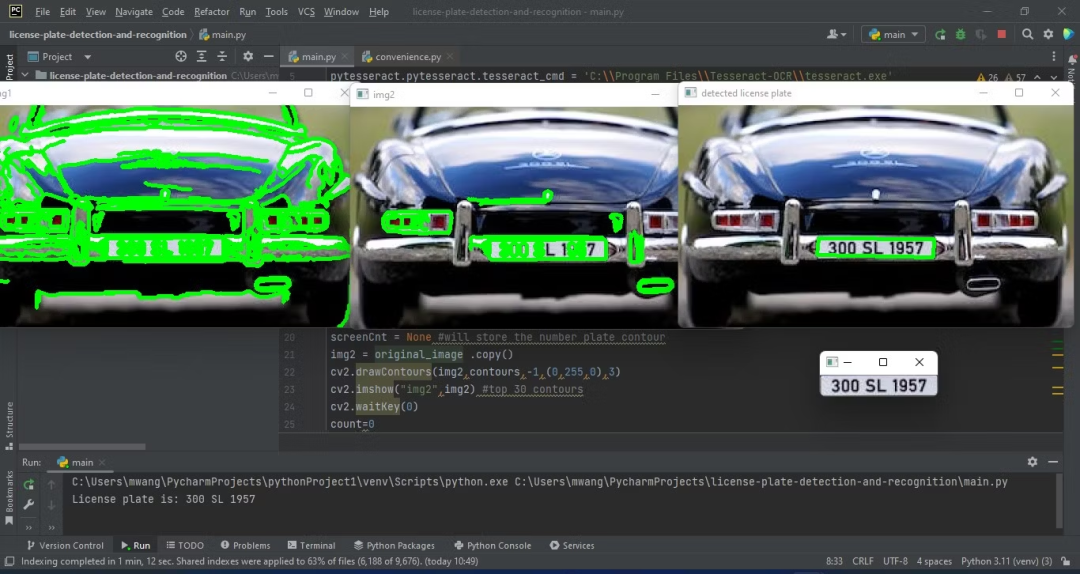
轻松使用 Python 检测和识别车牌(附代码)
车牌检测与识别技术用途广泛,可以用于道路系统、无票停车场、车辆门禁等。这项技术结合了计算机视觉和人工智能。 本文将使用Python创建一个车牌检测和识别程序。该程序对输入图像进行处理,检测和识别车牌,最后显示车牌字符,作为…...
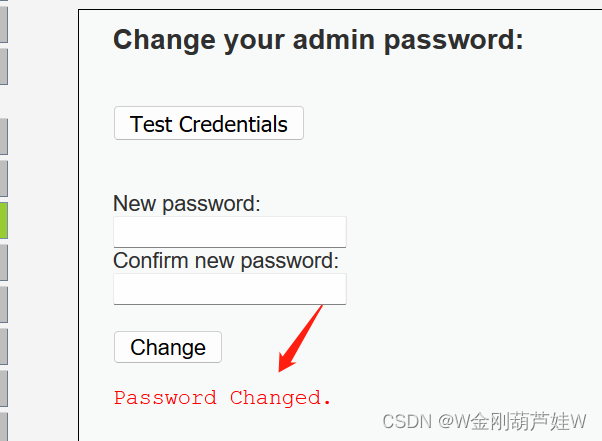
DVWA—CSRF-Medium跨站请求伪造中级
注意: 1、这里对XSS(Stored)关卡不熟悉的可以从这里去看http://t.csdn.cn/ggQDK 2、把难度设置成 Medium 一、这一关同样我们需要埋下伏笔,诱使用户点击来提交,首先从XSS(Stored)入手。 注意:在前面介绍…...
【电商】后台订单生成
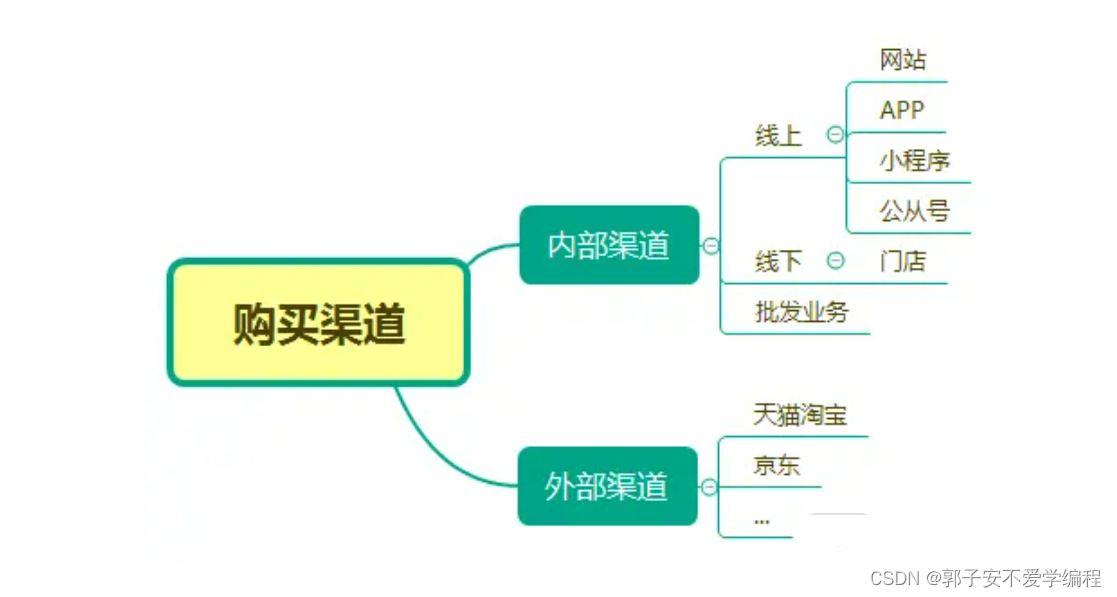
结合商品流转的电商系列介绍了一些了,商品已经采购入库、价格税率设置好了、活动及相关模板也已经准备完毕,下面就应该上架销售了,现在接着聊下订单的生成。 订单从产生到最终的关闭需要经历很多的环节,订单也是电商系统的核心数据…...

作为公司,这个5款在线软件工具赶紧安利起来!
2023年了 ,您的企业还没使用在线软件工具吗?自从用了在线工具之后,感觉打开了新办公世界的大门,效率蹭蹭蹭地往上涨啊。对于喜欢追求效率和便捷的我来说,在线实在是太棒了!今天安利几个非常不错的在线软件工…...
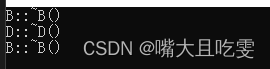
面试(七)为什么一般希望将析构函数定义为虚函数
class B { public:~B() // 基类析构函数不为虚函数{cout << "B::~B()" << endl;} };class D : public B { public:~D(){cout << "D::~D()" << endl;} };void Test(B* t) {delete t;t nullptr; }int main() {B *pb new B;Test…...

MySQL必会四大函数-时间函数
一、时间日期获取函数 获取当前日期(date)函数:curdate() mysql> select curdate(); 2023-02-09 获取当前时间(time)函数:curtime() select curtime(); 08:49:27 获取当前时间戳(date &…...
)
告别一堆转换头!一个自研小工具搞定USB、网口、485、232、TTL全互连(附配置软件)
极简主义工程师的终极武器:全协议互连调试工具实战指南 每次出差调试设备,我的背包里总塞满了各种转换头——USB转串口、网口转485、232电平转换器...直到上个月在客户现场,当我蹲在机柜旁手忙脚乱切换第五个转换器时,螺丝刀不小心…...

从DataOperation接口到QuickSort实现:探究适配器模式在算法整合中的应用
1. 适配器模式:解决接口不兼容的桥梁 想象一下你从国外带回来一个三脚插头的电器,但家里的插座都是两孔的。这时候你会怎么做?大多数人会选择买一个转换插头。在编程世界里,适配器模式就是这个万能的"转换插头"。 最近我…...
 Linux和Unix的关系 linux和Windows比较)
Linux 基础篇 -- Linux介绍(怎么读、是什么、创始人、吉祥物、发版本、目前存在的操作系统) Linux和Unix的关系 linux和Windows比较
Linux 基础篇 – Linux介绍(怎么读、是什么、创始人、吉祥物、发版本、目前存在的操作系统) & Linux和Unix的关系 & linux和Windows比较 文章目录 1. Linux介绍 1.1 Linux怎么读:1.2 Linux是什么:1.3 Linux创始人:1.4 Linux 的吉祥…...


马斯克解散 xAI、接纳 Anthropic:亡羊补牢的无奈,与一场被 AGI 神话带偏的豪赌
马斯克解散 xAI、接纳 Anthropic:亡羊补牢的无奈,与一场被 AGI 神话带偏的豪赌 2026 年 5 月 6 日,两件事同时发生: 一、Anthropic 宣布获得 xAI Colossus 1 集群的全部算力——22 万张英伟达 GPU,300 兆瓦电力容量。 …...

Vivado时序约束实战:输入/输出延时设置背后的时序模型与设计考量
1. 时序约束的本质:从理论到实践的桥梁 刚接触FPGA设计时,我最头疼的就是时序约束。那些建立时间、保持时间的概念看得人云里雾里,更别说要在Vivado里实际设置了。直到有一次项目因为时序问题导致整板无法工作,我才真正明白时序约…...

论文AI率太高怎么救?答辩前1周降AI率完整攻略+不延期方案!
论文AI率太高怎么救?答辩前1周降AI率完整攻略不延期方案! 导师周一通知答辩、周五查出来知网 AIGC 检测 67%——这种倒计时场景每年 3-5 月毕业季都会上演几千次。 这种场景下选工具,最关键的不是「单价便宜」是「降不下来怎么办」。1 周时间…...

AVL许可排队严重?不想买新许可,回收闲置即刻算例
AVL许可排队严重?不买新许可,回收闲置许可就能解决,我就踩过这个坑关键词分析:AVL里藏着的宝藏AVL许可排队严重?别急着买新许可!我们先来看看这个问题到底藏哪儿。2026年我帮某制造业客户做系统优化时&…...

Shinkai Node:无代码AI智能体平台架构解析与实战部署
1. 项目概述:Shinkai Node,一个无需代码的AI智能体构建平台 最近在折腾AI智能体(AI Agent)的时候,发现了一个挺有意思的开源项目—— Shinkai Node 。它来自dcSpark团队,核心目标非常明确: …...
)
从USB3.2到PCIe 5.0:我的高速串行链路阻抗匹配踩坑实录(附Sigrity仿真文件)
从USB3.2到PCIe 5.0:我的高速串行链路阻抗匹配踩坑实录 去年负责一款数据中心加速卡的设计时,我遇到了职业生涯中最棘手的高速信号完整性问题。这块板卡需要同时支持PCIe 5.0 x16和四个USB3.2 Gen2x2接口,当第一批工程样机回来进行信号测试时…...