【yolov8系列】将yolov8-seg 模型部署到瑞芯微RK3566上
前言
之前记录过【yolov5系列】将模型部署到瑞芯微RK3566上,整体比较流畅,记录了onnx转rknn的相关环境配置,使用的rk版本为rknn-toolkit2-v1.4.0。当前库已经更新为1.5,这里还是沿用1.4的版本进行记录。本篇博客是在上篇博客(yolov5的rk3566的部署)的基础上,记录下yolov8n-seg的模型在3566上的部署过程,原理得空再写。若精度异常可查看官方提供文档 Rockchip_User_Guide_RKNN_Toolkit2_CN-1.4.0.pdf,写的比较详细。
【自己遇到的问题】
1) yolov8模型模型进行全量化结果异常
2) yolov8模型在PC端模拟器的运行结果正确,但板端运行结果异常
上述的问题也许不久就会被RK的工程师修复,但若其他的网络出现新的问题,我们是要有问题定位分析并解决的能力。接下来的篇章是自己逐步查找定位问题的一个过程,并在最后一章节附了完成的python相关代码。
【对于yolov8的目标检测模型】
出现的问题与分割模型是一致的。从网络结构的实现上说,yolov8的实例分割任务,比目标检测任务多了一个语义的分支,且检测分支的channel通道发生变化,其他的结果基本一致。所以明白异常原因,即可同步解决yolov8其他任务的RK部署问题。
【模型量化时容易出现的问题】
1)平台有不支持的算子,若算子没有可训练参数,可在训练或导出模型前,将其替换成其他等效功能的算子即可;若算子存在可训练参数,需要在训练前就使用其他算子替换,否则无法进行模型转换。
2)模型量化时,多多注意输出端的concat操作。当合并的数据处于不同的量级,此时该节点量化一定会出现异常。
1 RK模型在仿真器中的推理
1.1 工程代码详解
这里先给出yolov8-seg模型的onnx转rknn、已经仿真器模型的输出结果的后处理 的工程代码。这里转换的工程参考rknn中yolov5的转换,后处理参考yolov8的官方工程(RK还未提供yolov8的方案)。
其中:
- 【data文件夹】该文件夹存放着量化数据,这里使用一张图片作为示例。
- 【model文件夹】为了整齐,这里创建个文件夹用来存放需要转换的onnx模型,以及转换后的rknn模型。
- 【dataset.txt】文本内容为 量化时需要设置的量化图片路径的列表。可事先提供,可代码生成
- 【test.py】实现模型转换、仿真器推理的代码
- 【post.py】yolov8-seg模型输出的后处理代码
这里附上 test.py and post.py两个代码文件内容
## test.pyimport os
import numpy as np
import cv2
from rknn.api import RKNN
import post as post
import globdef makedirs(path):if not os.path.exists(path): os.makedirs(path)return pathdef gen_color(class_num):"""随机生成掩码颜色, 用于可视化"""color_list = []np.random.seed(1)while 1:a = list(map(int, np.random.choice(range(255),3)))if(np.sum(a)==0): continuecolor_list.append(a)if len(color_list)==class_num: break# for i in range(len(color_list)):#     a = np.zeros((500,500,3))+color_list[i]#     cv2.imwrite(f"./labelcolor/{i}_{self.index2name[i]}.png", a)return color_listdef load_and_export_rknnmodel(ONNX_MODEL, RKNN_MODEL, OUT_NODE, QUANTIZE_ON, DATASET=None):"""rknn官方提供的onnx转rknn的代码, 并初始化仿真器运行环境需要手动设置的是图片的均值mean_values 和方差std_values"""# Create RKNN objectrknn = RKNN(verbose=True)# pre-process configprint('--> Config model')rknn.config(mean_values=[[0, 0, 0]], std_values=[[255, 255, 255]])print('done')# Load ONNX modelprint('--> Loading model')ret = rknn.load_onnx(model=ONNX_MODEL, outputs=OUT_NODE)if ret != 0:print('Load model failed!')exit(ret)print('done')# Build modelprint('--> Building model')ret = rknn.build(do_quantization=QUANTIZE_ON, dataset=DATASET)if ret != 0:print('Build model failed!')exit(ret)print('done')# Export RKNN modelprint('--> Export rknn model')ret = rknn.export_rknn(RKNN_MODEL)if ret != 0:print('Export rknn model failed!')exit(ret)print('done')# Init runtime environmentprint('--> Init runtime environment')ret = rknn.init_runtime()# ret = rknn.init_runtime('rk3566')if ret != 0:print('Init runtime environment failed!')exit(ret)print('done')return rknndef gene_dataset_txt(DATASET_path, savefile):"""获取量化图片文件名的列表, 并保存成txt, 用于量化时设置"""file_data = glob.glob(os.path.join(DATASET_path,"*.jpg"))with open(savefile, "w") as f:for file in file_data:f.writelines(f"./{file}\n")def load_image(IMG_PATH, IMG_SIZE):"""加载图片, 这里每个任务的预处理的规则可能不同, 只需要保证处理后的图片的尺寸和模型输入尺寸保持一致即可return: image用于结果可视, img用于模型推理"""image = cv2.imread(IMG_PATH)##==# image = cv2.resize(image, (IMG_SIZE[1],IMG_SIZE[0],3))##==# image_ = np.zeros((IMG_SIZE[1],IMG_SIZE[0],3), dtype=image.dtype)# pad = (IMG_SIZE[1]-360)//2# image_[pad:IMG_SIZE[1]-pad,:] = image# cv2.imwrite("data/test.jpg", image_)# image = image_img = cv2.cvtColor(image, cv2.COLOR_BGR2RGB)return image, imgdef vis_result(image, results, colorlist, save_file):"""将掩码信息+box信息画到原图上, 并将原图+masks图+可视化图 concat起来, 方便结果查看"""boxes, masks, shape = resultsvis_img = image.copy()mask_img = np.zeros_like(image)for box, mask in zip(boxes, masks):mask_img[mask!=0] = colorlist[int(box[-1])] ## cls=int(box[-1])vis_img = vis_img*0.5 + mask_img*0.5for box in boxes:cv2.rectangle(vis_img, (int(box[0]), int(box[1])), (int(box[2]), int(box[3])), (0,0,255),3,4)vis_img = np.concatenate([image, mask_img, vis_img],axis=1)cv2.imwrite(save_file, vis_img)if __name__ == '__main__':CLASSES = ["floor", "blanket","door_sill","obstacle"]### 模型转换相关设置ONNX_MODEL = './model/best_class4_384_640.onnx'RKNN_MODEL = './model/best_class4_384_640.rknn'DATASET = './dataset.txt'DATASET_PATH = 'data'QUANTIZE_ON = False# QUANTIZE_ON = TrueOUT_NODE = ["output0","output1"]### 预测图片的设置IMG_SIZE = [640, 384]  ## 图片的whIMG_PATH = './data/1664025163_1664064856_00164_001.jpg'### 后处理的设置save_PATH = makedirs('./result')OBJ_THRESH = 0.25NMS_THRESH = 0.45### 开始实现====================================================if QUANTIZE_ON:gene_dataset_txt(DATASET_PATH, DATASET)print('1---------------------------------------> export model')rknn = load_and_export_rknnmodel(ONNX_MODEL, RKNN_MODEL, OUT_NODE, QUANTIZE_ON, DATASET)print('2---------------------------------------> gene colorlist')colorlist = gen_color(len(CLASSES))  ## 获取着色时的颜色信息print('3---------------------------------------> loading image')image, img = load_image(IMG_PATH, IMG_SIZE)print('4---------------------------------------> Running model')outputs = rknn.inference(inputs=[img])print('5---------------------------------------> postprocess')## ============模型输出后的后处理。从yolov8源码中摘取后用numpy库代替了pytorch库im = np.transpose(img[np.newaxis],[0,3,1,2])results = post.postprocess(outputs, im, img, OBJ_THRESH, NMS_THRESH, classes=len(CLASSES)) ##[box,mask,shape]results = results[0]              ## batch=1,取第一个数据即可print('6---------------------------------------> save result')save_file = os.path.join(save_PATH, os.path.basename(IMG_PATH))vis_result(image,  results, colorlist, save_file)print()
## post.pyimport time import numpy as np import cv2def xywh2xyxy(x):y = np.copy(x)y[..., 0] = x[..., 0] - x[..., 2] / 2 # top left xy[..., 1] = x[..., 1] - x[..., 3] / 2 # top left yy[..., 2] = x[..., 0] + x[..., 2] / 2 # bottom right xy[..., 3] = x[..., 1] + x[..., 3] / 2 # bottom right yreturn ydef clip_boxes(boxes, shape):boxes[..., [0, 2]] = boxes[..., [0, 2]].clip(0, shape[1]) # x1, x2boxes[..., [1, 3]] = boxes[..., [1, 3]].clip(0, shape[0]) # y1, y2def scale_boxes(img1_shape, boxes, img0_shape, ratio_pad=None):if ratio_pad is None: # calculate from img0_shapegain = min(img1_shape[0] / img0_shape[0], img1_shape[1] / img0_shape[1]) # gain = old / newpad = (img1_shape[1] - img0_shape[1] * gain) / 2, (img1_shape[0] - img0_shape[0] * gain) / 2 # wh paddingelse:gain = ratio_pad[0][0]pad = ratio_pad[1]boxes[..., [0, 2]] -= pad[0] # x paddingboxes[..., [1, 3]] -= pad[1] # y paddingboxes[..., :4] /= gainclip_boxes(boxes, img0_shape)return boxesdef crop_mask(masks, boxes):n, h, w = masks.shapex1, y1, x2, y2 = np.split(boxes[:, :, None], 4, axis=1)r = np.arange(w, dtype=np.float32)[None, None, :] # rows shape(1,w,1)c = np.arange(h, dtype=np.float32)[None, :, None] # cols shape(h,1,1)return masks * ((r >= x1) * (r < x2) * (c >= y1) * (c < y2))def sigmoid(x): return 1.0/(1+np.exp(-x))def process_mask(protos, masks_in, bboxes, shape):c, mh, mw = protos.shape # CHWih, iw = shapemasks = sigmoid(masks_in @ protos.reshape(c, -1)).reshape(-1, mh, mw) # CHW 【lulu】downsampled_bboxes = bboxes.copy()downsampled_bboxes[:, 0] *= mw / iwdownsampled_bboxes[:, 2] *= mw / iwdownsampled_bboxes[:, 3] *= mh / ihdownsampled_bboxes[:, 1] *= mh / ihmasks = crop_mask(masks, downsampled_bboxes) # CHWmasks = np.transpose(masks, [1,2,0])# masks = cv2.resize(masks, (shape[1], shape[0]), interpolation=cv2.INTER_NEAREST)masks = cv2.resize(masks, (shape[1], shape[0]), interpolation=cv2.INTER_LINEAR)masks = np.transpose(masks, [2,0,1])return np.where(masks>0.5,masks,0)def nms(bboxes, scores, threshold=0.5):x1 = bboxes[:, 0]y1 = bboxes[:, 1]x2 = bboxes[:, 2]y2 = bboxes[:, 3]areas = (x2 - x1) * (y2 - y1)order = scores.argsort()[::-1]keep = []while order.size > 0:i = order[0]keep.append(i)if order.size == 1: breakxx1 = np.maximum(x1[i], x1[order[1:]])yy1 = np.maximum(y1[i], y1[order[1:]])xx2 = np.minimum(x2[i], x2[order[1:]])yy2 = np.minimum(y2[i], y2[order[1:]])w = np.maximum(0.0, (xx2 - xx1))h = np.maximum(0.0, (yy2 - yy1))inter = w * hiou = inter / (areas[i] + areas[order[1:]] - inter)ids = np.where(iou <= threshold)[0]order = order[ids + 1]return keepdef non_max_suppression(prediction,conf_thres=0.25,iou_thres=0.45,classes=None,agnostic=False,multi_label=False,labels=(),max_det=300,nc=0, # number of classes (optional) ):# Checksassert 0 <= conf_thres <= 1, f'Invalid Confidence threshold {conf_thres}, valid values are between 0.0 and 1.0'assert 0 <= iou_thres <= 1, f'Invalid IoU {iou_thres}, valid values are between 0.0 and 1.0'#【lulu】prediction.shape[1]:box + cls + num_masksbs = prediction.shape[0] # batch sizenc = nc or (prediction.shape[1] - 4) # number of classesnm = prediction.shape[1] - nc - 4 # num_masksmi = 4 + nc # mask start indexxc = np.max(prediction[:, 4:mi], axis=1) > conf_thres ## 【lulu】# Settings# min_wh = 2 # (pixels) minimum box width and heightmax_wh = 7680 # (pixels) maximum box width and heightmax_nms = 30000 # maximum number of boxes into torchvision.ops.nms()time_limit = 0.5 + 0.05 * bs # seconds to quit afterredundant = True # require redundant detectionsmulti_label &= nc > 1 # multiple labels per box (adds 0.5ms/img)merge = False # use merge-NMSt = time.time()output = [np.zeros((0,6 + nm))] * bs ## 【lulu】for xi, x in enumerate(prediction): # image index, image inference# Apply constraints# x[((x[:, 2:4] < min_wh) | (x[:, 2:4] > max_wh)).any(1), 4] = 0 # width-heightx = np.transpose(x,[1,0])[xc[xi]] ## 【lulu】# If none remain process next imageif not x.shape[0]: continue# Detections matrix nx6 (xyxy, conf, cls)box, cls, mask = np.split(x, [4, 4+nc], axis=1) ## 【lulu】box = xywh2xyxy(box) # center_x, center_y, width, height) to (x1, y1, x2, y2)j = np.argmax(cls, axis=1) ## 【lulu】conf = cls[np.array(range(j.shape[0])), j].reshape(-1,1)x = np.concatenate([box, conf, j.reshape(-1,1), mask], axis=1)[conf.reshape(-1,)>conf_thres]# Check shapen = x.shape[0] # number of boxesif not n: continuex = x[np.argsort(x[:, 4])[::-1][:max_nms]] # sort by confidence and remove excess boxes 【lulu】# Batched NMSc = x[:, 5:6] * max_wh # classes ## 乘以的原因是将相同类别放置统一尺寸区间进行nmsboxes, scores = x[:, :4] + c, x[:, 4] # boxes (offset by class), scoresi = nms(boxes, scores, iou_thres) ## 【lulu】i = i[:max_det] # limit detectionsoutput[xi] = x[i]if (time.time() - t) > time_limit:# LOGGER.warning(f'WARNING ⚠️ NMS time limit {time_limit:.3f}s exceeded')break # time limit exceededreturn outputdef postprocess(preds, img, orig_img, OBJ_THRESH, NMS_THRESH, classes=None):"""len(preds)=2preds[0].shape=(1,40,5040)。其中40=4(box)+4(cls)+32(num_masks), 32为原型系数。5040为3层输出featuremap的grid_ceil的总和。preds[1].shape=(1, 32, 96, 160)。32为32个原型掩码。(96,160)为第三层的featuremap的尺寸。总共需要3个步骤:1. 对检测框, 也就是preds[0], 进行得分阈值、iou阈值筛选, 得到需要保留的框的信息, 以及对应的32为原型系数2. 将每个检测框的原型系数乘以每个原型, 得到对应的类别的mask, 此时目标框和mask数量一一对应。然后使用每个检测框框自己对应的mask的featuremap,框以外的有效mask删除, 得到最终的目标掩码3. 将mask和框都恢复到原尺寸下"""p = non_max_suppression(preds[0],OBJ_THRESH,NMS_THRESH,agnostic=False,max_det=300,nc=classes,classes=None) results = []proto = preds[1] for i, pred in enumerate(p):shape = orig_img.shapeif not len(pred):results.append([[], [], []]) # save empty boxescontinuemasks = process_mask(proto[i], pred[:, 6:], pred[:, :4], img.shape[2:]) # HWCpred[:, :4] = scale_boxes(img.shape[2:], pred[:, :4], shape).round()results.append([pred[:, :6], masks, shape[:2]])return resultsdef make_anchors(feats_shape, strides, grid_cell_offset=0.5):"""Generate anchors from features."""anchor_points, stride_tensor = [], []assert feats_shape is not Nonedtype_ = np.floatfor i, stride in enumerate(strides):_, _, h, w = feats_shape[i]sx = np.arange(w, dtype=dtype_) + grid_cell_offset # shift xsy = np.arange(h, dtype=dtype_) + grid_cell_offset # shift ysy, sx = np.meshgrid(sy, sx, indexing='ij') anchor_points.append(np.stack((sx, sy), -1).reshape(-1, 2))stride_tensor.append(np.full((h * w, 1), stride, dtype=dtype_))return np.concatenate(anchor_points), np.concatenate(stride_tensor)def dist2bbox(distance, anchor_points, xywh=True, dim=-1):"""Transform distance(ltrb) to box(xywh or xyxy)."""lt, rb = np.split(distance, 2, dim)x1y1 = anchor_points - ltx2y2 = anchor_points + rbif xywh:c_xy = (x1y1 + x2y2) / 2wh = x2y2 - x1y1return np.concatenate((c_xy, wh), dim) # xywh bboxreturn np.concatenate((x1y1, x2y2), dim) # xyxy bbox
1.2 RK浮点模型在仿真器上的推理
当量化模型结果异常时,先确认浮点模型在仿真器上的运行结果是正常的。
将代码中这些设置修改成与自己模型任务相一致后,将QUANTIZE_ON 设置False即可运行。输出节点的命名,可使用netron打开onnx模型。
运行python test.py后
1.3 RK量化模型在仿真器上的推理
- 将
QUANTIZE_ON = True即可- 运行
python test.py,没有任何检出结果。接下来我们要开始查找原因。
1.4 使用RK提供的精度分析脚本
接下来进行精度分析,rknn提供了精度分析的脚本accuracy_analysis。这里适配自己的工程,修改其模型路径等设置,代码实现如下
import os
import sys
import numpy as np
import cv2
import time
from rknn.api import RKNN
import post as post
import globdef makedirs(path):if not os.path.exists(path): os.makedirs(path)return pathdef show_outputs(outputs):output = outputsoutput_sorted = sorted(output, reverse=True)top5_str = 'resnet50v2\n-----TOP 5-----\n'for i in range(5):value = output_sorted[i]index = np.where(output == value)for j in range(len(index)):if (i + j) >= 5:breakif value > 0:topi = '{}: {}\n'.format(index[j], value)else:topi = '-1: 0.0\n'top5_str += topiprint(top5_str)def readable_speed(speed):speed_bytes = float(speed)speed_kbytes = speed_bytes / 1024if speed_kbytes > 1024:speed_mbytes = speed_kbytes / 1024if speed_mbytes > 1024:speed_gbytes = speed_mbytes / 1024return "{:.2f} GB/s".format(speed_gbytes)else:return "{:.2f} MB/s".format(speed_mbytes)else:return "{:.2f} KB/s".format(speed_kbytes)def show_progress(blocknum, blocksize, totalsize):speed = (blocknum * blocksize) / (time.time() - start_time)speed_str = " Speed: {}".format(readable_speed(speed))recv_size = blocknum * blocksizef = sys.stdoutprogress = (recv_size / totalsize)progress_str = "{:.2f}%".format(progress * 100)n = round(progress * 50)s = ('#' * n).ljust(50, '-')f.write(progress_str.ljust(8, ' ') + '[' + s + ']' + speed_str)f.flush()f.write('\r\n')def accuracy_analysis(ONNX_MODEL, OUT_NODE, QUANTIZE_ON, DATASET=None):"""rknn官方提供的onnx转rknn的代码, 并初始化仿真器运行环境需要手动设置的是图片的均值mean_values 和方差std_values"""# Create RKNN objectrknn = RKNN(verbose=True)# pre-process configprint('--> Config model')rknn.config(mean_values=[[0, 0, 0]], std_values=[[255, 255, 255]])print('done')# Load ONNX modelprint('--> Loading model')ret = rknn.load_onnx(model=ONNX_MODEL, outputs=OUT_NODE)if ret != 0:print('Load model failed!')exit(ret)print('done')# Build modelprint('--> Building model')ret = rknn.build(do_quantization=QUANTIZE_ON, dataset=DATASET)if ret != 0:print('Build model failed!')exit(ret)print('done')# Accuracy analysisprint('--> Accuracy analysis')ret = rknn.accuracy_analysis(inputs=["./data/1664025163_1664064856_00164_001.jpg"], output_dir='./snapshot')if ret != 0:print('Accuracy analysis failed!')exit(ret)print('done')print('float32:')output = np.genfromtxt('./snapshot/golden/output0.txt')show_outputs(output)print('quantized:')output = np.genfromtxt('./snapshot/simulator/output0.txt')show_outputs(output)return rknndef gene_dataset_txt(DATASET_path, savefile):"""获取量化图片文件名的列表, 并保存成txt, 用于量化时设置"""file_data = glob.glob(os.path.join(DATASET_path,"*.jpg"))with open(savefile, "w") as f:for file in file_data:f.writelines(f"./{file}\n")if __name__ == '__main__':CLASSES = ["floor", "blanket","door_sill","obstacle"]### 模型转换相关设置ONNX_MODEL = './model/best_class4_384_640.onnx'RKNN_MODEL = './model/best_class4_384_640.rknn'DATASET = './dataset.txt'DATASET_PATH = 'data'# QUANTIZE_ON = FalseQUANTIZE_ON = TrueOUT_NODE = ["output0","output1"]### 开始实现====================================================if QUANTIZE_ON:gene_dataset_txt(DATASET_PATH, DATASET)print('1---------------------------------------> accuracy_analysis')rknn = accuracy_analysis(ONNX_MODEL, OUT_NODE, QUANTIZE_ON, DATASET)
运行python accuracy_analysis.py后,在【./snapshot/error_analysis.txt】文本中保存着浮点模型和量化模型的每层结果的余弦距离。但查看结果,从一开始就存在较多的小于0.98的余弦距离,如下图。所以在yolov8的模型,不敢相信RK的精度分析方式。
然后在跟RK方工程师沟通后,逐步发现问题:对于yolov8最后那个concat,我们查看concat前的三个节点输出数据范围,发现其中一个在0 ~1之间,另外一个在0 ~600+。
- 两者相加后依然是600+,此时对比浮点模型和量化模型的该节点的输出的余弦距离,不能反应出问题。
- 但存在输入数据范围差距时,量化时就会出现异常结果。
1.5 量化模型结果异常的解决
当我们分析出最后一层concat的量化存在异常,解决方式有两种:
- 混合量化 (本篇不做延伸)
- 将输出端存在异常的节点(这里是最后一个concat),放在后处理中实现
对于第二种方式:
重新设置输出节点,并修改量化为True
这里需要主要下,对于rknn-toolkit2-v1.4.0,设置四个输出节点,量化后的节点顺序与自己设置的顺序不对齐。但在rknn-toolkit2-v1.5.0 中修复了这个问题。所以在获取模型的4个输出,后concat时的顺序要多多留意。
运行结果如下:


2 板端运行结果
rknn的C++实现还未提供yolov8的后处理工程。自己暂不能测完整的板端推理,为了验证输出是否正确,这里将端侧推理的输出直接保存成txt文本,然后使用前面的python工程读取,然后后处理看结果是否正确。
工程的来源与运行在【yolov5系列】将模型部署到瑞芯微RK3566上 中记录过。这里在这个工程中进行修改和添加。修改内容如下:
- 对于
outputs[i].want_float的设置,浮点模型必须将其设置为1;量化模型设置为1时,模型输出的反量化后的数据,设置为0时输出的是量化后的数据。- 增加保存输出数据到txt的代码实现。
2.1 浮点模型在板端运行
首先测试浮点模型在板端的推理,看输出是否正常。
转换模型时将节点为
OUT_NODE = ["output0","output1"]。
先将转换后的模型推至板端运行,得到 output0.txt、output1.txt。然后在python工程中,加载 output0.txt、output1.txt,运行得到结果。最终得到结果如下:
观察结果发现,貌似掩码信息的分布是正确的,那我们就使用仿真器的预测结果和板端的预测结果交叉组合,最终发现板端预测结果中box是有问题的,其他是正常的。
然后我们使用仿真器预测的box,使用板端预测的其他信息,然后结果如下:
接下来就要定位出问题的节点,该节点一定在box的输出分支中
第一次尝试:OUT_NODE = ["494","495","390","output1"]
第二次尝试:OUT_NODE = ["480","495","390","output1"]
在第二次尝试的输出节点转换的模型,板端推理的结果+手动实现节点到输出的结构,最终得到正确的结果(这里不附图了,结果与python仿真器结果一致)。说明RKNN板端运行出错的问题在如下的结构中。至于为什么会有问题,已经向RKNN的工程师提出问题,后面补充原因。
2.1 量化模型在板端运行
与浮点模型的问题表现完全一致。


3 附 完整的代码
## test.py
import os
import numpy as np
import cv2
from rknn.api import RKNN
import post as post
import globdef makedirs(path):if not os.path.exists(path): os.makedirs(path)return pathdef gen_color(class_num):"""随机生成掩码颜色, 用于可视化"""color_list = []np.random.seed(1)while 1:a = list(map(int, np.random.choice(range(255),3)))if(np.sum(a)==0): continuecolor_list.append(a)if len(color_list)==class_num: break# for i in range(len(color_list)):#     a = np.zeros((500,500,3))+color_list[i]#     cv2.imwrite(f"./labelcolor/{i}_{self.index2name[i]}.png", a)return color_listdef load_and_export_rknnmodel(ONNX_MODEL, RKNN_MODEL, OUT_NODE, QUANTIZE_ON, DATASET=None):"""rknn官方提供的onnx转rknn的代码, 并初始化仿真器运行环境需要手动设置的是图片的均值mean_values 和方差std_values"""# Create RKNN objectrknn = RKNN(verbose=True)# pre-process configprint('--> Config model')rknn.config(mean_values=[[0, 0, 0]], std_values=[[255, 255, 255]])print('done')# Load ONNX modelprint('--> Loading model')ret = rknn.load_onnx(model=ONNX_MODEL, outputs=OUT_NODE)if ret != 0:print('Load model failed!')exit(ret)print('done')# Build modelprint('--> Building model')ret = rknn.build(do_quantization=QUANTIZE_ON, dataset=DATASET)if ret != 0:print('Build model failed!')exit(ret)print('done')# Export RKNN modelprint('--> Export rknn model')ret = rknn.export_rknn(RKNN_MODEL)if ret != 0:print('Export rknn model failed!')exit(ret)print('done')# Init runtime environmentprint('--> Init runtime environment')ret = rknn.init_runtime()# ret = rknn.init_runtime('rk3566')if ret != 0:print('Init runtime environment failed!')exit(ret)print('done')return rknndef gene_dataset_txt(DATASET_path, savefile):"""获取量化图片文件名的列表, 并保存成txt, 用于量化时设置"""file_data = glob.glob(os.path.join(DATASET_path,"*.jpg"))with open(savefile, "w") as f:for file in file_data:f.writelines(f"./{file}\n")def load_image(IMG_PATH, IMG_SIZE):"""加载图片, 这里每个任务的预处理的规则可能不同, 只需要保证处理后的图片的尺寸和模型输入尺寸保持一致即可return: image用于结果可视, img用于模型推理"""image = cv2.imread(IMG_PATH)##==# image = cv2.resize(image, (IMG_SIZE[1],IMG_SIZE[0],3))##==# image_ = np.zeros((IMG_SIZE[1],IMG_SIZE[0],3), dtype=image.dtype)# pad = (IMG_SIZE[1]-360)//2# image_[pad:IMG_SIZE[1]-pad,:] = image# cv2.imwrite("data/test.jpg", image_)# image = image_img = cv2.cvtColor(image, cv2.COLOR_BGR2RGB)return image, imgdef run_model_cut(outputs, OUT_NODE):"""480节点后的python的实现"""if "480" in OUT_NODE:## ============节点480-->494中间的解析a0 = outputs[1]stride = [8,16,32]x_shape = []for i in stride:x_shape.append([1,68,384//i,640//i])anchors, strides = (np.transpose(x, (1,0)) for x in post.make_anchors(x_shape, stride, 0.5))dbox = post.dist2bbox(a0, anchors[np.newaxis], xywh=True, dim=1) * stridesoutputs[1] = dbox## ============节点"494","495","390"后的concatOUT = []OUT.append(np.concatenate((outputs[1],outputs[2], outputs[3]),axis=1))OUT.append(outputs[0])outputs = OUTif "494" in OUT_NODE:## ============节点"494","495","390"后的concatOUT = []OUT.append(np.concatenate((outputs[1],outputs[2], outputs[3]),axis=1))OUT.append(outputs[0])outputs = OUTreturn outputsdef vis_result(image, results, colorlist, save_file):"""将掩码信息+box信息画到原图上, 并将原图+masks图+可视化图 concat起来, 方便结果查看"""boxes, masks, shape = resultsvis_img = image.copy()mask_img = np.zeros_like(image)for box, mask in zip(boxes, masks):mask_img[mask!=0] = colorlist[int(box[-1])] ## cls=int(box[-1])vis_img = vis_img*0.5 + mask_img*0.5for box in boxes:cv2.rectangle(vis_img, (int(box[0]), int(box[1])), (int(box[2]), int(box[3])), (0,0,255),3,4)vis_img = np.concatenate([image, mask_img, vis_img],axis=1)cv2.imwrite(save_file, vis_img)def load_RK3566_output(path, OUT_NODE):if "output0" in OUT_NODE:output0 = np.loadtxt(os.path.join(path, "output0.txt")).reshape((1, 40, 5040))output1 = np.loadtxt(os.path.join(path, "output1.txt")).reshape((1, 32, 96, 160))return (output0, output1)if "480" in OUT_NODE:node_480 = np.loadtxt(os.path.join(path, "480.txt")).reshape((1, 4, 5040))node_495 = np.loadtxt(os.path.join(path, "495.txt")).reshape((1, 4, 5040))node_390 = np.loadtxt(os.path.join(path, "390.txt")).reshape((1, 32, 5040))output1 = np.loadtxt(os.path.join(path, "output1.txt")).reshape((1, 32, 96, 160))return (node_480, node_495, node_390, output1)if "494" in OUT_NODE:node_494 = np.loadtxt(os.path.join(path, "494.txt")).reshape((1, 4, 5040))node_495 = np.loadtxt(os.path.join(path, "495.txt")).reshape((1, 4, 5040))node_390 = np.loadtxt(os.path.join(path, "390.txt")).reshape((1, 32, 5040))output1 = np.loadtxt(os.path.join(path, "output1.txt")).reshape((1, 32, 96, 160))return (node_494, node_495, node_390, output1)if __name__ == '__main__':CLASSES = ["floor", "blanket","door_sill","obstacle"]### 模型转换相关设置ONNX_MODEL = './model/best_class4_384_640.onnx'RKNN_MODEL = './model/best_class4_384_640.rknn'DATASET = './dataset.txt'DATASET_PATH = 'data'QUANTIZE_ON = False# QUANTIZE_ON = TrueOUT_NODE = ["output0","output1"]# OUT_NODE = ["494","495","390","output1"]# OUT_NODE = ["480","495","390","output1"]### 预测图片的设置IMG_SIZE = [640, 384]IMG_PATH = './data/1664025163_1664064856_00164_001.jpg'### 后处理的设置save_PATH = makedirs('./result')OBJ_THRESH = 0.25NMS_THRESH = 0.45### 开始实现====================================================if QUANTIZE_ON:gene_dataset_txt(DATASET_PATH, DATASET)print('1---------------------------------------> export model')rknn = load_and_export_rknnmodel(ONNX_MODEL, RKNN_MODEL, OUT_NODE, QUANTIZE_ON, DATASET)print('2---------------------------------------> gene colorlist')colorlist = gen_color(len(CLASSES))  ## 获取着色时的颜色信息print('3---------------------------------------> loading image')image, img = load_image(IMG_PATH, IMG_SIZE)print('4---------------------------------------> Running model')outputs = rknn.inference(inputs=[img])# outputs_rk3566 = load_RK3566_output("./RK3566", OUT_NODE)outputs = run_model_cut(outputs, OUT_NODE)print('5---------------------------------------> postprocess')## ============模型输出后的后处理。从yolov8源码中摘取后用numpy库代替了pytorch库im = np.transpose(img[np.newaxis],[0,3,1,2])results = post.postprocess(outputs, im, img, OBJ_THRESH, NMS_THRESH, classes=len(CLASSES)) results = results[0]              ## batch=1,取第一个数据即可print('6---------------------------------------> save result')save_file = os.path.join(save_PATH, os.path.basename(IMG_PATH))vis_result(image, results, colorlist, save_file)print()
## post.py import time import numpy as np import cv2def xywh2xyxy(x):y = np.copy(x)y[..., 0] = x[..., 0] - x[..., 2] / 2 # top left xy[..., 1] = x[..., 1] - x[..., 3] / 2 # top left yy[..., 2] = x[..., 0] + x[..., 2] / 2 # bottom right xy[..., 3] = x[..., 1] + x[..., 3] / 2 # bottom right yreturn ydef clip_boxes(boxes, shape):boxes[..., [0, 2]] = boxes[..., [0, 2]].clip(0, shape[1]) # x1, x2boxes[..., [1, 3]] = boxes[..., [1, 3]].clip(0, shape[0]) # y1, y2def scale_boxes(img1_shape, boxes, img0_shape, ratio_pad=None):if ratio_pad is None: # calculate from img0_shapegain = min(img1_shape[0] / img0_shape[0], img1_shape[1] / img0_shape[1]) # gain = old / newpad = (img1_shape[1] - img0_shape[1] * gain) / 2, (img1_shape[0] - img0_shape[0] * gain) / 2 # wh paddingelse:gain = ratio_pad[0][0]pad = ratio_pad[1]boxes[..., [0, 2]] -= pad[0] # x paddingboxes[..., [1, 3]] -= pad[1] # y paddingboxes[..., :4] /= gainclip_boxes(boxes, img0_shape)return boxesdef crop_mask(masks, boxes):n, h, w = masks.shapex1, y1, x2, y2 = np.split(boxes[:, :, None], 4, axis=1)r = np.arange(w, dtype=np.float32)[None, None, :] # rows shape(1,w,1)c = np.arange(h, dtype=np.float32)[None, :, None] # cols shape(h,1,1)return masks * ((r >= x1) * (r < x2) * (c >= y1) * (c < y2))def sigmoid(x): return 1.0/(1+np.exp(-x))def process_mask(protos, masks_in, bboxes, shape):c, mh, mw = protos.shape # CHWih, iw = shapemasks = sigmoid(masks_in @ protos.reshape(c, -1)).reshape(-1, mh, mw) # CHW 【lulu】downsampled_bboxes = bboxes.copy()downsampled_bboxes[:, 0] *= mw / iwdownsampled_bboxes[:, 2] *= mw / iwdownsampled_bboxes[:, 3] *= mh / ihdownsampled_bboxes[:, 1] *= mh / ihmasks = crop_mask(masks, downsampled_bboxes) # CHWmasks = np.transpose(masks, [1,2,0])# masks = cv2.resize(masks, (shape[1], shape[0]), interpolation=cv2.INTER_NEAREST)masks = cv2.resize(masks, (shape[1], shape[0]), interpolation=cv2.INTER_LINEAR)masks = np.transpose(masks, [2,0,1])return np.where(masks>0.5,masks,0)def nms(bboxes, scores, threshold=0.5):x1 = bboxes[:, 0]y1 = bboxes[:, 1]x2 = bboxes[:, 2]y2 = bboxes[:, 3]areas = (x2 - x1) * (y2 - y1)order = scores.argsort()[::-1]keep = []while order.size > 0:i = order[0]keep.append(i)if order.size == 1: breakxx1 = np.maximum(x1[i], x1[order[1:]])yy1 = np.maximum(y1[i], y1[order[1:]])xx2 = np.minimum(x2[i], x2[order[1:]])yy2 = np.minimum(y2[i], y2[order[1:]])w = np.maximum(0.0, (xx2 - xx1))h = np.maximum(0.0, (yy2 - yy1))inter = w * hiou = inter / (areas[i] + areas[order[1:]] - inter)ids = np.where(iou <= threshold)[0]order = order[ids + 1]return keepdef non_max_suppression(prediction,conf_thres=0.25,iou_thres=0.45,classes=None,agnostic=False,multi_label=False,labels=(),max_det=300,nc=0, # number of classes (optional) ):# Checksassert 0 <= conf_thres <= 1, f'Invalid Confidence threshold {conf_thres}, valid values are between 0.0 and 1.0'assert 0 <= iou_thres <= 1, f'Invalid IoU {iou_thres}, valid values are between 0.0 and 1.0'#【lulu】prediction.shape[1]:box + cls + num_masksbs = prediction.shape[0] # batch sizenc = nc or (prediction.shape[1] - 4) # number of classesnm = prediction.shape[1] - nc - 4 # num_masksmi = 4 + nc # mask start indexxc = np.max(prediction[:, 4:mi], axis=1) > conf_thres ## 【lulu】# Settings# min_wh = 2 # (pixels) minimum box width and heightmax_wh = 7680 # (pixels) maximum box width and heightmax_nms = 30000 # maximum number of boxes into torchvision.ops.nms()time_limit = 0.5 + 0.05 * bs # seconds to quit afterredundant = True # require redundant detectionsmulti_label &= nc > 1 # multiple labels per box (adds 0.5ms/img)merge = False # use merge-NMSt = time.time()output = [np.zeros((0,6 + nm))] * bs ## 【lulu】for xi, x in enumerate(prediction): # image index, image inference# Apply constraints# x[((x[:, 2:4] < min_wh) | (x[:, 2:4] > max_wh)).any(1), 4] = 0 # width-heightx = np.transpose(x,[1,0])[xc[xi]] ## 【lulu】# If none remain process next imageif not x.shape[0]: continue# Detections matrix nx6 (xyxy, conf, cls)box, cls, mask = np.split(x, [4, 4+nc], axis=1) ## 【lulu】box = xywh2xyxy(box) # center_x, center_y, width, height) to (x1, y1, x2, y2)j = np.argmax(cls, axis=1) ## 【lulu】conf = cls[np.array(range(j.shape[0])), j].reshape(-1,1)x = np.concatenate([box, conf, j.reshape(-1,1), mask], axis=1)[conf.reshape(-1,)>conf_thres]# Check shapen = x.shape[0] # number of boxesif not n: continuex = x[np.argsort(x[:, 4])[::-1][:max_nms]] # sort by confidence and remove excess boxes 【lulu】# Batched NMSc = x[:, 5:6] * max_wh # classes ## 乘以的原因是将相同类别放置统一尺寸区间进行nmsboxes, scores = x[:, :4] + c, x[:, 4] # boxes (offset by class), scoresi = nms(boxes, scores, iou_thres) ## 【lulu】i = i[:max_det] # limit detectionsoutput[xi] = x[i]if (time.time() - t) > time_limit:# LOGGER.warning(f'WARNING ⚠️ NMS time limit {time_limit:.3f}s exceeded')break # time limit exceededreturn outputdef postprocess(preds, img, orig_img, OBJ_THRESH, NMS_THRESH, classes=None):"""len(preds)=2preds[0].shape=(1,40,5040)。其中40=4(box)+4(cls)+32(num_masks), 32为原型系数。5040为3层输出featuremap的grid_ceil的总和。preds[1].shape=(1, 32, 96, 160)。32为32个原型掩码。(96,160)为第三层的featuremap的尺寸。总共需要3个步骤:1. 对检测框, 也就是preds[0], 进行得分阈值、iou阈值筛选, 得到需要保留的框的信息, 以及对应的32为原型系数2. 将每个检测框的原型系数乘以每个原型, 得到对应的类别的mask, 此时目标框和mask数量一一对应。然后使用每个检测框框自己对应的mask的featuremap,框以外的有效mask删除, 得到最终的目标掩码3. 将mask和框都恢复到原尺寸下"""p = non_max_suppression(preds[0],OBJ_THRESH,NMS_THRESH,agnostic=False,max_det=300,nc=classes,classes=None) results = []proto = preds[1] for i, pred in enumerate(p):shape = orig_img.shapeif not len(pred):results.append([[], [], []]) # save empty boxescontinuemasks = process_mask(proto[i], pred[:, 6:], pred[:, :4], img.shape[2:]) # HWCpred[:, :4] = scale_boxes(img.shape[2:], pred[:, :4], shape).round()results.append([pred[:, :6], masks, shape[:2]])return resultsdef make_anchors(feats_shape, strides, grid_cell_offset=0.5):"""Generate anchors from features."""anchor_points, stride_tensor = [], []assert feats_shape is not Nonedtype_ = np.floatfor i, stride in enumerate(strides):_, _, h, w = feats_shape[i]sx = np.arange(w, dtype=dtype_) + grid_cell_offset # shift xsy = np.arange(h, dtype=dtype_) + grid_cell_offset # shift ysy, sx = np.meshgrid(sy, sx, indexing='ij') anchor_points.append(np.stack((sx, sy), -1).reshape(-1, 2))stride_tensor.append(np.full((h * w, 1), stride, dtype=dtype_))return np.concatenate(anchor_points), np.concatenate(stride_tensor)def dist2bbox(distance, anchor_points, xywh=True, dim=-1):"""Transform distance(ltrb) to box(xywh or xyxy)."""lt, rb = np.split(distance, 2, dim)x1y1 = anchor_points - ltx2y2 = anchor_points + rbif xywh:c_xy = (x1y1 + x2y2) / 2wh = x2y2 - x1y1return np.concatenate((c_xy, wh), dim) # xywh bboxreturn np.concatenate((x1y1, x2y2), dim) # xyxy bbox
相关文章:

【yolov8系列】将yolov8-seg 模型部署到瑞芯微RK3566上
前言 之前记录过【yolov5系列】将模型部署到瑞芯微RK3566上,整体比较流畅,记录了onnx转rknn的相关环境配置,使用的rk版本为rknn-toolkit2-v1.4.0。当前库已经更新为1.5,这里还是沿用1.4的版本进行记录。本篇博客是在上篇博客&…...
Java类的默认构造函数
什么情况下存在默认构造函数 说明 如果一个Java类没有显式包含构造函数的声明,那么隐含着有一个默认构造函数。 示例 定义一个类B,没有显式声明构造函数,所以存在一个默认构造函数: package com.thb;public class B {public …...

华为openGauss数据库入门 - gsql用法
目录 1.1 gsql的语法 1.2 gsql常用选项 1.2.1 最常用的必要选项 1.2.2 -r选项 1.2.3 -E选项 1.2.4 -t选项 1.2.5 -A选项 1.2.6 -v选项 1.2.7 -c选项 1.2.8 -f选项 1.2.9 -q选项 1.3 gsql的元命令 1.3.1 \l命令 1.3.2 \du命令和\dg命令 1.3.3 \db命令 1.3.4 \d…...

The Sandbox 重新上线,带来全新体验!
在经历了一个充满史诗般新回忆的全力开局后,我们短暂休息了片刻,为玩家准备了全新的、惊心动魄的游戏活动。 我们已经完成了功能的微调,准备将您的游戏体验提升到一个全新高度! 想知道我们正在做什么吗?现在还无法公开…...
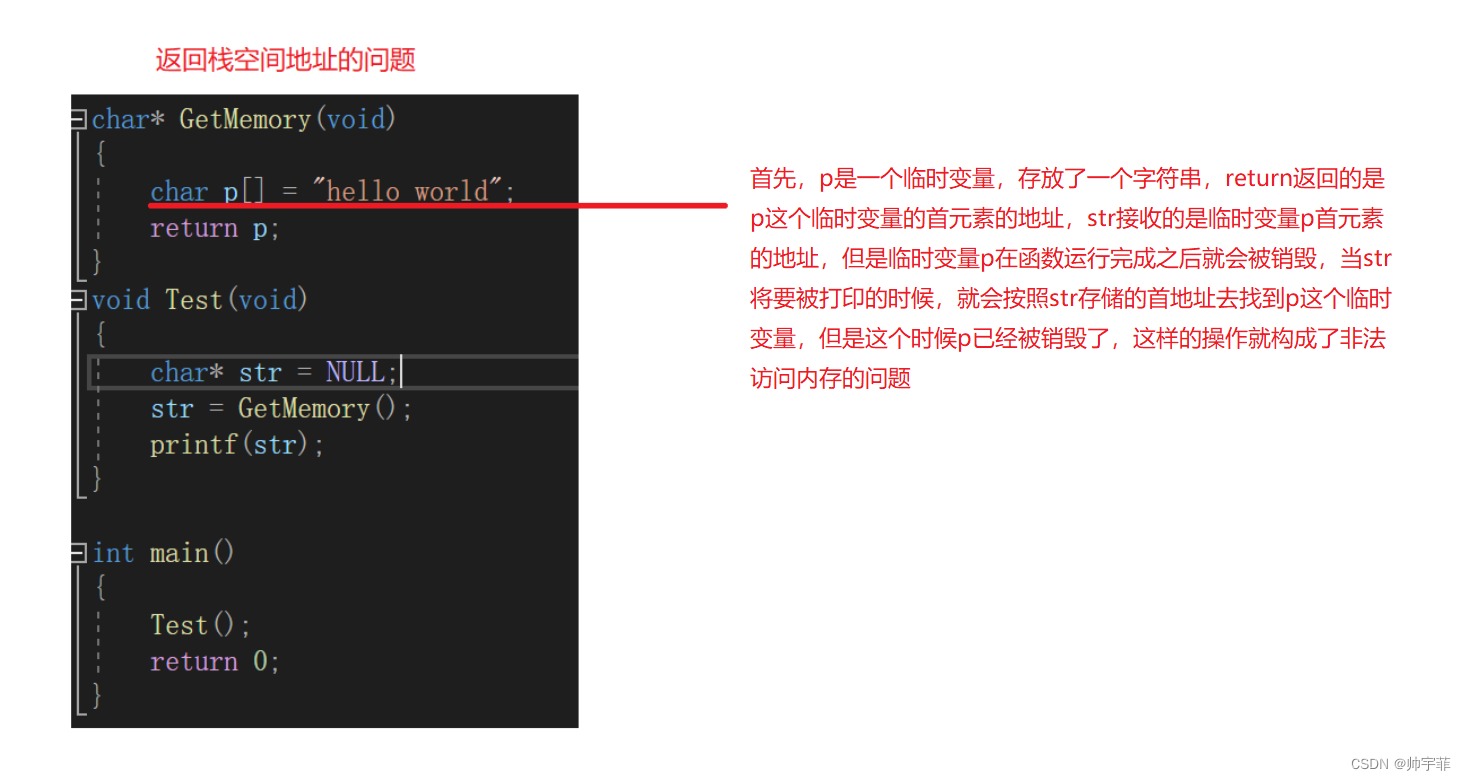
动态内存管理面试题
动态内存管理面试题 文章目录 动态内存管理面试题一、第一题此代码存在的问题运行结果分析原因修改 二、第二题此代码存在的问题运行结果分析原因修改 一、第一题 代码如下(示例): #include<stdio.h> #include<string.h> #incl…...

树莓派外设开发编程
目录 一、树莓派的接口:驱动 二、wiringPi 库 1.在使用wiringPi库的时候,需要包含头文件 2.wiringPi库API 一、树莓派的接口:驱动 IO口:input output 对于主控来说 Input :人体、烟雾、振动 output: 继电…...
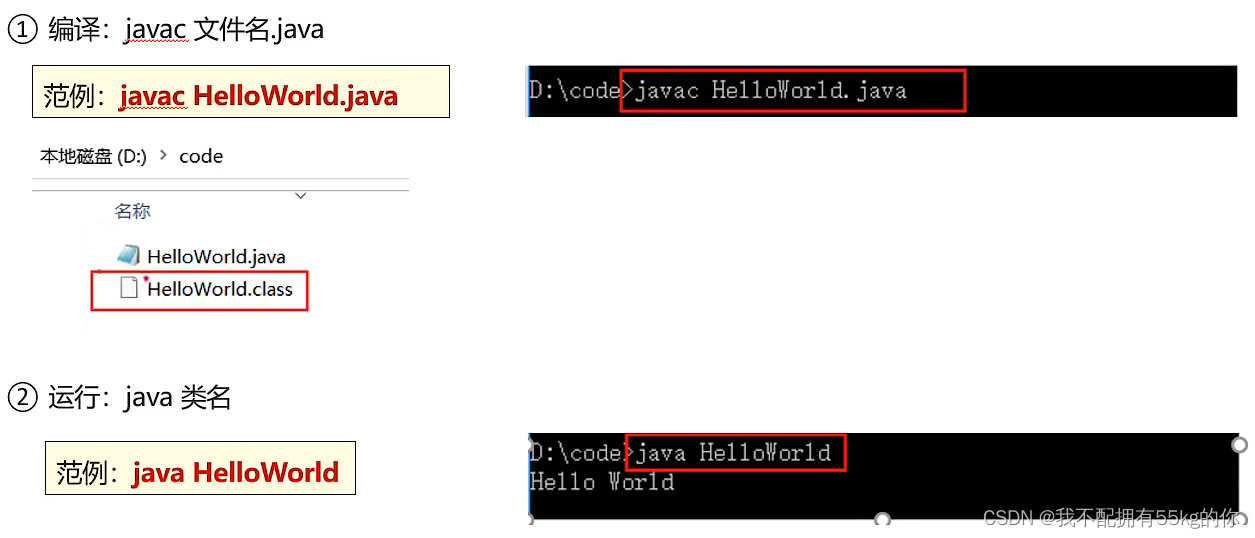
Java从入门到精通(一)
Java从入门到精通(一) 前言 温故而知新,闲着没事干,准备将Java编程语言的知识点从头梳理一遍,整理成笔记,逐篇发布。 部分图片素材来源与B站“黑马程序员”的课程。 一 Java背景 Java是1995年 由Sun公司…...
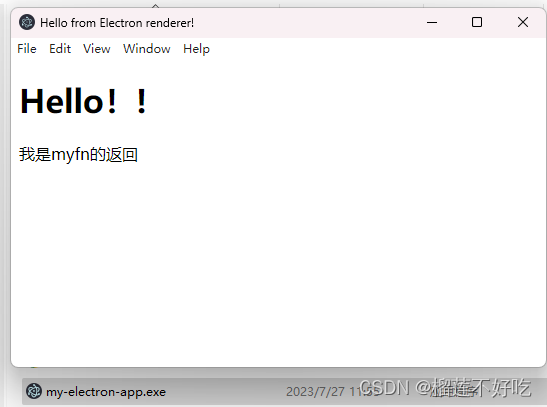
Electron从构建到打包程exe应用
Electron从构建到打包程exe应用 Electron文档搭建网页装载到 BrowserWindow中定义全局对象进程之间通信渲染器进程到主进程(单向)渲染器进程到主进程(双向)主进程到渲染器进程 打开调试器打包应用程序对代码进行签名 Electron文档…...

3分钟学会设计模式 -- 单例模式
►单例模式 ►使用场景 在编写软件时,对于某些类来说,只有一个实例很重要。例如,一个系统中可以存在多个打印任务,但是只能有一个正在工作的任务;一个系统中可以多次查询数据库,但是只需要一个连接&#x…...

《面试1v1》Kafka与传统消息系统区别
🍅 作者简介:王哥,CSDN2022博客总榜Top100🏆、博客专家💪 🍅 技术交流:定期更新Java硬核干货,不定期送书活动 🍅 王哥多年工作总结:Java学习路线总结…...

【算法第十三天7.27】平衡二叉树,二叉树所有路径,左叶子之和
链接力扣110-平衡二叉树 思路 1、左右子树高度差不超过1 2、左子树、右子树均为平衡二叉树 3、需要获得树高,如果不是平衡的就返回-1;如果是平衡,就返回对应的高 class Solution {public boolean isBalanced(TreeNode root) {return getH…...

arm架构cloudstack的agent报错No more available PCI slots如何解决
当ARM架构的CloudStack代理报错"No more available PCI slots"时,这通常表示ARM实例已用尽可用的PCI插槽。PCI插槽用于连接网络接口卡(NIC)和其他扩展设备到虚拟机实例。 解决此问题的方法可以考虑以下几点: 调整实例的…...
day43-Feedback Ui Design(反馈ui设计)
50 天学习 50 个项目 - HTMLCSS and JavaScript day43-Feedback Ui Design(反馈ui设计) 效果 index.html <!DOCTYPE html> <html lang"en"><head><meta charset"UTF-8" /><meta name"viewport&q…...

TypeScript基础篇 - TS日常类型 上篇
目录 TS的常见用法介绍 example01.ts 逃避类型检查:any 思考一下~:不知道类型 类型标注 函数(参数和返回值) 匿名函数 TS如何知道匿名函数的类型? TS是一种标注式语言,不侵入JS的设计 TS的常见用法…...
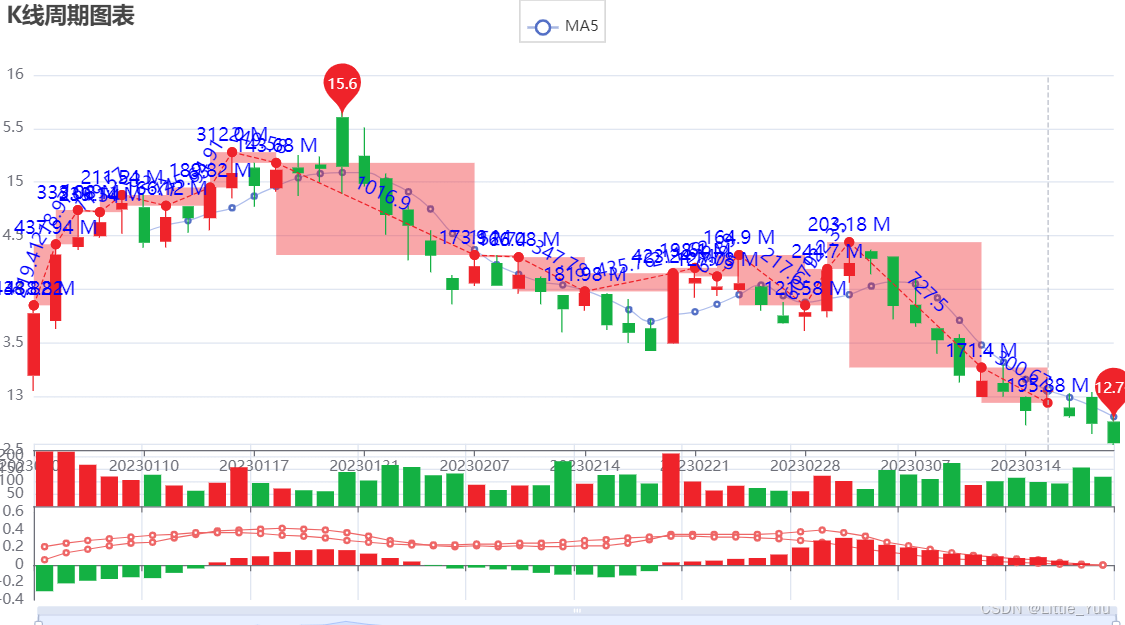
量化交易——python数据分析及可视化
该项目分为两个部分:一是数据计算,二是可视化,三是MACD策略 一、计算MACD 1、数据部分 数据来源:tushare 数据字段包含:日期,开盘价,收盘价,最低价,最高价,…...

微服务网关
1.网关是如何演化来的,在微服务中有什么作用? 随着单体架构转化为微服务架构的时候,由一个后台服务由一个单一的服务变成了多个微服务,前端应用需要调用多个服务的接口,为了解决这个问题,网关就产生了。网…...
【打卡】Datawhale暑期实训ML赛事
文章目录 赛题描述任务要求数据集介绍评估指标 赛题分析基于LightGBM模型Baseline详解改进baseline早停法添加特征 赛题描述 赛事地址:科大讯飞锂离子电池生产参数调控及生产温度预测挑战赛 任务要求 初赛任务:初赛提供了电炉17个温区的实际生产数据&…...

【python脚本】python实现:目标检测裁剪图片样本,根据类标签文件进行裁剪保存
python实现:目标检测裁剪图片样本,根据类标签文件进行裁剪保存 我在进行目标检测时候,比如红绿灯检测,目标区域很小,样本杂乱。 想要筛选错误样本的话,很困难。可以把目标区域裁剪出来。人大脑处理对于这…...

Mac 终端美化显示
Linux 也可安装 Zsh 后使用此套配置。 1. 安装 Oh My Zsh sh -c "$(curl -fsSL https://raw.githubusercontent.com/ohmyzsh/ohmyzsh/master/tools/install.sh)"2. 更换主题,修改文件:~/.zshrc,原内容: ZSH_THEME&quo…...
信息安全:密码学基本理论.
信息安全:密码学基本理论. 密码学是研究编制密码和破译密码的技术科学。研究密码变化的客观规律,应用于编制密码以保守通信秘密的,称为编码学;应用于破译密码以获取通信情报的,称为破译学,总称密码学. 目录…...

用数字逻辑门复刻柏林钟:从二进制编码到硬件实现
1. 项目概述:用数字电路复刻“柏林钟”作为一个在柏林长大的孩子,我从小就对库达姆大街上的那座“柏林钟”着迷。它不像传统时钟那样用指针或数字告诉你时间,而是通过几排不同颜色的发光方块,以一种近乎艺术的方式呈现时间。这种独…...

echarts中heatmap鼠标滚动禁用缩放,向下滚动
配置如下效果如下...

终极免费方案:WandEnhancer完整解锁WeMod Pro功能快速指南
终极免费方案:WandEnhancer完整解锁WeMod Pro功能快速指南 【免费下载链接】Wand-Enhancer Advanced UX and interoperability extension for Wand (WeMod) app 项目地址: https://gitcode.com/gh_mirrors/we/Wand-Enhancer 你是否渴望享受WeMod Pro会员的所…...

可解释AI新突破:基于局部帕累托最优的模型解释框架
1. 项目概述:当AI模型成为“黑箱”,我们如何撬开它?在机器学习项目里摸爬滚打十几年,我见过太多这样的场景:团队花大力气训练出一个准确率高达95%的复杂模型(比如深度神经网络),业务…...

从RD、CS到WK:一文讲透SAR主流成像算法的演进与选型实战
从RD、CS到WK:SAR成像算法选型实战指南 当无人机掠过灾区上空,或卫星扫描地球表面时,合成孔径雷达(SAR)正通过电磁波穿透云层和黑暗,将地面信息转化为高分辨率图像。而决定图像质量的关键,在于工…...

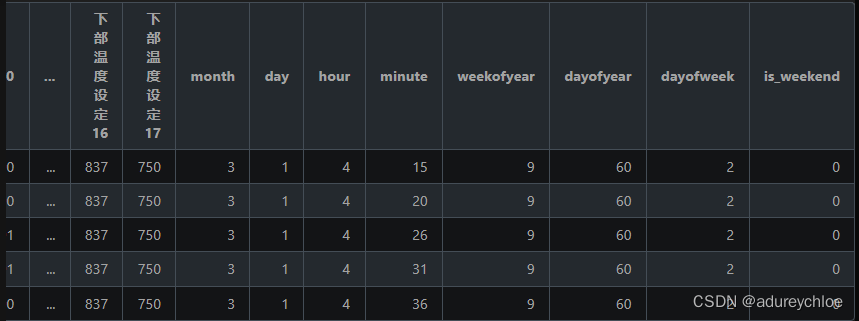
基于MAX78000的离线鸟类声音识别:边缘AI从数据到部署全流程解析
1. 项目概述:当边缘AI“听懂”鸟鸣在野外生态监测或自家后院观鸟时,你是否有过这样的经历:听到一阵清脆或婉转的鸟鸣,却完全不知道是哪位“歌唱家”在表演?传统的鸟类识别依赖专家经验和图鉴比对,不仅门槛高…...
)
Windows开机自动全屏打开指定网页?一个快捷方式参数就搞定(Chrome/Edge/Firefox教程)
Windows开机自动全屏展示网页的终极方案每次开机都要手动打开浏览器、输入网址、切换全屏模式?这种重复操作不仅浪费时间,还容易在重要演示时手忙脚乱。想象一下:电脑启动后自动全屏显示你的仪表盘、会议日程或是监控大屏,整个过程…...

通过TaotokenCLI工具一键配置开发环境接入参数
🚀 告别海外账号与网络限制!稳定直连全球优质大模型,限时半价接入中。 👉 点击领取海量免费额度 通过Taotoken CLI工具一键配置开发环境接入参数 对于需要接入多个大模型服务的开发者而言,手动配置每个项目的API密钥、…...

如何快速实现U盘文件自动备份:USBCopyer终极指南
如何快速实现U盘文件自动备份:USBCopyer终极指南 【免费下载链接】USBCopyer 😉 用于在插上U盘后自动按需复制该U盘的文件。”备份&偷U盘文件的神器”(写作USBCopyer,读作USBCopier) 项目地址: https://gitcode.…...

深入解析NxDumpTool:Switch游戏文件系统提取的终极指南 [特殊字符]
深入解析NxDumpTool:Switch游戏文件系统提取的终极指南 🎮 【免费下载链接】nxdumptool Generates XCI/NSP/HFS0/ExeFS/RomFS/Certificate/Ticket dumps from Nintendo Switch gamecards and installed SD/eMMC titles. 项目地址: https://gitcode.com…...