前端学习——Vue (Day5)
自定义指令
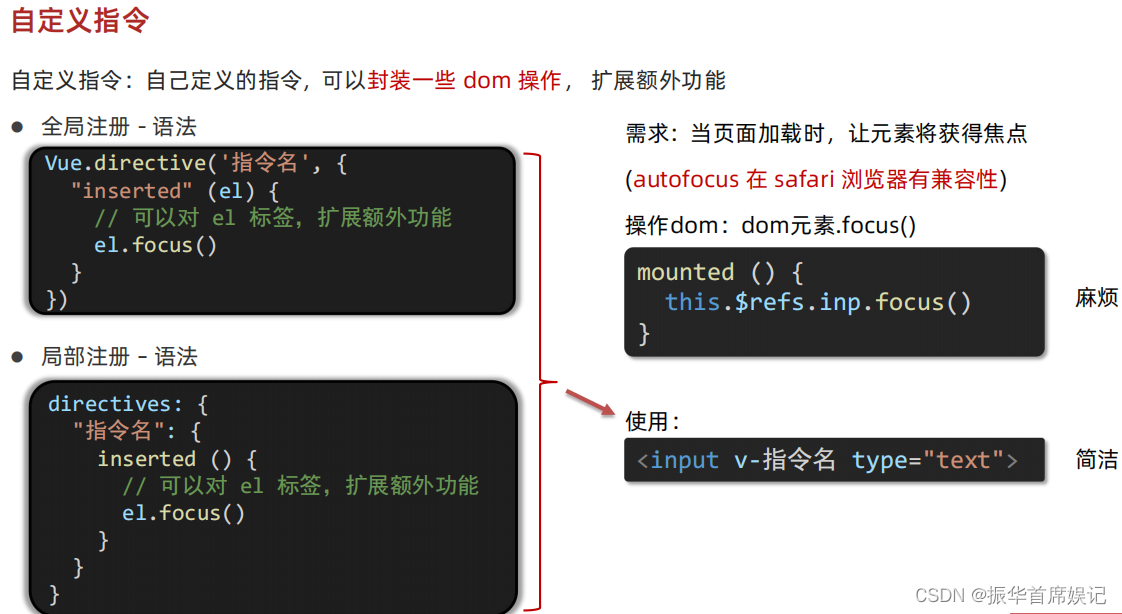
<template><div><h1>自定义指令</h1><input v-focus ref="inp" type="text" /></div>
</template><script>
export default {// mounted(){//   this.$ref.inp.focus()// }// 2. 局部注册指令directives: {focus: {inserted(el) {// 可以对 el 标签,扩展额外功能el.focus();},},},
};
</script><style>
</style>
import Vue from 'vue'
import App from './App.vue'Vue.config.productionTip = false// // 1. 全局注册指令
// Vue.directive('focus', {
//   // inserted会在指令所在的元素,被插入到页面中时被触发
//   "inserted" (el) {
//   // el指令所绑定的元素
//   el.focus()
//   }
//   })new Vue({render: h => h(App),
}).$mount('#app')
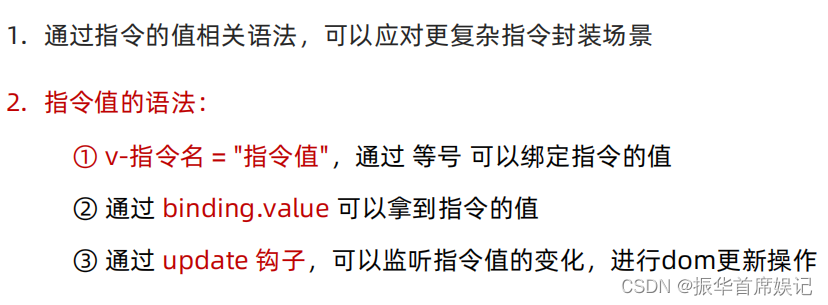
自定义指令 - 指令的值
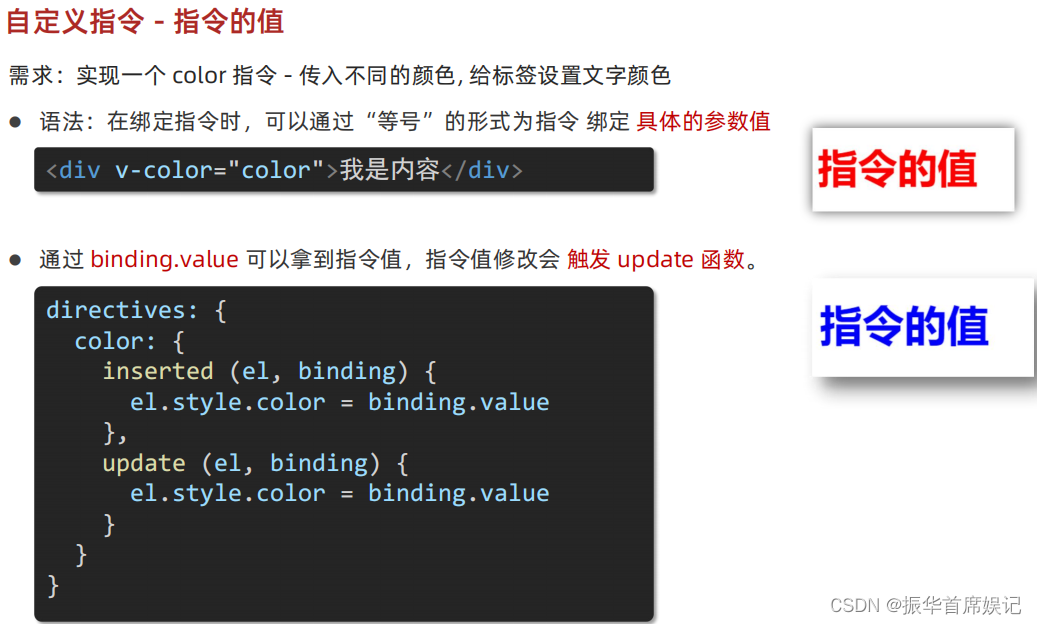
<template><div><h1 v-color="color1">指令的值1</h1><h1 v-color="color2">指令的值2</h1></div>
</template><script>
export default {data() {return {color1:'red',color2:'green'};},directives: {// inserted提供的是元素被添加到页面中时的逻辑color: {inserted(el, binding) {el.style.color = binding.value;},// update指令的值修改的时候触发,提供值变化后,dom更新的逻辑update(el, binding) {el.style.color = binding.value;},},},
};
</script><style>
</style>
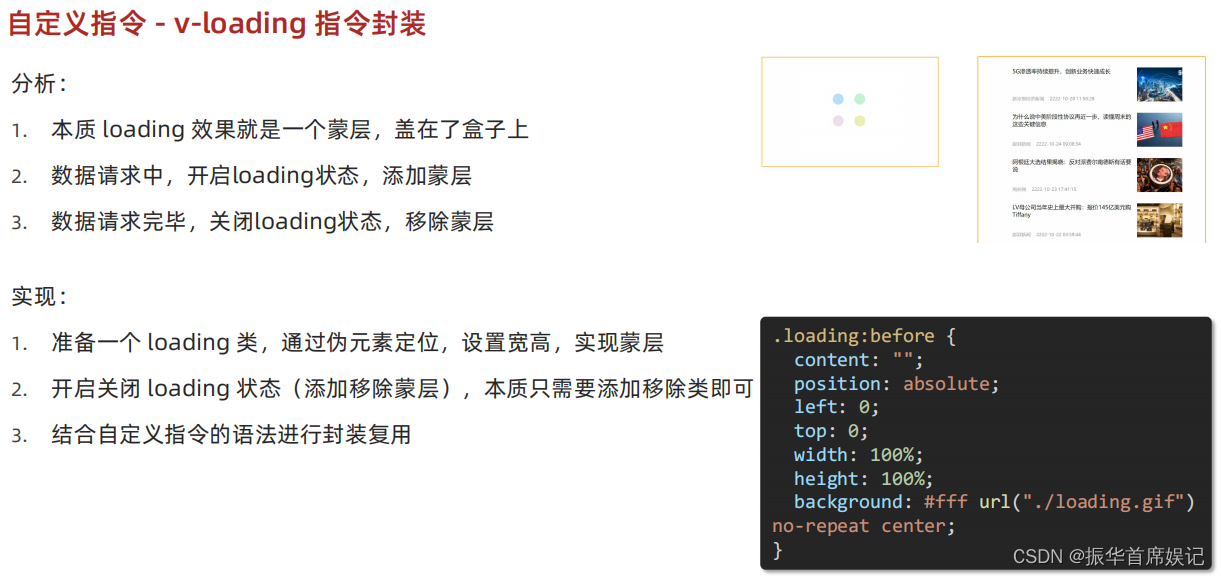
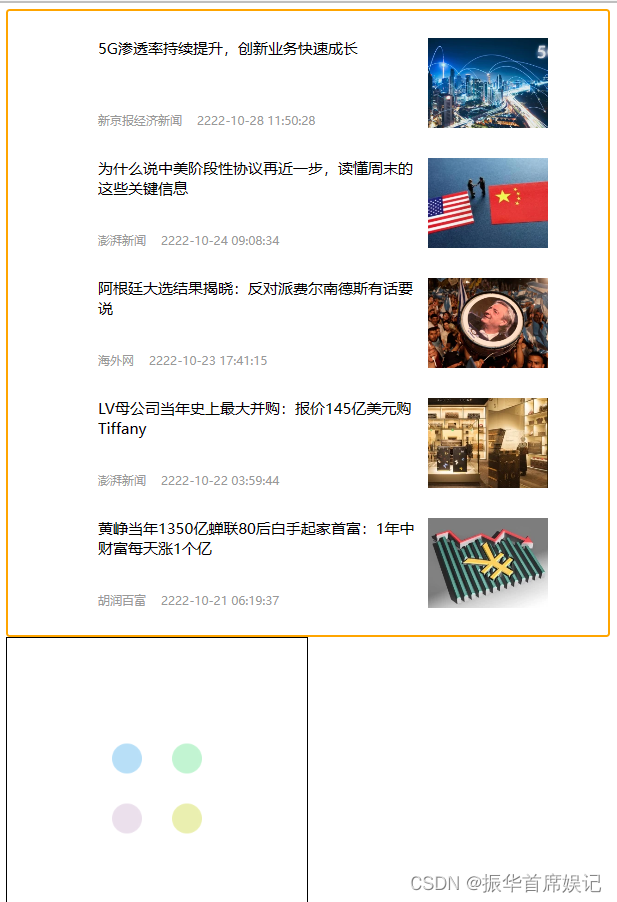
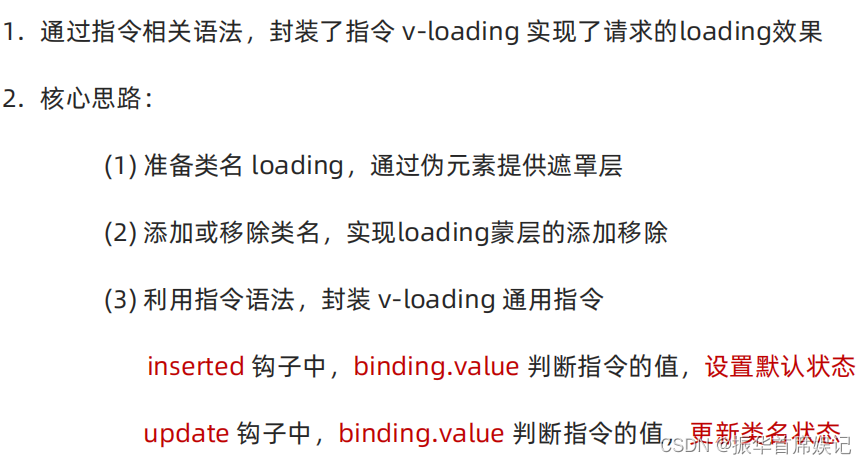
自定义指令 - v-loading 指令封装
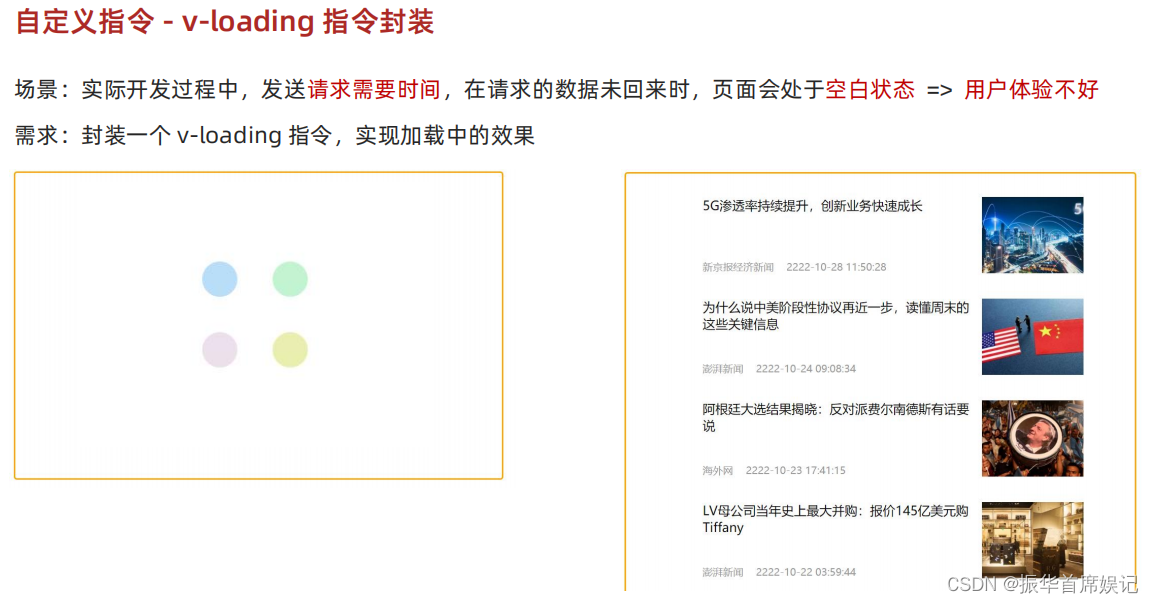
<template><div class="main"><div class="box" v-loading="isLoading"><ul><li v-for="item in list" :key="item.id" class="news"><div class="left"><div class="title">{{ item.title }}</div><div class="info"><span>{{ item.source }}</span><span>{{ item.time }}</span></div></div><div class="right"><img :src="item.img" alt=""></div></li></ul></div><div class="box2" v-loading="isLoading2"></div></div>
</template><script>
// 安装axios =>  yarn add axios
import axios from 'axios'// 接口地址:http://hmajax.itheima.net/api/news
// 请求方式:get
export default {data () {return {list: [],isLoading:true,isLoading2:true}},async created () {// 1. 发送请求获取数据const res = await axios.get('http://hmajax.itheima.net/api/news')setTimeout(() => {// 2. 更新到 list 中this.list = res.data.datathis.isLoading = false}, 2000)},directives:{loading:{inserted(el,binding){binding.value ? el.classList.add('loading') : el.classList.remove('loading')},update(el,binding){binding.value ? el.classList.add('loading') : el.classList.remove('loading')}}}}
</script><style>
/* 伪类 - 蒙层效果 */
.loading:before {content: '';position: absolute;left: 0;top: 0;width: 100%;height: 100%;background: #fff url('./loading.gif') no-repeat center;
}.box2 {width: 400px;height: 400px;border: 2px solid #000;position: relative;
}.box {width: 800px;min-height: 500px;border: 3px solid orange;border-radius: 5px;position: relative;
}
.news {display: flex;height: 120px;width: 600px;margin: 0 auto;padding: 20px 0;cursor: pointer;
}
.news .left {flex: 1;display: flex;flex-direction: column;justify-content: space-between;padding-right: 10px;
}
.news .left .title {font-size: 20px;
}
.news .left .info {color: #999999;
}
.news .left .info span {margin-right: 20px;
}
.news .right {width: 160px;height: 120px;
}
.news .right img {width: 100%;height: 100%;object-fit: cover;
}
</style>
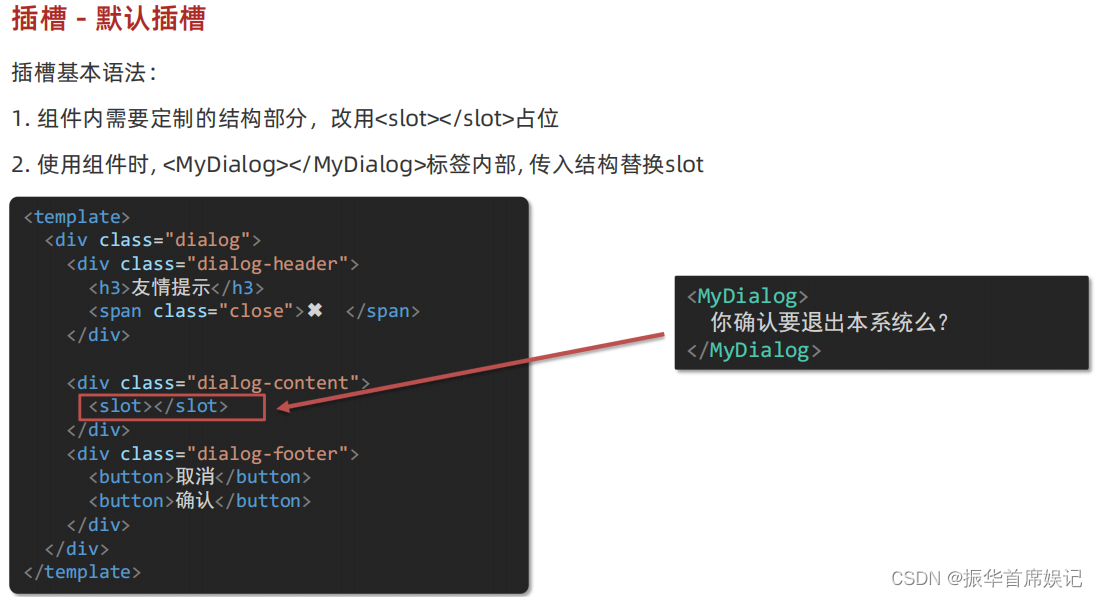
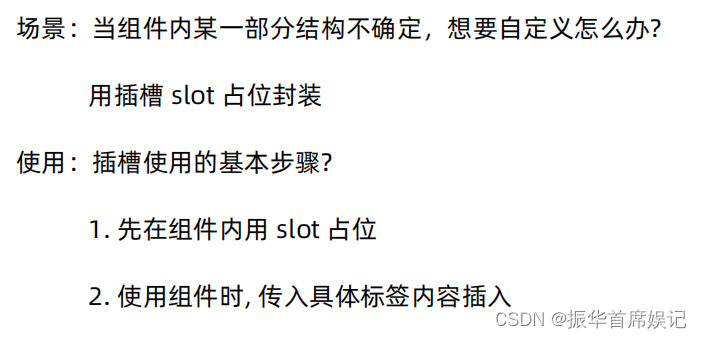
插槽
默认插槽
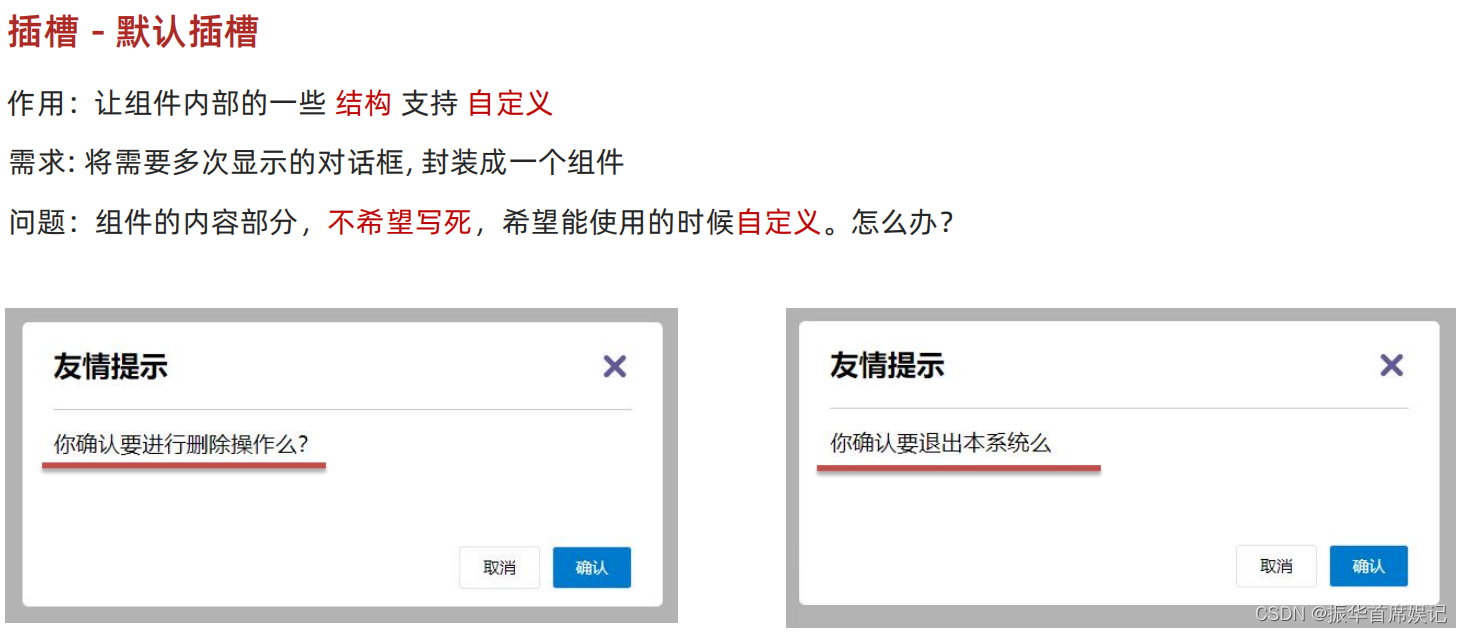
<template><div><!-- 2. 在使用组件时,在组建标签内填入内容 --><MyDialog><div>你确认要删除吗?</div></MyDialog><MyDialog><p>你确认要退出吗?</p></MyDialog></div>
</template><script>
import MyDialog from "./components/MyDialog.vue"
export default {data() {return {}},components: {MyDialog,},
}
</script><style>
body {background-color: #b3b3b3;
}
</style>
<template><div class="dialog"><div class="dialog-header"><h3>友情提示</h3><span class="close">✖️</span></div><div class="dialog-content"><!-- 1. 在需要定制的位置,使用slot占位 --><slot></slot></div><div class="dialog-footer"><button>取消</button><button>确认</button></div></div>
</template><script>
export default {data () {return {}}
}
</script><style scoped>
* {margin: 0;padding: 0;
}
.dialog {width: 470px;height: 230px;padding: 0 25px;background-color: #ffffff;margin: 40px auto;border-radius: 5px;
}
.dialog-header {height: 70px;line-height: 70px;font-size: 20px;border-bottom: 1px solid #ccc;position: relative;
}
.dialog-header .close {position: absolute;right: 0px;top: 0px;cursor: pointer;
}
.dialog-content {height: 80px;font-size: 18px;padding: 15px 0;
}
.dialog-footer {display: flex;justify-content: flex-end;
}
.dialog-footer button {width: 65px;height: 35px;background-color: #ffffff;border: 1px solid #e1e3e9;cursor: pointer;outline: none;margin-left: 10px;border-radius: 3px;
}
.dialog-footer button:last-child {background-color: #007acc;color: #fff;
}
</style>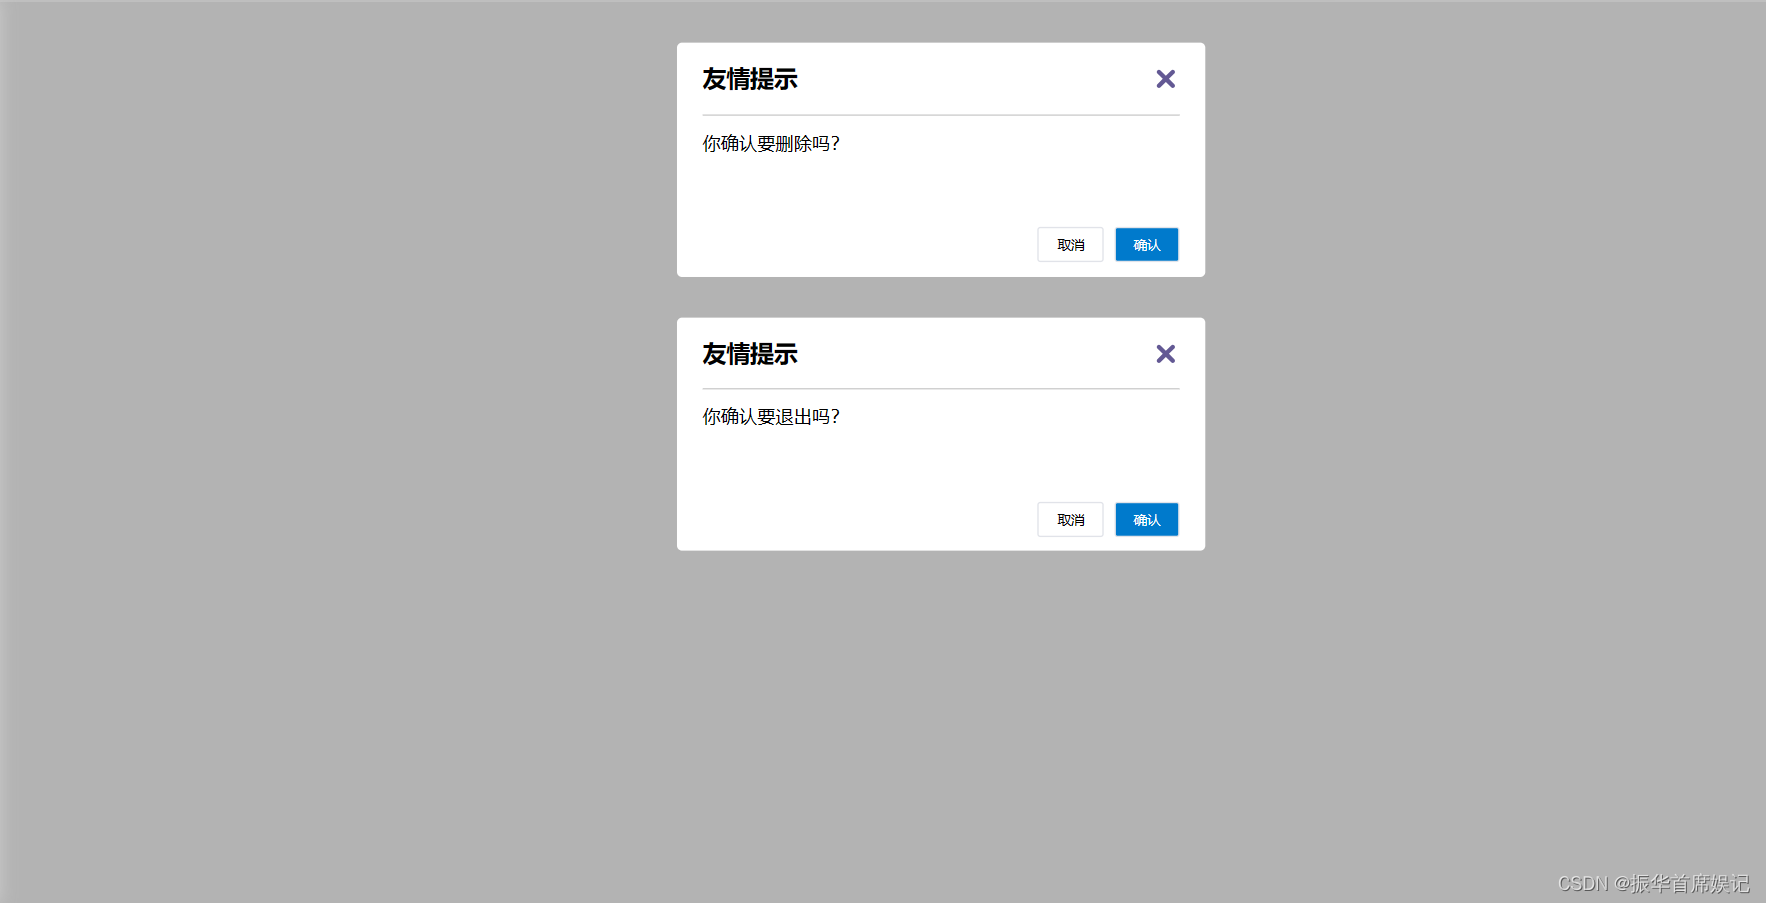
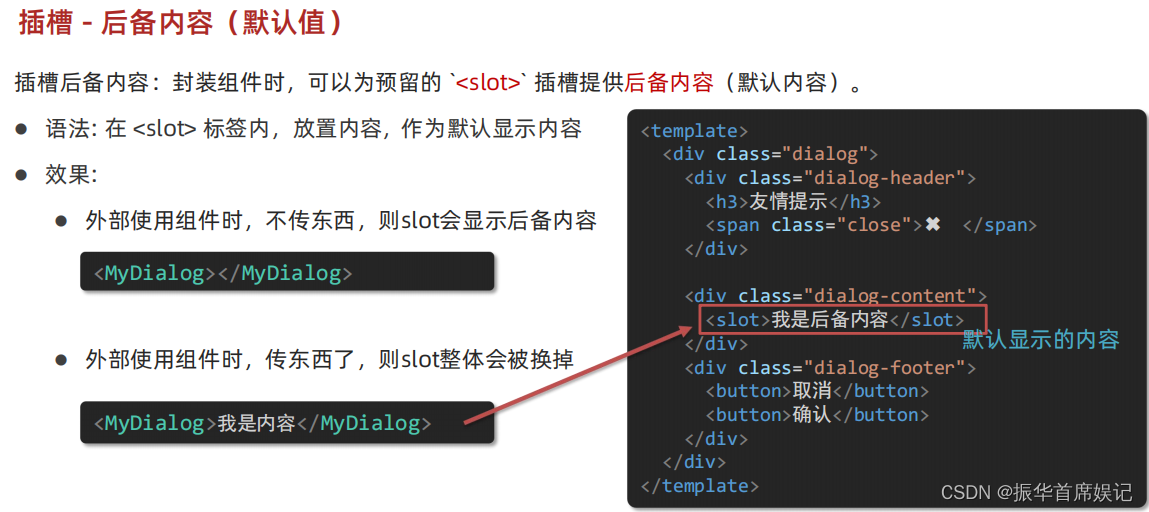
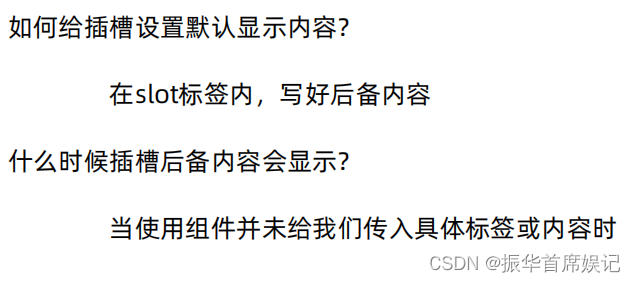
后备内容(默认值)
<template><div><!-- 2. 在使用组件时,在组建标签内填入内容 --><MyDialog>你确认要退出吗?</MyDialog><MyDialog></MyDialog></div>
</template><script>
import MyDialog from "./components/MyDialog.vue"
export default {data() {return {}},components: {MyDialog,},
}
</script><style>
body {background-color: #b3b3b3;
}
</style>
<template><div class="dialog"><div class="dialog-header"><h3>友情提示</h3><span class="close">✖️</span></div><div class="dialog-content"><!-- 1. 在需要定制的位置,使用slot占位 --><!-- 往slot标签内部,编写内容,可以作为后被内容 --><slot>我是默认的文本内容</slot></div><div class="dialog-footer"><button>取消</button><button>确认</button></div></div>
</template><script>
export default {data () {return {}}
}
</script><style scoped>
* {margin: 0;padding: 0;
}
.dialog {width: 470px;height: 230px;padding: 0 25px;background-color: #ffffff;margin: 40px auto;border-radius: 5px;
}
.dialog-header {height: 70px;line-height: 70px;font-size: 20px;border-bottom: 1px solid #ccc;position: relative;
}
.dialog-header .close {position: absolute;right: 0px;top: 0px;cursor: pointer;
}
.dialog-content {height: 80px;font-size: 18px;padding: 15px 0;
}
.dialog-footer {display: flex;justify-content: flex-end;
}
.dialog-footer button {width: 65px;height: 35px;background-color: #ffffff;border: 1px solid #e1e3e9;cursor: pointer;outline: none;margin-left: 10px;border-radius: 3px;
}
.dialog-footer button:last-child {background-color: #007acc;color: #fff;
}
</style>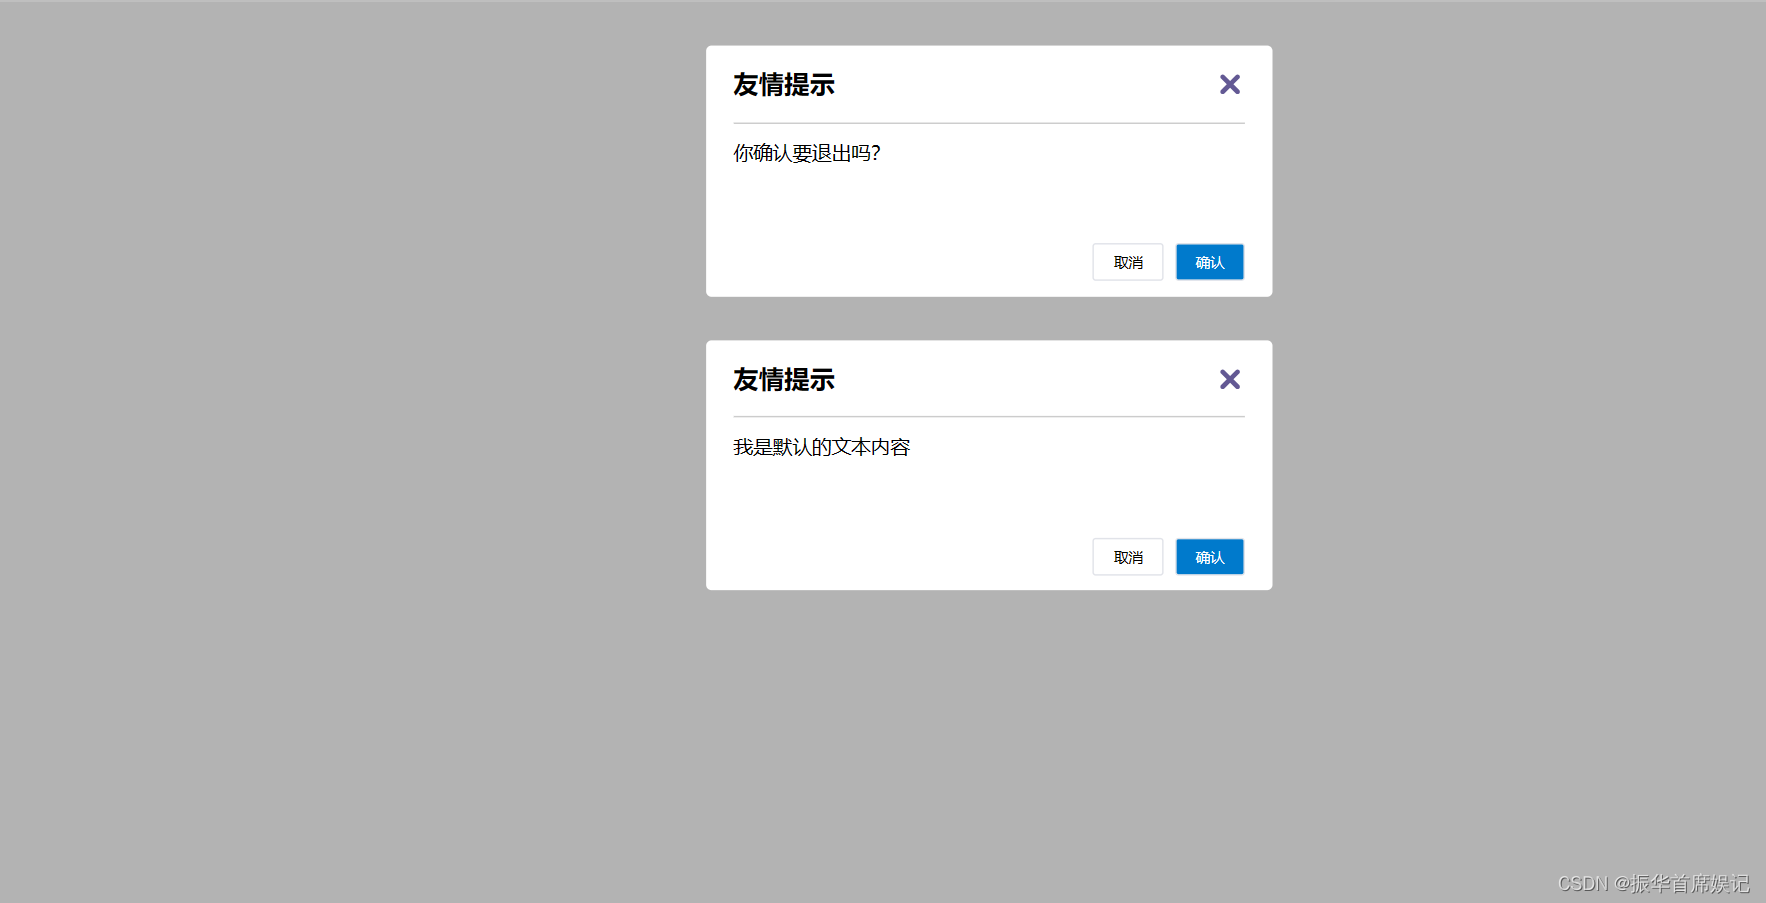
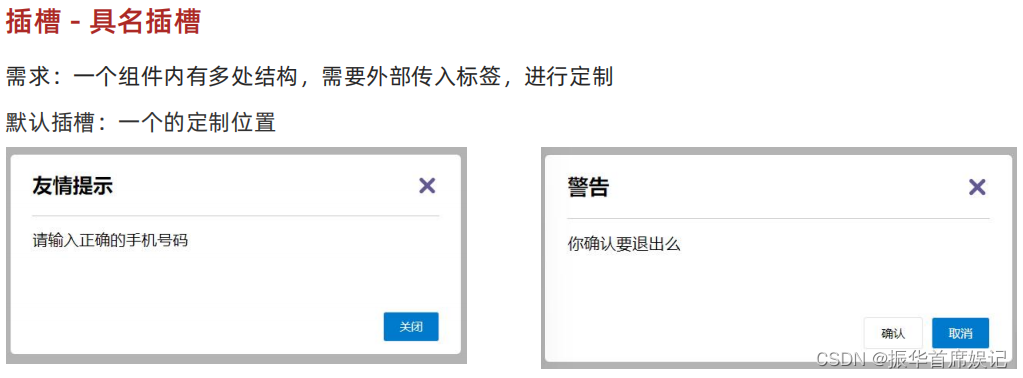
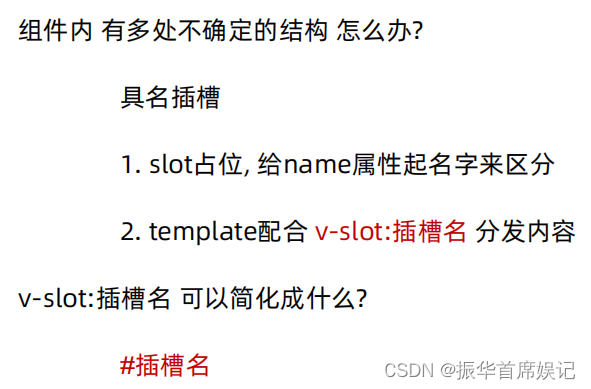
具名插槽
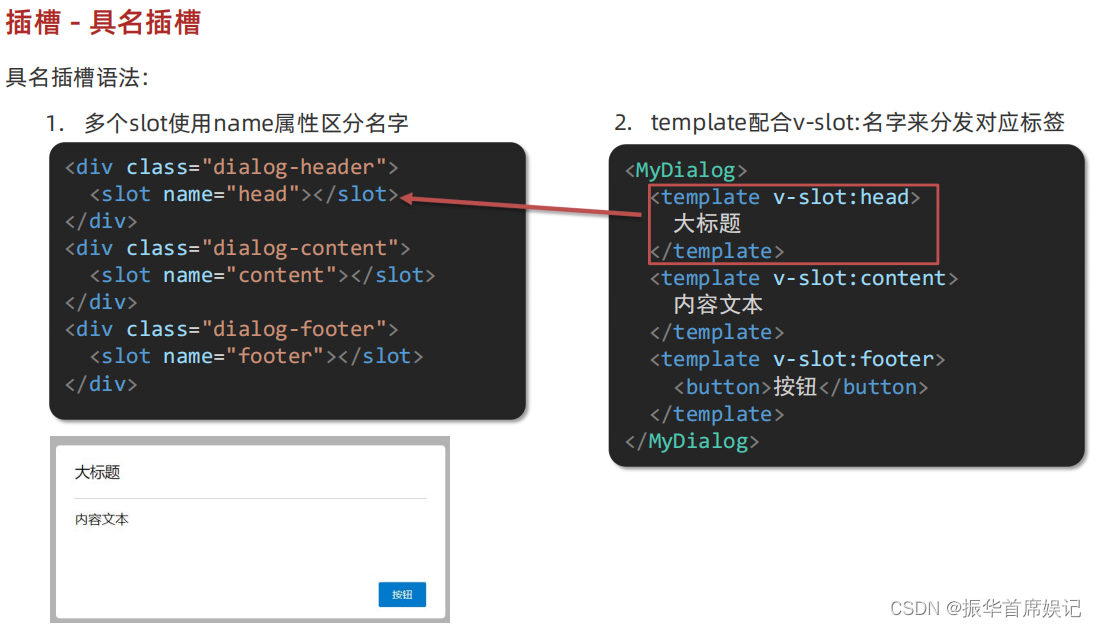
<template><div><!-- 2. 在使用组件时,在组建标签内填入内容 --><MyDialog><template v-slot:head><div>我是大标题</div></template><template v-slot:content><div>我是内容</div></template><template v-slot:footer><button>确认</button><button>取消</button></template></MyDialog></div>
</template><script>
import MyDialog from "./components/MyDialog.vue"
export default {data() {return {}},components: {MyDialog,},
}
</script><style>
body {background-color: #b3b3b3;
}
</style>
<template><div class="dialog"><div class="dialog-header"><slot name="head"></slot></div><div class="dialog-content"><!-- 1. 在需要定制的>=位置,使用slot占位 --><!-- 往slot标签内部,编写内容,可以作为后被内容 --><slot name="content"></slot></div><div class="dialog-footer"><slot name="footer"></slot></div></div>
</template><script>
export default {data () {return {}}
}
</script><style scoped>
* {margin: 0;padding: 0;
}
.dialog {width: 470px;height: 230px;padding: 0 25px;background-color: #ffffff;margin: 40px auto;border-radius: 5px;
}
.dialog-header {height: 70px;line-height: 70px;font-size: 20px;border-bottom: 1px solid #ccc;position: relative;
}
.dialog-header .close {position: absolute;right: 0px;top: 0px;cursor: pointer;
}
.dialog-content {height: 80px;font-size: 18px;padding: 15px 0;
}
.dialog-footer {display: flex;justify-content: flex-end;
}
.dialog-footer button {width: 65px;height: 35px;background-color: #ffffff;border: 1px solid #e1e3e9;cursor: pointer;outline: none;margin-left: 10px;border-radius: 3px;
}
.dialog-footer button:last-child {background-color: #007acc;color: #fff;
}
</style>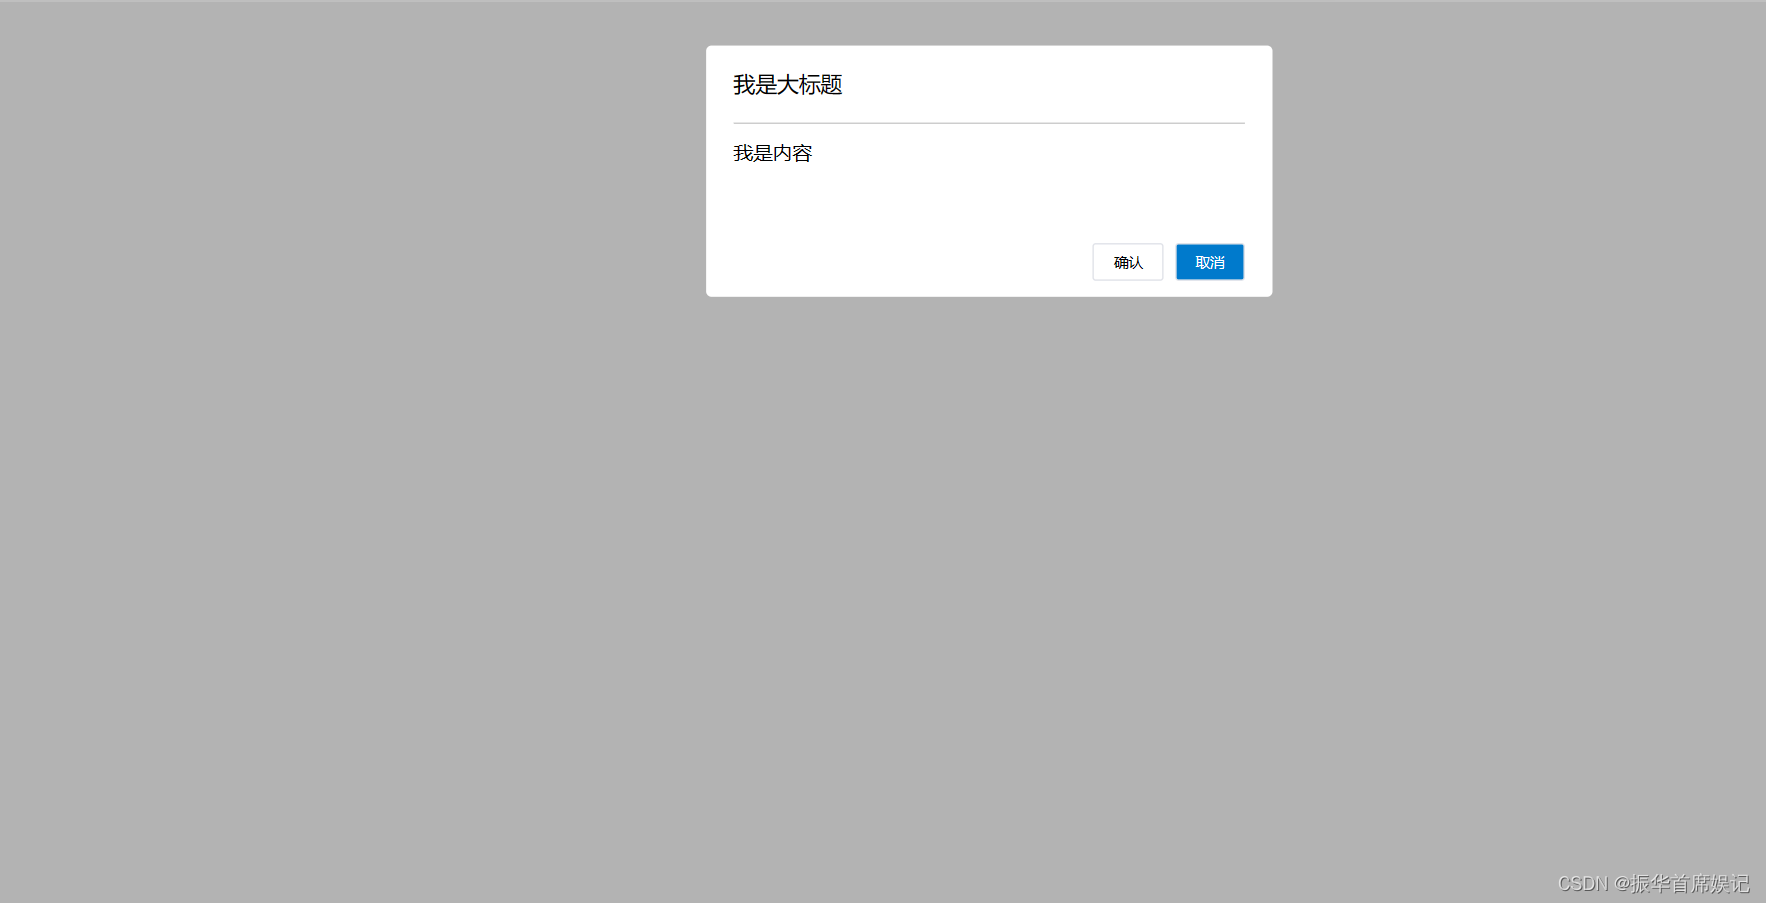

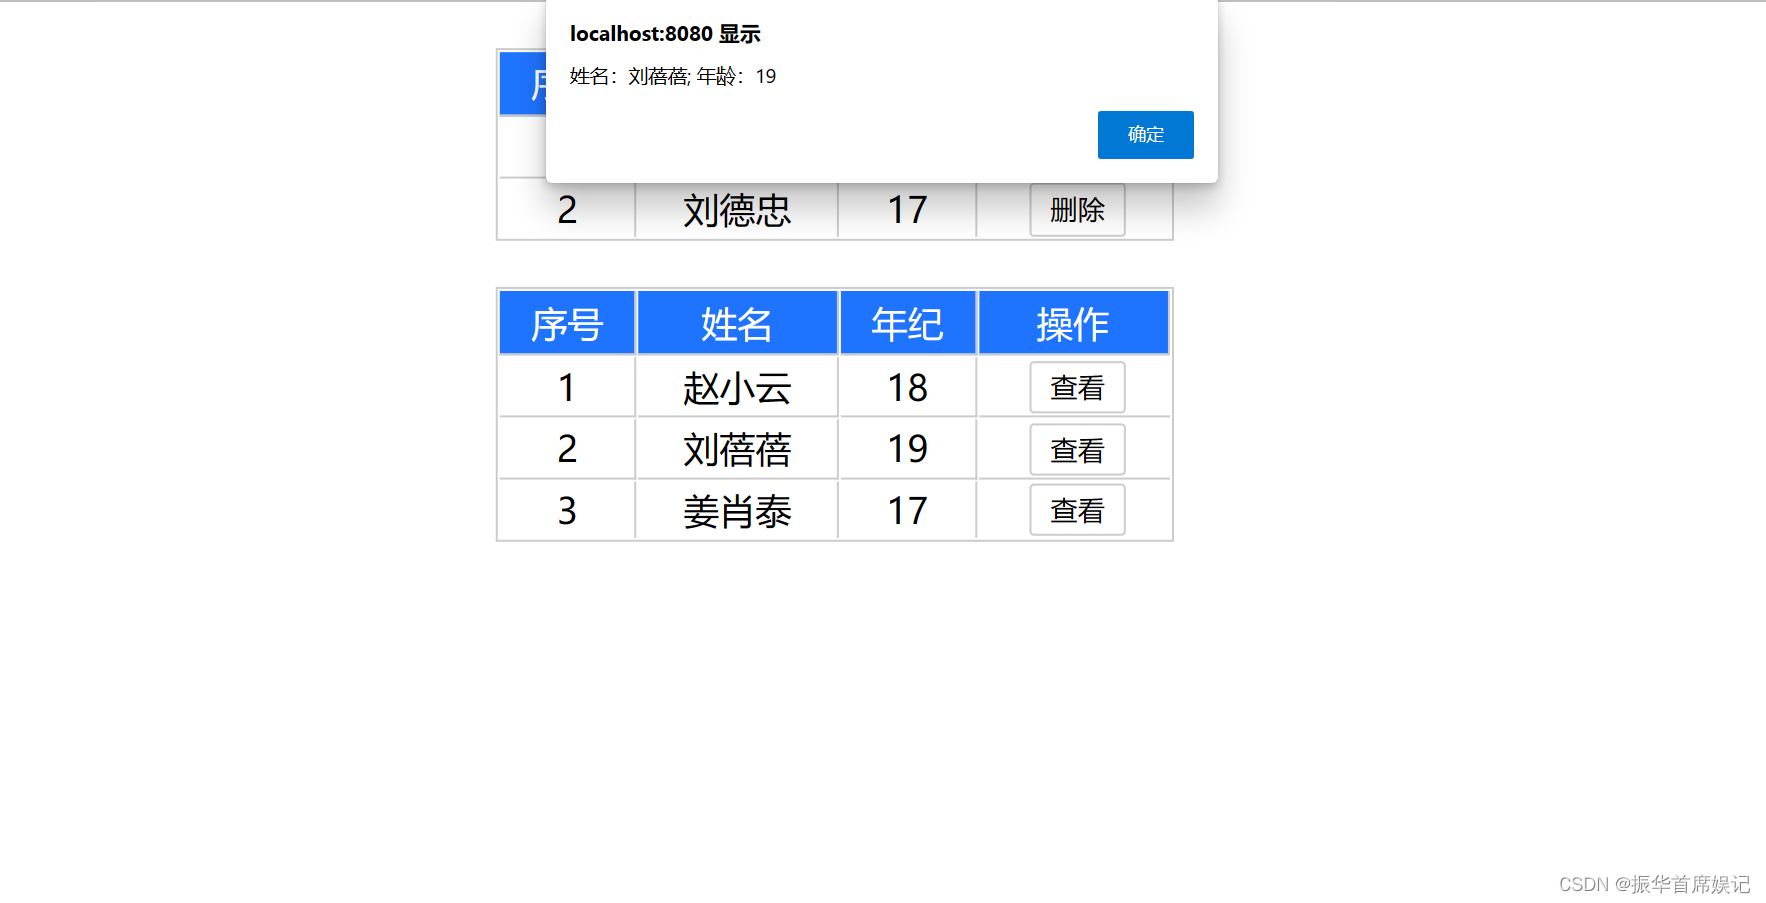
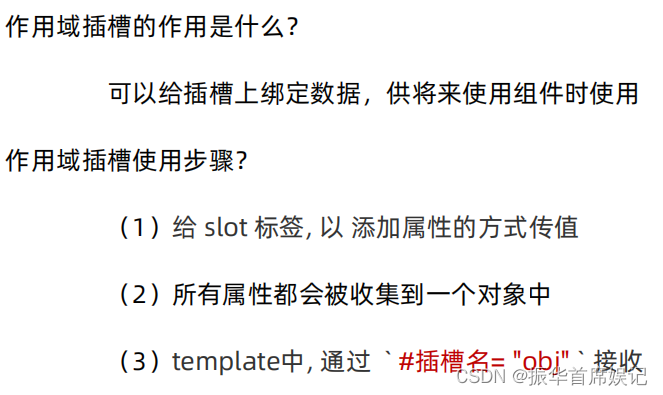
作用域插槽
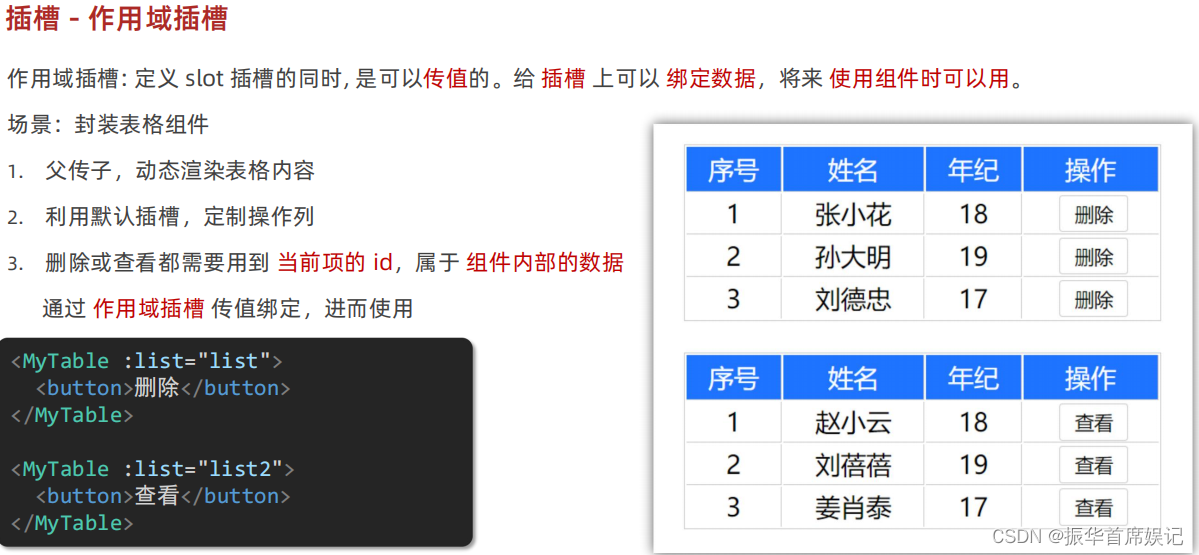
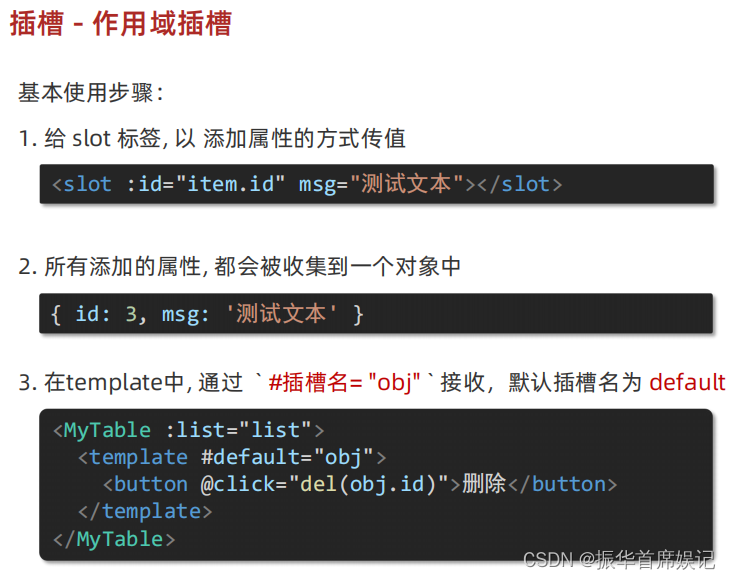
<template><div><MyTable :data="list"><!-- 通过template #插槽名="变量名" 接收 --><template #default="obj"><button @click="del(obj.row.id)">删除</button></template></MyTable><MyTable :data="list2"><template #default="{row}"><button @click="show(row)">查看</button></template></MyTable></div>
</template><script>
import MyTable from "./components/MyTable.vue";
export default {data() {return {list: [{ id: 1, name: "张小花", age: 18 },{ id: 2, name: "孙大明", age: 19 },{ id: 3, name: "刘德忠", age: 17 },],list2: [{ id: 1, name: "赵小云", age: 18 },{ id: 2, name: "刘蓓蓓", age: 19 },{ id: 3, name: "姜肖泰", age: 17 },],};},methods: {del(id) {this.list = this.list.filter((item) => item.id !== id);},show(row) {alert(`姓名:${row.name}; 年龄:${row.age}`)}},components: {MyTable,},
};
</script><template><table class="my-table"><thead><tr><th>序号</th><th>姓名</th><th>年纪</th><th>操作</th></tr></thead><tbody><tr v-for="(item,index) in data" :key="item.id"><td>{{ index+1 }}</td><td>{{ item.name }}</td><td>{{ item.age }}</td><td><!-- 给slot标签,添加属性的方式传值 --><slot :row="item" msg="测试文本"></slot><!-- 将所有属性,添加到一个对象中 --><!-- {row:{ id:2,name:'孙大明',age:19},msg:'测试文本'}--></td></tr></tbody></table>
</template><script>
export default {props: {data: Array,},
}
</script><style scoped>
.my-table {width: 450px;text-align: center;border: 1px solid #ccc;font-size: 24px;margin: 30px auto;
}
.my-table thead {background-color: #1f74ff;color: #fff;
}
.my-table thead th {font-weight: normal;
}
.my-table thead tr {line-height: 40px;
}
.my-table th,
.my-table td {border-bottom: 1px solid #ccc;border-right: 1px solid #ccc;
}
.my-table td:last-child {border-right: none;
}
.my-table tr:last-child td {border-bottom: none;
}
.my-table button {width: 65px;height: 35px;font-size: 18px;border: 1px solid #ccc;outline: none;border-radius: 3px;cursor: pointer;background-color: #ffffff;margin-left: 5px;
}
</style>
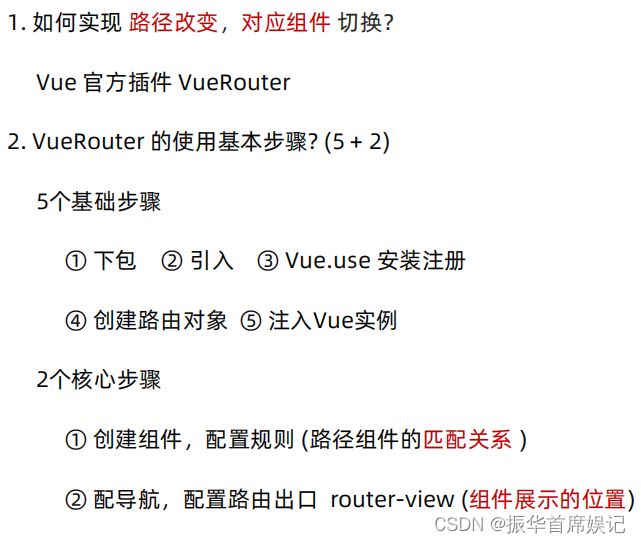
路由入门
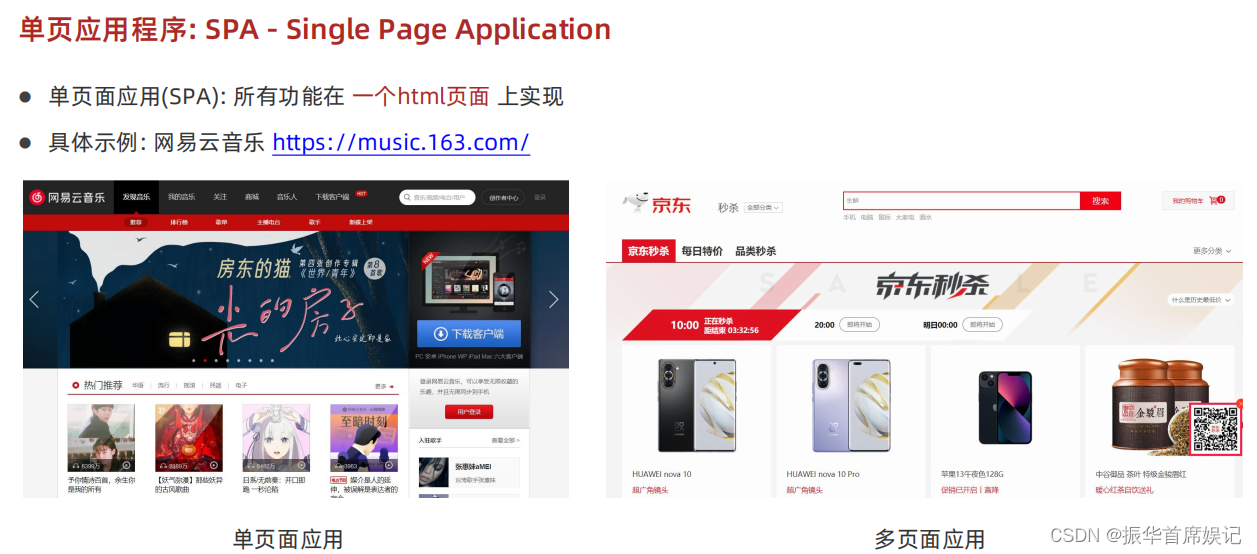
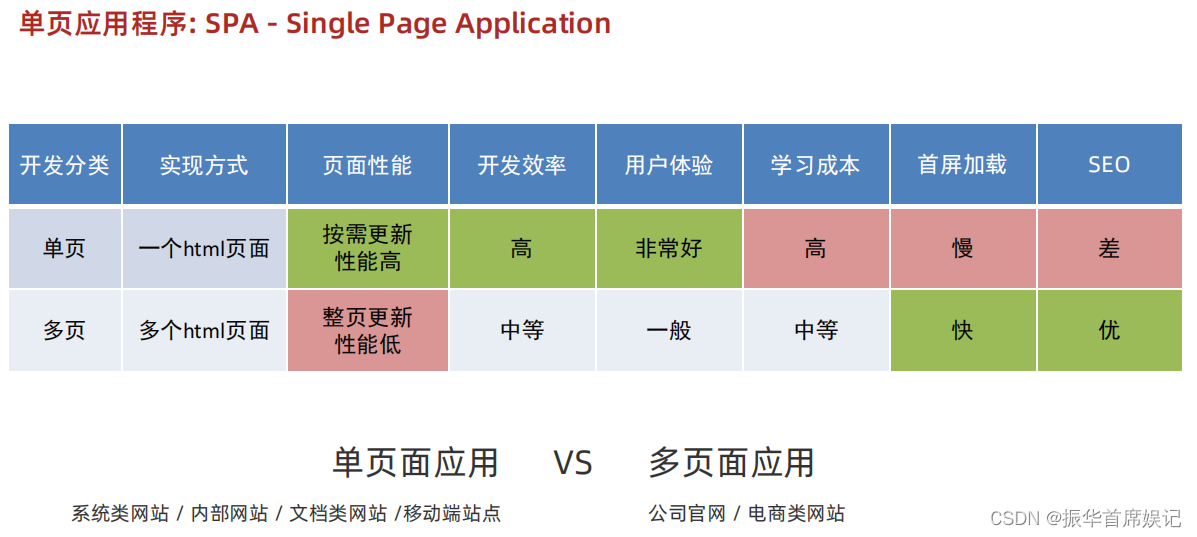
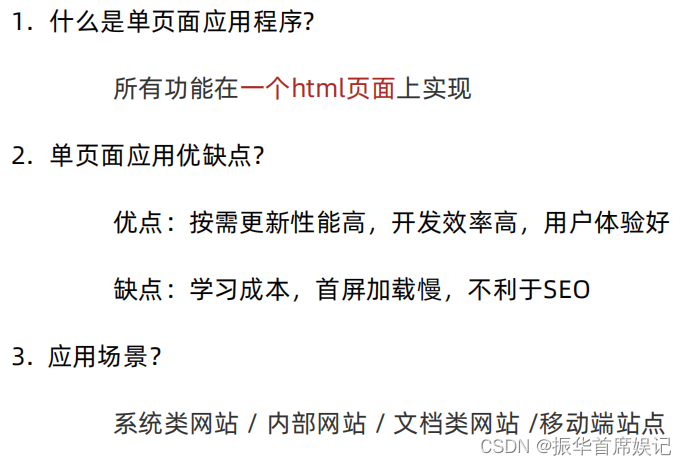
单页应用程序: SPA - Single Page Application
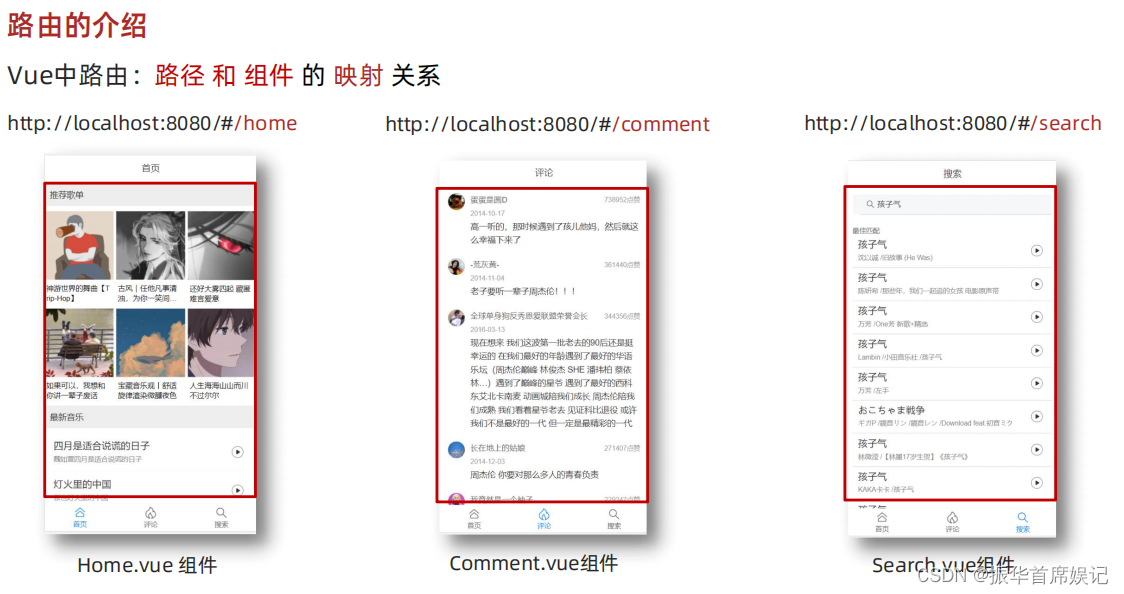
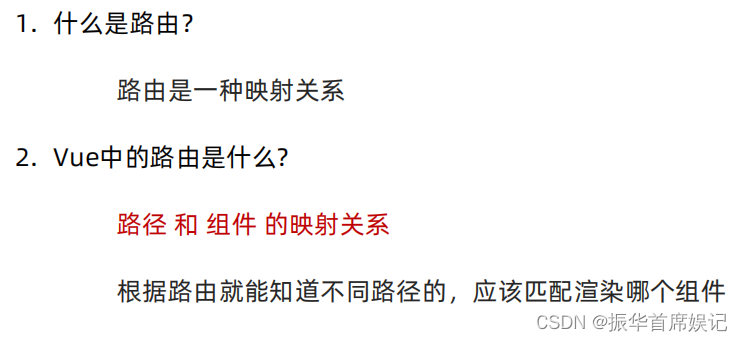
路由的介绍
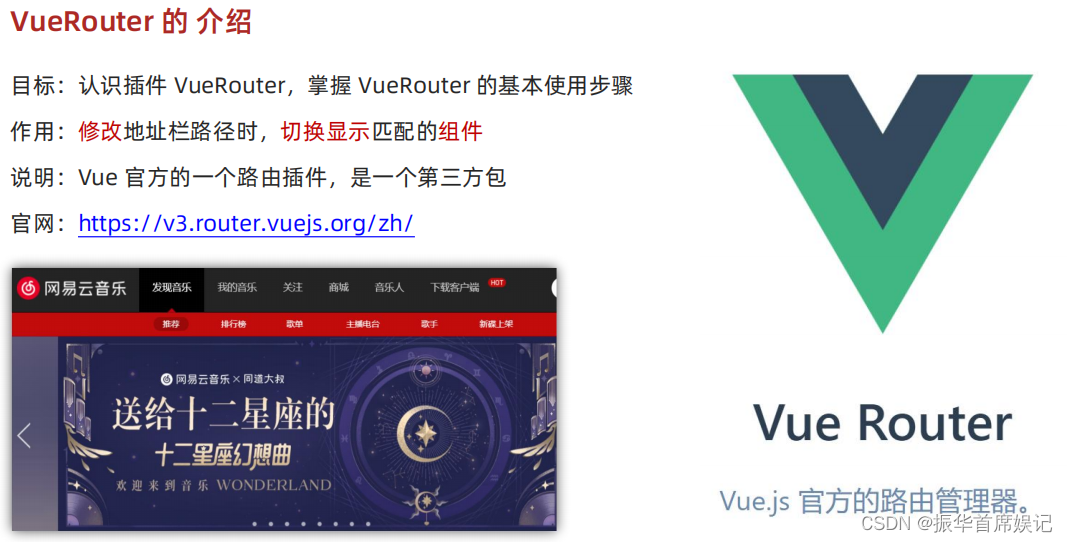
VueRouter 的 介绍
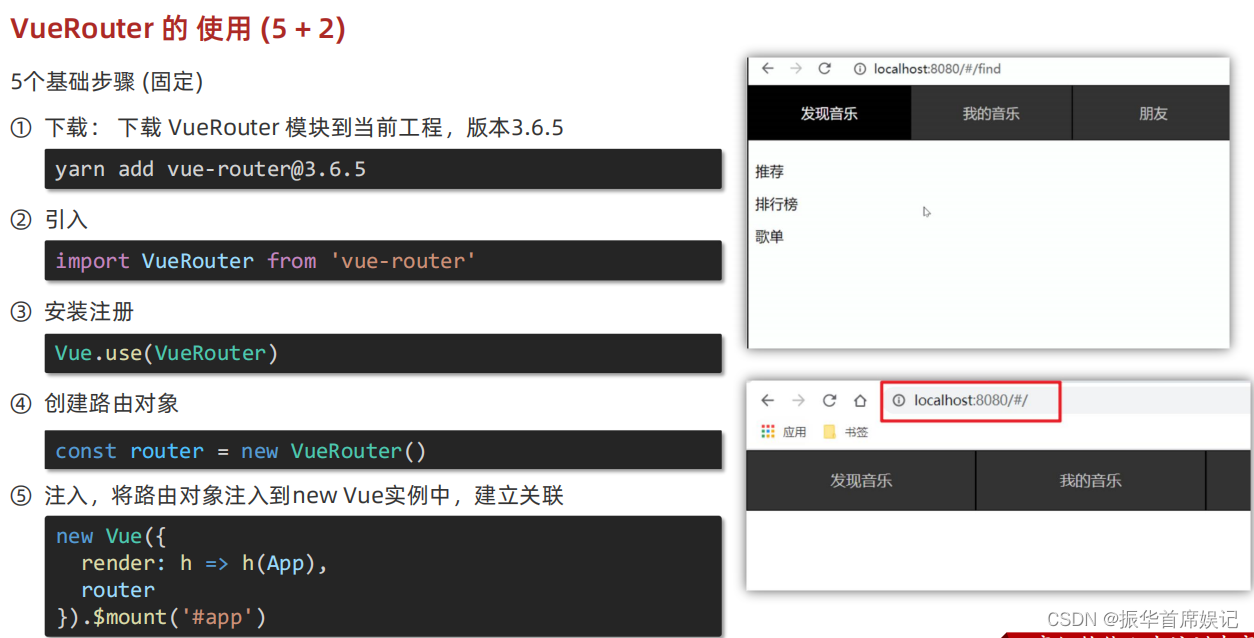
//main.js
import Vue from 'vue'
import App from './App.vue'// 路由的使用步骤 5 + 2
// 5个基础步骤
// 1. 下载 v3.6.5
// 2. 引入
// 3. 安装注册 Vue.use(Vue插件)
// 4. 创建路由对象
// 5. 注入到new Vue中,建立关联// 2个核心步骤
// 1. 建组件(views目录),配规则
// 2. 准备导航链接,配置路由出口(匹配的组件展示的位置)
import Find from './views/Find'
import My from './views/My'
import Friend from './views/Friend'
import VueRouter from 'vue-router'
Vue.use(VueRouter) // VueRouter插件初始化const router = new VueRouter({// routes 路由规则们// route  一条路由规则 { path: 路径, component: 组件 }routes: [{ path: '/find', component: Find },{ path: '/my', component: My },{ path: '/friend', component: Friend },]
})Vue.config.productionTip = falsenew Vue({render: h => h(App),router
}).$mount('#app')
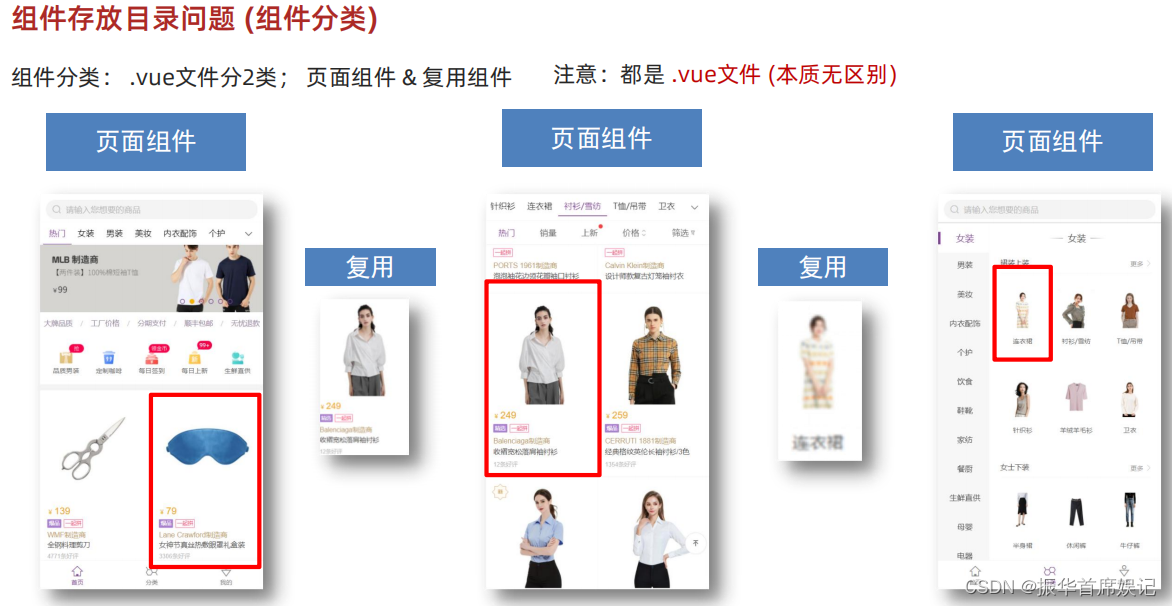
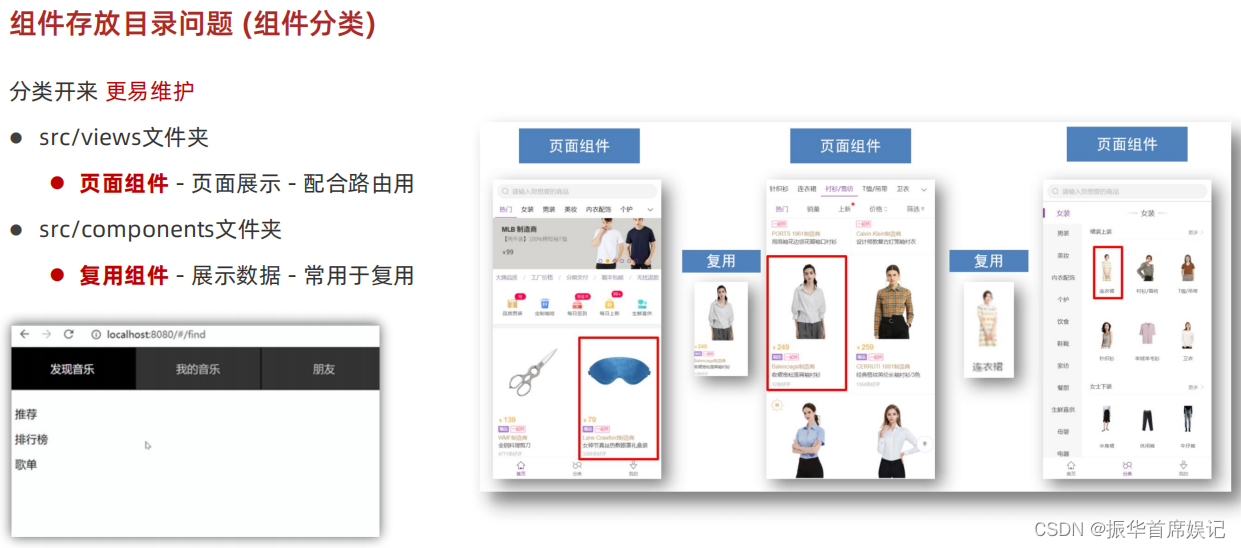
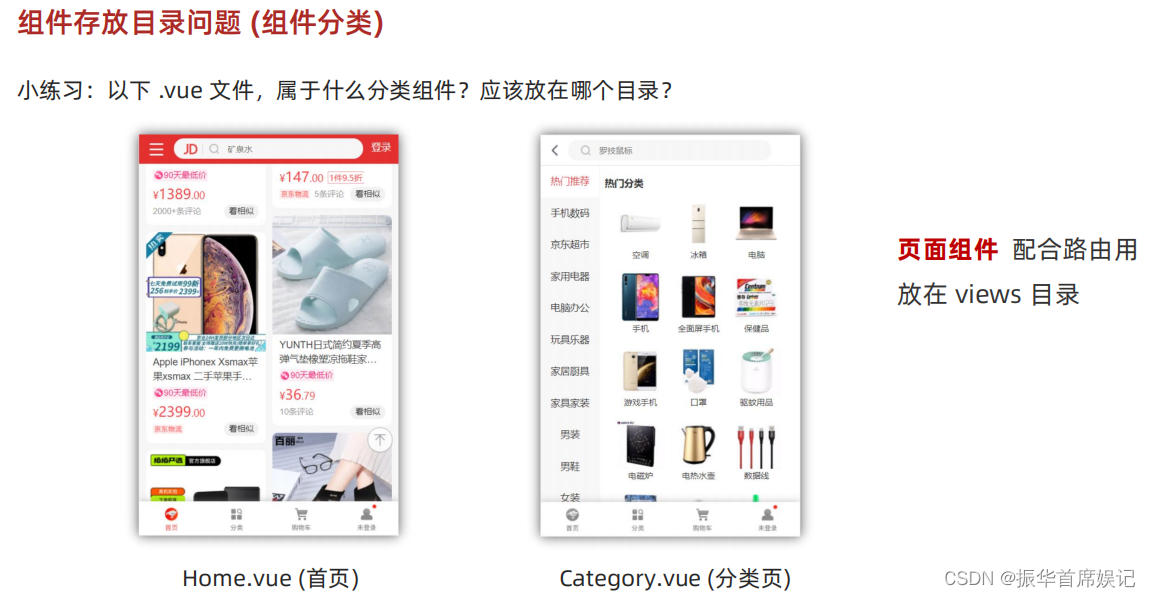
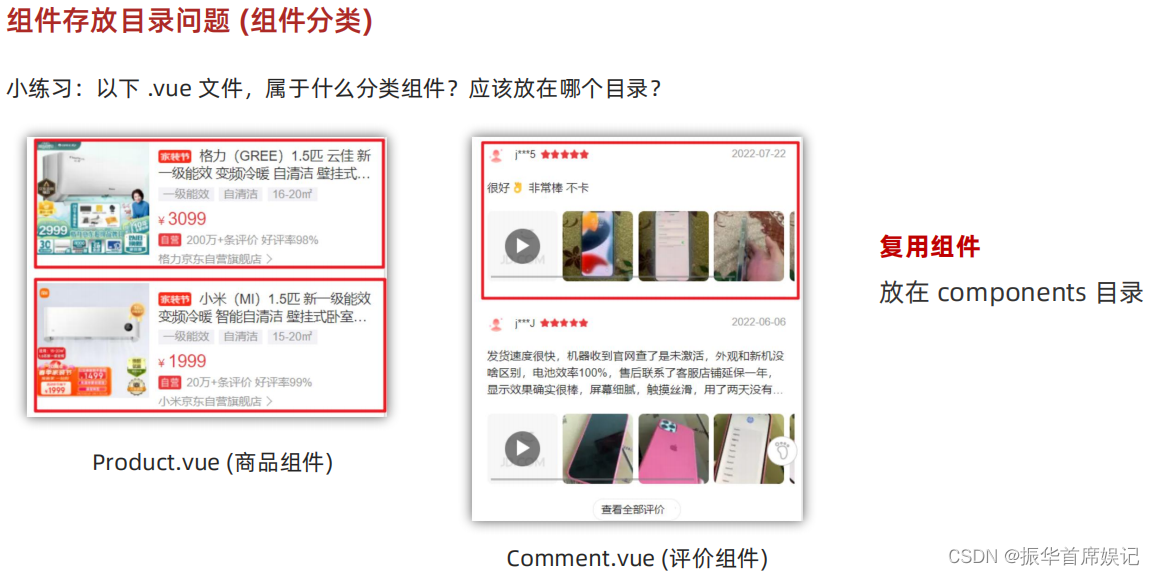
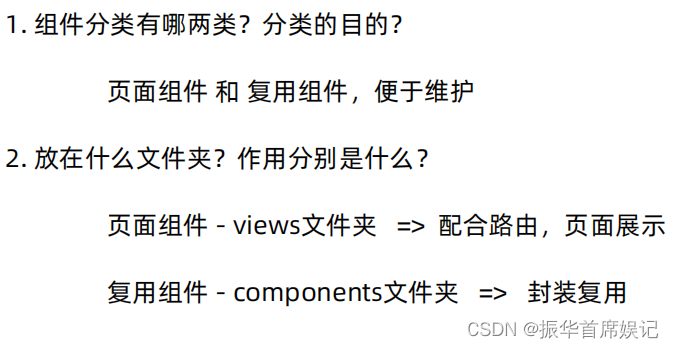
组件存放目录问题 (组件分类)
相关文章:
前端学习——Vue (Day5)
自定义指令 <template><div><h1>自定义指令</h1><input v-focus ref"inp" type"text" /></div> </template><script> export default {// mounted(){// this.$ref.inp.focus()// }// 2. 局部注册指令di…...
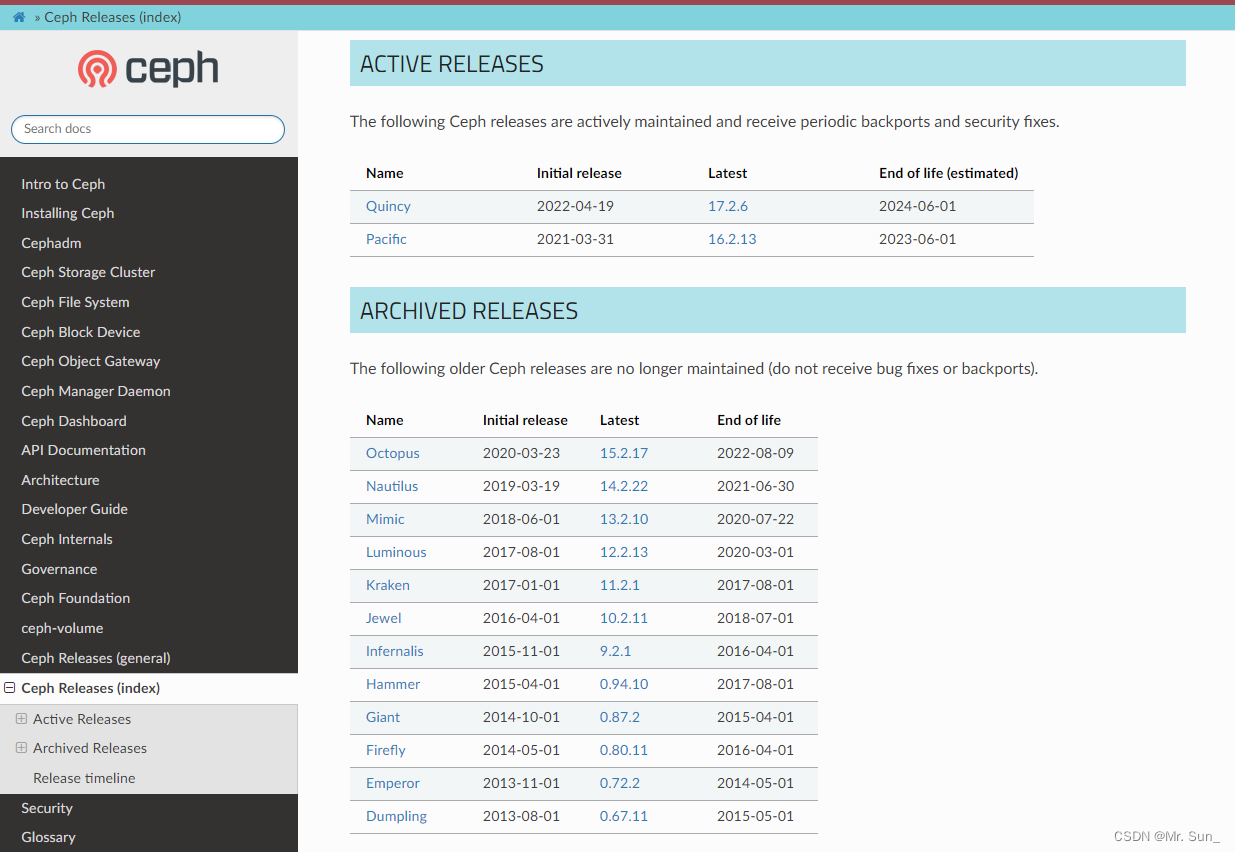
Ceph版本
每个Ceph的版本都有一个英文的名称和一个数字形式的版本编号 第一个 Ceph 版本编号是 0.1,发布于2008 年 1月。之后是0.2,0.3....多年来,版本号方案一直没变。 2015年 4月0.94.1 (Hammer 的第一个修正版) 发布后,为了避免 0.99 (以及 0.100…...

cspm是什么?考了有用吗?
CSPM是项目管理专业人员能力评价等级证书,相当于 PMP 的本土化,CSPM 相关问题大家都很关心,今天就给大家全面解答一下 CSPM到底是何方神圣? 文章主要是解答下面几个常见问题,其他问题可以留言或者私信咨询我哦~ 一、什…...
Java阶段五Day14
Java阶段五Day14 文章目录 Java阶段五Day14分布式事务整合demo案例中架构,代码关系发送半消息本地事务完成检查补偿购物车消费 鲁班周边环境调整前端启动介绍启动前端 直接启动的项目gateway(网关)login(登录注册)atta…...
【计算机网络】应用层协议 -- 安全的HTTPS协议
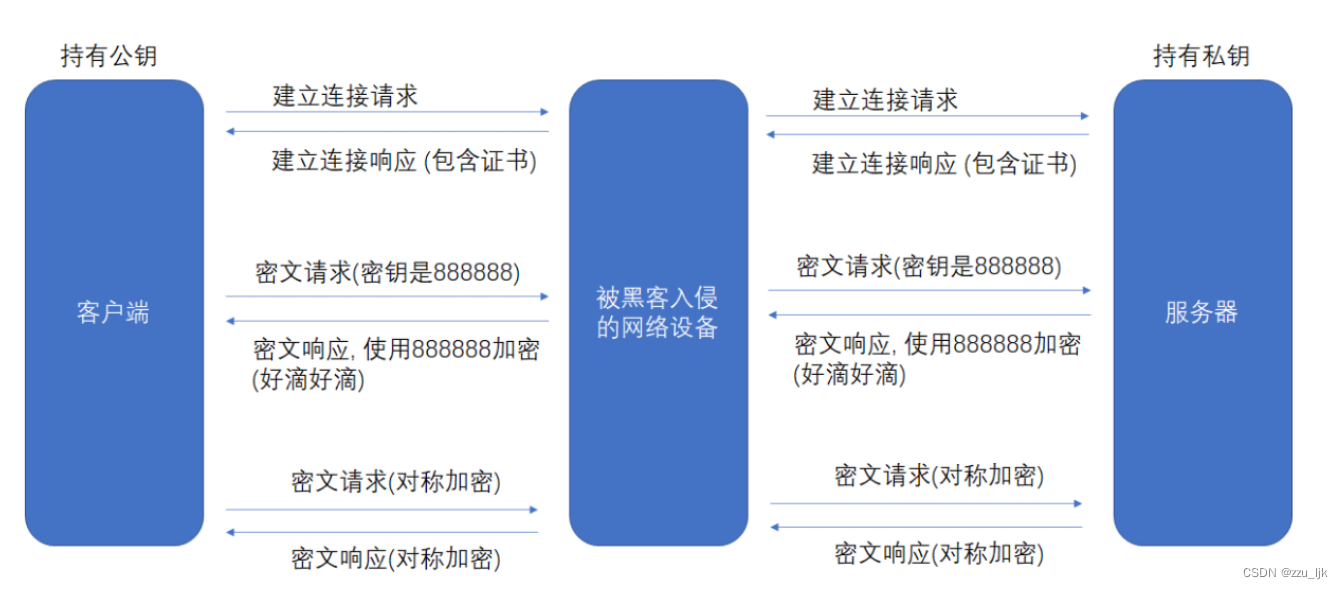
文章目录 1. 认识HTTPS2. 使用HTTPS加密的必要性3. 常见的加密方式3.1 对称加密3.2 非对称加密3.3 非对称加密对称加密 4. 引入CA证书4.1 CA认证4.2 数据签名4.3 非对称机密对称加密证书认证4.4 常见问题 5. 总结 1. 认识HTTPS HTTPS全称为 Hyper Text Tranfer Protocol over …...
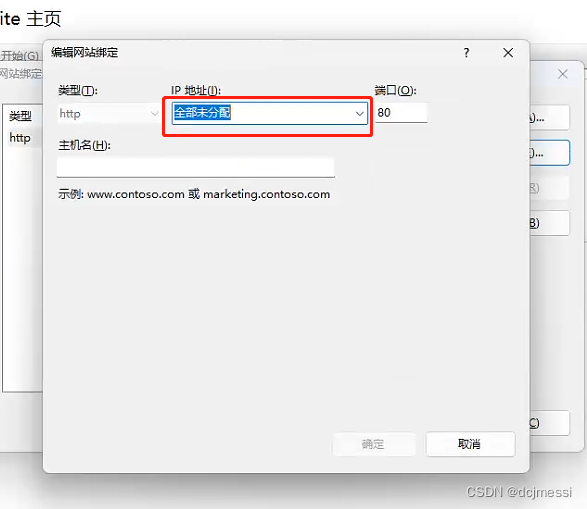
小程序通过ip+port+路径获取服务器中的图片
配置IIS 首先需要配置IIS。 打开控制面板,接下来的流程按下图所示。 安装好后,按“win”键,搜索IIS 选择一个ip地址,或手动填写,端口号按需更改...
(A-F))
Codeforces Round 888 (Div. 3)(A-F)
文章目录 ABCDEF A 题意: 就是有一个m步的楼梯。每一层都有k厘米高,现在A的身高是H,给了你n个人的身高问有多少个人与A站在不同层的楼梯高度相同。 思路: 我们只需要去枚举对于A来说每一层和他一样高(人的身高和楼…...
、多卷积核、全连接、池化)
【人工智能】深度神经网络、卷积神经网络(CNN)、多卷积核、全连接、池化
深度神经网络、卷积神经网络(CNN)、多卷积核、全连接、池化) 文章目录 深度神经网络、卷积神经网络(CNN)、多卷积核、全连接、池化)深度神经网络训练训练深度神经网络参数共享卷积神经网络(CNN)卷积多卷积核卷积全连接最大池化卷积+池化拉平向量激活函数优化小结深度神经…...

失去SSL证书,会对网站安全造成什么影响?
作为网络世界中的“身份证”,SSL证书可以在网络世界中证明你是一个真实可信的企业或个人网站,而不是一个钓鱼网站。且在网站的服务器上部署SSL证书后,可以使网站与访问者之间通过SSL协议建立安全的加密连接,确保在Web服务器和浏览…...
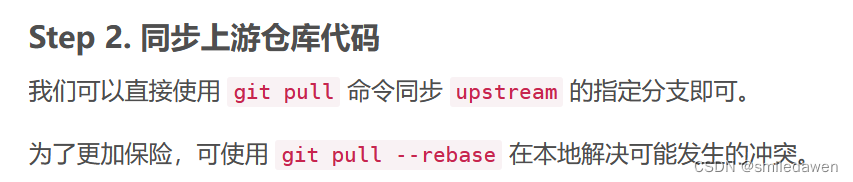
gitee中fork了其他仓库,如何在本地进行同步
GitHub 操作:同步 Fork 来的仓库(上游仓库)_sigmarising的博客-CSDN博客 1. 设置upstream 2. git pull --rebase 3. 然后再执行pull、push操作...
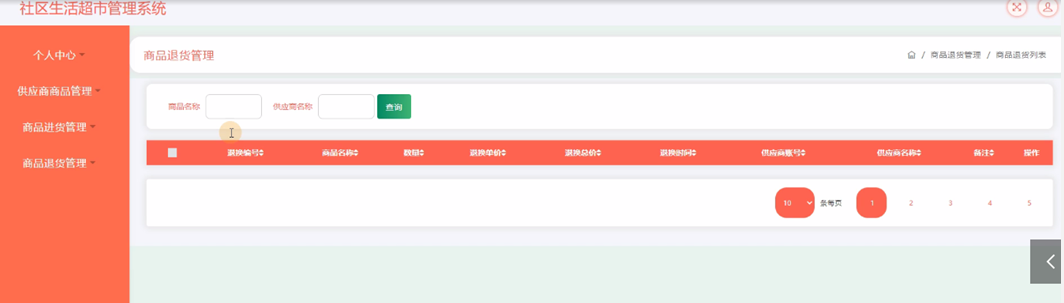
java项目之社区生活超市管理系统(ssm+mysql+jsp)
风定落花生,歌声逐流水,大家好我是风歌,混迹在java圈的辛苦码农。今天要和大家聊的是一款基于ssm的社区生活超市管理系统。技术交流和部署相关看文章末尾! 开发环境: 后端: 开发语言:Java 框…...
:C++头部封装)
WebGPU(七):C++头部封装
WebGPU(七):C头部封装 在前面的学习中,我们使用的都是原生态的WebGPU API,那是基于C语言的API,但是为了更高效的开发,我们可以使用一个基于C的库。 根据参考的教程,这个github库提供更加纤细的描述。它提…...

Linux 网络通信epoll详解( 10 ) -【Linux通信架构系列 】
系列文章目录 C技能系列 Linux通信架构系列 C高性能优化编程系列 深入理解软件架构设计系列 高级C并发线程编程 期待你的关注哦!!! 现在的一切都是为将来的梦想编织翅膀,让梦想在现实中展翅高飞。 Now everything is for the…...

java源码-List源码解析
Java中的List是一个接口,它定义了一组操作列表的方法。List接口的常见子类包括ArrayList、LinkedList和Vector等。 以下是Java中List接口及其常见方法的源码解析: 1. List接口定义 public interface List<E> extends Collection<E> { …...

Mybatis的动态SQL
动态 sql 是Mybatis的强⼤特性之⼀,能够完成动态的 sql 语句拼接。 动态 SQL 大大减少了编写代码的工作量,更体现了 MyBatis 的灵活性、高度可配置性和可维护性。 Mybatis里的动态标签主要有: <if><trim><where><set><forea…...
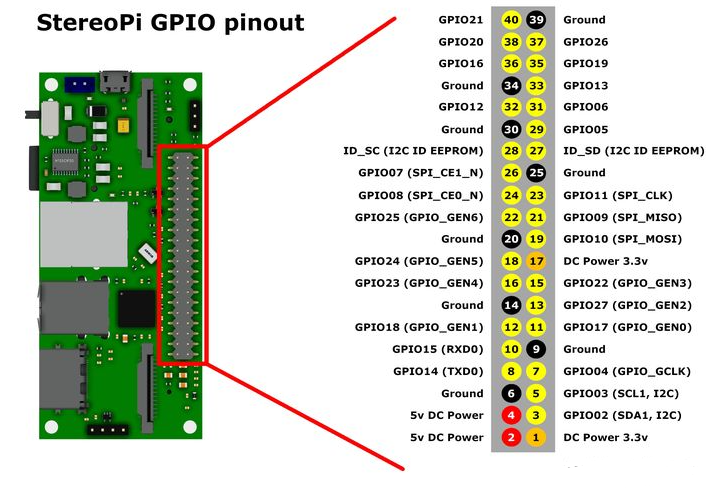
嵌入式系统中的GPIO控制:从理论到实践与高级应用
本文将探讨嵌入式系统中的GPIO(通用输入输出)控制,着重介绍GPIO的原理和基本用法。我们将使用一个实际的示例项目来演示如何通过编程配置和控制GPIO引脚。将基于ARM Cortex-M微控制器,并使用C语言进行编写。 GPIO是嵌入式系统中最常见且功能最强大的接口之一。它允许硬件工…...
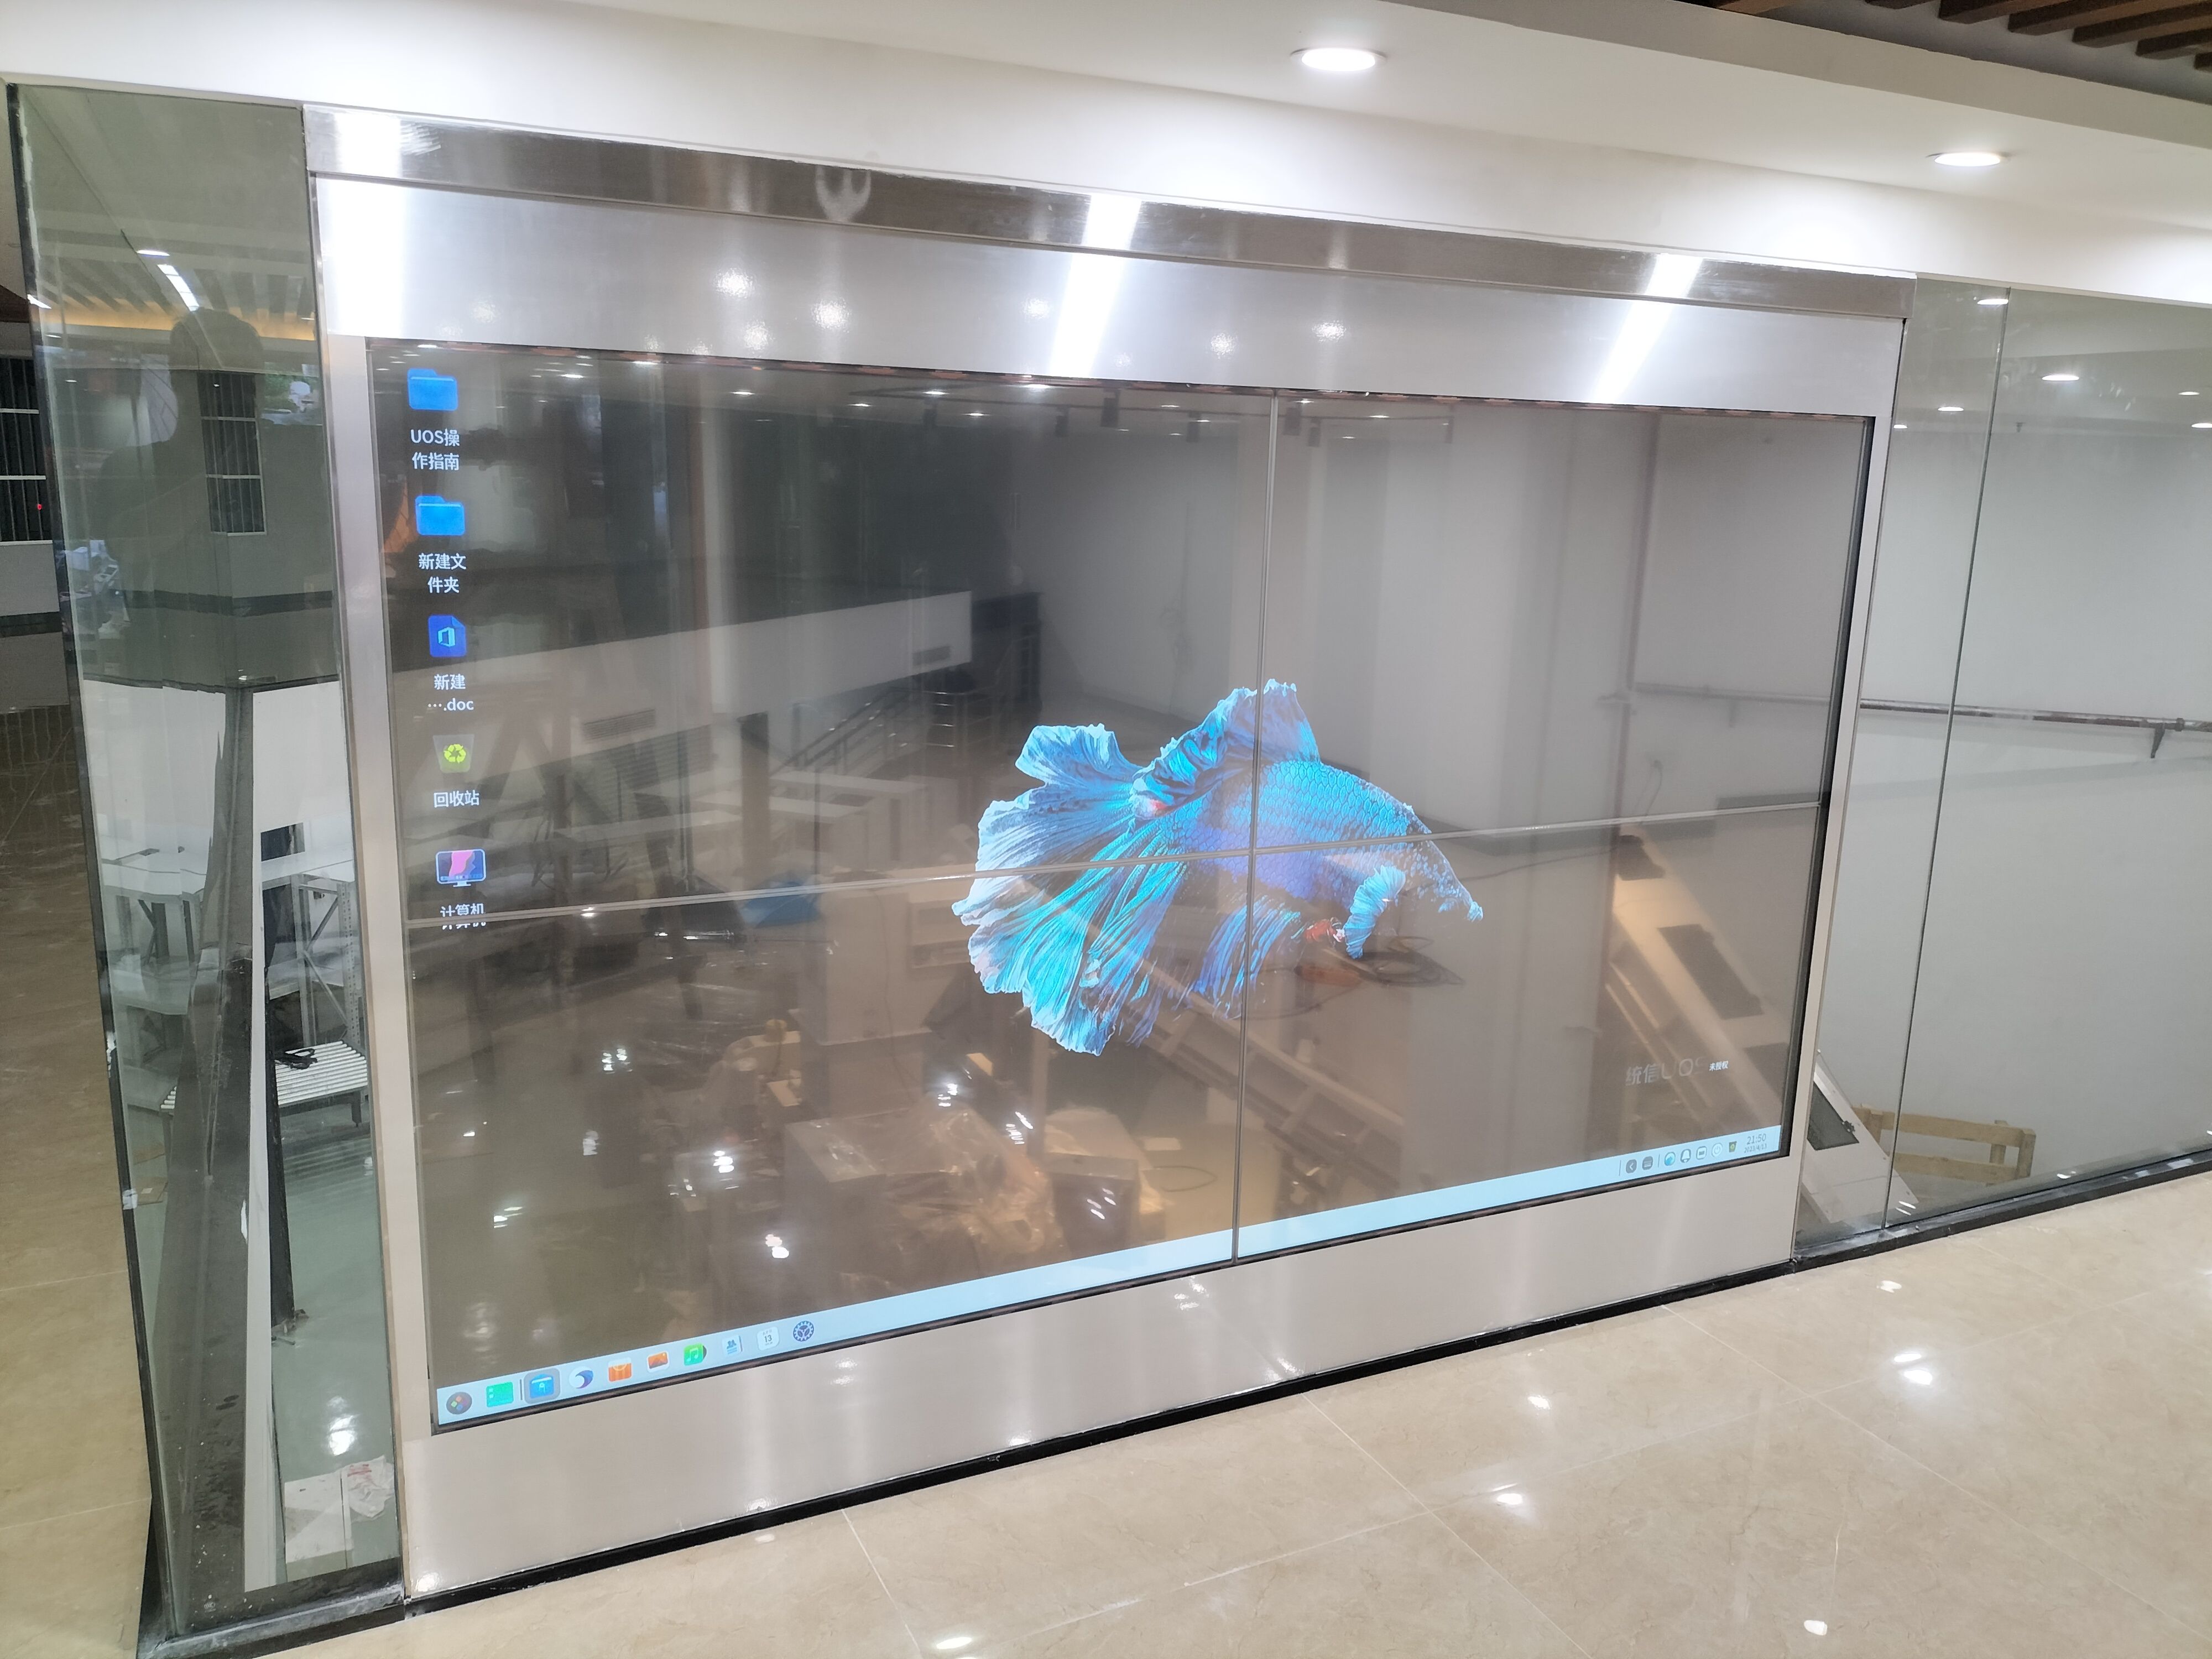
7D透明屏的市场应用广泛,在智能家居中有哪些应用表现?
7D透明屏是一种新型的显示技术,它能够实现透明度高达70%以上的显示效果。这种屏幕可以应用于各种领域,如商业广告、展览展示、智能家居等,具有广阔的市场前景。 7D透明屏的工作原理是利用光学投影技术,将图像通过透明屏幕投射出来…...

[游戏开发][Unity] 打包Xcode工程模拟器+真机调试
苹果开发者账号 账号分三类,个人,公司,企业,价格99/99/299美金 新注册账号的基本设置按网上的教程来就行 我们公司是企业账号,我的苹果开发者账号是公司一个User 下面讲述一下一个全新的打包机处理流程 首先是要把…...

python 添加环境变量
1 查看是否设置环境变量 和 使用的python在哪里安装 import sys import os# 获取Python的安装目录 import os import syspython_path sys.executable # 这个是python.exe的路径python_path os.path.dirname(python_path) print("Python安装路径:", python_path)# …...
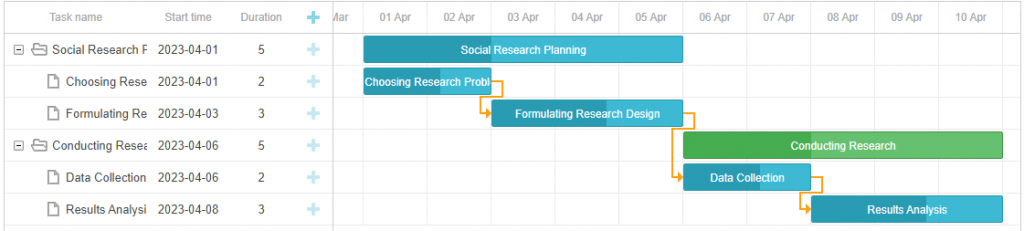
如何用DHTMLX组件为Web应用创建甘特图?(一)
dhtmlxGantt是用于跨浏览器和跨平台应用程序的功能齐全的Gantt图表。可满足项目管理应用程序的所有需求,是最完善的甘特图图表库。甘特图仍然是项目管理应用程序中最需要的工具之一,DHTMLX Gantt组件提供了能提升研发甘特图功能所需的重要工具。 在这篇…...

Qwen3-Coder-30B-A3B-Instruct-FP8:终极代码模型对比分析指南
Qwen3-Coder-30B-A3B-Instruct-FP8:终极代码模型对比分析指南 【免费下载链接】Qwen3-Coder-30B-A3B-Instruct-FP8 项目地址: https://ai.gitcode.com/hf_mirrors/Qwen/Qwen3-Coder-30B-A3B-Instruct-FP8 在当今AI代码生成领域,Qwen3-Coder-30B-…...
)
保姆级教程:在CentOS 7上用达梦8搭建DCA练习环境(附ulimit、VNC、ODBC全配置)
达梦8 DCA认证实战:CentOS 7环境搭建与调优全指南 在国产数据库技术快速发展的今天,达梦数据库作为核心产品之一,其DCA认证已成为众多从业者提升竞争力的重要选择。与理论为主的认证不同,DCA更注重实际操作能力,而一个…...

Rydberg原子量子门实现原理与优化技术
1. Rydberg原子平台中的量子门实现基础1.1 Rydberg原子特性与量子计算优势Rydberg原子是指外层电子被激发到高主量子数能级的原子态,这类原子具有三个关键特性使其成为量子计算的理想平台:强偶极-偶极相互作用:当两个原子同时处于Rydberg态时…...

为什么视频代剪辑会影响你的内容传播效果
为什么你精心拍的视频,发出去却没人看? 你有没有过这样的经历:花了一整天拍Vlog,素材画质高清、内容真实,可一剪出来就显得平淡无奇,点赞寥寥?或者婚礼当天感动全场,回看成片却像流水…...

航空航天为什么离不开高强镁合金?国产替代到哪一步了
飞机每减重一千克,全年大约节省四千两百美元的燃油费用——这是航空工程师熟悉的经验值。在商业航空领域,这个数字还只是财务账;在战斗机、导弹和卫星的世界里,减重的收益被换算成更远的航程、更大的载荷、更高的机动性࿰…...

使用TaotokenCLI工具一键配置开发环境中的API密钥
🚀 告别海外账号与网络限制!稳定直连全球优质大模型,限时半价接入中。 👉 点击领取海量免费额度 使用Taotoken CLI工具一键配置开发环境中的API密钥 在团队协作或个人开发中,为每个项目或成员手动配置大模型API密钥和…...

AI写的论文双率如何压到20%以下?这几款工具实测有效
毕业季、投稿季用AI写论文已经成为不少人的高效选择,但查重率飘红、AIGC疑似率超标两大问题,让很多人犯了难。2026年学术检测标准持续收紧,知网、维普及主流AIGC检测系统同步上线双检规则,两项指标均控制在20%以下才符合基本提交要…...

WarcraftHelper:魔兽争霸III现代兼容性问题的终极解决方案指南
WarcraftHelper:魔兽争霸III现代兼容性问题的终极解决方案指南 【免费下载链接】WarcraftHelper Warcraft III Helper , support 1.20e, 1.24e, 1.26a, 1.27a, 1.27b 项目地址: https://gitcode.com/gh_mirrors/wa/WarcraftHelper 魔兽争霸III作为经典即时战…...

基于ATtiny84的智能冰箱监控器:低功耗温度与门状态监测方案
1. 项目概述:一个装在树莓派盒子里的智能冰箱管家如果你家里有台老冰箱,或者对食物储存温度特别在意,总担心冰箱门没关严或者突然断电导致内部升温,那么这个自己动手做的“冰箱看门狗”项目就太适合你了。它本质上是一个高度定制化…...
)
GIS工程应用记录(AI辅助编程)
问题的问题:语境坍缩“从各个角度提出问题,AI做出对应积极答复和修改,结果没有什么变化。”这,就是元问题最核心的症状。你尝试了所有你已知的“高级”协作手段,但就像重拳打在棉花上,AI永远在积极回应&…...