iOS开发-CAShapeLayer与UIBezierPath实现微信首页的下拉菜单效果
iOS开发-CAShapeLayer与UIBezierPath实现微信首页的下拉菜单效果
之前开发中遇到需要使用实现微信首页的下拉菜单效果。用到了CAShapeLayer与UIBezierPath绘制菜单外框。

一、效果图

二、CAShapeLayer与UIBezierPath
2.1、CAShapeLayer是什么?
CAShapeLayer继承自CALayer,可使用CALayer的所有属性
CAShapeLayer需要和UIBezierPath绘制图形。
创建shapeLayer
// 创建 shapeLayer
CAShapeLayer *shapeLayer = [[CAShapeLayer alloc]init];
[self.view.layer addSublayer:shapeLayer];
shapeLayer.path = path.CGPath;
shapeLayer.fillColor = [UIColor clearColor].CGColor;
shapeLayer.strokeColor = [UIColor blackColor].CGColor;
shapeLayer.lineWidth = 5;
2.2、UIBezierPath是什么?
UIBezierPath即贝塞尔曲线
UIBezierPath 类允许你在自定义的 View 中绘制和渲染由直线和曲线组成的路径
+ (instancetype)bezierPath;
+ (instancetype)bezierPathWithRect:(CGRect)rect;
+ (instancetype)bezierPathWithOvalInRect:(CGRect)rect;
+ (instancetype)bezierPathWithRoundedRect:(CGRect)rect cornerRadius:(CGFloat)cornerRadius; // rounds all corners with the same horizontal and vertical radius
+ (instancetype)bezierPathWithRoundedRect:(CGRect)rect byRoundingCorners:(UIRectCorner)corners cornerRadii:(CGSize)cornerRadii;
+ (instancetype)bezierPathWithArcCenter:(CGPoint)center radius:(CGFloat)radius startAngle:(CGFloat)startAngle endAngle:(CGFloat)endAngle clockwise:(BOOL)clockwise;
+ (instancetype)bezierPathWithCGPath:(CGPathRef)CGPath;
三、绘制箭头
在弹出的菜单弹出时候会显示箭头,这里使用UIBezierPath和CAShapeLayer绘制箭头。
#pragma mark - DrawShapeLayer
- (void)drawShapeLayer {CGFloat startPointX = self.contentStartPoint.x;CGFloat startPointY = self.contentStartPoint.y;CGFloat width = CGRectGetWidth(self.contentBGImageView.frame);CGFloat height = CGRectGetHeight(self.contentBGImageView.frame);self.path = [UIBezierPath bezierPath]; // 创建路径[self.path moveToPoint:CGPointMake(startPointX, startPointY)]; // 设置起始点[self.path addLineToPoint:CGPointMake(startPointX + 5.0, kAnchorHeight)];[self.path addLineToPoint:CGPointMake(width - 5.0, kAnchorHeight)];[self.path addArcWithCenter:CGPointMake(width - 5.0, kAnchorHeight + 5.0) radius:5 startAngle:KCP*3/2 endAngle:2*KCP clockwise:YES]; // 绘制一个圆弧[self.path addLineToPoint:CGPointMake(width, height - 5.0)];[self.path addArcWithCenter:CGPointMake(width - 5.0, height - 5.0) radius:5 startAngle:0 endAngle:KCP/2 clockwise:YES]; // 绘制一个圆弧[self.path addLineToPoint:CGPointMake(5, height)];[self.path addArcWithCenter:CGPointMake(5.0, height-5.0) radius:5 startAngle:KCP/2 endAngle:KCP clockwise:YES]; // 绘制一个圆弧[self.path addLineToPoint:CGPointMake(0.0, kAnchorHeight + 5.0)];[self.path addArcWithCenter:CGPointMake(5, kAnchorHeight + 5) radius:5 startAngle:KCP endAngle:KCP*3/2 clockwise:YES]; // 绘制一个圆弧[self.path addLineToPoint:CGPointMake(startPointX - 5.0, kAnchorHeight)];[self.path addLineToPoint:CGPointMake(startPointX, startPointY)];self.path.lineWidth     = 2.f;self.path.lineCapStyle  = kCGLineCapRound;self.path.lineJoinStyle = kCGLineCapRound;[self.path closePath]; // 封闭未形成闭环的路径UIGraphicsBeginImageContext(self.contentBGImageView.bounds.size);[self.path stroke];UIGraphicsEndImageContext();self.shapeLayer.path = self.path.CGPath;
}
四、点击触摸的mask处理
当下拉菜单显示后,MaskView上实现touchesBegan可以点击触摸可以隐藏菜单,
INNoteZoneOptionMaskView.h
#import <UIKit/UIKit.h>
#import <Foundation/Foundation.h>@protocol INNoteZoneOptionMaskViewDelegate;
@interface INNoteZoneOptionMaskView : UIView@property (nonatomic, weak) id<INNoteZoneOptionMaskViewDelegate>maskDelegate;@end@protocol INNoteZoneOptionMaskViewDelegate <NSObject>- (void)optionMaskTouched;@end
INNoteZoneOptionMaskView.m
#import "INNoteZoneOptionMaskView.h"@implementation INNoteZoneOptionMaskView- (void)touchesBegan:(NSSet<UITouch *> *)touches withEvent:(nullable UIEvent *)event {// 1.自己先处理事件...if (self.maskDelegate && [self.maskDelegate respondsToSelector:@selector(optionMaskTouched)]) {[self.maskDelegate optionMaskTouched];}// 2.再调用系统的默认做法,再把事件交给上一个响应者处理[super touchesBegan:touches withEvent:event];
}@end
五、菜单显示
控件显示在keyWindow上
[[UIApplication sharedApplication].keyWindow addSubview:self];
显示动画
- (void)showOption {self.hidden = NO;CGPoint anchorPoint = CGPointMake(self.contentStartPoint.x/self.contentBGImageView.frame.size.width, 0.0);[self resetAnChorPoint:self.contentBGImageView anchorPoint:anchorPoint];self.contentBGImageView.transform = CGAffineTransformMakeScale(0.1, 0.1);[UIView animateWithDuration:0.25 animations:^{self.contentBGImageView.transform = CGAffineTransformMakeScale(1.0, 1.0);self.contentBGImageView.alpha = 1.0;} completion:^(BOOL finished) {}];
}
隐藏菜单
- (void)dismissOption {[UIView animateWithDuration:0.25 animations:^{self.contentBGImageView.transform = CGAffineTransformMakeScale(0.1, 0.1);self.contentBGImageView.alpha = 0.0;} completion:^(BOOL finished) {self.hidden = YES;[self removeFromSuperview];}];
}
五、菜单完整代码
菜单完整代码如下
INNoteZoneOptionView.h
#import <UIKit/UIKit.h>/**元素的item*/
typedef void(^OptionTouchBlock)(void);
@interface INNoteZoneOptionItem : NSObject@property (nonatomic, strong) UIImage *iconImage;
@property (nonatomic, strong) NSString *title;
@property (nonatomic, copy) OptionTouchBlock block;@end/**按钮控件*/
@interface INNoteZoneOptionButton : UIControl@property (nonatomic, strong) UIImage *iconImage;
@property (nonatomic, strong) NSString *title;
@property (nonatomic, assign) BOOL showLine;
@property (nonatomic, strong) INNoteZoneOptionItem *item;@end/**点击➕号的选项操作*/
@interface INNoteZoneOptionView : UIView- (instancetype)initWithFrame:(CGRect)frame anchorPoint:(CGPoint)anchorPoint items:(NSArray *)items;- (void)showOption;- (void)dismissOption;@end
INNoteZoneOptionView.m
#import "INNoteZoneOptionView.h"
#import "UIColor+Addition.h"
#import "UIImageView+WebCache.h"
#import "UIImage+YYAdd.h"
#import "INNoteZoneOptionMaskView.h"#define KCP 3.1415926static CGFloat kOpContentWidth = 130.0;
static CGFloat kOpItemHeight = 50.0;static CGFloat kOpIconSize = 16.0;
static CGFloat kOpMidPadding = 10.0;
static CGFloat kAnchorHeight = 5.0;static CGFloat kBtnMidPadding = 15.0;static CGFloat kBtnPadding = 2.0;
static CGFloat kLineHeight = 1.0;/**元素的item*/
@interface INNoteZoneOptionItem ()@end@implementation INNoteZoneOptionItem@end/**按钮控件*/
@interface INNoteZoneOptionButton ()@property (nonatomic, strong) UIImageView *bgImageView;
@property (nonatomic, strong) UIImageView *iconImageView;
@property (nonatomic, strong) UILabel *titleLabel;
@property (nonatomic, strong) UIImageView *lineImageView;@end@implementation INNoteZoneOptionButton- (instancetype)initWithFrame:(CGRect)frame
{self = [super initWithFrame:frame];if (self) {[self addSubview:self.bgImageView];[self.bgImageView addSubview:self.iconImageView];[self.bgImageView addSubview:self.titleLabel];[self.bgImageView addSubview:self.lineImageView];self.showLine = NO;}return self;
}- (void)layoutSubviews {[super layoutSubviews];self.bgImageView.frame = self.bounds;self.iconImageView.frame = CGRectMake(kBtnMidPadding, (CGRectGetHeight(self.bounds) - kOpIconSize)/2, kOpIconSize, kOpIconSize);self.titleLabel.frame = CGRectMake(CGRectGetMaxX(self.iconImageView.frame) + kBtnMidPadding, 0.0, CGRectGetWidth(self.bgImageView.frame) - (CGRectGetMaxX(self.iconImageView.frame) + kBtnMidPadding*2), CGRectGetHeight(self.bounds));self.lineImageView.frame = CGRectMake(0.0, CGRectGetHeight(self.bgImageView.frame) - kLineHeight, CGRectGetWidth(self.bgImageView.frame), kLineHeight);
}- (void)setIconImage:(UIImage *)iconImage {_iconImage = iconImage;self.iconImageView.image = iconImage;[self setNeedsLayout];
}- (void)setTitle:(NSString *)title {_title = (title?title:@"");self.titleLabel.text = _title;[self setNeedsLayout];
}- (void)setShowLine:(BOOL)showLine {_showLine = showLine;self.lineImageView.hidden = !showLine;[self setNeedsLayout];
}- (void)setHighlighted:(BOOL)highlighted {[super setHighlighted:highlighted];if (highlighted) {self.bgImageView.backgroundColor = [UIColor colorWithHexString:@"f4f4f4"];} else {self.bgImageView.backgroundColor = [UIColor whiteColor];}
}#pragma mark - SETTER/GETTER
- (UIImageView *)iconImageView {if (!_iconImageView) {_iconImageView = [[UIImageView alloc] initWithFrame:CGRectZero];_iconImageView.contentMode = UIViewContentModeScaleAspectFit;}return _iconImageView;
}- (UILabel *)titleLabel {if (!_titleLabel) {_titleLabel = [[UILabel alloc] initWithFrame:CGRectZero];_titleLabel.font = [UIFont boldSystemFontOfSize:14];_titleLabel.textColor = [UIColor colorWithHexString:@"131619"];_titleLabel.backgroundColor = [UIColor clearColor];}return _titleLabel;
}- (UIImageView *)bgImageView {if (!_bgImageView) {_bgImageView = [[UIImageView alloc] initWithFrame:CGRectZero];_bgImageView.backgroundColor = [UIColor whiteColor];_bgImageView.layer.cornerRadius = 2.0;_bgImageView.layer.masksToBounds = YES;}return _bgImageView;
}- (UIImageView *)lineImageView {if (!_lineImageView) {_lineImageView = [[UIImageView alloc] initWithFrame:CGRectZero];_lineImageView.backgroundColor = [UIColor colorWithHexString:@"f1f1f1"];}return _lineImageView;
}@end/**点击➕号的选项操作*/
@interface INNoteZoneOptionView ()<INNoteZoneOptionMaskViewDelegate>@property (nonatomic, strong) INNoteZoneOptionMaskView *maskBGView;
@property (nonatomic, strong) UIImageView *contentBGImageView;
@property (nonatomic, strong) CAShapeLayer *shapeLayer;
@property (nonatomic, strong) UIBezierPath *path;@property (nonatomic) CGPoint anchorPoint;
@property (nonatomic) CGPoint contentStartPoint;
@property (nonatomic, strong) NSArray *items;@end@implementation INNoteZoneOptionView- (instancetype)initWithFrame:(CGRect)frame anchorPoint:(CGPoint)anchorPoint items:(NSArray *)items {self = [super initWithFrame:frame];if (self) {self.anchorPoint = anchorPoint;self.items = items;[self addSubview:self.maskBGView];[self addSubview:self.contentBGImageView];[self.contentBGImageView.layer addSublayer:self.shapeLayer];[[UIApplication sharedApplication].keyWindow addSubview:self];self.frame = [UIScreen mainScreen].bounds;self.hidden = YES;[self layoutOptionSubviews];[self configContentPoint];[self drawShapeLayer];[self setupOptionButtons];}return self;
}- (void)configContentPoint {CGFloat scale = self.anchorPoint.x/self.frame.size.width;CGFloat contentWidth = CGRectGetWidth(self.contentBGImageView.frame);self.contentStartPoint = CGPointMake(scale*contentWidth - kOpMidPadding, 0.0);
}- (void)layoutOptionSubviews {self.maskBGView.frame = self.bounds;self.contentBGImageView.frame = CGRectMake(CGRectGetWidth(self.bounds) - kOpContentWidth - kOpMidPadding, self.anchorPoint.y, kOpContentWidth, self.items.count*kOpItemHeight + kAnchorHeight + 2*kBtnPadding);self.shapeLayer.frame = self.contentBGImageView.bounds;
}#pragma mark - Setup Buttons
- (void)setupOptionButtons {NSInteger index = 0;for (INNoteZoneOptionItem *item in self.items) {INNoteZoneOptionButton *button = [[INNoteZoneOptionButton alloc] initWithFrame:CGRectZero];button.frame = CGRectMake(kBtnPadding, kBtnPadding + kAnchorHeight + index*kOpItemHeight, CGRectGetWidth(self.contentBGImageView.frame) - 2*kBtnPadding, kOpItemHeight);button.iconImage = item.iconImage;button.title = item.title;button.item = item;[self.contentBGImageView addSubview:button];[button addTarget:self action:@selector(optionButtonAction:) forControlEvents:UIControlEventTouchUpInside];button.showLine = YES;if (index == self.items.count - 1) {button.showLine = NO;}index++;}
}- (void)optionButtonAction:(INNoteZoneOptionButton *)button {NSLog(@"点击栏目");if (button.item && button.item.block) {button.item.block();}
}#pragma mark - Show AND Dismiss
- (void)showOption {self.hidden = NO;CGPoint anchorPoint = CGPointMake(self.contentStartPoint.x/self.contentBGImageView.frame.size.width, 0.0);[self resetAnChorPoint:self.contentBGImageView anchorPoint:anchorPoint];self.contentBGImageView.transform = CGAffineTransformMakeScale(0.1, 0.1);[UIView animateWithDuration:0.25 animations:^{self.contentBGImageView.transform = CGAffineTransformMakeScale(1.0, 1.0);self.contentBGImageView.alpha = 1.0;} completion:^(BOOL finished) {}];
}- (void)dismissOption {[UIView animateWithDuration:0.25 animations:^{self.contentBGImageView.transform = CGAffineTransformMakeScale(0.1, 0.1);self.contentBGImageView.alpha = 0.0;} completion:^(BOOL finished) {self.hidden = YES;[self removeFromSuperview];}];
}#pragma mark - ResetAnChorPoint
/**设置动画图钉位置@param view subView*/
- (void)resetAnChorPoint:(UIView *)view anchorPoint:(CGPoint)anchorPoint {CGPoint oldAnchorPoint = view.layer.anchorPoint;view.layer.anchorPoint = anchorPoint;[view.layer setPosition:CGPointMake(view.layer.position.x + view.layer.bounds.size.width * (view.layer.anchorPoint.x - oldAnchorPoint.x), view.layer.position.y + view.layer.bounds.size.height * (view.layer.anchorPoint.y - oldAnchorPoint.y))];
}#pragma mark - INNoteZoneOptionMaskViewDelegate
- (void)optionMaskTouched {[self dismissOption];
}#pragma mark - SETTER/GETTER
- (INNoteZoneOptionMaskView *)maskBGView {if (!_maskBGView) {_maskBGView = [[INNoteZoneOptionMaskView alloc] initWithFrame:CGRectZero];_maskBGView.backgroundColor = [UIColor clearColor];_maskBGView.userInteractionEnabled = YES;_maskBGView.maskDelegate = self;}return _maskBGView;
}- (UIImageView *)contentBGImageView {if (!_contentBGImageView) {_contentBGImageView = [[UIImageView alloc] initWithFrame:CGRectZero];_contentBGImageView.userInteractionEnabled = YES;_contentBGImageView.backgroundColor = [UIColor clearColor];}return _contentBGImageView;
}- (CAShapeLayer *)shapeLayer {if (!_shapeLayer) {_shapeLayer = [CAShapeLayer layer];_shapeLayer.fillColor = [UIColor whiteColor].CGColor;//设置线条的宽度和颜色_shapeLayer.lineWidth = 1.0f;_shapeLayer.strokeColor = [UIColor colorWithHexString:@"9bb9ef" alpha:0.55].CGColor;_shapeLayer.shadowColor = [UIColor colorWithHexString:@"9bb9ef"].CGColor;_shapeLayer.shadowOffset = CGSizeMake(-3, 3);_shapeLayer.shadowOpacity = 0.3;_shapeLayer.shadowRadius = 3.0;}return _shapeLayer;
}#pragma mark - DrawShapeLayer
- (void)drawShapeLayer {CGFloat startPointX = self.contentStartPoint.x;CGFloat startPointY = self.contentStartPoint.y;CGFloat width = CGRectGetWidth(self.contentBGImageView.frame);CGFloat height = CGRectGetHeight(self.contentBGImageView.frame);self.path = [UIBezierPath bezierPath]; // 创建路径[self.path moveToPoint:CGPointMake(startPointX, startPointY)]; // 设置起始点[self.path addLineToPoint:CGPointMake(startPointX + 5.0, kAnchorHeight)];[self.path addLineToPoint:CGPointMake(width - 5.0, kAnchorHeight)];[self.path addArcWithCenter:CGPointMake(width - 5.0, kAnchorHeight + 5.0) radius:5 startAngle:KCP*3/2 endAngle:2*KCP clockwise:YES]; // 绘制一个圆弧[self.path addLineToPoint:CGPointMake(width, height - 5.0)];[self.path addArcWithCenter:CGPointMake(width - 5.0, height - 5.0) radius:5 startAngle:0 endAngle:KCP/2 clockwise:YES]; // 绘制一个圆弧[self.path addLineToPoint:CGPointMake(5, height)];[self.path addArcWithCenter:CGPointMake(5.0, height-5.0) radius:5 startAngle:KCP/2 endAngle:KCP clockwise:YES]; // 绘制一个圆弧[self.path addLineToPoint:CGPointMake(0.0, kAnchorHeight + 5.0)];[self.path addArcWithCenter:CGPointMake(5, kAnchorHeight + 5) radius:5 startAngle:KCP endAngle:KCP*3/2 clockwise:YES]; // 绘制一个圆弧[self.path addLineToPoint:CGPointMake(startPointX - 5.0, kAnchorHeight)];[self.path addLineToPoint:CGPointMake(startPointX, startPointY)];self.path.lineWidth     = 2.f;self.path.lineCapStyle  = kCGLineCapRound;self.path.lineJoinStyle = kCGLineCapRound;[self.path closePath]; // 封闭未形成闭环的路径UIGraphicsBeginImageContext(self.contentBGImageView.bounds.size);[self.path stroke];UIGraphicsEndImageContext();self.shapeLayer.path = self.path.CGPath;
}@end
六、使用显示下拉菜单
使用显示下拉菜单代码,根据anchorPoint确定显示的箭头位置
#pragma mark - INNoteZoneNavbarViewDelegate
- (void)addButtonDidAction:(UIButton *)button {CGRect btnRect = [button convertRect:button.bounds toView:[UIApplication sharedApplication].keyWindow];__weak typeof(self) weakSelf = self;INNoteZoneOptionItem *postItem = [[INNoteZoneOptionItem alloc] init];postItem.iconImage = [UIImage imageNamed:@"ic_op_editpost"];postItem.title = @"发布帖子";postItem.block = ^{NSLog(@"发布帖子");};INNoteZoneOptionItem *scanItem = [[INNoteZoneOptionItem alloc] init];scanItem.iconImage = [UIImage imageNamed:@"ic_op_scan"];scanItem.title = @"扫一扫";scanItem.block = ^{NSLog(@"扫一扫");};INNoteZoneOptionItem *calItem = [[INNoteZoneOptionItem alloc] init];calItem.iconImage = [UIImage imageNamed:@"ic_op_cal"];calItem.title = @"日历";calItem.block = ^{NSLog(@"日历");};INNoteZoneOptionItem *pubWordItem = [[INNoteZoneOptionItem alloc] init];pubWordItem.iconImage = [UIImage imageNamed:@"ic_op_edit"];pubWordItem.title = @"发布美句";pubWordItem.block = ^{NSLog(@"发布美句");};INNoteZoneOptionView *optionView = [[INNoteZoneOptionView alloc] initWithFrame:CGRectZero anchorPoint:CGPointMake(CGRectGetMidX(btnRect), CGRectGetMaxY(btnRect)) items:@[postItem,scanItem,calItem,pubWordItem]];[optionView showOption];
}
七、小结
iOS开发-CAShapeLayer与UIBezierPath实现微信首页的下拉菜单效果。用到了CAShapeLayer与UIBezierPath绘制菜单外框。
学习记录,每天不停进步。
相关文章:

iOS开发-CAShapeLayer与UIBezierPath实现微信首页的下拉菜单效果
iOS开发-CAShapeLayer与UIBezierPath实现微信首页的下拉菜单效果 之前开发中遇到需要使用实现微信首页的下拉菜单效果。用到了CAShapeLayer与UIBezierPath绘制菜单外框。 一、效果图 二、CAShapeLayer与UIBezierPath 2.1、CAShapeLayer是什么? CAShapeLayer继承自…...

《Elasticsearch 源码解析与优化实战》第5章:选主流程
《Elasticsearch 源码解析与优化实战》第5章:选主流程 - 墨天轮 一、简介 Discovery 模块负责发现集群中的节点,以及选择主节点。ES 支持多种不同 Discovery 类型选择,内置的实现称为Zen Discovery ,其他的包括公有云平台亚马逊的EC2、谷歌…...

Spring Cloud Alibaba - Nacos源码分析(三)
目录 一、Nacos客户端服务订阅的事件机制 1、监听事件的注册 2、ServiceInfo处理 serviceInfoHolder.processServiceInfo 一、Nacos客户端服务订阅的事件机制 Nacos客户端订阅的核心流程:Nacos客户端通过一个定时任务,每6秒从注册中心获取实例列表&…...

DOCKER镜像和容器
1.前言 初见DOCKER,感觉和我们常用的虚拟机(VMware,viurebox)类似,是一个独立于宿主机的模块,可以解决程序在各个系统间的移植,但它真的仅仅是这样嘛? 2.容器的优缺点 1.1.容器…...
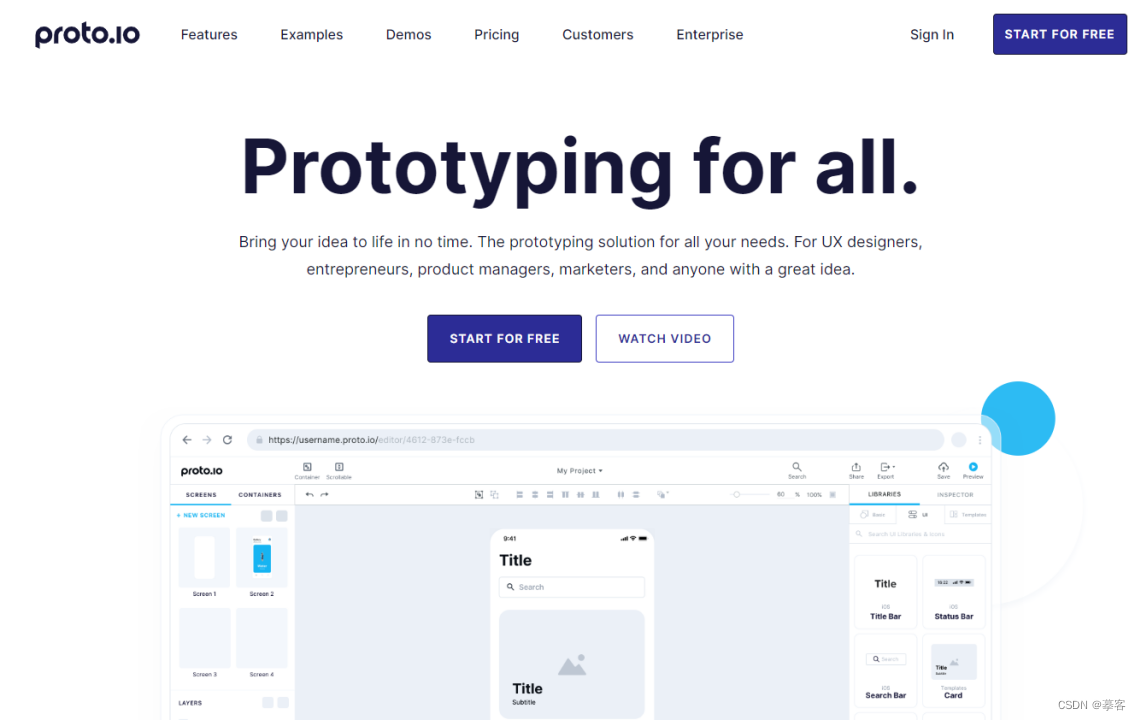
探索网页原型设计:构建出色的用户体验
在当今数字化时代,用户对网页体验的要求日益提高。在网页设计过程中,扮演着至关重要的角色。通过网页原型设计,产品经理能够更好地展示和传达网页的整体布局、导航结构、元素位置和交互效果,从而使团队成员更清晰地了解设计意图&a…...

48,排序算法merge
功能描述: 两个容器元素合并,并储存到另一容器中 函数原型: merge(iterator beg1,iterator end1,iterator beg2,iterator end2,iterator dest); //容器元素合并,并存储到另一个容器中 //注意:两个容器必须是有序的…...

【MySQL】复合查询
复合查询目录 一、基本查询二、多表查询三、自连接四、子查询4.1 单行子查询4.2 多行子查询4.3 多列子查询4.4 在from子句中使用子查询4.5 合并查询4.5.1 union4.5.2 union all 五、实战OJ 一、基本查询 --查询工资高于500或岗位为MANAGER的雇员,同时还要满足他们的…...

JavaScript中的this指向及绑定规则
在JavaScript中,this是一个特殊的关键字,用于表示函数执行的上下文对象,也就是当前函数被调用时所在的对象。由于JavaScript的函数调用方式多种多样,this的指向也因此而变化。本文将介绍JavaScript中this的指向及绑定规则…...

css中预编译理解,它们之间区别
css预编译? css预编译器用一种专门的编程语言,它可以对web页面样式然后再编译成正常css文件,可以更加方便和高效的编写css代表。主要作用就是为css提供了变量,函数,嵌套,继承,混合等功能&#…...

如何使用Java处理JSON数据?
在Java中,您可以使用许多库来处理JSON数据。以下是使用一种常见的库 Gson 的示例: 首先,确保您已经将 Gson 库添加到您的项目中。您可以在 Maven 中添加以下依赖项: <dependency><groupId>com.google.code.gson<…...
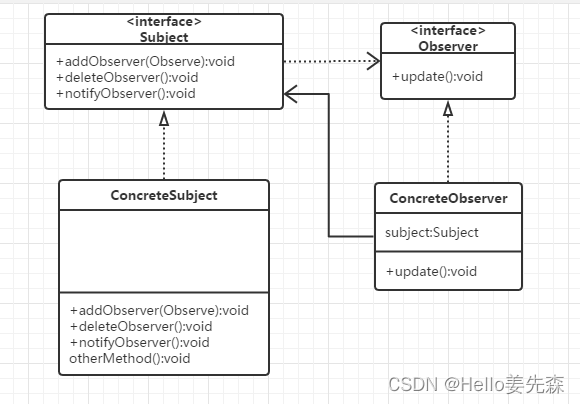
java设计模式-观察者模式
什么是观察者模式 观察者模式(Observer)是软件设计中的一种行为模式。 它定义了对象之间的一对多关系,其中如果一个对象改变了状态,所有依赖它的对象都会自动被通知并更新。 这种模式包含了两种主要的角色,即被观察…...

HiveSQL SparkSQL中常用知识点记录
目录 0. 相关文章链接 1. hive中多表full join主键重复问题 2. Hive中选出最新一个分区中新增和变化的数据 3. Hive中使用sort_array函数解决collet_list列表排序混乱问题 4. SQL中对小数位数很多的数值转换成文本的时候不使用科学计数法 5. HiveSQL & SparkSQL中炸裂…...

mac不识别移动硬盘导致无法拷贝资源
背景 硬盘插入到Mac电脑上之后,mac不识别移动硬盘导致无法拷贝资源。 移动硬盘在Mac上无法被识别的原因可能有很多,多数情况下,是硬盘的格式与Mac电脑不兼容。 文件系统格式不兼容 macOS使用的文件系统是HFS或APFS,如果移动硬盘是…...

Opencv的Mat内容学习
来源:Opencv的Mat内容小记 - 知乎 (zhihu.com) 1.Mat是一种图像容器,是二维向量。 灰度图的Mat一般存放<uchar>类型 RGB彩色图像一般存放<Vec3b>类型。 (1)单通道灰度图数据存放样式: (2)RGB三通道彩色图存放形式不同&#x…...

MySQL~数据库的设计
二、数据库的设计 1、多表之间的关系 1.1 三种分类 一对一: 分析:一个人只有一个身份证,一个身份证只能对应一个人 如:人和身份证 一对多: 如:部门和员工 分析:一个部门有多个员工ÿ…...
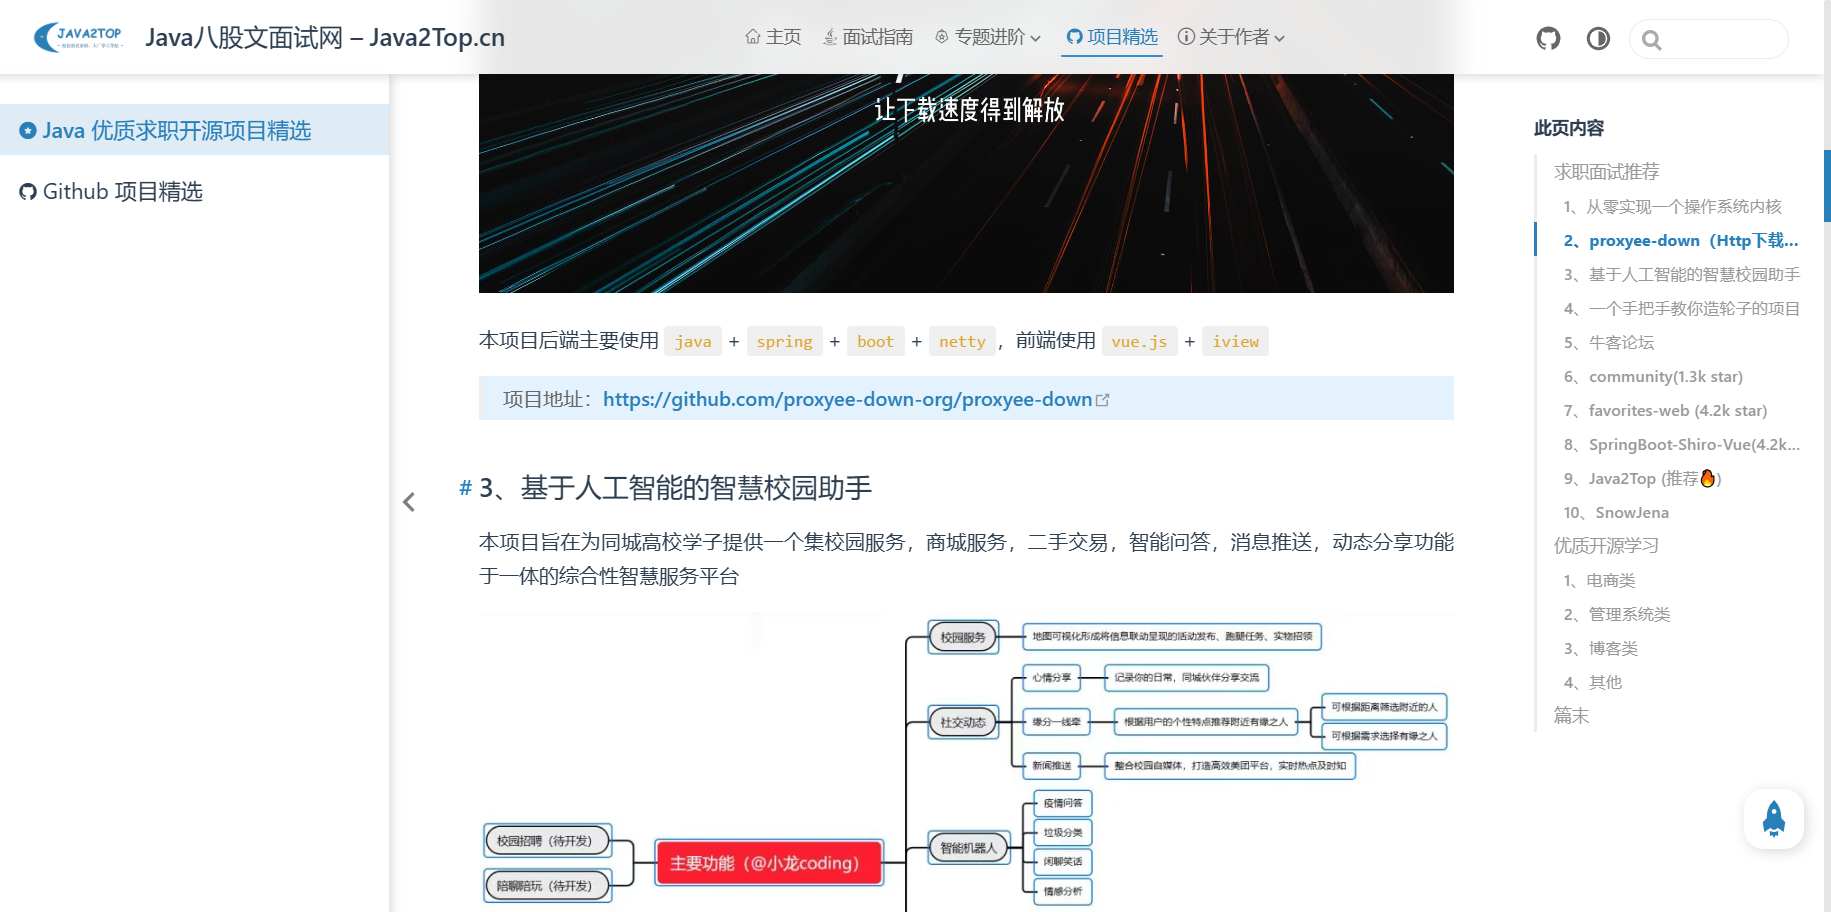
开源了!最强原创图解八股文面试网来袭
强烈推荐 Github上业内新晋的一匹黑马—Java图解八股文面试网—Java2Top.cn,图解 Java 大厂面试题,深入全面,真的强烈推荐~ 这是一个二本逆袭阿里的大佬根据自己秋招上岸所看过的相关专栏,面经,课程,结合自…...

微信小程序开发6
一、分包-基础概念 1.1、什么是分包 分包指的是把一个完整的小程序项目,按照需求划分为不同的子包,在构建时打包成不同的分包,用户在使用时按需进行加载。 1.2、分包的好处 对小程序进行分包的好处主要有以下两点: 可以优化小程序…...

JS 根据身份证号获取年龄、性别、出生日期
先说一代身份证和二代身份证的区别: 1.编号位数不同,第一代身份证为15位号码,第二代证是18位号码 2.编码规则不同,第一代身份证在前6位号码后没有完整出生年份,而二代的有完整的出生年份,一代身份证将年份前二位省略…...
)
Python+Mongo+LSTM(GTP生成)
下面是一个简单的示例来展示如何使用Python和MongoDB来生成LSTM预测算法。 首先,我们需要安装pymongo和tensorflow库,可以使用以下命令进行安装: pip install pymongo tensorflow接下来,我们连接到MongoDB数据库并获取需要进行预…...
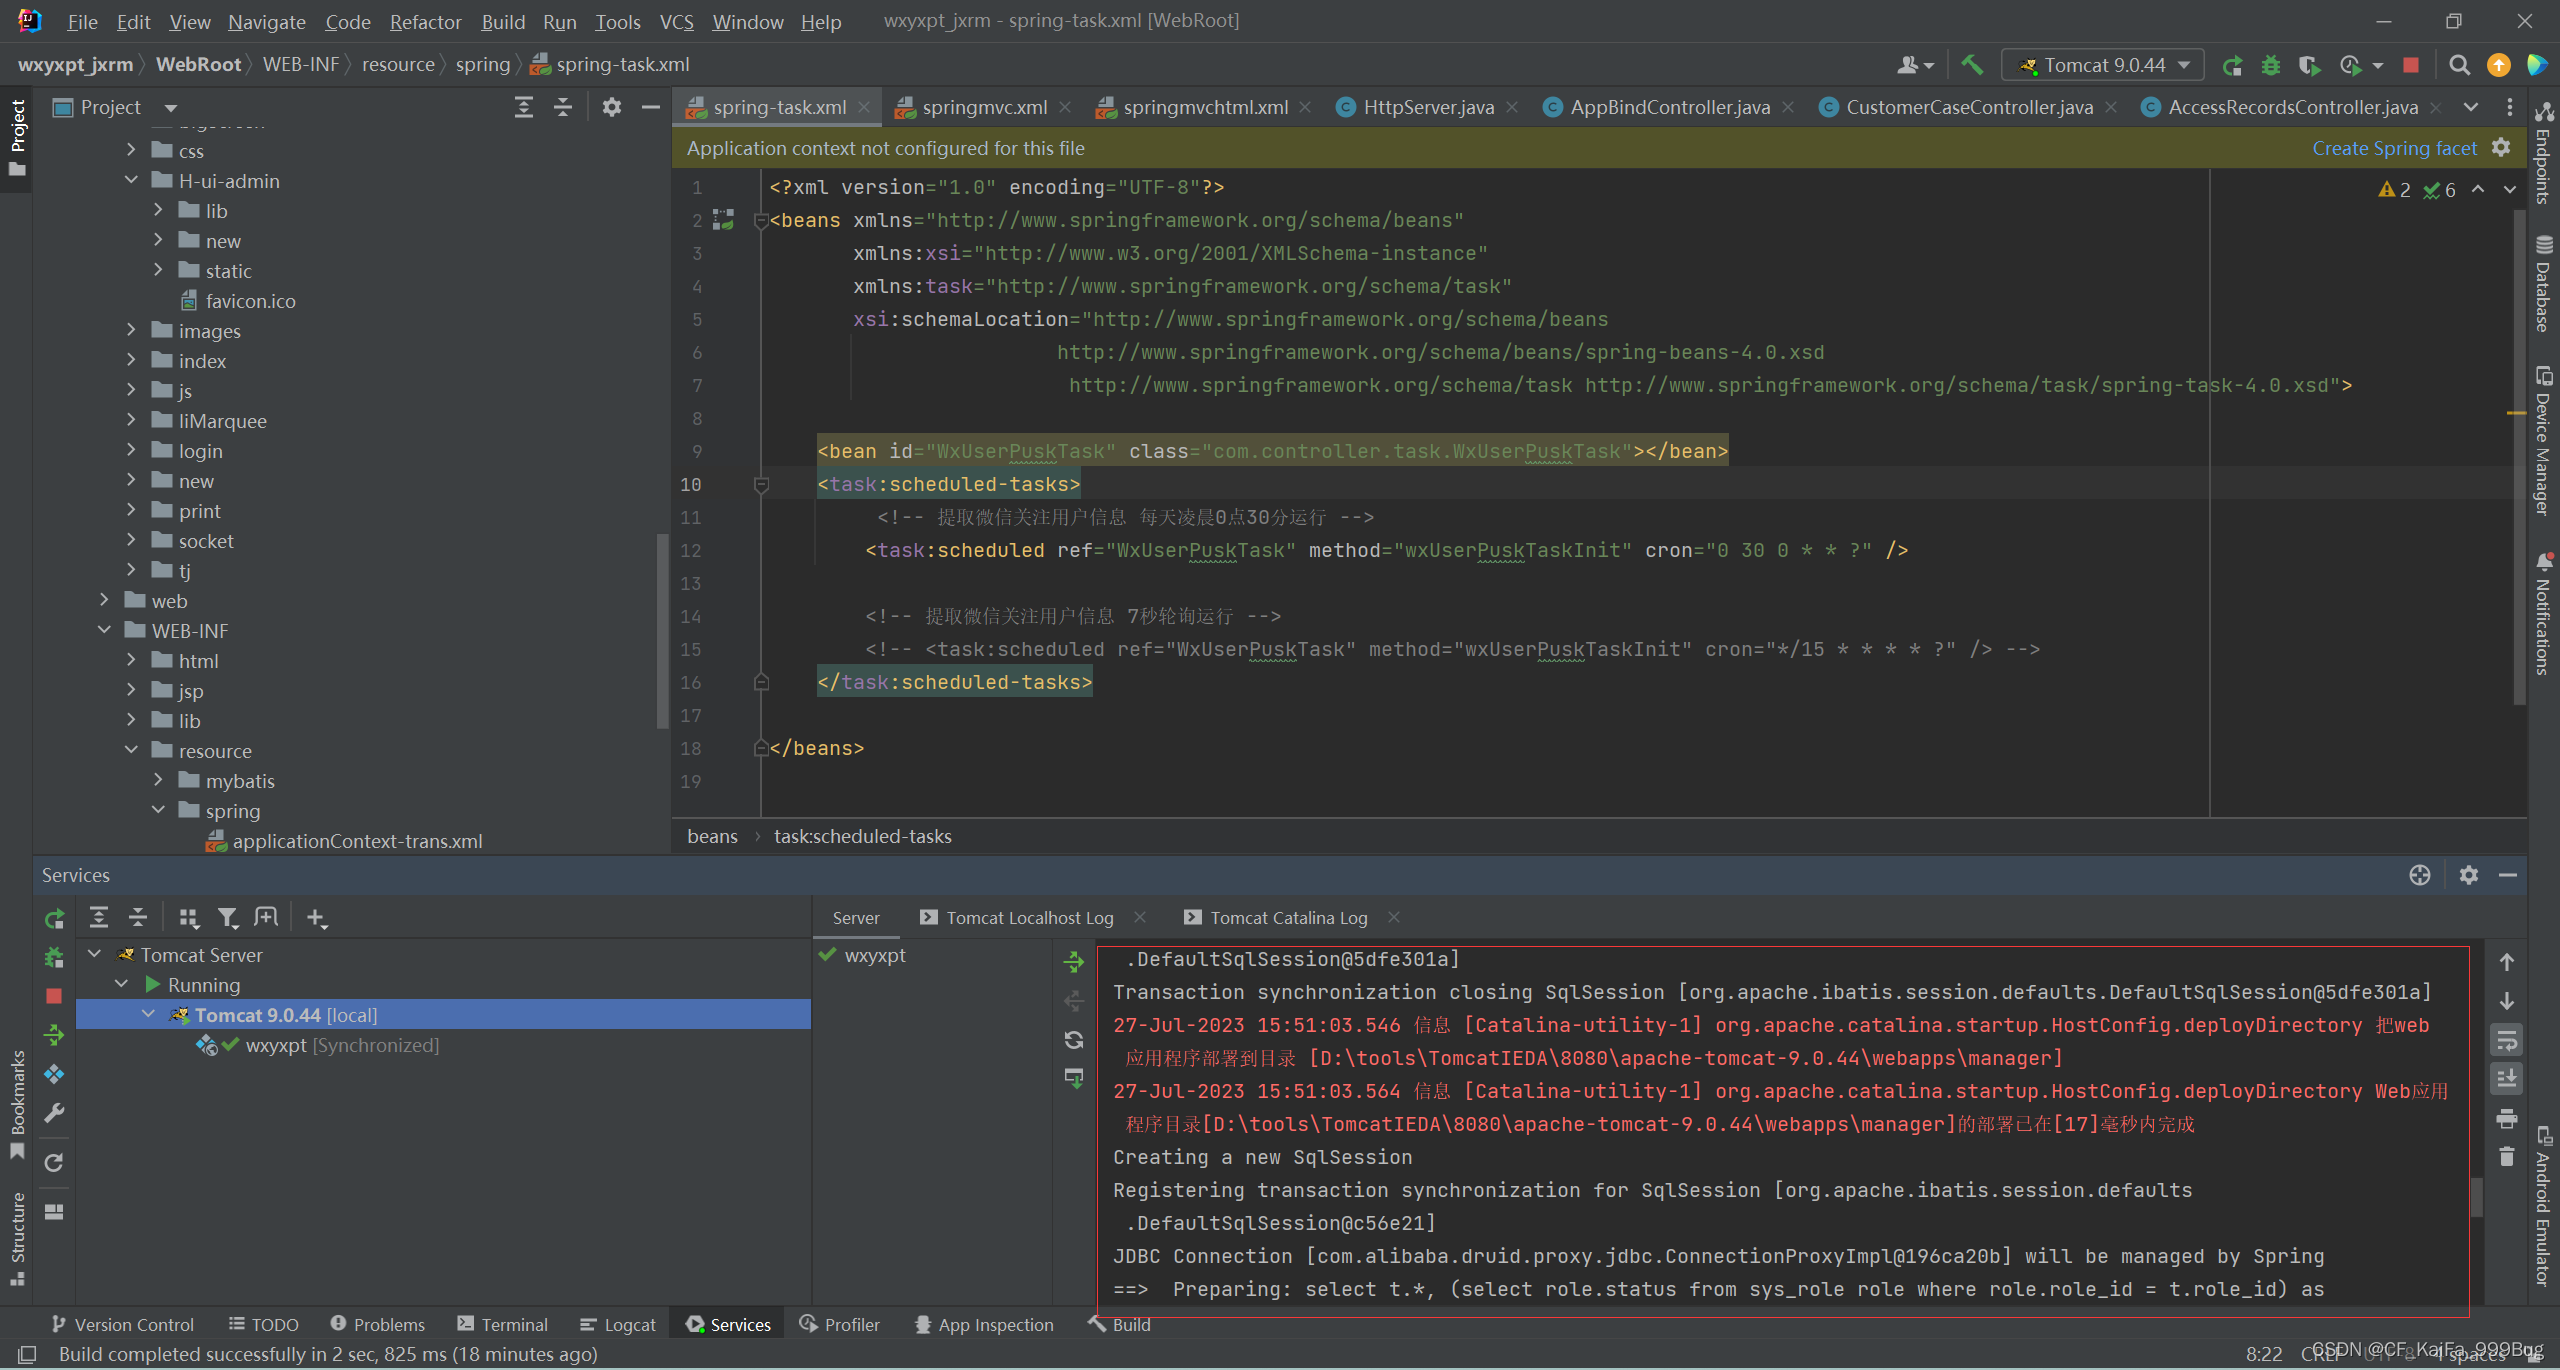
关于idea如何成功运行web项目
导入项目 如图 依次选择 file - new - Project from Existing Sources 选择存放的项目目录地址 如图 导入完成 点击ok 如图 依次选择 Create project from existing sources 点击next如图 ,此处默认即可 点击 next如图 点击next有该提示 是因为之前导入过…...

手游刚开服就被攻击怎么办?如何防御DDoS?
开服初期是手游最脆弱的阶段,极易成为DDoS攻击的目标。一旦遭遇攻击,可能导致服务器瘫痪、玩家流失,甚至造成巨大经济损失。本文为开发者提供一套简洁有效的应急与防御方案,帮助快速应对并构建长期防护体系。 一、遭遇攻击的紧急应…...
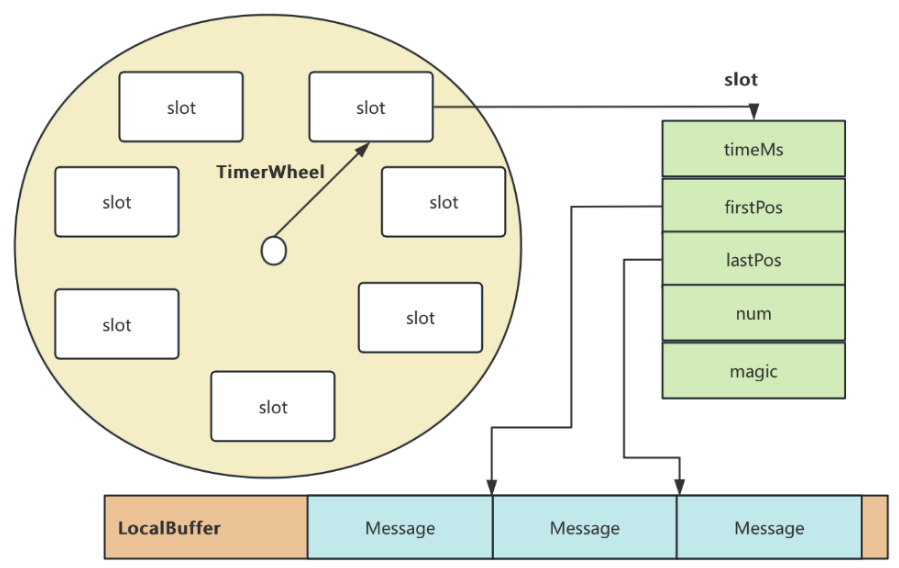
RocketMQ延迟消息机制
两种延迟消息 RocketMQ中提供了两种延迟消息机制 指定固定的延迟级别 通过在Message中设定一个MessageDelayLevel参数,对应18个预设的延迟级别指定时间点的延迟级别 通过在Message中设定一个DeliverTimeMS指定一个Long类型表示的具体时间点。到了时间点后…...

【入坑系列】TiDB 强制索引在不同库下不生效问题
文章目录 背景SQL 优化情况线上SQL运行情况分析怀疑1:执行计划绑定问题?尝试:SHOW WARNINGS 查看警告探索 TiDB 的 USE_INDEX 写法Hint 不生效问题排查解决参考背景 项目中使用 TiDB 数据库,并对 SQL 进行优化了,添加了强制索引。 UAT 环境已经生效,但 PROD 环境强制索…...

java 实现excel文件转pdf | 无水印 | 无限制
文章目录 目录 文章目录 前言 1.项目远程仓库配置 2.pom文件引入相关依赖 3.代码破解 二、Excel转PDF 1.代码实现 2.Aspose.License.xml 授权文件 总结 前言 java处理excel转pdf一直没找到什么好用的免费jar包工具,自己手写的难度,恐怕高级程序员花费一年的事件,也…...
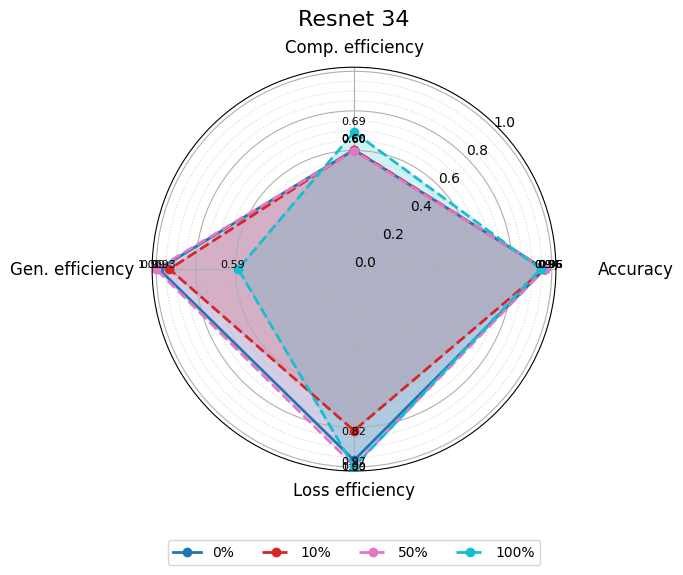
使用分级同态加密防御梯度泄漏
抽象 联邦学习 (FL) 支持跨分布式客户端进行协作模型训练,而无需共享原始数据,这使其成为在互联和自动驾驶汽车 (CAV) 等领域保护隐私的机器学习的一种很有前途的方法。然而,最近的研究表明&…...
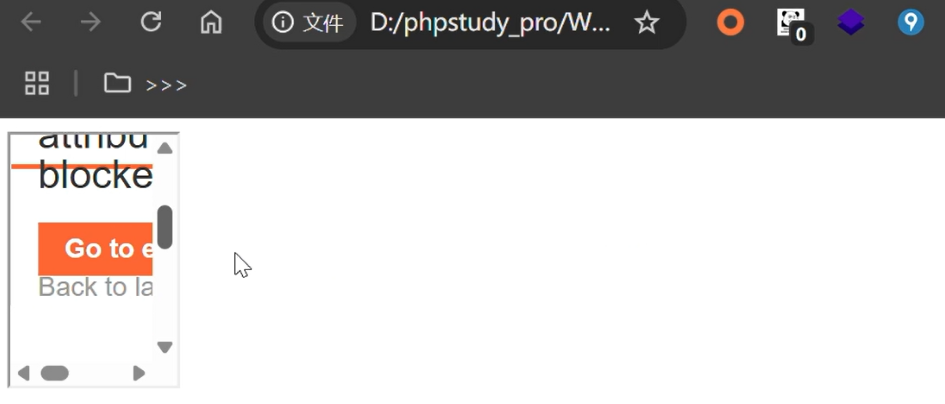
渗透实战PortSwigger靶场-XSS Lab 14:大多数标签和属性被阻止
<script>标签被拦截 我们需要把全部可用的 tag 和 event 进行暴力破解 XSS cheat sheet: https://portswigger.net/web-security/cross-site-scripting/cheat-sheet 通过爆破发现body可以用 再把全部 events 放进去爆破 这些 event 全部可用 <body onres…...
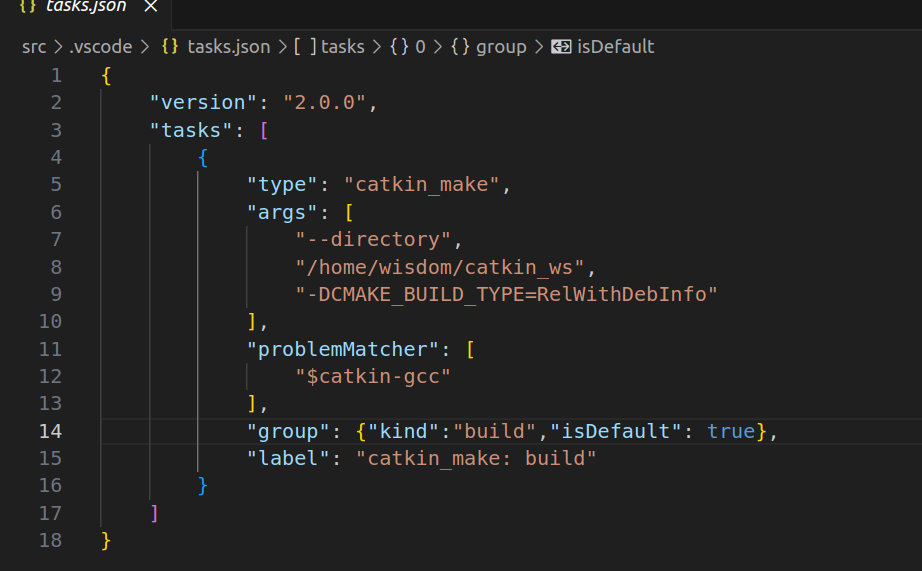
1.3 VSCode安装与环境配置
进入网址Visual Studio Code - Code Editing. Redefined下载.deb文件,然后打开终端,进入下载文件夹,键入命令 sudo dpkg -i code_1.100.3-1748872405_amd64.deb 在终端键入命令code即启动vscode 需要安装插件列表 1.Chinese简化 2.ros …...

Java多线程实现之Callable接口深度解析
Java多线程实现之Callable接口深度解析 一、Callable接口概述1.1 接口定义1.2 与Runnable接口的对比1.3 Future接口与FutureTask类 二、Callable接口的基本使用方法2.1 传统方式实现Callable接口2.2 使用Lambda表达式简化Callable实现2.3 使用FutureTask类执行Callable任务 三、…...

SpringBoot+uniapp 的 Champion 俱乐部微信小程序设计与实现,论文初版实现
摘要 本论文旨在设计并实现基于 SpringBoot 和 uniapp 的 Champion 俱乐部微信小程序,以满足俱乐部线上活动推广、会员管理、社交互动等需求。通过 SpringBoot 搭建后端服务,提供稳定高效的数据处理与业务逻辑支持;利用 uniapp 实现跨平台前…...
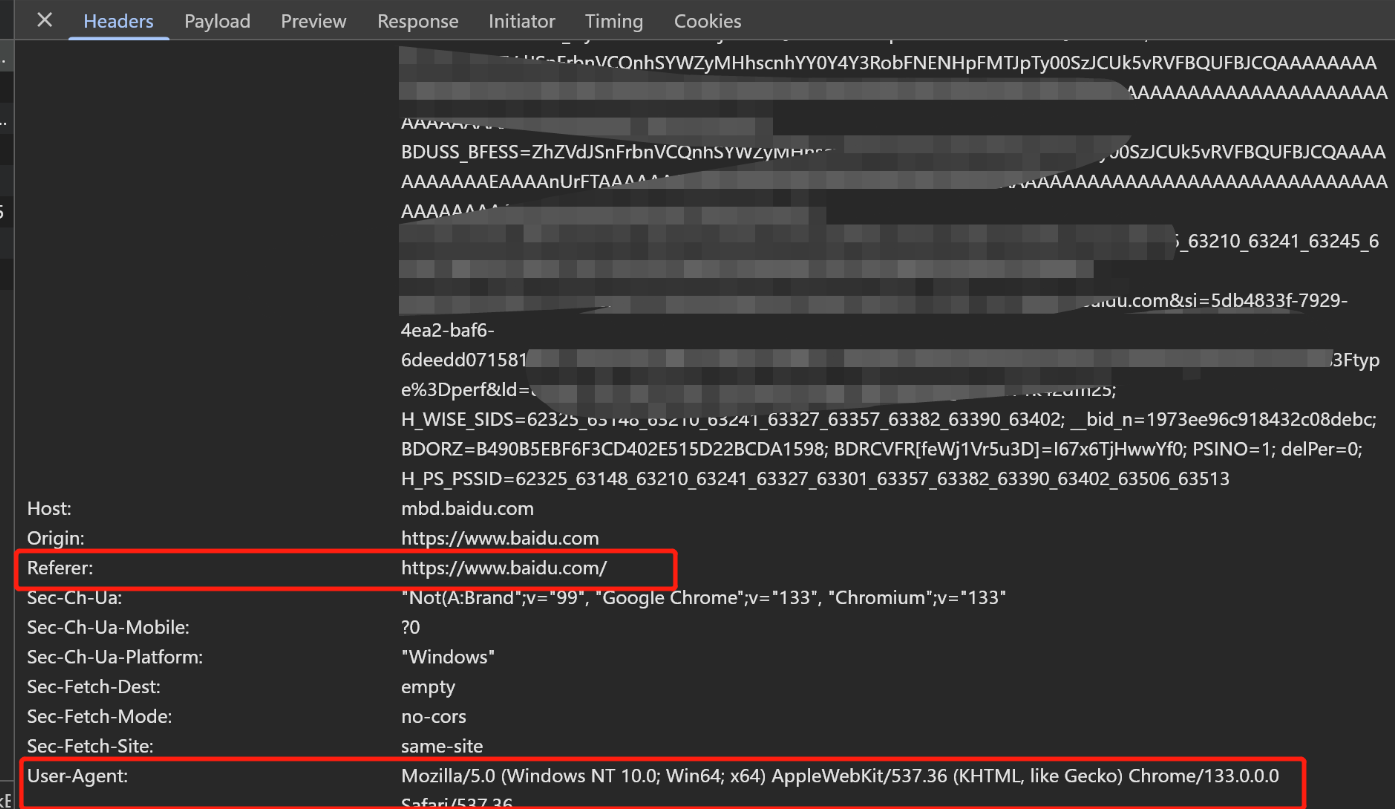
Python爬虫(一):爬虫伪装
一、网站防爬机制概述 在当今互联网环境中,具有一定规模或盈利性质的网站几乎都实施了各种防爬措施。这些措施主要分为两大类: 身份验证机制:直接将未经授权的爬虫阻挡在外反爬技术体系:通过各种技术手段增加爬虫获取数据的难度…...
