Java 调用 HTTP 和 HTTPS 的方式详解
文章目录
- 1. HTTP 和 HTTPS 基础知识
- 1.1 什么是 HTTP/HTTPS?
- 1.2 HTTP 请求与响应结构
- 1.3 常见的 HTTP 方法
- 1.4 常见的 HTTP 状态码
- 2. Java 原生 HTTP 客户端
- 2.1 使用 URLConnection 和 HttpURLConnection
- 2.1.1 基本 GET 请求
- 2.1.2 基本 POST 请求
- 2.1.3 处理 HTTPS 请求
- 2.1.4 设置代理
- 2.1.5 上传文件
- 2.2 使用 Java 11+ HttpClient
- 2.2.1 基本 GET 请求
- 2.2.2 基本 POST 请求
- 2.2.3 异步请求
- 2.2.4 处理 HTTPS 和 SSL
- 2.2.5 上传文件
- 3. Apache HttpClient
- 3.1 添加依赖
- 3.2 基本 GET 请求
- 3.3 基本 POST 请求
- 3.4 配置连接池
- 3.5 处理 Cookie
- 3.6 表单提交
- 3.7 文件上传
- 3.8 配置 HTTPS 和 SSL
- 4. OkHttp
- 4.1 添加依赖
- 4.2 基本 GET 请求
- 4.3 基本 POST 请求
- 4.4 异步请求
- 4.5 表单提交
- 4.6 文件上传
- 4.7 配置超时和重试
- 4.8 配置 HTTPS 和 SSL
- 5. Spring RestTemplate
- 5.1 添加依赖
- 5.2 基本 GET 请求
- 5.3 获取并映射到 Java 对象
- 5.4 基本 POST 请求
- 5.5 PUT 和 DELETE 请求
- 5.6 请求参数和路径变量
- 5.7 处理响应错误
- 5.8 自定义 RestTemplate 配置
- 5.9 文件上传
- 5.10 请求和响应拦截器
- 6. Spring WebClient
- 6.1 添加依赖
- 6.2 基本 GET 请求
- 6.3 获取并映射到 Java 对象
- 6.4 基本 POST 请求
- 6.5 PUT 和 DELETE 请求
- 6.6 请求参数和路径变量
- 6.7 处理错误
- 6.8 自定义 WebClient 配置
- 6.9 文件上传
- 6.10 同步与异步并行请求
- 7. Retrofit
- 7.1 添加依赖
- 7.2 定义 API 接口
- 7.3 数据模型
- 7.4 创建 Retrofit 实例
- 7.5 基本 GET 请求
- 7.6 基本 POST 请求
- 7.7 文件上传
- 7.8 自定义 OkHttpClient
- 8. 小结与对比
- 8.1 各个 HTTP 客户端库的特点
- 8.2 如何选择合适的 HTTP 客户端库
- 8.3 最佳实践建议
1. HTTP 和 HTTPS 基础知识
1.1 什么是 HTTP/HTTPS?
HTTP(HyperText Transfer Protocol,超文本传输协议)是一种用于分布式、协作式和超媒体信息系统的应用层协议。它是 Web 的基础,用于在 Web 浏览器和服务器之间传输数据,如HTML文件、图像、查询结果等。
HTTPS(HTTP Secure,安全超文本传输协议)是 HTTP 的安全版本,通过 SSL/TLS 协议进行加密通信,提供了三个关键安全功能:
- 加密:防止数据在传输过程中被第三方窃听
- 数据完整性:防止数据被篡改
- 认证:确保用户正在与预期的网站通信
1.2 HTTP 请求与响应结构
HTTP 请求由以下部分组成:
- 请求行:包含HTTP方法(GET、POST等)、URL和HTTP版本
- 请求头:包含有关请求的附加信息(如Content-Type、User-Agent等)
- 空行:分隔请求头和请求体
- 请求体:包含发送到服务器的数据(如POST请求中的表单数据)
HTTP 响应由以下部分组成:
- 状态行:包含HTTP版本、状态码和状态消息
- 响应头:包含有关响应的附加信息
- 空行:分隔响应头和响应体
- 响应体:包含服务器返回的数据
1.3 常见的 HTTP 方法
- GET:请求指定的资源,应该只被用于获取数据
- POST:向指定资源提交数据,可能导致新资源的创建或已有资源的修改
- PUT:使用请求中的数据替换指定资源的内容
- DELETE:删除指定的资源
- PATCH:对资源应用部分修改
- HEAD:与GET相同,但只返回响应头,不返回响应体
- OPTIONS:获取目标资源支持的通信选项
1.4 常见的 HTTP 状态码
- 1xx(信息性):请求已接收,继续处理
- 2xx(成功):请求已成功接收、理解、接受
- 200 OK:请求成功
- 201 Created:请求已完成,并创建了新资源
- 204 No Content:服务器成功处理了请求,但没有返回任何内容
- 3xx(重定向):需要进一步操作才能完成请求
- 301 Moved Permanently:资源已永久移动到新位置
- 302 Found:资源临时位于不同的URL
- 304 Not Modified:资源未被修改
- 4xx(客户端错误):请求包含错误语法或无法完成
- 400 Bad Request:服务器无法理解请求
- 401 Unauthorized:需要身份验证
- 403 Forbidden:服务器拒绝请求
- 404 Not Found:服务器找不到请求的资源
- 5xx(服务器错误):服务器在处理请求时发生错误
- 500 Internal Server Error:服务器遇到了意外情况
- 502 Bad Gateway:服务器作为网关,从上游服务器收到无效响应
- 503 Service Unavailable:服务器暂时不可用
2. Java 原生 HTTP 客户端
2.1 使用 URLConnection 和 HttpURLConnection
URLConnection 和 HttpURLConnection 是 Java 标准库提供的最基本的 HTTP 客户端 API,自 JDK 1.1 就存在。虽然功能相对简单,但不需要任何外部依赖。
2.1.1 基本 GET 请求
import java.io.BufferedReader;
import java.io.InputStreamReader;
import java.net.HttpURLConnection;
import java.net.URL;public class HttpURLConnectionExample {public static void main(String[] args) {try {// 创建URL对象URL url = new URL("https://api.example.com/data");// 打开连接HttpURLConnection connection = (HttpURLConnection) url.openConnection();// 设置请求方法(默认为GET)connection.setRequestMethod("GET");// 设置连接和读取超时(毫秒)connection.setConnectTimeout(5000);connection.setReadTimeout(5000);// 获取响应状态码int responseCode = connection.getResponseCode();System.out.println("Response Code: " + responseCode);// 读取响应内容BufferedReader in = new BufferedReader(new InputStreamReader(connection.getInputStream()));String inputLine;StringBuilder response = new StringBuilder();while ((inputLine = in.readLine()) != null) {response.append(inputLine);}in.close();// 打印响应内容System.out.println("Response: " + response.toString());// 断开连接connection.disconnect();} catch (Exception e) {e.printStackTrace();}}
}
2.1.2 基本 POST 请求
import java.io.BufferedReader;
import java.io.DataOutputStream;
import java.io.InputStreamReader;
import java.net.HttpURLConnection;
import java.net.URL;
import java.nio.charset.StandardCharsets;public class HttpURLConnectionPostExample {public static void main(String[] args) {try {// 创建URL对象URL url = new URL("https://api.example.com/submit");// 打开连接HttpURLConnection connection = (HttpURLConnection) url.openConnection();// 设置请求方法connection.setRequestMethod("POST");// 启用输入/输出流connection.setDoOutput(true);connection.setDoInput(true);// 设置请求头connection.setRequestProperty("Content-Type", "application/json");connection.setRequestProperty("Accept", "application/json");// 构建请求体String jsonInputString = "{\"name\": \"John Doe\", \"email\": \"john@example.com\"}";// 发送请求体try (DataOutputStream outputStream = new DataOutputStream(connection.getOutputStream())) {byte[] input = jsonInputString.getBytes(StandardCharsets.UTF_8);outputStream.write(input, 0, input.length);}// 获取响应状态码int responseCode = connection.getResponseCode();System.out.println("Response Code: " + responseCode);// 读取响应内容BufferedReader in;if (responseCode >= 200 && responseCode < 300) {in = new BufferedReader(new InputStreamReader(connection.getInputStream()));} else {in = new BufferedReader(new InputStreamReader(connection.getErrorStream()));}String inputLine;StringBuilder response = new StringBuilder();while ((inputLine = in.readLine()) != null) {response.append(inputLine);}in.close();// 打印响应内容System.out.println("Response: " + response.toString());// 断开连接connection.disconnect();} catch (Exception e) {e.printStackTrace();}}
}
2.1.3 处理 HTTPS 请求
处理 HTTPS 请求需要配置 HttpsURLConnection,特别是在需要自定义信任管理器或者客户端证书时:
import javax.net.ssl.*;
import java.io.BufferedReader;
import java.io.InputStreamReader;
import java.net.URL;
import java.security.cert.X509Certificate;public class HttpsURLConnectionExample {public static void main(String[] args) {try {// 创建信任所有证书的信任管理器(仅用于测试/开发环境!)TrustManager[] trustAllCerts = new TrustManager[] {new X509TrustManager() {public X509Certificate[] getAcceptedIssuers() { return null; }public void checkClientTrusted(X509Certificate[] certs, String authType) { }public void checkServerTrusted(X509Certificate[] certs, String authType) { }}};// 创建SSL上下文,并使用我们的信任管理器SSLContext sslContext = SSLContext.getInstance("TLS");sslContext.init(null, trustAllCerts, new java.security.SecureRandom());// 创建URL对象URL url = new URL("https://api.example.com/secure-data");// 打开连接HttpsURLConnection connection = (HttpsURLConnection) url.openConnection();// 设置SSL socket工厂connection.setSSLSocketFactory(sslContext.getSocketFactory());// 设置主机名验证器(跳过主机名验证,仅用于测试)connection.setHostnameVerifier((hostname, session) -> true);// 设置请求方法connection.setRequestMethod("GET");// 获取响应状态码int responseCode = connection.getResponseCode();System.out.println("Response Code: " + responseCode);// 读取响应内容BufferedReader in = new BufferedReader(new InputStreamReader(connection.getInputStream()));String inputLine;StringBuilder response = new StringBuilder();while ((inputLine = in.readLine()) != null) {response.append(inputLine);}in.close();// 打印响应内容System.out.println("Response: " + response.toString());// 断开连接connection.disconnect();} catch (Exception e) {e.printStackTrace();}}
}
注意:上述示例中使用了接受所有证书的信任管理器,这仅应在开发/测试环境中使用,生产环境应使用适当的证书验证。
2.1.4 设置代理
import java.io.BufferedReader;
import java.io.InputStreamReader;
import java.net.HttpURLConnection;
import java.net.InetSocketAddress;
import java.net.Proxy;
import java.net.URL;public class HttpURLConnectionProxyExample {public static void main(String[] args) {try {// 创建代理对象Proxy proxy = new Proxy(Proxy.Type.HTTP, new InetSocketAddress("proxy.example.com", 8080));// 创建URL对象URL url = new URL("https://api.example.com/data");// 使用代理打开连接HttpURLConnection connection = (HttpURLConnection) url.openConnection(proxy);// 设置请求方法connection.setRequestMethod("GET");// 如果代理需要身份验证String authString = "username:password";byte[] authEncBytes = java.util.Base64.getEncoder().encode(authString.getBytes());String authStringEnc = new String(authEncBytes);connection.setRequestProperty("Proxy-Authorization", "Basic " + authStringEnc);// 获取响应状态码int responseCode = connection.getResponseCode();System.out.println("Response Code: " + responseCode);// 读取响应内容BufferedReader in = new BufferedReader(new InputStreamReader(connection.getInputStream()));String inputLine;StringBuilder response = new StringBuilder();while ((inputLine = in.readLine()) != null) {response.append(inputLine);}in.close();// 打印响应内容System.out.println("Response: " + response.toString());// 断开连接connection.disconnect();} catch (Exception e) {e.printStackTrace();}}
}
2.1.5 上传文件
import java.io.*;
import java.net.HttpURLConnection;
import java.net.URL;
import java.nio.charset.StandardCharsets;public class HttpURLConnectionFileUploadExample {public static void main(String[] args) {try {// 创建URL对象URL url = new URL("https://api.example.com/upload");// 连接参数String boundary = "===" + System.currentTimeMillis() + "===";// 打开连接HttpURLConnection connection = (HttpURLConnection) url.openConnection();// 设置请求方法connection.setRequestMethod("POST");// 启用输入/输出流connection.setDoOutput(true);connection.setDoInput(true);// 设置请求头connection.setRequestProperty("Content-Type", "multipart/form-data; boundary=" + boundary);// 创建请求体try (OutputStream outputStream = connection.getOutputStream();PrintWriter writer = new PrintWriter(new OutputStreamWriter(outputStream, StandardCharsets.UTF_8), true)) {// 添加表单字段writer.append("--").append(boundary).append("\r\n");writer.append("Content-Disposition: form-data; name=\"description\"\r\n\r\n");writer.append("文件描述").append("\r\n");// 添加文件writer.append("--").append(boundary).append("\r\n");writer.append("Content-Disposition: form-data; name=\"file\"; filename=\"example.txt\"\r\n");writer.append("Content-Type: text/plain\r\n\r\n");writer.flush();// 从文件读取并写入请求try (FileInputStream fileInputStream = new FileInputStream("example.txt")) {byte[] buffer = new byte[4096];int bytesRead;while ((bytesRead = fileInputStream.read(buffer)) != -1) {outputStream.write(buffer, 0, bytesRead);}outputStream.flush();}writer.append("\r\n");// 结束请求writer.append("--").append(boundary).append("--").append("\r\n");}// 获取响应状态码int responseCode = connection.getResponseCode();System.out.println("Response Code: " + responseCode);// 读取响应内容BufferedReader in = new BufferedReader(new InputStreamReader(connection.getInputStream()));String inputLine;StringBuilder response = new StringBuilder();while ((inputLine = in.readLine()) != null) {response.append(inputLine);}in.close();// 打印响应内容System.out.println("Response: " + response.toString());// 断开连接connection.disconnect();} catch (Exception e) {e.printStackTrace();}}
}
2.2 使用 Java 11+ HttpClient
从 Java 11 开始,Java 标准库引入了现代化的 HttpClient API,提供了比 HttpURLConnection 更丰富的功能,包括异步请求、WebSocket 支持等。
2.2.1 基本 GET 请求
import java.io.IOException;
import java.net.URI;
import java.net.http.HttpClient;
import java.net.http.HttpRequest;
import java.net.http.HttpResponse;
import java.time.Duration;public class Java11HttpClientExample {public static void main(String[] args) {try {// 创建 HttpClientHttpClient client = HttpClient.newBuilder().version(HttpClient.Version.HTTP_2)  // 设置HTTP协议版本.connectTimeout(Duration.ofSeconds(5))  // 设置连接超时.build();// 创建 HttpRequestHttpRequest request = HttpRequest.newBuilder().uri(URI.create("https://api.example.com/data")).timeout(Duration.ofSeconds(5))  // 设置请求超时.header("Content-Type", "application/json").GET()  // 设置请求方法为GET.build();// 发送请求并获取响应HttpResponse<String> response = client.send(request, HttpResponse.BodyHandlers.ofString());// 获取响应状态码int statusCode = response.statusCode();System.out.println("Status Code: " + statusCode);// 获取响应头response.headers().map().forEach((key, values) -> {System.out.println(key + ": " + values);});// 获取响应体String responseBody = response.body();System.out.println("Response Body: " + responseBody);} catch (IOException | InterruptedException e) {e.printStackTrace();}}
}
2.2.2 基本 POST 请求
import java.io.IOException;
import java.net.URI;
import java.net.http.HttpClient;
import java.net.http.HttpRequest;
import java.net.http.HttpResponse;
import java.time.Duration;public class Java11HttpClientPostExample {public static void main(String[] args) {try {// 创建 HttpClientHttpClient client = HttpClient.newBuilder().version(HttpClient.Version.HTTP_2).connectTimeout(Duration.ofSeconds(5)).build();// 准备JSON请求体String jsonBody = "{\"name\": \"John Doe\", \"email\": \"john@example.com\"}";// 创建 HttpRequestHttpRequest request = HttpRequest.newBuilder().uri(URI.create("https://api.example.com/submit")).timeout(Duration.ofSeconds(5)).header("Content-Type", "application/json").POST(HttpRequest.BodyPublishers.ofString(jsonBody))  // 设置请求方法为POST并提供请求体.build();// 发送请求并获取响应HttpResponse<String> response = client.send(request, HttpResponse.BodyHandlers.ofString());// 获取响应状态码int statusCode = response.statusCode();System.out.println("Status Code: " + statusCode);// 获取响应体String responseBody = response.body();System.out.println("Response Body: " + responseBody);} catch (IOException | InterruptedException e) {e.printStackTrace();}}
}
2.2.3 异步请求
import java.net.URI;
import java.net.http.HttpClient;
import java.net.http.HttpRequest;
import java.net.http.HttpResponse;
import java.time.Duration;
import java.util.concurrent.CompletableFuture;public class Java11HttpClientAsyncExample {public static void main(String[] args) {// 创建 HttpClientHttpClient client = HttpClient.newBuilder().version(HttpClient.Version.HTTP_2).connectTimeout(Duration.ofSeconds(5)).build();// 创建 HttpRequestHttpRequest request = HttpRequest.newBuilder().uri(URI.create("https://api.example.com/data")).timeout(Duration.ofSeconds(5)).GET().build();// 异步发送请求CompletableFuture<HttpResponse<String>> futureResponse = client.sendAsync(request, HttpResponse.BodyHandlers.ofString());// 添加响应处理逻辑futureResponse.thenApply(response -> {System.out.println("Status Code: " + response.statusCode());return response;}).thenApply(HttpResponse::body).thenAccept(responseBody -> System.out.println("Response Body: " + responseBody)).exceptionally(e -> {System.err.println("Error: " + e.getMessage());return null;});// 等待异步操作完成futureResponse.join();System.out.println("请求已完成");}
}
2.2.4 处理 HTTPS 和 SSL
import javax.net.ssl.*;
import java.io.IOException;
import java.net.URI;
import java.net.http.HttpClient;
import java.net.http.HttpRequest;
import java.net.http.HttpResponse;
import java.security.KeyStore;
import java.security.cert.X509Certificate;
import java.time.Duration;public class Java11HttpClientSslExample {public static void main(String[] args) {try {// 方法1:使用默认的SSL配置SSLContext sslContext = SSLContext.getInstance("TLS");sslContext.init(null, null, null);HttpClient defaultClient = HttpClient.newBuilder().version(HttpClient.Version.HTTP_2).sslContext(sslContext).build();// 方法2:配置自定义SSL上下文(允许所有证书,仅用于测试)SSLContext sslContext2 = SSLContext.getInstance("TLS");sslContext2.init(null, null, null);HttpClient customSslClient = HttpClient.newBuilder().version(HttpClient.Version.HTTP_2).sslContext(sslContext2).build();// 方法3:使用客户端证书进行双向SSL认证KeyStore clientKeyStore = KeyStore.getInstance("PKCS12");clientKeyStore.load(Java11HttpClientSslExample.class.getResourceAsStream("/client.p12"), "password".toCharArray());KeyManagerFactory keyManagerFactory = KeyManagerFactory.getInstance(KeyManagerFactory.getDefaultAlgorithm());keyManagerFactory.init(clientKeyStore, "password".toCharArray());SSLContext clientAuthSslContext = SSLContext.getInstance("TLS");clientAuthSslContext.init(keyManagerFactory.getKeyManagers(), null,  // 使用默认的信任管理器null); // 使用默认的随机数生成器HttpClient clientAuthClient = HttpClient.newBuilder().version(HttpClient.Version.HTTP_2).sslContext(clientAuthSslContext).build();// 创建请求HttpRequest request = HttpRequest.newBuilder().uri(URI.create("https://api.example.com/secure-data")).timeout(Duration.ofSeconds(5)).GET().build();// 使用适当的客户端发送请求HttpResponse<String> response = customSslClient.send(request, HttpResponse.BodyHandlers.ofString());System.out.println("Status Code: " + response.statusCode());System.out.println("Response Body: " + response.body());} catch (Exception e) {e.printStackTrace();}}
}
2.2.5 上传文件
import java.io.IOException;
import java.net.URI;
import java.net.http.HttpClient;
import java.net.http.HttpRequest;
import java.net.http.HttpResponse;
import java.nio.file.Path;
import java.time.Duration;public class Java11HttpClientFileUploadExample {public static void main(String[] args) {try {// 创建 HttpClientHttpClient client = HttpClient.newBuilder().version(HttpClient.Version.HTTP_2).connectTimeout(Duration.ofSeconds(30))  // 上传文件可能需要更长的超时时间.build();// 创建多部分请求var multipartData = MultipartBodyPublisher.newBuilder().addPart("description", "文件描述").addFilePart("file", Path.of("example.txt")).build();// 创建 HttpRequestHttpRequest request = HttpRequest.newBuilder().uri(URI.create("https://api.example.com/upload")).timeout(Duration.ofSeconds(60)).header("Content-Type", "multipart/form-data; boundary=" + multipartData.getBoundary()).POST(multipartData).build();// 发送请求并获取响应HttpResponse<String> response = client.send(request, HttpResponse.BodyHandlers.ofString());// 获取响应状态码int statusCode = response.statusCode();System.out.println("Status Code: " + statusCode);// 获取响应体String responseBody = response.body();System.out.println("Response Body: " + responseBody);} catch (IOException | InterruptedException e) {e.printStackTrace();}}// 自定义多部分请求体发布器static class MultipartBodyPublisher {private final String boundary;private final HttpRequest.BodyPublisher bodyPublisher;private MultipartBodyPublisher(String boundary, HttpRequest.BodyPublisher bodyPublisher) {this.boundary = boundary;this.bodyPublisher = bodyPublisher;}public String getBoundary() {return boundary;}public HttpRequest.BodyPublisher bodyPublisher() {return bodyPublisher;}public static Builder newBuilder() {return new Builder();}static class Builder {private final String boundary = "===" + System.currentTimeMillis() + "===";private final StringBuilder content = new StringBuilder();public Builder addPart(String name, String value) {content.append("--").append(boundary).append("\r\n");content.append("Content-Disposition: form-data; name=\"").append(name).append("\"\r\n\r\n");content.append(value).append("\r\n");return this;}public Builder addFilePart(String name, Path filePath) throws IOException {content.append("--").append(boundary).append("\r\n");content.append("Content-Disposition: form-data; name=\"").append(name).append("\"; filename=\"").append(filePath.getFileName()).append("\"\r\n");content.append("Content-Type: application/octet-stream\r\n\r\n");// 为简化示例,这里将文件内容也作为字符串处理// 实际应用中应使用byte数组或流处理二进制内容content.append(java.nio.file.Files.readString(filePath)).append("\r\n");return this;}public HttpRequest.BodyPublisher build() {content.append("--").append(boundary).append("--\r\n");return HttpRequest.BodyPublishers.ofString(content.toString());}}}
3. Apache HttpClient
Apache HttpClient 是 Apache HttpComponents 项目的一部分,提供了功能丰富、标准兼容的 HTTP 客户端库。它支持 HTTP/1.1 和 HTTP/2,并具有许多高级功能,如连接池、认证支持、重试机制等。
3.1 添加依赖
Maven:
<dependency><groupId>org.apache.httpcomponents.client5</groupId><artifactId>httpclient5</artifactId><version>5.2.1</version>
</dependency>
Gradle:
implementation 'org.apache.httpcomponents.client5:httpclient5:5.2.1'
3.2 基本 GET 请求
import org.apache.hc.client5.http.classic.methods.HttpGet;
import org.apache.hc.client5.http.impl.classic.CloseableHttpClient;
import org.apache.hc.client5.http.impl.classic.CloseableHttpResponse;
import org.apache.hc.client5.http.impl.classic.HttpClients;
import org.apache.hc.core5.http.io.entity.EntityUtils;import java.io.IOException;public class ApacheHttpClientGetExample {public static void main(String[] args) {// 创建 HttpClient 实例try (CloseableHttpClient httpClient = HttpClients.createDefault()) {// 创建 HttpGet 请求HttpGet httpGet = new HttpGet("https://api.example.com/data");// 设置请求头httpGet.setHeader("User-Agent", "Mozilla/5.0");httpGet.setHeader("Accept", "application/json");// 发送 GET 请求并获取响应try (CloseableHttpResponse response = httpClient.execute(httpGet)) {// 获取响应状态码int statusCode = response.getCode();System.out.println("Status Code: " + statusCode);// 获取响应实体String responseBody = EntityUtils.toString(response.getEntity());System.out.println("Response Body: " + responseBody);}} catch (IOException e) {e.printStackTrace();}}
}
3.3 基本 POST 请求
import org.apache.hc.client5.http.classic.methods.HttpPost;
import org.apache.hc.client5.http.impl.classic.CloseableHttpClient;
import org.apache.hc.client5.http.impl.classic.CloseableHttpResponse;
import org.apache.hc.client5.http.impl.classic.HttpClients;
import org.apache.hc.core5.http.ContentType;
import org.apache.hc.core5.http.io.entity.EntityUtils;
import org.apache.hc.core5.http.io.entity.StringEntity;import java.io.IOException;public class ApacheHttpClientPostExample {public static void main(String[] args) {// 创建 HttpClient 实例try (CloseableHttpClient httpClient = HttpClients.createDefault()) {// 创建 HttpPost 请求HttpPost httpPost = new HttpPost("https://api.example.com/submit");// 设置请求头httpPost.setHeader("User-Agent", "Mozilla/5.0");httpPost.setHeader("Accept", "application/json");// 设置请求体String jsonBody = "{\"name\": \"John Doe\", \"email\": \"john@example.com\"}";StringEntity entity = new StringEntity(jsonBody, ContentType.APPLICATION_JSON);httpPost.setEntity(entity);// 发送 POST 请求并获取响应try (CloseableHttpResponse response = httpClient.execute(httpPost)) {// 获取响应状态码int statusCode = response.getCode();System.out.println("Status Code: " + statusCode);// 获取响应实体String responseBody = EntityUtils.toString(response.getEntity());System.out.println("Response Body: " + responseBody);}} catch (IOException e) {e.printStackTrace();}}
}
3.4 配置连接池
import org.apache.hc.client5.http.classic.methods.HttpGet;
import org.apache.hc.client5.http.config.RequestConfig;
import org.apache.hc.client5.http.impl.classic.CloseableHttpClient;
import org.apache.hc.client5.http.impl.classic.CloseableHttpResponse;
import org.apache.hc.client5.http.impl.classic.HttpClients;
import org.apache.hc.client5.http.impl.io.PoolingHttpClientConnectionManager;
import org.apache.hc.core5.http.io.entity.EntityUtils;
import org.apache.hc.core5.util.Timeout;import java.io.IOException;
import java.util.concurrent.TimeUnit;public class ApacheHttpClientConnectionPoolExample {public static void main(String[] args) {// 创建连接管理器PoolingHttpClientConnectionManager connectionManager = new PoolingHttpClientConnectionManager();// 设置最大连接数connectionManager.setMaxTotal(100);// 设置每个路由的最大连接数connectionManager.setDefaultMaxPerRoute(20);// 配置请求参数RequestConfig requestConfig = RequestConfig.custom().setConnectTimeout(Timeout.of(5, TimeUnit.SECONDS)).setResponseTimeout(Timeout.of(5, TimeUnit.SECONDS)).setConnectionRequestTimeout(Timeout.of(5, TimeUnit.SECONDS)).build();// 创建 HttpClient 实例try (CloseableHttpClient httpClient = HttpClients.custom().setConnectionManager(connectionManager).setDefaultRequestConfig(requestConfig).build()) {// 创建 HttpGet 请求HttpGet httpGet = new HttpGet("https://api.example.com/data");// 发送 GET 请求并获取响应try (CloseableHttpResponse response = httpClient.execute(httpGet)) {// 获取响应状态码int statusCode = response.getCode();System.out.println("Status Code: " + statusCode);// 获取响应实体String responseBody = EntityUtils.toString(response.getEntity());System.out.println("Response Body: " + responseBody);}} catch (IOException e) {e.printStackTrace();}}
}
3.5 处理 Cookie
import org.apache.hc.client5.http.classic.methods.HttpGet;
import org.apache.hc.client5.http.cookie.BasicCookieStore;
import org.apache.hc.client5.http.cookie.Cookie;
import org.apache.hc.client5.http.impl.classic.CloseableHttpClient;
import org.apache.hc.client5.http.impl.classic.CloseableHttpResponse;
import org.apache.hc.client5.http.impl.classic.HttpClients;
import org.apache.hc.client5.http.impl.cookie.BasicClientCookie;
import org.apache.hc.core5.http.io.entity.EntityUtils;import java.io.IOException;
import java.util.Date;
import java.util.List;public class ApacheHttpClientCookieExample {public static void main(String[] args) {// 创建 Cookie 存储BasicCookieStore cookieStore = new BasicCookieStore();// 添加自定义 CookieBasicClientCookie cookie = new BasicClientCookie("sessionId", "abc123");cookie.setDomain("example.com");cookie.setPath("/");// 设置过期时间(1小时后)cookie.setExpiryDate(new Date(System.currentTimeMillis() + 3600 * 1000));cookieStore.addCookie(cookie);// 创建 HttpClient 实例,使用 Cookie 存储try (CloseableHttpClient httpClient = HttpClients.custom().setDefaultCookieStore(cookieStore).build()) {// 创建 HttpGet 请求HttpGet httpGet = new HttpGet("https://api.example.com/data");// 发送 GET 请求并获取响应try (CloseableHttpResponse response = httpClient.execute(httpGet)) {// 获取响应状态码int statusCode = response.getCode();System.out.println("Status Code: " + statusCode);// 获取响应实体String responseBody = EntityUtils.toString(response.getEntity());System.out.println("Response Body: " + responseBody);// 获取响应中的 CookieList<Cookie> cookies = cookieStore.getCookies();for (Cookie c : cookies) {System.out.println("Cookie: " + c.getName() + " = " + c.getValue());}}} catch (IOException e) {e.printStackTrace();}}
}
3.6 表单提交
import org.apache.hc.client5.http.classic.methods.HttpPost;
import org.apache.hc.client5.http.entity.UrlEncodedFormEntity;
import org.apache.hc.client5.http.impl.classic.CloseableHttpClient;
import org.apache.hc.client5.http.impl.classic.CloseableHttpResponse;
import org.apache.hc.client5.http.impl.classic.HttpClients;
import org.apache.hc.core5.http.NameValuePair;
import org.apache.hc.core5.http.io.entity.EntityUtils;
import org.apache.hc.core5.http.message.BasicNameValuePair;import java.io.IOException;
import java.util.ArrayList;
import java.util.List;public class ApacheHttpClientFormPostExample {public static void main(String[] args) {// 创建 HttpClient 实例try (CloseableHttpClient httpClient = HttpClients.createDefault()) {// 创建 HttpPost 请求HttpPost httpPost = new HttpPost("https://api.example.com/submit-form");// 创建表单参数列表List<NameValuePair> params = new ArrayList<>();params.add(new BasicNameValuePair("username", "john_doe"));params.add(new BasicNameValuePair("password", "secret123"));params.add(new BasicNameValuePair("remember", "true"));// 设置表单实体httpPost.setEntity(new UrlEncodedFormEntity(params));// 发送 POST 请求并获取响应try (CloseableHttpResponse response = httpClient.execute(httpPost)) {// 获取响应状态码int statusCode = response.getCode();System.out.println("Status Code: " + statusCode);// 获取响应实体String responseBody = EntityUtils.toString(response.getEntity());System.out.println("Response Body: " + responseBody);}} catch (IOException e) {e.printStackTrace();}}
}
3.7 文件上传
import org.apache.hc.client5.http.classic.methods.HttpPost;
import org.apache.hc.client5.http.entity.mime.MultipartEntityBuilder;
import org.apache.hc.client5.http.impl.classic.CloseableHttpClient;
import org.apache.hc.client5.http.impl.classic.CloseableHttpResponse;
import org.apache.hc.client5.http.impl.classic.HttpClients;
import org.apache.hc.core5.http.ContentType;
import org.apache.hc.core5.http.io.entity.EntityUtils;import java.io.File;
import java.io.IOException;public class ApacheHttpClientFileUploadExample {public static void main(String[] args) {// 需要额外添加依赖:httpmime// <dependency>//   <groupId>org.apache.httpcomponents.client5</groupId>//   <artifactId>httpclient5-fluent</artifactId>//   <version>5.2.1</version>// </dependency>// 创建 HttpClient 实例try (CloseableHttpClient httpClient = HttpClients.createDefault()) {// 创建 HttpPost 请求HttpPost httpPost = new HttpPost("https://api.example.com/upload");// 创建 MultipartEntityBuilderMultipartEntityBuilder builder = MultipartEntityBuilder.create();// 添加文本字段builder.addTextBody("description", "文件描述", ContentType.TEXT_PLAIN);// 添加文件File file = new File("example.txt");builder.addBinaryBody("file",file,ContentType.APPLICATION_OCTET_STREAM,file.getName());// 设置请求实体httpPost.setEntity(builder.build());// 发送 POST 请求并获取响应try (CloseableHttpResponse response = httpClient.execute(httpPost)) {// 获取响应状态码int statusCode = response.getCode();System.out.println("Status Code: " + statusCode);// 获取响应实体String responseBody = EntityUtils.toString(response.getEntity());System.out.println("Response Body: " + responseBody);}} catch (IOException e) {e.printStackTrace();}}
}
3.8 配置 HTTPS 和 SSL
import org.apache.hc.client5.http.classic.methods.HttpGet;
import org.apache.hc.client5.http.impl.classic.CloseableHttpClient;
import org.apache.hc.client5.http.impl.classic.CloseableHttpResponse;
import org.apache.hc.client5.http.impl.classic.HttpClients;
import org.apache.hc.client5.http.impl.io.PoolingHttpClientConnectionManager;
import org.apache.hc.client5.http.socket.ConnectionSocketFactory;
import org.apache.hc.client5.http.socket.PlainConnectionSocketFactory;
import org.apache.hc.client5.http.ssl.NoopHostnameVerifier;
import org.apache.hc.client5.http.ssl.SSLConnectionSocketFactory;
import org.apache.hc.core5.http.config.Registry;
import org.apache.hc.core5.http.config.RegistryBuilder;
import org.apache.hc.core5.http.io.entity.EntityUtils;
import org.apache.hc.core5.ssl.SSLContextBuilder;
import org.apache.hc.core5.ssl.TrustStrategy;import javax.net.ssl.SSLContext;
import java.io.File;
import java.io.IOException;
import java.security.KeyManagementException;
import java.security.KeyStoreException;
import java.security.NoSuchAlgorithmException;
import java.security.cert.CertificateException;
import java.security.cert.X509Certificate;public class ApacheHttpClientSslExample {public static void main(String[] args) {try {// 方法1:信任所有证书(仅用于测试/开发环境!)SSLContext sslContext = new SSLContextBuilder().loadTrustMaterial(null, new TrustStrategy() {@Overridepublic boolean isTrusted(X509Certificate[] chain, String authType) throws CertificateException {return true;}}).build();SSLConnectionSocketFactory sslSocketFactory = new SSLConnectionSocketFactory(sslContext,NoopHostnameVerifier.INSTANCE);Registry<ConnectionSocketFactory> socketFactoryRegistry = RegistryBuilder.<ConnectionSocketFactory>create().register("http", PlainConnectionSocketFactory.getSocketFactory()).register("https", sslSocketFactory).build();PoolingHttpClientConnectionManager connectionManager = new PoolingHttpClientConnectionManager(socketFactoryRegistry);// 创建 HttpClient 实例try (CloseableHttpClient httpClient = HttpClients.custom().setConnectionManager(connectionManager).build()) {// 创建 HttpGet 请求HttpGet httpGet = new HttpGet("https://api.example.com/secure-data");// 发送 GET 请求并获取响应try (CloseableHttpResponse response = httpClient.execute(httpGet)) {// 获取响应状态码int statusCode = response.getCode();System.out.println("Status Code: " + statusCode);// 获取响应实体String responseBody = EntityUtils.toString(response.getEntity());System.out.println("Response Body: " + responseBody);}}// 方法2:使用客户端证书进行双向SSL认证SSLContext clientAuthSslContext = new SSLContextBuilder().loadTrustMaterial(new File("truststore.jks"), "truststorePassword".toCharArray()).loadKeyMaterial(new File("keystore.jks"), "keystorePassword".toCharArray(), "keyPassword".toCharArray()).build();SSLConnectionSocketFactory clientAuthSslSocketFactory = new SSLConnectionSocketFactory(clientAuthSslContext);try (CloseableHttpClient clientAuthHttpClient = HttpClients.custom().setSSLSocketFactory(clientAuthSslSocketFactory).build()) {// 使用双向SSL认证的HttpClient发送请求// ...}} catch (IOException | NoSuchAlgorithmException | KeyStoreException | KeyManagementException e) {e.printStackTrace();}}
}
4. OkHttp
OkHttp 是一个由 Square 开发的高效 HTTP 客户端,专为 Android 和 Java 应用程序设计。它支持 HTTP/2 和 SPDY,可以共享同一地址的 socket 连接,使用连接池减少请求延迟,并提供透明的 GZIP 压缩和响应缓存。
4.1 添加依赖
Maven:
<dependency><groupId>com.squareup.okhttp3</groupId><artifactId>okhttp</artifactId><version>4.10.0</version>
</dependency>
Gradle:
implementation 'com.squareup.okhttp3:okhttp:4.10.0'
4.2 基本 GET 请求
import okhttp3.OkHttpClient;
import okhttp3.Request;
import okhttp3.Response;import java.io.IOException;public class OkHttpGetExample {// OkHttpClient 实例应该是单例的,在应用程序生命周期内重用private final OkHttpClient client = new OkHttpClient();public static void main(String[] args) {OkHttpGetExample example = new OkHttpGetExample();try {String response = example.run("https://api.example.com/data");System.out.println(response);} catch (IOException e) {e.printStackTrace();}}private String run(String url) throws IOException {Request request = new Request.Builder().url(url).header("User-Agent", "OkHttp Example").build();try (Response response = client.newCall(request).execute()) {if (!response.isSuccessful()) {throw new IOException("Unexpected response code: " + response);}return response.body().string();}}
}
4.3 基本 POST 请求
import okhttp3.*;import java.io.IOException;public class OkHttpPostExample {private final OkHttpClient client = new OkHttpClient();public static void main(String[] args) {OkHttpPostExample example = new OkHttpPostExample();try {String response = example.post("https://api.example.com/submit");System.out.println(response);} catch (IOException e) {e.printStackTrace();}}private String post(String url) throws IOException {// 设置请求体的媒体类型MediaType JSON = MediaType.parse("application/json; charset=utf-8");String jsonBody = "{\"name\": \"John Doe\", \"email\": \"john@example.com\"}";RequestBody body = RequestBody.create(jsonBody, JSON);Request request = new Request.Builder().url(url).post(body).build();try (Response response = client.newCall(request).execute()) {if (!response.isSuccessful()) {throw new IOException("Unexpected response code: " + response);}return response.body().string();}}
}
4.4 异步请求
import okhttp3.*;import java.io.IOException;public class OkHttpAsyncExample {private final OkHttpClient client = new OkHttpClient();public static void main(String[] args) {OkHttpAsyncExample example = new OkHttpAsyncExample();example.run("https://api.example.com/data");// 等待异步请求完成try {Thread.sleep(5000);} catch (InterruptedException e) {e.printStackTrace();}}private void run(String url) {Request request = new Request.Builder().url(url).build();client.newCall(request).enqueue(new Callback() {@Overridepublic void onFailure(Call call, IOException e) {e.printStackTrace();}@Overridepublic void onResponse(Call call, Response response) throws IOException {try (ResponseBody responseBody = response.body()) {if (!response.isSuccessful()) {throw new IOException("Unexpected response code: " + response);}System.out.println(responseBody.string());}}});System.out.println("请求已发送,等待响应...");}
}
4.5 表单提交
import okhttp3.*;import java.io.IOException;public class OkHttpFormPostExample {private final OkHttpClient client = new OkHttpClient();public static void main(String[] args) {OkHttpFormPostExample example = new OkHttpFormPostExample();try {String response = example.formPost("https://api.example.com/submit-form");System.out.println(response);} catch (IOException e) {e.printStackTrace();}}private String formPost(String url) throws IOException {RequestBody formBody = new FormBody.Builder().add("username", "john_doe").add("password", "secret123").add("remember", "true").build();Request request = new Request.Builder().url(url).post(formBody).build();try (Response response = client.newCall(request).execute()) {if (!response.isSuccessful()) {throw new IOException("Unexpected response code: " + response);}return response.body().string();}}
}
4.6 文件上传
import okhttp3.*;import java.io.File;
import java.io.IOException;public class OkHttpFileUploadExample {private final OkHttpClient client = new OkHttpClient();public static void main(String[] args) {OkHttpFileUploadExample example = new OkHttpFileUploadExample();try {String response = example.uploadFile("https://api.example.com/upload");System.out.println(response);} catch (IOException e) {e.printStackTrace();}}private String uploadFile(String url) throws IOException {File file = new File("example.txt");RequestBody requestBody = new MultipartBody.Builder().setType(MultipartBody.FORM).addFormDataPart("description", "文件描述").addFormDataPart("file", file.getName(),RequestBody.create(file, MediaType.parse("application/octet-stream"))).build();Request request = new Request.Builder().url(url).post(requestBody).build();try (Response response = client.newCall(request).execute()) {if (!response.isSuccessful()) {throw new IOException("Unexpected response code: " + response);}return response.body().string();}}
}
4.7 配置超时和重试
import okhttp3.*;import java.io.IOException;
import java.util.concurrent.TimeUnit;public class OkHttpTimeoutRetryExample {public static void main(String[] args) {// 配置超时OkHttpClient client = new OkHttpClient.Builder().connectTimeout(10, TimeUnit.SECONDS).writeTimeout(10, TimeUnit.SECONDS).readTimeout(30, TimeUnit.SECONDS).build();// 创建请求Request request = new Request.Builder().url("https://api.example.com/data").build();// 使用重试拦截器OkHttpClient clientWithRetry = client.newBuilder().addInterceptor(new RetryInterceptor(3)).build();try (Response response = clientWithRetry.newCall(request).execute()) {System.out.println("Response Code: " + response.code());System.out.println("Response Body: " + response.body().string());} catch (IOException e) {e.printStackTrace();}}// 自定义重试拦截器static class RetryInterceptor implements Interceptor {private final int maxRetries;public RetryInterceptor(int maxRetries) {this.maxRetries = maxRetries;}@Overridepublic Response intercept(Chain chain) throws IOException {Request request = chain.request();IOException exception = null;Response response = null;int retryCount = 0;while (retryCount < maxRetries && (response == null || !response.isSuccessful())) {if (retryCount > 0) {System.out.println("重试请求: " + retryCount);// 如果需要,可以在重试之间增加延迟try {Thread.sleep(1000 * retryCount);} catch (InterruptedException e) {Thread.currentThread().interrupt();throw new IOException("Retry interrupted", e);}}if (exception != null) {System.out.println("上次尝试失败: " + exception.getMessage());}try {response = chain.proceed(request);} catch (IOException e) {exception = e;retryCount++;if (retryCount >= maxRetries) {throw exception;}continue;}if (!response.isSuccessful()) {System.out.println("请求失败,状态码: " + response.code());response.close();retryCount++;if (retryCount >= maxRetries) {break;}}}return response;}}
}
4.8 配置 HTTPS 和 SSL
import okhttp3.*;import javax.net.ssl.*;
import java.io.IOException;
import java.io.InputStream;
import java.security.*;
import java.security.cert.CertificateException;
import java.security.cert.X509Certificate;public class OkHttpSslExample {public static void main(String[] args) throws Exception {// 方法1:信任所有证书(仅用于测试/开发环境!)TrustManager[] trustAllCerts = new TrustManager[]{new X509TrustManager() {@Overridepublic void checkClientTrusted(X509Certificate[] chain, String authType) {}@Overridepublic void checkServerTrusted(X509Certificate[] chain, String authType) {}@Overridepublic X509Certificate[] getAcceptedIssuers() {return new X509Certificate[0];}}};SSLContext sslContext = SSLContext.getInstance("TLS");sslContext.init(null, trustAllCerts, new SecureRandom());OkHttpClient unsafeClient = new OkHttpClient.Builder().sslSocketFactory(sslContext.getSocketFactory(), (X509TrustManager) trustAllCerts[0]).hostnameVerifier((hostname, session) -> true).build();// 方法2:使用自定义信任库和密钥库KeyStore trustStore = KeyStore.getInstance(KeyStore.getDefaultType());try (InputStream trustStoreInputStream = OkHttpSslExample.class.getResourceAsStream("/truststore.jks")) {trustStore.load(trustStoreInputStream, "truststorePassword".toCharArray());}TrustManagerFactory trustManagerFactory = TrustManagerFactory.getInstance(TrustManagerFactory.getDefaultAlgorithm());trustManagerFactory.init(trustStore);KeyStore keyStore = KeyStore.getInstance("PKCS12");try (InputStream keyStoreInputStream = OkHttpSslExample.class.getResourceAsStream("/keystore.p12")) {keyStore.load(keyStoreInputStream, "keystorePassword".toCharArray());}KeyManagerFactory keyManagerFactory = KeyManagerFactory.getInstance(KeyManagerFactory.getDefaultAlgorithm());keyManagerFactory.init(keyStore, "keyPassword".toCharArray());SSLContext clientAuthSslContext = SSLContext.getInstance("TLS");clientAuthSslContext.init(keyManagerFactory.getKeyManagers(),trustManagerFactory.getTrustManagers(),null);OkHttpClient secureClient = new OkHttpClient.Builder().sslSocketFactory(clientAuthSslContext.getSocketFactory(), (X509TrustManager) trustManagerFactory.getTrustManagers()[0]).build();// 创建请求Request request = new Request.Builder().url("https://api.example.com/secure-data").build();// 使用配置的客户端发送请求try (Response response = unsafeClient.newCall(request).execute()) {System.out.println("Response Code: " + response.code());System.out.println("Response Body: " + response.body().string());} catch (IOException e) {e.printStackTrace();}}
}
5. Spring RestTemplate
Spring RestTemplate 是 Spring 框架提供的同步 HTTP 客户端,支持 RESTful 风格的 HTTP 交互。它是 Spring 应用中进行 HTTP 请求的经典选择,提供了丰富的方法来简化 HTTP 客户端的开发。
注意:从 Spring 5 开始,RestTemplate 被标记为处于维护模式,建议新项目使用 WebClient(下一节介绍)。
5.1 添加依赖
Maven:
<!-- Spring Web -->
<dependency><groupId>org.springframework</groupId><artifactId>spring-web</artifactId><version>5.3.23</version>
</dependency>
Gradle:
implementation 'org.springframework:spring-web:5.3.23'
5.2 基本 GET 请求
import org.springframework.http.ResponseEntity;
import org.springframework.web.client.RestTemplate;public class RestTemplateGetExample {public static void main(String[] args) {// 创建 RestTemplate 实例RestTemplate restTemplate = new RestTemplate();// 基本 GET 请求(返回字符串)String result = restTemplate.getForObject("https://api.example.com/data", String.class);System.out.println("Response Body: " + result);// 使用 ResponseEntity 获取更多响应细节ResponseEntity<String> response = restTemplate.getForEntity("https://api.example.com/data", String.class);System.out.println("Status Code: " + response.getStatusCode());System.out.println("Headers: " + response.getHeaders());System.out.println("Response Body: " + response.getBody());}
}
5.3 获取并映射到 Java 对象
import org.springframework.http.ResponseEntity;
import org.springframework.web.client.RestTemplate;public class RestTemplateObjectMappingExample {// 响应数据的模型类static class User {private Long id;private String name;private String email;// Getters and Setterspublic Long getId() { return id; }public void setId(Long id) { this.id = id; }public String getName() { return name; }public void setName(String name) { this.name = name; }public String getEmail() { return email; }public void setEmail(String email) { this.email = email; }@Overridepublic String toString() {return "User{id=" + id + ", name='" + name + "', email='" + email + "'}";}}public static void main(String[] args) {// 创建 RestTemplate 实例RestTemplate restTemplate = new RestTemplate();// 获取单个对象User user = restTemplate.getForObject("https://api.example.com/users/1", User.class);System.out.println("User: " + user);// 获取对象数组User[] users = restTemplate.getForObject("https://api.example.com/users", User[].class);System.out.println("Users count: " + users.length);for (User u : users) {System.out.println(u);}// 使用 ResponseEntity 获取更多响应细节ResponseEntity<User> response = restTemplate.getForEntity("https://api.example.com/users/1", User.class);System.out.println("Status Code: " + response.getStatusCode());System.out.println("User from response: " + response.getBody());}
}
5.4 基本 POST 请求
import org.springframework.http.*;
import org.springframework.web.client.RestTemplate;public class RestTemplatePostExample {// 请求数据的模型类static class UserRequest {private String name;private String email;public UserRequest(String name, String email) {this.name = name;this.email = email;}// Getterspublic String getName() { return name; }public String getEmail() { return email; }}// 响应数据的模型类static class UserResponse {private Long id;private String name;private String email;private String createdAt;// Getters and Setterspublic Long getId() { return id; }public void setId(Long id) { this.id = id; }public String getName() { return name; }public void setName(String name) { this.name = name; }public String getEmail() { return email; }public void setEmail(String email) { this.email = email; }public String getCreatedAt() { return createdAt; }public void setCreatedAt(String createdAt) { this.createdAt = createdAt; }@Overridepublic String toString() {return "UserResponse{id=" + id + ", name='" + name + "', email='" + email + "', createdAt='" + createdAt + "'}";}}public static void main(String[] args) {// 创建 RestTemplate 实例RestTemplate restTemplate = new RestTemplate();// 创建请求对象UserRequest requestUser = new UserRequest("John Doe", "john@example.com");// 方法 1: 简单的 POST 请求UserResponse createdUser = restTemplate.postForObject("https://api.example.com/users", requestUser, UserResponse.class);System.out.println("Created User: " + createdUser);// 方法 2: 使用 ResponseEntity 获取更多响应细节ResponseEntity<UserResponse> response = restTemplate.postForEntity("https://api.example.com/users", requestUser, UserResponse.class);System.out.println("Status Code: " + response.getStatusCode());System.out.println("Created User from response: " + response.getBody());// 方法 3: 使用 HttpEntity 设置请求头HttpHeaders headers = new HttpHeaders();headers.setContentType(MediaType.APPLICATION_JSON);headers.set("Authorization", "Bearer your-token-here");HttpEntity<UserRequest> requestEntity = new HttpEntity<>(requestUser, headers);ResponseEntity<UserResponse> responseWithHeaders = restTemplate.postForEntity("https://api.example.com/users", requestEntity, UserResponse.class);System.out.println("Status Code with headers: " + responseWithHeaders.getStatusCode());System.out.println("Created User with headers: " + responseWithHeaders.getBody());}
}
5.5 PUT 和 DELETE 请求
import org.springframework.http.*;
import org.springframework.web.client.RestTemplate;public class RestTemplatePutDeleteExample {// 响应数据的模型类static class User {private Long id;private String name;private String email;public User() {}public User(Long id, String name, String email) {this.id = id;this.name = name;this.email = email;}// Getters and Setterspublic Long getId() { return id; }public void setId(Long id) { this.id = id; }public String getName() { return name; }public void setName(String name) { this.name = name; }public String getEmail() { return email; }public void setEmail(String email) { this.email = email; }@Overridepublic String toString() {return "User{id=" + id + ", name='" + name + "', email='" + email + "'}";}}public static void main(String[] args) {// 创建 RestTemplate 实例RestTemplate restTemplate = new RestTemplate();// PUT 请求 - 更新资源User userToUpdate = new User(1L, "Updated Name", "updated@example.com");// 方法 1: 简单的 PUT 请求restTemplate.put("https://api.example.com/users/1", userToUpdate);System.out.println("User updated");// 方法 2: 使用 HttpEntity 设置请求头HttpHeaders headers = new HttpHeaders();headers.setContentType(MediaType.APPLICATION_JSON);headers.set("Authorization", "Bearer your-token-here");HttpEntity<User> requestEntity = new HttpEntity<>(userToUpdate, headers);// 使用 exchange 方法可以获取响应ResponseEntity<User> putResponse = restTemplate.exchange("https://api.example.com/users/1", HttpMethod.PUT, requestEntity, User.class);System.out.println("PUT Status Code: " + putResponse.getStatusCode());System.out.println("Updated User: " + putResponse.getBody());// DELETE 请求 - 删除资源// 方法 1: 简单的 DELETE 请求restTemplate.delete("https://api.example.com/users/2");System.out.println("User deleted");// 方法 2: 使用 exchange 方法带请求头并获取响应HttpEntity<Void> deleteRequestEntity = new HttpEntity<>(headers);ResponseEntity<Void> deleteResponse = restTemplate.exchange("https://api.example.com/users/3", HttpMethod.DELETE, deleteRequestEntity, Void.class);System.out.println("DELETE Status Code: " + deleteResponse.getStatusCode());}
}
5.6 请求参数和路径变量
import org.springframework.web.client.RestTemplate;
import org.springframework.web.util.UriComponentsBuilder;import java.net.URI;
import java.util.HashMap;
import java.util.Map;public class RestTemplateParamsExample {// 响应数据的模型类static class SearchResult {private String query;private int page;private int perPage;private int total;private Object[] results;// Getters and Setterspublic String getQuery() { return query; }public void setQuery(String query) { this.query = query; }public int getPage() { return page; }public void setPage(int page) { this.page = page; }public int getPerPage() { return perPage; }public void setPerPage(int perPage) { this.perPage = perPage; }public int getTotal() { return total; }public void setTotal(int total) { this.total = total; }public Object[] getResults() { return results; }public void setResults(Object[] results) { this.results = results; }@Overridepublic String toString() {return "SearchResult{query='" + query + "', page=" + page + ", perPage=" + perPage + ", total=" + total + ", results.length=" + (results != null ? results.length : 0) + "}";}}public static void main(String[] args) {// 创建 RestTemplate 实例RestTemplate restTemplate = new RestTemplate();// 1. 使用路径变量String url = "https://api.example.com/users/{id}";Map<String, String> params = new HashMap<>();params.put("id", "123");// 替换路径变量并发送请求String result = restTemplate.getForObject(url, String.class, params);System.out.println("User with ID 123: " + result);// 或使用可变参数直接传递值result = restTemplate.getForObject(url, String.class, "456");System.out.println("User with ID 456: " + result);// 2. 使用查询参数// 方法 1: 使用 UriComponentsBuilderURI uri = UriComponentsBuilder.fromHttpUrl("https://api.example.com/search").queryParam("q", "java").queryParam("page", 1).queryParam("per_page", 10).build().encode().toUri();SearchResult searchResult = restTemplate.getForObject(uri, SearchResult.class);System.out.println("Search Result: " + searchResult);// 方法 2: 直接在 URL 中添加查询参数String searchUrl = "https://api.example.com/search?q={q}&page={page}&per_page={perPage}";Map<String, Object> searchParams = new HashMap<>();searchParams.put("q", "spring");searchParams.put("page", 2);searchParams.put("perPage", 20);SearchResult anotherResult = restTemplate.getForObject(searchUrl, SearchResult.class, searchParams);System.out.println("Another Search Result: " + anotherResult);}
}
5.7 处理响应错误
import org.springframework.http.HttpStatus;
import org.springframework.http.ResponseEntity;
import org.springframework.web.client.HttpClientErrorException;
import org.springframework.web.client.HttpServerErrorException;
import org.springframework.web.client.RestClientException;
import org.springframework.web.client.RestTemplate;public class RestTemplateErrorHandlingExample {public static void main(String[] args) {// 创建 RestTemplate 实例RestTemplate restTemplate = new RestTemplate();try {// 尝试获取不存在的资源ResponseEntity<String> response = restTemplate.getForEntity("https://api.example.com/users/999", String.class);System.out.println("Status Code: " + response.getStatusCode());System.out.println("Response Body: " + response.getBody());} catch (HttpClientErrorException e) {// 处理客户端错误 (4xx)System.out.println("Client Error: " + e.getMessage());System.out.println("Status Code: " + e.getStatusCode());System.out.println("Response Body: " + e.getResponseBodyAsString());// 根据状态码处理特定错误if (e.getStatusCode() == HttpStatus.NOT_FOUND) {System.out.println("资源不存在");} else if (e.getStatusCode() == HttpStatus.UNAUTHORIZED) {System.out.println("认证失败,请检查凭证");} else if (e.getStatusCode() == HttpStatus.FORBIDDEN) {System.out.println("没有访问权限");}} catch (HttpServerErrorException e) {// 处理服务器错误 (5xx)System.out.println("Server Error: " + e.getMessage());System.out.println("Status Code: " + e.getStatusCode());System.out.println("Response Body: " + e.getResponseBodyAsString());} catch (RestClientException e) {// 处理其他 REST 客户端异常System.out.println("REST Client Error: " + e.getMessage());}}
}
5.8 自定义 RestTemplate 配置
import org.apache.hc.client5.http.classic.HttpClient;
import org.apache.hc.client5.http.config.RequestConfig;
import org.apache.hc.client5.http.impl.classic.HttpClientBuilder;
import org.apache.hc.client5.http.impl.io.PoolingHttpClientConnectionManager;
import org.apache.hc.core5.util.Timeout;
import org.springframework.http.client.HttpComponentsClientHttpRequestFactory;
import org.springframework.web.client.DefaultResponseErrorHandler;
import org.springframework.web.client.ResponseErrorHandler;
import org.springframework.web.client.RestTemplate;import java.io.IOException;
import java.util.concurrent.TimeUnit;public class RestTemplateCustomizationExample {public static void main(String[] args) {// 自定义 RestTemplate 配置// 1. 配置连接池和超时PoolingHttpClientConnectionManager connectionManager = new PoolingHttpClientConnectionManager();connectionManager.setMaxTotal(100);connectionManager.setDefaultMaxPerRoute(20);RequestConfig requestConfig = RequestConfig.custom().setConnectTimeout(Timeout.of(5, TimeUnit.SECONDS)).setResponseTimeout(Timeout.of(5, TimeUnit.SECONDS)).setConnectionRequestTimeout(Timeout.of(5, TimeUnit.SECONDS)).build();HttpClient httpClient = HttpClientBuilder.create().setConnectionManager(connectionManager).setDefaultRequestConfig(requestConfig).build();HttpComponentsClientHttpRequestFactory requestFactory = new HttpComponentsClientHttpRequestFactory(httpClient);// 2. 自定义错误处理ResponseErrorHandler customErrorHandler = new DefaultResponseErrorHandler() {@Overridepublic boolean hasError(org.springframework.http.client.ClientHttpResponse response) throws IOException {// 只在5xx状态码时认为是错误return response.getStatusCode().series() == HttpStatus.Series.SERVER_ERROR;}};// 3. 创建并配置 RestTemplateRestTemplate restTemplate = new RestTemplate(requestFactory);restTemplate.setErrorHandler(customErrorHandler);// 使用配置好的 RestTemplatetry {String result = restTemplate.getForObject("https://api.example.com/data", String.class);System.out.println("Response: " + result);// 这里即使返回 4xx 也不会抛出异常String notFound = restTemplate.getForObject("https://api.example.com/not-exists", String.class);System.out.println("4xx Response: " + notFound);} catch (Exception e) {System.out.println("Error: " + e.getMessage());}}
}
5.9 文件上传
import org.springframework.core.io.FileSystemResource;
import org.springframework.core.io.Resource;
import org.springframework.http.*;
import org.springframework.util.LinkedMultiValueMap;
import org.springframework.util.MultiValueMap;
import org.springframework.web.client.RestTemplate;import java.io.File;public class RestTemplateFileUploadExample {public static void main(String[] args) {// 创建 RestTemplate 实例RestTemplate restTemplate = new RestTemplate();// 准备文件资源File file = new File("example.txt");Resource fileResource = new FileSystemResource(file);// 创建表单数据MultiValueMap<String, Object> body = new LinkedMultiValueMap<>();body.add("file", fileResource);body.add("description", "文件描述");// 设置请求头HttpHeaders headers = new HttpHeaders();headers.setContentType(MediaType.MULTIPART_FORM_DATA);// 创建请求实体HttpEntity<MultiValueMap<String, Object>> requestEntity = new HttpEntity<>(body, headers);// 发送 POST 请求ResponseEntity<String> response = restTemplate.postForEntity("https://api.example.com/upload",requestEntity,String.class);// 输出结果System.out.println("Status Code: " + response.getStatusCode());System.out.println("Response: " + response.getBody());}
}
5.10 请求和响应拦截器
import org.springframework.http.HttpRequest;
import org.springframework.http.client.*;
import org.springframework.web.client.RestTemplate;import java.io.BufferedReader;
import java.io.IOException;
import java.io.InputStreamReader;
import java.nio.charset.StandardCharsets;
import java.util.ArrayList;
import java.util.List;
import java.util.stream.Collectors;public class RestTemplateInterceptorExample {// 请求拦截器static class LoggingRequestInterceptor implements ClientHttpRequestInterceptor {@Overridepublic ClientHttpResponse intercept(HttpRequest request, byte[] body, ClientHttpRequestExecution execution) throws IOException {// 记录请求信息System.out.println("===========================请求开始===========================");System.out.println("URI: " + request.getURI());System.out.println("Method: " + request.getMethod());System.out.println("Headers: " + request.getHeaders());System.out.println("Request Body: " + new String(body, StandardCharsets.UTF_8));// 执行请求ClientHttpResponse response = execution.execute(request, body);// 创建可重复读取的响应包装器BufferingClientHttpResponseWrapper responseWrapper = new BufferingClientHttpResponseWrapper(response);// 记录响应信息System.out.println("===========================响应开始===========================");System.out.println("Status Code: " + responseWrapper.getStatusCode());System.out.println("Status Text: " + responseWrapper.getStatusText());System.out.println("Headers: " + responseWrapper.getHeaders());// 读取响应体String responseBody = new BufferedReader(new InputStreamReader(responseWrapper.getBody(), StandardCharsets.UTF_8)).lines().collect(Collectors.joining("\n"));System.out.println("Response Body: " + responseBody);return responseWrapper;}}// 响应包装器,使响应体可以重复读取static class BufferingClientHttpResponseWrapper implements ClientHttpResponse {private final ClientHttpResponse response;private byte[] body;public BufferingClientHttpResponseWrapper(ClientHttpResponse response) {this.response = response;}@Overridepublic HttpStatus getStatusCode() throws IOException {return response.getStatusCode();}@Overridepublic int getRawStatusCode() throws IOException {return response.getRawStatusCode();}@Overridepublic String getStatusText() throws IOException {return response.getStatusText();}@Overridepublic void close() {response.close();}@Overridepublic java.io.InputStream getBody() throws IOException {if (body == null) {body = response.getBody().readAllBytes();}return new java.io.ByteArrayInputStream(body);}@Overridepublic HttpHeaders getHeaders() {return response.getHeaders();}}public static void main(String[] args) {// 创建客户端工厂SimpleClientHttpRequestFactory requestFactory = new SimpleClientHttpRequestFactory();requestFactory.setConnectTimeout(5000);requestFactory.setReadTimeout(5000);// 创建 RestTemplate 实例RestTemplate restTemplate = new RestTemplate(requestFactory);// 添加拦截器List<ClientHttpRequestInterceptor> interceptors = new ArrayList<>();interceptors.add(new LoggingRequestInterceptor());restTemplate.setInterceptors(interceptors);// 发送请求String response = restTemplate.getForObject("https://api.example.com/data", String.class);System.out.println("Final Response: " + response);}
}
6. Spring WebClient
Spring WebClient 是 Spring 5 引入的非阻塞、响应式 HTTP 客户端,是 RestTemplate 的现代替代品。它基于 Project Reactor 构建,支持同步和异步操作,适合高性能和响应式编程场景。
6.1 添加依赖
Maven:
<!-- Spring WebFlux -->
<dependency><groupId>org.springframework.boot</groupId><artifactId>spring-boot-starter-webflux</artifactId><version>2.7.5</version>
</dependency>
Gradle:
implementation 'org.springframework.boot:spring-boot-starter-webflux:2.7.5'
6.2 基本 GET 请求
import org.springframework.web.reactive.function.client.WebClient;
import reactor.core.publisher.Mono;public class WebClientGetExample {public static void main(String[] args) {// 创建 WebClient 实例WebClient webClient = WebClient.create("https://api.example.com");// 同步 GET 请求String result = webClient.get().uri("/data").retrieve().bodyToMono(String.class).block();  // 阻塞等待结果System.out.println("Synchronous Result: " + result);// 异步 GET 请求Mono<String> resultMono = webClient.get().uri("/data").retrieve().bodyToMono(String.class);resultMono.subscribe(response -> {System.out.println("Asynchronous Result: " + response);});// 等待异步操作完成(仅用于示例)try {Thread.sleep(2000);} catch (InterruptedException e) {e.printStackTrace();}}
}
6.3 获取并映射到 Java 对象
import org.springframework.web.reactive.function.client.WebClient;
import reactor.core.publisher.Flux;
import reactor.core.publisher.Mono;public class WebClientObjectMappingExample {// 响应数据的模型类static class User {private Long id;private String name;private String email;// Getters and Setterspublic Long getId() { return id; }public void setId(Long id) { this.id = id; }public String getName() { return name; }public void setName(String name) { this.name = name; }public String getEmail() { return email; }public void setEmail(String email) { this.email = email; }@Overridepublic String toString() {return "User{id=" + id + ", name='" + name + "', email='" + email + "'}";}}public static void main(String[] args) {// 创建 WebClient 实例WebClient webClient = WebClient.create("https://api.example.com");// 获取单个对象User user = webClient.get().uri("/users/1").retrieve().bodyToMono(User.class).block();  // 阻塞等待结果System.out.println("Single User: " + user);// 获取对象列表Flux<User> usersFlux = webClient.get().uri("/users").retrieve().bodyToFlux(User.class);// 处理对象流usersFlux.subscribe(u -> System.out.println("Received user: " + u),error -> System.err.println("Error: " + error),() -> System.out.println("Stream completed"));// 或者收集所有结果usersFlux.collectList().subscribe(allUsers -> {System.out.println("All users count: " + allUsers.size());allUsers.forEach(System.out::println);});// 等待异步操作完成(仅用于示例)try {Thread.sleep(3000);} catch (InterruptedException e) {e.printStackTrace();}}
}
6.4 基本 POST 请求
import org.springframework.http.MediaType;
import org.springframework.web.reactive.function.client.WebClient;
import reactor.core.publisher.Mono;public class WebClientPostExample {// 请求数据的模型类static class UserRequest {private String name;private String email;public UserRequest(String name, String email) {this.name = name;this.email = email;}// Getterspublic String getName() { return name; }public String getEmail() { return email; }}// 响应数据的模型类static class UserResponse {private Long id;private String name;private String email;private String createdAt;// Getters and Setterspublic Long getId() { return id; }public void setId(Long id) { this.id = id; }public String getName() { return name; }public void setName(String name) { this.name = name; }public String getEmail() { return email; }public void setEmail(String email) { this.email = email; }public String getCreatedAt() { return createdAt; }public void setCreatedAt(String createdAt) { this.createdAt = createdAt; }@Overridepublic String toString() {return "UserResponse{id=" + id + ", name='" + name + "', email='" + email + "', createdAt='" + createdAt + "'}";}}public static void main(String[] args) {// 创建 WebClient 实例WebClient webClient = WebClient.create("https://api.example.com");// 创建请求对象UserRequest requestUser = new UserRequest("John Doe", "john@example.com");// 同步 POST 请求UserResponse createdUser = webClient.post().uri("/users").contentType(MediaType.APPLICATION_JSON).bodyValue(requestUser).retrieve().bodyToMono(UserResponse.class).block();  // 阻塞等待结果System.out.println("Created User: " + createdUser);// 异步 POST 请求Mono<UserResponse> responseMono = webClient.post().uri("/users").contentType(MediaType.APPLICATION_JSON).bodyValue(requestUser).retrieve().bodyToMono(UserResponse.class);responseMono.subscribe(response -> System.out.println("Async Created User: " + response),error -> System.err.println("Error: " + error));// 等待异步操作完成(仅用于示例)try {Thread.sleep(2000);} catch (InterruptedException e) {e.printStackTrace();}}
}
6.5 PUT 和 DELETE 请求
import org.springframework.http.MediaType;
import org.springframework.web.reactive.function.client.WebClient;
import reactor.core.publisher.Mono;public class WebClientPutDeleteExample {// 数据模型类static class User {private Long id;private String name;private String email;public User() {}public User(Long id, String name, String email) {this.id = id;this.name = name;this.email = email;}// Getters and Setterspublic Long getId() { return id; }public void setId(Long id) { this.id = id; }public String getName() { return name; }public void setName(String name) { this.name = name; }public String getEmail() { return email; }public void setEmail(String email) { this.email = email; }@Overridepublic String toString() {return "User{id=" + id + ", name='" + name + "', email='" + email + "'}";}}public static void main(String[] args) {// 创建 WebClient 实例WebClient webClient = WebClient.create("https://api.example.com");// PUT 请求 - 更新资源User userToUpdate = new User(1L, "Updated Name", "updated@example.com");// 执行 PUT 请求并获取更新后的资源User updatedUser = webClient.put().uri("/users/{id}", 1).contentType(MediaType.APPLICATION_JSON).bodyValue(userToUpdate).retrieve().bodyToMono(User.class).block();  // 阻塞等待结果System.out.println("Updated User: " + updatedUser);// DELETE 请求 - 删除资源// 执行 DELETE 请求webClient.delete().uri("/users/{id}", 2).retrieve().toBodilessEntity()  // 获取无响应体的结果.block();  // 阻塞等待结果System.out.println("User with ID 2 deleted");// 异步 DELETE 请求Mono<Void> deleteMono = webClient.delete().uri("/users/{id}", 3).retrieve().bodyToMono(Void.class);deleteMono.subscribe(aVoid -> System.out.println("User with ID 3 deleted asynchronously"),error -> System.err.println("Error deleting user: " + error));// 等待异步操作完成(仅用于示例)try {Thread.sleep(2000);} catch (InterruptedException e) {e.printStackTrace();}}
}
6.6 请求参数和路径变量
import org.springframework.web.reactive.function.client.WebClient;
import reactor.core.publisher.Mono;import java.util.HashMap;
import java.util.Map;public class WebClientParamsExample {// 响应数据的模型类static class SearchResult {private String query;private int page;private int perPage;private int total;private Object[] results;// Getters and Setterspublic String getQuery() { return query; }public void setQuery(String query) { this.query = query; }public int getPage() { return page; }public void setPage(int page) { this.page = page; }public int getPerPage() { return perPage; }public void setPerPage(int perPage) { this.perPage = perPage; }public int getTotal() { return total; }public void setTotal(int total) { this.total = total; }public Object[] getResults() { return results; }public void setResults(Object[] results) { this.results = results; }@Overridepublic String toString() {return "SearchResult{query='" + query + "', page=" + page + ", perPage=" + perPage + ", total=" + total + ", results.length=" + (results != null ? results.length : 0) + "}";}}public static void main(String[] args) {// 创建 WebClient 实例WebClient webClient = WebClient.create("https://api.example.com");// 1. 使用路径变量String userId = "123";Mono<String> userMono = webClient.get().uri("/users/{id}", userId).retrieve().bodyToMono(String.class);String user = userMono.block();System.out.println("User with ID " + userId + ": " + user);// 2. 使用多个路径变量Mono<String> commentMono = webClient.get().uri("/users/{userId}/posts/{postId}/comments/{commentId}", userId, "456", "789").retrieve().bodyToMono(String.class);String comment = commentMono.block();System.out.println("Comment: " + comment);// 3. 使用 Map 传递路径变量Map<String, Object> uriVariables = new HashMap<>();uriVariables.put("userId", "123");uriVariables.put("postId", "456");Mono<String> postMono = webClient.get().uri("/users/{userId}/posts/{postId}", uriVariables).retrieve().bodyToMono(String.class);String post = postMono.block();System.out.println("Post: " + post);// 4. 添加查询参数Mono<SearchResult> searchMono = webClient.get().uri(uriBuilder -> uriBuilder.path("/search").queryParam("q", "java").queryParam("page", 1).queryParam("per_page", 10).build()).retrieve().bodyToMono(SearchResult.class);SearchResult searchResult = searchMono.block();System.out.println("Search Result: " + searchResult);}
}
6.7 处理错误
import org.springframework.http.HttpStatus;
import org.springframework.web.reactive.function.client.ClientResponse;
import org.springframework.web.reactive.function.client.WebClient;
import org.springframework.web.reactive.function.client.WebClientResponseException;
import reactor.core.publisher.Mono;public class WebClientErrorHandlingExample {// 自定义错误模型static class ErrorResponse {private String error;private String message;private int status;// Getters and Setterspublic String getError() { return error; }public void setError(String error) { this.error = error; }public String getMessage() { return message; }public void setMessage(String message) { this.message = message; }public int getStatus() { return status; }public void setStatus(int status) { this.status = status; }@Overridepublic String toString() {return "ErrorResponse{error='" + error + "', message='" + message + "', status=" + status + "}";}}public static void main(String[] args) {// 创建 WebClient 实例WebClient webClient = WebClient.create("https://api.example.com");// 方法 1: 使用 onStatus 处理特定状态码Mono<String> resultMono = webClient.get().uri("/users/999")  // 假设该资源不存在.retrieve().onStatus(HttpStatus::is4xxClientError,response -> handleClientError(response)).onStatus(HttpStatus::is5xxServerError,response -> Mono.error(new RuntimeException("服务器错误: " + response.statusCode()))).bodyToMono(String.class);try {String result = resultMono.block();System.out.println("Result: " + result);} catch (Exception e) {System.err.println("Error handled: " + e.getMessage());}// 方法 2: 使用 exchangeToMono 处理完整响应,包括错误Mono<String> exchangeMono = webClient.get().uri("/users/999").exchangeToMono(response -> {if (response.statusCode().is2xxSuccessful()) {return response.bodyToMono(String.class);} else if (response.statusCode().is4xxClientError()) {return response.bodyToMono(ErrorResponse.class).flatMap(errorBody -> Mono.error(new RuntimeException("Client error: " + errorBody)));} else {return Mono.error(new RuntimeException("Unexpected status: " + response.statusCode()));}});try {String exchangeResult = exchangeMono.block();System.out.println("Exchange Result: " + exchangeResult);} catch (Exception e) {System.err.println("Exchange error handled: " + e.getMessage());}// 方法 3: 使用全局错误处理并恢复Mono<String> recoveryMono = webClient.get().uri("/users/999").retrieve().bodyToMono(String.class).onErrorResume(WebClientResponseException.class, e -> {System.err.println("Error status code: " + e.getStatusCode());System.err.println("Error body: " + e.getResponseBodyAsString());// 提供默认值或执行恢复操作return Mono.just("{ \"id\": -1, \"name\": \"默认用户\", \"email\": \"default@example.com\" }");});String recoveryResult = recoveryMono.block();System.out.println("Recovery Result: " + recoveryResult);}private static Mono<? extends Throwable> handleClientError(ClientResponse response) {if (response.statusCode().equals(HttpStatus.NOT_FOUND)) {return Mono.error(new RuntimeException("资源不存在"));} else if (response.statusCode().equals(HttpStatus.UNAUTHORIZED)) {return Mono.error(new RuntimeException("认证失败,请检查凭证"));} else if (response.statusCode().equals(HttpStatus.FORBIDDEN)) {return Mono.error(new RuntimeException("没有访问权限"));} else {return response.bodyToMono(ErrorResponse.class).flatMap(errorBody -> Mono.error(new RuntimeException("客户端错误: " + errorBody)));}}
}
6.8 自定义 WebClient 配置
import io.netty.channel.ChannelOption;
import io.netty.handler.ssl.SslContextBuilder;
import io.netty.handler.ssl.util.InsecureTrustManagerFactory;
import io.netty.handler.timeout.ReadTimeoutHandler;
import io.netty.handler.timeout.WriteTimeoutHandler;
import org.springframework.http.HttpHeaders;
import org.springframework.http.MediaType;
import org.springframework.http.client.reactive.ReactorClientHttpConnector;
import org.springframework.web.reactive.function.client.ExchangeFilterFunction;
import org.springframework.web.reactive.function.client.ExchangeStrategies;
import org.springframework.web.reactive.function.client.WebClient;
import reactor.core.publisher.Mono;
import reactor.netty.http.client.HttpClient;import javax.net.ssl.SSLException;
import java.time.Duration;
import java.util.concurrent.TimeUnit;public class WebClientCustomizationExample {public static void main(String[] args) throws SSLException {// 1. 配置HTTP客户端HttpClient httpClient = HttpClient.create()// 连接超时.option(ChannelOption.CONNECT_TIMEOUT_MILLIS, 5000)// 响应超时.responseTimeout(Duration.ofSeconds(5))// 读写超时.doOnConnected(conn -> conn.addHandlerLast(new ReadTimeoutHandler(5, TimeUnit.SECONDS)).addHandlerLast(new WriteTimeoutHandler(5, TimeUnit.SECONDS)))// 配置SSL(允许自签名证书,仅用于测试).secure(spec -> spec.sslContext(SslContextBuilder.forClient().trustManager(InsecureTrustManagerFactory.INSTANCE).build()));// 2. 配置内存缓冲区大小ExchangeStrategies strategies = ExchangeStrategies.builder().codecs(configurer -> configurer.defaultCodecs().maxInMemorySize(2 * 1024 * 1024))  // 2MB.build();// 3. 请求拦截器(添加统一请求头、日志等)ExchangeFilterFunction requestFilter = ExchangeFilterFunction.ofRequestProcessor(clientRequest -> {System.out.println("Request: " + clientRequest.method() + " " + clientRequest.url());clientRequest.headers().forEach((name, values) -> values.forEach(value -> System.out.println(name + ": " + value)));return Mono.just(clientRequest);});// 4. 响应拦截器ExchangeFilterFunction responseFilter = ExchangeFilterFunction.ofResponseProcessor(clientResponse -> {System.out.println("Response Status: " + clientResponse.statusCode());clientResponse.headers().asHttpHeaders().forEach((name, values) -> values.forEach(value -> System.out.println(name + ": " + value)));return Mono.just(clientResponse);});// 5. 创建配置完成的 WebClientWebClient webClient = WebClient.builder().baseUrl("https://api.example.com").clientConnector(new ReactorClientHttpConnector(httpClient)).exchangeStrategies(strategies).filter(requestFilter).filter(responseFilter).defaultHeader(HttpHeaders.CONTENT_TYPE, MediaType.APPLICATION_JSON_VALUE).defaultHeader(HttpHeaders.USER_AGENT, "WebClient-Example").defaultHeader(HttpHeaders.ACCEPT, MediaType.APPLICATION_JSON_VALUE).build();// 使用配置好的 WebClienttry {String result = webClient.get().uri("/data").retrieve().bodyToMono(String.class).block();System.out.println("Result: " + result);} catch (Exception e) {System.err.println("Error: " + e.getMessage());}}
}
6.9 文件上传
import org.springframework.core.io.FileSystemResource;
import org.springframework.http.MediaType;
import org.springframework.http.client.MultipartBodyBuilder;
import org.springframework.web.reactive.function.BodyInserters;
import org.springframework.web.reactive.function.client.WebClient;
import reactor.core.publisher.Mono;import java.io.File;
import java.nio.file.Path;
import java.nio.file.Paths;public class WebClientFileUploadExample {public static void main(String[] args) {// 创建 WebClient 实例WebClient webClient = WebClient.create("https://api.example.com");// 准备文件Path path = Paths.get("example.txt");File file = path.toFile();// 方法 1: 使用 MultipartBodyBuilderMultipartBodyBuilder bodyBuilder = new MultipartBodyBuilder();bodyBuilder.part("file", new FileSystemResource(file)).filename(file.getName());bodyBuilder.part("description", "文件描述");String response = webClient.post().uri("/upload").contentType(MediaType.MULTIPART_FORM_DATA).body(BodyInserters.fromMultipartData(bodyBuilder.build())).retrieve().bodyToMono(String.class).block();System.out.println("Response: " + response);// 方法 2: 直接使用 BodyInsertersMono<String> responseMono = webClient.post().uri("/upload").contentType(MediaType.MULTIPART_FORM_DATA).body(BodyInserters.fromMultipartData("file", new FileSystemResource(file)).with("description", "另一个文件描述")).retrieve().bodyToMono(String.class);String anotherResponse = responseMono.block();System.out.println("Another Response: " + anotherResponse);}
}
6.10 同步与异步并行请求
import org.springframework.web.reactive.function.client.WebClient;
import reactor.core.publisher.Flux;
import reactor.core.publisher.Mono;import java.util.Arrays;
import java.util.List;public class WebClientParallelExample {// 响应数据的模型类static class User {private Long id;private String name;private String email;// Getters and Setterspublic Long getId() { return id; }public void setId(Long id) { this.id = id; }public String getName() { return name; }public void setName(String name) { this.name = name; }public String getEmail() { return email; }public void setEmail(String email) { this.email = email; }@Overridepublic String toString() {return "User{id=" + id + ", name='" + name + "', email='" + email + "'}";}}public static void main(String[] args) {// 创建 WebClient 实例WebClient webClient = WebClient.create("https://api.example.com");// 1. 顺序请求User user1 = webClient.get().uri("/users/1").retrieve().bodyToMono(User.class).block();User user2 = webClient.get().uri("/users/2").retrieve().bodyToMono(User.class).block();System.out.println("Sequential User 1: " + user1);System.out.println("Sequential User 2: " + user2);// 2. 并行请求List<Integer> userIds = Arrays.asList(1, 2, 3, 4, 5);List<User> users = Flux.fromIterable(userIds).flatMap(id -> webClient.get().uri("/users/{id}", id).retrieve().bodyToMono(User.class)).collectList().block();System.out.println("Parallel Users count: " + users.size());users.forEach(System.out::println);// 3. 并行请求并合并结果Mono<User> userMono = webClient.get().uri("/users/1").retrieve().bodyToMono(User.class);Mono<String> postsMono = webClient.get().uri("/users/1/posts").retrieve().bodyToMono(String.class);// 合并两个请求的结果Mono<String> combined = Mono.zip(userMono, postsMono, (user, posts) -> {return "User: " + user + ", Posts: " + posts;});String combinedResult = combined.block();System.out.println("Combined Result: " + combinedResult);// 4. 串行依赖请求String nestedResult = webClient.get().uri("/users/1").retrieve().bodyToMono(User.class).flatMap(user -> {// 使用第一个请求的结果来构建第二个请求return webClient.get().uri("/users/{id}/details", user.getId()).retrieve().bodyToMono(String.class).map(details -> "User: " + user + ", Details: " + details);}).block();System.out.println("Nested Result: " + nestedResult);}
}
7. Retrofit
Retrofit 是由 Square 公司开发的类型安全的 HTTP 客户端,专为 Android 和 Java 设计。它将 HTTP API 转换为 Java 接口,简化了 API 调用的实现。Retrofit 使用注解来描述 HTTP 请求,内部使用 OkHttp 处理 HTTP 请求。
7.1 添加依赖
Maven:
<dependency><groupId>com.squareup.retrofit2</groupId><artifactId>retrofit</artifactId><version>2.9.0</version>
</dependency>
<dependency><groupId>com.squareup.retrofit2</groupId><artifactId>converter-gson</artifactId><version>2.9.0</version>
</dependency>
Gradle:
implementation 'com.squareup.retrofit2:retrofit:2.9.0'
implementation 'com.squareup.retrofit2:converter-gson:2.9.0'
7.2 定义 API 接口
import retrofit2.Call;
import retrofit2.http.*;import java.util.List;
import java.util.Map;/*** 定义 API 接口*/
public interface ApiService {// GET 请求@GET("users/{id}")Call<User> getUser(@Path("id") int userId);// 带查询参数的 GET 请求@GET("users")Call<List<User>> getUsers(@Query("page") int page, @Query("limit") int limit);// 动态 URL 的 GET 请求@GETCall<List<User>> getUsersWithDynamicUrl(@Url String url);// POST 请求@POST("users")Call<User> createUser(@Body User user);// 表单数据的 POST 请求@FormUrlEncoded@POST("login")Call<LoginResponse> login(@Field("username") String username,@Field("password") String password);// 多部分表单数据 (文件上传)@Multipart@POST("upload")Call<UploadResponse> uploadFile(@Part("description") String description,@Part MultipartBody.Part file);// PUT 请求@PUT("users/{id}")Call<User> updateUser(@Path("id") int userId, @Body User user);// PATCH 请求@PATCH("users/{id}")Call<User> patchUser(@Path("id") int userId, @Body Map<String, Object> updates);// DELETE 请求@DELETE("users/{id}")Call<Void> deleteUser(@Path("id") int userId);// 添加请求头@GET("secure-data")Call<SecureData> getSecureData(@Header("Authorization") String authToken);// 添加固定请求头@Headers({"Accept: application/json","User-Agent: Retrofit-Sample"})@GET("users")Call<List<User>> getUsersWithHeaders();
}
7.3 数据模型
/*** 用户模型*/
public class User {private int id;private String name;private String email;// 构造函数public User() {}public User(String name, String email) {this.name = name;this.email = email;}// Getters and Setterspublic int getId() { return id; }public void setId(int id) { this.id = id; }public String getName() { return name; }public void setName(String name) { this.name = name; }public String getEmail() { return email; }public void setEmail(String email) { this.email = email; }@Overridepublic String toString() {return "User{id=" + id + ", name='" + name + "', email='" + email + "'}";}
}/*** 登录响应模型*/
public class LoginResponse {private String token;private String refreshToken;private User user;// Getters and Setterspublic String getToken() { return token; }public void setToken(String token) { this.token = token; }public String getRefreshToken() { return refreshToken; }public void setRefreshToken(String refreshToken) { this.refreshToken = refreshToken; }public User getUser() { return user; }public void setUser(User user) { this.user = user; }@Overridepublic String toString() {return "LoginResponse{token='" + token + "', refreshToken='" + refreshToken + "', user=" + user + "}";}
}/*** 上传响应模型*/
public class UploadResponse {private String fileUrl;private long fileSize;private String fileType;// Getters and Setterspublic String getFileUrl() { return fileUrl; }public void setFileUrl(String fileUrl) { this.fileUrl = fileUrl; }public long getFileSize() { return fileSize; }public void setFileSize(long fileSize) { this.fileSize = fileSize; }public String getFileType() { return fileType; }public void setFileType(String fileType) { this.fileType = fileType; }@Overridepublic String toString() {return "UploadResponse{fileUrl='" + fileUrl + "', fileSize=" + fileSize + ", fileType='" + fileType + "'}";}
}/*** 安全数据模型*/
public class SecureData {private String data;private long timestamp;// Getters and Setterspublic String getData() { return data; }public void setData(String data) { this.data = data; }public long getTimestamp() { return timestamp; }public void setTimestamp(long timestamp) { this.timestamp = timestamp; }@Overridepublic String toString() {return "SecureData{data='" + data + "', timestamp=" + timestamp + "}";}
}
7.4 创建 Retrofit 实例
import com.google.gson.Gson;
import com.google.gson.GsonBuilder;
import okhttp3.OkHttpClient;
import retrofit2.Retrofit;
import retrofit2.converter.gson.GsonConverterFactory;import java.util.concurrent.TimeUnit;public class RetrofitClient {private static final String BASE_URL = "https://api.example.com/";private static Retrofit retrofit = null;/*** 获取 Retrofit 实例*/public static Retrofit getClient() {if (retrofit == null) {// 创建 OkHttpClient 并配置OkHttpClient okHttpClient = new OkHttpClient.Builder().connectTimeout(10, TimeUnit.SECONDS).readTimeout(30, TimeUnit.SECONDS).writeTimeout(30, TimeUnit.SECONDS).build();// 创建 Gson 实例Gson gson = new GsonBuilder().setDateFormat("yyyy-MM-dd'T'HH:mm:ssZ").create();// 创建 Retrofit 实例retrofit = new Retrofit.Builder().baseUrl(BASE_URL).client(okHttpClient).addConverterFactory(GsonConverterFactory.create(gson)).build();}return retrofit;}/*** 获取 API 服务*/public static ApiService getApiService() {return getClient().create(ApiService.class);}
}
7.5 基本 GET 请求
import retrofit2.Call;
import retrofit2.Callback;
import retrofit2.Response;import java.io.IOException;
import java.util.List;public class RetrofitGetExample {public static void main(String[] args) {// 获取 API 服务ApiService apiService = RetrofitClient.getApiService();// 同步 GET 请求try {Response<User> response = apiService.getUser(1).execute();if (response.isSuccessful()) {User user = response.body();System.out.println("User: " + user);} else {System.err.println("Error: " + response.code() + " " + response.message());}} catch (IOException e) {e.printStackTrace();}// 异步 GET 请求apiService.getUsers(1, 10).enqueue(new Callback<List<User>>() {@Overridepublic void onResponse(Call<List<User>> call, Response<List<User>> response) {if (response.isSuccessful()) {List<User> users = response.body();System.out.println("Users count: " + users.size());for (User user : users) {System.out.println(user);}} else {System.err.println("Error: " + response.code() + " " + response.message());}}@Overridepublic void onFailure(Call<List<User>> call, Throwable t) {System.err.println("Request failed: " + t.getMessage());}});// 等待异步请求完成(仅用于示例)try {Thread.sleep(3000);} catch (InterruptedException e) {e.printStackTrace();}}
}
7.6 基本 POST 请求
import retrofit2.Call;
import retrofit2.Callback;
import retrofit2.Response;import java.io.IOException;public class RetrofitPostExample {public static void main(String[] args) {// 获取 API 服务ApiService apiService = RetrofitClient.getApiService();// 创建用户对象User newUser = new User("John Doe", "john@example.com");// 同步 POST 请求try {Response<User> response = apiService.createUser(newUser).execute();if (response.isSuccessful()) {User createdUser = response.body();System.out.println("Created User: " + createdUser);} else {System.err.println("Error: " + response.code() + " " + response.message());}} catch (IOException e) {e.printStackTrace();}// 异步 POST 请求User anotherUser = new User("Jane Smith", "jane@example.com");apiService.createUser(anotherUser).enqueue(new Callback<User>() {@Overridepublic void onResponse(Call<User> call, Response<User> response) {if (response.isSuccessful()) {User createdUser = response.body();System.out.println("Created Another User: " + createdUser);} else {System.err.println("Error: " + response.code() + " " + response.message());}}@Overridepublic void onFailure(Call<User> call, Throwable t) {System.err.println("Request failed: " + t.getMessage());}});// 表单提交apiService.login("john_doe", "password123").enqueue(new Callback<LoginResponse>() {@Overridepublic void onResponse(Call<LoginResponse> call, Response<LoginResponse> response) {if (response.isSuccessful()) {LoginResponse loginResponse = response.body();System.out.println("Login successful: " + loginResponse);} else {System.err.println("Login failed: " + response.code() + " " + response.message());}}@Overridepublic void onFailure(Call<LoginResponse> call, Throwable t) {System.err.println("Login request failed: " + t.getMessage());}});// 等待异步请求完成(仅用于示例)try {Thread.sleep(3000);} catch (InterruptedException e) {e.printStackTrace();}}
}
7.7 文件上传
import okhttp3.MediaType;
import okhttp3.MultipartBody;
import okhttp3.RequestBody;
import retrofit2.Call;
import retrofit2.Callback;
import retrofit2.Response;import java.io.File;public class RetrofitFileUploadExample {public static void main(String[] args) {// 获取 API 服务ApiService apiService = RetrofitClient.getApiService();// 准备文件File file = new File("example.txt");// 创建 RequestBodyRequestBody requestFile = RequestBody.create(MediaType.parse("multipart/form-data"), file);// MultipartBody.Part 包装以表单方式上传MultipartBody.Part filePart = MultipartBody.Part.createFormData("file", file.getName(), requestFile);// 添加描述String description = "文件描述";// 异步上传apiService.uploadFile(description, filePart).enqueue(new Callback<UploadResponse>() {@Overridepublic void onResponse(Call<UploadResponse> call, Response<UploadResponse> response) {if (response.isSuccessful()) {UploadResponse uploadResponse = response.body();System.out.println("Upload successful: " + uploadResponse);} else {System.err.println("Upload failed: " + response.code() + " " + response.message());}}@Overridepublic void onFailure(Call<UploadResponse> call, Throwable t) {System.err.println("Upload request failed: " + t.getMessage());}});// 等待异步请求完成(仅用于示例)try {Thread.sleep(3000);} catch (InterruptedException e) {e.printStackTrace();}}
}
7.8 自定义 OkHttpClient
import okhttp3.Interceptor;
import okhttp3.OkHttpClient;
import okhttp3.Request;
import okhttp3.Response;
import okhttp3.logging.HttpLoggingInterceptor;
import retrofit2.Retrofit;
import retrofit2.converter.gson.GsonConverterFactory;import java.io.IOException;
import java.util.concurrent.TimeUnit;public class RetrofitCustomOkHttpExample {private static final String BASE_URL = "https://api.example.com/";private static final String AUTH_TOKEN = "your-auth-token";public static void main(String[] args) {// 创建日志拦截器HttpLoggingInterceptor loggingInterceptor = new HttpLoggingInterceptor();loggingInterceptor.setLevel(HttpLoggingInterceptor.Level.BODY);// 创建认证拦截器Interceptor authInterceptor = new Interceptor() {@Overridepublic Response intercept(Chain chain) throws IOException {Request originalRequest = chain.request();// 添加认证头Request authenticatedRequest = originalRequest.newBuilder().header("Authorization", "Bearer " + AUTH_TOKEN).build();return chain.proceed(authenticatedRequest);}};// 创建重试拦截器Interceptor retryInterceptor = new Interceptor() {@Overridepublic Response intercept(Chain chain) throws IOException {Request request = chain.request();// 最大重试次数int maxRetries = 3;int retryCount = 0;Response response = null;IOException ioException = null;while (retryCount < maxRetries && (response == null || !response.isSuccessful())) {if (retryCount > 0) {System.out.println("重试请求 #" + retryCount + ": " + request.url());}if (ioException != null) {System.out.println("上次请求失败: " + ioException.getMessage());}try {response = chain.proceed(request);} catch (IOException e) {ioException = e;retryCount++;if (retryCount >= maxRetries) {throw ioException;}continue;}// 当服务器错误时重试if (!response.isSuccessful() && response.code() >= 500) {retryCount++;if (retryCount >= maxRetries) {break;}response.close();} else {break;}}return response;}};// 创建 OkHttpClientOkHttpClient okHttpClient = new OkHttpClient.Builder().connectTimeout(10, TimeUnit.SECONDS).readTimeout(30, TimeUnit.SECONDS).writeTimeout(30, TimeUnit.SECONDS).addInterceptor(authInterceptor)         // 认证拦截器.addInterceptor(retryInterceptor)        // 重试拦截器.addInterceptor(loggingInterceptor)      // 日志拦截器.build();// 创建 Retrofit 实例Retrofit retrofit = new Retrofit.Builder().baseUrl(BASE_URL).client(okHttpClient).addConverterFactory(GsonConverterFactory.create()).build();// 创建 API 服务ApiService apiService = retrofit.create(ApiService.class);// 使用配置好的 API 服务发送请求apiService.getSecureData("Bearer " + AUTH_TOKEN).enqueue(new retrofit2.Callback<SecureData>() {@Overridepublic void onResponse(retrofit2.Call<SecureData> call, retrofit2.Response<SecureData> response) {if (response.isSuccessful()) {SecureData secureData = response.body();System.out.println("Secure Data: " + secureData);} else {System.err.println("Error: " + response.code() + " " + response.message());}}@Overridepublic void onFailure(retrofit2.Call<SecureData> call, Throwable t) {System.err.println("Request failed: " + t.getMessage());}});// 等待异步请求完成(仅用于示例)try {Thread.sleep(3000);} catch (InterruptedException e) {e.printStackTrace();}}
}
8. 小结与对比
8.1 各个 HTTP 客户端库的特点
| 客户端库 | 特点 | 优势 | 适用场景 |
|---|---|---|---|
| Java 原生 HttpURLConnection | 标准库内置,无需额外依赖 | 简单,轻量 | 简单的 HTTP 请求,对依赖项敏感的项目 |
| Java 11+ HttpClient | Java 标准库内置,现代 API | 支持异步,WebSocket,HTTP/2 | Java 11+ 的现代项目,需要现代特性但不想引入外部依赖 |
| Apache HttpClient | 功能丰富,成熟稳定 | 连接池管理,丰富的配置选项 | 需要高度定制化和精细控制的复杂 HTTP 交互 |
| OkHttp | 高效,现代化,专注于性能 | HTTP/2 支持,连接池,拦截器 | 对性能要求高的应用,尤其是 Android 应用 |
| Spring RestTemplate | Spring 生态集成,简洁 API | 与 Spring 无缝集成,消息转换器 | Spring 应用,特别是传统的同步编程模型 |
| Spring WebClient | 非阻塞,响应式 | 支持响应式编程模型,背压控制 | 响应式 Spring 应用,高并发场景 |
| Retrofit | 类型安全,接口驱动 | 简洁的 API 定义,易于维护 | API 客户端开发,尤其是结构化良好的 RESTful API |
8.2 如何选择合适的 HTTP 客户端库
-
考虑项目约束:
- 如果项目不能引入外部依赖,选择 Java 原生 HttpURLConnection 或 Java 11+ HttpClient
- 如果已经使用 Spring 框架,优先考虑 RestTemplate 或 WebClient
-
考虑编程模型:
- 同步编程模型: HttpURLConnection, Apache HttpClient, RestTemplate, OkHttp
- 响应式/异步编程模型: Java 11+ HttpClient, WebClient, OkHttp
-
考虑功能需求:
- 简单 HTTP 请求: 任何客户端都可以
- 连接池和高级配置: Apache HttpClient, OkHttp
- 类型安全的 API 客户端: Retrofit
- 响应式编程: WebClient
-
考虑性能要求:
- 高并发: WebClient, OkHttp
- 低延迟: OkHttp
- 内存效率: Apache HttpClient, OkHttp
-
考虑可维护性:
- 代码简洁度: Retrofit, WebClient
- 调试便利性: Apache HttpClient (详细日志)
- API 定义清晰度: Retrofit
-
考虑团队经验:
- 选择团队成员熟悉的技术,降低学习成本
8.3 最佳实践建议
-
常规 Java 应用:
- Java 11+: 优先使用 Java 11+ HttpClient
- Java 8 或更早: 考虑 OkHttp 或 Apache HttpClient
-
Spring 应用:
- Spring 5+,响应式编程: WebClient
- 传统 Spring MVC: RestTemplate
- 注意 RestTemplate 已进入维护模式,新项目建议使用 WebClient
-
Android 应用:
- 优先考虑 OkHttp 或基于 OkHttp 的 Retrofit
-
微服务架构:
- 服务间通信: WebClient 或 Retrofit
- 支持熔断等弹性功能: 结合 Resilience4j
-
高性能要求:
- 使用非阻塞客户端: WebClient
- 配置适当的连接池和超时
-
安全最佳实践:
- 始终验证 HTTPS 证书(除开发环境外)
- 设置合理的连接和读取超时
- 实施重试机制但要避免大量重试导致的级联故障
- 处理所有异常并记录有用的错误信息
相关文章:

Java 调用 HTTP 和 HTTPS 的方式详解
文章目录 1. HTTP 和 HTTPS 基础知识1.1 什么是 HTTP/HTTPS?1.2 HTTP 请求与响应结构1.3 常见的 HTTP 方法1.4 常见的 HTTP 状态码 2. Java 原生 HTTP 客户端2.1 使用 URLConnection 和 HttpURLConnection2.1.1 基本 GET 请求2.1.2 基本 POST 请求2.1.3 处理 HTTPS …...

Redis--基础知识点--28--慢查询相关
1 慢查询的原因 1.1 非命令数据相关原因 1.1.1 网络延迟 原因:客户端与 Redis 服务器之间的网络延迟可能导致客户端感知到的响应时间变长。 解决方案:优化网络环境 排查: 1.1.2 CPU 竞争 原因:Redis 是单线程的,…...

目标检测:YOLO 模型详解
目录 一、YOLO(You Only Look Once)模型讲解 YOLOv1 YOLOv2 (YOLO9000) YOLOv3 YOLOv4 YOLOv5 YOLOv6 YOLOv7 YOLOv8 YOLOv9 YOLOv10 YOLOv11 YOLOv12 其他变体:PP-YOLO 二、YOLO 模型的 Backbone:Focus 结构 三、…...

HDFS存储原理与MapReduce计算模型
HDFS存储原理 1. 架构设计 主从架构:包含一个NameNode(主节点)和多个DataNode(从节点)。 NameNode:管理元数据(文件目录结构、文件块映射、块位置信息),不存储实际数据…...

电机控制选 STM32 还是 DSP?技术选型背后的现实博弈
现在搞电机控制,圈里人都门儿清 —— 主流方案早就被 STM32 这些 Cortex-M 单片机给拿捏了。可要是撞上系统里的老甲方,技术认知还停留在诺基亚砸核桃的年代,非揪着 DSP 不放,咱也只能赔笑脸:“您老说的对,…...
.NET 开源工业视觉系统 OpenIVS 快速搭建自动化检测平台
前言 随着工业4.0和智能制造的发展,工业视觉在质检、定位、识别等场景中发挥着越来越重要的作用。然而,开发一个完整的工业视觉系统往往需要集成相机控制、图像采集、图像处理、AI推理、PLC通信等多个模块,这对开发人员提出了较高的技术要求…...

从0到1掌握Kotlin高阶函数:开启Android开发新境界!
简介 在当今的Android开发领域,Kotlin已成为开发者们的首选编程语言。其高阶函数特性更是为代码的编写带来了极大的灵活性和简洁性。本文将深入探讨Kotlin中的高阶函数,从基础概念到实际应用,结合详细的代码示例和mermaid图表,为你呈现一个全面且深入的学习指南。无论你是…...

【OSS】 前端如何直接上传到OSS 上返回https链接,如果做到OSS图片资源加密访问
使用阿里云OSS(对象存储服务)进行前端直接上传并返回HTTPS链接,同时实现图片资源的加密访问,可以通过以下步骤实现: 前端直接上传到OSS并返回HTTPS链接 设置OSS Bucket: 确保你的OSS Bucket已创建…...
AI智能分析网关V4室内消防逃生通道占用检测算法打造住宅/商业/工业园区等场景应用方案
一、方案背景 火灾严重威胁生命财产安全,消防逃生通道畅通是人员疏散的关键。但现实中通道被占用、堵塞现象频发,传统人工巡查监管效率低、不及时。AI智能分析网关V4结合消防逃生通道占用算法,以强大的图像识别和数据分析能力,…...

商城前端监控体系搭建:基于 Sentry + Lighthouse + ELK 的全链路监控实践
在电商行业,用户体验直接关乎转化率和用户留存。一个页面加载延迟1秒可能导致7%的订单流失,一次未捕获的前端错误可能引发用户信任危机。如何构建一套高效的前端监控体系,实现错误实时追踪、性能深度优化与数据可视化分析?本文将揭…...

Kotlin 中的数据类型有隐式转换吗?为什么?
在 Kotlin 中,基本数据类型没有隐式转换。主要出于安全性和明确性的考虑。 1 Kotlin 的显式类型转换规则 Kotlin 要求开发者显式调用转换函数进行类型转换, 例如: val a: Int 10 val b: Long a.toLong() // 必须显式调用 toLong() // 错…...

基于 HTTP 的邮件认证深入解读 ngx_mail_auth_http_module
一、模块启用与示例配置 mail {server {listen 143; # IMAPprotocol imap;auth_http http://auth.local/auth;# 可选:传递客户端证书给认证服务auth_http_pass_client_cert on;auth_http_timeout 5s;auth_http_header X-Auth-Key "shared_se…...
关于无法下载Qt离线安装包的说明
不知道出于什么原因考虑,Qt官方目前不提供离线的安装包下载,意味着网上各种文章提供的各种下载地址都失效了,会提示Download from your IP address is not allowed,当然目前可以在线安装,但是据说只提供了从5.15开始的…...
Java开发经验——阿里巴巴编码规范实践解析4
摘要 本文主要介绍了阿里巴巴编码规范中关于日志处理的相关实践解析。强调了使用日志框架(如 SLF4J、JCL)而非直接使用日志系统(如 Log4j、Logback)的 API 的重要性,包括解耦日志实现、统一日志调用方式等好处。同时&…...

HTML应用指南:利用GET请求获取全国捞王锅物料理门店位置信息
随着新零售业态的快速发展,门店位置信息的获取变得越来越重要。作为知名中式餐饮品牌之一,捞王锅物料理自2009年创立以来,始终致力于为消费者提供高品质的锅物料理与贴心的服务体验。经过多年的发展,捞王在全国范围内不断拓展门店…...
算法日记32:埃式筛、gcd和lcm、快速幂、乘法逆元
一、埃式筛(计算质数) 1.1、概念 1.1.1、在传统的计算质数中,我们采用单点判断,即判断(2~sqrt(n))是否存在不合法元素,若存在则判否,否则判是 1.1.2、假设,此时我们需要求1~1000的所有质数&am…...

黑马点评-分布式锁Lua脚本
文章目录 分布式锁Redis setnxredis锁误删Lua脚本 分布式锁 当我们的项目服务器不只是一台(单体),而是部署在多态服务器上(集群/分布式),同样会出现线程安全问题。不同服务器内部有不同的JVM,每…...

P7-大规模语言模型分布式训练与微调框架调研文档
1. 引言 随着大语言模型(LLMs)在自然语言处理(NLP)、对话系统、文本生成等领域的广泛应用,分布式训练和高效微调技术成为提升模型性能和部署效率的关键。分布式训练框架如 Megatron-LM 和 DeepSpeed 针对超大规模模型…...

机械师安装ubantu双系统:三、GPT分区安装Ubantu
目录 一、查看磁盘格式 二、安装ubantu 参考链接: GPT分区安装Ubuntu_哔哩哔哩_bilibili 一、查看磁盘格式 右击左边灰色区域,点击属性 二、安装ubantu 插入磁盘,重启系统,狂按F7(具体我也忘了)&#…...

ORM++ 封装实战指南:安全高效的 C++ MySQL 数据库操作
ORM 封装实战指南:安全高效的 C MySQL 数据库操作 一、环境准备 1.1 依赖安装 # Ubuntu/Debian sudo apt-get install libmysqlclient-dev # CentOS sudo yum install mysql-devel# 编译时链接库 (-I 指定头文件路径 -L 指定库路径) g main.cpp -stdc17 -I/usr/i…...

kafka学习笔记(三、消费者Consumer使用教程——从指定位置消费)
1.简介 Kafka的poll()方法消费无法精准的掌握其消费的起始位置,auto.offset.reset参数也只能在比较粗粒度的指定消费方式。更细粒度的消费方式kafka提供了seek()方法可以指定位移消费允许消费者从特定位置(如固定偏移量、时间戳或分区首尾)开…...

【后端高阶面经:架构篇】46、分布式架构:如何应对高并发的用户请求
一、架构设计原则:构建可扩展的系统基石 在分布式系统中,高并发场景对架构设计提出了极高要求。 分层解耦与模块化是应对复杂业务的核心策略,通过将系统划分为客户端、CDN/边缘节点、API网关、微服务集群、缓存层和数据库层等多个层次,实现各模块的独立演进与维护。 1.1 …...

网络编程学习笔记——TCP网络编程
文章目录 1、socket()函数2、bind()函数3、listen()4、accept()5、connect()6、send()/write()7、recv()/read()8、套接字的关闭9、TCP循环服务器模型10、TCP多线程服务器11、TCP多进程并发服务器 网络编程常用函数 socket() 创建套接字bind() 绑定本机地址和端口connect() …...
Vue+element-ui,实现表格渲染缩略图,鼠标悬浮缩略图放大,点击缩略图播放视频(一)
Vueelement-ui,实现表格渲染缩略图,鼠标悬浮缩略图放大,点击缩略图播放视频 前言整体代码预览图具体分析基础结构主要标签作用videoel-popover 前言 如标题,需要实现这样的业务 此处文章所实现的,是静态视频资源。 注…...
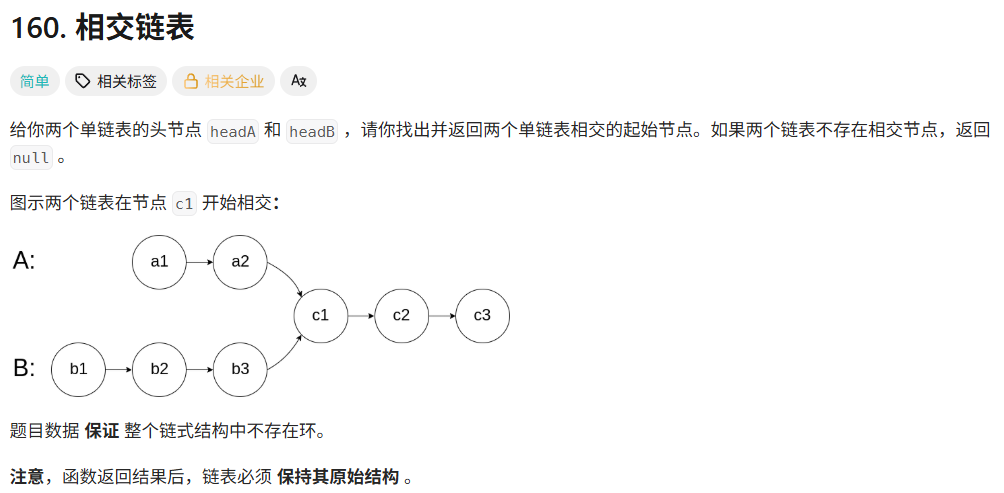
day13 leetcode-hot100-22(链表1)
160. 相交链表 - 力扣(LeetCode) 1.哈希集合HashSet 思路 (1)将A链的所有数据存储到HashSet中。 (2)遍历B链,找到是否在A中存在。 具体代码 /*** Definition for singly-linked list.* pu…...

【Oracle】DQL语言
个人主页:Guiat 归属专栏:Oracle 文章目录 1. DQL概述1.1 什么是DQL?1.2 DQL的核心功能 2. SELECT语句基础2.1 基本语法结构2.2 最简单的查询2.3 DISTINCT去重 3. WHERE条件筛选3.1 基本条件运算符3.2 逻辑运算符组合3.3 高级条件筛选 4. 排序…...

HUAWEI华为MateBook D 14 2021款i5,i7集显非触屏(NBD-WXX9,NbD-WFH9)原装出厂Win10系统
适用型号:NbD-WFH9、NbD-WFE9A、NbD-WDH9B、NbD-WFE9、 链接:https://pan.baidu.com/s/1qTCbaQQa8xqLR-4Ooe3ytg?pwdvr7t 提取码:vr7t 华为原厂WIN系统自带所有驱动、出厂主题壁纸、系统属性联机支持标志、系统属性专属LOGO标志、Office…...
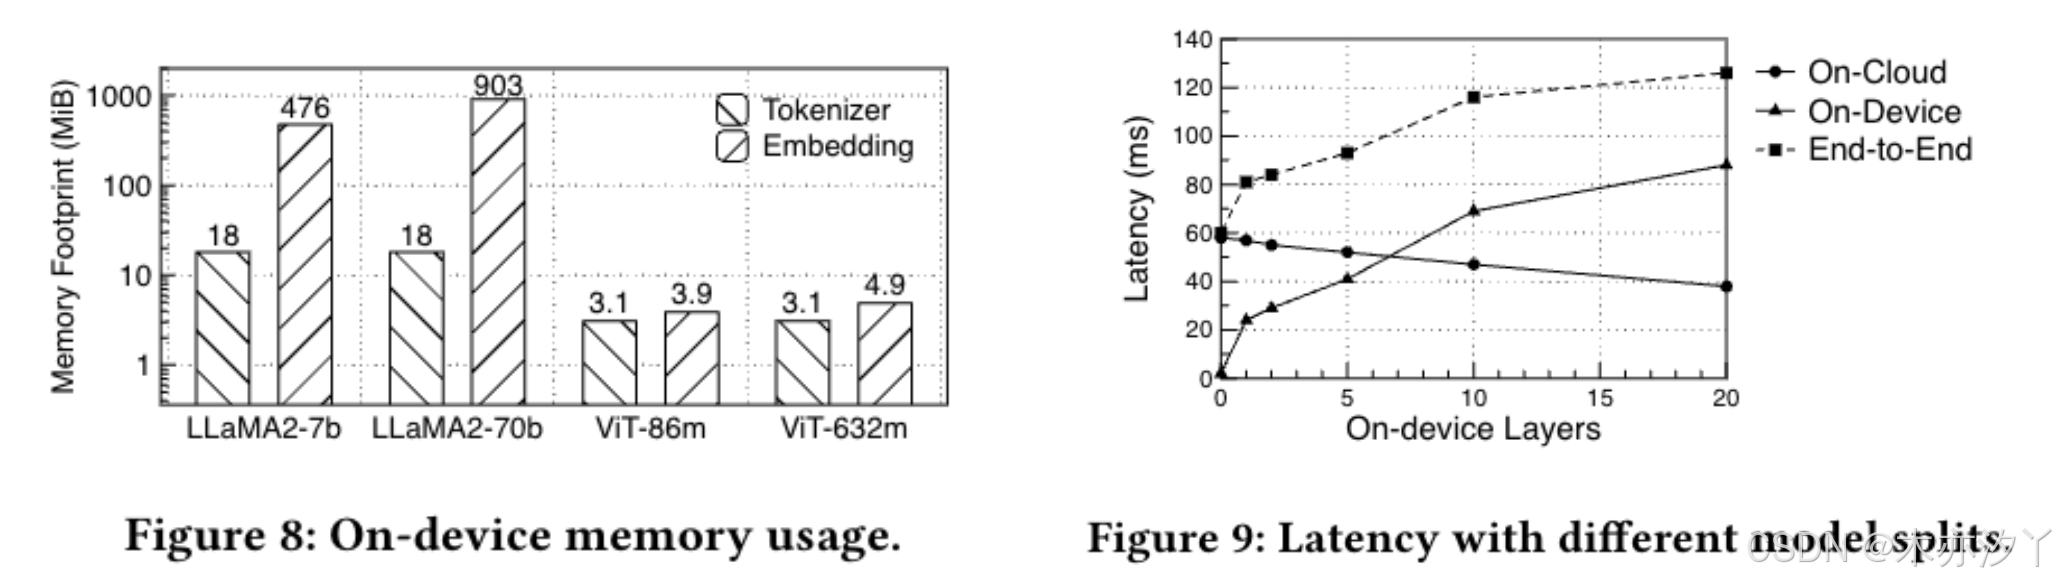
【STIP】安全Transformer推理协议
Secure Transformer Inference Protocol 论文地址:https://arxiv.org/abs/2312.00025 摘要 模型参数和用户数据的安全性对于基于 Transformer 的服务(例如 ChatGPT)至关重要。虽然最近在安全两方协议方面取得的进步成功地解决了服务 Transf…...
leetcode hot100刷题日记——27.对称二叉树
方法一:递归法 class Solution { public:bool check(TreeNode *left,TreeNode *right){//左子树和右子树的节点同时是空的是对称的if(leftnullptr&&rightnullptr){return true;}if(leftnullptr||rightnullptr){return false;}//检查左右子树的值相不相等&a…...

高考加油(Python+HTML)
前言 询问DeepSeek根据自己所学到的知识来生成多个可执行的代码,为高考学子加油。最开始生成的都会有点小问题,还是需要自己调试一遍,下面就是完整的代码,当然了最后几天也不会有多少人看,都在专心的备考。 Python励…...