快速了解MyBatis---映射关系多对一
文章目录
- 映射关系多对一
- 映射关系-官方文档
- 映射关系多对1-基本介绍
- 基本介绍
- 注意细节
- 映射关系多对1-映射方式
- 映射方式
- 配置Mapper.xml 方式-应用实例
- 注解实现多对1 映射-应用实例
映射关系多对一
映射关系-官方文档
文档地址: https://mybatis.org/mybatis-3/zh/sqlmap-xml.html
映射关系多对1-基本介绍
基本介绍
- 项目中多对1 的关系是一个基本的映射关系, 多对1, 也可以理解成是1 对多.
- User — Pet: 一个用户可以养多只宠物
- Dep —Emp : 一个部门可以有多个员工
注意细节
- 我们直接讲双向的多对一的关系,单向的多对一比双向的多对一简单。
- 在实际的项目开发中, 要求会使用双向的多对一的映射关系
- 什么是双向的多对一的关系: 比如通过User 可以查询到对应的Pet, 反过来,通过Pet 也可以级联查询到对应的User 信息.
- 多对多的关系,是在多对1 的基础上扩展.
映射关系多对1-映射方式
映射方式
方式1:通过配置XxxMapper.xml 实现多对1
方式2:通过注解的方式实现多对1
配置Mapper.xml 方式-应用实例
需求说明: 实现级联查询,通过user 的id 可以查询到用户信息,并可以查询到关联的pet信息,
反过来,通过Pet 的id 可以查询到Pet 的信息,并且可以级联查询到它的主人User对象信息。
- 创建mybatis_user 和mybatis_pet 表
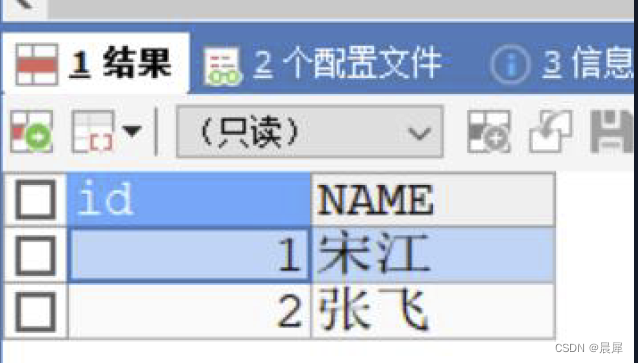
CREATE TABLE mybatis_user
(id INT PRIMARY KEY AUTO_INCREMENT,NAME VARCHAR(32) NOT NULL DEFAULT ''
)CHARSET=utf8 ;CREATE TABLE mybatis_pet
(id INT PRIMARY KEY AUTO_INCREMENT,nickname VARCHAR(32) NOT NULL DEFAULT '',user_id INT ,FOREIGN KEY (user_id) REFERENCES mybatis_user(id)
)CHARSET=utf8 ;INSERT INTO mybatis_user
VALUES(NULL,'宋江'),(NULL,'张飞');
INSERT INTO mybatis_pet
VALUES(1,'黑背',1),(2,'小哈',1);
INSERT INTO mybatis_pet
VALUES(3,'波斯猫',2),(4,'贵妃猫',2);SELECT * FROM mybatis_user;
SELECT * FROM mybatis_pet;

- 创建src\main\java\com\nlc\entity\Pet.java
public class Pet {private Integer id;private String nickname;//一个pet对应一个主人 User对象private User user;public Integer getId() {return id;}public void setId(Integer id) {this.id = id;}public String getNickname() {return nickname;}public void setNickname(String nickname) {this.nickname = nickname;}public User getUser() {return user;}public void setUser(User user) {this.user = user;}}创建src\main\java\com\nlc\entity\User.java
public class User {private Integer id;private String name;//因为一个user可以养多个宠物,mybatis 使用集合List<Pet>体现这个关系private List<Pet> pets;public Integer getId() {return id;}public void setId(Integer id) {this.id = id;}public String getName() {return name;}public void setName(String name) {this.name = name;}public List<Pet> getPets() {return pets;}public void setPets(List<Pet> pets) {this.pets = pets;}//这toString会带来麻烦=>会造成StackOverFlow//@Override//public String toString() {//    return "User{" +//            "id=" + id +//            ", name='" + name + '\'' +//            ", pets=" + pets +//            '}';//}
}
-
创建PetMapper.java
public interface PetMapper {//通过User的id来获取pet对象,可能有多个,因此使用List接收public List<Pet> getPetByUserId(Integer userId);//通过pet的id获取Pet对象, 同时会查询到pet对象关联的user对象public Pet getPetById(Integer id);
}
创建UserMapper.java
public interface UserMapper {//通过id获取User对象public User getUserById(Integer id);}
-
创建UserMapper.xml
<?xml version="1.0" encoding="UTF-8" ?> <!DOCTYPE mapperPUBLIC "-//mybatis.org//DTD Mapper 3.0//EN""http://mybatis.org/dtd/mybatis-3-mapper.dtd"> <mapper nameNlcace="com.nlc.mapper.UserMapper"><!--解读1、一定要想一想我们前面1-1是如何实现2、配置/实现 public User getUserById(Integer id);3、思路(1) 先通过user-id 查询得到user信息 (2) 再根据user-id查询对应的pet信息并映射到User-List<Pet> pets--><resultMap id="UserResultMap" type="User"><id property="id" column="id"/><result property="name" column="name"/><!--解读:因为pets属性是集合,因此这里需要是collection标签来处理1. ofType="Pet" 指定返回的集合中存放的数据类型Pet2. collection 表示 pets 是一个集合3. property="pets" 是返回的user对象的属性 pets4. column="id" SELECT * FROM `mybatis_user` WHERE `id` = #{id} 返回的id字段对应的值--><collection property="pets" column="id" ofType="Pet"select="com.nlc.mapper.PetMapper.getPetByUserId"/></resultMap><select id="getUserById" parameterType="Integer" resultMap="UserResultMap">SELECT * FROM `mybatis_user` WHERE `id` = #{id}</select></mapper> -
创建PetMapper.xml
<?xml version="1.0" encoding="UTF-8" ?>
<!DOCTYPE mapperPUBLIC "-//mybatis.org//DTD Mapper 3.0//EN""http://mybatis.org/dtd/mybatis-3-mapper.dtd">
<mapper nameNlcace="com.nlc.mapper.PetMapper"><!--1、通过User的id来获取pet对象,可能有多个,因此使用List接收2、public List<Pet> getPetByUserId(Integer userId);3. 完成的思路和前面大体相同.--><resultMap id="PetResultMap" type="Pet"><id property="id" column="id"/><result property="nickname" column="nickname"/><association property="user" column="user_id"select="com.nlc.mapper.UserMapper.getUserById" /></resultMap><select id="getPetByUserId" parameterType="Integer" resultMap="PetResultMap">SELECT * FROM `mybatis_pet` WHERE `user_id` = #{userId}</select><!--说明1. 注意体会resultMap带来好处, 直接复用2. 实现/配置public Pet getPetById(Integer id);3. 通过pet的id获取Pet对象--><select id="getPetById"  parameterType="Integer"  resultMap="PetResultMap">SELECT * FROM `mybatis_pet` WHERE `id` = #{id}</select>
</mapper>
-
创建PetMapperTest.java 完成测试
public class PetMapperTest {//属性private SqlSession sqlSession;private PetMapper petMapper;//初始化@Beforepublic void init() {//获取到sqlSessionsqlSession = MyBatisUtils.getSqlSession();petMapper = sqlSession.getMapper(PetMapper.class);}@Testpublic void getPetByUserId() {List<Pet> pets = petMapper.getPetByUserId(2);for (Pet pet : pets) {System.out.println("pet信息-" + pet.getId() + "-" + pet.getNickname());User user = pet.getUser();System.out.println("user信息 name-" + user.getName());}if(sqlSession != null) {sqlSession.close();}}@Testpublic void getPetById() {Pet pet = petMapper.getPetById(2);System.out.println("pet信息-" + pet.getId() + "-" + pet.getNickname());User user = pet.getUser();System.out.println("user信息-" + user.getId() + "-" + user.getName());if(sqlSession != null) {sqlSession.close();}} } -
创建UserMapperTest.java 完成测试
public class UserMapperTest {//属性private SqlSession sqlSession;private UserMapper userMapper;//初始化@Beforepublic void init() {//获取到sqlSessionsqlSession = MyBatisUtils.getSqlSession();userMapper = sqlSession.getMapper(UserMapper.class);}@Testpublic void getUserById() {User user = userMapper.getUserById(2);System.out.println("user信息-" + user.getId() + "-" + user.getName());List<Pet> pets = user.getPets();for (Pet pet : pets) {System.out.println("养的宠物信息-" + pet.getId() + "-" + pet.getNickname());}if(sqlSession != null) {sqlSession.close();}}
}
注解实现多对1 映射-应用实例
需求说明: 通过注解的方式来实现下面的多对1 的映射关系,实现级联查询,
完成前面完成的任务,通过User–>Pet 也可Pet->User , 在实际开发中推荐使用配置方式来做
- 创建UserMapperAnnotation.java
// UserMapperAnnotation:以注解的方式来配置多对一
public interface UserMapperAnnotation {//通过id获取User对象/*** 1. 注解的配置就是对应的Mapper.xml文件配置的,改写* 2.*     1、一定要想一想我们前面1-1是如何实现*     2、配置/实现 public User getUserById(Integer id);*     3、思路(1) 先通过user-id 查询得到user信息 (2) 再根据user-id查询对应的pet信息*       并映射到User-List<Pet> pets*     <resultMap id="UserResultMap" type="User">*         <id property="id" column="id"/>*         <result property="name" column="name"/>*         1. ofType="Pet" 指定返回的集合中存放的数据类型Pet*         2. collection 表示 pets 是一个集合*         3. property="pets" 是返回的user对象的属性 pets*         4. column="id" SELECT * FROM `mybatis_user` WHERE `id` = #{id} 返回的id字段对应的值*         <collection property="pets" column="id" ofType="Pet"*                     select="com.nlc.mapper.PetMapper.getPetByUserId"/>*     </resultMap>*     <select id="getUserById" parameterType="Integer" resultMap="UserResultMap">*         SELECT * FROM `mybatis_user` WHERE `id` = #{id}*     </select>*/@Select("SELECT * FROM `mybatis_user` WHERE `id` = #{id}")@Results({@Result(id = true, property = "id", column = "id"),@Result(property = "name", column = "name"),//这里注意,pets属性对应的是集合@Result(property = "pets",column = "id",many = @Many(select = "com.nlc.mapper.PetMapperAnnotation.getPetByUserId"))})public User getUserById(Integer id);
}
- 创建PetMapperAnnotation.java
public interface PetMapperAnnotation {//通过User的id来获取pet对象,可能有多个,因此使用List接收/*** 1、通过User的id来获取pet对象,可能有多个,因此使用List接收* 2、public List<Pet> getPetByUserId(Integer userId);* 3. 完成的思路和前面大体相同.* <resultMap id="PetResultMap" type="Pet">* <id property="id" column="id"/>* <result property="nickname" column="nickname"/>* <association property="user" column="user_id"* select="com.nlc.mapper.UserMapper.getUserById" />* </resultMap>* <select id="getPetByUserId" parameterType="Integer" resultMap="PetResultMap">* SELECT * FROM `mybatis_pet` WHERE `user_id` = #{userId}* </select>*///id = "PetResultMap" 就是给我们的Results[Result Map] 指定一个名字//目的是为了后面复用@Select("SELECT * FROM `mybatis_pet` WHERE `user_id` = #{userId}")@Results(id = "PetResultMap", value = {@Result(id = true, property = "id", column = "id"),@Result(property = "nickname", column = "nickname"),@Result(property = "user",column = "user_id",one = @One(select = "com.nlc.mapper.UserMapperAnnotation.getUserById"))})public List<Pet> getPetByUserId(Integer userId);//通过pet的id获取Pet对象, 同时会查询到pet对象关联的user对象/*** <select id="getPetById"  parameterType="Integer"  resultMap="PetResultMap">* SELECT * FROM `mybatis_pet` WHERE `id` = #{id}* </select>* @ResultMap("PetResultMap") 使用/引用我们上面定义的 Results[ResultMap]*/@Select("SELECT * FROM `mybatis_pet` WHERE `id` = #{id}")@ResultMap("PetResultMap")public Pet getPetById(Integer id);
}- 创建UserMapperAnnotationTest.java 完成测试
public class UserMapperAnnotationTest {//属性private SqlSession sqlSession;private UserMapperAnnotation userMapperAnnotation;//初始化@Beforepublic void init() {//获取到sqlSessionsqlSession = MyBatisUtils.getSqlSession();userMapperAnnotation = sqlSession.getMapper(UserMapperAnnotation.class);}@Testpublic void getUserById() {User user = userMapperAnnotation.getUserById(2);System.out.println("user信息-" + user.getId() + "-" + user.getName());List<Pet> pets = user.getPets();for (Pet pet : pets) {System.out.println("宠物信息-" + pet.getId() + "-" + pet.getNickname());}if(sqlSession != null) {sqlSession.close();}}
}
- 创建PetMapperAnnotationTest.java 完成测试
public class PetMapperAnnotationTest {//属性private SqlSession sqlSession;private PetMapperAnnotation petMapperAnnotation;//初始化@Beforepublic void init() {//获取到sqlSessionsqlSession = MyBatisUtils.getSqlSession();petMapperAnnotation = sqlSession.getMapper(PetMapperAnnotation.class);}@Testpublic void getPetByUserId() {List<Pet> pets = petMapperAnnotation.getPetByUserId(1);for (Pet pet : pets) {System.out.println("宠物信息-" + pet.getId() + "-" + pet.getNickname());}if(sqlSession != null) {sqlSession.close();}}@Testpublic void getPetById() {Pet pet = petMapperAnnotation.getPetById(1);System.out.println("pet信息-" + pet.getId() + "-" +pet.getNickname());User user = pet.getUser();System.out.println("user信息-" + user.getId() + "-" + user.getName());if(sqlSession != null) {sqlSession.close();}}
}
相关文章:
快速了解MyBatis---映射关系多对一
文章目录 映射关系多对一映射关系-官方文档映射关系多对1-基本介绍基本介绍注意细节 映射关系多对1-映射方式映射方式配置Mapper.xml 方式-应用实例注解实现多对1 映射-应用实例 映射关系多对一 映射关系-官方文档 文档地址: https://mybatis.org/mybatis-3/zh/sqlmap-xml.ht…...

python学到什么程度算入门,python从入门到精通好吗
本篇文章给大家谈谈python学到什么程度算入门,以及python从入门到精通好吗,希望对各位有所帮助,不要忘了收藏本站喔。 学习 Python 之 进阶学习 一切皆对象 1. 变量和函数皆对象2. 模块和类皆对象3. 对象的基本操作 (1). 可以赋值给变量(2). …...
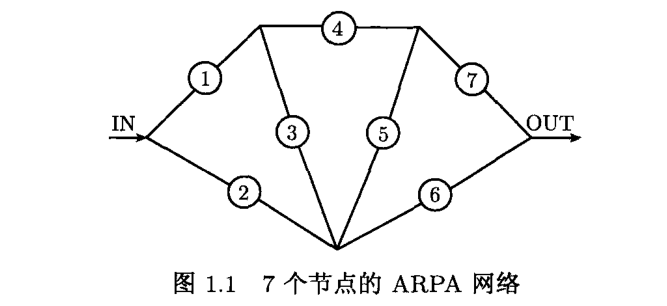
整数规划——第一章 引言
整数规划——第一章 引言 整数规划是带整数变量的最优化问题,即最大化或最小化一个全部或部分变量为整数的多元函数受约束于一组等式和不等式条件的最优化问题。许多经济、管理、交通、通信和工程中的最优化问题都可以用整数规划来建模。 考虑一个电视机工厂的生产…...
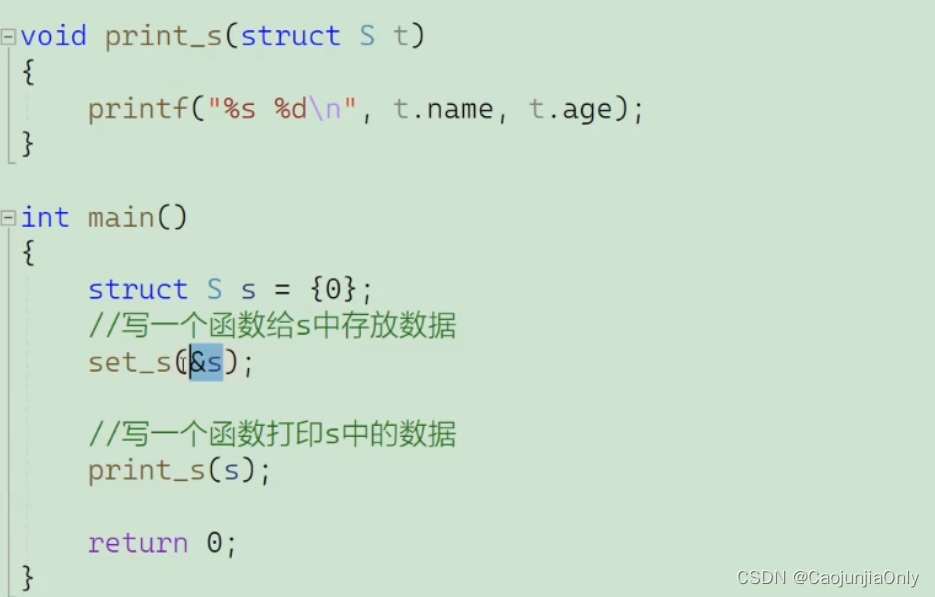
C语言结构体讲解
目录 结构体的声明 结构的基础知识 结构的声明 为什么要出现结构体? 结构成员的类型 结构体变量的定义和初始化 定义:(全局变量//局部变量) 初始化: 结构体成员的访问 结构体传参 结构体的声明 结构的基础知识…...
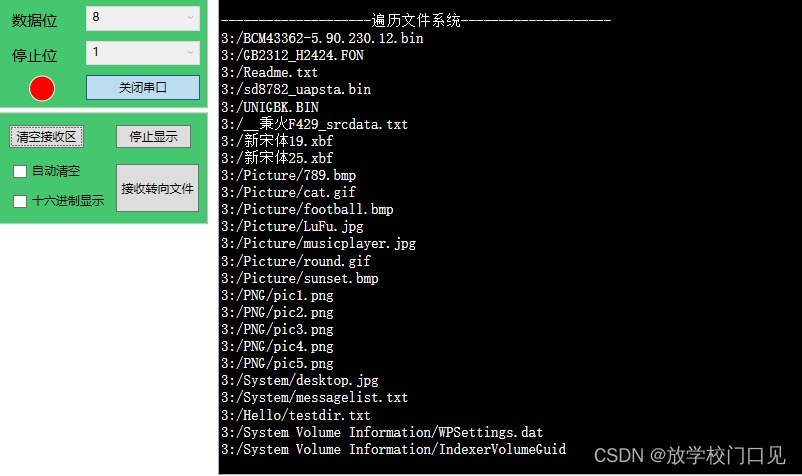
021 - STM32学习笔记 - Fatfs文件系统(三) - 细化与总结
021 - STM32学习笔记 - Fatfs文件系统(三) - 细化与总结 上节内容中,初步实现了FatFs文件系统的移植,并且实现了设备的挂载、文件打开/关闭与读写功能,这里对上节遗留的一些问题进行总结,并且继续完善文件…...
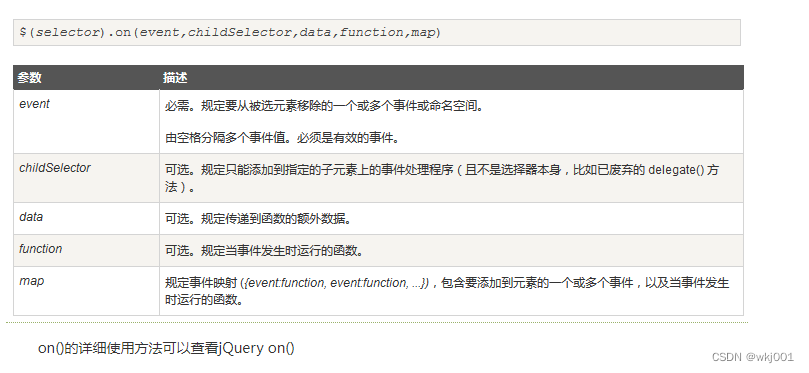
jQuery如何获取动态添加的元素
jQuery如何获取动态添加的元素 使用 on()方法 本质上使用了事件委派,将事件委派在父元素身上 自 jQuery 版本 1.7 起,on() 方法是 bind()、live() 和 delegate() 方法的新的替代品,但是由于on()方法必须有事件,没有事件时可选择de…...
Keepalived 在CentOS 7安装并配置监听MySQL双主
keepalived安装 MySQL双主配置请看这里:https://tongyao.blog.csdn.net/article/details/132016200?spm1001.2014.3001.5502 128、129两台服务器安装步骤相同,配置文件不同,下面有介绍。 1.安装相关依赖包,并下载keepalived安…...

深度学习,神经网络介绍
目录 1.神经网络的整体构架 2.神经网络架构细节 3.正则化与激活函数 4.神经网络过拟合解决方法 1.神经网络的整体构架 ConvNetJS demo: Classify toy 2D data 我们可以看看这个神经网络的网站,可以用来学习。 神经网络的整体构架如下1: 感知器&…...

中国AI大模型峰会“封神之作”!开发者不容错过这场夏季盛会
年度最强大模型顶会来袭!喊话中国数百万AI开发者,速来! 硬核来袭!中国AI大模型峰会“封神之作”,开发者们不容错过! 前瞻大模型发展趋势,紧跟这场大会! 中国科技超级碗,大模型最新前…...
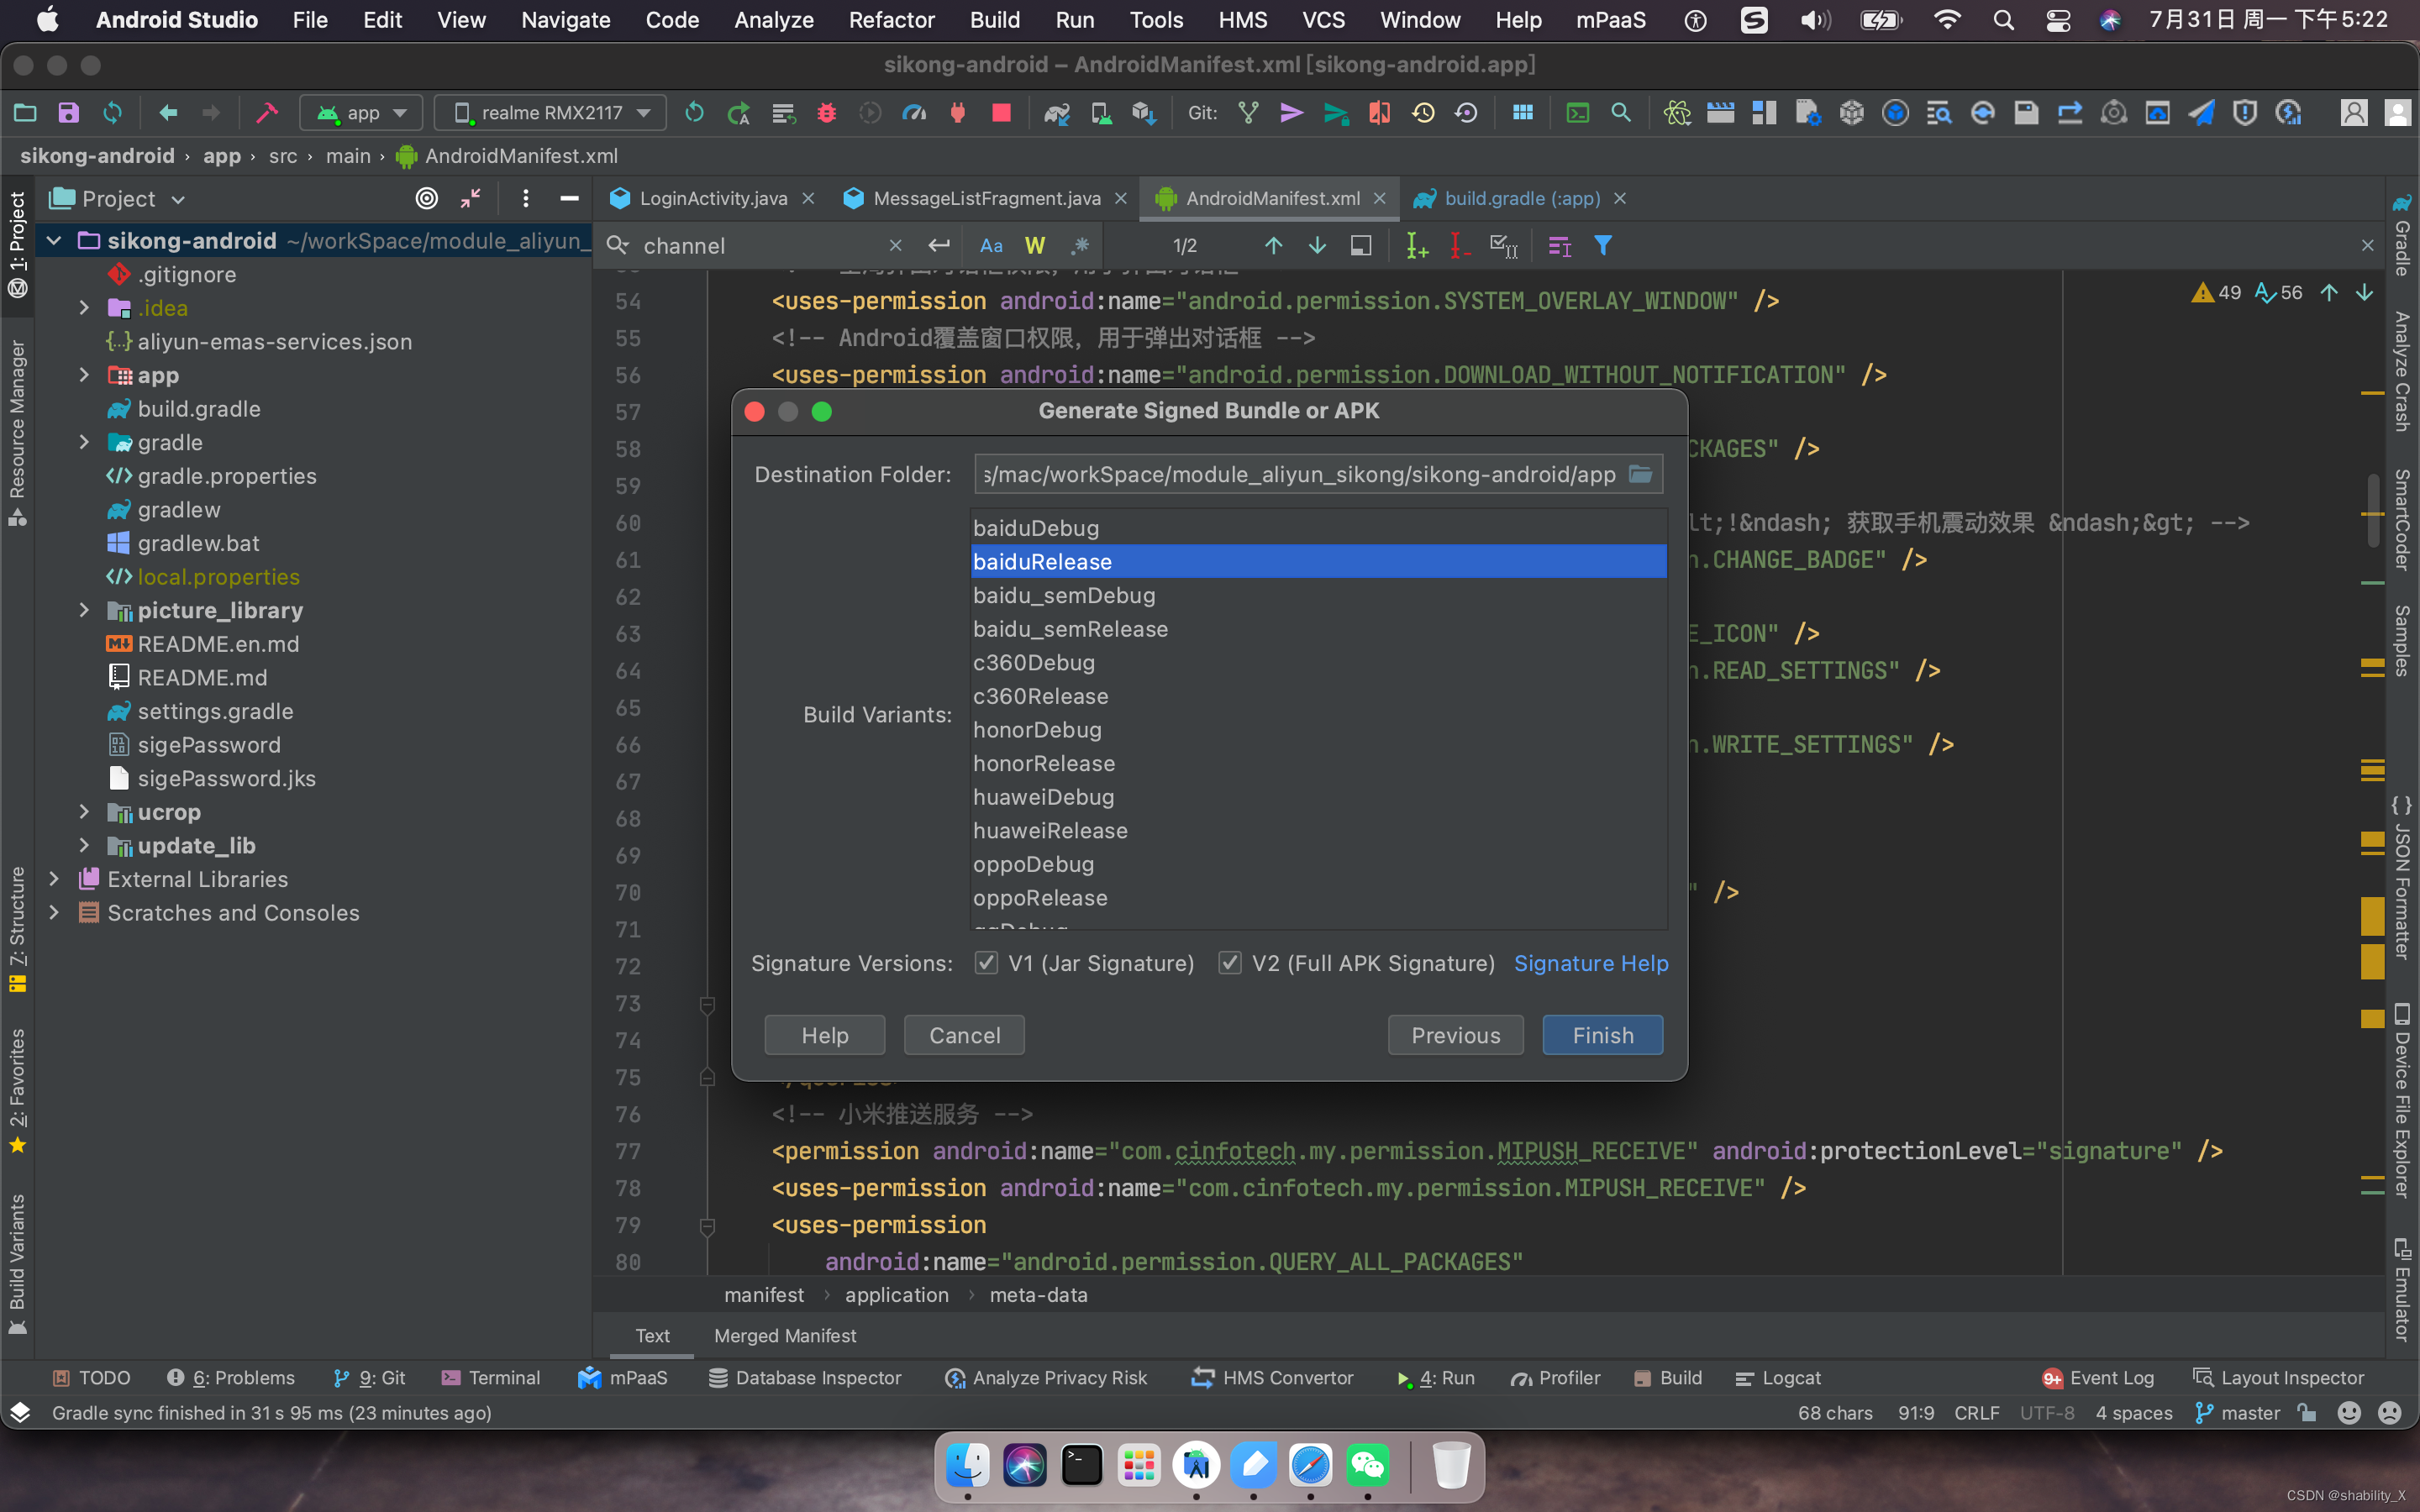
Android Studio多渠道打包
使用环境: Android studio 多渠道打包 使用方法: 1 APP下build.gradle文件 flavorDimensions "default"productFlavors {huawei {dimension "default"manifestPlaceholders [ channel:"huawei" ]}xiaomi {dimension &…...

RK3566 Android11默认客户Launcher修改
前言 客户需要默认自己的Launcher为home,同时保留系统的Launcher3. 解决办法:在启动home应用之前设置一下默认Launcher。查找home app启动相关资料,找到了frameworks/base/services/core/java/com/android/server/wm/RootWindowContainer.java的startHomeOnTaskDisplayA…...

ORB算法在opencv中实现方法
在OPenCV中实现ORB算法,使用的是: 1.实例化ORB orb cv.xfeatures2d.orb_create(nfeatures)参数: nfeatures: 特征点的最大数量 2.利用orb.detectAndCompute()检测关键点并计算 kp,des orb.detectAndCompute(gray,None)参数:…...

vue项目回显文本无法识别换行符
解决方法 1:使用<br/>替换文本中的\n,使用v-html渲染 <template> <div v-html"str"></div> </template> <script> let str 以下内容自动换行\n换行了 // 使用replace截取提换 this.str str.replace(/…...

Minio 部署
minio 官网:https://www.minio.org.cn/ 部署文档:https://www.minio.org.cn/docs/minio/container/operations/install-deploy-manage/deploy-minio-single-node-single-drive.html# 选择自己的部署环境: 我用的docker: docker pull qua…...
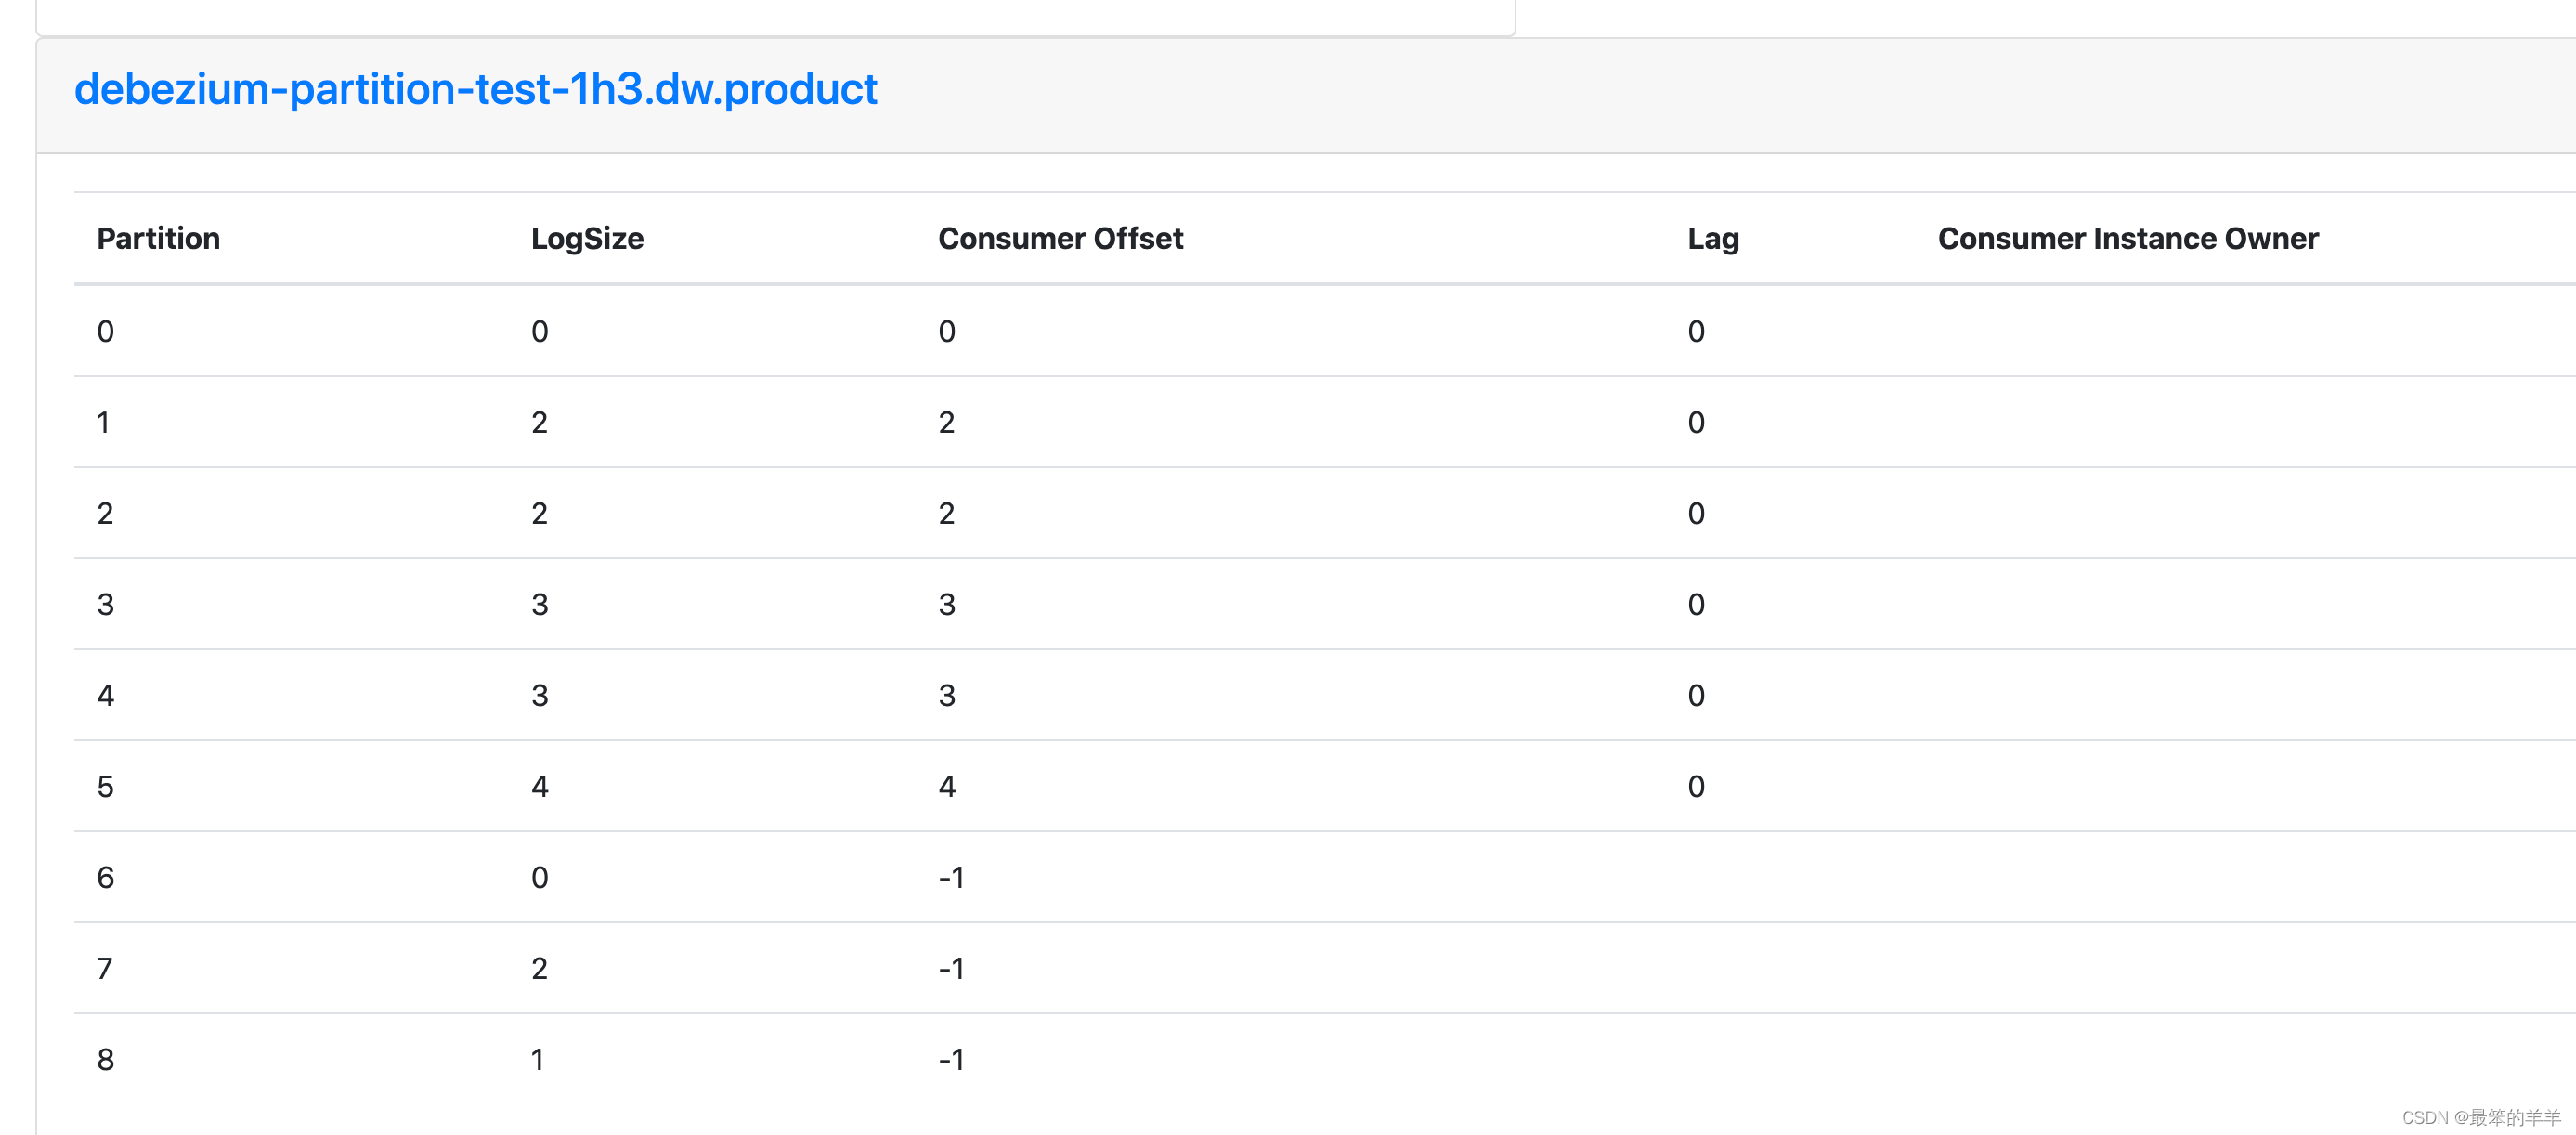
Kafka系列之:记录一次Kafka Topic分区扩容,但是下游flink消费者没有自动消费新的分区的解决方法
Kafka系列之:记录一次Kafka Topic分区扩容,但是下游flink消费者没有自动消费新的分区的解决方法 一、背景二、解决方法三、实现自动发现新的分区一、背景 生产环境Kafka集群压力大,Topic读写压力大,消费的lag比较大,因此通过扩容Topic的分区,增大Topic的读写性能理论上下…...
)
Ansible部署MariaDB galera集群(多主)
文章目录 Ansible部署MariaDB galera集群(多主)介绍节点规划基础环境准备编写剧本文件执行剧本文件查看集群状态测试 Ansible部署MariaDB galera集群(多主) 介绍 MariaDB Galera集群是一套基于同步复制的、多主的MySQL集群解决方案,使用节点没有单点故障ÿ…...

立体库-库龄
split 用法第一种: 1.对单个字符进行分割(注意这里是字符,不是字符串,故只能用单引号‘’) string sabcdeabcdeabcde; string[] sArrays.Split(c) ; foreach(string i in sArray) Console.WriteLine(i.ToString());…...

extern/头文件包含,实现一个函数被两个文件共用
目录 一、extern 1、在a.c文件中定义int add函数 2、在b.c文件中使用extern关键字声明add函数 二、用头文件包含的形式 1、在a.c文件中定义int add函数 2、创建一个名为a.h的头文件,其中包含add函数的函数原型 3、在b.c文件中包含a.c的头文件,并调…...
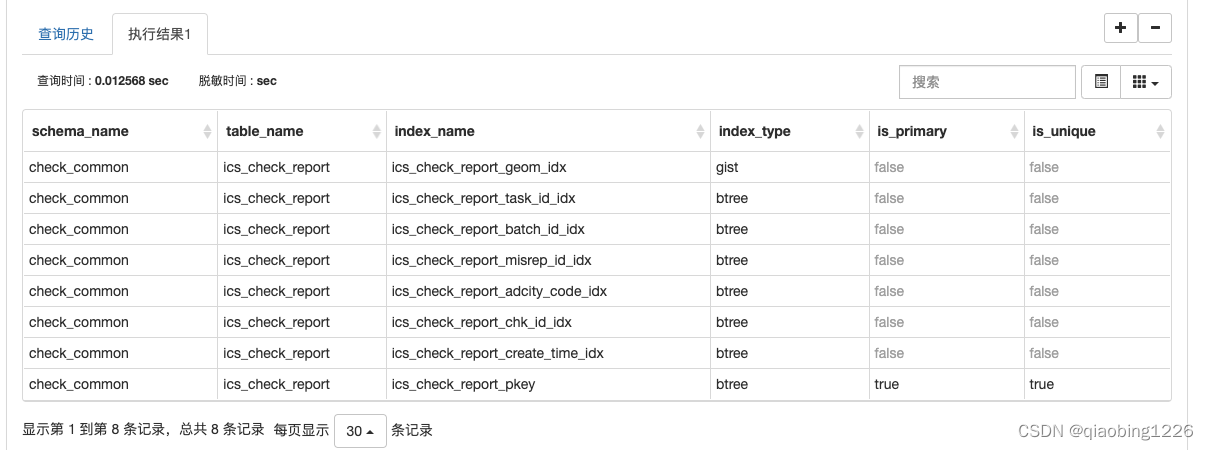
pgsql 查看某个表建立了那些索引sql
执行以下sql: SELECTns.nspname as schema_name,tab.relname as table_name,cls.relname as index_name,am.amname as index_type,idx.indisprimary as is_primary,idx.indisunique as is_unique FROMpg_index idx INNER JOIN pg_class cls ON cls.oididx.indexrel…...

【SCSS】网格布局中的动画
效果 index.html <!DOCTYPE html> <html><head><title> Document </title><link type"text/css" rel"styleSheet" href"index.css" /></head><body><div class"container">&l…...

2026年5月14隔夜暗盘挂单排行榜
推荐好文:每年节约五六千交易费不香吗如何获取龙虎榜是否有量化参与如何获取股东减持信息大A有5400多只股票, 这里面只有不到10%, 约500只由资金投票, 剩余的都是杂毛, 炒股看龙头找主线. 从隔夜挂单里选择, 再叠加我们之前分享的如何判断是否有大股东减持, 是否有融资融券参与…...

基于MCP协议构建AI助手用户反馈闭环:从原理到工程实践
1. 项目概述:一个为AI助手“装”上用户反馈的桥梁最近在折腾AI应用开发,特别是想让大语言模型(LLM)驱动的助手能更“懂”用户。一个核心痛点出现了:助手处理完用户请求后,如何让用户方便地给出“好评”或“…...

OpenResearcher:AI驱动的模块化科研工作流框架实践指南
1. 项目概述:一个为研究者量身打造的AI驱动开源工具箱最近在折腾一些研究项目,发现从文献调研、数据处理到论文写作,整个流程里重复性劳动实在太多了。每次开一个新坑,光是搭建基础环境、找合适的工具链就得花上半天,更…...

深入PEX8796:从Serdes到Virtual Switch,图解PCIe交换芯片的三种工作模式
深入解析PEX8796:PCIe交换芯片的架构设计与模式创新 在高速数据传输领域,PCIe交换芯片如同交通枢纽般连接着计算系统的各个组件。作为PLX公司(现已被博通收购)的经典之作,PEX8796凭借其灵活的架构设计和多样化的操作模…...

AWorksLP嵌入式系统移植FatFs驱动SD卡:从原理到实践全解析
1. 项目概述:为什么要在AWorksLP上折腾FatFs和SD卡?如果你正在用AWorksLP这类面向物联网的轻量级实时操作系统(RTOS)平台做开发,大概率会遇到一个经典需求:如何可靠、高效地存储数据。无论是记录传感器日志…...

开源AI智能体技能库:模块化设计赋能AI应用开发
1. 项目概述:一个开源的AI智能体技能库最近在GitHub上闲逛,发现了一个挺有意思的项目,叫free-ai-agent-skills。光看名字,你可能会觉得这又是一个堆砌各种AI工具调用的代码仓库。但点进去仔细研究后,我发现它的定位和设…...

揭秘AMD处理器底层控制:Ryzen SDT调试工具从入门到精通
揭秘AMD处理器底层控制:Ryzen SDT调试工具从入门到精通 【免费下载链接】SMUDebugTool A dedicated tool to help write/read various parameters of Ryzen-based systems, such as manual overclock, SMU, PCI, CPUID, MSR and Power Table. 项目地址: https://g…...

构建多模型备用策略时Taotoken的聚合与路由能力价值
🚀 告别海外账号与网络限制!稳定直连全球优质大模型,限时半价接入中。 👉 点击领取海量免费额度 构建多模型备用策略时Taotoken的聚合与路由能力价值 在构建依赖大模型能力的生产应用时,服务的稳定性是核心考量之一。…...

Apple Silicon Mac原生Linux游戏体验:Asahi Linux驱动突破与实战指南
1. 项目概述:当Apple Silicon Mac遇见原生Linux游戏如果你和我一样,既是Mac用户,又对在Linux系统上折腾抱有热情,那么最近Asahi Linux项目的进展绝对会让你心跳加速。长久以来,在搭载Apple Silicon(M1、M2、…...

Parabolic视频下载工具:三步完成200+网站视频下载的终极方案
Parabolic视频下载工具:三步完成200网站视频下载的终极方案 【免费下载链接】Parabolic Download web video and audio 项目地址: https://gitcode.com/GitHub_Trending/pa/Parabolic 你是否还在为寻找一款简单易用、功能强大的视频下载工具而烦恼࿱…...