从实体按键看 Android 车载的自定义事件机制
作者:TechMerger
在汽车数字化、智能化变革的进程中,越来越多的车机设计或部分、或全部地舍弃了实体按键,进而把车主操作的入口转移到了车机 UI 以及语音助手。
但统一、高效的零层级 UI 颇为困难,语音的准确率、覆盖率亦不够完善,那么在当下的阶段适当地保留部分实体按键是比较明智的选择。
开发者都了解 Android 平台可以监听按键、屏幕触控、耳机插拔等硬件的事件来源,来获取用户输入,进而封装成 KeyEvent、MotionEvent 等各种事件类型,并发送到 System 或 App 来进一步处理。
其原理都是利用 InputManagerService 系统服务读取 EventHub 所对应的事件类型,依照对应的 Mapper 转换、Dispatcher 分发以及 Channel 传送等步骤来完成的。
而本次探讨的 Android 变体即 Automotive OS(简称 AAOS)作用在车载场景下,其需要更多、丰富的事件需求,比如来自方控、中控等。
可其和 Android 标准的 Event 来源不同,方控等设备并不处于同一个系统当中,属于系统以外的 ECU 单元。那么如何高效、快捷地添加对这些系统以外的按键支持和处理,显得非常必要。
这就要谈到 AAOS 里特有的车载事件定制 CustomInputService。
自定义按键的实战
AAOS 默认支持的自定义事件 Code 位于文件 hardware/interfaces/automotive/vehicle/2.0/types.hal 中,App 可以利用这些预设的事件 Code 进行监听和自定义处理逻辑。
当然,Car OEM 厂商可以使用任意有符号的 32 位数值来扩展支持自定义输入 HW_CUSTOM_INPUT 的 CustomInputType 枚举范围,以支持更多的按键 Code,确保处理的范围符合实际的车辆按键需求。
// hardware/interfaces/automotive/vehicle/2.0/types.hal/*** Input code values for HW_CUSTOM_INPUT.*/enum CustomInputType : int32_t {CUSTOM_EVENT_F1 = 1001,CUSTOM_EVENT_F2 = 1002,CUSTOM_EVENT_F3 = 1003,CUSTOM_EVENT_F4 = 1004,CUSTOM_EVENT_F5 = 1005,CUSTOM_EVENT_F6 = 1006,CUSTOM_EVENT_F7 = 1007,CUSTOM_EVENT_F8 = 1008,CUSTOM_EVENT_F9 = 1009,CUSTOM_EVENT_F10 = 1010,};
我们利用上述 Code 来自定义一个打开高频 app 的专用控件,比如:接电话、挂电话、音量、语音、微信按钮、地图按钮、音乐控制等等。
实战的具体步骤来说,首先得声明特定权限,才能监听 Car 的自定义输入:
android.car.permission.CAR_MONITOR_INPUT
当然,如果涉及到向 Android 系统注入回标准 KeyEvent,还需要申明对应的注入权限:
android.permission.INJECT_EVENTS
总体的 Manifest 定义如下:
<manifest xmlns:android="http://schemas.android.com/apk/res/android"package="com.android.car.custominput.sample"><uses-permission android:name="android.permission.INJECT_EVENTS" /><uses-permission android:name="android.car.permission.CAR_MONITOR_INPUT"/>...<application><service android:name=".SampleCustomInputService"android:exported="true" android:enabled="true">...</service></application></manifest>
- onBind() 时候调用 connectToCarService() 创建 Car 实例、获取
CarInputManager、CustomInputEventListener实例,并向 CarInputManager 提供的requestInputEventCapture()进行注册,并传递 INPUT_TYPE_CUSTOM_INPUT_EVENT 作为输入类型参数 - onDestroy() 里释放对于该事件的监听
- 复写
CarInputCaptureCallback的onCustomInputEvents()方法,作为各事件的处理入口和时机,回调理将提供事件所属的屏幕类型和事件类型,CustomInputEventListener承载了具体的处理逻辑
// SampleCustomInputService.javapublic class SampleCustomInputService extends Service implementsCarInputManager.CarInputCaptureCallback {private Car mCar;private CarInputManager mCarInputManager;private CustomInputEventListener mEventHandler;@Overridepublic IBinder onBind(Intent intent) {if (intent != null) {connectToCarService();}return null;}private void connectToCarService() {if (mCar != null && mCar.isConnected()) {return;}mCar = Car.createCar(this, /* handler= */ null, Car.CAR_WAIT_TIMEOUT_WAIT_FOREVER,(car, ready) -> {mCar = car;if (ready) {mCarInputManager =(CarInputManager) mCar.getCarManager(Car.CAR_INPUT_SERVICE);mCarInputManager.requestInputEventCapture(CarOccupantZoneManager.DISPLAY_TYPE_MAIN,new int[]{CarInputManager.INPUT_TYPE_CUSTOM_INPUT_EVENT},CarInputManager.CAPTURE_REQ_FLAGS_ALLOW_DELAYED_GRANT,/* callback= */ this);mEventHandler = new CustomInputEventListener(getApplicationContext(),(CarAudioManager) mCar.getCarManager(Car.AUDIO_SERVICE),(CarOccupantZoneManager) mCar.getCarManager(Car.CAR_OCCUPANT_ZONE_SERVICE),this);}});}@Overridepublic void onDestroy() {if (mCarInputManager != null) {mCarInputManager.releaseInputEventCapture(CarOccupantZoneManager.DISPLAY_TYPE_MAIN);}if (mCar != null) {mCar.disconnect();mCar = null;}}@Overridepublic void onCustomInputEvents(int targetDisplayType,@NonNull List<CustomInputEvent> events) {for (CustomInputEvent event : events) {mEventHandler.handle(targetDisplayType, event);}}...}
CustomInputEventListener 的核心逻辑在于 handle():
-
首先调用 isValidTargetDisplayType() 验证屏幕类型,决定是否处理
-
通过 getInputCode() 从
CustomInputEvent中提取 KEY CODE -
按照预设的 Event 类型进行对应的处理,比如:
- LAUNCH_MAPS_ACTION 的话,封装启动 Map App 的方法 launchMap(),注意需要根据起初的 DisplayType 获取目标屏幕的 ID:targetDisplayId 并传入
- INJECT_VOICE_ASSIST_ACTION_DOWN 的话,表明是启动语音助手按键的按下事件,注入 语音助手的标准 KeyEvent 即 KEYCODE_VOICE_ASSIST 的 DOWN 事件
- INJECT_VOICE_ASSIST_ACTION_UP 则是注入 KEYCODE_VOICE_ASSIST 的 UP 事件
- 等
// CustomInputEventListener.javapublic final class CustomInputEventListener {private final SampleCustomInputService mService;...public @interface EventAction {/** Launches Map action. */int LAUNCH_MAPS_ACTION = 1001;.../** Injects KEYCODE_VOICE_ASSIST (action down) key event */int INJECT_VOICE_ASSIST_ACTION_DOWN = 1009;/** Injects KEYCODE_VOICE_ASSIST (action up) key event */int INJECT_VOICE_ASSIST_ACTION_UP = 1010;}public CustomInputEventListener( ... ) {mContext = context;...}public void handle(int targetDisplayType, CustomInputEvent event) {if (!isValidTargetDisplayType(targetDisplayType)) {return;}int targetDisplayId = getDisplayIdForDisplayType(targetDisplayType);@EventAction int action = event.getInputCode();switch (action) {case EventAction.LAUNCH_MAPS_ACTION:launchMap(targetDisplayId);break;...case EventAction.INJECT_VOICE_ASSIST_ACTION_DOWN:injectKeyEvent(targetDisplayType,newKeyEvent(KeyEvent.ACTION_DOWN, KeyEvent.KEYCODE_VOICE_ASSIST));break;case EventAction.INJECT_VOICE_ASSIST_ACTION_UP:injectKeyEvent(targetDisplayType,newKeyEvent(KeyEvent.ACTION_UP, KeyEvent.KEYCODE_VOICE_ASSIST));break;default: Log.e(TAG, "Ignoring event [" + action + "]");}}private int getDisplayIdForDisplayType(int targetDisplayType) {int displayId = mCarOccupantZoneManager.getDisplayIdForDriver(targetDisplayType);return displayId;}private static boolean isValidTargetDisplayType(int displayType) {if (displayType == CarOccupantZoneManager.DISPLAY_TYPE_MAIN) {return true;}return false;}private void launchMap(int targetDisplayId) {ActivityOptions options = ActivityOptions.makeBasic();options.setLaunchDisplayId(targetDisplayId);Intent mapsIntent = new Intent(Intent.ACTION_VIEW);mapsIntent.setClassName(mContext.getString(R.string.maps_app_package),mContext.getString(R.string.maps_activity_class));mapsIntent.addFlags(Intent.FLAG_ACTIVITY_NEW_TASK | Intent.FLAG_ACTIVITY_CLEAR_TOP);mService.startActivity(mapsIntent, options.toBundle());}...private KeyEvent newKeyEvent(int action, int keyCode) {long currentTime = SystemClock.uptimeMillis();return new KeyEvent(/* downTime= */ currentTime, /* eventTime= */ currentTime,action, keyCode, /* repeat= */ 0);}private void injectKeyEvent(int targetDisplayType, KeyEvent event) {mService.injectKeyEvent(event, targetDisplayType);}}
KeyEvent 的注入还需要回到自定义 CustomInputService 中,之后是调用 CarInputManager 将 Event 进一步注入。
将在下个章节阐述 CarInputManager 的进一步处理。
// SampleCustomInputService.javapublic class SampleCustomInputService extends Service implementsCarInputManager.CarInputCaptureCallback {...public void injectKeyEvent(KeyEvent event, int targetDisplayType) {if (mCarInputManager == null) {throw new IllegalStateException("Service was properly initialized, reference to CarInputManager is null");}mCarInputManager.injectKeyEvent(event, targetDisplayType);}}
需要该 Service 生效的话,需要使用如下命令启动 Service,按照逻辑向系统注册事件监听。
adb shell am start-foreground-service com.android.car.custominput.sample/.SampleCustomInputService
接下来按压硬件的按键,或者像下面一样模拟按键的输入,比如下面模拟 1001 启动 Map 的按键按下:
adb shell cmd car_service inject-custom-input -d 0 f1
其他几个和上述逻辑相应的事件模拟命令:
adb shell cmd car_service inject-custom-input f2 // accept incoming callsadb shell cmd car_service inject-custom-input f3 // reject incoming callsadb shell cmd car_service inject-custom-input f4 // To increase media volumeadb shell cmd car_service inject-custom-input f5 // To decrease media volumeadb shell cmd car_service inject-custom-input f6 // To increase alarm volumeadb shell cmd car_service inject-custom-input f7 // To decrease alarm volumeadb shell cmd car_service inject-custom-input f8 // To simulate pressing BACK HOME button
系统的默认处理
以上述的 KEYCODE_VOICE_ASSIST 为例,看一下 CarInputManager 的进一步处理如何。
对应的在 CarInputService 中:
- 首先,injectKeyEvent() 将先检查注入方的相关权限:
INJECT_EVENTS - 接着,调用 onKeyEvent() 执行事件的后续处理
// packages/services/Car/service/src/com/android/car/CarInputService.javapublic class CarInputService ... {...@Overridepublic void injectKeyEvent(KeyEvent event, @DisplayTypeEnum int targetDisplayType) {// Permission checkif (PackageManager.PERMISSION_GRANTED != mContext.checkCallingOrSelfPermission(android.Manifest.permission.INJECT_EVENTS)) {throw new SecurityException("Injecting KeyEvent requires INJECT_EVENTS permission");}long token = Binder.clearCallingIdentity();try {// Redirect event to onKeyEventonKeyEvent(event, targetDisplayType);} finally {Binder.restoreCallingIdentity(token);}}}
注入的事件类型为 KEYCODE_VOICE_ASSIST 的话,交给 handleVoiceAssistKey() 处理。
-
当 action 尚为 DOWN 时机,交给
VoiceKeyTimer的keyDown()开始计时 -
当 action 为 UP 时机:通过 Timer 的
keyUp()获取是否达到长按(长按时长默认是 400ms,可以在 SettingsProvider 中改写)条件,并调用dispatchProjectionKeyEvent()发送相应的事件:- 短按处理 KEY_EVENT_VOICE_SEARCH_SHORT_PRESS_KEY_UP
- 反之,发送 KEY_EVENT_VOICE_SEARCH_LONG_PRESS_KEY_UP
- 如果 dispatchProjectionKeyEvent() 没没有拦截处理,执行默认逻辑:
launchDefaultVoiceAssistantHandler()
// packages/services/Car/service/src/com/android/car/CarInputService.javapublic class CarInputService ... {...@Overridepublic void onKeyEvent(KeyEvent event, @DisplayTypeEnum int targetDisplayType) {switch (event.getKeyCode()) {case KeyEvent.KEYCODE_VOICE_ASSIST:handleVoiceAssistKey(event);return;...default:break;}...}private void handleVoiceAssistKey(KeyEvent event) {int action = event.getAction();if (action == KeyEvent.ACTION_DOWN && event.getRepeatCount() == 0) {mVoiceKeyTimer.keyDown();dispatchProjectionKeyEvent(CarProjectionManager.KEY_EVENT_VOICE_SEARCH_KEY_DOWN);} else if (action == KeyEvent.ACTION_UP) {if (mVoiceKeyTimer.keyUp()) {dispatchProjectionKeyEvent(CarProjectionManager.KEY_EVENT_VOICE_SEARCH_LONG_PRESS_KEY_UP);return;}if (dispatchProjectionKeyEvent(CarProjectionManager.KEY_EVENT_VOICE_SEARCH_SHORT_PRESS_KEY_UP)) {return;}launchDefaultVoiceAssistantHandler();}}private void launchDefaultVoiceAssistantHandler() {if (!AssistUtilsHelper.showPushToTalkSessionForActiveService(mContext, mShowCallback)) {Slogf.w(TAG, "Unable to retrieve assist component for current user");}}}
CarProjectionManager 是允许 App 向系统注册/注销某些事件处理的机制。
CarProjectionManager allows applications implementing projection to register/unregister itself with projection manager, listen for voice notification.
dispatchProjectionKeyEvent() 则将上述的短按、长按事件发送给 App 通过 CarProjectionManager 向其注册的 ProjectionKeyEventHandler 处理。
// packages/services/Car/service/src/com/android/car/CarInputService.javapublic class CarInputService ... {...private boolean dispatchProjectionKeyEvent(@CarProjectionManager.KeyEventNum int event) {CarProjectionManager.ProjectionKeyEventHandler projectionKeyEventHandler;synchronized (mLock) {projectionKeyEventHandler = mProjectionKeyEventHandler;if (projectionKeyEventHandler == null || !mProjectionKeyEventsSubscribed.get(event)) {return false;}}projectionKeyEventHandler.onKeyEvent(event);return true;}}// packages/services/Car/service/src/com/android/car/CarProjectionService.javaclass CarProjectionService ... {@Overridepublic void onKeyEvent(@CarProjectionManager.KeyEventNum int keyEvent) {Slogf.d(TAG, "Dispatching key event: " + keyEvent);synchronized (mLock) {for (BinderInterfaceContainer.BinderInterface<ICarProjectionKeyEventHandler>eventHandlerInterface : mKeyEventHandlers.getInterfaces()) {ProjectionKeyEventHandler eventHandler =(ProjectionKeyEventHandler) eventHandlerInterface;if (eventHandler.canHandleEvent(keyEvent)) {try {// onewayeventHandler.binderInterface.onKeyEvent(keyEvent);} catch (RemoteException e) {Slogf.e(TAG, "Cannot dispatch event to client", e);}}}}}...}
假使没有 App 注册或者消费了 VOICE_SEARCH 的短按/长按事件,则调用默认的 launchDefaultVoiceAssistantHandler() 通过 Assist 相关的帮助类 AssistUtilsHelper 继续。
public final class AssistUtilsHelper {...public static boolean showPushToTalkSessionForActiveService( ... ) {AssistUtils assistUtils = getAssistUtils(context);...Bundle args = new Bundle();args.putBoolean(EXTRA_CAR_PUSH_TO_TALK, true);IVoiceInteractionSessionShowCallback callbackWrapper =new InternalVoiceInteractionSessionShowCallback(callback);return assistUtils.showSessionForActiveService(args, SHOW_SOURCE_PUSH_TO_TALK,callbackWrapper, /* activityToken= */ null);}...}
默认的语音助手的启动是通过 Android 标准的 VoiceInteraction 链路完成,所以后续的处理是通过 showSessionForActiveService() 交由专门管理 VoiceInteraction 的 VoiceInteractionManagerService 系统服务来完成。
public class AssistUtils {...public boolean showSessionForActiveService(Bundle args, int sourceFlags,IVoiceInteractionSessionShowCallback showCallback, IBinder activityToken) {try {if (mVoiceInteractionManagerService != null) {return mVoiceInteractionManagerService.showSessionForActiveService(args,sourceFlags, showCallback, activityToken);}} catch (RemoteException e) {Log.w(TAG, "Failed to call showSessionForActiveService", e);}return false;}...}
具体的是找到默认的数字助手 DigitalAssitant app 的 VoiceInteractionService 进行绑定和启动对应的 Session。
public class VoiceInteractionManagerService extends SystemService {class VoiceInteractionManagerServiceStub extends IVoiceInteractionManagerService.Stub {public boolean showSessionForActiveService( ... ) {...final long caller = Binder.clearCallingIdentity();try {...return mImpl.showSessionLocked(args,sourceFlags| VoiceInteractionSession.SHOW_WITH_ASSIST| VoiceInteractionSession.SHOW_WITH_SCREENSHOT,showCallback, activityToken);} finally {Binder.restoreCallingIdentity(caller);}}}...}...}
对 VoiceInteraction 细节感兴趣的可以参考其他文章:
自定义按键的来源
按键的信号输入来自于 ECU,其与 AAOS 的 Hal 按照定义监听 HW_CUSTOM_INPUT 输入事件的 property 变化,来自于上述提及的 types.hal 中定义的支持自定义输入事件 Code 发送到 Car Service 层。
Car Service App 的 VehicleHal 将在 onPropertyEvent() 中接收到 HAL service 的 property 发生变化。接着,订阅了 HW_CUSTOM_INPUT property 变化的 InputHalService 的 onHalEvents() 将被调用。
之后交由 CarInputService 处理,因其在 init() 时将自己作为 InputListener 的实现传递给了 InputHalService 持有。
处理自定义输入的 App 在调用 requestInputEventCapture() 时的 Callback 将被管理在 InputCaptureClientController 中的 SparseArray 里。
自然的 CarInputService 的 onCustomInputEvent() 需要将事件交给 InputCaptureClientController 来进一步分发。
public class CarInputService ... {...@Overridepublic void onCustomInputEvent(CustomInputEvent event) {if (!mCaptureController.onCustomInputEvent(event)) {return;}}}
InputCaptureClientController 将从 SparseArray 中获取对应的 Callback 并回调 onCustomInputEvents()。
public class InputCaptureClientController {...public boolean onCustomInputEvent(CustomInputEvent event) {int displayType = event.getTargetDisplayType();if (!SUPPORTED_DISPLAY_TYPES.contains(displayType)) {return false;}ICarInputCallback callback;synchronized (mLock) {callback = getClientForInputTypeLocked(displayType,CarInputManager.INPUT_TYPE_CUSTOM_INPUT_EVENT);if (callback == null) {return false;}}dispatchCustomInputEvent(displayType, event, callback);return true;}private void dispatchCustomInputEvent(@DisplayTypeEnum int targetDisplayType,CustomInputEvent event,ICarInputCallback callback) {CarServiceUtils.runOnCommon(() -> {mCustomInputEventDispatchScratchList.clear();mCustomInputEventDispatchScratchList.add(event);try {callback.onCustomInputEvents(targetDisplayType,mCustomInputEventDispatchScratchList);} ...});}}
此后便抵达了 上个实战章节实现的 SampleCustomInputService 中的 onCustomInputEvents()。
模拟调试
在漫长的 HMI 实验台架、实车准备就绪之前,往往需要开发者提前验证链路的可行性,这时候就如何模拟这些自定义事件的注入就显得非常需要。
我们知道自定义实体按键的输入并不属于 EventHub 范畴,那么传统的 getevent、dumpsys input 也就无法监听到该事件的输入,自然也就无法使用 adb 的 input 和 sendevent 命令来反向注入,正如实战章节提到的那样,我们可以使用 Car 专用的 adb 命令来达到目的。
adb shell cmd car_service inject-custom-input <custom key code># oradb shell cmd car_service inject-key <key code>
前者模拟的是自定义事件的注入,后者则是针对 Android 标准事件。
当然如果需要区分按键的短按和长按事件,需要像上面的事例一样提供针对 DOWN 和 UP 的两种 Code,那么模拟的时候也要模拟按键之间的时长。
adb shell cmd car_service inject-custom-input <custom key code for down>; sleep 0.2; adb shell cmd car_service inject-custom-input <custome key code for up>
另外要留意,虽然都归属于 Android platform,但有些标准 KeyEvent 的模拟可以被 AAOS 所处理,而有些却不支持呢?
比如使用如下的命令模拟发出音量 mute Keycode,系统能完成静音,但使用同样命令模式的音量的 +/-,系统则无反应。
adb shell input keyevent <key code number or name>adb shell sendevent [device] [type] [code] [value]
这是因为部分 AAOS 的 OEM 实现里可能删除了部分标准 KeyEvent 的处理,而改部分的标准 Event 处理挪到了 Car Input 中统一处理了,所以需要使用上述的 car_service 对应的 inject-custom-input 才行。
结语
让我们再从整体上看下自定义按键事件的分发和处理过程:

如果自定义的按键数量不多,可以使用 AAOS 预置的 F1~F10。反之,可以采用任意有符号的 32 位数值来扩展自定义输入的范围。
当不用区分某种事件的短按、长按逻辑,使用一种 Code 映射即可,由 CustomInputService 直接执行。比如监控方控上的“通话”和“结束通话”实体按键:
- 当没有来电时,按下方向盘上的“通话”按钮会发送 DIAL intent 并显示拨号器的拨号键盘页面
- 当有来电时,按下方向盘上的“通话”按钮会使 TelecomManager 接听来电
- 当有来电时,按下方向盘上的“结束通话”按钮会使 TelecomManager 挂断电话
而当需要区分长、短按的时候,需要配置两种 Code 和 DOWN 及 UP 进行对应,由 CustomInputService 或 转发送给 CarInputService 按照 DOWN 和 UP 的时间间隔决定触发短按还是长按逻辑。
从遥远的未来来讲,实体按键的交互方式肯定会消亡,取而代之的是手势、语音、眼睛等更直接、丰富的方式。
但正如前言讲的,在现阶段适当地保留高频的实体按键,和车机的数字化、智能化之间并不冲突,车机的智能化不等于粗暴地抛弃实体按键等传统设计。
而且需要当心的一点是:如果车机交互做得不够好,还执意取消了实体键,那真是本末倒置了。
至于Android 车载相关的学习文档,目前网上很难找到比较完整的,在这里我推荐给大家一份《Android 车载学习手册》+《Android Framework学习手册》,学完以后想去面试车企可以参考这份《Android 车载面试习题》,最后祝大家都有一份稳定的工作。
Android 车载学习手册
- 第一章——Android Auto概述
- 第二章——开发汽车媒体应用
- 第三章——构建 Android Auto即时通信应用
- 第四章——构建车载导航和地图的注点应用
- 第五章——构建 Android Automotive OS 视频应用

《Android Framework学习手册》:https://qr18.cn/AQpN4J
- 开机Init 进程
- 开机启动 Zygote 进程
- 开机启动 SystemServer 进程
- Binder 驱动
- AMS 的启动过程
- PMS 的启动过程
- Launcher 的启动过程
- Android 四大组件
- Android 系统服务 - Input 事件的分发过程
- Android 底层渲染 - 屏幕刷新机制源码分析
- Android 源码分析实战

相关文章:
从实体按键看 Android 车载的自定义事件机制
作者:TechMerger 在汽车数字化、智能化变革的进程中,越来越多的车机设计或部分、或全部地舍弃了实体按键,进而把车主操作的入口转移到了车机 UI 以及语音助手。 但统一、高效的零层级 UI 颇为困难,语音的准确率、覆盖率亦不够完善…...
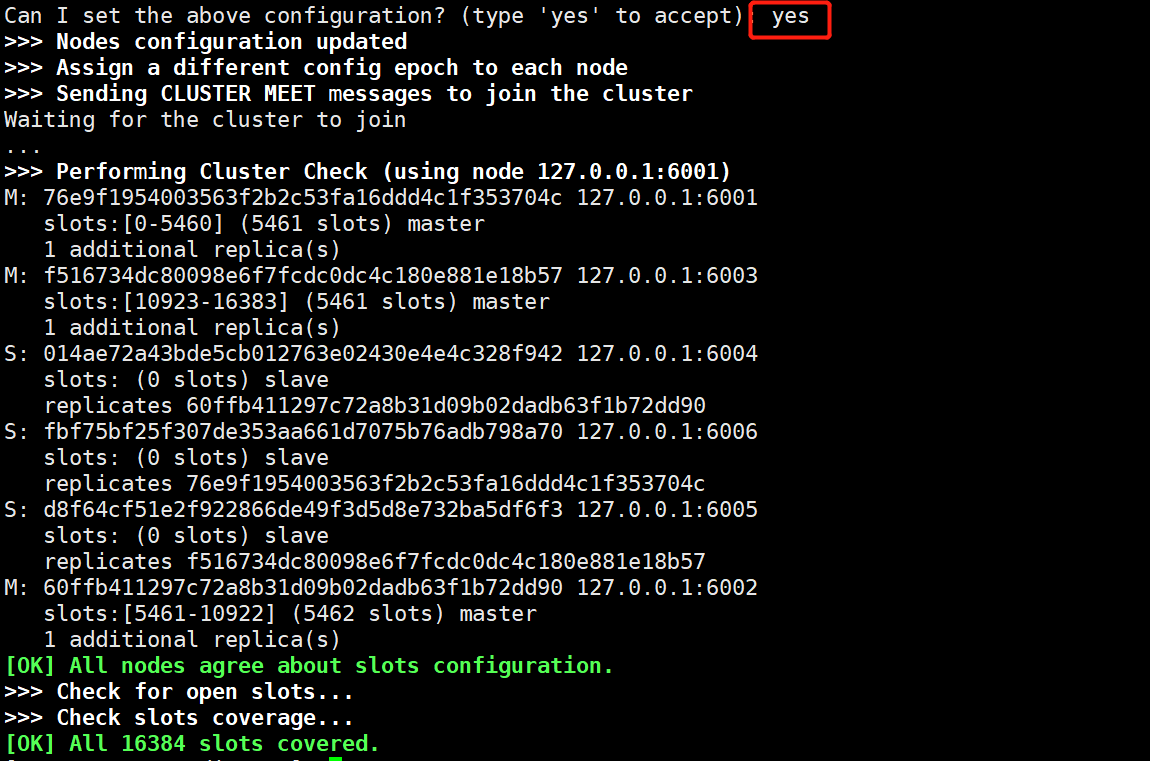
nosql之redis集群
提示:文章写完后,目录可以自动生成,如何生成可参考右边的帮助文档 文章目录 一、redis集群1.单节点redis服务器带来的问题2.集群redis3.集群的优势4.redis集群的实现方法5.redis群集的三种模式5.1 主从复制5.2 哨兵5.3 集群 二、Redis 主从复…...
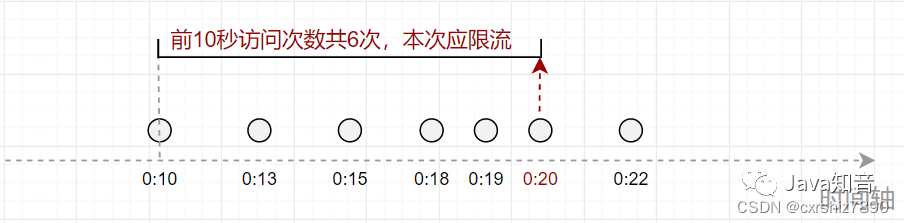
SpringBoot 项目使用 Redis 对用户 IP 进行接口限流
一、思路 使用接口限流的主要目的在于提高系统的稳定性,防止接口被恶意打击(短时间内大量请求)。 比如要求某接口在1分钟内请求次数不超过1000次,那么应该如何设计代码呢? 下面讲两种思路,如果想看代码可…...

SLA探活工具EaseProbe
工具介绍 EaseProbe可以做三种工作:探测、通知和报告。 项目地址:https://github.com/megaease/easeprobe 1、安装 [rootlocalhost ]# yum -y install unzip go [rootlocalhost ]# unzip easeprobe-main.zip [rootlocalhost ]# cd easeprobe-main [r…...
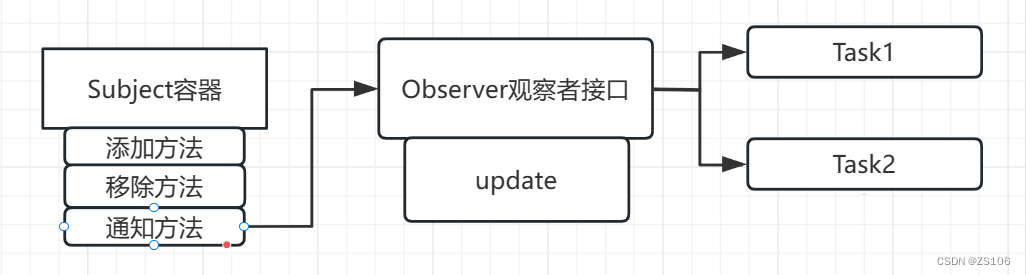
[Java] 观察者模式简述
模式定义:定义了对象之间的一对多依赖,让多个观察者对象同时监听某一个主题对象,当主题对象发生变化时,他的所有依赖者都会收到通知并且更新 依照这个图,简单的写一个代码 package Section1.listener;import java.ut…...
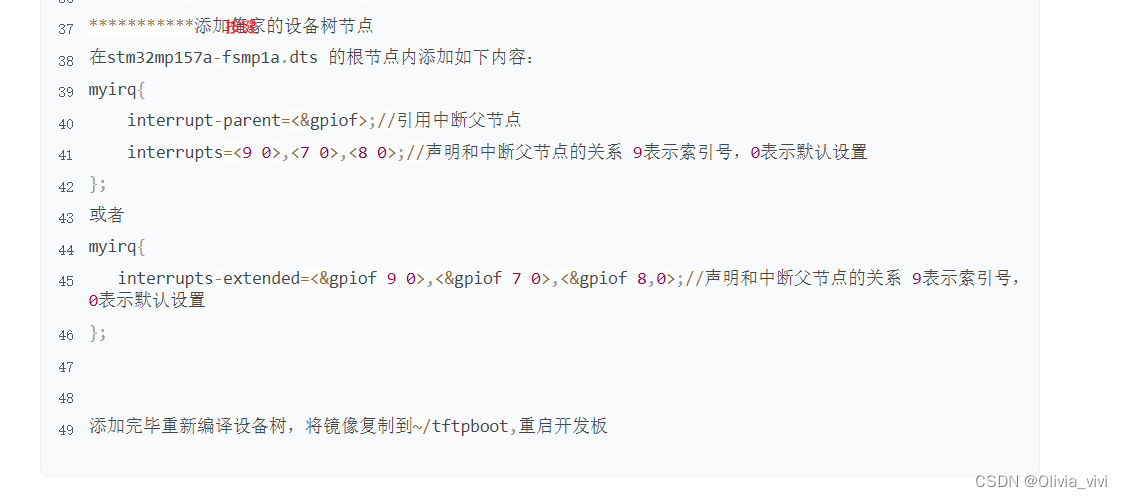
linux驱动定时器实现按键按下打印字符
#include <linux/init.h> #include <linux/module.h> #include <linux/of.h> #include <linux/of_irq.h> #include <linux/interrupt.h>struct device_node *dev; unsigned int irqno; //中断处理函数 irqreturn_t myirq_handler(int irq,void *…...
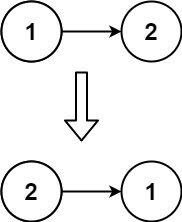
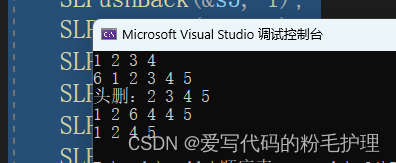
反转链表(JS)
反转链表 题目 给你单链表的头节点 head ,请你反转链表,并返回反转后的链表。 示例 1: 输入:head [1,2,3,4,5] 输出:[5,4,3,2,1]示例 2: 输入:head [1,2] 输出:[2,1]示例 3&…...

[PyTorch][chapter 45][RNN_2]
目录: RNN 问题 RNN 时序链问题 RNN 词组预测的例子 RNN简洁实现 一 RNN 问题 RNN 主要有两个问题,梯度弥散和梯度爆炸 1.1 损失函数 梯度 其中: 则 1.1 梯度爆炸(Gradient Exploding) 上面矩阵进行连乘后…...
基于canvas画布的实用类Fabric.js的使用
目录 前言 一、Fabric.js简介 二、开始 1、引入Fabric.js 2、在main.js中使用 3、初始化画布 三、方法 四、事件 1、常用事件 2、事件绑定 3、事件解绑 五、canvas常用属性 六、对象属性 1、基本属性 2、扩展属性 七、图层层级操作 八、复制和粘贴 1、复制 2…...
)
基于SpringBoot+Vue驾校理论课模拟考试系统源码(自动化部署)
DrivingTestSimulation Unity3D Project, subject two, simulated driving test 【更新信息】 更新时间-2021-1-17 解决了方向盘不同机型转动轴心偏离 更新时间-2021-2-18 加入了手刹系统 待更新-2021-6-19(工作太忙少有时间更新,先指出问题…...
SpringBoot使用Redis对用户IP进行接口限流
使用接口限流的主要目的在于提高系统的稳定性,防止接口被恶意打击(短时间内大量请求)。 一、创建限流注解 引入redis依赖 <!--redis--><dependency><groupId>org.springframework.boot</groupId><artifactId&g…...

MeterSphere学习篇
从开发环境部署开始 metersphere-1.20.4 源码下载地址: https://gitee.com/fit2cloud-feizhiyun/MeterSphere/tree/v1.20/ MeterSphere GitHub 相关插件程序下载 相关准备 安装mysql 配置IDEA...

大数据技术之Clickhouse---入门篇---数据类型、表引擎
星光下的赶路人star的个人主页 今天没有开始的事,明天绝对不会完成 文章目录 1、数据类型1.1 整型1.2 浮点型1.3 布尔型1.4 Decimal型1.5 字符串1.6 枚举类型1.7 时间类型1.8 数组 2、表引擎2.1 表引擎的使用2.2 TinyLog2.3 Memory2.4 MergeTree2.4.1 Partition by分…...
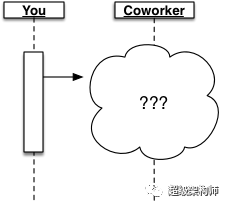
【微服务架构设计】微服务不是魔术:处理超时
微服务很重要。它们可以为我们的架构和团队带来一些相当大的胜利,但微服务也有很多成本。随着微服务、无服务器和其他分布式系统架构在行业中变得更加普遍,我们将它们的问题和解决它们的策略内化是至关重要的。在本文中,我们将研究网络边界可…...

天下风云出我辈,AI准独角兽实在智能获评“十大数字经济风云企业
时值盛夏,各地全力拼经济的氛围同样热火朝天。在浙江省经济强区余杭区这片创业热土上,人工智能助力数字经济建设正焕发出蓬勃生机。 7月28日,经专家评审、公开投票,由中共杭州市余杭区委组织部(区委两新工委ÿ…...

SpringBoot2学习笔记
信息来源:https://www.bilibili.com/video/BV19K4y1L7MT?p5&vd_source3969f30b089463e19db0cc5e8fe4583a 作者提供的文档:https://www.yuque.com/atguigu/springboot 作者提供的代码:https://gitee.com/leifengyang/springboot2 ----…...
安达发|APS生产派单系统对数字化工厂有哪些影响和作用
数字化工厂是当今制造业的热门话题,而APS软件则是这一领域的颠覆者。它以其独特的影响和作用,给制造业带来了巨大的改变。让我们一起来看看APS软件对数字化工厂有哪些影响和作用吧! 提高生产效率的神器 1.APS软件作为数字化工厂的核心系统&a…...

状态机的介绍和使用 | 京东物流技术团队
1 状态机简介 1.1 定义 我们先来给出状态机的基本定义。一句话: 状态机是有限状态自动机的简称,是现实事物运行规则抽象而成的一个数学模型。 先来解释什么是“状态”( State )。现实事物是有不同状态的,例如一个自…...
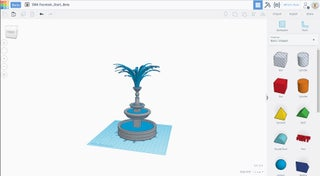
tinkerCAD案例:32. 使用对齐工具构建喷泉
tinkerCAD案例:32. 使用对齐工具构建喷泉 In this lesson, you will practice the basics in Tinkercad, such as move, rotate, and scale. You will also learn how to use the Align Tool. 在本课中,您将练习 Tinkercad 中的基础知识,例如…...
一起学数据结构(2)——线性表及线性表顺序实现
目录 1. 什么是数据结构: 1.1 数据结构的研究内容: 1.2 数据结构的基本概念: 1.2.1 逻辑结构: 1.2.2 存储结构: 2. 线性表: 2.1 线性表的基本定义: 2.2 线性表的运用: 3 .线性…...

大语言模型对抗性攻击与防御:Decepticon框架原理与实践
1. 项目概述:当AI学会“伪装”,一场攻防博弈的新范式最近在安全圈和AI研究领域,一个名为“Decepticon”的项目引起了我的注意。这个项目来自PurpleAILAB,名字本身就充满了对抗的意味——“Decepticon”直译是“霸天虎”࿰…...

高速SOIC插座技术解析:从原理到工程实践
1. 高速SOIC插座的技术演进与核心价值在射频和高速数字电路设计中,工程师们经常面临一个经典矛盾:既要保证芯片测试的便捷性,又不能牺牲信号完整性。传统DIP插座在MHz级频率下尚能应付,但当频率攀升至GHz领域时,其机械…...

Arduino开源贡献全流程:从Fork到Pull Request的工程实践
1. 项目概述与核心价值 如果你在玩Arduino,发现某个常用库有个小bug,或者想给它加个新功能,你会怎么做?是去论坛发个帖子,还是自己改完代码藏起来用?对于很多刚接触开源的朋友来说,虽然有心贡献…...
)
两种 Linux 发行版:Ubuntu 与 CentOS Shell 环境核心差异对比(查看 Linux 版本,Hadoop 是什么)
Xshell5作为远程连接工具,可通过命令行查看连接的Linux服务器版本。推荐使用cat /etc/os-release或lsb_release -a查看发行版信息,特定系统可用cat /etc/redhat-release(CentOS)或cat /etc/debian_version(Debian)。内核版本用uname -r查看。Ubuntu和Cen…...

基于RT-Thread与STM32的物联网桌面天气时钟开发实战
1. 项目概述:一个嵌入式工程师的桌面小确幸几年前,我在工位上放了一个从网上淘来的电子时钟,功能很简单,就是显示时间。后来觉得光看时间有点单调,就想,能不能自己动手做一个既能显示时间日期,又…...

用TensorFlow 2.0复现Mask R-CNN:从ResNet主干到ROI Align的保姆级代码解读
TensorFlow 2.0实现Mask R-CNN核心技术解析:从ResNet到ROI Align的工程实践 在计算机视觉领域,实例分割一直是最具挑战性的任务之一。它不仅需要精确地定位物体,还要在像素级别上区分不同实例。本文将深入探讨如何用TensorFlow 2.0实现Mask R…...

Windows下用Python调用CDS API下载ERA5数据,报错Missing/incomplete configuration?手把手教你创建.cdsapirc配置文件
Windows下Python调用CDS API下载ERA5数据报错排查指南:从配置文件创建到隐藏文件陷阱全解析 当你在Windows系统上首次尝试使用Python调用CDS API下载ERA5气象数据时,可能会遇到一个令人困惑的报错:"Missing/incomplete configuration f…...

raylib终极指南:3天从零到一的游戏开发快速入门
raylib终极指南:3天从零到一的游戏开发快速入门 【免费下载链接】raylib A simple and easy-to-use library to enjoy videogames programming 项目地址: https://gitcode.com/GitHub_Trending/ra/raylib raylib是一款专为游戏开发设计的轻量级跨平台框架&am…...

Simulink仿真PMSM时,那个神秘的‘4’和‘30/π’到底怎么来的?手把手带你算清楚
Simulink仿真PMSM时关键参数转换原理与实战解析 在永磁同步电机(PMSM)的Simulink仿真过程中,工程师们常常会遇到几个看似"神秘"的增益系数——特别是30/π和4这两个数值。这些参数并非随意设置,而是深植于电机物理本质与单位系统转换的数学表达…...

Nornir网络自动化监控插件:集成Sentry实现异常告警与上下文追踪
1. 项目概述:一个为Nornir网络自动化框架量身定制的告警与监控插件 如果你和我一样,长期使用Nornir框架来管理成百上千的网络设备,那你一定遇到过这样的场景:一个精心编写的自动化任务在测试环境跑得飞快,一旦放到生产…...