Android 实现无预览拍照功能
Android 实现无预览拍照功能
1.权限
需要相机、读写文件、悬浮窗权限
申请相机、读写文件
manifest.xml
<uses-permission android:name="android.permission.CAMERA" />
<uses-permission android:name="android.permission.READ_EXTERNAL_STORAGE" />
<uses-permission android:name="android.permission.WRITE_EXTERNAL_STORAGE" />
相机、读写文件权限需要动态申请
ActivityCompat.requestPermissions(this, new String[]{Manifest.permission.CAMERA,Manifest.permission.WRITE_EXTERNAL_STORAGE}, 101);
悬浮窗权限
<uses-permission android:name="android.permission.SYSTEM_ALERT_WINDOW" />
<uses-permission android:name="android.permission.SYSTEM_OVERLAY_WINDOW" />
需要申请
if (Build.VERSION.SDK_INT >= Build.VERSION_CODES.M) {if (!Settings.canDrawOverlays(this)) {startActivityForResult(new Intent(Settings.ACTION_MANAGE_OVERLAY_PERMISSION, Uri.parse("package:" + getPackageName())), 0);} else {//TODO do something you need}
}
2.布局与使用
布局
<?xml version="1.0" encoding="utf-8"?> <androidx.constraintlayout.widget.ConstraintLayout xmlns:android="http://schemas.android.com/apk/res/android"xmlns:app="http://schemas.android.com/apk/res-auto"xmlns:tools="http://schemas.android.com/tools"android:layout_width="match_parent"android:layout_height="match_parent"tools:context=".test1.Main2Activity"> <Buttonandroid:id="@+id/button"android:layout_width="match_parent"android:layout_height="wrap_content"android:text="拍照"app:layout_constraintTop_toTopOf="parent" /> </androidx.constraintlayout.widget.ConstraintLayout>
使用
主要参数
Camera camera;
WindowManager wm;
SurfaceView preview;
String path = Environment.getExternalStorageDirectory().getAbsolutePath();
File fileTest = new File(path + "/test.jpg");
然后调用
public void onTakePhotoClicked() {preview = new SurfaceView(this);SurfaceHolder holder = preview.getHolder();// deprecated setting, but required on Android versions prior to 3.0holder.setType(SurfaceHolder.SURFACE_TYPE_PUSH_BUFFERS);holder.addCallback(new SurfaceHolder.Callback() {@Override//The preview must happen at or after this point or takePicture failspublic void surfaceCreated(SurfaceHolder holder) {Log.d("zcf", "Surface created");camera = null;try {camera = Camera.open(Camera.CameraInfo.CAMERA_FACING_BACK);Log.d("zcf", "Opened camera");try {camera.setPreviewDisplay(holder);} catch (IOException e) {throw new RuntimeException(e);}camera.startPreview();Log.d("zcf", "Started preview");Log.e("zcf","开始拍照");camera.takePicture(null, null, TestActivity.this);} catch (Exception e) {if (camera != null)camera.release();throw new RuntimeException(e);}}@Overridepublic void surfaceDestroyed(SurfaceHolder holder) {}@Overridepublic void surfaceChanged(SurfaceHolder holder, int format, int width, int height) {}});wm = (WindowManager)getSystemService(Context.WINDOW_SERVICE);WindowManager.LayoutParams params = null;if (android.os.Build.VERSION.SDK_INT >= android.os.Build.VERSION_CODES.O) {params = new WindowManager.LayoutParams(1, 1, //Must be at least 1x1WindowManager.LayoutParams.TYPE_APPLICATION_OVERLAY,0,//Don't know if this is a safe defaultPixelFormat.UNKNOWN);}//Don't set the preview visibility to GONE or INVISIBLEwm.addView(preview, params);}
@Overridepublic void onPictureTaken(byte[] bytes, Camera camera) {Log.e("zcf", "拍照结束");try {FileOutputStream fos = new FileOutputStream(fileAdvert);fos.write(bytes);fos.close();Log.e("zcf","保存结束");Message message = handler.obtainMessage();message.what = 1;handler.sendEmptyMessageDelayed(1,1500);} catch (FileNotFoundException e) {Log.d("zcf", "File not found: " + e.getMessage());} catch (IOException e) {Log.d("zcf", "Error accessing file: " + e.getMessage());}}
拍照结束需要把wm给remove掉,要不还是会挡着下边的东西。
3.完整代码
import android.Manifest;
import android.annotation.SuppressLint;
import android.content.Context;
import android.content.Intent;
import android.graphics.Bitmap;
import android.graphics.BitmapFactory;
import android.graphics.Matrix;
import android.graphics.PixelFormat;
import android.hardware.Camera;
import android.os.Build;
import android.os.Bundle;
import android.os.Environment;
import android.os.Handler;
import android.os.Message;
import android.provider.Settings;
import android.util.Log;
import android.view.OrientationEventListener;
import android.view.SurfaceHolder;
import android.view.SurfaceView;
import android.view.View;
import android.view.WindowManager;
import android.widget.Button;
import androidx.annotation.NonNull;
import androidx.core.app.ActivityCompat;
import com.arcsoft.face.FaceEngine;
import com.arcsoft.face.FaceFeature;
import com.arcsoft.face.FaceInfo;
import com.arcsoft.face.enums.DetectMode;
import com.arcsoft.face.enums.DetectModel;
import com.zg.massagerobot.R;
import com.zg.massagerobot.base.BaseActivity;
import com.zg.massagerobot.faceserver.CompareResult;
import com.zg.massagerobot.faceserver.FaceServer;
import com.zg.massagerobot.utils.ConfigUtil;
import java.io.File;
import java.io.FileInputStream;
import java.io.FileNotFoundException;
import java.io.FileOutputStream;
import java.io.IOException;
import java.util.ArrayList;
import java.util.List;
import java.util.concurrent.ExecutorService;
import java.util.concurrent.Executors;
import io.reactivex.Observable;
import io.reactivex.ObservableEmitter;
import io.reactivex.ObservableOnSubscribe;
import io.reactivex.Observer;
import io.reactivex.android.schedulers.AndroidSchedulers;
import io.reactivex.disposables.Disposable;
import io.reactivex.schedulers.Schedulers;
public class Main2Activity extends BaseActivity implements Camera.PictureCallback {
Button button;Camera camera;
WindowManager wm;SurfaceView preview;
String path = Environment.getExternalStorageDirectory().getAbsolutePath();File fileTest = new File(path + "/test.jpg");
@Overrideprotected void onCreate(Bundle savedInstanceState) {super.onCreate(savedInstanceState);setContentView(R.layout.activity_main2);
ActivityCompat.requestPermissions(this, new String[]{Manifest.permission.CAMERA,Manifest.permission.WRITE_EXTERNAL_STORAGE}, 101);
if (Build.VERSION.SDK_INT >= Build.VERSION_CODES.M) {if (!Settings.canDrawOverlays(this)) {Intent intent = new Intent(Settings.ACTION_MANAGE_OVERLAY_PERMISSION);intent.addFlags(Intent.FLAG_ACTIVITY_NEW_TASK);startActivityForResult(intent, 1);} else {//TODO do something you need}}
FaceServer.getInstance().init(this);initOrientate();
button = findViewById(R.id.button);button.setOnClickListener(new View.OnClickListener() {@Overridepublic void onClick(View v) {onTakePhotoClicked();}});}
@SuppressLint("HandlerLeak")private Handler handler = new Handler() {@Overridepublic void handleMessage(@NonNull Message msg) {super.handleMessage(msg);switch (msg.what) {case 1:wm.removeViewImmediate(preview);break;}}};
public void onTakePhotoClicked() {preview = new SurfaceView(this);SurfaceHolder holder = preview.getHolder();// deprecated setting, but required on Android versions prior to 3.0holder.setType(SurfaceHolder.SURFACE_TYPE_PUSH_BUFFERS);holder.addCallback(new SurfaceHolder.Callback() {@Override//The preview must happen at or after this point or takePicture failspublic void surfaceCreated(SurfaceHolder holder) {Log.d("zcf", "Surface created");camera = null;try {camera = Camera.open(Camera.CameraInfo.CAMERA_FACING_FRONT);Log.d("zcf", "Opened camera");try {camera.setPreviewDisplay(holder);} catch (IOException e) {throw new RuntimeException(e);}camera.startPreview();Log.d("zcf", "Started preview");Log.e("zcf", "开始拍照");camera.takePicture(null, null, Main2Activity.this);} catch (Exception e) {if (camera != null)camera.release();throw new RuntimeException(e);}}
@Overridepublic void surfaceDestroyed(SurfaceHolder holder) {}
@Overridepublic void surfaceChanged(SurfaceHolder holder, int format, int width, int height) {}});wm = (WindowManager) getSystemService(Context.WINDOW_SERVICE);WindowManager.LayoutParams params = null;if (android.os.Build.VERSION.SDK_INT >= android.os.Build.VERSION_CODES.O) {params = new WindowManager.LayoutParams(1, 1, //Must be at least 1x1WindowManager.LayoutParams.TYPE_APPLICATION_OVERLAY,0,//Don't know if this is a safe defaultPixelFormat.UNKNOWN);}//Don't set the preview visibility to GONE or INVISIBLEwm.addView(preview, params);}
@Overridepublic void onPictureTaken(byte[] bytes, Camera camera) {/*Log.e("zcf", "拍照结束");try {//图片需要向右旋转90度,然后提取特征比较FileOutputStream fos = new FileOutputStream(fileTest);fos.write(bytes);fos.close();Log.e("zcf", "保存结束");Message message = handler.obtainMessage();message.what = 1;handler.sendEmptyMessageDelayed(1, 1500);} catch (FileNotFoundException e) {Log.d("zcf", "File not found: " + e.getMessage());} catch (IOException e) {Log.d("zcf", "Error accessing file: " + e.getMessage());}*/
Log.e("zcf", "拍照结束");//图片需要向右旋转90度,然后提取特征比较getPhotoPath(bytes, takePhotoOrientation);}
@Overrideprotected void onDestroy() {super.onDestroy();}
private ExecutorService threadPool = Executors.newCachedThreadPool();
/*** @return 返回路径*/private void getPhotoPath(final byte[] data, final int takePhotoOrientation) {threadPool.execute(new Runnable() {@Overridepublic void run() {try {FileOutputStream fos = new FileOutputStream(fileTest);try {//将数据写入文件fos.write(data);} catch (IOException e) {e.printStackTrace();} finally {try {fos.close();} catch (IOException e) {e.printStackTrace();}}
//将图片旋转rotateImageView(Camera.CameraInfo.CAMERA_FACING_FRONT, takePhotoOrientation, fileTest.getAbsolutePath());} catch (FileNotFoundException e) {e.printStackTrace();}Log.e("zcf", "保存结束");Message message = handler.obtainMessage();message.what = 1;handler.sendEmptyMessageDelayed(1, 1500);}});}
/*** 旋转图片** @param cameraId 前置还是后置* @param orientation 拍照时传感器方向* @param path 图片路径*/private void rotateImageView(int cameraId, int orientation, String path) {Bitmap bitmap = BitmapFactory.decodeFile(path);Matrix matrix = new Matrix();matrix.postRotate(Float.valueOf(orientation));// 创建新的图片Bitmap resizedBitmap;
if (cameraId == 1) {if (orientation == 90) {matrix.postRotate(180f);}}// 创建新的图片resizedBitmap = Bitmap.createBitmap(bitmap, 0, 0,bitmap.getWidth(), bitmap.getHeight(), matrix, true);
//新增 如果是前置 需要镜面翻转处理if (cameraId == 1) {Matrix matrix1 = new Matrix();matrix1.postScale(-1f, 1f);resizedBitmap = Bitmap.createBitmap(resizedBitmap, 0, 0,resizedBitmap.getWidth(), resizedBitmap.getHeight(), matrix1, true);
}
File file = new File(path);//重新写入文件try {// 写入文件FileOutputStream fos;fos = new FileOutputStream(file);//默认jpgresizedBitmap.compress(Bitmap.CompressFormat.JPEG, 100, fos);fos.flush();fos.close();resizedBitmap.recycle();} catch (Exception e) {e.printStackTrace();return;}
}
//增加传感器private OrientationEventListener mOrientationEventListener;//当前角度private float mCurrentOrientation = 0f;//拍照时的传感器方向private int takePhotoOrientation = 0;
/*** 初始化传感器方向*/private void initOrientate() {if (mOrientationEventListener == null) {mOrientationEventListener = new OrientationEventListener(this) {@Overridepublic void onOrientationChanged(int orientation) {// i的范围是0-359// 屏幕左边在顶部的时候 i = 90;// 屏幕顶部在底部的时候 i = 180;// 屏幕右边在底部的时候 i = 270;// 正常的情况默认i = 0;if (45 <= orientation && orientation < 135) {takePhotoOrientation = 180;mCurrentOrientation = -180;} else if (135 <= orientation && orientation < 225) {takePhotoOrientation = 270;mCurrentOrientation = 90;} else if (225 <= orientation && orientation < 315) {takePhotoOrientation = 0;mCurrentOrientation = 0;} else {takePhotoOrientation = 90;mCurrentOrientation = -90;}
}};}mOrientationEventListener.enable();}
}相关文章:

Android 实现无预览拍照功能
Android 实现无预览拍照功能 1.权限 需要相机、读写文件、悬浮窗权限 申请相机、读写文件 manifest.xml <uses-permission android:name"android.permission.CAMERA" /> <uses-permission android:name"android.permission.READ_EXTERNAL_STORAGE…...
第一章-数据结构绪论
第一章-数据结构绪论 数据结构的起源和相关概念 数据结构是一门研究非数值计算的程序设计问题中的操作对象,以及它们之间的关系和操作等相关问题的学科。 程序设计的实质是选择一个好的结构,再设计一种好的算法。 数据:是描述客观事物的符…...
20、stm32使用FMC驱动SDRAM(IS42S32800G-6BLI)
本文将使用安富莱的STM32H743XIH板子驱动SDRAM 引脚连接情况 一、CubeMx配置工程 1、开启调试口 2、开启外部高速时钟 配置时钟树 3、开启串口1 4、配置MPU 按照安富莱的例程配置: /* ********************************************************************…...

git仓库大文件导致仓库体积增大处理
一、删除大文件 git filter-branch --tree-filter rm -rf path/to/large/file --prune-empty HEAD二、提交到远程 git push -f origin main PS:-f必须参数,强制刷新PS:git设计是为了存储代码,一般不将大文件上传到仓库...

将游戏坐标转化成屏幕鼠标坐标
将游戏坐标转化成屏幕鼠标坐标 思路说明:转化其实是取得两点的相对位置,例如将游戏人物移动到另外一个位置(游戏人物初始位置坐标到目的位置坐标),鼠标需要移动到屏幕的某个位置。算出游戏的移动距离,游戏…...

springboot中Instant时间传参及序列化
在部分场景中,后台的时间属性用的不是Date或Long,而是Instant,Java8引入的一个精度极高的时间类型,可以精确到纳秒,但实际使用的时候不需要这么高的精确度,通常到毫秒就可以了。 而在前后端传参的时候需要…...
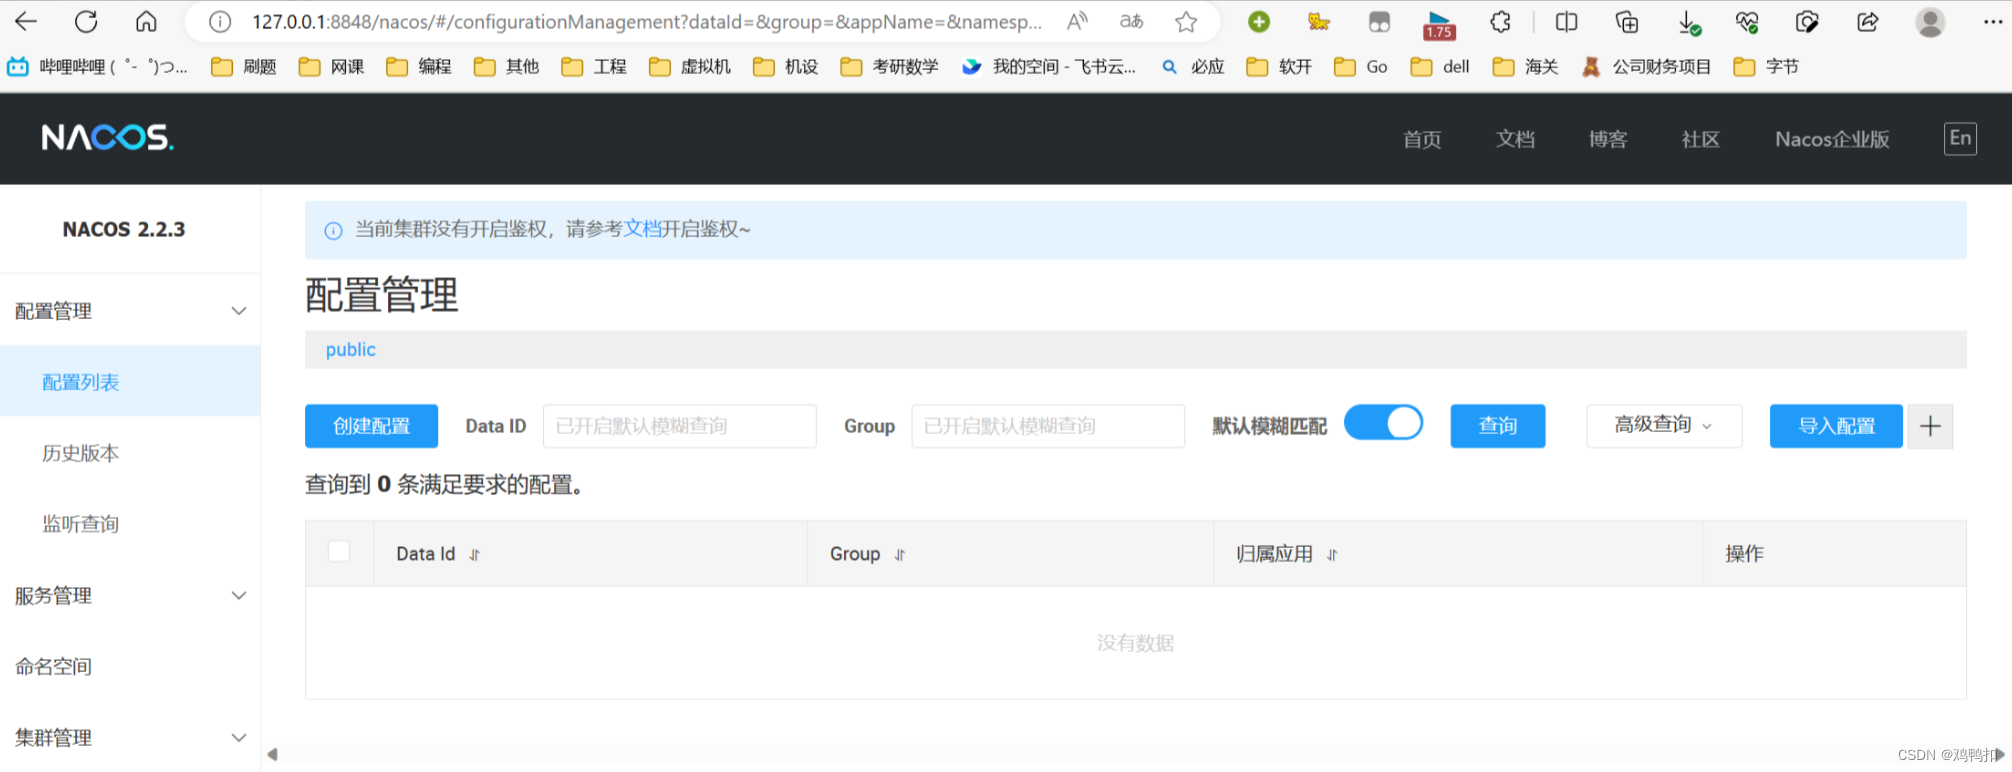
nacos安装与启动相关问题(启动闪退和显示此站点的连接不安全)
问题:启动闪退 尝试: 使用记事本打开cmd文件,在文件结尾处新增两行 pause endlocal 如果还有问题:ERROR Nacos failed to start, please see D:\dev\nacos\logs\nacos.log for more details 尝试: 在nacos的bin目…...
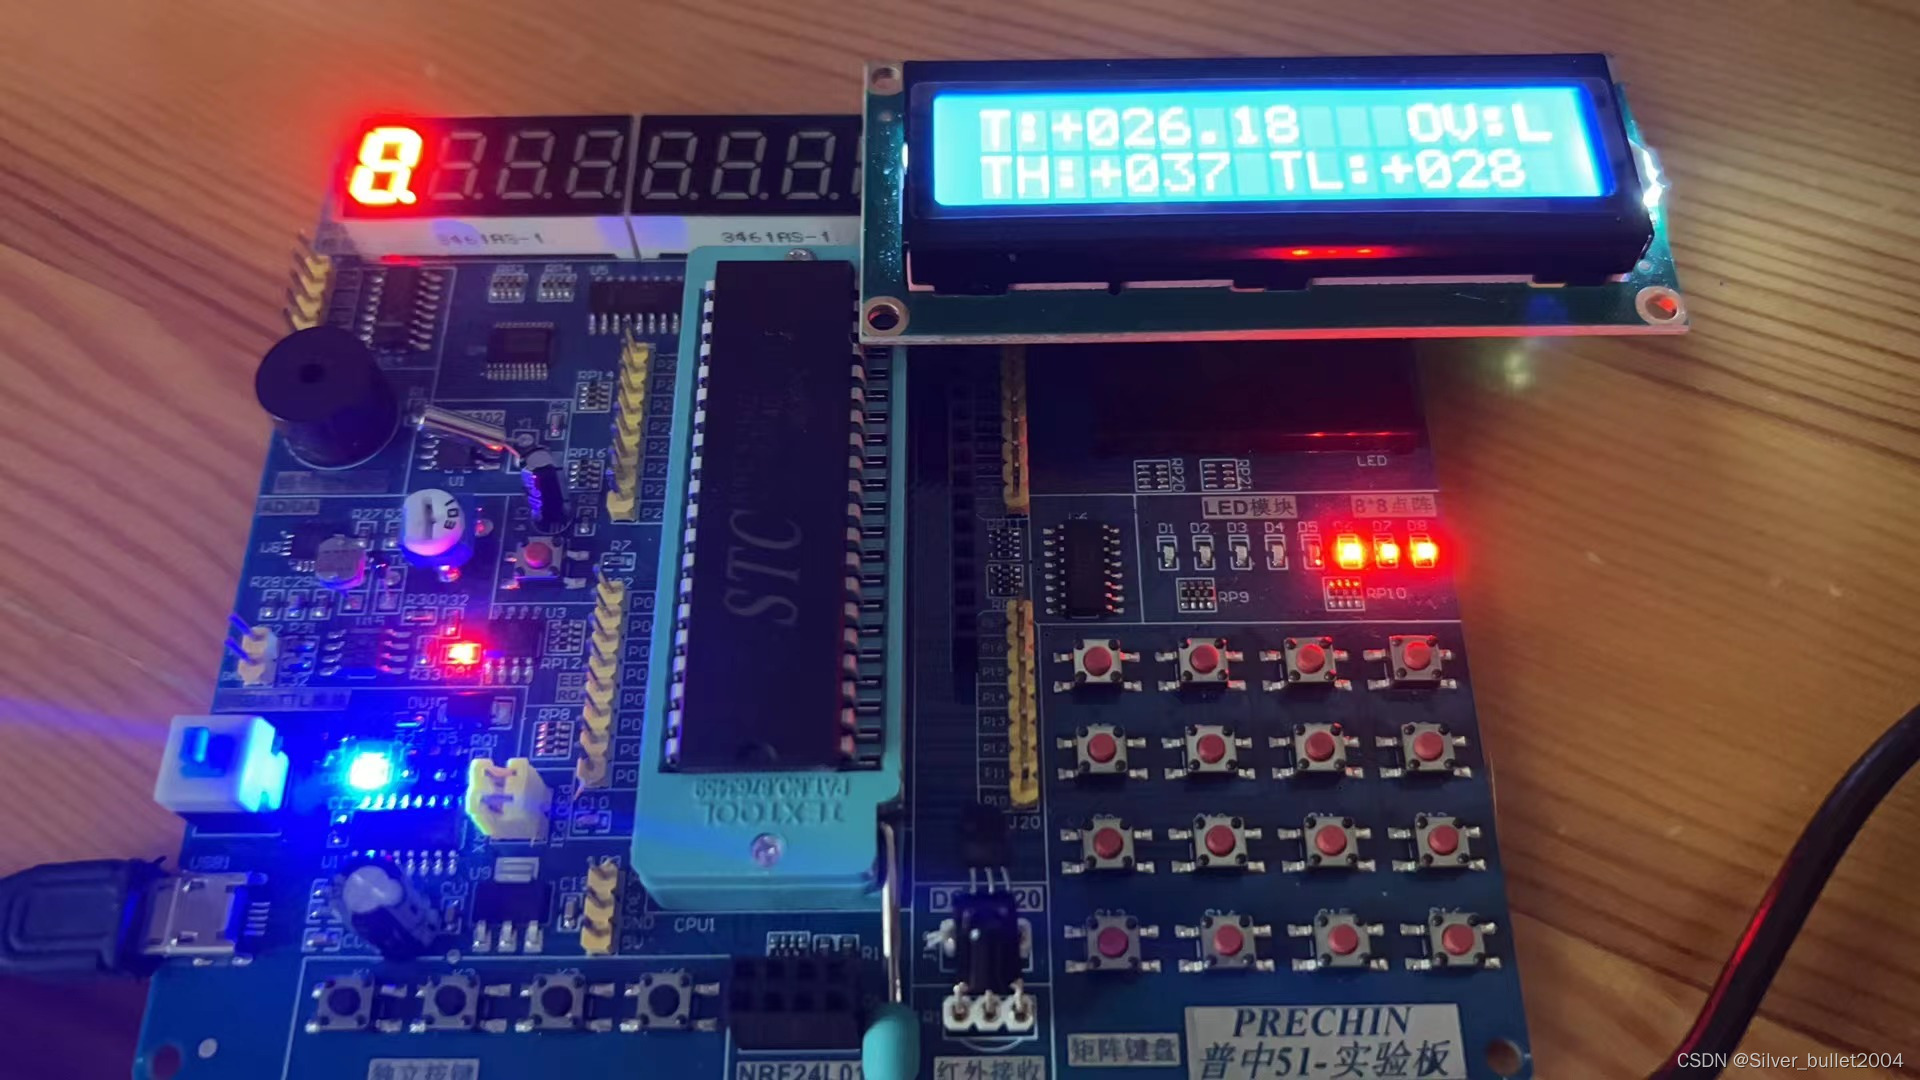
51单片机学习--DS18B20温度读取温度报警器
需要先编写OneWire模块,再在DS18B20模块中调用OneWire模块的函数 先根据原理图做好端口的声明: sbit OneWire_DQ P3^7;接下来像之前一样把时序结构用代码模拟出来: unsigned char OneWire_Init(void) {unsigned char i;unsigned char Ac…...

PYTHON专栏
PYTHON专栏 python基础教程 python基础教程 Python练手算法 Python练手算法 Python设计模式 Python设计模式 MySQL教程 MySQL教程 ORM框架SQLAlchemy Python ORM框架SQLAlchemy Python Web框架Django Python Web框架Django Web框架FastAPI Web框架FastAPI http库request…...

从初学者到专家:Java运算符的完整指南
目录 1.算数运算符 2.增量运算符 2.1自增/自减运算符 4. 逻辑运算符 5.位运算符 6.移位运算符 7. 条件运算符 导言: Java作为一门广泛使用的编程语言,其运算符是编写代码时必不可少的一部分。本篇博客将为你详细介绍Java中的各种运算符…...
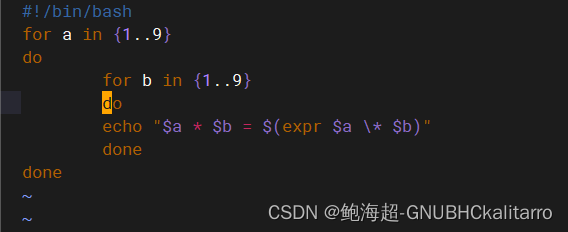
Linux:shell脚本:基础使用(3)
for循环语句 语句格式 for for变量 in 取值列表(可以是变量或者自己定义) do 循环内容 done 工作方式就是通过取值列表去判断循环的次数,每次循环的同时把列表一行的值赋予到for变量。取值方式如果是数字,那就通过数字去…...

opencv基础46-图像金字塔02-拉普拉斯金字塔
前面我们介绍了高斯金字塔,高斯金字塔是通过对一幅图像一系列的向下采样所产生的。有时,我们希望通过对金字塔中的小图像进行向上采样以获取完整的大尺寸高分辨率图像,这时就需要用到拉普拉斯金字塔 前面我们已经介绍过,一幅图像在…...
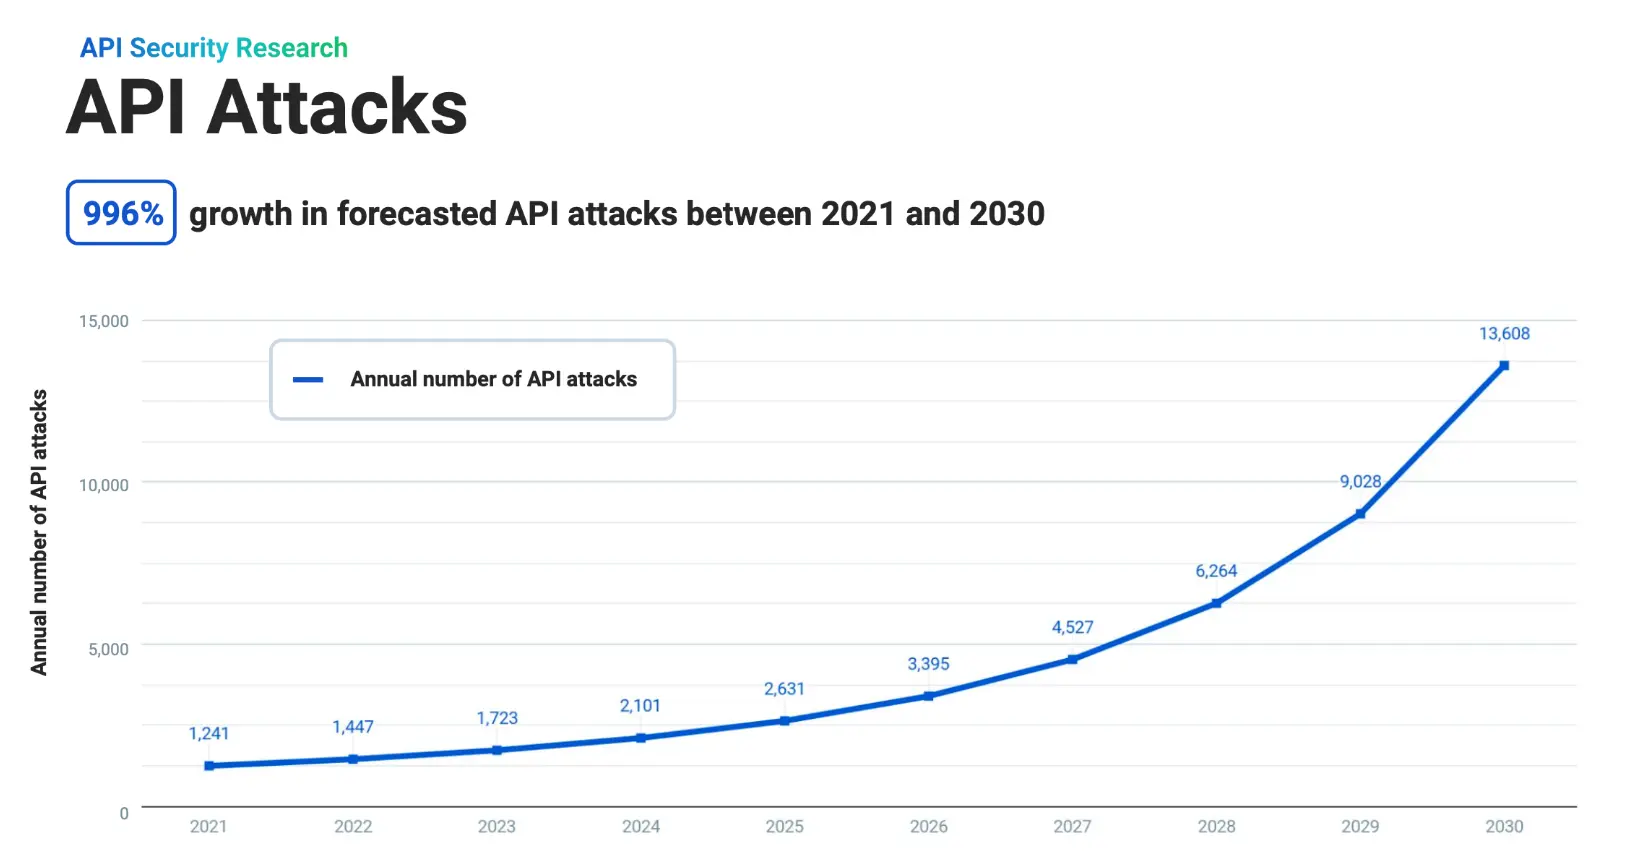
到 2030 年API 攻击预计将激增近 1000%
导读云原生应用程序编程接口管理公司 Kong 联合外部经济学家的最新研究预计,截至 2030 年 API 攻击将激增 996%,意味着与 API 相关的网络威胁的频率和强度都显着升级。 这项研究由 Kong 分析师和布朗大学副教授 Christopher Whaley 博士合作进行&#x…...

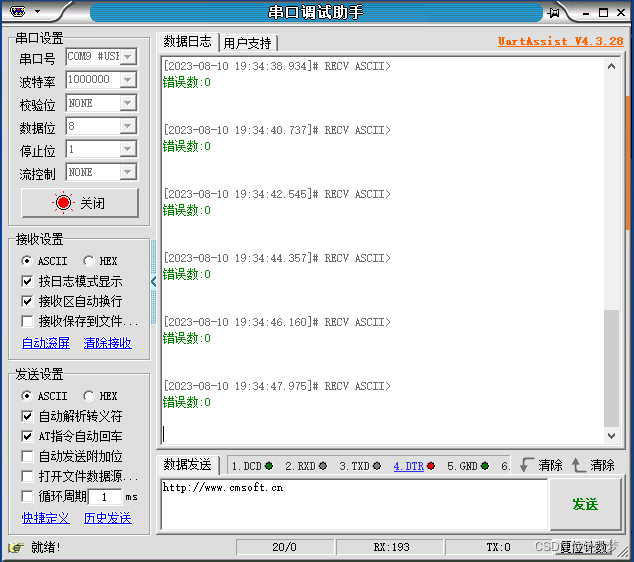
环形队列+DMA空闲中断+接收串口数据
环形队列DMA空闲中断接收串口数据 一.序言二.实验原理三.实战是检验真理的唯一标准3.1 usart1.c3.2 串口中断 三.队列代码4.1 fifo.c4.2 fifo.h 五.结语 一.序言 本次实验利用环形队列DMA空闲中断串口。。通过这个实验可以非常深入的理解队列,DMA,串口的知识。如果…...

LeetCode 31题:下一个排列
目录 题目 思路 代码 题目 整数数组的一个 排列 就是将其所有成员以序列或线性顺序排列。 例如,arr [1,2,3] ,以下这些都可以视作 arr 的排列:[1,2,3]、[1,3,2]、[3,1,2]、[2,3,1] 。 整数数组的 下一个排列 是指其整数的下一个字典序…...
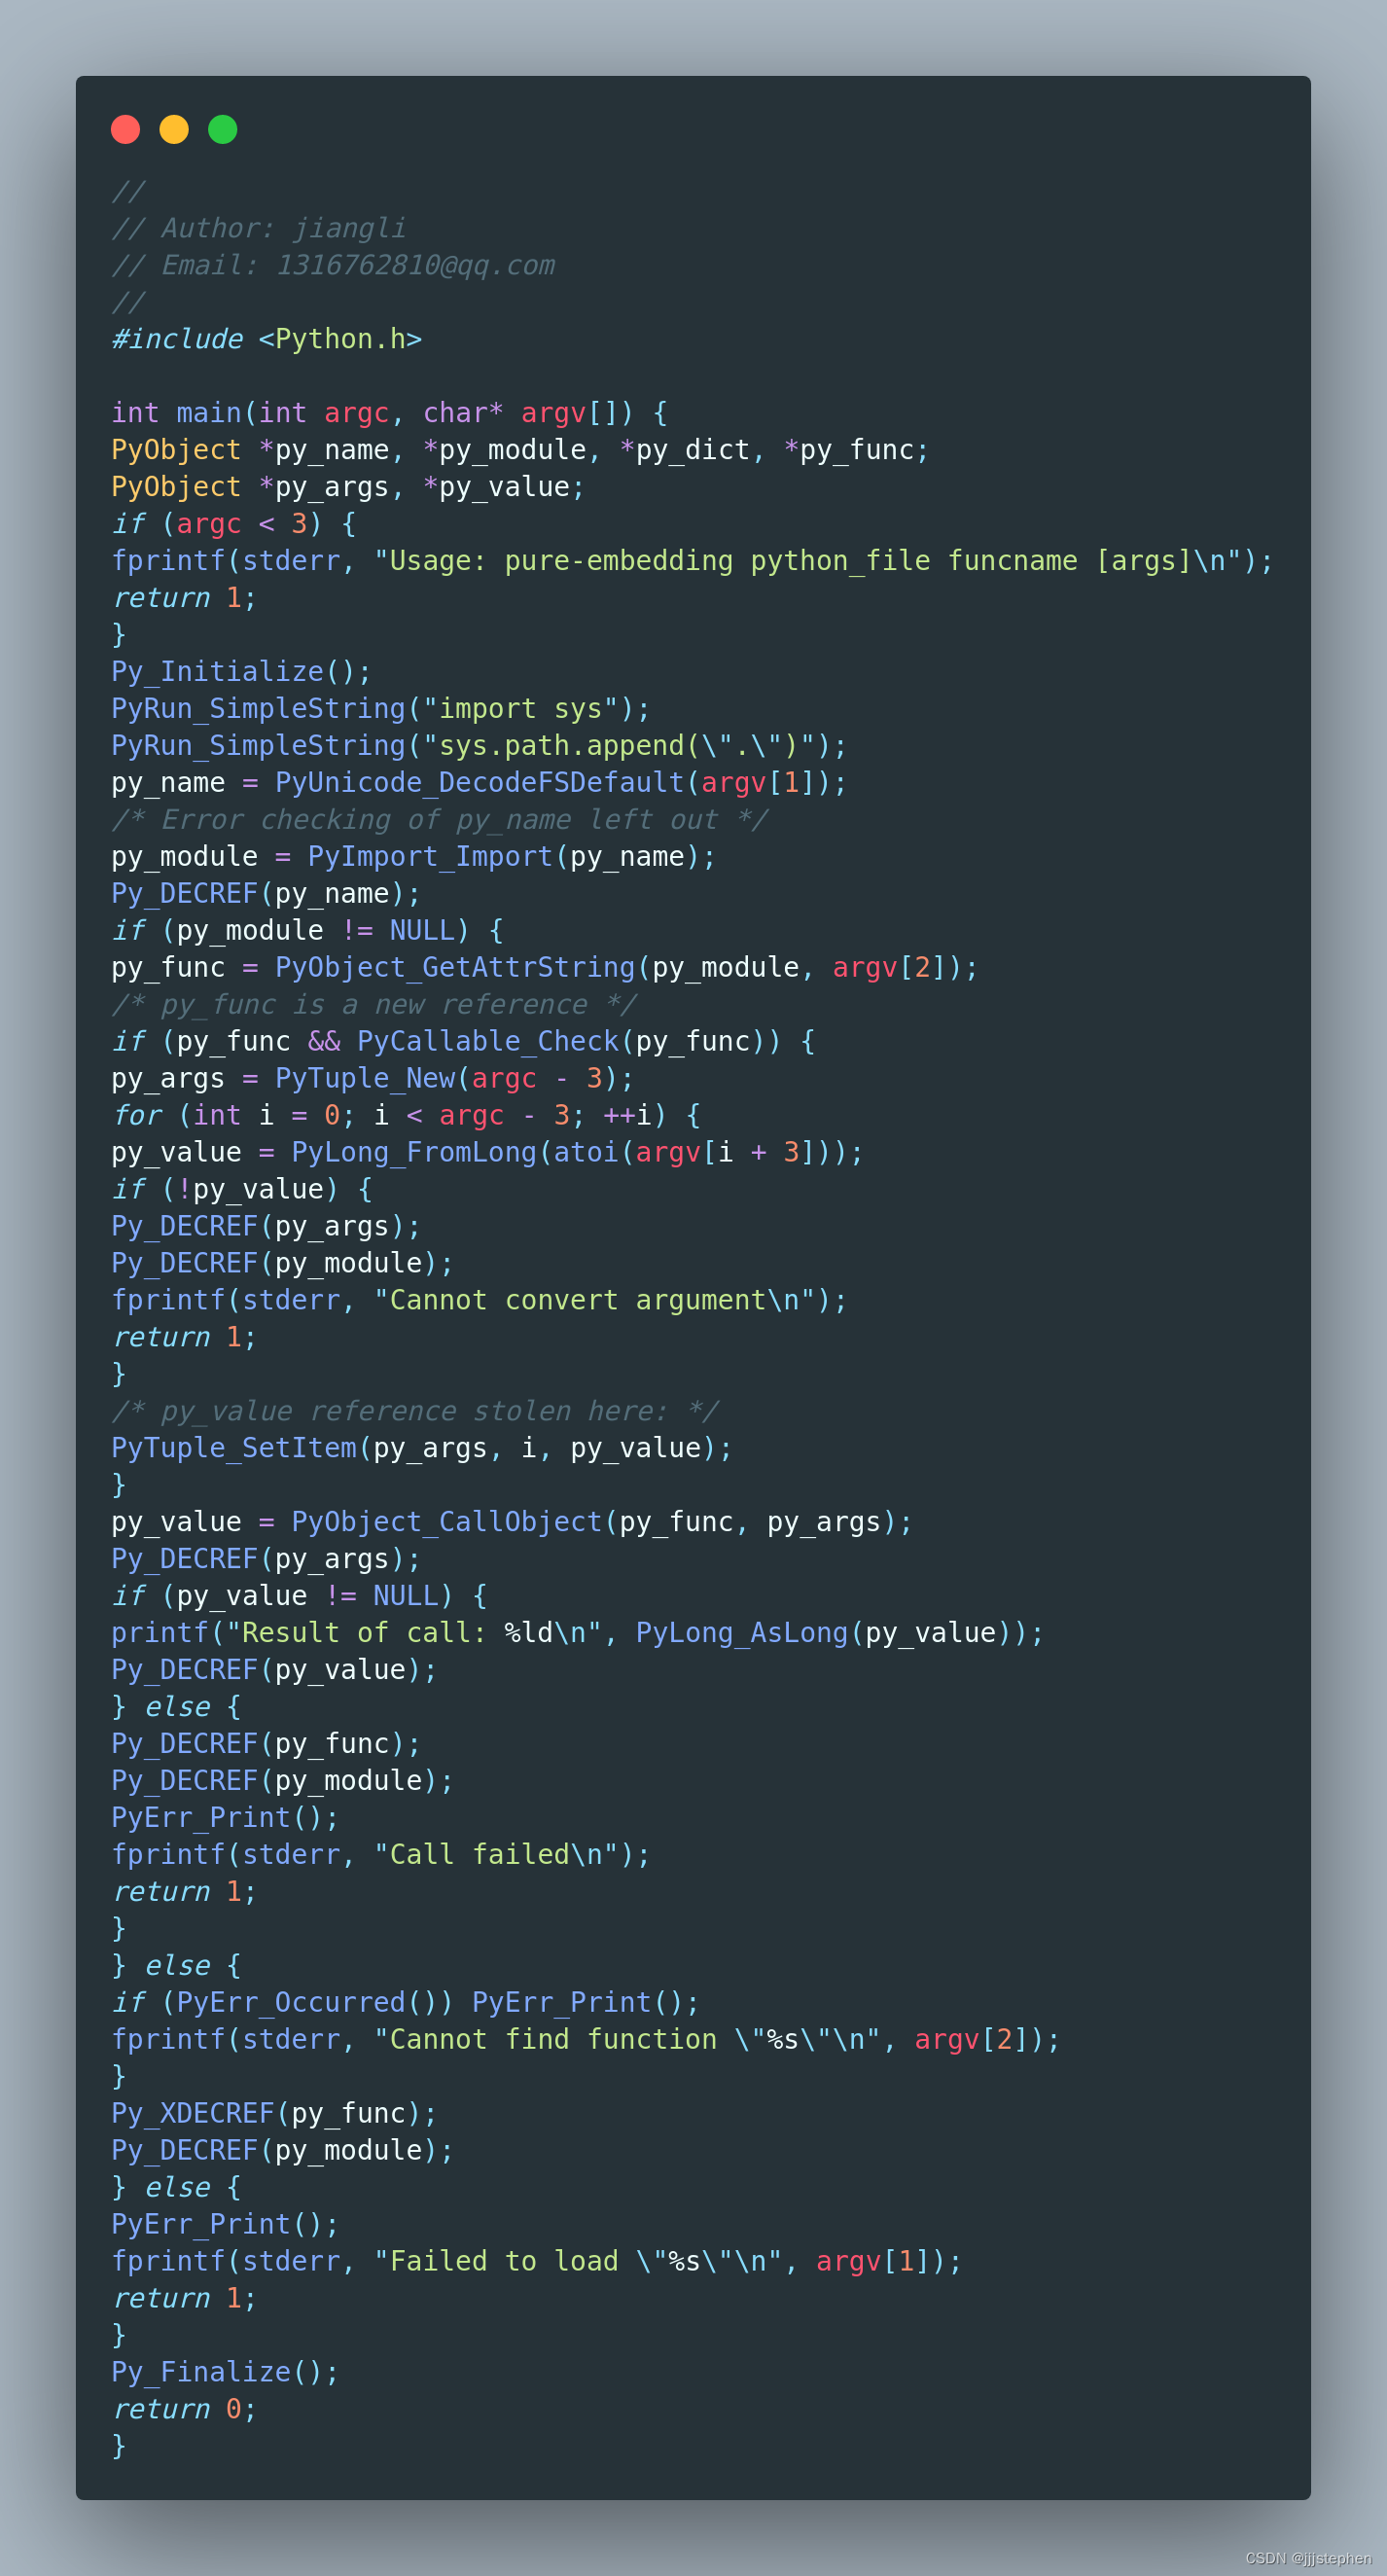
CMake:检测python模块和包
CMake:检测python模块和包 导言项目结构CMakeLists.txt相关源码 导言 上一篇,我们基本了解了如何去检测python的解释器和python库。通常,代码是依赖于特定的python模块,无论是python工具、嵌入python的程序,还是扩展python的库。…...
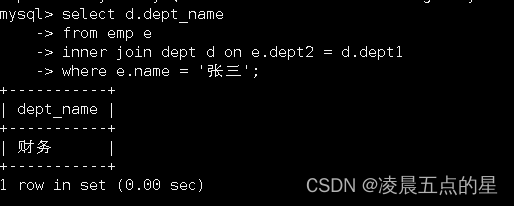
02Mysql之多表查询--例题讲解
一、题目详情,以及表的建立 新增员工表emp和部门表deptcreate table dept (dept1 int ,dept_name varchar(11));create table emp (sid int ,name varchar(11),age int,worktime_start date,incoming int,dept2 int);insert into dept values(101,财务),(102,销售)…...

虹科方案 | 汽车总线协议转换解决方案
汽车总线: 汽车总线是一种用于在车辆电子系统中传输数据和控制信息的通信系统。它允许不同的电子控制单元(ECU)在车辆中相互通信,协调各个系统的操作,以实现功能的集成和协同工作。 在现代汽车中,综合通信…...
Mr. Cappuccino的第59杯咖啡——简单手写SpringIOC框架
简单手写SpringIOC框架 环境搭建基于XML方式项目结构项目代码运行结果 基于注解方式项目结构项目代码运行结果 简单手写SpringIOC框架核心原理基于XML方式原理项目结构项目代码运行结果 基于注解方式原理项目结构项目代码运行结果 环境搭建 基于XML方式 项目结构 项目代码 p…...

爬虫 学习HTML标签和元素的基本概念,了解网页的结构和内容
HTML(Hypertext Markup Language)是一种用于创建网页的标记语言,由一系列的标签组成。标签使用尖括号(< 和 >)包围,并且通常成对出现,一个是开始标签,一个是结束标签。 HTML文…...

别再只盯着OIS了!手机拍照防抖的真相:EIS如何弥补OIS的短板?
手机防抖技术革命:OIS与EIS如何重塑移动影像体验 当你在街头抓拍转瞬即逝的瞬间,或是记录孩子蹒跚学步的珍贵视频时,是否经常遇到画面模糊、抖动严重的困扰?这背后隐藏着手机影像系统最关键的挑战——动态稳定性。如今高端智能手机…...
python中文编程)
第8篇:模板与实例——面向对象编程入门(上)python中文编程
作者: 中文编程倡导者—— 李金雨 联系方式: wbtm2718qq.com 系列: python中文编程入门教程 ** 核心理念: AI时代必须使用中文编程,母语编程阅读效率极高" 第8篇:模板与实例——面向对象编程入门&…...

GPT Image 2 为何如此强大?三大技术方向揭秘
GPT Image 2 的技术方向引发关注GPT Image 2 凭什么这么强?是扩散模型又迭代了一版,是把 DiT 的参数量从 7B 扩到 20B,还是训了更多高质量数据?这些答案都对,但都不够。与多位从业者交流后,提炼出几个值得关…...

多表关联大平层转JSON树形结构
比如把这种平层数据转化为下面这种树形结构树 [{"id": 2,"parentId": null,"name": "有声书","type": "category","children": [{"id": 1,"parentId": 2,"name": "…...

Beyond Compare 5密钥生成完全指南:3种方法解决软件授权问题
Beyond Compare 5密钥生成完全指南:3种方法解决软件授权问题 【免费下载链接】BCompare_Keygen Keygen for BCompare 5 项目地址: https://gitcode.com/gh_mirrors/bc/BCompare_Keygen 在软件开发、系统维护和文件管理工作中,Beyond Compare 5作为…...
)
【限时解禁】VS Code Copilot Next 企业版自动化工作流配置包(含Terraform模块+Prometheus成本看板+SLA保障模板)
更多请点击: https://intelliparadigm.com 第一章:VS Code Copilot Next 自动化工作流配置 启用 Copilot Next 扩展与基础环境准备 确保已安装 VS Code 1.85 版本,并通过官方扩展市场安装最新版 Copilot Next(ID: github.copil…...

Windows上直接安装APK文件:告别安卓模拟器的终极指南
Windows上直接安装APK文件:告别安卓模拟器的终极指南 【免费下载链接】APK-Installer An Android Application Installer for Windows 项目地址: https://gitcode.com/GitHub_Trending/ap/APK-Installer 你是否曾经想在Windows电脑上运行安卓应用,…...

机器学习大师课 第 1 课:什么是机器学习?写出你的第一个 AI 程序
课程承诺:每节课只讲 1 个核心概念、1 个核心思想、1 段可运行代码。学完立刻能用,绝不讲听不懂的废话。本节课目标:彻底搞懂机器学习和普通编程的本质区别,亲手写出人生第一个机器学习程序,5 分钟内看到 AI 预测结果。…...
【Proteus仿真+Keil程序+报告+原理图】)
062B-基于51单片机无线病房呼叫系统(+时间)【Proteus仿真+Keil程序+报告+原理图】
062B-基于51单片机无线病房呼叫系统(时间)一、系统硬件整体架构 本无线病房定时呼叫系统选用STC89C51单片机作为主控芯片。整体硬件配置包含:51 单片机最小系统、NRF24L01 无线通信模块、DS1302 实时时钟芯片、LCD1602 液晶显示模块、按键控制…...

阶跃星辰发布新一代语音识别模型 StepAudio 2.5 ASR,推理速度提升 400%、成本直降 80%
品玩 4 月 28 日消息,阶跃星辰发布新一代自动语音识别模型 StepAudio 2.5 ASR,创新性引入大语言模型推理加速技术,性能突破且成本大降,已全量上线提供服务。技术创新亮点阶跃星辰的 StepAudio 2.5 ASR 创新性地把大语言模型推理加…...