目标检测笔记(十四): 使用YOLOv8完成对图像的目标检测任务(从数据准备到训练测试部署的完整流程)
文章目录
- 一、目标检测介绍
- 二、YOLOv8介绍
- 三、源码获取
- 四、环境搭建
- 4.1 环境检测
- 五、数据集准备
- 六、 模型训练
- 6.1 方式一
- 6.2 方式二
- 6.3 针对其他任务
- 七、模型验证
- 八、模型测试
- 九、模型转换
- 9.1 转onnx
- 9.1.1 方式一
- 9.2 转tensorRT
- 9.2.1 trtexec
- 9.2.2 代码转换
- 9.2.3 推理代码
一、目标检测介绍
目标检测(Object Detection)是计算机视觉领域的一项重要技术,旨在识别图像或视频中的特定目标并确定其位置。通过训练深度学习模型,如卷积神经网络(CNN),可以实现对各种目标的精确检测。常见的目标检测任务包括:人脸检测、行人检测、车辆检测等。目标检测在安防监控、自动驾驶、智能零售等领域具有广泛应用前景。
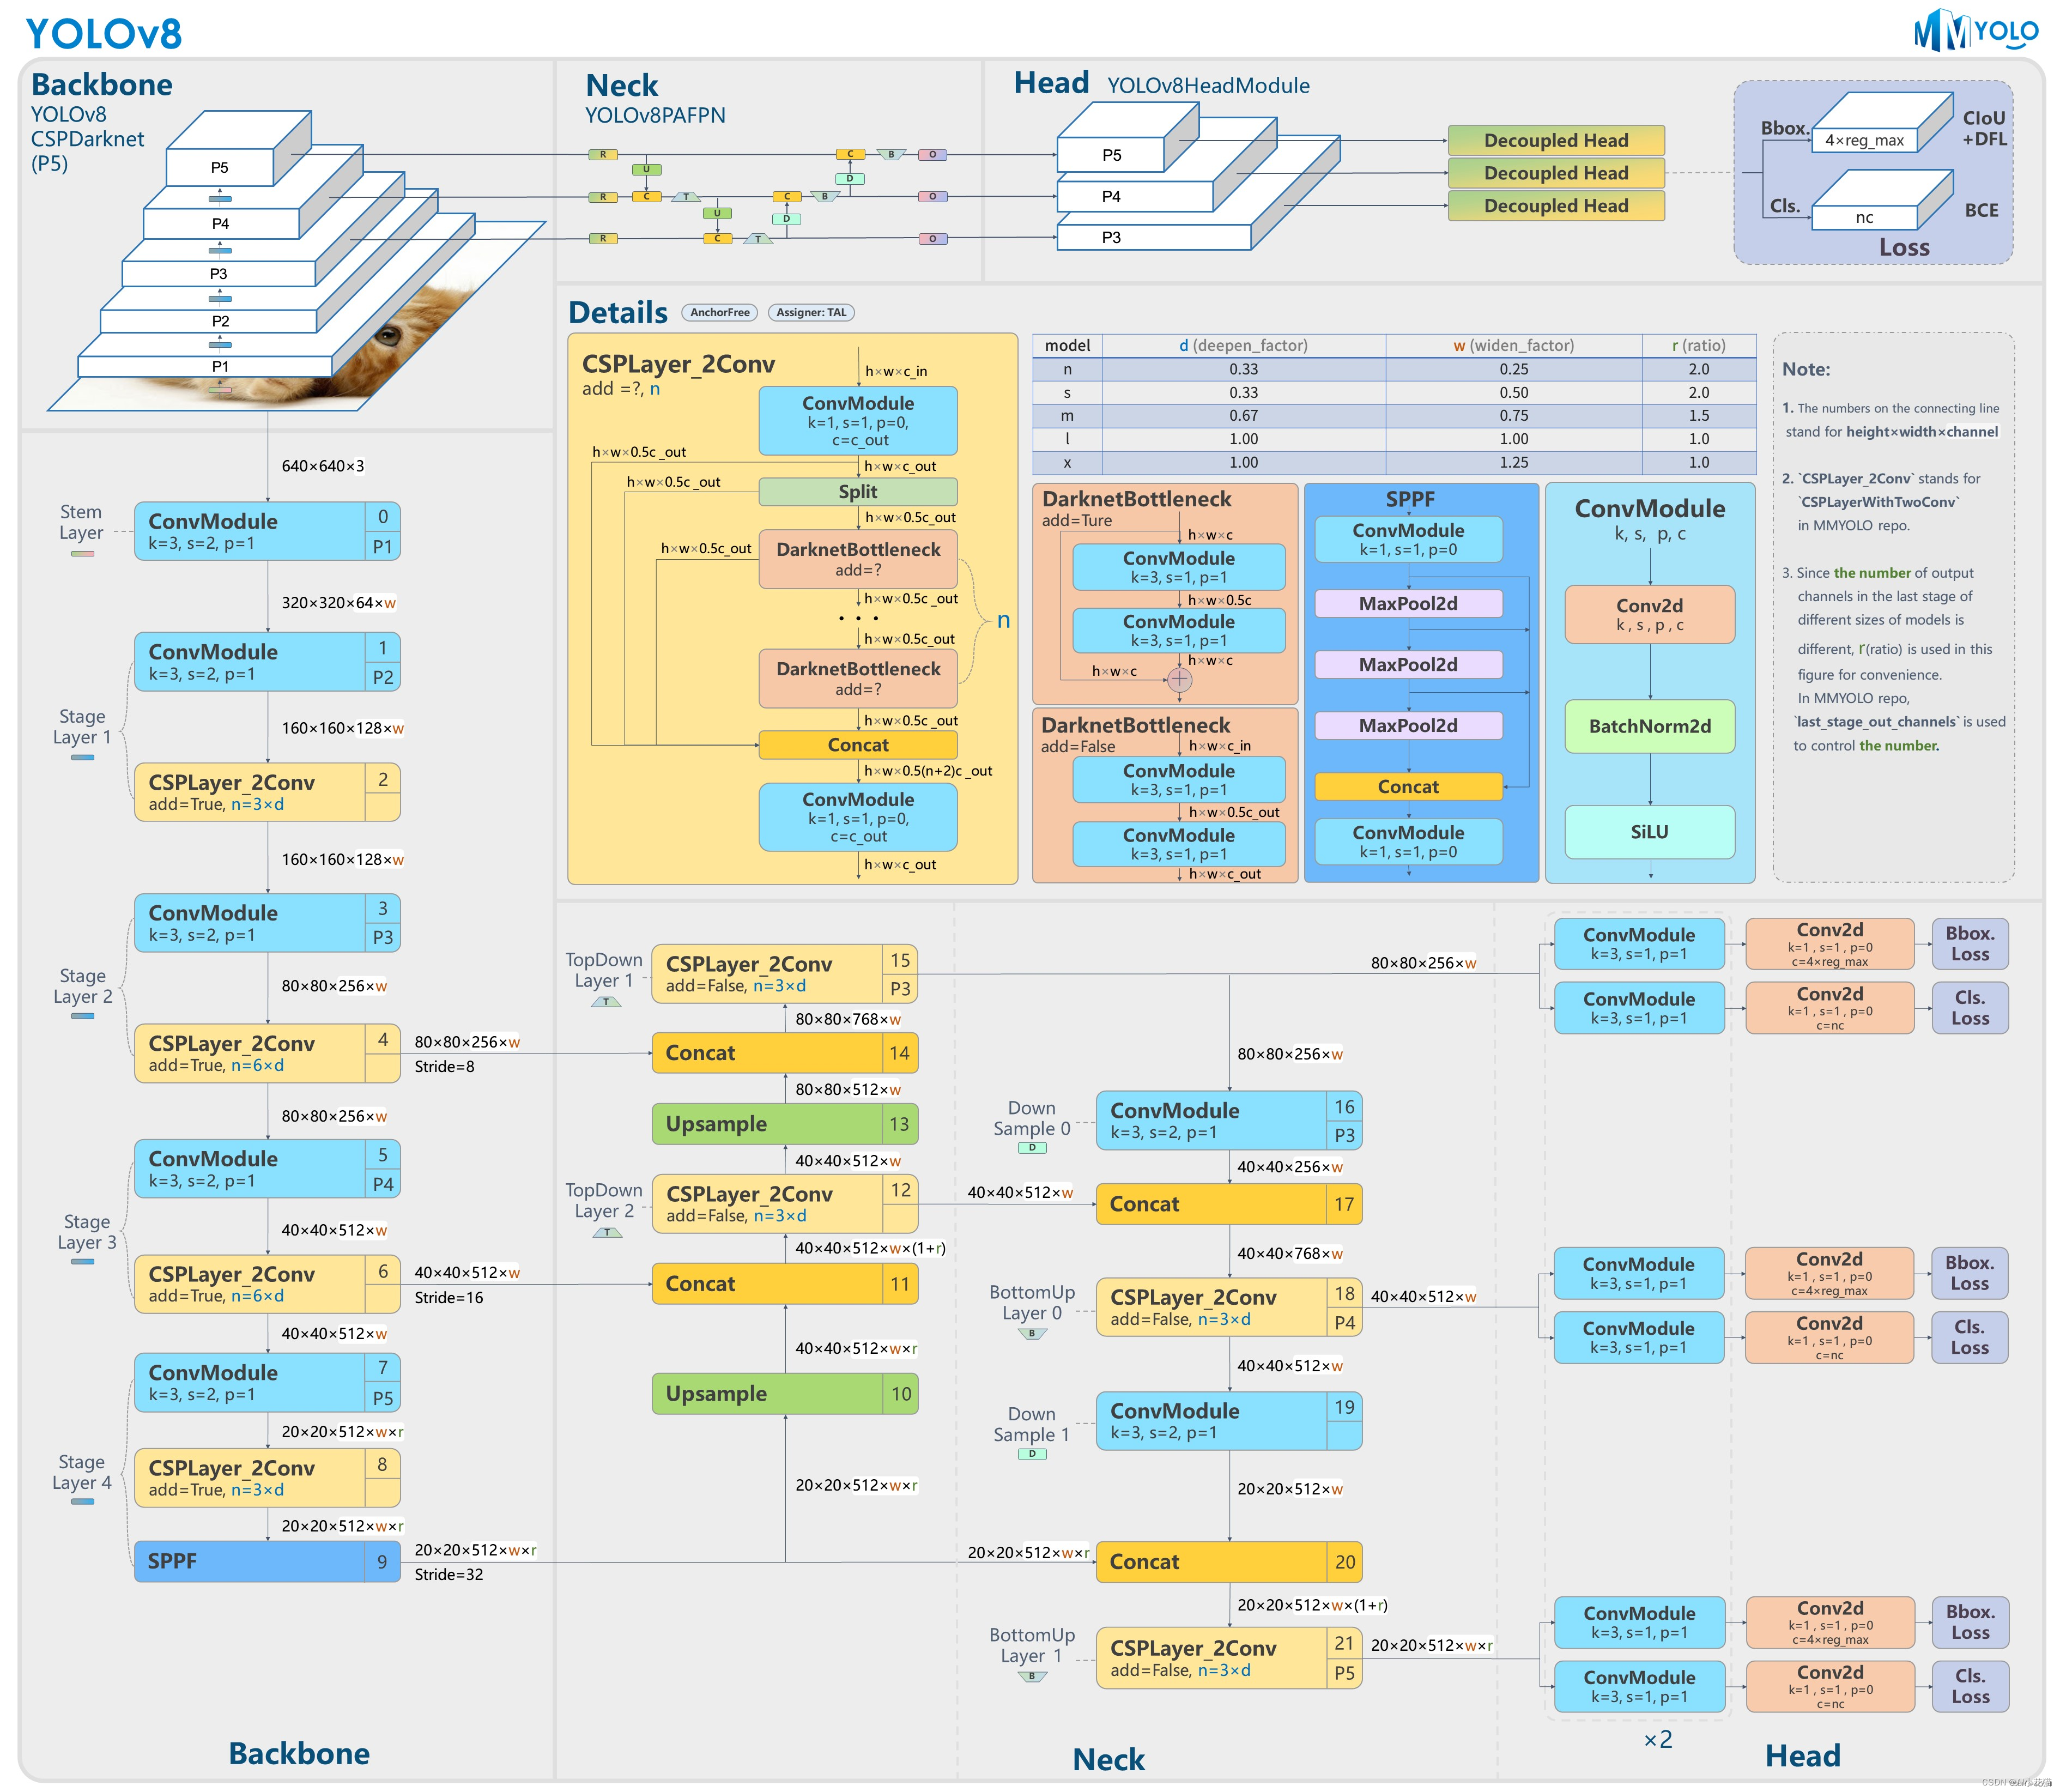
二、YOLOv8介绍
YOLOv8 是 Ultralytics 公司在 2023 年 1月 10 号开源的 YOLOv5 的下一个重大更新版本,目前支持图像分类、物体检测和实例分割任务,在还没有开源时就收到了用户的广泛关注。YOLOv8 抛弃了前几代模型的 Anchor-Base,提供了一个全新的 SOTA 模型,包括 P5 640 和 P6 1280 分辨率的目标检测网络和基于 YOLACT 的实例分割模型。和 YOLOv5 一样,基于缩放系数也提供了 N/S/M/L/X 尺度的不同大小模型,用于处理不同大小的输入图像 。
三、源码获取
https://github.com/ultralytics/ultralytics
四、环境搭建
CPU环境安装
conda create -n YOLOv8 python==3.8.1
pip install ultralytics -i https://pypi.tuna.tsinghua.edu.cn/simple
GPU环境安装
参考这个链接:点击
# 安装CUDA、CUDNN、Python、Pytorch、Torchvision  这里每个版本要相互对应
pip install ultralytics -i https://pypi.tuna.tsinghua.edu.cn/simple
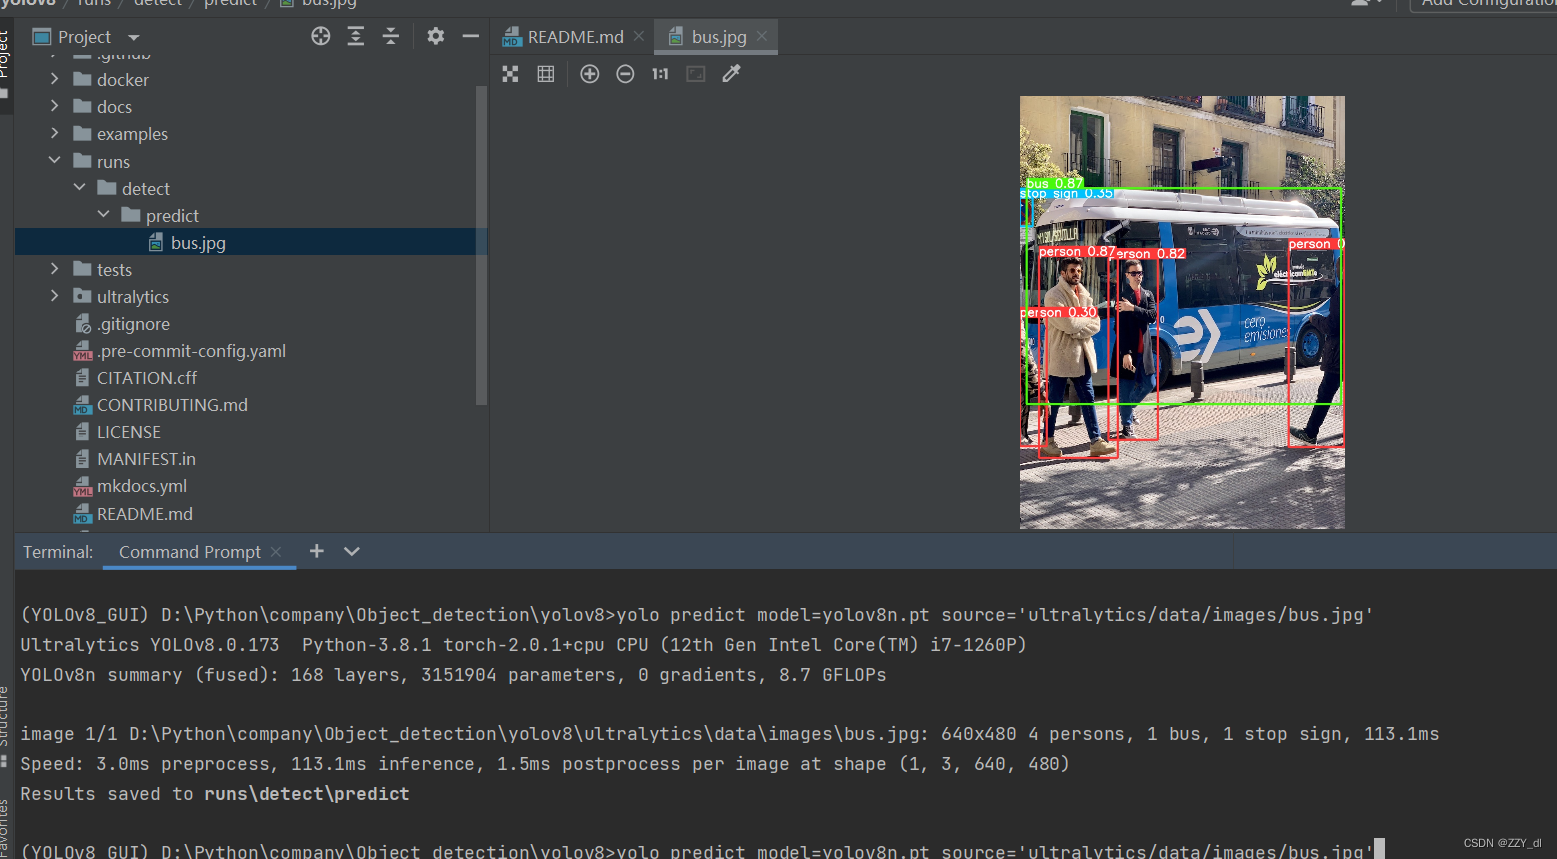
4.1 环境检测
下载yolov8n.pt和bus.jpg
然后命令行输入
yolo predict model=yolov8n.pt source='ultralytics/data/images/bus.jpg'
然后就会看到这个图片
五、数据集准备
这时候说明环境是没问题的了,我们可以准备数据集了,数据集的格式就是TXT标签加原图片,可参考YOLOv5这个博客:点击
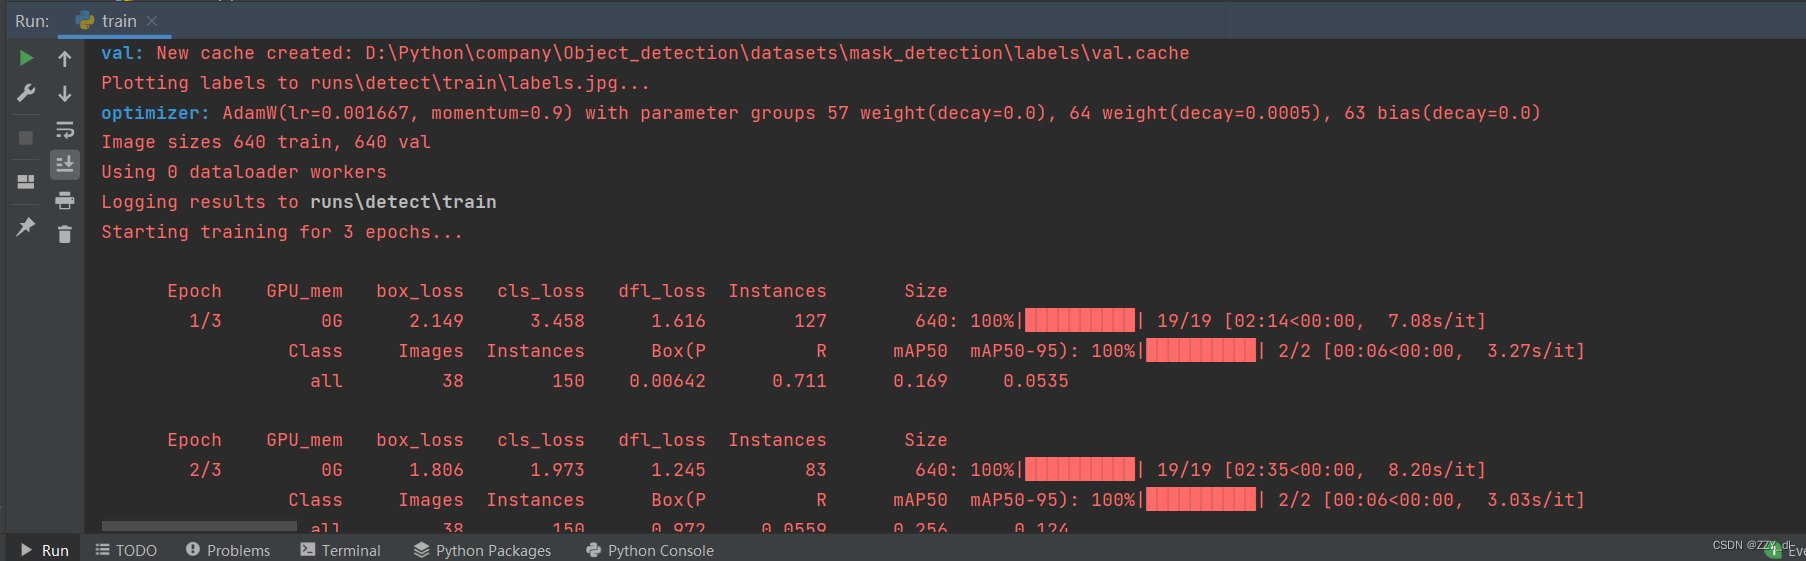
六、 模型训练
6.1 方式一
YOLO(“yolov8n.pt”) 表示用预训练模型
YOLO(“yolov8n.yaml”)表示正常训练
from ultralytics import YOLO# Load a model
# model = YOLO("yolov8n.yaml")  # build a new model from scratch
model = YOLO("yolov8n.pt")  # load a pretrained model (recommended for training)# Use the model
model.train(data="ultralytics/cfg/mask.yaml", epochs=3)  # train the model
metrics = model.val()  # evaluate model performance on the validation set
results = model("ultralytics/data/images/bus.jpg")  # predict on an image
path = model.export(format="onnx")  # export the model to ONNX format
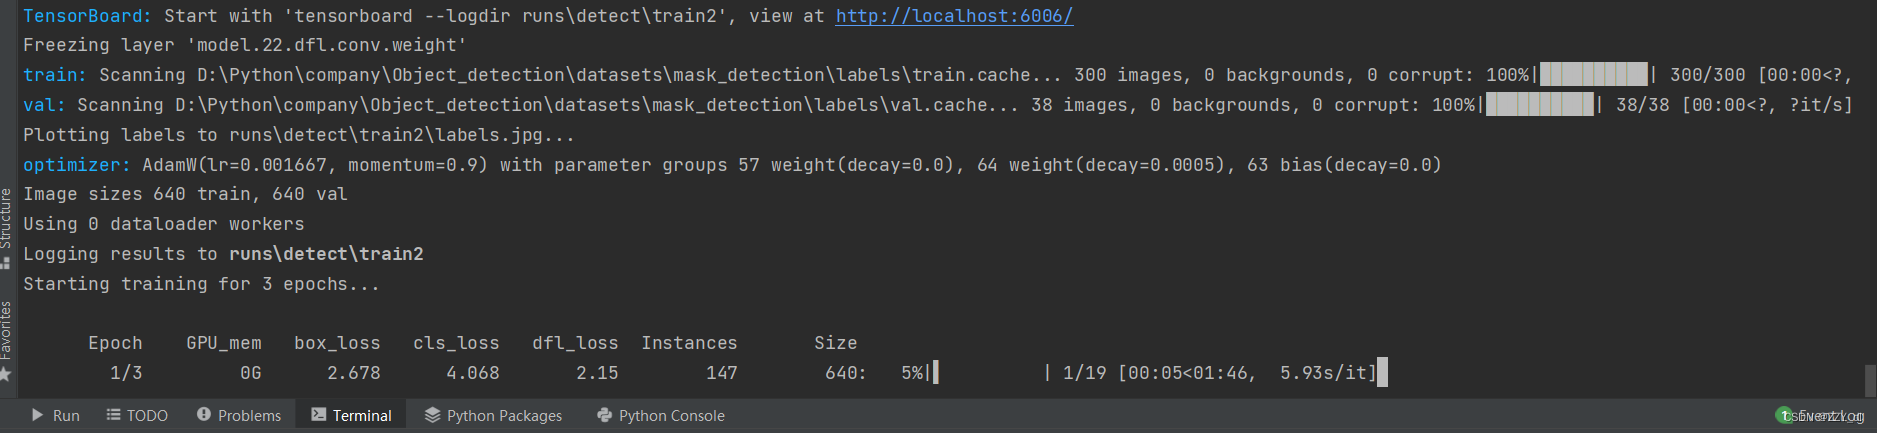
6.2 方式二
yolo task=detect mode=train model=yolov8n.pt data=ultralytics/cfg/mask.yaml epochs=3 batch=16
6.3 针对其他任务
包括四种:detect 、segment、classify 、pose
通过修改YOLO()导入正确任务的yaml配置文件,以及通过data来指定需要载入的对应任务的数据集即可。
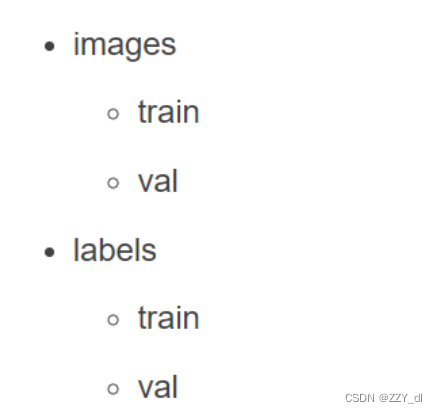
这里的数据集我都是按照TXT标签和原图来进行划分的,具体格式如下:
from ultralytics import YOLO# Load a model
model = YOLO("ultralytics/cfg/models/v8/yolov8-seg.yaml")  # build a new model from scratch# Use the model
model.train(data="ultralytics/cfg/custom_seg.yaml", epochs=3)  # train the model
metrics = model.val()  # evaluate model performance on the validation set
results = model("ultralytics/data/images/bus.jpg")  # predict on an image
path = model.export(format="onnx")  # export the model to ONNX format
针对实例分割任务也成功运行。
七、模型验证
yolo task=detect mode=val model=runs/detect/train/weights/best.pt data=ultralytics/cfg/mask.yaml device=cpu

八、模型测试
yolo task=detect mode=predict model=runs/detect/train/weights/best.pt source=ultralytics/data/images device=cpu

九、模型转换
9.1 转onnx
9.1.1 方式一
根据YOLOv8官网所给代码来实现
yolo export model=yolov8s.pt format=onnx opset=12
其次,可以通过ultralytics API导出onnx模型,并同时将bbox解码器和NMS等后处理添加到onnx模型中。YOLOv8-TensorRT
python export-det.py \
--weights yolov8s.pt \
--iou-thres 0.65 \
--conf-thres 0.25 \
--topk 100 \
--opset 11 \
--sim \
--input-shape 1 3 640 640 \
--device cuda:0
9.2 转tensorRT
9.2.1 trtexec
最简单的方式是使用TensorRT的bin文件夹下的trtexec.exe可执行文件
trtexec.exe --onnx=best.onnx --saveEngine=best.engine --fp16
9.2.2 代码转换
代码链接:YOLOv8-TensorRT
python3 build.py \
--weights yolov8s.onnx \
--iou-thres 0.65 \
--conf-thres 0.25 \
--topk 100 \
--fp16  \
--device cuda:0
9.2.3 推理代码
参考博客:点击
"""
An example that uses TensorRT's Python api to make inferences.
"""
import ctypes
import os
import shutil
import random
import sys
import threading
import time
import cv2
import numpy as np
import pycuda.autoinit
import pycuda.driver as cuda
import tensorrt as trtCONF_THRESH = 0.5
IOU_THRESHOLD = 0.45
LEN_ALL_RESULT = 705600##42000   ##(20*20+40*40+80*80)*(num_cls+4) 一个batch长度
NUM_CLASSES = 80 ##1
OBJ_THRESH = 0.4def get_img_path_batches(batch_size, img_dir):ret = []batch = []for root, dirs, files in os.walk(img_dir):for name in files:if len(batch) == batch_size:ret.append(batch)batch = []batch.append(os.path.join(root, name))if len(batch) > 0:ret.append(batch)return retdef plot_one_box(x, img, color=None, label=None, line_thickness=None):"""description: Plots one bounding box on image img,this function comes from YoLov5 project.param:x:      a box likes [x1,y1,x2,y2]img:    a opencv image objectcolor:  color to draw rectangle, such as (0,255,0)label:  strline_thickness: intreturn:no return"""tl = (line_thickness or round(0.002 * (img.shape[0] + img.shape[1]) / 2) + 1)  # line/font thicknesscolor = color or [random.randint(0, 255) for _ in range(3)]c1, c2 = (int(x[0]), int(x[1])), (int(x[2]), int(x[3]))cv2.rectangle(img, c1, c2, color, thickness=tl, lineType=cv2.LINE_AA)if label:tf = max(tl - 1, 1)  # font thicknesst_size = cv2.getTextSize(label, 0, fontScale=tl / 3, thickness=tf)[0]c2 = c1[0] + t_size[0], c1[1] - t_size[1] - 3cv2.rectangle(img, c1, c2, color, -1, cv2.LINE_AA)  # filledcv2.putText(img,label,(c1[0], c1[1] - 2),0,tl / 3,[225, 255, 255],thickness=tf,lineType=cv2.LINE_AA,)class YoLov8TRT(object):"""description: A YOLOv5 class that warps TensorRT ops, preprocess and postprocess ops."""def __init__(self, engine_file_path):# Create a Context on this device,self.ctx = cuda.Device(0).make_context()stream = cuda.Stream()TRT_LOGGER = trt.Logger(trt.Logger.INFO)runtime = trt.Runtime(TRT_LOGGER)# Deserialize the engine from filewith open(engine_file_path, "rb") as f:engine = runtime.deserialize_cuda_engine(f.read())context = engine.create_execution_context()host_inputs = []cuda_inputs = []host_outputs = []cuda_outputs = []bindings = []for binding in engine:print('bingding:', binding, engine.get_tensor_shape(binding))size = trt.volume(engine.get_tensor_shape(binding)) * engine.max_batch_sizedtype = trt.nptype(engine.get_tensor_dtype(binding))# Allocate host and device buffershost_mem = cuda.pagelocked_empty(size, dtype)cuda_mem = cuda.mem_alloc(host_mem.nbytes)# Append the device buffer to device bindings.bindings.append(int(cuda_mem))# Append to the appropriate list.if engine.binding_is_input(binding):self.input_w = engine.get_tensor_shape(binding)[-1]self.input_h = engine.get_tensor_shape(binding)[-2]host_inputs.append(host_mem)cuda_inputs.append(cuda_mem)else:host_outputs.append(host_mem)cuda_outputs.append(cuda_mem)# Storeself.stream = streamself.context = contextself.engine = engineself.host_inputs = host_inputsself.cuda_inputs = cuda_inputsself.host_outputs = host_outputsself.cuda_outputs = cuda_outputsself.bindings = bindingsself.batch_size = engine.max_batch_sizedef infer(self, raw_image_generator):threading.Thread.__init__(self)# Make self the active context, pushing it on top of the context stack.self.ctx.push()# Restorestream = self.streamcontext = self.contextengine = self.enginehost_inputs = self.host_inputscuda_inputs = self.cuda_inputshost_outputs = self.host_outputscuda_outputs = self.cuda_outputsbindings = self.bindings# Do image preprocessbatch_image_raw = []batch_origin_h = []batch_origin_w = []batch_input_image = np.empty(shape=[self.batch_size, 3, self.input_h, self.input_w])for i, image_raw in enumerate(raw_image_generator):input_image, image_raw, origin_h, origin_w = self.preprocess_image(image_raw)batch_image_raw.append(image_raw)batch_origin_h.append(origin_h)batch_origin_w.append(origin_w)np.copyto(batch_input_image[i], input_image)batch_input_image = np.ascontiguousarray(batch_input_image)# Copy input image to host buffernp.copyto(host_inputs[0], batch_input_image.ravel())start = time.time()# Transfer input data  to the GPU.cuda.memcpy_htod_async(cuda_inputs[0], host_inputs[0], stream)# Run inference.context.execute_async_v2(bindings=bindings, stream_handle=stream.handle)# context.execute_async(batch_size=self.batch_size, bindings=bindings, stream_handle=stream.handle)# Transfer predictions back from the GPU.cuda.memcpy_dtoh_async(host_outputs[0], cuda_outputs[0], stream)# Synchronize the streamstream.synchronize()end = time.time()# Remove any context from the top of the context stack, deactivating it.self.ctx.pop()# Here we use the first row of output in that batch_size = 1output = host_outputs[0]# Do postprocessfor i in range(self.batch_size):result_boxes, result_scores, result_classid = self.post_process_new(output[i * LEN_ALL_RESULT: (i + 1) * LEN_ALL_RESULT], batch_origin_h[i], batch_origin_w[i],batch_input_image[i])if result_boxes is None:continue# Draw rectangles and labels on the original imagefor j in range(len(result_boxes)):box = result_boxes[j]plot_one_box(box,batch_image_raw[i],label="{}:{:.2f}".format(categories[int(result_classid[j])], result_scores[j]),)return batch_image_raw, end - startdef destroy(self):# Remove any context from the top of the context stack, deactivating it.self.ctx.pop()def get_raw_image(self, image_path_batch):"""description: Read an image from image path"""for img_path in image_path_batch:yield cv2.imread(img_path)def get_raw_image_zeros(self, image_path_batch=None):"""description: Ready data for warmup"""for _ in range(self.batch_size):yield np.zeros([self.input_h, self.input_w, 3], dtype=np.uint8)def preprocess_image(self, raw_bgr_image):"""description: Convert BGR image to RGB,resize and pad it to target size, normalize to [0,1],transform to NCHW format.param:input_image_path: str, image pathreturn:image:  the processed imageimage_raw: the original imageh: original heightw: original width"""image_raw = raw_bgr_imageh, w, c = image_raw.shapeimage = cv2.cvtColor(image_raw, cv2.COLOR_BGR2RGB)# Calculate widht and height and paddingsr_w = self.input_w / wr_h = self.input_h / hif r_h > r_w:tw = self.input_wth = int(r_w * h)tx1 = tx2 = 0ty1 = int((self.input_h - th) / 2)ty2 = self.input_h - th - ty1else:tw = int(r_h * w)th = self.input_htx1 = int((self.input_w - tw) / 2)tx2 = self.input_w - tw - tx1ty1 = ty2 = 0# Resize the image with long side while maintaining ratioimage = cv2.resize(image, (tw, th))# Pad the short side with (128,128,128)image = cv2.copyMakeBorder(image, ty1, ty2, tx1, tx2, cv2.BORDER_CONSTANT, None, (128, 128, 128))image = image.astype(np.float32)# Normalize to [0,1]image /= 255.0# HWC to CHW format:image = np.transpose(image, [2, 0, 1])# CHW to NCHW formatimage = np.expand_dims(image, axis=0)# Convert the image to row-major order, also known as "C order":image = np.ascontiguousarray(image)return image, image_raw, h, wdef xywh2xyxy(self, origin_h, origin_w, x):"""description:    Convert nx4 boxes from [x, y, w, h] to [x1, y1, x2, y2] where xy1=top-left, xy2=bottom-rightparam:origin_h:   height of original imageorigin_w:   width of original imagex:          A boxes numpy, each row is a box [center_x, center_y, w, h]return:y:          A boxes numpy, each row is a box [x1, y1, x2, y2]"""y = np.zeros_like(x)r_w = self.input_w / origin_wr_h = self.input_h / origin_hif r_h > r_w:y[:, 0] = x[:, 0] - x[:, 2] / 2y[:, 2] = x[:, 0] + x[:, 2] / 2y[:, 1] = x[:, 1] - x[:, 3] / 2 - (self.input_h - r_w * origin_h) / 2y[:, 3] = x[:, 1] + x[:, 3] / 2 - (self.input_h - r_w * origin_h) / 2y /= r_welse:y[:, 0] = x[:, 0] - x[:, 2] / 2 - (self.input_w - r_h * origin_w) / 2y[:, 2] = x[:, 0] + x[:, 2] / 2 - (self.input_w - r_h * origin_w) / 2y[:, 1] = x[:, 1] - x[:, 3] / 2y[:, 3] = x[:, 1] + x[:, 3] / 2y /= r_hreturn ydef post_process_new(self, output, origin_h, origin_w, img_pad):# Reshape to a two dimentional ndarrayc, h, w = img_pad.shaperatio_w = w / origin_wratio_h = h / origin_hnum_anchors = int(((h / 32) * (w / 32) + (h / 16) * (w / 16) + (h / 8) * (w / 8)))pred = np.reshape(output, (num_anchors, 4 + NUM_CLASSES))results = []for detection in pred:score = detection[4:]classid = np.argmax(score)confidence = score[classid]if confidence > CONF_THRESH:if ratio_h > ratio_w:center_x = int(detection[0] / ratio_w)center_y = int((detection[1] - (h - ratio_w * origin_h) / 2) / ratio_w)width = int(detection[2] / ratio_w)height = int(detection[3] / ratio_w)x1 = int(center_x - width / 2)y1 = int(center_y - height / 2)x2 = int(center_x + width / 2)y2 = int(center_y + height / 2)else:center_x = int((detection[0] - (w - ratio_h * origin_w) / 2) / ratio_h)center_y = int(detection[1] / ratio_h)width = int(detection[2] / ratio_h)height = int(detection[3] / ratio_h)x1 = int(center_x - width / 2)y1 = int(center_y - height / 2)x2 = int(center_x + width / 2)y2 = int(center_y + height / 2)results.append([x1, y1, x2, y2, confidence, classid])results = np.array(results)if len(results) <= 0:return None, None, None# Do nmsboxes = self.non_max_suppression(results, origin_h, origin_w, conf_thres=CONF_THRESH, nms_thres=IOU_THRESHOLD)result_boxes = boxes[:, :4] if len(boxes) else np.array([])result_scores = boxes[:, 4] if len(boxes) else np.array([])result_classid = boxes[:, 5] if len(boxes) else np.array([])return result_boxes, result_scores, result_classiddef bbox_iou(self, box1, box2, x1y1x2y2=True):"""description: compute the IoU of two bounding boxesparam:box1: A box coordinate (can be (x1, y1, x2, y2) or (x, y, w, h))box2: A box coordinate (can be (x1, y1, x2, y2) or (x, y, w, h))x1y1x2y2: select the coordinate formatreturn:iou: computed iou"""if not x1y1x2y2:# Transform from center and width to exact coordinatesb1_x1, b1_x2 = box1[:, 0] - box1[:, 2] / 2, box1[:, 0] + box1[:, 2] / 2b1_y1, b1_y2 = box1[:, 1] - box1[:, 3] / 2, box1[:, 1] + box1[:, 3] / 2b2_x1, b2_x2 = box2[:, 0] - box2[:, 2] / 2, box2[:, 0] + box2[:, 2] / 2b2_y1, b2_y2 = box2[:, 1] - box2[:, 3] / 2, box2[:, 1] + box2[:, 3] / 2else:# Get the coordinates of bounding boxesb1_x1, b1_y1, b1_x2, b1_y2 = box1[:, 0], box1[:, 1], box1[:, 2], box1[:, 3]b2_x1, b2_y1, b2_x2, b2_y2 = box2[:, 0], box2[:, 1], box2[:, 2], box2[:, 3]# Get the coordinates of the intersection rectangleinter_rect_x1 = np.maximum(b1_x1, b2_x1)inter_rect_y1 = np.maximum(b1_y1, b2_y1)inter_rect_x2 = np.minimum(b1_x2, b2_x2)inter_rect_y2 = np.minimum(b1_y2, b2_y2)# Intersection areainter_area = np.clip(inter_rect_x2 - inter_rect_x1 + 1, 0, None) * \np.clip(inter_rect_y2 - inter_rect_y1 + 1, 0, None)# Union Areab1_area = (b1_x2 - b1_x1 + 1) * (b1_y2 - b1_y1 + 1)b2_area = (b2_x2 - b2_x1 + 1) * (b2_y2 - b2_y1 + 1)iou = inter_area / (b1_area + b2_area - inter_area + 1e-16)return ioudef non_max_suppression(self, prediction, origin_h, origin_w, conf_thres=0.5, nms_thres=0.4):"""description: Removes detections with lower object confidence score than 'conf_thres' and performsNon-Maximum Suppression to further filter detections.param:prediction: detections, (x1, y1,x2, y2, conf, cls_id)origin_h: original image heightorigin_w: original image widthconf_thres: a confidence threshold to filter detectionsnms_thres: a iou threshold to filter detectionsreturn:boxes: output after nms with the shape (x1, y1, x2, y2, conf, cls_id)"""# Get the boxes that score > CONF_THRESHboxes = prediction[prediction[:, 4] >= conf_thres]# Trandform bbox from [center_x, center_y, w, h] to [x1, y1, x2, y2]# boxes[:, :4] = self.xywh2xyxy(origin_h, origin_w, boxes[:, :4])# clip the coordinatesboxes[:, 0] = np.clip(boxes[:, 0], 0, origin_w)boxes[:, 2] = np.clip(boxes[:, 2], 0, origin_w)boxes[:, 1] = np.clip(boxes[:, 1], 0, origin_h)boxes[:, 3] = np.clip(boxes[:, 3], 0, origin_h)# Object confidenceconfs = boxes[:, 4]# Sort by the confsboxes = boxes[np.argsort(-confs)]# Perform non-maximum suppressionkeep_boxes = []while boxes.shape[0]:large_overlap = self.bbox_iou(np.expand_dims(boxes[0, :4], 0), boxes[:, :4]) > nms_threslabel_match = boxes[0, -1] == boxes[:, -1]# Indices of boxes with lower confidence scores, large IOUs and matching labelsinvalid = large_overlap & label_matchkeep_boxes += [boxes[0]]boxes = boxes[~invalid]boxes = np.stack(keep_boxes, 0) if len(keep_boxes) else np.array([])return boxesdef img_infer(yolov5_wrapper, image_path_batch):batch_image_raw, use_time = yolov5_wrapper.infer(yolov5_wrapper.get_raw_image(image_path_batch))for i, img_path in enumerate(image_path_batch):parent, filename = os.path.split(img_path)save_name = os.path.join('output', filename)# Save imagecv2.imwrite(save_name, batch_image_raw[i])print('input->{}, time->{:.2f}ms, saving into output/'.format(image_path_batch, use_time * 1000))def warmup(yolov5_wrapper):batch_image_raw, use_time = yolov5_wrapper.infer(yolov5_wrapper.get_raw_image_zeros())print('warm_up->{}, time->{:.2f}ms'.format(batch_image_raw[0].shape, use_time * 1000))if __name__ == "__main__":engine_file_path = r"D:\personal\workplace\python_code\ultralytics-main\yolov8s_p.engine"# load coco labelscategories = ["person", "bicycle", "car", "motorcycle", "airplane", "bus", "train", "truck", "boat", "traffic light", "fire hydrant", "stop sign", "parking meter", "bench", "bird", "cat", "dog", "horse", "sheep", "cow", "elephant", "bear", "zebra", "giraffe", "backpack", "umbrella", "handbag", "tie", "suitcase", "frisbee", "skis", "snowboard", "sports ball", "kite", "baseball bat", "baseball glove", "skateboard", "surfboard", "tennis racket", "bottle", "wine glass", "cup", "fork", "knife", "spoon", "bowl", "banana", "apple", "sandwich", "orange", "broccoli", "carrot", "hot dog", "pizza", "donut", "cake", "chair", "couch", "potted plant", "bed", "dining table", "toilet", "tv", "laptop", "mouse", "remote", "keyboard", "cell phone", "microwave", "oven", "toaster", "sink", "refrigerator", "book", "clock", "vase", "scissors", "teddy bear", "hair drier", "toothbrush" ]# engine_file_path = r'C:\Users\caobin\Desktop\model_version\yolov8\20230602\best.engine'# categories = ['man']if os.path.exists('output/'):shutil.rmtree('output/')os.makedirs('output/')# a YoLov5TRT instanceyolov8_wrapper = YoLov8TRT(engine_file_path)try:print('batch size is', yolov8_wrapper.batch_size)image_dir = r"D:\personal\workplace\python_code\yolov5-6.0\data\images"image_path_batches = get_img_path_batches(yolov8_wrapper.batch_size, image_dir)for i in range(10):warmup(yolov8_wrapper)for batch in image_path_batches:img_infer(yolov8_wrapper, batch)finally:yolov8_wrapper.destroy()
相关文章:
目标检测笔记(十四): 使用YOLOv8完成对图像的目标检测任务(从数据准备到训练测试部署的完整流程)
文章目录 一、目标检测介绍二、YOLOv8介绍三、源码获取四、环境搭建4.1 环境检测 五、数据集准备六、 模型训练6.1 方式一6.2 方式二6.3 针对其他任务 七、模型验证八、模型测试九、模型转换9.1 转onnx9.1.1 方式一 9.2 转tensorRT9.2.1 trtexec9.2.2 代码转换9.2.3 推理代码 一…...
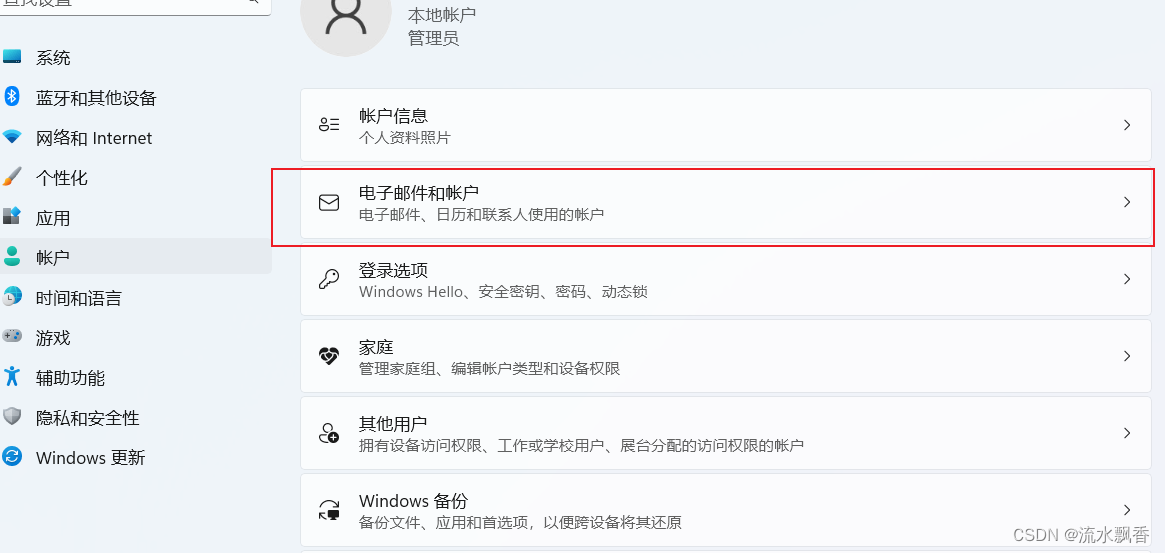
windows系统edge浏览器退出账户后还能免密登录的解决方式
edge浏览器明明退出登录了,还能不用输密码一键点击就能登录; 这是因为微软的煞笔产品经理用脚后跟想出来的方案。 解决方案: 去设置里的账号管理,注销自己的微软账号登录;如果你发现自己并没有登录,那么看…...
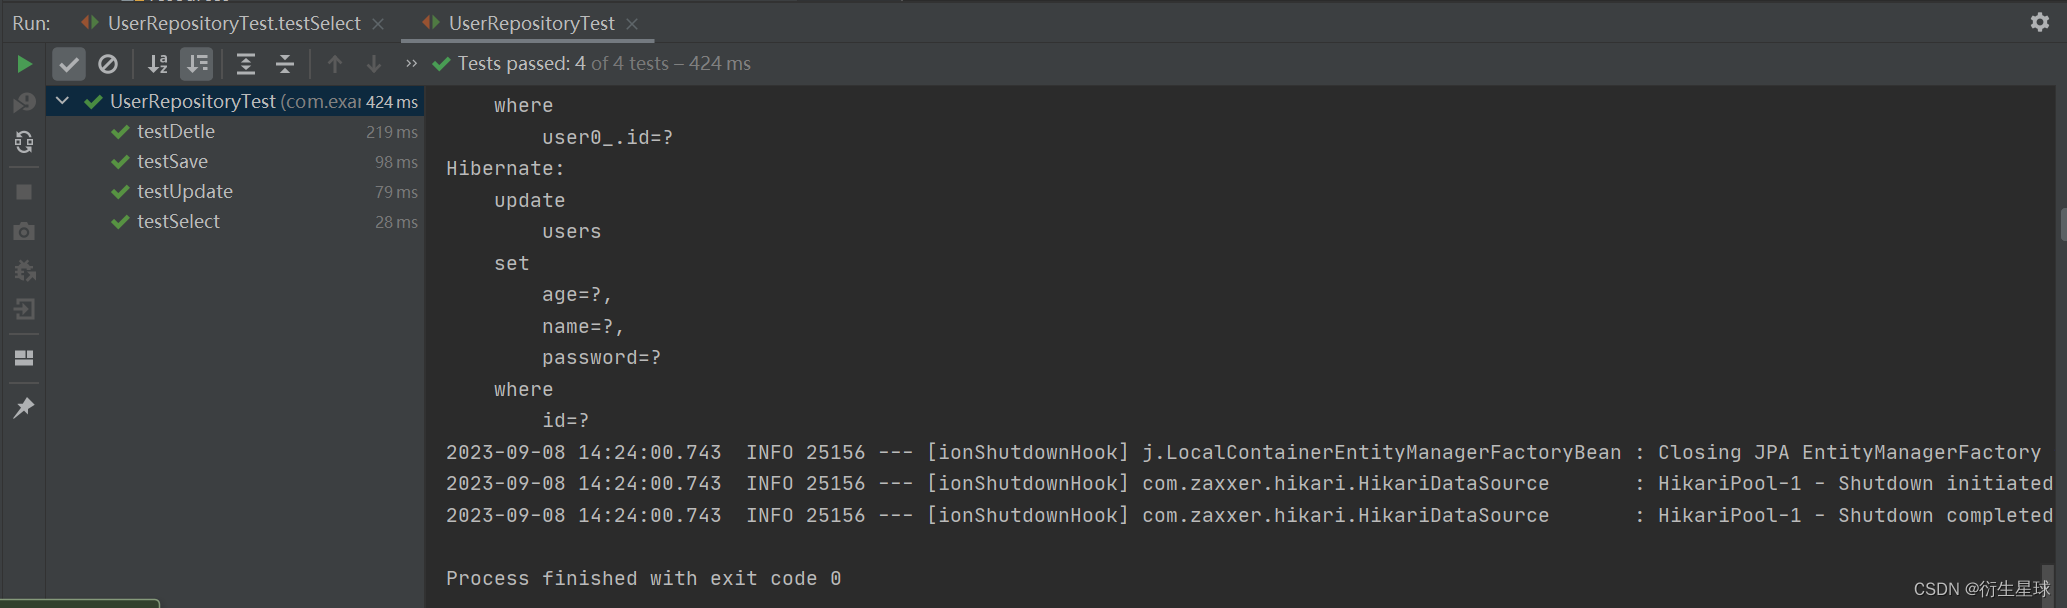
在Spring Boot项目中使用JPA
1.集成Spring Data JPA Spring Boot提供了启动器spring-boot-starter-data-jpa,只需要添加启动器(Starters)就能实现在项目中使用JPA。下面一步一步演示集成Spring Data JPA所需的配置。 步骤01 添加JPA依赖。 首先创建新的Spring Boot项目…...

探讨Socks5代理IP在跨境电商与网络游戏中的网络安全应用
随着全球互联网的迅猛发展,跨境电商和在线游戏成为了跨国公司和游戏开发商的新战场。然而,与此同时,网络安全问题也日益突出。本文将探讨如何利用Socks5代理IP来增强跨境电商和网络游戏的网络安全,保障数据传输的隐私和安全性。 …...

T检验的前提条件|独立性|方差齐性|随机抽样
T检验是一种用于比较两组数据均值是否存在显著差异的统计方法,但在进行T检验之前,有一些前提条件需要满足,以确保结果的准确性和可靠性。这些前提条件包括: 正态性:T检验要求数据在每个组内都服从正态分布。正态性可以…...
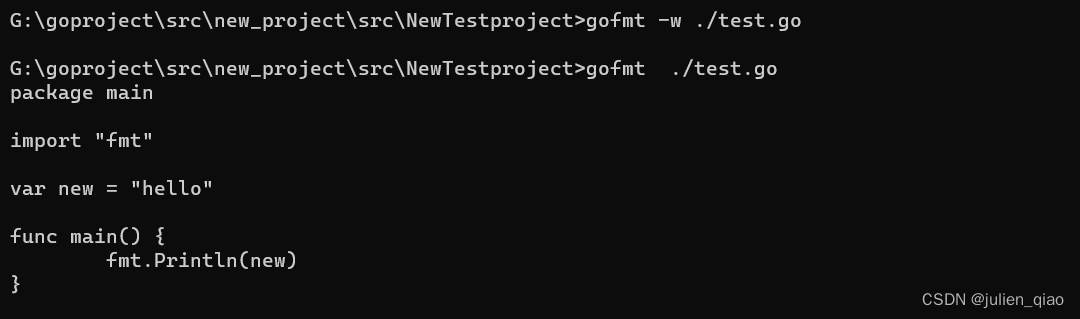
【GO语言基础】变量常量
系列文章目录 【Go语言学习】ide安装与配置 【GO语言基础】前言 【GO语言基础】变量常量 【GO语言基础】数据类型 【GO语言基础】运算符 文章目录 系列文章目录常量和枚举变量声明全局变量声明大小写敏感 总结 常量和枚举 使用const关键字声明常量,并为每个常量提…...

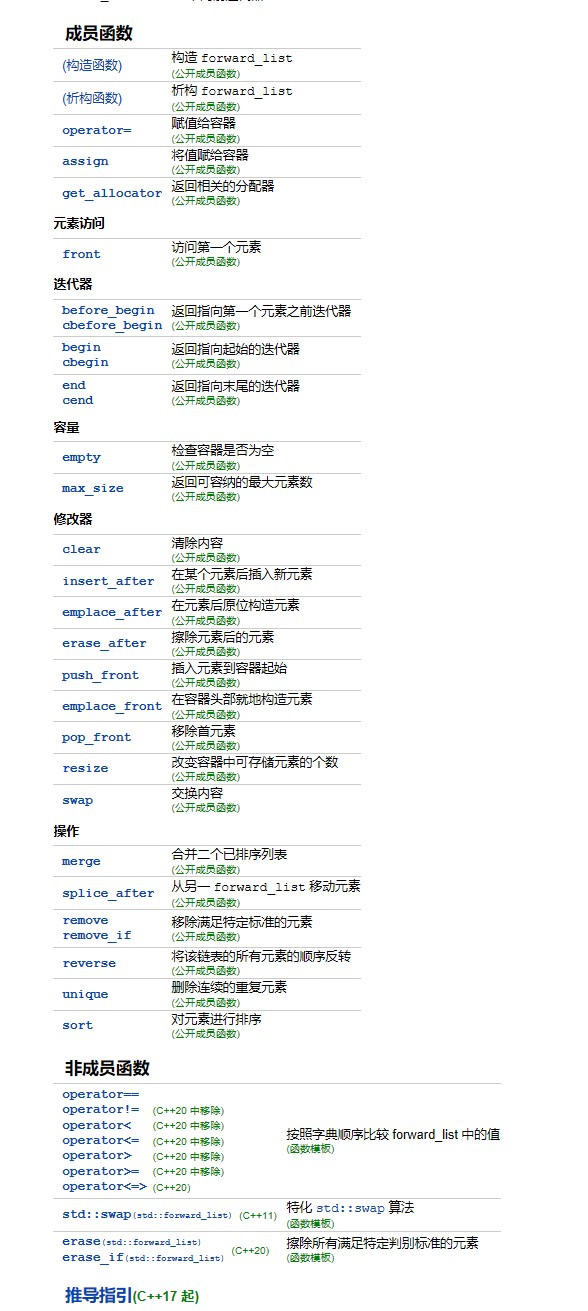
C++QT day3
1> 自行封装一个栈的类,包含私有成员属性:栈的数组、记录栈顶的变量 成员函数完成:构造函数、析构函数、拷贝构造函数、入栈、出栈、清空栈、判空、判满、获取栈顶元素、求栈的大小 2> 自行封装一个循环顺序队列的类,包含…...

AI时代的较量,MixTrust能否略胜一筹?
人工智能的能力正在迅速接近人类,而在许多细分领域,已经超越了人类。虽然短期内这个突破是否会导致人工通用智能(AGI)还不清楚,但我们现在有的模型被训练成在数字交互中完美地模仿高能人类。尽管AGI仍不确定࿰…...
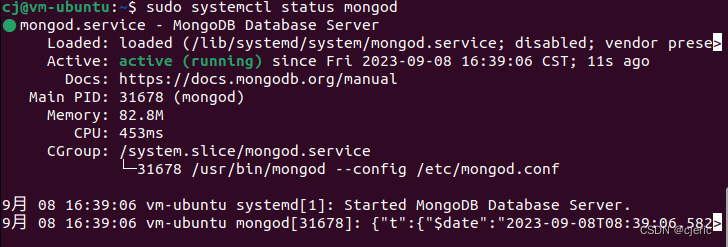
Ubuntu22.04 安装 MongoDB 7.0
稍微查了一些文章发现普遍比较过时。有的是使用旧版本的Ubuntu,或者安装的旧版本的MongoDB。英语可以的朋友可以移步Install MongoDB Community Edition on Ubuntu — MongoDB Manual,按照官方安装文档操作。伸手党或者英语略差的朋友可以按照本文一步步…...

【日志技术——Logback日志框架】
日志技术 1.引出 我们通常展示信息使用的是输出语句,但它有弊端,只能在控制台展示信息,不能灵活的指定日志输出的位置(文件,数据库),想加入或取消日志,需要修改源代码 2.日志技术…...

mysql存储过程和函数
存储过程语法 设置变量: set dogNum 1002; 1、无参的存储过程 delimiter $ CREATE PROCEDURE 存储过程名() begin 存储过程体 end $; 2、有参数的存储过程 delimiter $ CREATE PROCEDURE 存储过程名(in|out|inout 参数名1 参数类型,参数名2 参数类型……...

【HDFS】Hadoop-RPC:客户端侧通过Client.Connection#sendRpcRequest方法发送RPC序列化数据
org.apache.hadoop.ipc.Client.Connection#sendRpcRequest: 这个方法是客户端侧向服务端发送RPC请求的地方。调用点是Client#call方法过来的。 此方法代码注释里描述了一个细节:这个向服务端发送RPC请求数据的过程并不是由Connection线程发送的,而是其他的线程(sendParams…...
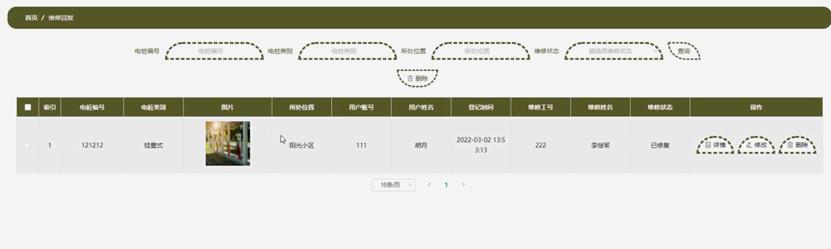
Java基于 SpringBoot 的车辆充电桩系统
博主介绍:✌程序员徐师兄、7年大厂程序员经历。全网粉丝30W,Csdn博客专家、掘金/华为云/阿里云/InfoQ等平台优质作者、专注于Java技术领域和毕业项目实战✌ 文章目录 1、效果演示效果图技术栈 2、 前言介绍(完整源码请私聊)3、主要技术3.4.1 …...

excel表导出
dto:查询条件所在的类 GetMapping(value "/downloadProject")ApiOperation("导出台账数据")AnonymousAccesspublic void queryDownload(Dto dto, HttpServletResponse response) throws IOException, ParseException {service.queryDownload(byPageDto, re…...

YOLOv8 快速入门
前言 本文是 YOLOv8 入门指南(大佬请绕过),将会详细讲解安装,配置,训练,验证,预测等过程 YOLOv8 官网:ultralytics/ultralytics: NEW - YOLOv8 🚀 in PyTorch > ONN…...
HJ48 从单向链表中删除指定值的节点
Powered by:NEFU AB-IN Link 文章目录 HJ48 从单向链表中删除指定值的节点题意思路代码 HJ48 从单向链表中删除指定值的节点 题意 输入一个单向链表和一个节点的值,从单向链表中删除等于该值的节点,删除后如果链表中无节点则返回空指针。 思路 单向链表…...

Java缓存理解
CPU占用:如果你有某些应用需要消耗大量的cpu去计算,比如正则表达式,如果你使用正则表达式比较频繁,而其又占用了很多CPU的话,那你就应该使用缓存将正则表达式的结果给缓存下来。 数据库IO性能:如果发现有大…...

MHA高可用及故障切换
一、什么是 MHA MHA(MasterHigh Availability)是一套优秀的MySQL高可用环境下故障切换和主从复制的软件。 MHA 的出现就是解决MySQL 单点的问题。 MySQL故障切换过程中,MHA能做到0-30秒内自动完成故障切换操作。 MHA能在故障切换的过程中最大…...
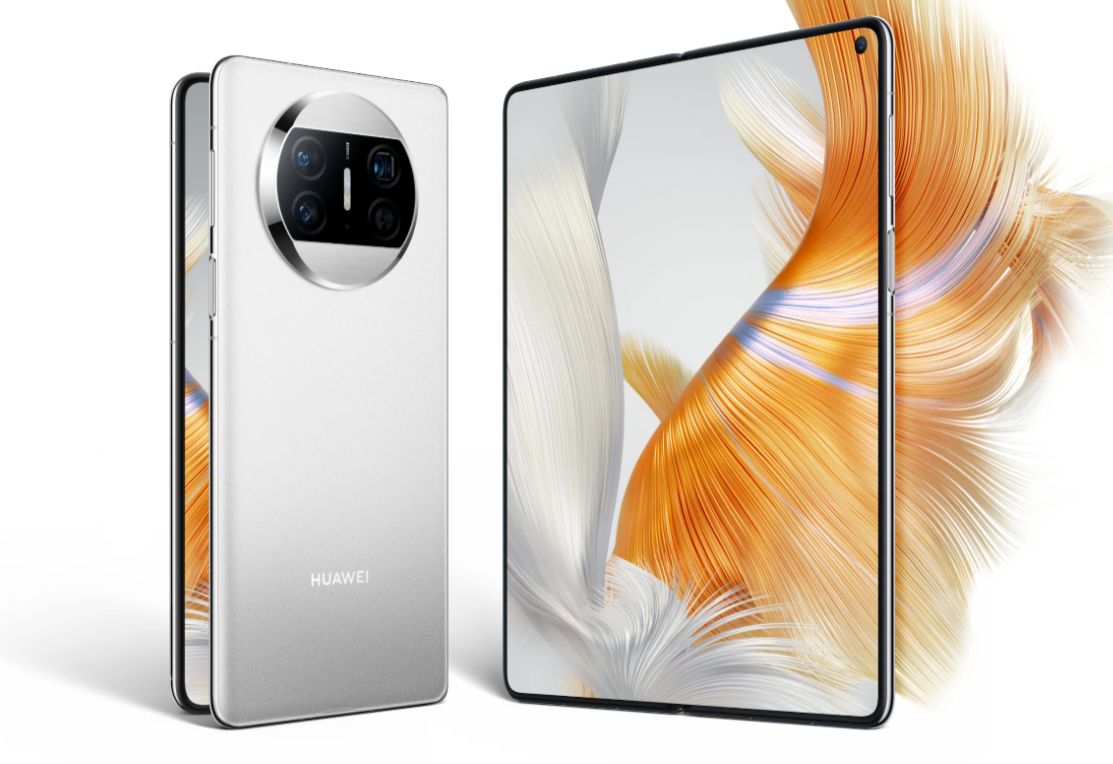
1000元订金?华为折叠屏手机MateX5今日开始预订,售价尚未公布
华为最新款折叠屏手机Mate X5今日在华为商城开始预订,吸引了众多消费者的关注。预订时需交纳1000元的订金,而具体售价尚未公布。据华为商城配置表显示,Mate X5预计将搭载Mate 60系列同款麒麟9000S处理器,或可能搭载麒麟9100处理器…...
Golang编写客户端SDK,并开源发布包到GitHub,供其他项目import使用
目录 编写客户端SDK,并开源发布包到GitHub1. 创建 GitHub 仓库2. 构建项目,编写代码Go 代码示例:项目目录结构展示: 3. 提交代码到 GitHub仓库4. 发布版本5. 现在其他人可以引用使用你的模块包了 编写客户端SDK,并开源…...

从零到集群:基于Rocky Linux ARM64的虚拟化平台构建与自动化部署实战
1. 环境准备与基础配置 第一次接触ARM64架构的虚拟化平台搭建时,我踩过不少坑。不同于常见的x86环境,Rocky Linux ARM64在驱动支持和软件生态上有其特殊性。我们先从最基础的物理服务器配置说起。 假设你面前是一台刚拆封的ARM架构服务器,我…...

Cesium性能优化:你可能不知道的onTick事件监听器内存泄漏问题
Cesium性能优化:你可能不知道的onTick事件监听器内存泄漏问题 在构建长时间运行的WebGIS应用时,Cesium的流畅渲染往往被视为首要目标。但许多开发者忽略了一个隐形杀手——未被正确清理的onTick事件监听器。这些看似无害的代码片段,会在用户毫…...

CN3881-规格书 如韵电子 10A 降压型同步单节锂电池充电管理集成电路
概述: CN3881 是一款可使用太阳能供电的 PWM 降压模式单节锂电池充电管理集成电路,可独立对单 节锂电池充电进行管理,具有封装外形小,外围元器件少和使用简单等优点。 CN3881 采用涓流,恒流和恒压充电模式,非常适合单节…...

Golang怎么用Task替代Makefile_Golang如何用go-task编写跨平台的任务脚本文件【教程】
go-task 是用 Go 编写的跨平台任务编排工具,本质区别于 Makefile:它用 YAML 定义任务、不依赖 shell 缩进、默认不继承父环境变量、无增量构建、支持变量注入与平台条件判断,且单文件分发。go-task 是什么,和 Makefile 有什么本质…...
)
Wan2.2-I2V-A14B镜像免配置:所有路径预设标准化(/workspace/model /output)
Wan2.2-I2V-A14B镜像免配置:所有路径预设标准化(/workspace/model /output) 1. 镜像概述与核心优势 Wan2.2-I2V-A14B是一款专为文生视频任务优化的私有部署镜像,基于RTX 4090D 24GB显存显卡和CUDA 12.4环境深度定制。这个镜像的…...
AgentCPM-Report镜像免配置方案:Pixel Epic一键部署教程(含Streamlit定制)
AgentCPM-Report镜像免配置方案:Pixel Epic一键部署教程(含Streamlit定制) 1. 像素史诗:当科研遇上RPG冒险 想象一下,撰写专业研究报告的过程变成了一场像素风格的RPG冒险。这就是Pixel Epic带来的独特体验——它将A…...

CodeSys自定义HTML5控件:从零构建到工程部署的实战指南
1. 为什么需要自定义HTML5控件? 在工业自动化领域,CodeSys作为主流的PLC编程环境,其WebVisu功能允许工程师创建可视化界面。但默认控件库往往无法满足特定需求,比如: 需要展示实时数据曲线图而非简单数值要求特殊交互…...

别只盯着Flag!从‘金盾信安杯’赛题看企业级安全实战:文件上传、源码泄露与RSA的坑
企业安全实战:从CTF赛题到真实威胁的防御之道 当安全工程师们在CTF竞赛中破解一道道赛题时,很少有人意识到这些看似游戏化的挑战背后,隐藏着企业安全防护体系中最致命的漏洞原型。本文将带您穿越虚拟赛场与真实战场之间的界限,揭示…...

PCB开窗技术:提升电流承载能力的关键工艺
1. PCB开窗技术解析:从概念到应用在PCB设计领域,"开窗"这个术语经常被经验丰富的工程师挂在嘴边,但对于刚入行的新手来说,这个看似简单的操作背后却蕴含着不少设计门道。作为一名有十年硬件设计经验的工程师,…...

GBase 8c 表空间规划和对象迁移
GBase 8c 表空间规划和对象迁移 我最近看 GBase 8c 资料时,越来越强烈的一个感觉是:很多现场不是不会建表空间,而是把表空间用得太晚、太散、太随意。 真正落到现场时,最常见的现象通常不是“不会执行 CREATE TABLESPACE”&#x…...