iOS 视频压缩 mov转mp4 码率
最近还是因为IM模块的功能,IOS录制MOV视频发送后,安卓端无法播放,迫不得已兼容将MOV视频转为MP4发送。
其中mov视频包括4K/24FPS、4K/30FPS、4K/60FPS、720p HD/30FPS、1080p HD/30FPS、1080p HD/60FPS!
使用AVAssetExportSession作为导出工具,指定压缩质量AVAssetExportPresetMediumQuality,这样能有效的减少视频体积,但是视频画面清晰度比较差,举个例子:一个25秒的1080p视频,经过压缩后从1080p变为320p,大小从34m变成2.6m。
AVAssetExportSession *exportSession = [[AVAssetExportSession alloc] initWithAsset:avAsset presetName:AVAssetExportPresetMediumQuality];exportSession.outputURL= url;exportSession.shouldOptimizeForNetworkUse = YES;exportSession.outputFileType = AVFileTypeMPEG4;[exportSessionexportAsynchronouslyWithCompletionHandler:^{switch([exportSessionstatus]) {case AVAssetExportSessionStatusFailed:NSLog(@"Export canceled");break;case AVAssetExportSessionStatusCancelled:NSLog(@"Export canceled");break;case AVAssetExportSessionStatusCompleted:{NSLog(@"Successful!");break;}default:break;}重新梳理下我们的需求,我们的场景对视频质量要求稍高,对视频的大小容忍比较高,所以将最大分辨率设为720p。
所以我们的压缩设置改为AVAssetExportPreset1280x720,压缩后大小几乎没变,从34m变成32.5m。我们可以用mideaInfo来查看下两个视频文件到底有什么区别,上图为1080p,下图为720p:
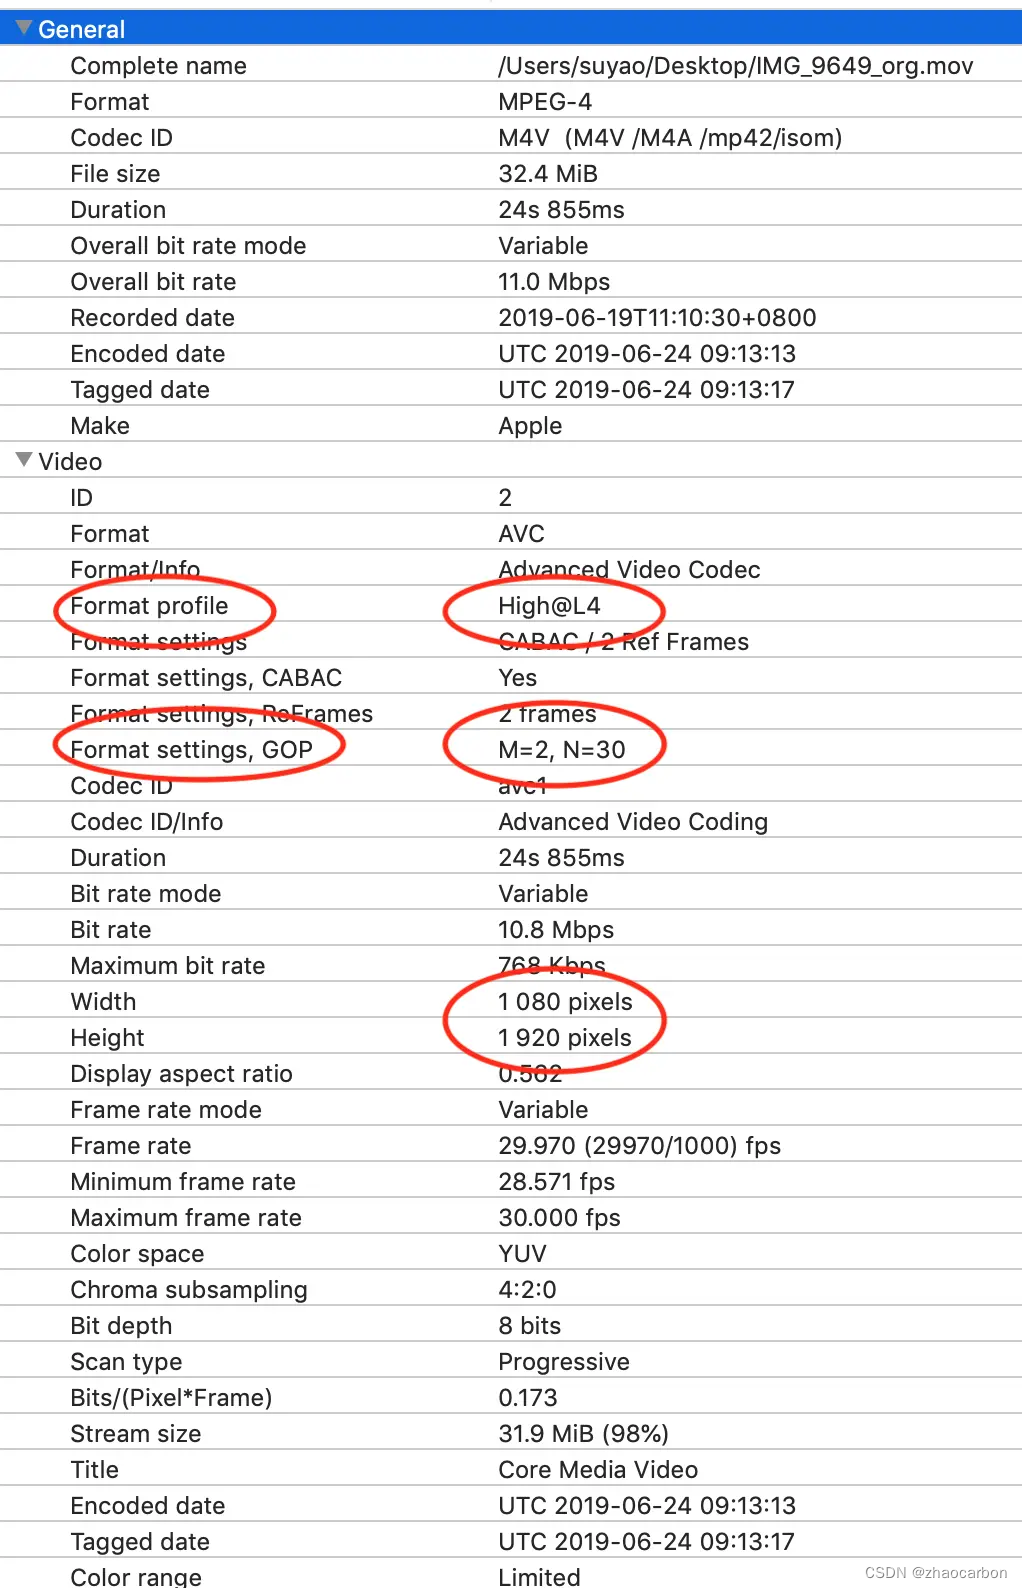
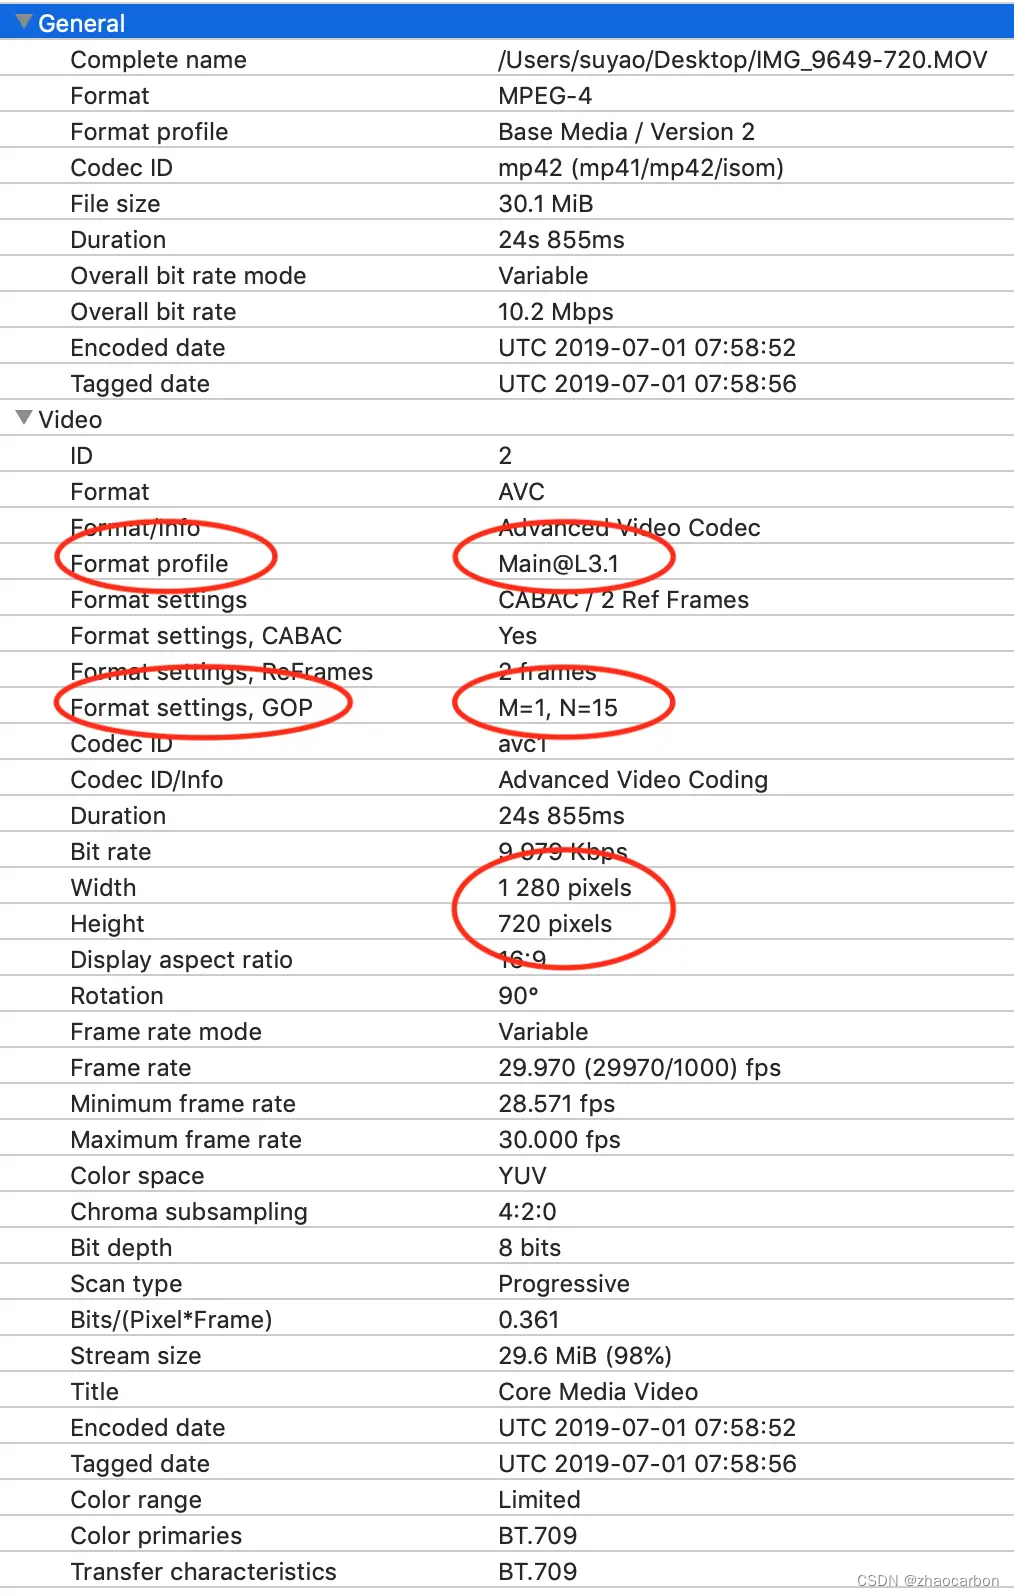
由上图可以看到,两个分辨率差别巨大的视频,大小居然差不多,要分析其中的原因首先要了解H264编码。
3.H264编码
关于H264编码的原理可以参考(这篇文章),本文不详细展开,只说明几个参数。
Bit Rate:
比特率是指每秒传送的比特(bit)数。单位为 bps(Bit Per Second),比特率越高,每秒传送数据就越多,画质就越清晰。声音中的比特率是指将模拟声音信号转换成数字声音信号后,单位时间内的二进制数据量,是间接衡量音频质量的一个指标。 视频中的比特率(码率)原理与声音中的相同,都是指由模拟信号转换为数字信号后,单位时间内的二进制数据量。
所以选择适合的比特率是压缩视频大小的关键,比特率设置太小的话,视频会变得模糊,失真。比特率太高的话,视频数据太大,又达不到我们压缩的要求。
Format profile:
作为行业标准,H.264编码体系定义了4种不同的Profile(类):Baseline(基线类),Main(主要类), Extended(扩展类)和High Profile(高端类)(它们各自下分成许多个层):
Baseline Profile 提供I/P帧,仅支持progressive(逐行扫描)和CAVLC;
Extended Profile 提供I/P/B/SP/SI帧,仅支持progressive(逐行扫描)和CAVLC;
Main Profile 提供I/P/B帧,支持progressive(逐行扫描)和interlaced(隔行扫描),提供CAVLC或CABAC;
High Profile (也就是FRExt)在Main Profile基础上新增:8x8 intra prediction(8x8 帧内预测), custom quant(自定义量化), lossless video coding(无损视频编码), 更多的yuv格式(4:4:4...);
从压缩比例来说 从压缩比例来说,baseline< main < high,由于上图中720p是Main@L3.1,1080p是High@L4,这就是明明分辨率不一样,但是压缩后的大小却差不多的原因。
关于iPhone设备对的支持
-
iPhone 3GS 和更早的设备支持 Baseline Profile level 3.0 及更低的级别
-
iPhone 4S 支持 High Profile level 4.1 及更低的级别
-
iPhone 5C 支持 High Profile level 4.1 及更低的级别
-
iPhone 5S 支持 High Profile level 4.1 及更低的级别
-
iPad 1 支持 Main Profile level 3.1 及更低的级别
-
iPad 2 支持 Main Profile level 3.1 及更低的级别
-
iPad with Retina display 支持 High Profile level 4.1 及更低的级别
-
iPad mini 支持 High Profile level 4.1 及更低的级别
GOP:
GOP 指的就是两个I帧之间的间隔。
在视频编码序列中,主要有三种编码帧:I帧、P帧、B帧。
- I帧即Intra-coded picture(帧内编码图像帧),不参考其他图像帧,只利用本帧的信息进行编码
- P帧即Predictive-codedPicture(预测编码图像帧),利用之前的I帧或P帧,采用运动预测的方式进行帧间预测编码
- B帧即Bidirectionallypredicted picture(双向预测编码图像帧),提供最高的压缩比,它既需要之前的图
像帧(I帧或P帧),也需要后来的图像帧(P帧),采用运动预测的方式进行帧间双向预测编码
在视频编码序列中,GOP即Group of picture(图像组),指两个I帧之间的距离,Reference(参考周期)指两个P帧之间的距离。一个I帧所占用的字节数大于一个P帧,一个P帧所占用的字节数大于一个B帧。
所以在码率不变的前提下,GOP值越大,P、B帧的数量会越多,平均每个I、P、B帧所占用的字节数就越多,也就更容易获取较好的图像质量;Reference越大,B帧的数量越多,同理也更容易获得较好的图像质量。
需要说明的是,通过提高GOP值来提高图像质量是有限度的,在遇到场景切换的情况时,H.264编码器会自动强制插入一个I帧,此时实际的GOP值被缩短了。另一方面,在一个GOP中,P、B帧是由I帧预测得到的,当I帧的图像质量比较差时,会影响到一个GOP中后续P、B帧的图像质量,直到下一个GOP开始才有可能得以恢复,所以GOP值也不宜设置过大。
同时,由于P、B帧的复杂度大于I帧,所以过多的P、B帧会影响编码效率,使编码效率降低。另外,过长的GOP还会影响Seek操作的响应速度,由于P、B帧是由前面的I或P帧预测得到的,所以Seek操作需要直接定位,解码某一个P或B帧时,需要先解码得到本GOP内的I帧及之前的N个预测帧才可以,GOP值越长,需要解码的预测帧就越多,seek响应的时间也越长。
M 和 N :M值表示I帧或者P帧之间的帧数目,N值表示GOP的长度。N的至越大,代表压缩率越大。因为图2中N=15远小于图一中N=30。这也是720p尺寸压缩不理想的原因。
4.解决思路
由上可知压缩视频主要可以采用以下几种手段:
- 降低分辨率
- 降低码率
- 指定高的
Format profile
由于业务指定分辨率为720p,所以我们只能尝试另外两种方法。
降低码率
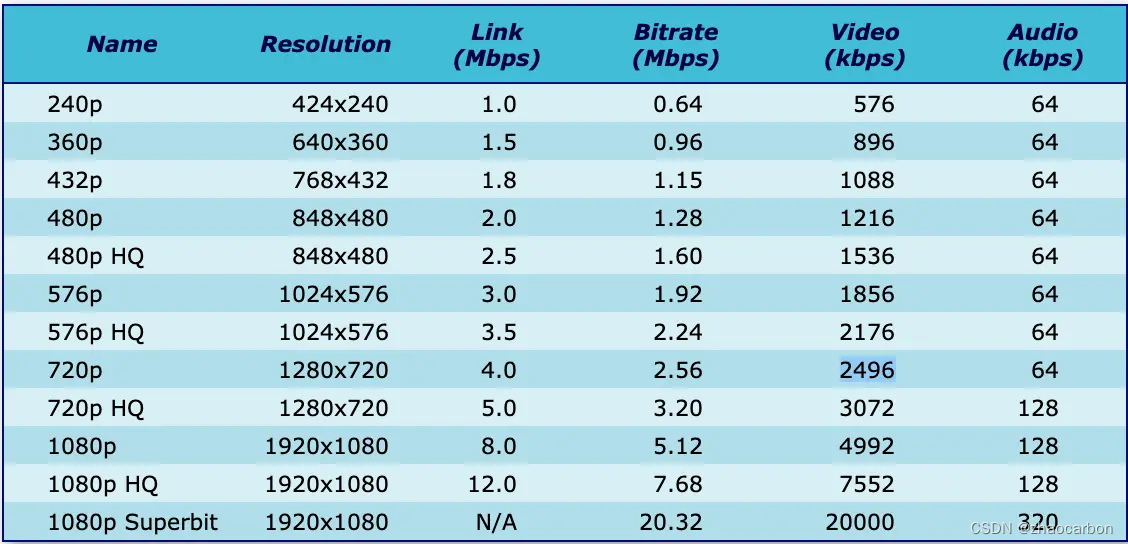
根据这篇文章Video Encoding Settings for H.264 Excellence,推荐了适合720p的推荐码率为2400~3700之间。之前压缩的文件码率为9979,所以码率还是有很大的优化空间的。
宽屏

非宽屏
指定高的 Format profile
由于现在大部分的设备都支持High Profile level,所以我们可以把Format profile 从Main Profile level改为High Profile level。
现在我们已经知道要做什么了,那么怎么做呢?
5.解决方法
由于之前的AVAssetExportSession不能指定码率和Format profile,我们这里需要使用AVAssetReader和AVAssetWriter。
AVAssetReader负责将数据从asset里拿出来,AVAssetWriter负责将得到的数据存成文件。
核心代码如下:
//生成reader 和 writerself.reader = [AVAssetReader.alloc initWithAsset:self.asset error:&readerError];self.writer = [AVAssetWriter assetWriterWithURL:self.outputURL fileType:self.outputFileType error:&writerError];
//视频if (videoTracks.count > 0) {self.videoOutput = [AVAssetReaderVideoCompositionOutput assetReaderVideoCompositionOutputWithVideoTracks:videoTracks videoSettings:self.videoInputSettings];self.videoOutput.alwaysCopiesSampleData = NO;if (self.videoComposition){self.videoOutput.videoComposition = self.videoComposition;}else{self.videoOutput.videoComposition = [self buildDefaultVideoComposition];}if ([self.reader canAddOutput:self.videoOutput]){[self.reader addOutput:self.videoOutput];}//// Video input//self.videoInput = [AVAssetWriterInput assetWriterInputWithMediaType:AVMediaTypeVideo outputSettings:self.videoSettings];self.videoInput.expectsMediaDataInRealTime = NO;if ([self.writer canAddInput:self.videoInput]){[self.writer addInput:self.videoInput];}NSDictionary *pixelBufferAttributes = @{(id)kCVPixelBufferPixelFormatTypeKey: @(kCVPixelFormatType_32BGRA),(id)kCVPixelBufferWidthKey: @(self.videoOutput.videoComposition.renderSize.width),(id)kCVPixelBufferHeightKey: @(self.videoOutput.videoComposition.renderSize.height),@"IOSurfaceOpenGLESTextureCompatibility": @YES,@"IOSurfaceOpenGLESFBOCompatibility": @YES,};self.videoPixelBufferAdaptor = [AVAssetWriterInputPixelBufferAdaptor assetWriterInputPixelBufferAdaptorWithAssetWriterInput:self.videoInput sourcePixelBufferAttributes:pixelBufferAttributes];}//音频NSArray *audioTracks = [self.asset tracksWithMediaType:AVMediaTypeAudio];if (audioTracks.count > 0) {self.audioOutput = [AVAssetReaderAudioMixOutput assetReaderAudioMixOutputWithAudioTracks:audioTracks audioSettings:nil];self.audioOutput.alwaysCopiesSampleData = NO;self.audioOutput.audioMix = self.audioMix;if ([self.reader canAddOutput:self.audioOutput]){[self.reader addOutput:self.audioOutput];}} else {// Just in case this gets reusedself.audioOutput = nil;}//// Audio input//if (self.audioOutput) {self.audioInput = [AVAssetWriterInput assetWriterInputWithMediaType:AVMediaTypeAudio outputSettings:self.audioSettings];self.audioInput.expectsMediaDataInRealTime = NO;if ([self.writer canAddInput:self.audioInput]){[self.writer addInput:self.audioInput];}}//开始读写[self.writer startWriting];[self.reader startReading];[self.writer startSessionAtSourceTime:self.timeRange.start];//压缩完成的回调__block BOOL videoCompleted = NO;__block BOOL audioCompleted = NO;__weak typeof(self) wself = self;self.inputQueue = dispatch_queue_create("VideoEncoderInputQueue", DISPATCH_QUEUE_SERIAL);if (videoTracks.count > 0) {[self.videoInput requestMediaDataWhenReadyOnQueue:self.inputQueue usingBlock:^{if (![wself encodeReadySamplesFromOutput:wself.videoOutput toInput:wself.videoInput]){@synchronized(wself){videoCompleted = YES;if (audioCompleted){[wself finish];}}}}];}else {videoCompleted = YES;}if (!self.audioOutput) {audioCompleted = YES;} else {[self.audioInput requestMediaDataWhenReadyOnQueue:self.inputQueue usingBlock:^{if (![wself encodeReadySamplesFromOutput:wself.audioOutput toInput:wself.audioInput]){@synchronized(wself){audioCompleted = YES;if (videoCompleted){[wself finish];}}}}];}其中self.videoInput里的self.videoSettings我们需要对视频压缩参数做设置
self.videoSettings = @
{AVVideoCodecKey: AVVideoCodecH264,AVVideoWidthKey: @1280,AVVideoHeightKey: @720,AVVideoCompressionPropertiesKey: @{AVVideoAverageBitRateKey: @3000000,AVVideoProfileLevelKey: AVVideoProfileLevelH264High40,},
};
封装好的控件可以参考https://blog.csdn.net/yunhuaikong/article/details/133300420?spm=1001.2014.3001.5502。
6.最终效果
通过下图我们可以看到,视频已经成功被压缩成10m左右。结合视频效果,这个压缩成果我们还是很满意的。
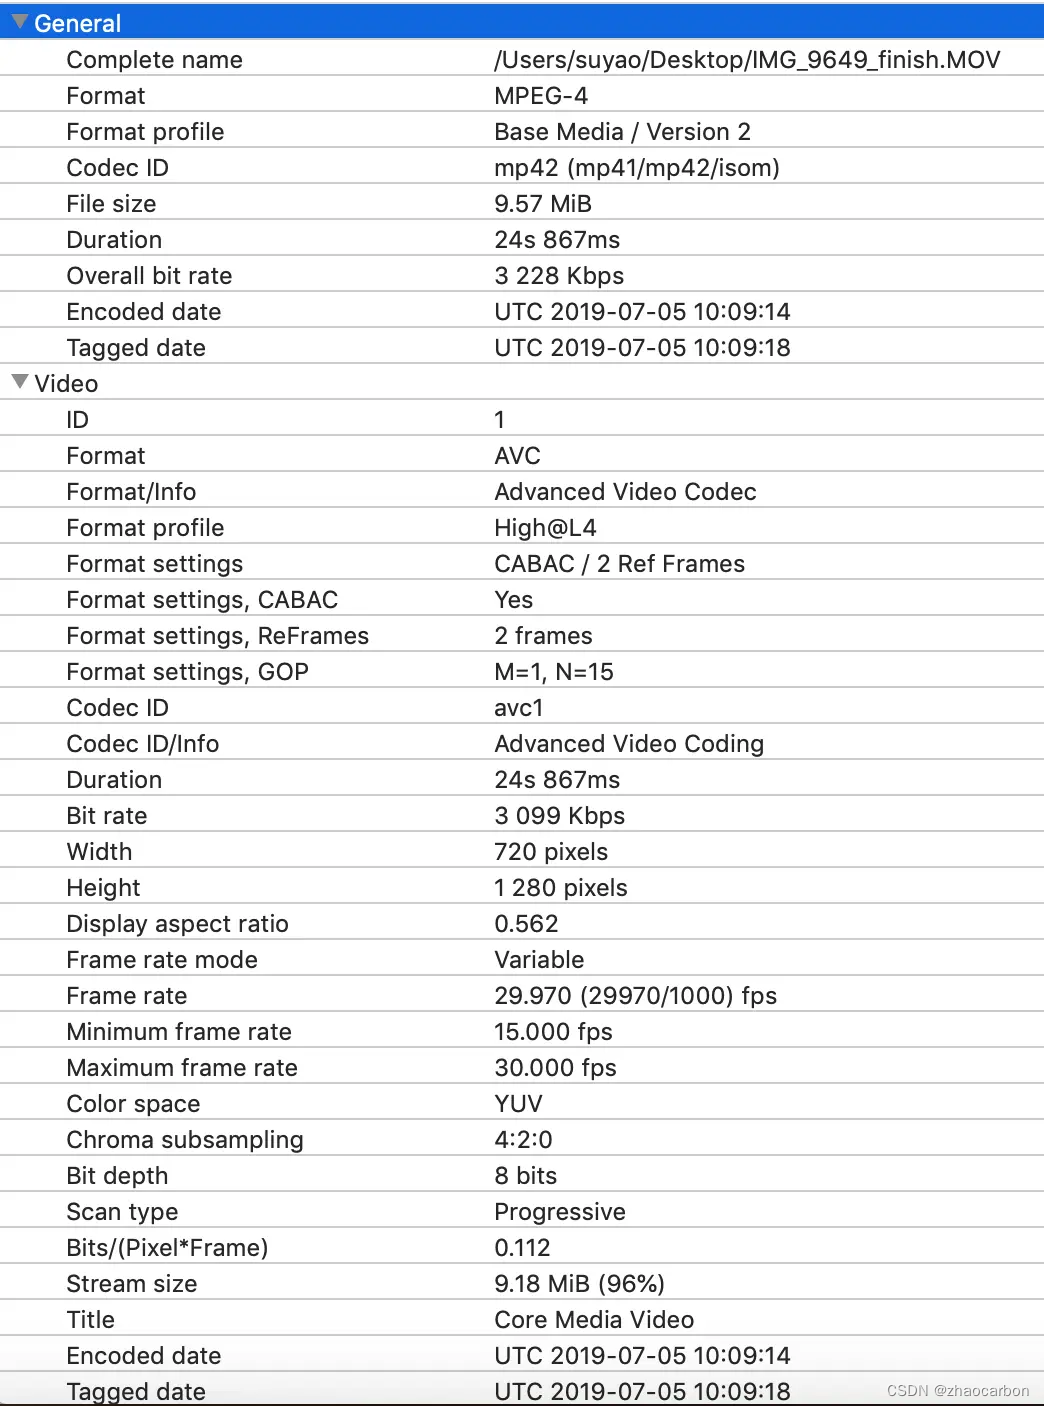
压缩后的文件
下面是视频部分画面截图的效果:

原视频,34m

原来的MediumQuality压缩效果,2.6m
原来的720p压缩效果,32.5m
优化后的720p的压缩效果,10m
7.视频转码时遇到的坑
使用 SDAVAssetExportSession 时遇到一个坑,大部分视频转码没问题,部分视频转码会有黑屏问题,最后定位出现问题的代码如下:
- (AVMutableVideoComposition *)buildDefaultVideoComposition
{AVMutableVideoComposition *videoComposition = [AVMutableVideoComposition videoComposition];AVAssetTrack *videoTrack = [[self.asset tracksWithMediaType:AVMediaTypeVideo] objectAtIndex:0];// get the frame rate from videoSettings, if not set then try to get it from the video track,// if not set (mainly when asset is AVComposition) then use the default frame rate of 30float trackFrameRate = 0;if (self.videoSettings){NSDictionary *videoCompressionProperties = [self.videoSettings objectForKey:AVVideoCompressionPropertiesKey];if (videoCompressionProperties){NSNumber *frameRate = [videoCompressionProperties objectForKey:AVVideoAverageNonDroppableFrameRateKey];if (frameRate){trackFrameRate = frameRate.floatValue;}}}else{trackFrameRate = [videoTrack nominalFrameRate];}if (trackFrameRate == 0){trackFrameRate = 30;}videoComposition.frameDuration = CMTimeMake(1, trackFrameRate);CGSize targetSize = CGSizeMake([self.videoSettings[AVVideoWidthKey] floatValue], [self.videoSettings[AVVideoHeightKey] floatValue]);CGSize naturalSize = [videoTrack naturalSize];CGAffineTransform transform = videoTrack.preferredTransform;// Workaround radar 31928389, see https://github.com/rs/SDAVAssetExportSession/pull/70 for more infoif (transform.ty == -560) {transform.ty = 0;}if (transform.tx == -560) {transform.tx = 0;}CGFloat videoAngleInDegree  = atan2(transform.b, transform.a) * 180 / M_PI;if (videoAngleInDegree == 90 || videoAngleInDegree == -90) {CGFloat width = naturalSize.width;naturalSize.width = naturalSize.height;naturalSize.height = width;}videoComposition.renderSize = naturalSize;// center inside{float ratio;float xratio = targetSize.width / naturalSize.width;float yratio = targetSize.height / naturalSize.height;ratio = MIN(xratio, yratio);float postWidth = naturalSize.width * ratio;float postHeight = naturalSize.height * ratio;float transx = (targetSize.width - postWidth) / 2;float transy = (targetSize.height - postHeight) / 2;CGAffineTransform matrix = CGAffineTransformMakeTranslation(transx / xratio, transy / yratio);matrix = CGAffineTransformScale(matrix, ratio / xratio, ratio / yratio);transform = CGAffineTransformConcat(transform, matrix);}// Make a "pass through video track" video composition.AVMutableVideoCompositionInstruction *passThroughInstruction = [AVMutableVideoCompositionInstruction videoCompositionInstruction];passThroughInstruction.timeRange = CMTimeRangeMake(kCMTimeZero, self.asset.duration);AVMutableVideoCompositionLayerInstruction *passThroughLayer = [AVMutableVideoCompositionLayerInstruction videoCompositionLayerInstructionWithAssetTrack:videoTrack];[passThroughLayer setTransform:transform atTime:kCMTimeZero];passThroughInstruction.layerInstructions = @[passThroughLayer];videoComposition.instructions = @[passThroughInstruction];return videoComposition;
}
1. transform 不正确引起的黑屏
CGAffineTransform transform = videoTrack.preferredTransform;
1.参考评论区 @baopanpan同学的说法,TZImagePickerController可以解决,找到代码试了一下,确实不会出现黑屏的问题了,代码如下
/// 获取优化后的视频转向信息
- (AVMutableVideoComposition *)fixedCompositionWithAsset:(AVAsset *)videoAsset {AVMutableVideoComposition *videoComposition = [AVMutableVideoComposition videoComposition];// 视频转向int degrees = [self degressFromVideoFileWithAsset:videoAsset];if (degrees != 0) {CGAffineTransform translateToCenter;CGAffineTransform mixedTransform;videoComposition.frameDuration = CMTimeMake(1, 30);NSArray *tracks = [videoAsset tracksWithMediaType:AVMediaTypeVideo];AVAssetTrack *videoTrack = [tracks objectAtIndex:0];AVMutableVideoCompositionInstruction *roateInstruction = [AVMutableVideoCompositionInstruction videoCompositionInstruction];roateInstruction.timeRange = CMTimeRangeMake(kCMTimeZero, [videoAsset duration]);AVMutableVideoCompositionLayerInstruction *roateLayerInstruction = [AVMutableVideoCompositionLayerInstruction videoCompositionLayerInstructionWithAssetTrack:videoTrack];if (degrees == 90) {// 顺时针旋转90°translateToCenter = CGAffineTransformMakeTranslation(videoTrack.naturalSize.height, 0.0);mixedTransform = CGAffineTransformRotate(translateToCenter,M_PI_2);videoComposition.renderSize = CGSizeMake(videoTrack.naturalSize.height,videoTrack.naturalSize.width);[roateLayerInstruction setTransform:mixedTransform atTime:kCMTimeZero];} else if(degrees == 180){// 顺时针旋转180°translateToCenter = CGAffineTransformMakeTranslation(videoTrack.naturalSize.width, videoTrack.naturalSize.height);mixedTransform = CGAffineTransformRotate(translateToCenter,M_PI);videoComposition.renderSize = CGSizeMake(videoTrack.naturalSize.width,videoTrack.naturalSize.height);[roateLayerInstruction setTransform:mixedTransform atTime:kCMTimeZero];} else if(degrees == 270){// 顺时针旋转270°translateToCenter = CGAffineTransformMakeTranslation(0.0, videoTrack.naturalSize.width);mixedTransform = CGAffineTransformRotate(translateToCenter,M_PI_2*3.0);videoComposition.renderSize = CGSizeMake(videoTrack.naturalSize.height,videoTrack.naturalSize.width);[roateLayerInstruction setTransform:mixedTransform atTime:kCMTimeZero];}else {//增加异常处理videoComposition.renderSize = CGSizeMake(videoTrack.naturalSize.width,videoTrack.naturalSize.height);}roateInstruction.layerInstructions = @[roateLayerInstruction];// 加入视频方向信息videoComposition.instructions = @[roateInstruction];}return videoComposition;
}/// 获取视频角度
- (int)degressFromVideoFileWithAsset:(AVAsset *)asset {int degress = 0;NSArray *tracks = [asset tracksWithMediaType:AVMediaTypeVideo];if([tracks count] > 0) {AVAssetTrack *videoTrack = [tracks objectAtIndex:0];CGAffineTransform t = videoTrack.preferredTransform;if(t.a == 0 && t.b == 1.0 && t.c == -1.0 && t.d == 0){// Portraitdegress = 90;} else if(t.a == 0 && t.b == -1.0 && t.c == 1.0 && t.d == 0){// PortraitUpsideDowndegress = 270;} else if(t.a == 1.0 && t.b == 0 && t.c == 0 && t.d == 1.0){// LandscapeRightdegress = 0;} else if(t.a == -1.0 && t.b == 0 && t.c == 0 && t.d == -1.0){// LandscapeLeftdegress = 180;}}return degress;
}
2. naturalSize 不正确的坑
之前用模拟器录屏得到一个视频,调用[videoTrack naturalSize]的时候,得到的size为 (CGSize) naturalSize = (width = 828, height = 0.02734375),明显是不正确的,这个暂时没有找到解决办法,知道的同学可以在下面评论一下。
3. 视频黑边问题
视频黑边应该是视频源尺寸和目标尺寸比例不一致造成的,需要根据原尺寸的比例算出目标尺寸
CGSize targetSize = CGSizeMake(videoAsset.pixelWidth, videoAsset.pixelHeight);//尺寸过大才压缩,否则不更改targetSizeif (targetSize.width * targetSize.height > 1280 * 720) {int width = 0,height = 0;if (targetSize.width > targetSize.height) {width = 1280;height = 1280 * targetSize.height/targetSize.width;}else {width = 720;height = 720 * targetSize.height/targetSize.width;}targetSize = CGSizeMake(width, height);}else if (targetSize.width == 0 || targetSize.height == 0) {//异常情况处理targetSize = CGSizeMake(720, 1280);}
相关文章:
iOS 视频压缩 mov转mp4 码率
最近还是因为IM模块的功能,IOS录制MOV视频发送后,安卓端无法播放,迫不得已兼容将MOV视频转为MP4发送。 其中mov视频包括4K/24FPS、4K/30FPS、4K/60FPS、720p HD/30FPS、1080p HD/30FPS、1080p HD/60FPS! 使用AVAssetExportSessi…...
基于Esp32-cam在无外部 PIR 传感器情况下实现运动检测(一)
关于无需外部 PIR 传感器的 Esp32-cam 运动检测的世界最佳指南。从 A 到 Z 您需要了解的一切 无需外部 PIR 传感器的 Esp32-cam 运动检测一直是该网站上最热门的话题。 几个月来我付出了很大的努力来完善本指南,但它始终感觉不够好。 所以我继续工作。现在我感到很满足。 现在…...
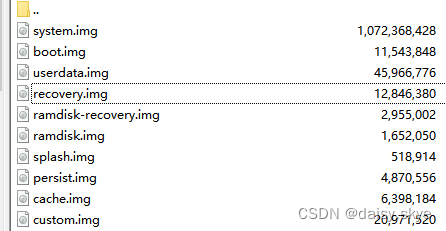
安卓recovery流程分析(编译、界面、图片)
目录 recovery 界面菜单 recovery 界面操作 recovery 启动流程 recovery 编译makefile recovery 图片大小 ramdisk、boot.img、recovery.img之间的关系 authordaisy.skye的博客_CSDN博客-嵌入式,Qt,Linux领域博主 recovery 界面菜单 recovery 界面显示 android recoveryuse …...
唤醒手腕 2023年 B 站课程 Golang 语言详细教程笔记(更新中)
0001、1000集GO语言Flag毒誓 唤醒手腕UP猪Pig目标花费1000集进行讲解Go语言视频学习教程(有趣的灵魂,适合小白,不适合巨佬),从2023年3月19日开始,将会一直每天更新,准备在2024年5月1日之前更新…...
的大小或分辨率)
Qt获取屏幕(桌面)的大小或分辨率
Qt提供QDesktopWidget和QScreen两个类获取屏幕大小。Qt5开始,QDesktopWidget官方不建议使用,改为QScreen。Qt 6.0 及之后版本,QDesktopWidget 已从QtWidgets 模块中被彻底移除。 QDesktopWidget QDesktopWidget 提供了详细的位置信息&#…...
第4讲:vue内置命令(文本插值,属性绑定,v-text,v-html)
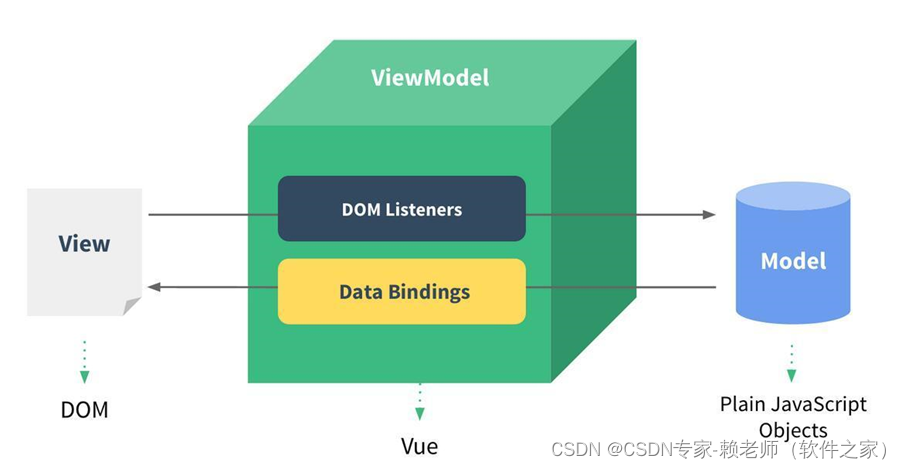
MVVM 什么是MVVM? MVVM是Model-View-ViewModel的简写。它本质上就是MVC 的改进版。MVVM 就是将其中的View 的状态和行为抽象化,让我们将视图 UI 和业务逻辑分开。 View层: 视图层 在我们前端开发中,通常就是 DOM 层。 主要的作用是…...

vue实现自动生成路由,非手动创建,含避坑点
自动生成路由js文件:autoRouter.js let routeArr []; let baseUrl /components/settingManagement/; const content require.context(../components/settingManagement/, true, /\.vue$/); content.keys().forEach(e > {const path e.substring(e.indexOf(/…...
数据挖掘note(赵老师语录)
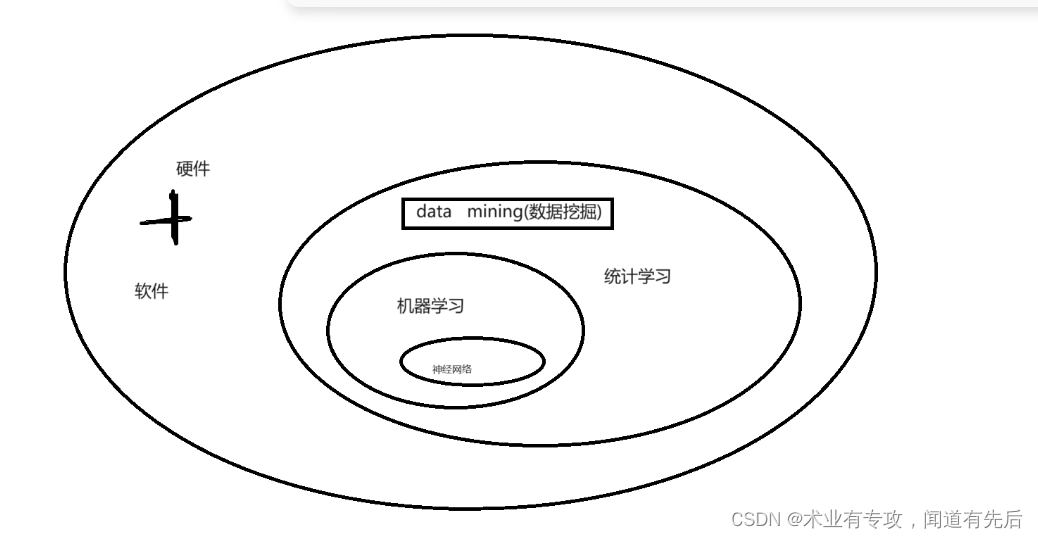
(一) 数据挖掘一般分为机器学习和统计学习,大数据学的课程一般是关于机器学习,我们学的浅,主要关于统计学习,示意图如下所示: 这是一个大数据时代,但是数据挖掘的利用率不足0.5%&am…...
秋招在线人才测评考什么内容?
又是一年招聘季,各大高校都会组织校园招聘,这次我们就来了解一下秋季校园招聘究竟考什么。近些年来校园秋招已经广泛采用在线测评,尤其各行业龙头大厂们,网申、在线测评、小组无领导讨论,一面二面......各类纷杂的面试…...
LeetCode算法二叉树—236. 二叉树的最近公共祖先
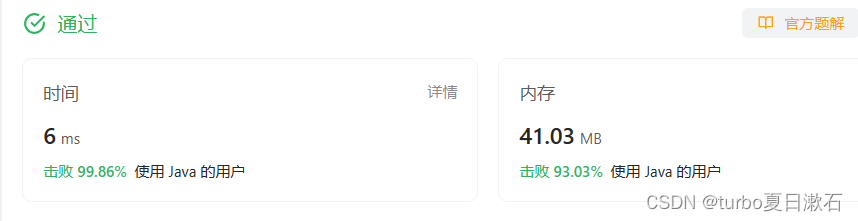
目录 236. 二叉树的最近公共祖先 代码: 运行结果: 给定一个二叉树, 找到该树中两个指定节点的最近公共祖先。 百度百科中最近公共祖先的定义为:“对于有根树 T 的两个节点 p、q,最近公共祖先表示为一个节点 x,满足…...
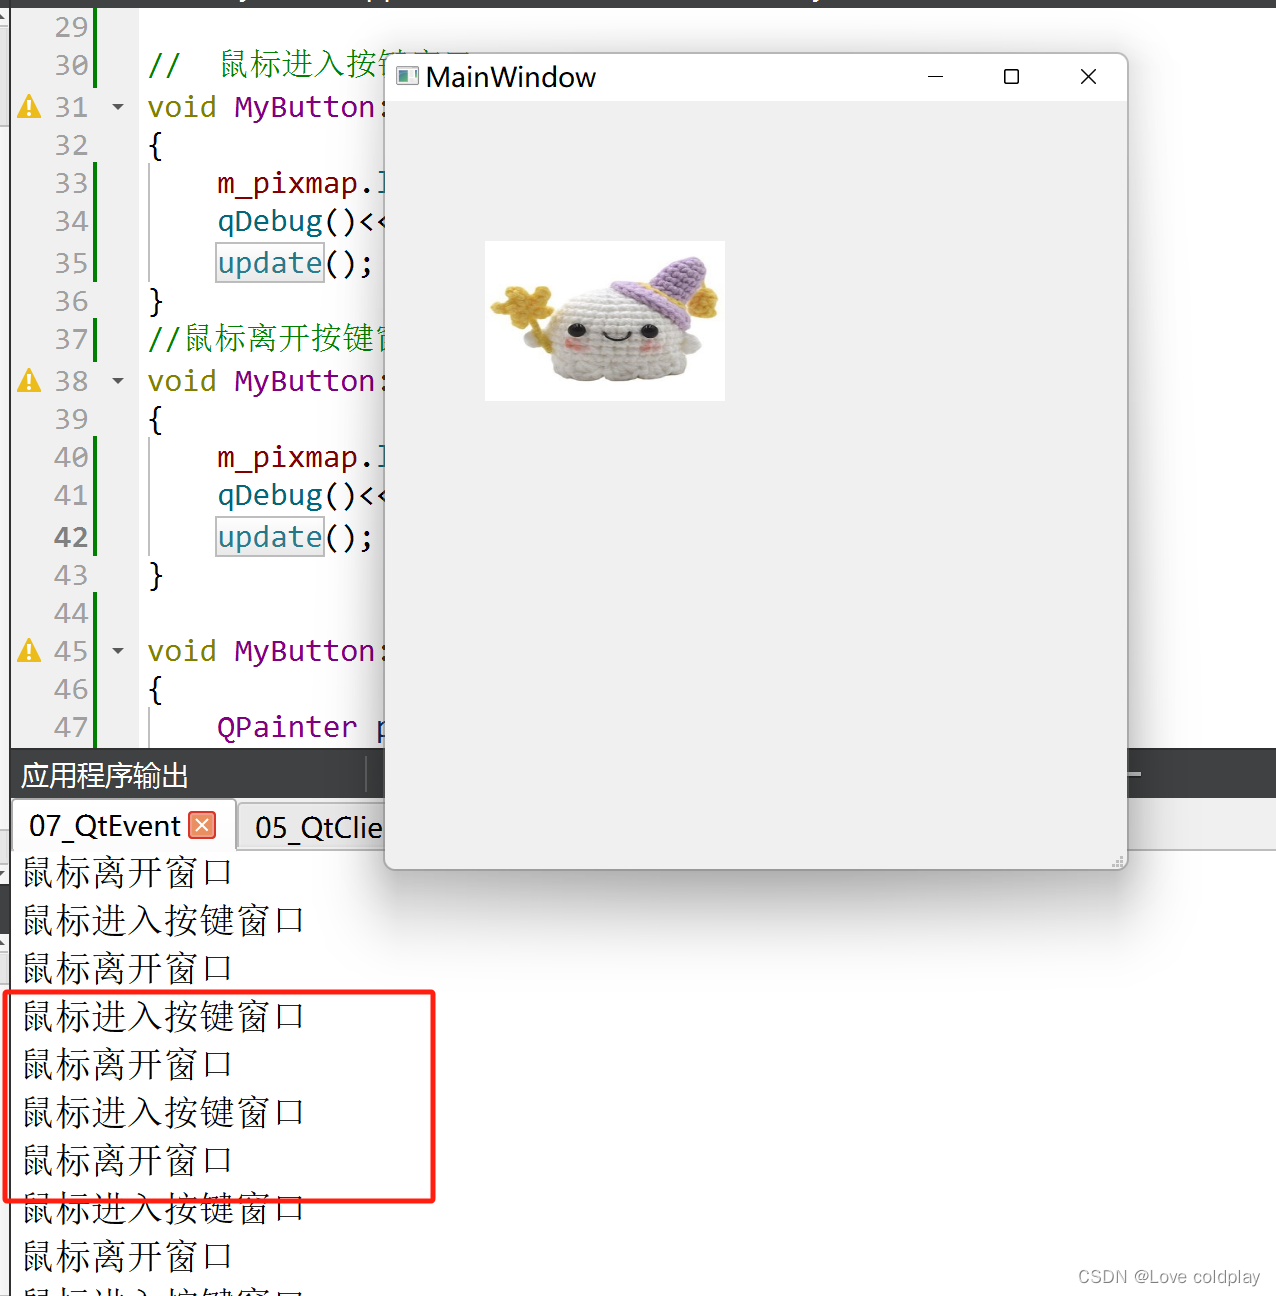
Qt事件处理
1. 事件 众所周知Qt是一个基于C的框架,主要用来开发带窗口的应用程序(不带窗口的也行,但不是主流)。我们使用的基于窗口的应用程序都是基于事件,其目的主要是用来实现回调(因为只有这样程序的效率才是最高…...
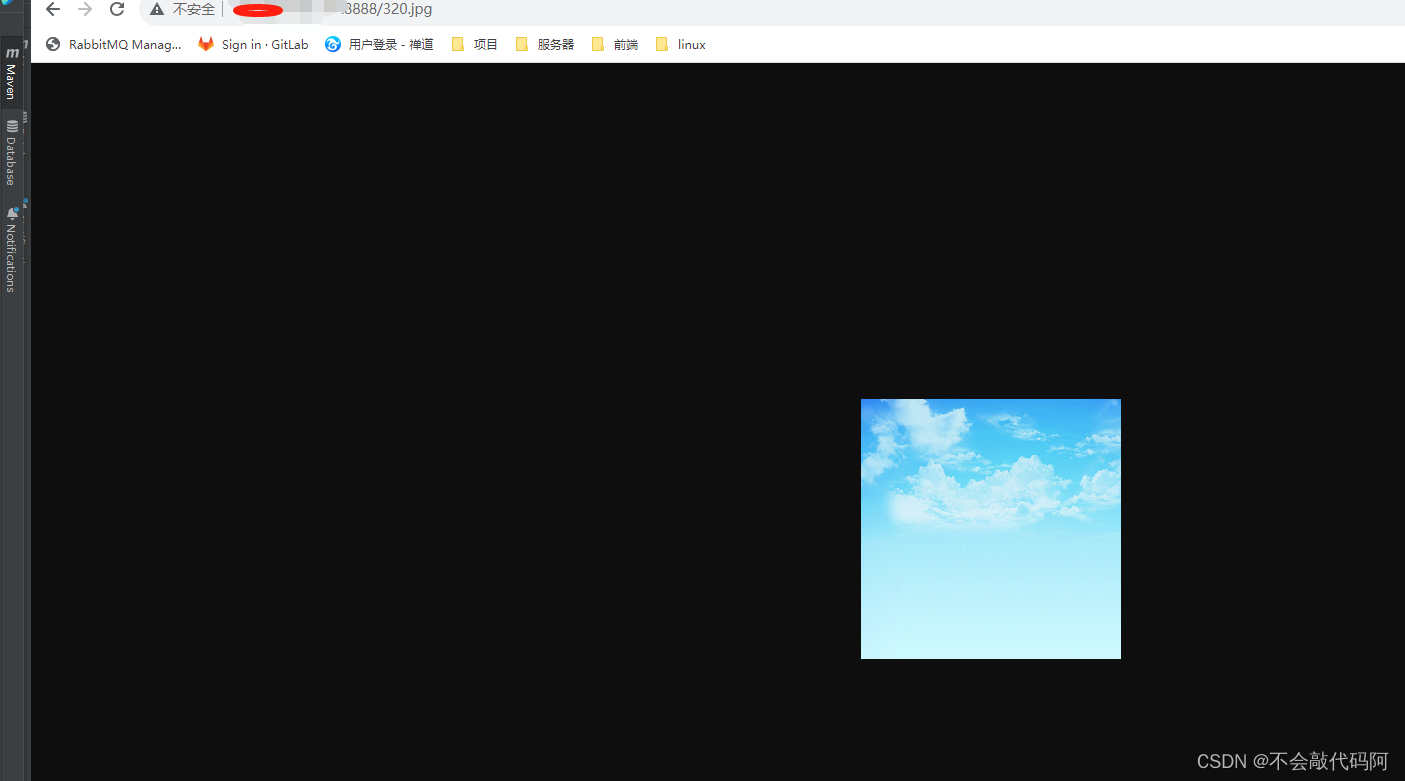
宝塔nginx搭建Ftp文件服务器
一:创建FTP 填入账号密码后,选择根目录,这个根目录就是nginx要代理的目录 二:配置nginx root的地址就是上面填的FTP根目录 三:http访问 服务器ip端口号加图片 例如我放了一个320.jp 我服务器ip是110.120.120.120 那…...

SAP和APS系统订单BOM核对(SAP配置BOM攻略九)
配置订单BOM因为要考虑历史ECN、特征语法、BOM语法,是最复杂的一个算法结果,为了摆脱这种被动的场景,博主开发了一个被动核对数据的程序来保障数据质量。 今天是APS系统上线的第三天,我们的核对程序在昨天上线,面对大量…...
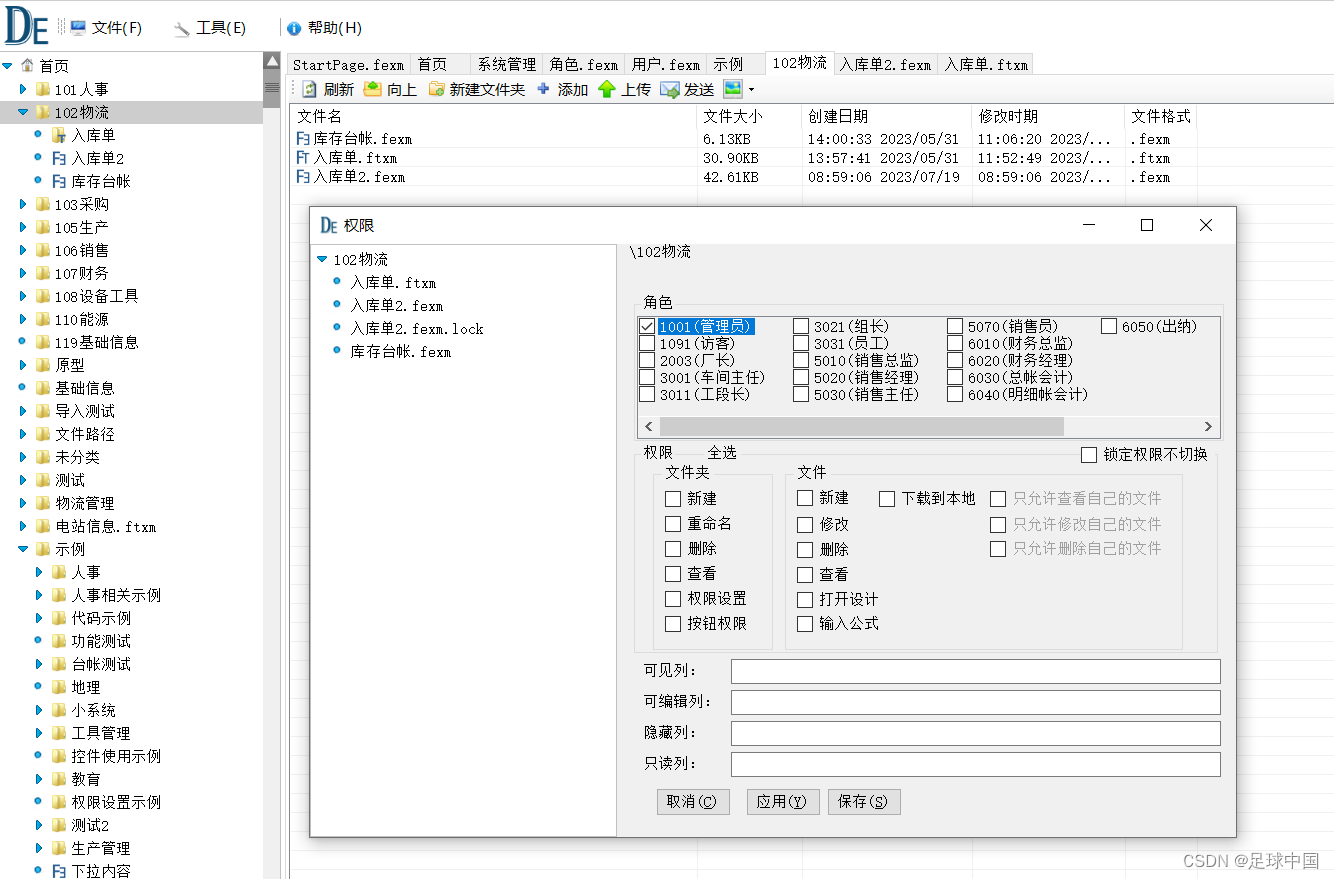
ExcelServer EXCEL服务器使用- 用户、角色权限配置
Excel文件服务器搭建 搭建Excel服务器 1、登录 默认 用户名 Admin 密码 3 2、角色管理 添加修改角色 角色配置在 系统管理->角色.fexm文件夹下 可以像修改excel文件一样 修改角色 3、用户管理 添加修改用户 用户的修改在 系统管理->用户.fexm 可以像excel一样编辑用户…...
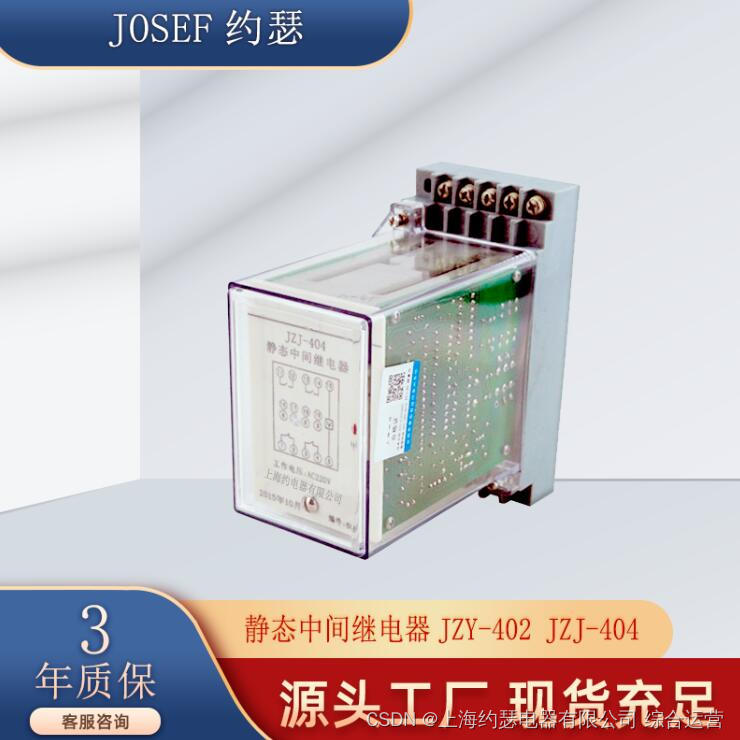
JOSEF约瑟 静态中间继电器JZY-402 JZJ-404 AC220V 触点形式两开两闭
系列型号: JZY(J)-400静态中间继电器 JZ-Y-401静态中间继电器JZ-Y-402静态中间继电器 JZ-Y-403静态中间继电器JZ-Y-404静态中间继电器 JZ-Y-405静态中间继电器JZ-Y-406静态中间继电器 JZ-Y-407静态中间继电器JZ-Y-408静态中间继电器 JZ-Y-409静态中间继电器JZ…...

C#并发编程的实现方式
一、多线程:是一种并发编程技术,它允许一个应用程序同时执行多个线程。每个线程都有自己的指令集和堆栈,可以在不同的CPU核心上并行运行,或者在一个CPU核心上通过时间片轮转的方式交替运行。多线程的主要优点是可以利用多核处理器…...
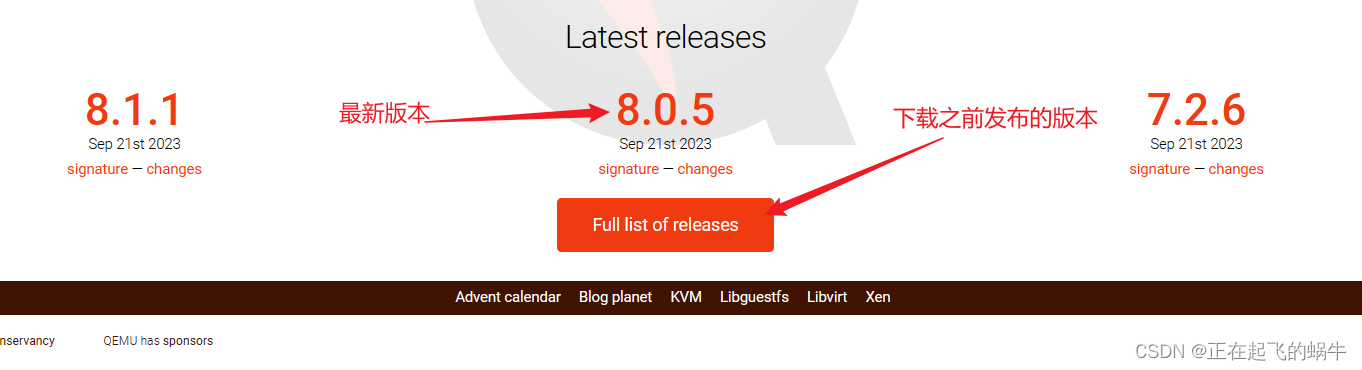
qemu源码下载和安装
1、QEMU源码下载 1、官网:https://www.qemu.org/; 2、在“Full of releases”中可以找到以往发布过的版本; 2、源码编译 # 配置命令,生成Makefile。其中--target-list指定编译哪些些架构对应的目录,默认是所有架构都编…...
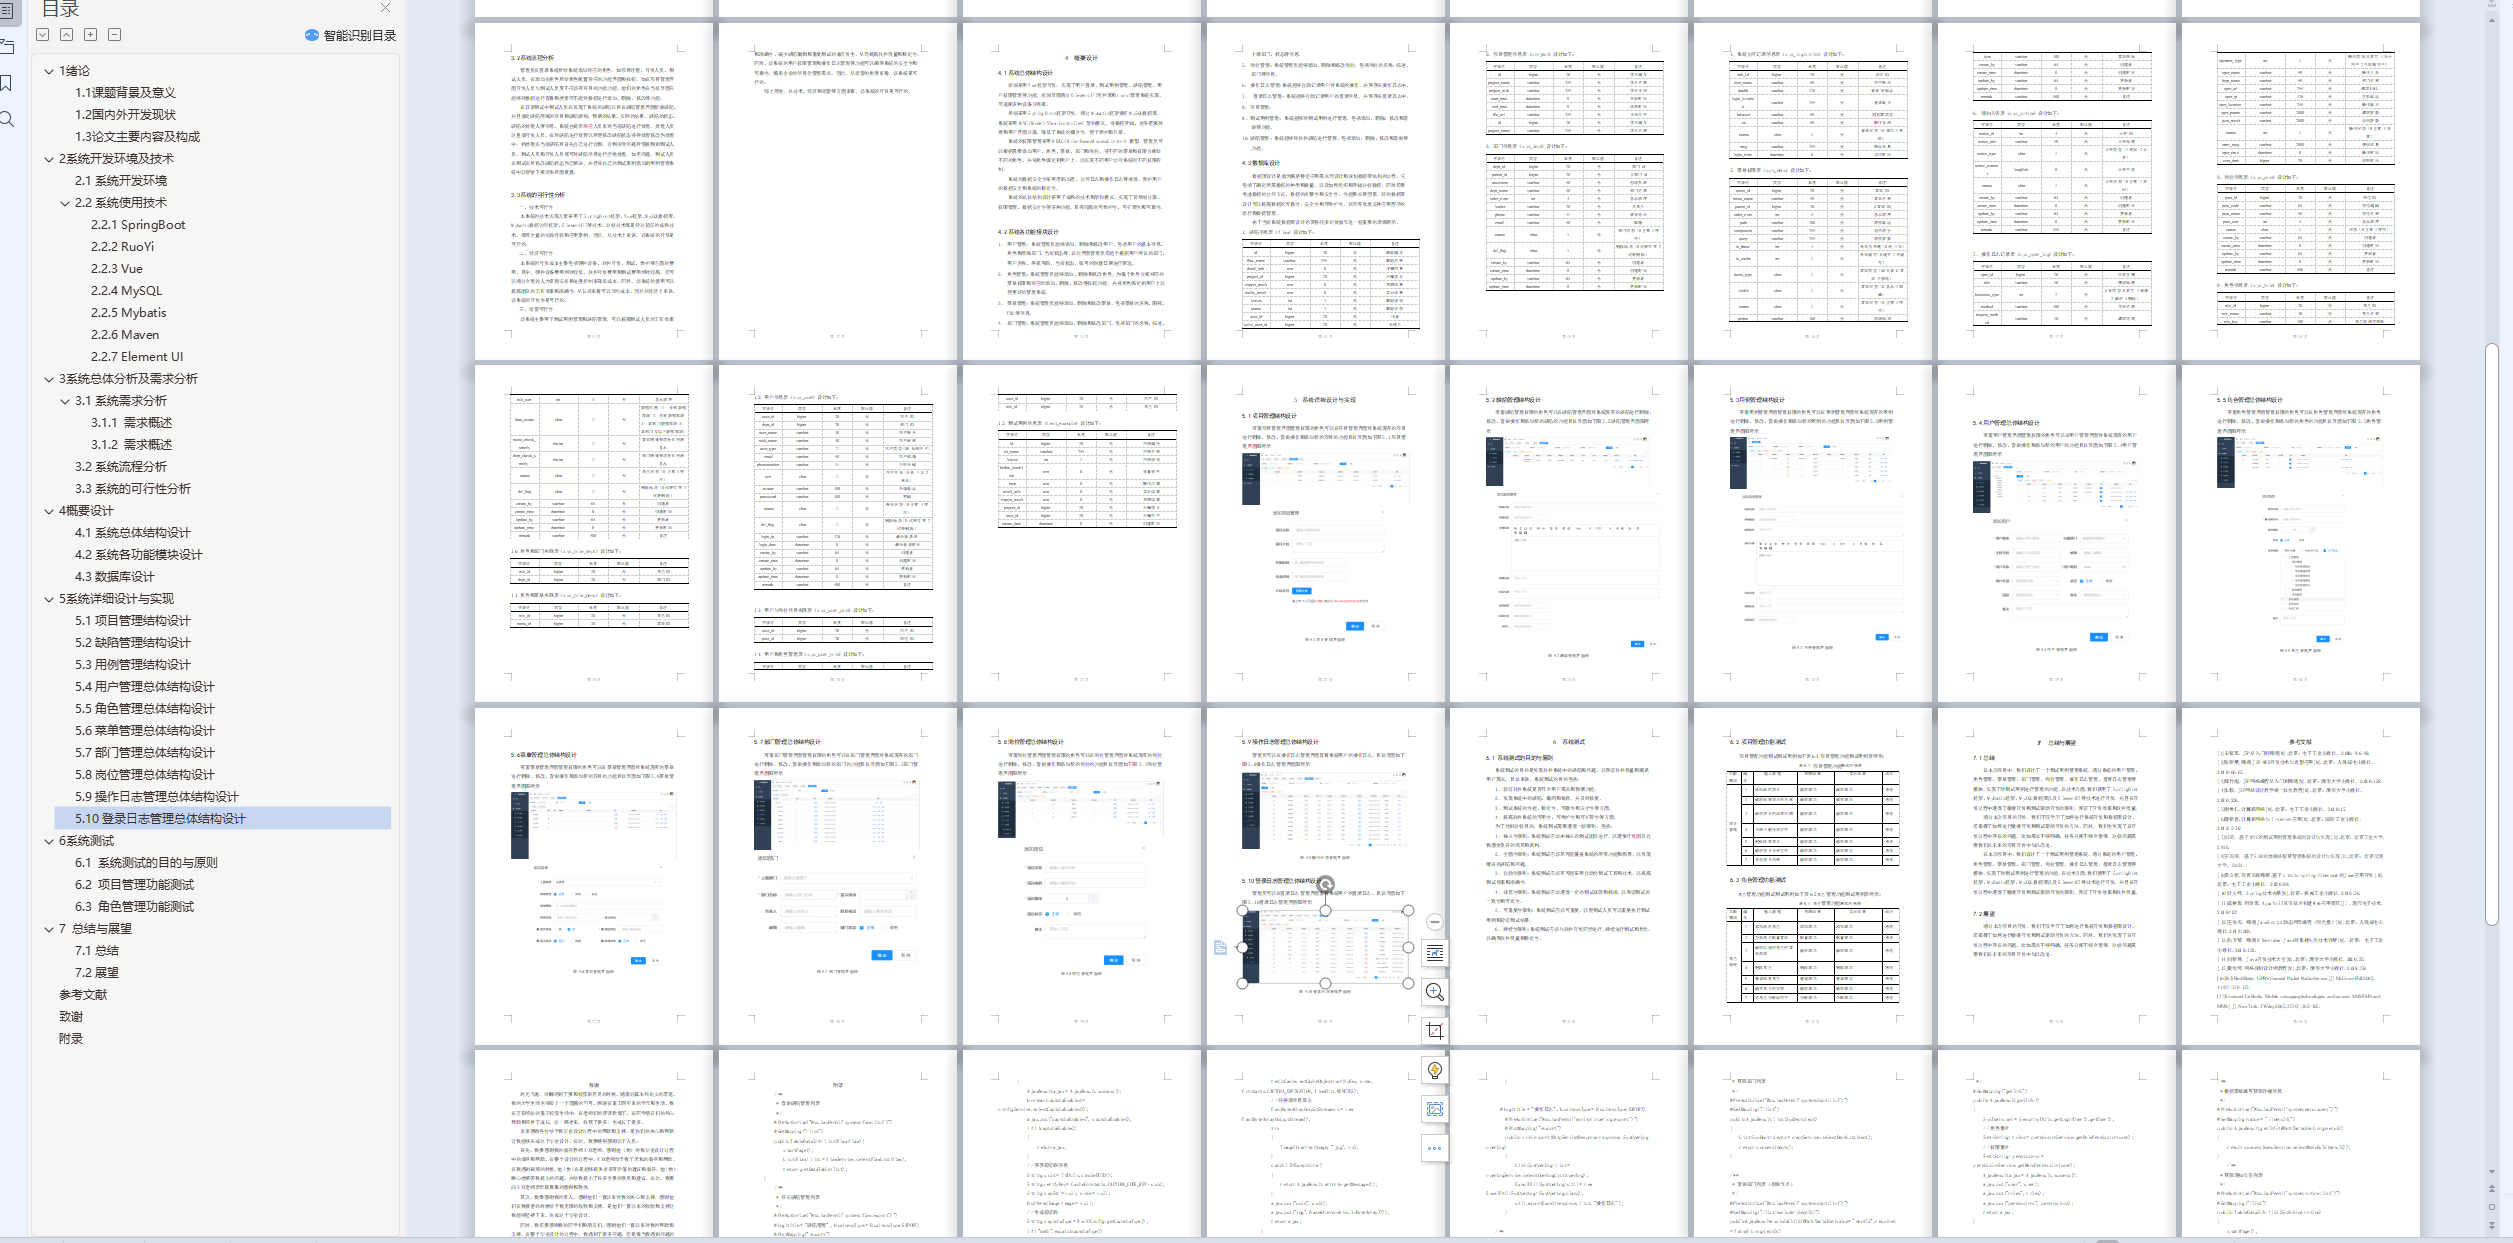
计算机,软件工程,网络工程,大数据专业毕业设计选题有哪些(附源码获取)
计算机,软件工程,网络工程,大数据专业毕业设计选题有哪些?(附源码获取) ✌全网粉丝20W,csdn特邀作者、博客专家、CSDN新星计划导师、java领域优质创作者,博客之星、掘金/华为云/阿里云/InfoQ等平台优质作者、专注于J…...
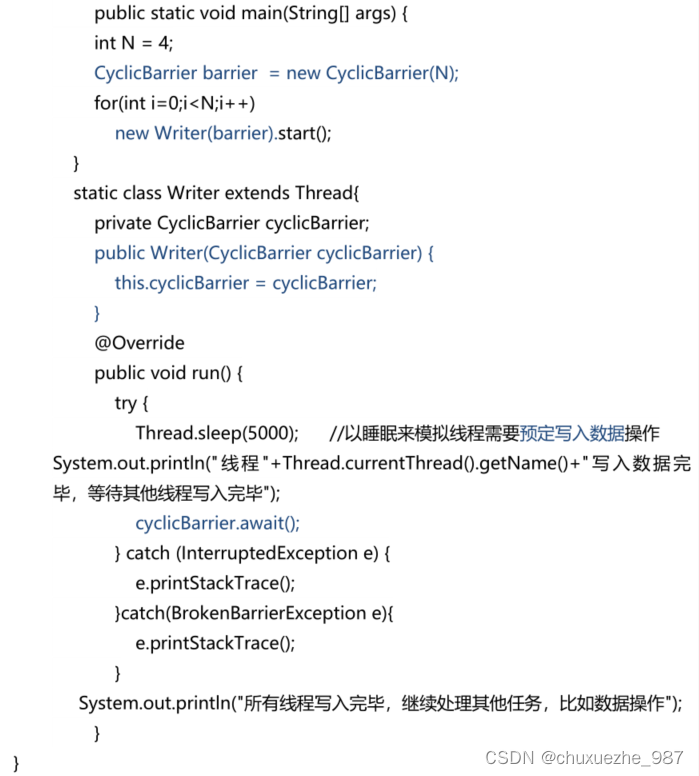
CyclicBarrier 、CountDownLatch 、Semaphore 的用法
1 CountDownLatch(线程计数器 ) CountDownLatch类位于java.util.concurrent 包下,利用它可以实现类似计数器的功能。比如有一个任务 A,它要等待其他 4 个任务执行完毕之后才能执行,此时就可以利用 CountDownLatch 来实…...

RestTemplate发送HTTPS请求
RestTemplate发送HTTPS请求 基础知识: Https原理与工作流程及证书校验:https://www.cnblogs.com/zjdxr-up/p/14359904.html 忽略ssl证书的方式配置: import lombok.extern.slf4j.Slf4j;import org.springframework.http.client.SimpleClien…...

终极图形化方案:Applite如何让Mac软件管理变得简单快速
终极图形化方案:Applite如何让Mac软件管理变得简单快速 【免费下载链接】Applite User-friendly GUI macOS application for Homebrew Casks 项目地址: https://gitcode.com/gh_mirrors/ap/Applite 还在为Mac上的软件安装、更新和卸载而烦恼吗?Ap…...

ARM RAS架构:错误记录与注入机制详解
1. ARM RAS架构概述在现代计算系统中,可靠性、可用性和可服务性(Reliability, Availability, and Serviceability, RAS)已成为关键设计指标。ARM架构通过一系列硬件机制实现这些特性,其中错误记录与注入机制是核心组成部分。这套机制允许系统检测、记录硬…...

终极指南:如何用3步清理Windows右键菜单,让电脑操作效率翻倍
终极指南:如何用3步清理Windows右键菜单,让电脑操作效率翻倍 【免费下载链接】ContextMenuManager 🖱️ 纯粹的Windows右键菜单管理程序 项目地址: https://gitcode.com/gh_mirrors/co/ContextMenuManager 你是否曾被Windows右键菜单的…...

每天140万亿次“Token“在狂奔!这组数据背后,有人赚疯,有人焦虑到失眠
> 就在今天,你刷的每一条AI回复,都在创造历史。0101 你随口的一句话,正在"吃掉"一座超级计算机你有没有这种感觉——早上用豆包写了个周报,中午让Kimi帮你总结了一份PDF,下午在微信里让AI画了一张插画&am…...

WordPress AI内容创作栈:基于Claude API的自动化写作与运维实践
1. 项目概述:一个为WordPress量身定制的AI内容创作栈最近在折腾一个内容站,发现内容创作和日常运维的重复性工作实在太多了。从构思文章大纲、撰写初稿,到批量处理图片、优化SEO元数据,再到回复评论、生成周报,这些工作…...

PostgreSQL COPY命令实战:从CSV导入到导出的完整数据流处理
1. 为什么你需要掌握COPY命令 如果你经常需要把Excel表格或CSV文件的数据导入PostgreSQL数据库,或者反过来把数据库查询结果导出成文件,那么COPY命令就是你的瑞士军刀。我见过太多人还在用Python脚本逐行读写CSV,不仅效率低,代码还…...

从零构建高效项目脚手架:自动化项目初始化与最佳实践
1. 项目概述:一个为开发者准备的“瑞士军刀”式工具集最近在GitHub上闲逛,发现了一个挺有意思的项目,叫jpKuji/clawstrate。乍一看这个名字,有点摸不着头脑,既不像常见的框架名,也不像某个具体的应用。点进…...

ESXi 6.7 能直接升级到 8.0 吗?正确升级路径一次讲清
很多运维新手在服务器虚拟化运维中,想把老旧的 ESXi 6.7 主机直接跨版本升级到 ESXi 8.0,省去中间步骤、节约时间成本,但实际操作中总会出现升级报错、镜像不兼容、引导失败等问题。其实官方明确规定:ESXi 6.7 不能直接越级升级到…...

珠海市高新技术企业资质认定流程及时间
珠海市暂未发布2026年高企申报通知,往年高新技术企业认定工作通常于每年5月至9月分批开展,目前非申报窗口期,建议您提前准备以备下一轮申报。根据往年(如2025年)的受理安排,申报主要通过线上平台进行&#…...

构筑数字韧性:从零信任到内生安全,打造面向未来的数字基础设施
1. 从一篇行业评论引发的深度思考:我们该如何构筑数字时代的“安全地基”?前几天,行业媒体EE Times上的一篇旧文被重新翻了出来,标题挺抓人眼球,大致是在讨论某个国家在关键技术领域的主导地位是否面临挑战。抛开其中地…...