从零开始:深入理解Kubernetes架构及安装过程
K8s环境搭建
文章目录
- K8s环境搭建
- 集群类型
- 安装方式
- 环境规划
- 克隆三台虚拟机
- 系统环境配置
- 集群搭建
- 初始化集群(仅在master节点)
- 配置环境变量(仅在master节点)
- 工作节点加入集群(knode1节点及knode2节点)
- 安装calico网络(仅master节点)
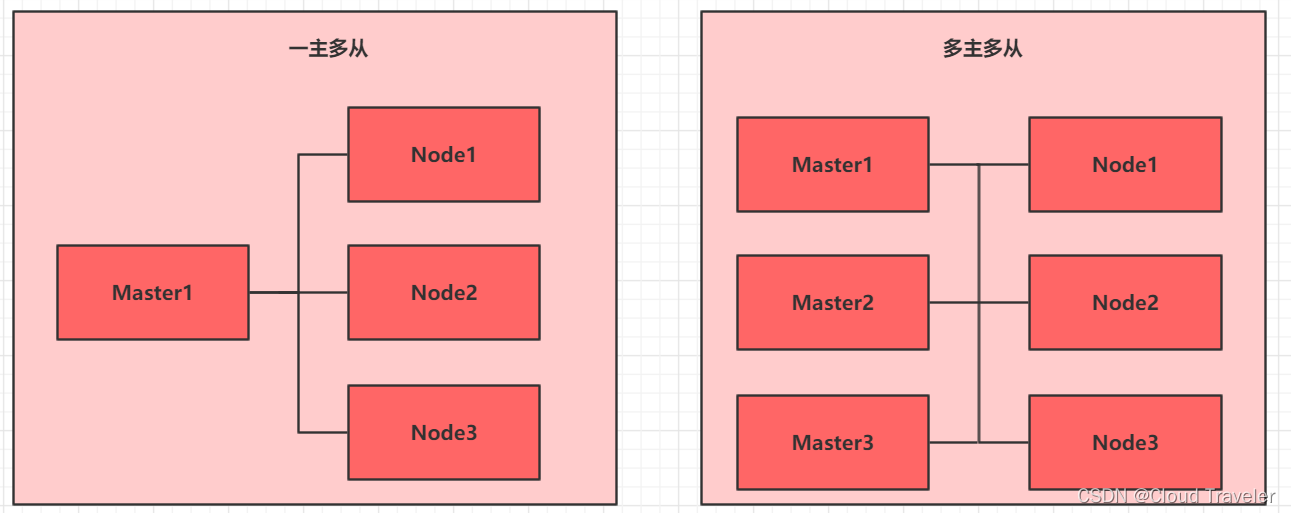
集群类型
- Kubernetes 集群大致分为两类:一主多从和多主多从。
- 一主多从(单 master ):一个 Master 节点和多台Node 节点,搭建简单,但是有单机故障风险,适合用于测试环境。
- 多主多从(高可用):多台 Master 节点和多台 Node节点,搭建麻烦,安全性高,适合用于生产环境。
安装方式
- Kubernetes 有多种部署方式,目前主流的方式有 kubeadm 、minikube 、二进制包。
- ① minikube:一个用于快速搭建单节点的 Kubernetes 工具。
- ② kubeadm:一个用于快速搭建Kubernetes 集群的工具(可以用于生产环境)。
- ③ 二进制包:从官网上下载每个组件的二进制包,依次去安装(建议生产环境使用)。
环境规划
- 操作系统版本
Centos Stream 8- 安装源可访问阿里云开源镜像站或其他镜像站下载
- 环境需要用到
3台虚拟机,需要联通外网,网卡类型 NAT 或者 桥接。- 本文通过脚本文件快速搭建 k8s集群
| 主机名 | ip地址 | 内存 | 磁盘 | 处理器 |
|---|---|---|---|---|
| Kmaster | 192.168.129.200 | 8GB | 100GB | 2 |
| Knode1 | 192.168.129.201 | 8GB | 100GB | 2 |
| Knode2 | 192.168.129.202 | 8GB | 100GB | 2 |
也可根据自身电脑性能进行内存和存盘的分配,处理器每个节点最少两颗。
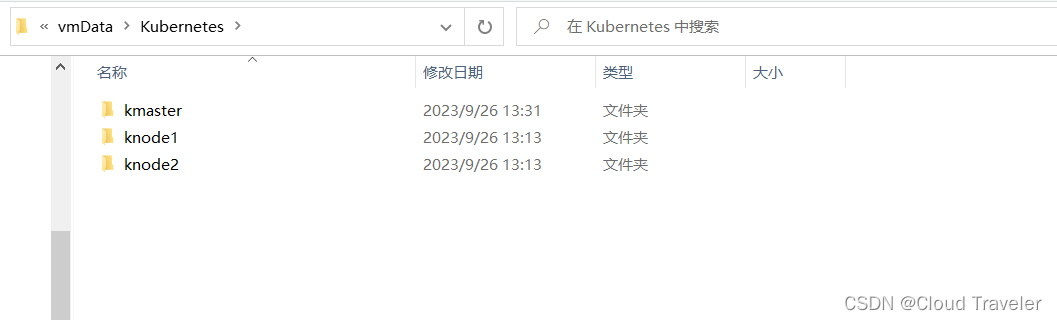
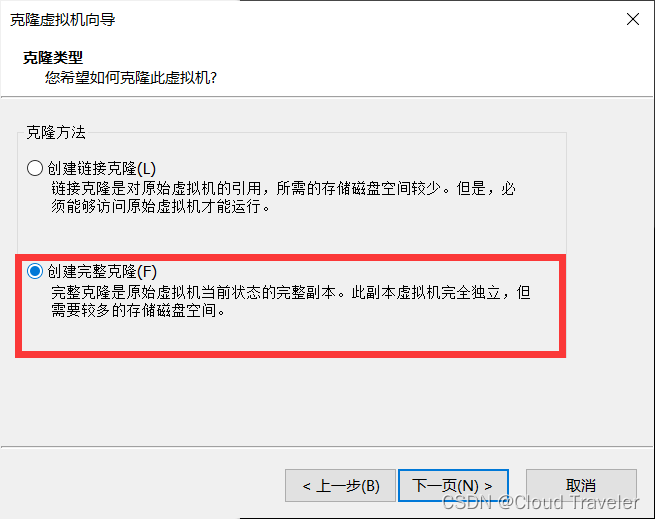
克隆三台虚拟机
准备三个文件夹
一定要注意,是完整克隆
启动,修改3台虚拟机主机名及ip地址。
注意:修改ip地址的时候,看清楚你的网卡名字叫什么,我的是 ifcfg-ens160.
修改完成之后,关机拍快照。
# kmaster 节点
[root@tmp ~]# hostnamectl set-hostname kmaster
[root@kmaster ~]# cd /etc/sysconfig/network-scripts/
[root@kmaster network-scripts]# vi ifcfg-ens160
[root@kmaster network-scripts]# cat ifcfg-ens160
TYPE=Ethernet
BOOTPROTO=none
NAME=ens160
DEVICE=ens160
ONBOOT=yes
IPADDR=192.168.129.200
NETMASK=255.255.255.0
GATEWAY=192.168.129.2
DNS1=192.168.129.2# knode1 节点
[root@tmp ~]# hostnamectl set-hostname knode1
[root@knode1 ~]# cd /etc/sysconfig/network-scripts/
[root@knode1 network-scripts]# vi ifcfg-ens160
[root@knode1 network-scripts]# cat ifcfg-ens160
TYPE=Ethernet
BOOTPROTO=none
NAME=ens160
DEVICE=ens160
ONBOOT=yes
IPADDR=192.168.129.201
NETMASK=255.255.255.0
GATEWAY=192.168.129.2
DNS1=192.168.129.2# knode2 节点
[root@tmp ~]# hostnamectl set-hostname knode2
[root@knode2 ~]# cd /etc/sysconfig/network-scripts/
[root@knode2 network-scripts]# vi ifcfg-ens160
[root@knode2 network-scripts]# cat ifcfg-ens160
TYPE=Ethernet
BOOTPROTO=none
NAME=ens160
DEVICE=ens160
ONBOOT=yes
IPADDR=192.168.129.202
NETMASK=255.255.255.0
GATEWAY=192.168.129.2
DNS1=192.168.129.2
系统环境配置
点击获取脚本及其配置文件
本脚本针对网卡为 ens160,如果不是,请修改脚本网卡指定。
K8s版本 1.27.0
[root@kmaster ~]# vim Stream8-k8s-v1.27.0.sh
#!/bin/bash
# CentOS stream 8 install kubenetes 1.27.0
# the number of available CPUs 1 is less than the required 2
# k8s 环境要求虚拟cpu数量至少2个
# 使用方法:在所有节点上执行该脚本,所有节点配置完成后,复制第11步语句,单独在master节点上进行集群初始化。
#1 rpm
echo '###00 Checking RPM###'
yum install -y yum-utils vim bash-completion net-tools wget
echo "00 configuration successful ^_^"
#Basic Information
echo '###01 Basic Information###'
hostname=`hostname`
# 网卡为 ens160
hostip=$(ifconfig ens160 |grep -w "inet" |awk '{print $2}')
echo 'The Hostname is:'$hostname
echo 'The IPAddress is:'$hostip#2 /etc/hosts
echo '###02 Checking File:/etc/hosts###'
hosts=$(cat /etc/hosts)
result01=$(echo $hosts |grep -w "${hostname}")
if [[ "$result01" != "" ]]
thenecho "Configuration passed ^_^"
elseecho "hostname and ip not set,configuring......"echo "$hostip $hostname" >> /etc/hostsecho "configuration successful ^_^"
fi
echo "02 configuration successful ^_^"#3 firewall & selinux
echo '###03 Checking Firewall and SELinux###'
systemctl stop firewalld
systemctl disable firewalld
se01="SELINUX=disabled"
se02=$(cat /etc/selinux/config |grep -w "^SELINUX")
if [[ "$se01" == "$se02" ]]
thenecho "Configuration passed ^_^"
elseecho "SELinux Not Closed,configuring......"sed -i 's/^SELINUX=enforcing/SELINUX=disabled/g' /etc/selinux/configecho "configuration successful ^_^"
fi
echo "03 configuration successful ^_^"#4 swap
echo '###04 Checking swap###'
swapoff -a
sed -i "s/^.*swap/#&/g" /etc/fstab
echo "04 configuration successful ^_^"#5 docker-ce
echo '###05 Checking docker###'
yum-config-manager --add-repo http://mirrors.aliyun.com/docker-ce/linux/centos/docker-ce.repo
echo 'list docker-ce versions'
yum list docker-ce --showduplicates | sort -r
yum install -y docker-ce
systemctl start docker
systemctl enable docker
cat <<EOF > /etc/docker/daemon.json
{"registry-mirrors": ["https://cc2d8woc.mirror.aliyuncs.com"]
}
EOF
systemctl restart docker
echo "05 configuration successful ^_^"#6 iptables
echo '###06 Checking iptables###'
cat <<EOF > /etc/sysctl.d/k8s.conf
net.bridge.bridge-nf-call-ip6tables = 1
net.bridge.bridge-nf-call-iptables = 1
net.ipv4.ip_forward = 1
EOF
sysctl -p /etc/sysctl.d/k8s.conf
echo "06 configuration successful ^_^"#7 cgroup(systemd/cgroupfs)
echo '###07 Checking cgroup###'
containerd config default > /etc/containerd/config.toml
sed -i "s#registry.k8s.io/pause#registry.aliyuncs.com/google_containers/pause#g" /etc/containerd/config.toml
sed -i 's/SystemdCgroup = false/SystemdCgroup = true/g' /etc/containerd/config.toml
systemctl restart containerd
echo "07 configuration successful ^_^"#8 kubenetes.repo
echo '###08 Checking repo###'
cat <<EOF > /etc/yum.repos.d/kubernetes.repo
[kubernetes]
name=Kubernetes
baseurl=https://mirrors.aliyun.com/kubernetes/yum/repos/kubernetes-el7-x86_64/
enabled=1
gpgcheck=1
repo_gpgcheck=1
gpgkey=https://mirrors.aliyun.com/kubernetes/yum/doc/yum-key.gpg https://mirrors.aliyun.com/kubernetes/yum/doc/rpm-package-key.gpg
EOF
echo "08 configuration successful ^_^"#9 crictl
echo "Checking crictl"
cat <<EOF > /etc/crictl.yaml
runtime-endpoint: unix:///run/containerd/containerd.sock
image-endpoint: unix:///run/containerd/containerd.sock
timeout: 5
debug: false
EOF
echo "09 configuration successful ^_^"#10 kube1.27.0
echo "Checking kube"
yum install -y kubelet-1.27.0 kubeadm-1.27.0 kubectl-1.27.0 --disableexcludes=kubernetes
systemctl enable --now kubelet
echo "10 configuration successful ^_^"
echo "Congratulations ! The basic configuration has been completed"#11 Initialize the cluster
# 仅在master主机上做集群初始化
# kubeadm init --image-repository registry.aliyuncs.com/google_containers --kubernetes-version=v1.27.0 --pod-network-cidr=10.244.0.0/16
在三台节点上分别运行脚本
[root@kmaster ~]# sh Stream8-k8s-v1.27.0.sh
[root@knode1 ~]# sh Stream8-k8s-v1.27.0.sh
[root@knode2 ~]# sh Stream8-k8s-v1.27.0.sh# ***kmaster输出记录***
###00 Checking RPM###
CentOS Stream 8 - AppStream
CentOS Stream 8 - BaseOS
CentOS Stream 8 - Extras
CentOS Stream 8 - Extras common packages
Dependencies resolved.
=============================================================================================================================================================Package                                                                                    Architecture
=============================================================================================================================================================
Installing:bash-completion                  noarch                                                   net-tools                        x86_64
......略......Installed:conntrack-tools-1.4.4-11.el8.x86_64              cri-tools-1.26.0-0.x86_64             kubeadm-1.27.0-0.x86_64            kubectl-1.27.0-0.x86_64          libnetfilter_queue-1.0.4-3.el8.x86_64            socat-1.7.4.1-1.el8.x86_64           Complete!
Created symlink /etc/systemd/system/multi-user.target.wants/kubelet.service → /usr/lib/systemd/system/kubelet.service.
10 configuration successful ^_^
Congratulations ! The basic configuration has been completed# ***knode1和knode2输出记录与kmaster一致***
集群搭建
初始化集群(仅在master节点)
复制脚本中最后一段命令执行,进行
集群初始化
[root@kmaster ~]# kubeadm init --image-repository registry.aliyuncs.com/google_containers --kubernetes-version=v1.27.0 --pod-network-cidr=10.244.0.0/16
[init] Using Kubernetes version: v1.27.0
[preflight] Running pre-flight checks[WARNING FileExisting-tc]: tc not found in system path
[preflight] Pulling images required for setting up a Kubernetes cluster
[preflight] This might take a minute or two, depending on the speed of your internet connection
[preflight] You can also perform this action in beforehand using 'kubeadm config images pull'
W0719 10:48:35.823181   13745 images.go:80] could not find officially supported version of etcd for Kubernetes v1.27.0, falling back to the nearest etcd vers
W0719 10:48:51.007564   13745 checks.go:835] detected that the sandbox image "registry.aliyuncs.com/google_containers/pause:3.6" of the container runtime is
[certs] Using certificateDir folder "/etc/kubernetes/pki"
[certs] Generating "ca" certificate and key
[certs] Generating "apiserver" certificate and key
[certs] apiserver serving cert is signed for DNS names [kmaster kubernetes kubernetes.default kubernetes.default.svc kubernetes.default.svc.cluster.local] an
[certs] Generating "apiserver-kubelet-client" certificate and key
[certs] Generating "front-proxy-ca" certificate and key
[certs] Generating "front-proxy-client" certificate and key
[certs] Generating "etcd/ca" certificate and key
[certs] Generating "etcd/server" certificate and key
[certs] etcd/server serving cert is signed for DNS names [kmaster localhost] and IPs [192.168.100.150 127.0.0.1 ::1]
[certs] Generating "etcd/peer" certificate and key
[certs] etcd/peer serving cert is signed for DNS names [kmaster localhost] and IPs [192.168.100.150 127.0.0.1 ::1]
[certs] Generating "etcd/healthcheck-client" certificate and key
[certs] Generating "apiserver-etcd-client" certificate and key
[certs] Generating "sa" key and public key
[kubeconfig] Using kubeconfig folder "/etc/kubernetes"
[kubeconfig] Writing "admin.conf" kubeconfig file
[kubeconfig] Writing "kubelet.conf" kubeconfig file
[kubeconfig] Writing "controller-manager.conf" kubeconfig file
[kubeconfig] Writing "scheduler.conf" kubeconfig file
[kubelet-start] Writing kubelet environment file with flags to file "/var/lib/kubelet/kubeadm-flags.env"
[kubelet-start] Writing kubelet configuration to file "/var/lib/kubelet/config.yaml"
[kubelet-start] Starting the kubelet
[control-plane] Using manifest folder "/etc/kubernetes/manifests"
[control-plane] Creating static Pod manifest for "kube-apiserver"
[control-plane] Creating static Pod manifest for "kube-controller-manager"
[control-plane] Creating static Pod manifest for "kube-scheduler"
[etcd] Creating static Pod manifest for local etcd in "/etc/kubernetes/manifests"
W0719 10:49:09.467378   13745 images.go:80] could not find officially supported version of etcd for Kubernetes v1.27.0, falling back to the nearest etcd vers
[wait-control-plane] Waiting for the kubelet to boot up the control plane as static Pods from directory "/etc/kubernetes/manifests". This can take up to 4m0s
[apiclient] All control plane components are healthy after 8.059875 seconds
[upload-config] Storing the configuration used in ConfigMap "kubeadm-config" in the "kube-system" Namespace
[kubelet] Creating a ConfigMap "kubelet-config" in namespace kube-system with the configuration for the kubelets in the cluster
[upload-certs] Skipping phase. Please see --upload-certs
[mark-control-plane] Marking the node kmaster as control-plane by adding the labels: [node-role.kubernetes.io/control-plane node.kubernetes.io/exclude-from-e
[mark-control-plane] Marking the node kmaster as control-plane by adding the taints [node-role.kubernetes.io/control-plane:NoSchedule]
[bootstrap-token] Using token: ddct8j.i2dloykyc0wpwdg3
[bootstrap-token] Configuring bootstrap tokens, cluster-info ConfigMap, RBAC Roles
[bootstrap-token] Configured RBAC rules to allow Node Bootstrap tokens to get nodes
[bootstrap-token] Configured RBAC rules to allow Node Bootstrap tokens to post CSRs in order for nodes to get long term certificate credentials
[bootstrap-token] Configured RBAC rules to allow the csrapprover controller automatically approve CSRs from a Node Bootstrap Token
[bootstrap-token] Configured RBAC rules to allow certificate rotation for all node client certificates in the cluster
[bootstrap-token] Creating the "cluster-info" ConfigMap in the "kube-public" namespace
[kubelet-finalize] Updating "/etc/kubernetes/kubelet.conf" to point to a rotatable kubelet client certificate and key
[addons] Applied essential addon: CoreDNS
[addons] Applied essential addon: kube-proxyYour Kubernetes control-plane has initialized successfully!To start using your cluster, you need to run the following as a regular user:mkdir -p $HOME/.kubesudo cp -i /etc/kubernetes/admin.conf $HOME/.kube/configsudo chown $(id -u):$(id -g) $HOME/.kube/configAlternatively, if you are the root user, you can run:export KUBECONFIG=/etc/kubernetes/admin.confYou should now deploy a pod network to the cluster.
Run "kubectl apply -f [podnetwork].yaml" with one of the options listed at:https://kubernetes.io/docs/concepts/cluster-administration/addons/Then you can join any number of worker nodes by running the following on each as root:kubeadm join 192.168.129.200:6443 --token ddct8j.i2dloykyc0wpwdg3 \--discovery-token-ca-cert-hash sha256:3bdd47846f02bcc9858d2946714341f22b37aaa07dbaa61594f2a0ecce80f4fb
配置环境变量(仅在master节点)
# 根据安装提示,执行命令
[root@kmaster ~]#   mkdir -p $HOME/.kube
[root@kmaster ~]#   sudo cp -i /etc/kubernetes/admin.conf $HOME/.kube/config
[root@kmaster ~]#   sudo chown $(id -u):$(id -g) $HOME/.kube/config
[root@kmaster ~]# echo 'export KUBECONFIG=/etc/kubernetes/admin.conf' >> /etc/profile
[root@kmaster ~]# source /etc/profile[root@kmaster ~]# kubectl get nodes
NAME      STATUS   ROLES           AGE     VERSION
kmaster   NotReady    control-plane   2d23h   v1.27.
工作节点加入集群(knode1节点及knode2节点)
将初始化集群后,生成的
kubeadm join语句,分别拷贝到两个节点执行
# knode1节点
[root@knode1 ~]# kubeadm join 192.168.129.200:6443 --token ddct8j.i2dloykyc0wpwdg3 \--discovery-token-ca-cert-hash sha256:3bdd47846f02bcc9858d2946714341f22b37aaa07dbaa61594f2a0ecce80f4fb
[preflight] Running pre-flight checks[WARNING FileExisting-tc]: tc not found in system path
[preflight] Reading configuration from the cluster...
[preflight] FYI: You can look at this config file with 'kubectl -n kube-system get cm kubeadm-config -o yaml'
[kubelet-start] Writing kubelet configuration to file "/var/lib/kubelet/config.yaml"
[kubelet-start] Writing kubelet environment file with flags to file "/var/lib/kubelet/kubeadm-flags.env"
[kubelet-start] Starting the kubelet
[kubelet-start] Waiting for the kubelet to perform the TLS Bootstrap...This node has joined the cluster:
* Certificate signing request was sent to apiserver and a response was received.
* The Kubelet was informed of the new secure connection details.Run 'kubectl get nodes' on the control-plane to see this node join the cluster.# knode2节点
[root@knode2 ~]# kubeadm join 192.168.129.200:6443 --token ddct8j.i2dloykyc0wpwdg3 \--discovery-token-ca-cert-hash sha256:3bdd47846f02bcc9858d2946714341f22b37aaa07dbaa61594f2a0ecce80f4fb	[preflight] Running pre-flight checks[WARNING FileExisting-tc]: tc not found in system path
[preflight] Reading configuration from the cluster...
[preflight] FYI: You can look at this config file with 'kubectl -n kube-system get cm kubeadm-config -o yaml'
[kubelet-start] Writing kubelet configuration to file "/var/lib/kubelet/config.yaml"
[kubelet-start] Writing kubelet environment file with flags to file "/var/lib/kubelet/kubeadm-flags.env"
[kubelet-start] Starting the kubelet
[kubelet-start] Waiting for the kubelet to perform the TLS Bootstrap...This node has joined the cluster:
* Certificate signing request was sent to apiserver and a response was received.
* The Kubelet was informed of the new secure connection details.Run 'kubectl get nodes' on the control-plane to see this node join the cluster.[root@kmaster ~]# kubectl get nodes
NAME      STATUS   ROLES           AGE     VERSION
kmaster   NotReady    control-plane   2d23h   v1.27.0
knode1    NotReady    <none>          2d23h   v1.27.0
knode2    NotReady    <none>          2d23h   v1.27.0
安装calico网络(仅master节点)
安装网络组件前,集群状态为
NotReady,安装后,稍等片刻,集群状态将变为Ready。
查看集群状态
[root@kmaster ~]# kubectl get nodes
NAME      STATUS   ROLES           AGE     VERSION
kmaster   NotReady    control-plane   2d23h   v1.27.0
knode1    NotReady    <none>          2d23h   v1.27.0
knode2    NotReady    <none>          2d23h   v1.27.0
安装 Tigera Calico operator,版本 3.26
# 所需文件可在百度网盘自行获取
[root@kmaster ~]# kubectl create -f tigera-operator-3-26-1.yaml
namespace/tigera-operator created
customresourcedefinition.apiextensions.k8s.io/bgpconfigurations.crd.projectcalico.org created
customresourcedefinition.apiextensions.k8s.io/bgpfilters.crd.projectcalico.org created
customresourcedefinition.apiextensions.k8s.io/bgppeers.crd.projectcalico.org created
customresourcedefinition.apiextensions.k8s.io/blockaffinities.crd.projectcalico.org created
customresourcedefinition.apiextensions.k8s.io/caliconodestatuses.crd.projectcalico.org created
customresourcedefinition.apiextensions.k8s.io/clusterinformations.crd.projectcalico.org created
customresourcedefinition.apiextensions.k8s.io/felixconfigurations.crd.projectcalico.org created
customresourcedefinition.apiextensions.k8s.io/globalnetworkpolicies.crd.projectcalico.org created
customresourcedefinition.apiextensions.k8s.io/globalnetworksets.crd.projectcalico.org created
customresourcedefinition.apiextensions.k8s.io/hostendpoints.crd.projectcalico.org created
customresourcedefinition.apiextensions.k8s.io/ipamblocks.crd.projectcalico.org created
customresourcedefinition.apiextensions.k8s.io/ipamconfigs.crd.projectcalico.org created
customresourcedefinition.apiextensions.k8s.io/ipamhandles.crd.projectcalico.org created
customresourcedefinition.apiextensions.k8s.io/ippools.crd.projectcalico.org created
customresourcedefinition.apiextensions.k8s.io/ipreservations.crd.projectcalico.org created
customresourcedefinition.apiextensions.k8s.io/kubecontrollersconfigurations.crd.projectcalico.org created
customresourcedefinition.apiextensions.k8s.io/networkpolicies.crd.projectcalico.org created
customresourcedefinition.apiextensions.k8s.io/networksets.crd.projectcalico.org created
customresourcedefinition.apiextensions.k8s.io/apiservers.operator.tigera.io created
customresourcedefinition.apiextensions.k8s.io/imagesets.operator.tigera.io created
customresourcedefinition.apiextensions.k8s.io/installations.operator.tigera.io created
customresourcedefinition.apiextensions.k8s.io/tigerastatuses.operator.tigera.io created
serviceaccount/tigera-operator created
clusterrole.rbac.authorization.k8s.io/tigera-operator created
clusterrolebinding.rbac.authorization.k8s.io/tigera-operator created
deployment.apps/tigera-operator created
配置
custom-resources.yaml
[root@kmaster ~]# vim custom-resources-3-26-1.yaml
# 更改IP地址池中的 CIDR,和 kubeadm 初始化集群中的 --pod-network-cidr 参数保持一致(配置文件已做更改)
# cidr: 10.244.0.0/16# 所需文件可在百度网盘自行获取
[root@kmaster ~]# kubectl create -f custom-resources-3-26-1.yaml
installation.operator.tigera.io/default created
apiserver.operator.tigera.io/default created# 动态查看calico容器状态,待全部running后,集群状态变为正常
[root@kmaster ~]# watch kubectl get pods -n calico-system
NAME                                       READYSTATUS    RESTARTS	  AGE
calico-kube-controllers-5d6c98ff78-gcj2n   1/1Running   3 (103m ago)   2d23h
calico-node-cc9ct                          1/1Running   3 (103m ago)   2d23h
calico-node-v8459                          1/1Running   3 (103m ago)   2d23h
calico-node-w524w                          1/1Running   3 (103m ago)   2d23h
calico-typha-bbb96d56-46w2v                1/1Running   3 (103m ago)   2d23h
calico-typha-bbb96d56-nrxkf                1/1Running   3 (103m ago)   2d23h
csi-node-driver-4wm4h                      2/2Running   6 (103m ago)   2d23h
csi-node-driver-dr7hq                      2/2Running   6 (103m ago)   2d23h
csi-node-driver-fjr77                      2/2Running   6 (103m ago)   2d23h
再次查看集群状态
[root@kmaster ~]# kubectl get nodes
NAME      STATUS   ROLES           AGE     VERSION
kmaster   Ready    control-plane   2d23h   v1.27.0
knode1    Ready    <none>          2d23h   v1.27.0
knode2    Ready    <none>          2d23h   v1.27.
·END
2
Running 6 (103m ago) 2d23h
csi-node-driver-dr7hq 2/2
Running 6 (103m ago) 2d23h
csi-node-driver-fjr77 2/2
Running 6 (103m ago) 2d23h
> 再次查看集群状态```bash
[root@kmaster ~]# kubectl get nodes
NAME      STATUS   ROLES           AGE     VERSION
kmaster   Ready    control-plane   2d23h   v1.27.0
knode1    Ready    <none>          2d23h   v1.27.0
knode2    Ready    <none>          2d23h   v1.27.
·END
相关文章:
从零开始:深入理解Kubernetes架构及安装过程
K8s环境搭建 文章目录 K8s环境搭建集群类型安装方式环境规划克隆三台虚拟机系统环境配置集群搭建初始化集群(仅在master节点)配置环境变量(仅在master节点)工作节点加入集群(knode1节点及knode2节点)安装ca…...

混淆技术研究笔记(五)混淆后如何反篡改?
有了上一节的基础工具后,接下来要考虑如何反篡改。 本文采用的是对混淆后的代码,针对某些关键包的字节码数据计算md5值,对所有类计算完成后对md5值进行排序,排序后拼接字符串再次计算md5值,最后通过私钥对md5进行RSA对…...
QTableWidget 表格部件
QTableWidget是QT中的表格组件类。一般用来展示多行多列的数据,是QT中使用较多的控件之一。1、QTableWidgetItem对象 QTableWidget中的每一个单元格都是一个QTableWidgetItem对象,因此先介绍下QTableWidgetItem的常用方法。 1.1、设置文本内容 void QT…...
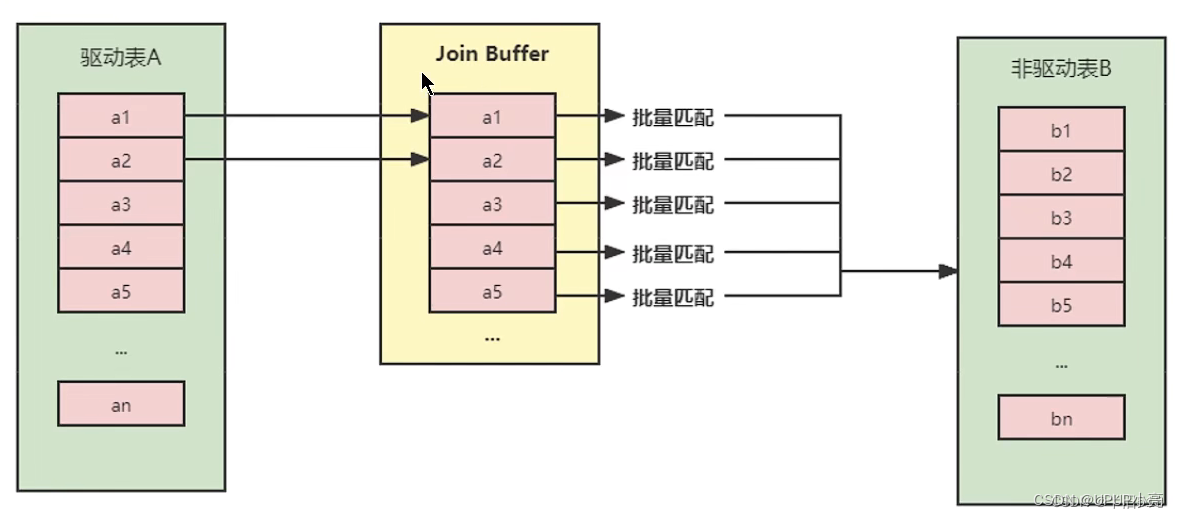
MySQL join的底层原理
文章目录 前言一、join是什么?二、join的使用例子三、join的连接方式1、简单嵌套2、索引嵌套3、块嵌套4、哈希连接 前言 面试的时候,被问到join 的底层原理,之前没有深入了解过,今天对这个知识点进行一个学习。 一、join是什么&…...

如何在 Spring Boot 中实现容错机制
在 Spring Boot 中实现容错机制 容错机制是构建健壮和可靠的应用程序的重要组成部分。它可以帮助应用程序在面对异常或故障时保持稳定运行。Spring Boot提供了多种机制来实现容错,包括异常处理、断路器、重试和降级等。本文将介绍如何在Spring Boot中实现这些容错机…...

Sqlite3 查询 今日、昨日、本周、上周、本月、上月、本季度、上季度、本年
一、使用Between AND select * from 表名 where 字段名 Between ‘2019-1-01 00:00:00’ AND ‘2019-7-12 23:59:59’ 二、使用>,< select * from 表名 where 字段名 > ‘2019-1-01 00:00:00’ and 字段名 < ‘2019-12-12 23:59:59’ 三、升降序 select * from 表…...

IDEA XML文件里写SQL比较大小条件
背景 最近开发的时候,有一个需求的查询需要支持范围查询[a,b),并且查询的结果要求查询的范围含头端点不含尾端点。因为between…and…查询的范围是含头含尾的,因而不能使用。 因此打算直接使用>和<来比较实现,使用>的时…...
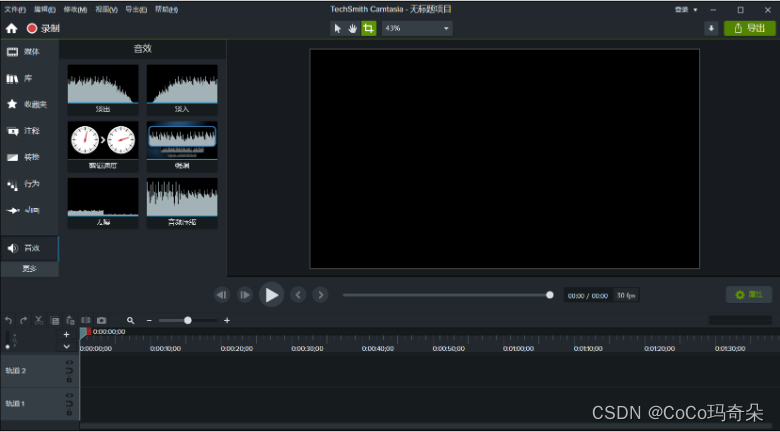
Camtasia Studio2024最新版本正式更新上线!
Camtasia Studio2024是一款专门录制屏幕动作的工具,它能在任何颜色模式下轻松地记录 屏幕动作,包括影像、音效、鼠标移动轨迹、解说声音等等,简单实用的视频录制软件,游戏的精彩画面,网络视频,屏幕录制可以让您录制屏幕所有内容视频录制支持3…...

各种业务场景调用API代理的API接口教程
API代理的API接口在各种业务场景中具有广泛的应用,本文将介绍哪些业务场景可以使用API代理的API接口,并提供详细的调用教程和代码演示,同时,我们还将讨论在不同场景下使用API代理的API接口所带来的好处。 哪些业务场景可以使用API…...

安卓App使用HttpURLConnection发送请求与上传文件
安卓原生App开发时常用的http开发工具 系统内置http请求工具为 HttpURLConnectionhttpClient 是 apache 的开源工具okHttp 使用更简单,语法相对HttpURLConnection也简洁了许多,需要在graddle添加依赖。 本文主要讲解如何使用HttpURConnection向服务器发…...
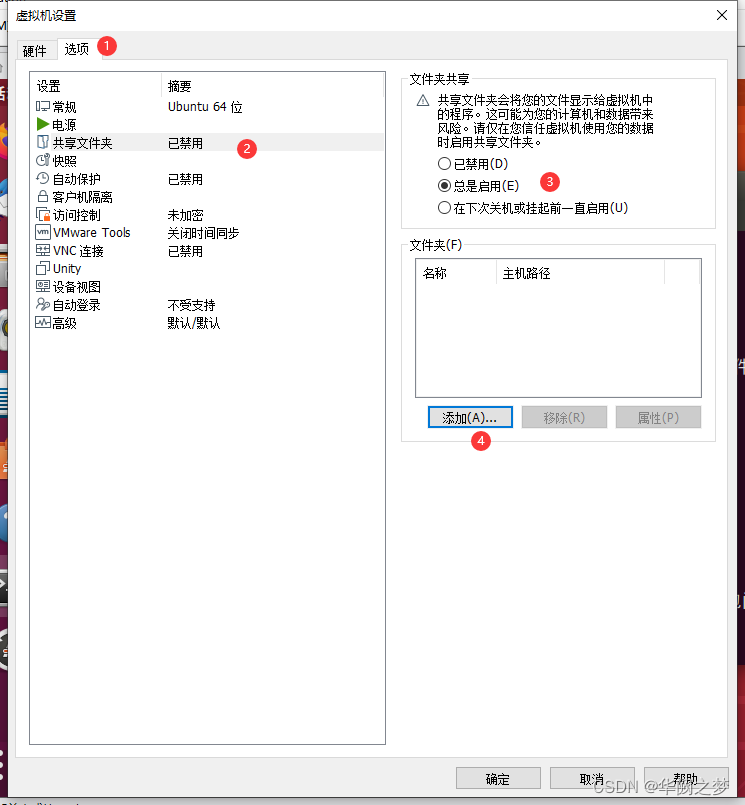
【Linux服务端搭建及使用】
连接服务器的软件:mobaxterm 设置root 账号 sudo apt-get install passwd #安装passwd 设置方法 sudo passwd #设置root密码 su root #切换到root账户设置共享文件夹 一、强制删除原有环境 1.删除python rpm -qa|grep pytho…...
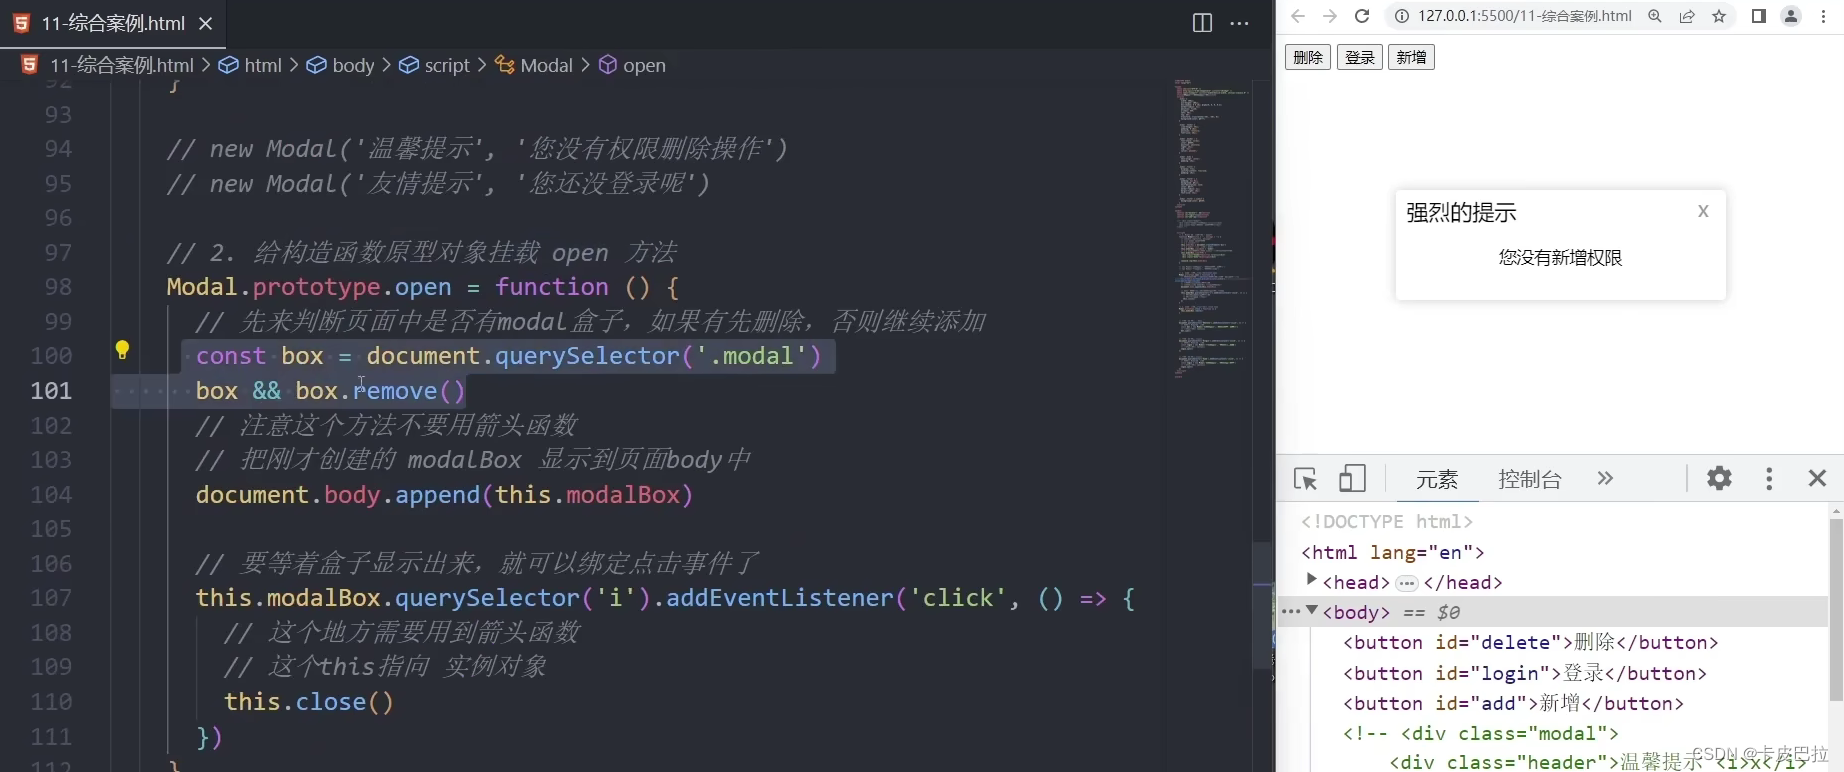
前端JavaScript入门到精通,javascript核心进阶ES6语法、API、js高级等基础知识和实战 —— JS进阶(三)
思维导图 1.编程思想 1.1 面向过程编程 1.2 面向对象编程 (oop) 2. 构造函数 3. 原型 3.1 原型 <!DOCTYPE html> <html lang"en"><head><meta charset"UTF-8"><meta http-equiv"X-UA-Compatible" content"IE…...
`tail` 显示文本文件的末尾部分)
Linux 指令心法(十一)`tail` 显示文本文件的末尾部分
文章目录 命令的概述和用途命令的用法命令行选项和参数的详细说明命令的示例命令的注意事项或提示 命令的概述和用途 tail 是一个用于显示文本文件的末尾部分的命令。它在 Linux 和 Unix 系统中非常有用,因为它允许用户查看文件的最后几行,以便实时监视…...
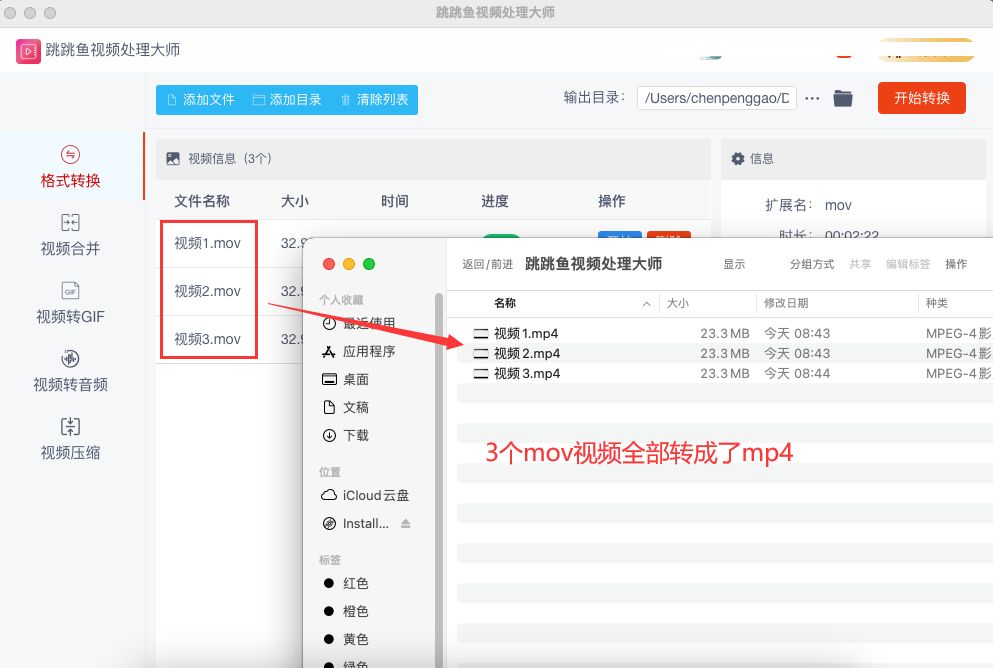
Mac mov转mp4,详细转换步骤
Mac mov转mp4怎么转?视频文件格式为.mov是由Apple公司所开发的特殊格式。因其只能在苹果设备上播放,与他人分享时就会变得困难。为此,我们通常会选择使用MP4这种最受欢迎的视频格式。在日常使用中,MP4成为了大家首选的视频格式。而…...

高级深入--day31
Item Pipeline 当Item在Spider中被收集之后,它将会被传递到Item Pipeline,这些Item Pipeline组件按定义的顺序处理Item。 每个Item Pipeline都是实现了简单方法的Python类,比如决定此Item是丢弃而存储。以下是item pipeline的一些典型应用&…...

一文讲解图像梯度
简介: 图像梯度计算的是图像变化的幅度。对于图像的边缘部分,其灰度值变化较大,梯度值变化也较大;相反,对于图像中比较平滑的部分,其灰度值变化较小,相应的梯度值变化也较小。一般情…...

湖州OLED透明拼接屏技术应用引领现代化旅游观光方式
湖州市位于中国浙江省北部,拥有悠久的历史和丰富的文化遗产。湖州市以其美丽的湖泊和秀丽的自然风光而闻名。 作为中国重要的历史文化名城之一,湖州市有着丰富的文化遗产和历史资源,如古城墙、古建筑和古镇等。 这为OLED透明拼接屏技术的应用…...
)
点云从入门到精通技术详解100篇-点云特征学习模型及其在配准中的应用(续)
目录 基于局部邻域的点云特征学习模型 3.1引言 3.2自适应邻域选择算法...
铁道交通运输运营3D模拟仿真实操提供一个沉浸、高效且环保的情境
VR模拟果蔬运输应急处理场景在农产品物流行业中具有重要的意义。这种模拟技术为农产品运输提供了全新的、更高效和更安全的方式来模拟真实世界的应急情况,帮助操作人员、研究者和管理者更好地理解和应对可能的运输风险措施。 VR模拟果蔬运输应急处理场景可以模拟出各…...

yum apt pip 阿里云源
centos yum 阿里云源 # 备份 mv /etc/yum.repos.d/CentOS-Base.repo /etc/yum.repos.d/CentOS-Base.repo.backup# centos 6 wget -O /etc/yum.repos.d/CentOS-Base.repo https://mirrors.aliyun.com/repo/Centos-vault-6.10.repo curl -o /etc/yum.repos.d/CentOS-Base.repo h…...
Pixel Aurora Engine惊艳案例:用单句描述生成完整RPG角色设定+立绘+装备图
Pixel Aurora Engine惊艳案例:用单句描述生成完整RPG角色设定立绘装备图 1. 像素极光引擎简介 Pixel Aurora Engine是一款革命性的AI像素艺术生成工具,它将先进的扩散模型技术与复古游戏美学完美融合。这款工具最令人惊叹的能力在于:仅需一…...
多电平变换器并网仿真,网侧电压220V PR电压外环 ,PI电流内环,有...)
单相级联H桥(CHB)多电平变换器并网仿真,网侧电压220V PR电压外环 ,PI电流内环,有...
单相级联H桥(CHB)多电平变换器并网仿真,网侧电压220V PR电压外环 ,PI电流内环,有独立的电容电压平衡控制,使用三个全桥子模块,可输出7电平,可供参考学习单相级联H桥多电平变换器这…...

高德地图JS API报错10009?手把手教你解决USERKEY_PLAT_NOMATCH问题
高德地图JS API报错10009?手把手教你解决USERKEY_PLAT_NOMATCH问题 当你在前端项目中集成高德地图JS API时,突然控制台抛出USERKEY_PLAT_NOMATCH错误(错误码10009),这意味着你的密钥与当前使用平台不匹配。这种问题看…...

2026 Java AI框架选型:Spring AI/LangChain4j企业级对比
文章目录引子:Java程序员的"AI焦虑"一、血统与基因:两个截然不同的"家族遗传"1.1 Spring AI:Spring生态的"嫡长子"1.2 LangChain4j:Java AI界的"瑞士军刀"二、代码实战:同样的…...
显存再降40%)
all-MiniLM-L6-v2详细步骤:Ollama模型量化部署(Q4_K_M)显存再降40%
all-MiniLM-L6-v2详细步骤:Ollama模型量化部署(Q4_K_M)显存再降40% 在资源受限的环境中部署高效的句子嵌入模型一直是开发者的痛点。all-MiniLM-L6-v2作为轻量级语义表示模型,虽然已经比标准BERT模型小了80%以上,但在…...

全双工和半双工的区别
全双工和半双工是描述通信双方数据流动方向的两种基本模式,它们决定了通信链路的利用率、硬件复杂度和应用场景。下面从定义、工作机制、典型协议、优缺点、实际应用五个方面展开。一、基本定义模式英文数据传输方向比喻单工Simplex单向,只能A→B&#x…...

基于 HT for Web 的机车整备场数字孪生系统技术实现
本文基于 HT for Web(基于 WebGL/Canvas 的纯前端可视化插件)构建机车整备场数字孪生三维可视化系统,通过轻量化三维建模、实时数据对接、前端 API 驱动渲染,实现整备场全流程、全要素、全场景的数字化监管。该系统采用 B/S 架构&…...

Oracle数据库进程体系结构概述
Oracle数据库进程体系结构概述 Oracle属于多进程体系架构,它由多个后台进程组成,每个后台进程完成特定的维护任务,进程之间互相协助,最终共同完成数据库所需的维护任务。 本文讲述的内容: 1、进程类型 2、Oracle两种服…...

本科论文降AI率花多少钱合适?各档工具对比
每年毕业季都有同学问:降AI率要花多少钱?买个工具值不值?这篇把费用账算清楚,让你心里有数。 先算清楚你实际需要处理多少字 很多人有个误区,以为论文AI率30%就要处理30%的字数。实际上不是的。 实际需要处理的字数…...

从 Agent 到 Skill:揭秘 AI 产品经理进阶的真正关键!
文章深入探讨了 AI 产品经理应如何理解和应用 Agent 与 Skill。文章指出,当前许多 AI 产品经理将注意力过度集中于 Agent,而忽略了 Skill 的重要性。实际上,Skill 是定义 Agent 在具体任务中行为、标准和质量的关键。文章详细阐述了 Skill 的…...