threejs(7)-精通粒子特效
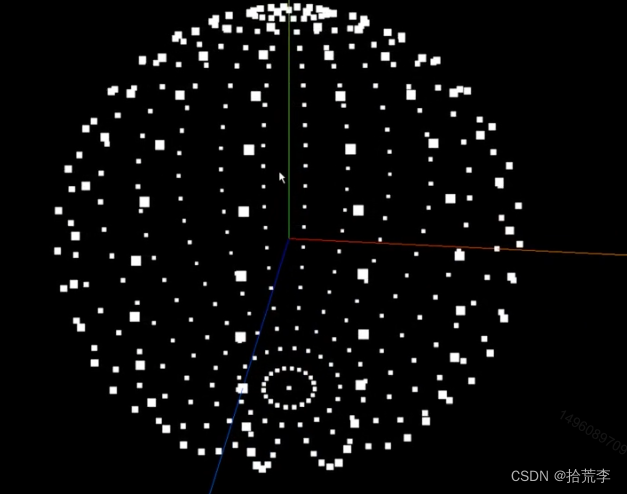
一、初识Points与点材质
// 设置点材质
const pointsMaterial = new THREE.PointsMaterial();
import * as THREE from "three";
// 导入轨道控制器
import { OrbitControls } from "three/examples/jsm/controls/OrbitControls";
// 导入动画库
import gsap from "gsap";
// 导入dat.gui
import * as dat from "dat.gui";// 目标:认识pointesconst gui = new dat.GUI();
// 1、创建场景
const scene = new THREE.Scene();// 2、创建相机
const camera = new THREE.PerspectiveCamera(75,window.innerWidth / window.innerHeight,0.1,1000
);// 设置相机位置
camera.position.set(0, 0, 10);
scene.add(camera);// 创建球几何体
const sphereGeometry = new THREE.SphereBufferGeometry(3, 30, 30);
delete sphereGeometry.attributes.uv;
// const material = new THREE.MeshBasicMaterial({
// color: 0xff0000,
// wireframe: true,
// });
// const mesh = new THREE.Mesh(sphereGeometry, material);
// scene.add(mesh);// 设置点材质
const pointsMaterial = new THREE.PointsMaterial();
pointsMaterial.size = 0.1;
pointsMaterial.color.set(0xfff000);
// 相机深度而衰减
pointsMaterial.sizeAttenuation = true;// 载入纹理
const textureLoader = new THREE.TextureLoader();
const texture = textureLoader.load("./textures/particles/2.png");
// 设置点材质纹理
pointsMaterial.map = texture;
pointsMaterial.alphaMap = texture;
pointsMaterial.transparent = true;
pointsMaterial.depthWrite = false;
pointsMaterial.blending = THREE.AdditiveBlending;const points = new THREE.Points(sphereGeometry, pointsMaterial);scene.add(points);// 初始化渲染器
const renderer = new THREE.WebGLRenderer();
// 设置渲染的尺寸大小
renderer.setSize(window.innerWidth, window.innerHeight);
// 开启场景中的阴影贴图
renderer.shadowMap.enabled = true;
renderer.physicallyCorrectLights = true;// console.log(renderer);
// 将webgl渲染的canvas内容添加到body
document.body.appendChild(renderer.domElement);// // 使用渲染器,通过相机将场景渲染进来
// renderer.render(scene, camera);// 创建轨道控制器
const controls = new OrbitControls(camera, renderer.domElement);
// 设置控制器阻尼,让控制器更有真实效果,必须在动画循环里调用.update()。
controls.enableDamping = true;// 添加坐标轴辅助器
const axesHelper = new THREE.AxesHelper(5);
scene.add(axesHelper);
// 设置时钟
const clock = new THREE.Clock();function render() {let time = clock.getElapsedTime();controls.update();renderer.render(scene, camera);// 渲染下一帧的时候就会调用render函数requestAnimationFrame(render);
}render();// 监听画面变化,更新渲染画面
window.addEventListener("resize", () => {// console.log("画面变化了");// 更新摄像头camera.aspect = window.innerWidth / window.innerHeight;// 更新摄像机的投影矩阵camera.updateProjectionMatrix();// 更新渲染器renderer.setSize(window.innerWidth, window.innerHeight);// 设置渲染器的像素比renderer.setPixelRatio(window.devicePixelRatio);
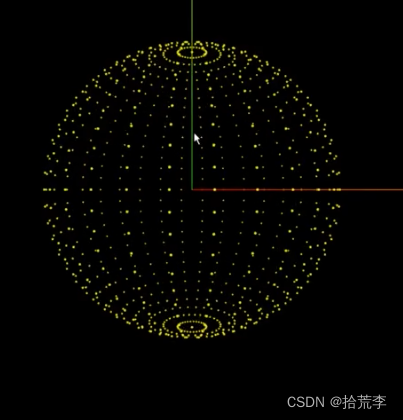
});二、深度解析点材质属性
import * as THREE from "three";
// 导入轨道控制器
import { OrbitControls } from "three/examples/jsm/controls/OrbitControls";
// 导入动画库
import gsap from "gsap";
// 导入dat.gui
import * as dat from "dat.gui";// 目标:认识pointesconst gui = new dat.GUI();
// 1、创建场景
const scene = new THREE.Scene();// 2、创建相机
const camera = new THREE.PerspectiveCamera(75,window.innerWidth / window.innerHeight,0.1,1000
);// 设置相机位置
camera.position.set(0, 0, 10);
scene.add(camera);// 创建球几何体
const sphereGeometry = new THREE.SphereBufferGeometry(3, 30, 30);
// const material = new THREE.MeshBasicMaterial({
// color: 0xff0000,
// wireframe: true,
// });
// const mesh = new THREE.Mesh(sphereGeometry, material);
// scene.add(mesh);// 设置点材质
const pointsMaterial = new THREE.PointsMaterial();
pointsMaterial.size = 0.1;
pointsMaterial.color.set(0xfff000);
// 相机深度而衰减
pointsMaterial.sizeAttenuation = true;// 载入纹理
const textureLoader = new THREE.TextureLoader();
const texture = textureLoader.load("./textures/particles/2.png");
// 设置点材质纹理
pointsMaterial.map = texture;
pointsMaterial.alphaMap = texture;
pointsMaterial.transparent = true; // 允许透明
pointsMaterial.depthWrite = false; // 叠加时使用
pointsMaterial.blending = THREE.AdditiveBlending; // 例子重合之后颜色叠加const points = new THREE.Points(sphereGeometry, pointsMaterial);scene.add(points);// 初始化渲染器
const renderer = new THREE.WebGLRenderer();
// 设置渲染的尺寸大小
renderer.setSize(window.innerWidth, window.innerHeight);
// 开启场景中的阴影贴图
renderer.shadowMap.enabled = true;
renderer.physicallyCorrectLights = true;// console.log(renderer);
// 将webgl渲染的canvas内容添加到body
document.body.appendChild(renderer.domElement);// // 使用渲染器,通过相机将场景渲染进来
// renderer.render(scene, camera);// 创建轨道控制器
const controls = new OrbitControls(camera, renderer.domElement);
// 设置控制器阻尼,让控制器更有真实效果,必须在动画循环里调用.update()。
controls.enableDamping = true;// 添加坐标轴辅助器
const axesHelper = new THREE.AxesHelper(5);
scene.add(axesHelper);
// 设置时钟
const clock = new THREE.Clock();function render() {let time = clock.getElapsedTime();controls.update();renderer.render(scene, camera);// 渲染下一帧的时候就会调用render函数requestAnimationFrame(render);
}render();// 监听画面变化,更新渲染画面
window.addEventListener("resize", () => {// console.log("画面变化了");// 更新摄像头camera.aspect = window.innerWidth / window.innerHeight;// 更新摄像机的投影矩阵camera.updateProjectionMatrix();// 更新渲染器renderer.setSize(window.innerWidth, window.innerHeight);// 设置渲染器的像素比renderer.setPixelRatio(window.devicePixelRatio);
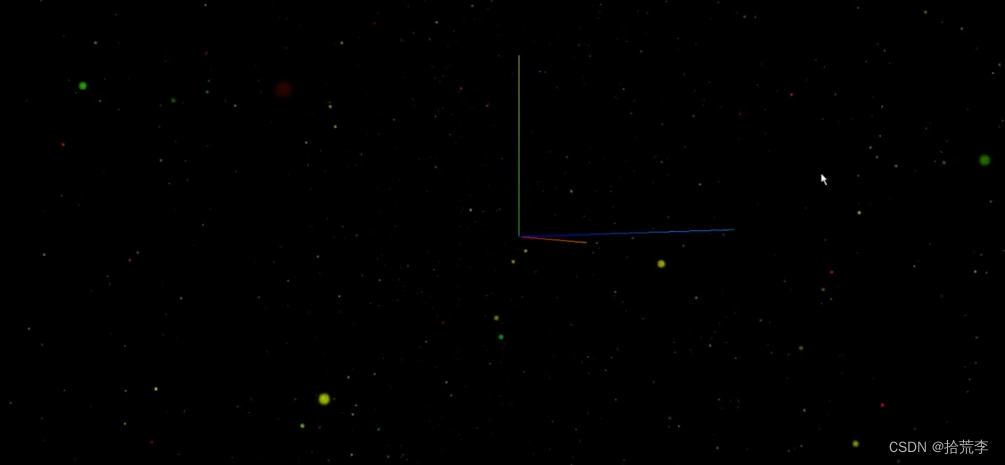
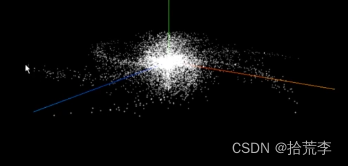
});三、应用顶点着色打造绚丽多彩的星空
import * as THREE from "three";
// 导入轨道控制器
import { OrbitControls } from "three/examples/jsm/controls/OrbitControls";
// 导入动画库
import gsap from "gsap";
// 导入dat.gui
import * as dat from "dat.gui";// 目标:使用pointes设置随机顶点打造星河const gui = new dat.GUI();
// 1、创建场景
const scene = new THREE.Scene();// 2、创建相机
const camera = new THREE.PerspectiveCamera(75,window.innerWidth / window.innerHeight,0.1,1000
);// 设置相机位置
camera.position.set(0, 0, 10);
scene.add(camera);const particlesGeometry = new THREE.BufferGeometry();
const count = 5000;// 设置缓冲区数组
const positions = new Float32Array(count * 3);
// 设置粒子顶点颜色
const colors = new Float32Array(count * 3);
// 设置顶点
for (let i = 0; i < count * 3; i++) {positions[i] = (Math.random() - 0.5) * 100;colors[i] = Math.random();
}
particlesGeometry.setAttribute("position",new THREE.BufferAttribute(positions, 3)
);
particlesGeometry.setAttribute("color", new THREE.BufferAttribute(colors, 3));// 设置点材质
const pointsMaterial = new THREE.PointsMaterial();
pointsMaterial.size = 0.5;
pointsMaterial.color.set(0xfff000);
// 相机深度而衰减
pointsMaterial.sizeAttenuation = true;// 载入纹理
const textureLoader = new THREE.TextureLoader();
const texture = textureLoader.load("./textures/particles/zs2.png");
// 设置点材质纹理
pointsMaterial.map = texture;
pointsMaterial.alphaMap = texture;
pointsMaterial.transparent = true;
pointsMaterial.depthWrite = false;
pointsMaterial.blending = THREE.AdditiveBlending;
// 设置启动顶点颜色
pointsMaterial.vertexColors = true;const points = new THREE.Points(particlesGeometry, pointsMaterial);scene.add(points);// 初始化渲染器
const renderer = new THREE.WebGLRenderer();
// 设置渲染的尺寸大小
renderer.setSize(window.innerWidth, window.innerHeight);
// 开启场景中的阴影贴图
renderer.shadowMap.enabled = true;
renderer.physicallyCorrectLights = true;// console.log(renderer);
// 将webgl渲染的canvas内容添加到body
document.body.appendChild(renderer.domElement);// // 使用渲染器,通过相机将场景渲染进来
// renderer.render(scene, camera);// 创建轨道控制器
const controls = new OrbitControls(camera, renderer.domElement);
// 设置控制器阻尼,让控制器更有真实效果,必须在动画循环里调用.update()。
controls.enableDamping = true;// 添加坐标轴辅助器
const axesHelper = new THREE.AxesHelper(5);
scene.add(axesHelper);
// 设置时钟
const clock = new THREE.Clock();function render() {let time = clock.getElapsedTime();controls.update();renderer.render(scene, camera);//   渲染下一帧的时候就会调用render函数requestAnimationFrame(render);
}render();// 监听画面变化,更新渲染画面
window.addEventListener("resize", () => {//   console.log("画面变化了");// 更新摄像头camera.aspect = window.innerWidth / window.innerHeight;//   更新摄像机的投影矩阵camera.updateProjectionMatrix();//   更新渲染器renderer.setSize(window.innerWidth, window.innerHeight);//   设置渲染器的像素比renderer.setPixelRatio(window.devicePixelRatio);
});import * as THREE from "three";
import { texture, equirectUV } from "three/nodes";import WebGPU from "three/addons/capabilities/WebGPU.js";
import WebGPURenderer from "three/addons/renderers/webgpu/WebGPURenderer.js";import { OrbitControls } from "three/addons/controls/OrbitControls.js";if (WebGPU.isAvailable() === false) {document.body.appendChild(WebGPU.getErrorMessage());throw new Error("No WebGPU support");
}const container = document.createElement("div");
document.body.appendChild(container);camera = new THREE.PerspectiveCamera(45,window.innerWidth / window.innerHeight,0.25,20
);
camera.position.set(1, 0, 0);const equirectTexture = new THREE.TextureLoader().load("textures/2294472375_24a3b8ef46_o.jpg"
);
equirectTexture.flipY = false;scene = new THREE.Scene();
scene.backgroundNode = texture(equirectTexture, equirectUV(), 0);function render() {controls.update();renderer.render(scene, camera);
}renderer = new WebGPURenderer();
renderer.setPixelRatio(window.devicePixelRatio);
renderer.setSize(window.innerWidth, window.innerHeight);
renderer.setAnimationLoop(render);
container.appendChild(renderer.domElement);controls = new OrbitControls(camera, renderer.domElement);
controls.autoRotate = true;
controls.rotateSpeed = -0.125; // negative, to track mouse pointer
controls.autoRotateSpeed = 1.0;window.addEventListener("resize", onWindowResize);function onWindowResize() {camera.aspect = window.innerWidth / window.innerHeight;camera.updateProjectionMatrix();renderer.setSize(window.innerWidth, window.innerHeight);
}
四、通过封装与相机裁剪实现漫天飞舞的雪花
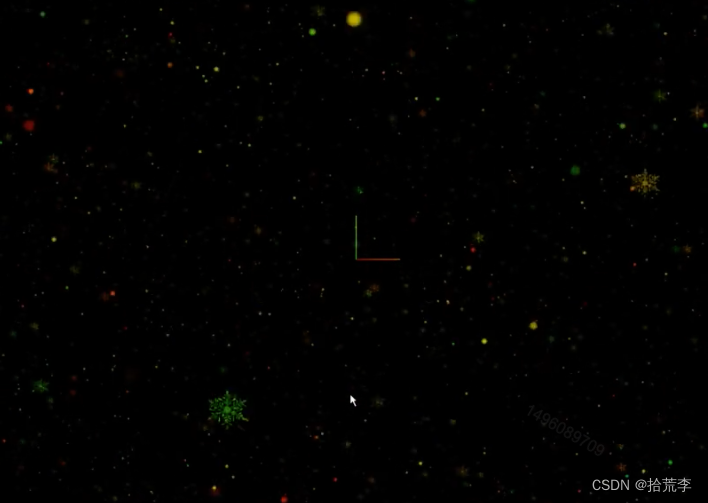
雪花纷飞的效果可以使用旋转模拟
function render() {let time = clock.getElapsedTime();points.rotation.x = time * 0.3;points2.rotation.x = time * 0.5;points2.rotation.y = time * 0.4;points3.rotation.x = time * 0.2;points3.rotation.y = time * 0.2;controls.update();renderer.render(scene, camera);//   渲染下一帧的时候就会调用render函数requestAnimationFrame(render);
}render();
import * as THREE from "three";
// 导入轨道控制器
import { OrbitControls } from "three/examples/jsm/controls/OrbitControls";
// 导入动画库
import gsap from "gsap";
// 导入dat.gui
import * as dat from "dat.gui";// 目标:设置漫天的雪花const gui = new dat.GUI();
// 1、创建场景
const scene = new THREE.Scene();// 2、创建相机
const camera = new THREE.PerspectiveCamera(75,window.innerWidth / window.innerHeight,0.1,30
);// 设置相机位置
camera.position.set(0, 0, 40);
scene.add(camera);function createPoints(url, size = 0.5) {const particlesGeometry = new THREE.BufferGeometry();const count = 10000;// 设置缓冲区数组const positions = new Float32Array(count * 3);// 设置粒子顶点颜色const colors = new Float32Array(count * 3);// 设置顶点for (let i = 0; i < count * 3; i++) {positions[i] = (Math.random() - 0.5) * 100;colors[i] = Math.random();}particlesGeometry.setAttribute("position",new THREE.BufferAttribute(positions, 3));particlesGeometry.setAttribute("color", new THREE.BufferAttribute(colors, 3));// 设置点材质const pointsMaterial = new THREE.PointsMaterial();pointsMaterial.size = 0.5;pointsMaterial.color.set(0xfff000);// 相机深度而衰减pointsMaterial.sizeAttenuation = true;// 载入纹理const textureLoader = new THREE.TextureLoader();const texture = textureLoader.load(`./textures/particles/${url}.png`);// 设置点材质纹理pointsMaterial.map = texture;pointsMaterial.alphaMap = texture;pointsMaterial.transparent = true;pointsMaterial.depthWrite = false;pointsMaterial.blending = THREE.AdditiveBlending;// 设置启动顶点颜色pointsMaterial.vertexColors = true;const points = new THREE.Points(particlesGeometry, pointsMaterial);scene.add(points);return points;
}const points = createPoints("1", 1.5);
const points2 = createPoints("xh", 1);
const points3 = createPoints("xh", 2);// 初始化渲染器
const renderer = new THREE.WebGLRenderer();
// 设置渲染的尺寸大小
renderer.setSize(window.innerWidth, window.innerHeight);
// 开启场景中的阴影贴图
renderer.shadowMap.enabled = true;
renderer.physicallyCorrectLights = true;// console.log(renderer);
// 将webgl渲染的canvas内容添加到body
document.body.appendChild(renderer.domElement);// // 使用渲染器,通过相机将场景渲染进来
// renderer.render(scene, camera);// 创建轨道控制器
const controls = new OrbitControls(camera, renderer.domElement);
// 设置控制器阻尼,让控制器更有真实效果,必须在动画循环里调用.update()。
controls.enableDamping = true;// 添加坐标轴辅助器
const axesHelper = new THREE.AxesHelper(5);
scene.add(axesHelper);
// 设置时钟
const clock = new THREE.Clock();function render() {let time = clock.getElapsedTime();points.rotation.x = time * 0.3;points2.rotation.x = time * 0.5;points2.rotation.y = time * 0.4;points3.rotation.x = time * 0.2;points3.rotation.y = time * 0.2;controls.update();renderer.render(scene, camera);//   渲染下一帧的时候就会调用render函数requestAnimationFrame(render);
}render();// 监听画面变化,更新渲染画面
window.addEventListener("resize", () => {//   console.log("画面变化了");// 更新摄像头camera.aspect = window.innerWidth / window.innerHeight;//   更新摄像机的投影矩阵camera.updateProjectionMatrix();//   更新渲染器renderer.setSize(window.innerWidth, window.innerHeight);//   设置渲染器的像素比renderer.setPixelRatio(window.devicePixelRatio);
});
五、运用数学知识打造复杂形状臂旋星系
import * as THREE from "three";
// 导入轨道控制器
import { OrbitControls } from "three/examples/jsm/controls/OrbitControls";
// 导入动画库
import gsap from "gsap";
// 导入dat.gui
import * as dat from "dat.gui";// 目标:运用数学知识设计特定形状的星系const gui = new dat.GUI();
// 1、创建场景
const scene = new THREE.Scene();// 2、创建相机
const camera = new THREE.PerspectiveCamera(75,window.innerWidth / window.innerHeight,0.1,30
);const textureLoader = new THREE.TextureLoader();
const particlesTexture = textureLoader.load("./textures/particles/1.png");
// 设置相机位置
camera.position.set(0, 0, 10);
scene.add(camera);const params = {count: 10000,size: 0.1,radius: 5,branch: 3,color: "#ff6030",rotateScale: 0.3,endColor: "#1b3984",
};let geometry = null;
let material = null;
let points = null;
const centerColor = new THREE.Color(params.color);
const endColor = new THREE.Color(params.endColor);
const generateGalaxy = () => {// 生成顶点geometry = new THREE.BufferGeometry();//   随机生成位置和const positions = new Float32Array(params.count * 3);// 设置顶点颜色const colors = new Float32Array(params.count * 3);//   循环生成点for (let i = 0; i < params.count; i++) {//   当前的点应该在哪一条分支的角度上const branchAngel = (i % params.branch) * ((2 * Math.PI) / params.branch);// 当前点距离圆心的距离const distance = Math.random() * params.radius * Math.pow(Math.random(), 3);const current = i * 3;const randomX =(Math.pow(Math.random() * 2 - 1, 3) * (params.radius - distance)) / 5;const randomY =(Math.pow(Math.random() * 2 - 1, 3) * (params.radius - distance)) / 5;const randomZ =(Math.pow(Math.random() * 2 - 1, 3) * (params.radius - distance)) / 5;// const randomX = (Math.pow(Math.random() * 2 - 1, 3) * distance) / 5;// const randomY = (Math.pow(Math.random() * 2 - 1, 3) * distance) / 5;// const randomZ = (Math.pow(Math.random() * 2 - 1, 3) * distance) / 5;positions[current] =Math.cos(branchAngel + distance * params.rotateScale) * distance +randomX;positions[current + 1] = 0 + randomY;positions[current + 2] =Math.sin(branchAngel + distance * params.rotateScale) * distance +randomZ;// 混合颜色,形成渐变色const mixColor = centerColor.clone();mixColor.lerp(endColor, distance / params.radius);colors[current] = mixColor.r;colors[current + 1] = mixColor.g;colors[current + 2] = mixColor.b;}geometry.setAttribute("position", new THREE.BufferAttribute(positions, 3));geometry.setAttribute("color", new THREE.BufferAttribute(colors, 3));//   设置点材质material = new THREE.PointsMaterial({// color: new THREE.Color(params.color),size: params.size,sizeAttenuation: true,depthWrite: false,blending: THREE.AdditiveBlending,map: particlesTexture,alphaMap: particlesTexture,transparent: true,vertexColors: true,});points = new THREE.Points(geometry, material);scene.add(points);
};
generateGalaxy();// 初始化渲染器
const renderer = new THREE.WebGLRenderer();
// 设置渲染的尺寸大小
renderer.setSize(window.innerWidth, window.innerHeight);
// 开启场景中的阴影贴图
renderer.shadowMap.enabled = true;
renderer.physicallyCorrectLights = true;// console.log(renderer);
// 将webgl渲染的canvas内容添加到body
document.body.appendChild(renderer.domElement);// // 使用渲染器,通过相机将场景渲染进来
// renderer.render(scene, camera);// 创建轨道控制器
const controls = new OrbitControls(camera, renderer.domElement);
// 设置控制器阻尼,让控制器更有真实效果,必须在动画循环里调用.update()。
controls.enableDamping = true;// 添加坐标轴辅助器
const axesHelper = new THREE.AxesHelper(5);
scene.add(axesHelper);
// 设置时钟
const clock = new THREE.Clock();function render() {let time = clock.getElapsedTime();controls.update();renderer.render(scene, camera);//   渲染下一帧的时候就会调用render函数requestAnimationFrame(render);
}render();// 监听画面变化,更新渲染画面
window.addEventListener("resize", () => {//   console.log("画面变化了");// 更新摄像头camera.aspect = window.innerWidth / window.innerHeight;//   更新摄像机的投影矩阵camera.updateProjectionMatrix();//   更新渲染器renderer.setSize(window.innerWidth, window.innerHeight);//   设置渲染器的像素比renderer.setPixelRatio(window.devicePixelRatio);
});
相关文章:
threejs(7)-精通粒子特效
一、初识Points与点材质 // 设置点材质 const pointsMaterial new THREE.PointsMaterial(); import * as THREE from "three"; // 导入轨道控制器 import { OrbitControls } from "three/examples/jsm/controls/OrbitControls"; // 导入动画库 import gsa…...

使用了百度OCR,记录一下
由于识别ocr有的频率不高,图片无保密性需求,也不想太大的库, 就决定还是用下api算了,试用了几家,决定用百度的ocr包,相对简单。 遇到的问题里面下列基本有提到:例如获取ID,KEY&…...
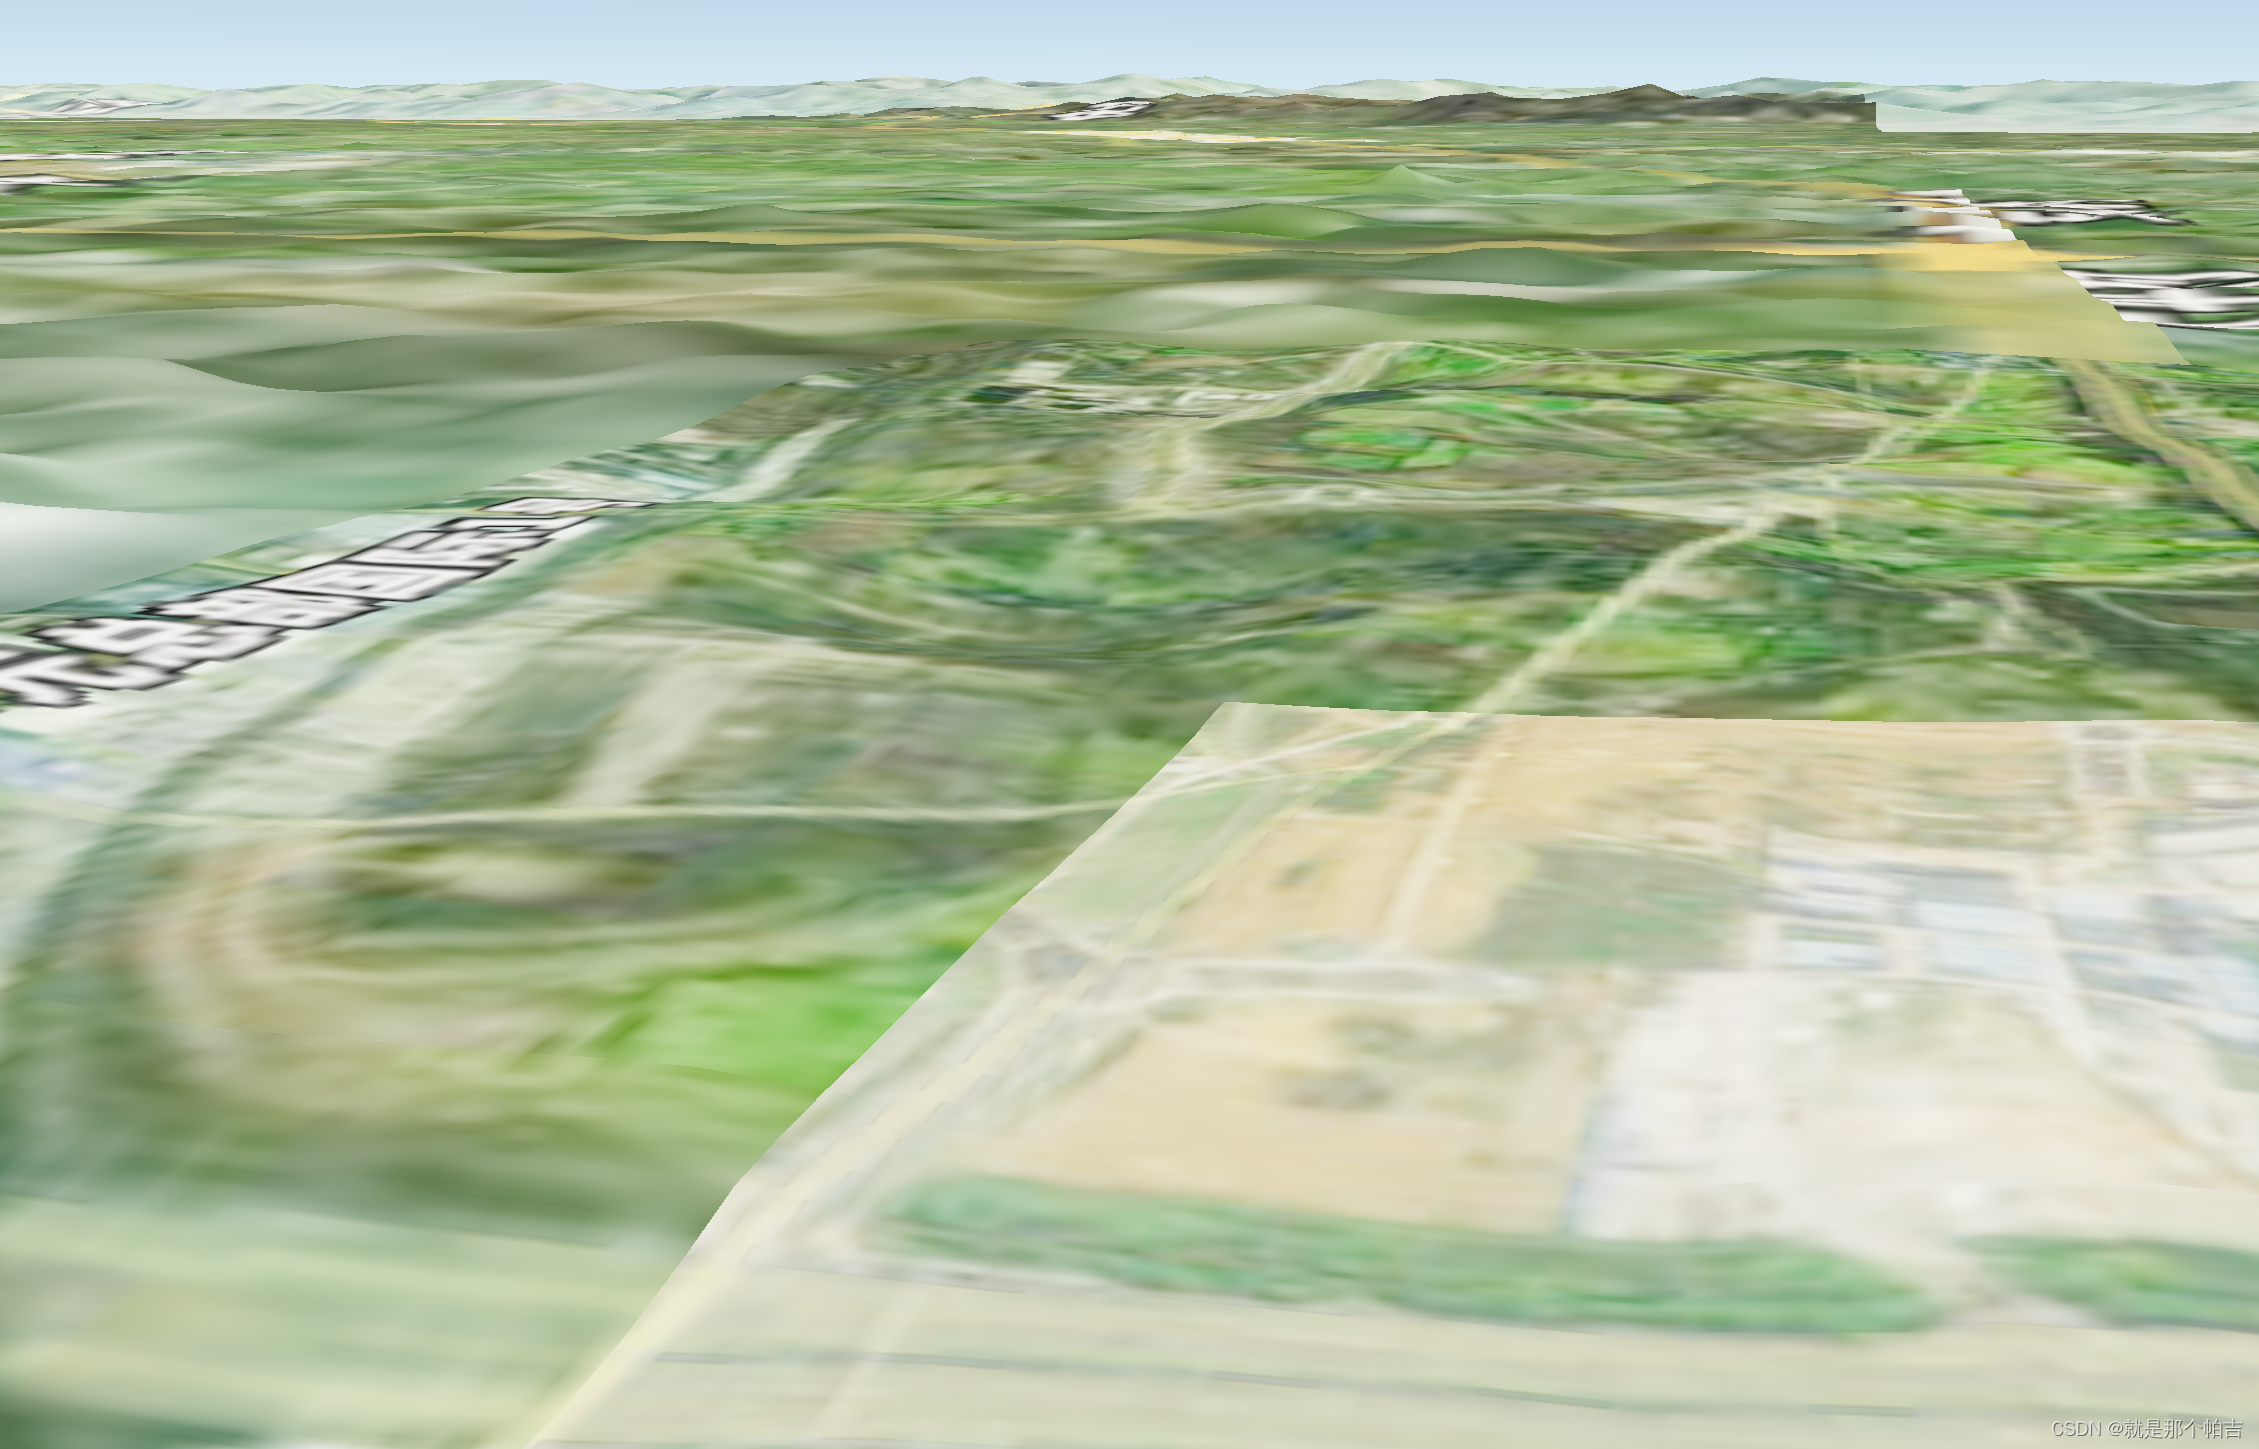
5.OsgEarth加载地形
愿你出走半生,归来仍是少年! 在三维场景中除了使用影像体现出地貌情况,还需要通过地形体现出地势起伏,还原一个相对真实的三维虚拟世界。 osgEarth可通过直接加载Dem数据进行场景内的地形构建。 1.数据准备 由于我也没有高程数据,…...

基于回溯搜索算法的无人机航迹规划-附代码
基于回溯搜索算法的无人机航迹规划 文章目录 基于回溯搜索算法的无人机航迹规划1.回溯搜索搜索算法2.无人机飞行环境建模3.无人机航迹规划建模4.实验结果4.1地图创建4.2 航迹规划 5.参考文献6.Matlab代码 摘要:本文主要介绍利用回溯搜索算法来优化无人机航迹规划。 …...

微信小程序云开发笔记-初始化商城小程序
缘起:由于痴迷机器人,店都快倒闭了,没办法,拿出点精力给店里搞个小程序,要多卖货才能活下来搞机器人,在此记录一下搞小程序的过程,要不然搞完又忘了。腾讯的云开发,前端和后端都有了…...
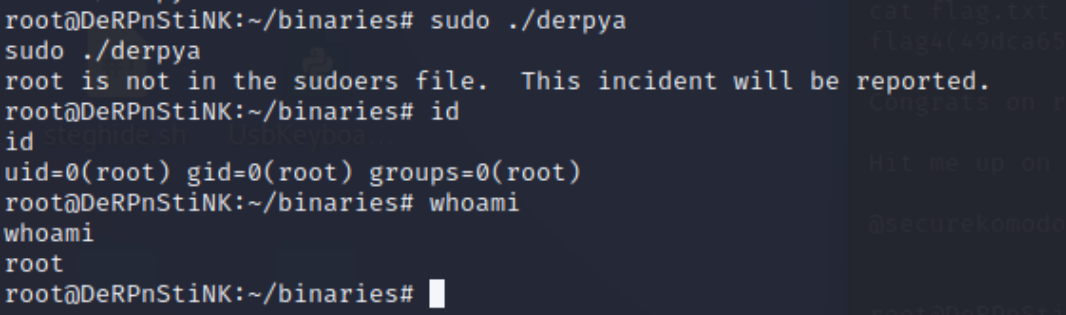
vulnhub_DeRPnStiNK靶机渗透测试
VulnHub2018_DeRPnStiNK靶机 https://www.vulnhub.com/entry/derpnstink-1,221/ flag1(52E37291AEDF6A46D7D0BB8A6312F4F9F1AA4975C248C3F0E008CBA09D6E9166) flag2(a7d355b26bda6bf1196ccffead0b2cf2b81f0a9de5b4876b44407f1dc07e51e6) flag4(49dca65f362fee401292ed7ada96f9…...

网站如何判断请求是来自手机-移动端还是PC-电脑端?如何让网站能适应不同的客户端?
如果网站需要实现手机和PC双界面适应,可以有两种方式: 第一种是响应式界面,根据屏幕宽度来判定显示的格式。这种需要前端来做,手机/PC共用一套代码,有一定的局限性。 第二种是后端通过request请求头中的内容来分析客户…...

sass和 scss的区别?
Sass(Syntactically Awesome Style Sheets)和 SCSS(Sassy CSS)是两种流行的 CSS 预处理器,它们扩展了普通的 CSS 语法,提供了更多的功能和便利性。下面是 Sass 和 SCSS 的主要区别: 1ÿ…...
Vuex 动态模块状态管理器
模块化思想 我们之前的博文已经讲述了Vuex怎么使用命名空间实现模块化状态管理。详情可以看: Vuex命名空间及如何获取根模块、兄弟模块状态管理器_AI3D_WebEngineer的博客-CSDN博客https://blog.csdn.net/weixin_42274805/article/details/133269196?ops_request_…...
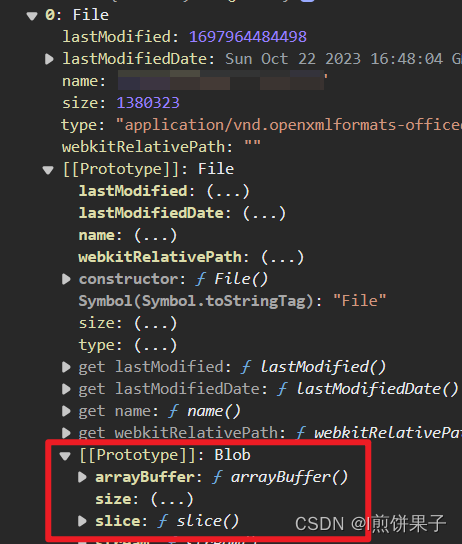
实现分片上传、断点续传、秒传 (JS+NodeJS)(TypeScript)
一、引入及效果 上传文件是一个很常见的操作,但是当文件很大时,上传花费的时间会非常长,上传的操作就会具有不确定性,如果不小心连接断开,那么文件就需要重新上传,导致浪费时间和网络资源。 所以࿰…...
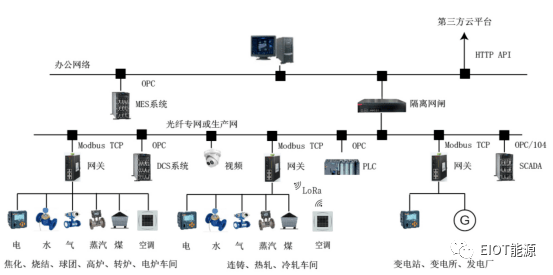
浅谈安科瑞EMS能源管控平台建设的意义-安科瑞 蒋静
摘 要:能源消耗量大、能源运输供给不足、环境压力日趋增加、能耗双控等一系列问题一直困扰着钢铁冶金行业,制约着企业快速稳定健康发展。本文介绍的安科瑞EMS能源管控平台,采用自动化、信息化技术,实现从能源数据采集、过程监控、…...

【原创】指针变量作为函数参数要点注意+main函数中值是否改变
指针变量作为函数参数要点注意(已写至笔记) 1传参指针不加*(main中函数) 2收参指针要加*(被main调用的函数) 3传参指针名可与收参指针名不同,不影响 4【问】如何看主函数中指针所指内容是否改变…...
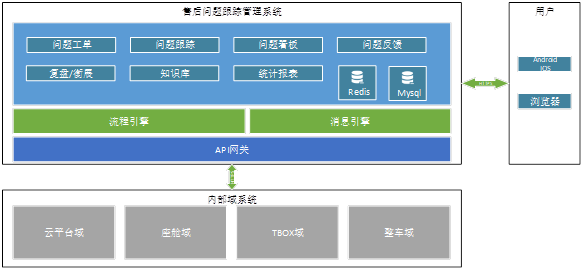
售后处置跟踪系统设想
售后处置跟踪系统设想 前言 随着汽车工业的发展,软件定义车的模式已成为主流汽车设计及智能化功能架构模式,通过引入SOA的软件架构设计,使得现有的座舱软件、云端服务软件、App软件等众多功能模块的版本迭代频次日新月异,发版更…...

python实现ModBusTCP协议的server
python实现ModBusTCP协议的server是一件简单的事情,只要通过pymodbus、pyModbusTCP等模块都可以实现,本文采用pymodbus。 相关文章见: python实现ModBusTCP协议的client-CSDN博客 一、了解pymodbus的Server 1、pymodbus.server的模块 pym…...

AndroidStudio编译错误‘android.injected.build.density‘ is deprecated
问题 AndroidStudio编译错误 The option ‘android.injected.build.density’ is deprecated. It was removed in version 8.0 of the Android Gradle plugin. Density property injection from Android Studio has been removed. 解决 app/build.gradle 中这行 apply plugi…...

计网小题题库整理第一轮(面向期末基础)(3)
基础选择题的最后一章更新,看完期末75至少没问题~ 前情提要: 计网小题题库整理第一轮(12期) 一.选择题 1、 目前,最流行的以太网组网的拓扑结构是( C )。 A) 总线结构 B) 环…...
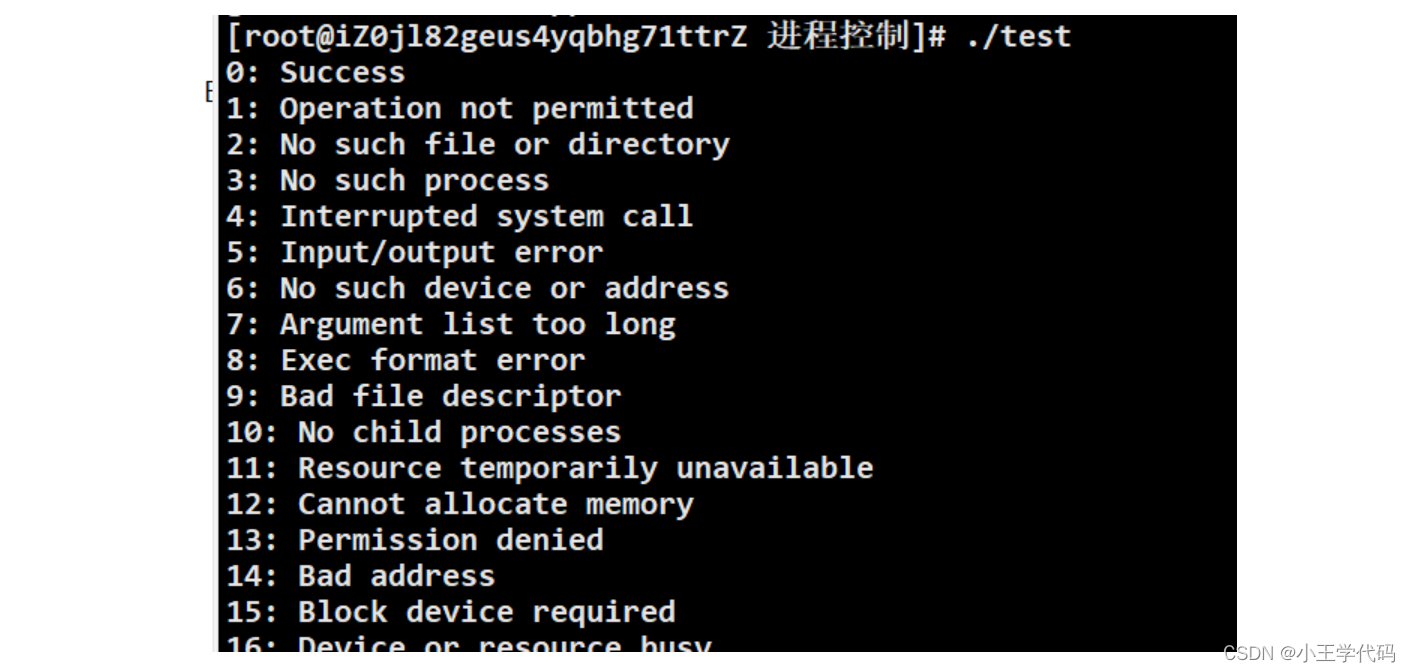
进程控制(一):进程终止
文章目录 进程控制(一)进程终止运行正常退出码 运行异常进程正常/异常总结 进程控制(一) 在前文中,我们初步了解了进程的概念,以及通过fork函数来创建子进程,并对于为什么运行一个程序…...
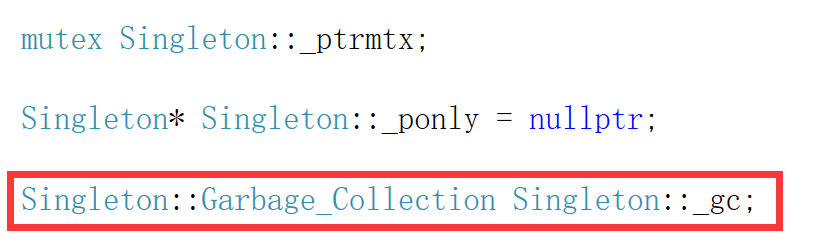
特殊类设计[下] --- 单例模式
文章目录 5.只能创建一个对象的类5.1设计模式[2.5 万字详解:23 种设计模式](https://zhuanlan.zhihu.com/p/433152245)5.2单例模式1.饿汉模式1.懒汉模式 6.饿汉模式7.懒汉模式7.1饿汉模式优缺点:7.2懒汉模式1.线程安全问题2.单例对象的析构问题 8.整体代码9.C11后可…...
)
计算机网络-应用层(1)
一、DNS 域名系统 (DNS) 是把主机域名解析为IP地址的系统。该系统是由解析器和域名服务器组成的。采用UDP 协议,较少情况下使用TCP 协议,端口号均为53。 域名系统由三部分构成: DNS 名字空间、域名服务器、 DNS客户机。 (1)根域:…...

Kotlin基础——枚举、When、in、for
枚举 声明只有值的枚举 enum class Color {RED, GREEN, BLUE }此外还可以增加属性和方法,如果需要在枚举类中定义方法,要使用分号把枚举常量列表和方法定义分开,这也是Kotlin唯一必须使用分号的地方 enum class Color(val r: Int, val g: …...

基于Cynthion逆向USB协议,为DP100电源开发Linux控制软件
1. 项目概述:用Cynthion嗅探USB,为DP100电源打造Linux软件作为一名长期在Linux环境下折腾硬件和嵌入式开发的爱好者,我经常遇到一个头疼的问题:很多不错的桌面小设备,比如电源、示波器、逻辑分析仪,它们的官…...

基于Arduino UNO的真随机数生成与数据持久化在Tambola游戏机中的应用
1. 项目概述:用Arduino UNO打造一台全自动Tambola游戏机如果你玩过或者听说过Tambola(在印度非常流行的游戏,在欧美也叫Bingo或Housie),就知道它的核心玩法是主持人从一个装有数字球的容器中随机抽取号码,玩…...

3步终结Windows热键冲突:Hotkey Detective终极排查指南
3步终结Windows热键冲突:Hotkey Detective终极排查指南 【免费下载链接】hotkey-detective A small program for investigating stolen key combinations under Windows 7 and later. 项目地址: https://gitcode.com/gh_mirrors/ho/hotkey-detective 你是否曾…...

如何用Nucleus Co-Op让单机游戏变身本地多人分屏神器
如何用Nucleus Co-Op让单机游戏变身本地多人分屏神器 【免费下载链接】nucleuscoop Starts multiple instances of a game for split-screen multiplayer gaming! 项目地址: https://gitcode.com/gh_mirrors/nu/nucleuscoop 还在为想和朋友一起玩游戏却只有一台电脑而烦…...
)
仅限首批200位架构师获取:DeepSeek-DDD联合建模工作坊实录(含领域事件风暴原始会议录像+决策日志)
更多请点击: https://kaifayun.com 第一章:DeepSeek领域驱动设计的范式演进与本质洞察 DeepSeek作为面向大规模智能体协同与复杂业务语义建模的新一代AI原生架构,其领域驱动设计(DDD)实践已突破传统分层单体范式&…...

Playwright文件上传避坑指南:遇到动态生成的文件选择框怎么办?
Playwright文件上传避坑指南:动态生成文件选择框的实战解决方案最近在为一个电商平台做自动化测试时,遇到了一个棘手的问题——商品图片上传功能总是失败。页面上的"上传图片"按钮明明可以点击,但传统的set_input_files()方法却毫无…...

Linux CPU性能优化:D状态和Z状态排查与处理
文章目录一、Linux进程五大基本状态1. 运行状态(R,Running / Runnable)2. 可中断睡眠状态(S,Interruptible Sleep)3. 不可中断睡眠状态(D,Uninterruptible Sleep)4. 停止…...
如何在macOS上免费安装HSTracker:终极炉石传说套牌追踪器完整指南
如何在macOS上免费安装HSTracker:终极炉石传说套牌追踪器完整指南 【免费下载链接】HSTracker A deck tracker and deck manager for Hearthstone on macOS 项目地址: https://gitcode.com/gh_mirrors/hs/HSTracker 还在为炉石传说对局中记不住对手出牌而烦恼…...
)
告别ENVI/Erdas!用PCI Geomatica处理Pleiades立体像对,手把手教你提取高精度DEM(附数据与避坑指南)
从Pleiades立体像对到高精度DEM:PCI Geomatica全流程实战解析 在遥感数据处理领域,数字高程模型(DEM)的生成一直是核心工作之一。传统主流软件如ENVI和Erdas虽然功能全面,但在处理高分辨率卫星立体像对时,特…...

从subprocess报错聊起:我是怎么给NX盒子里的Python脚本做‘版本体检’和‘降级手术’的
从subprocess报错聊起:我是怎么给NX盒子里的Python脚本做‘版本体检’和‘降级手术’的 那天下午,当我正试图在NVIDIA Jetson NX上部署一个图像处理流水线时,终端突然抛出一行刺眼的红色错误:TypeError: __init__() got an unexpe…...