计算机视觉基础——基于yolov5-face算法的车牌检测
文章目录
- 车牌检测算法检测实现
- 1.环境布置
- 2.数据处理
- 2.1 CCPD数据集介绍
- 2.1.1 ccpd2019及2020
- 2.1.2 文件名字解析
- 2.2数据集处理
- 2.2.1 CCPD数据处理
- 2.2.2 CPRD数据集处理
- 2.3 检测算法
- 2.3.1 数据配置car_plate.yaml
- 2.3.2 模型配置
- 2.3.3 train.py
- 2.3.4 训练结果
- 2.4 部署
- 2.4.1 pth推理(detect.py)
- 2.4.2 onnx推理
- 2.4.3 trt推理
- 2.4.4 numpy版本trt推理
- 2.4.5 推理结果展示
- 参考开源
车牌检测算法检测实现
1.环境布置
- torch==1.8.1
- torchvision==0.9.1
pip install -r requirements.txt
2.数据处理
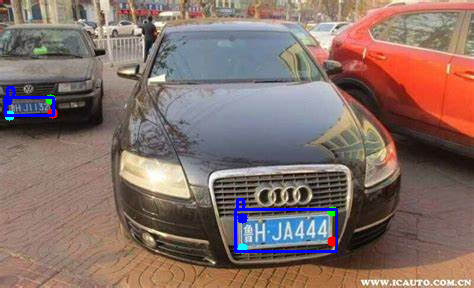
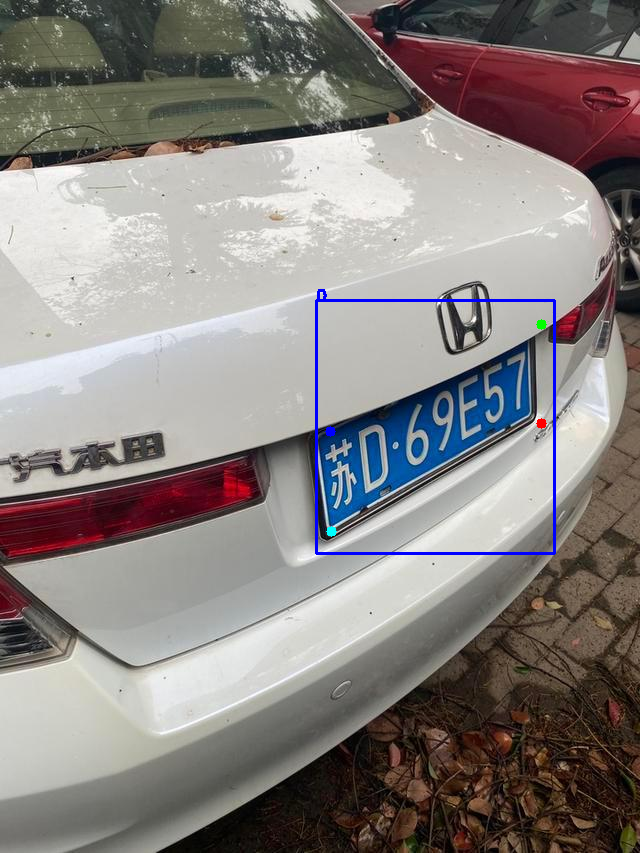
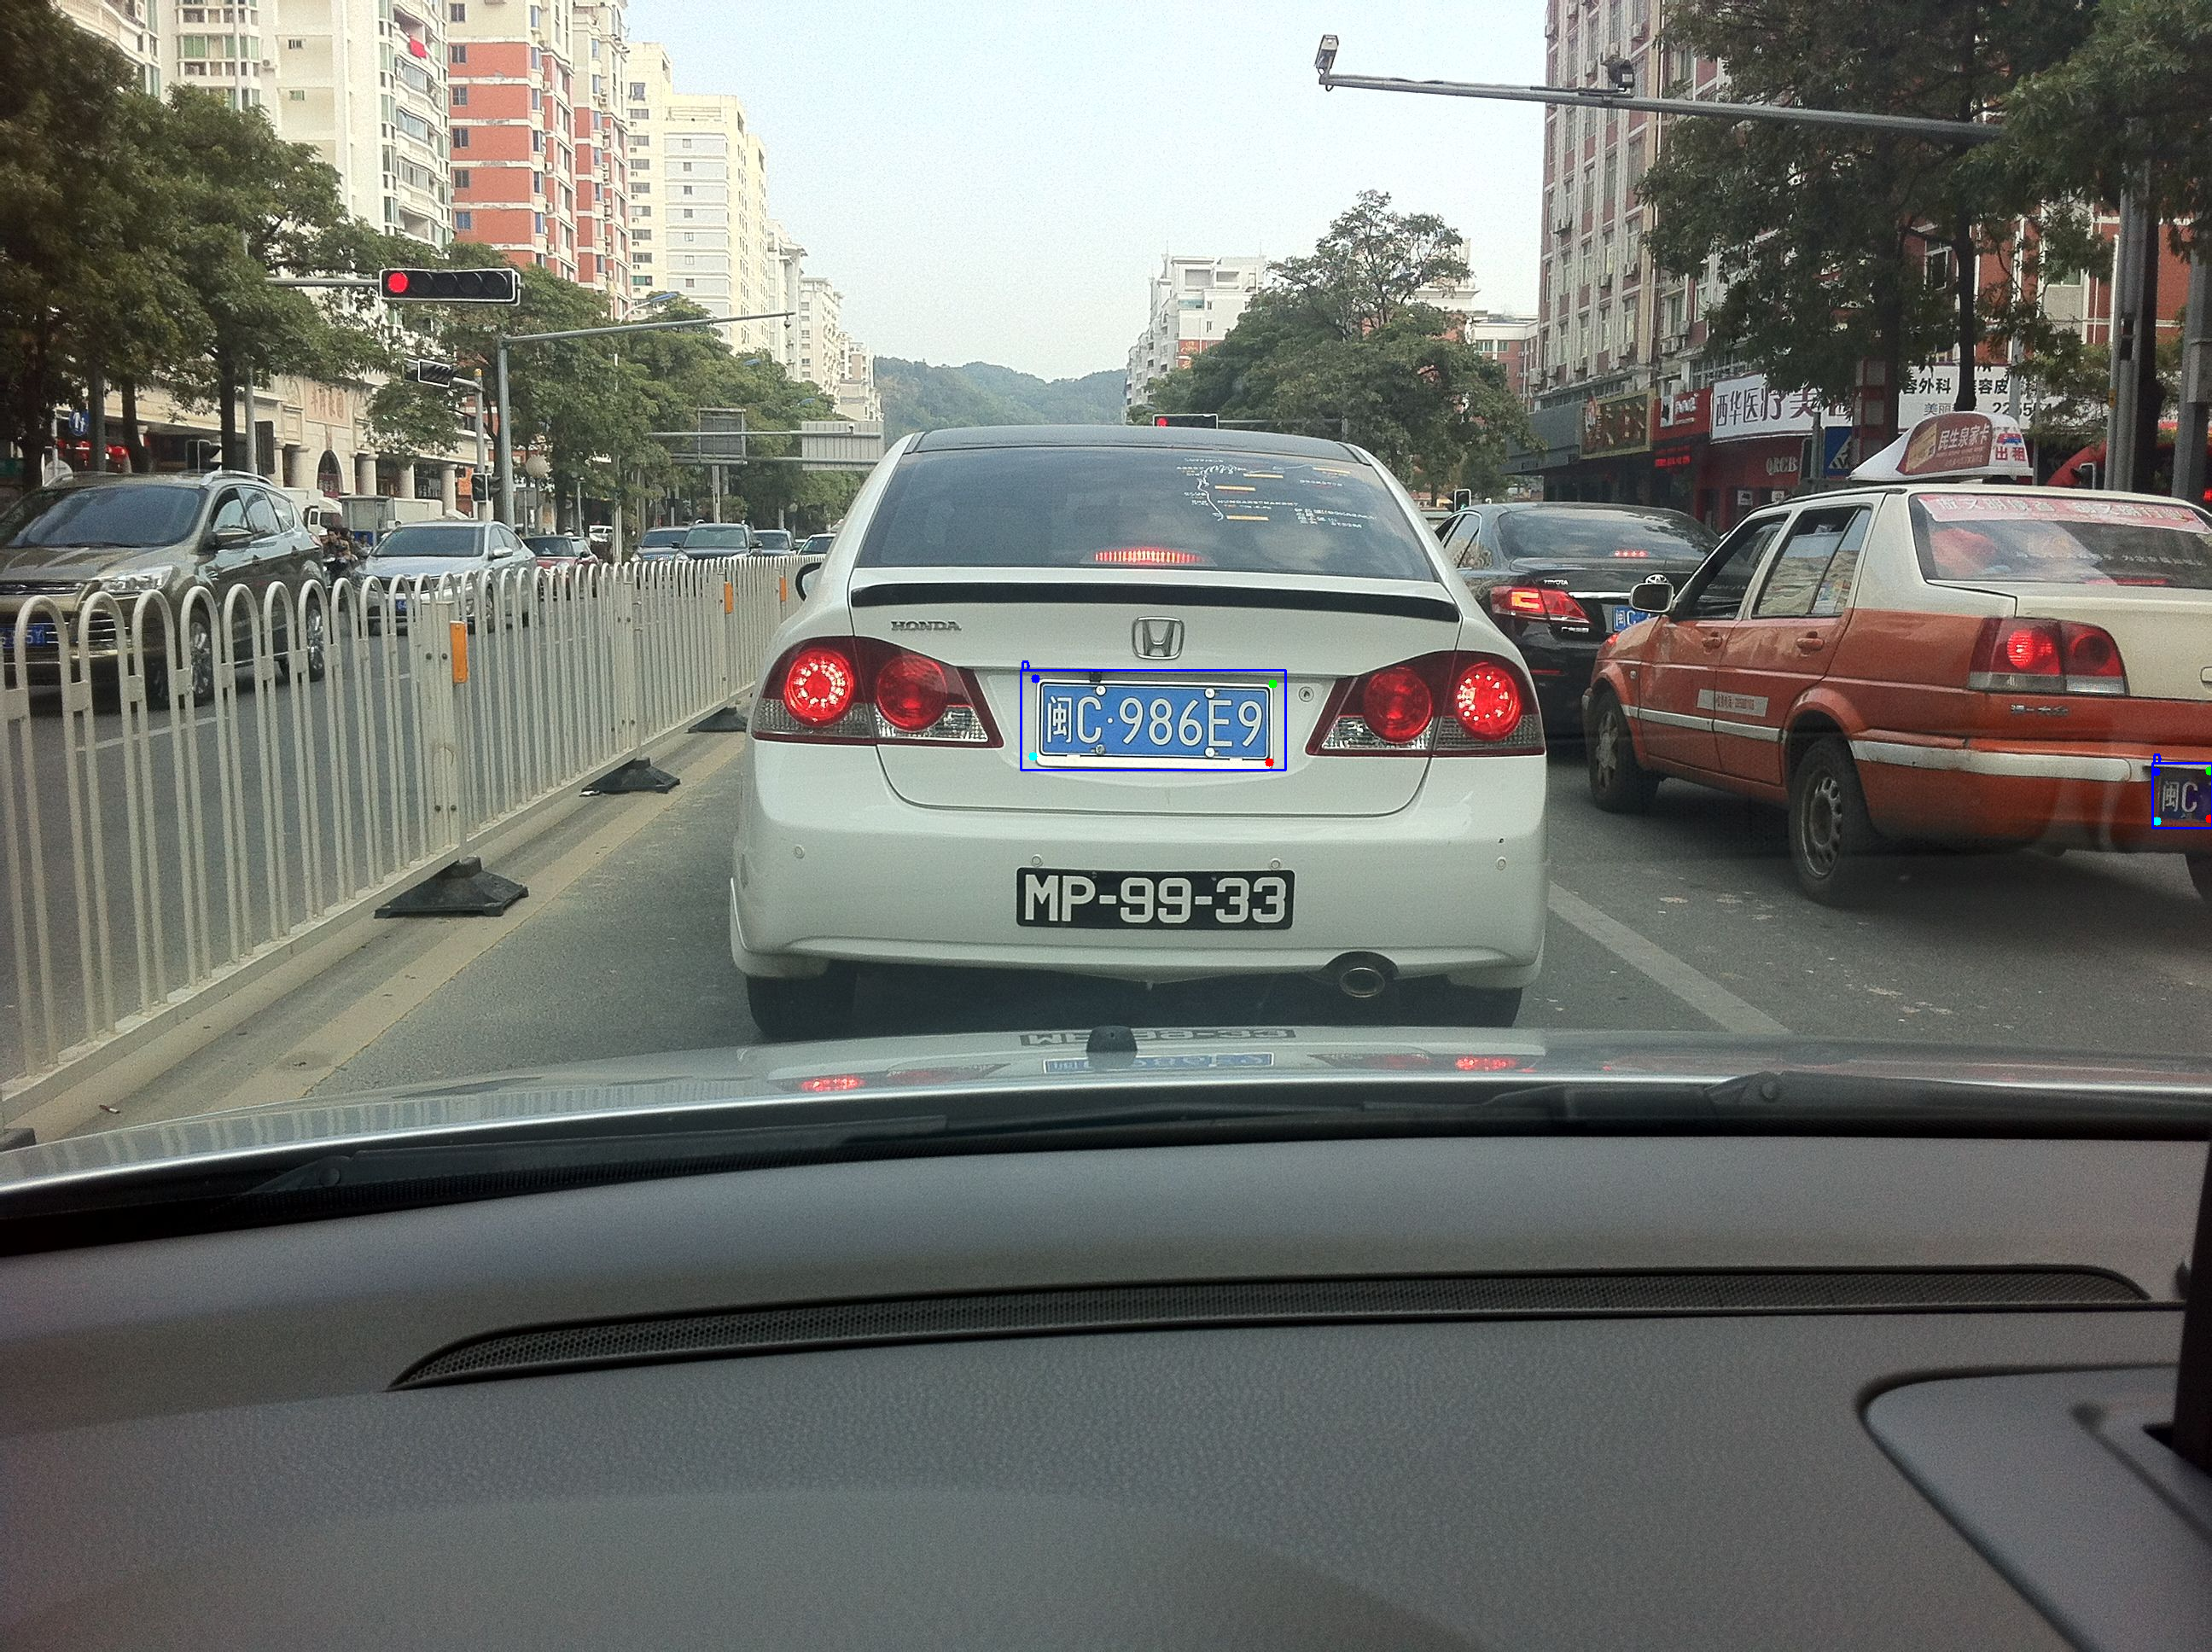
2.1 CCPD数据集介绍
2.1.1 ccpd2019及2020
CCPD数据集主要采集于安徽某停车场一段时间内的数据,
所有图片尺寸固定为720×1160(w×h),
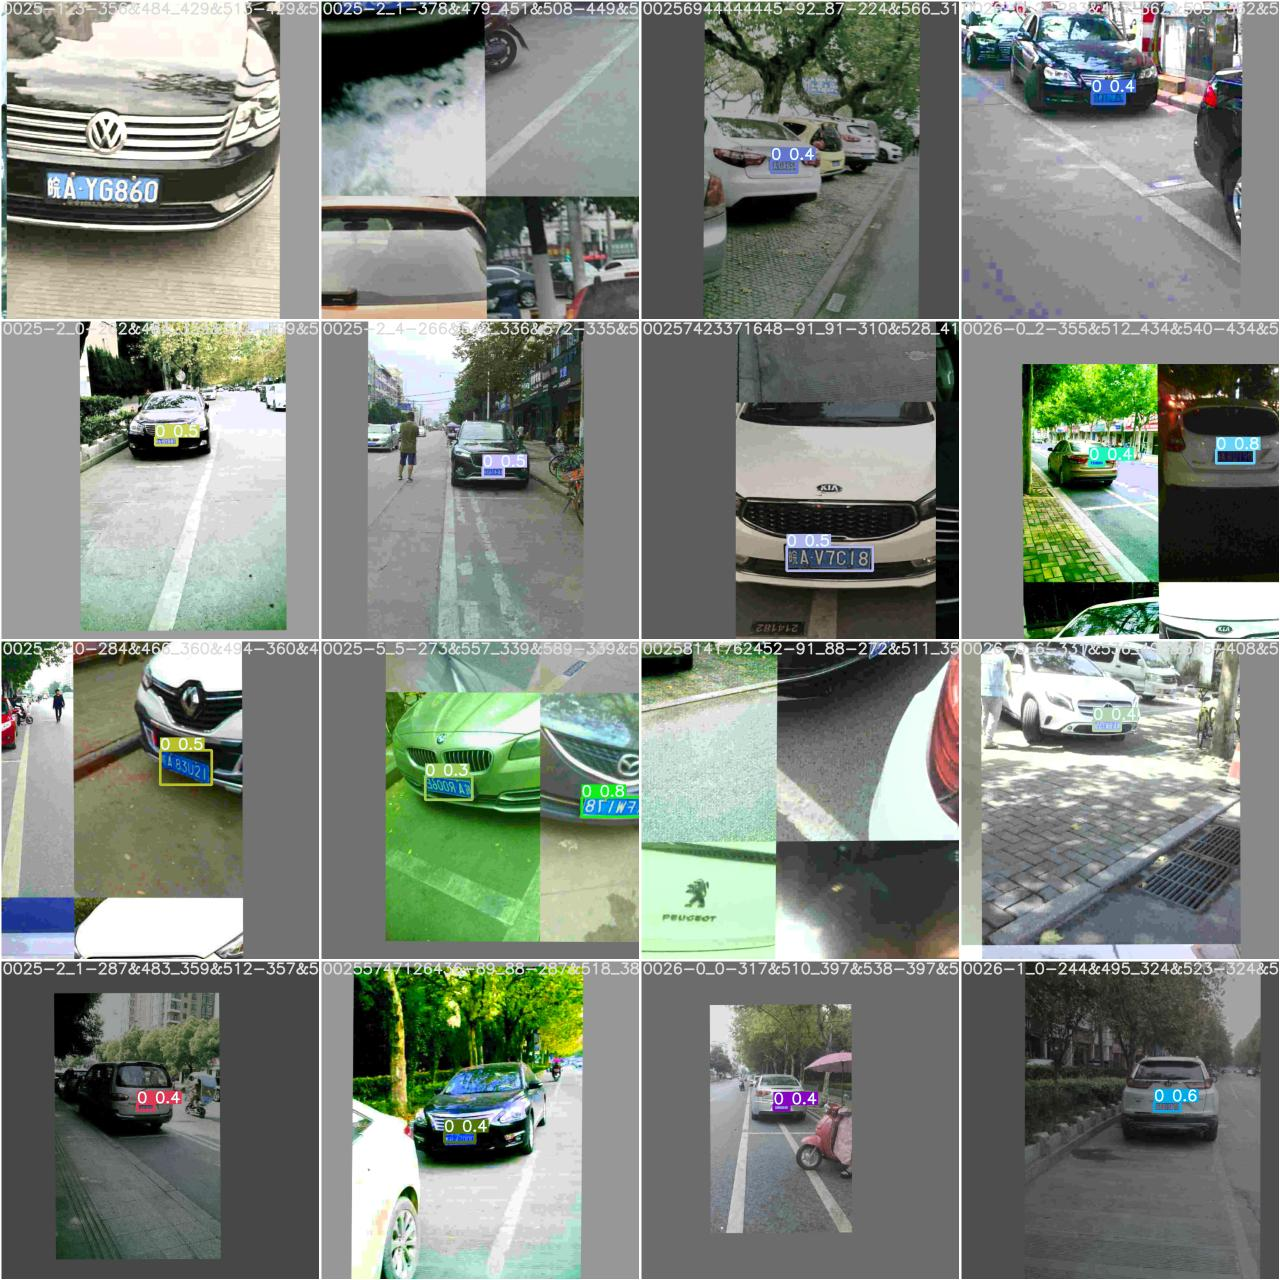
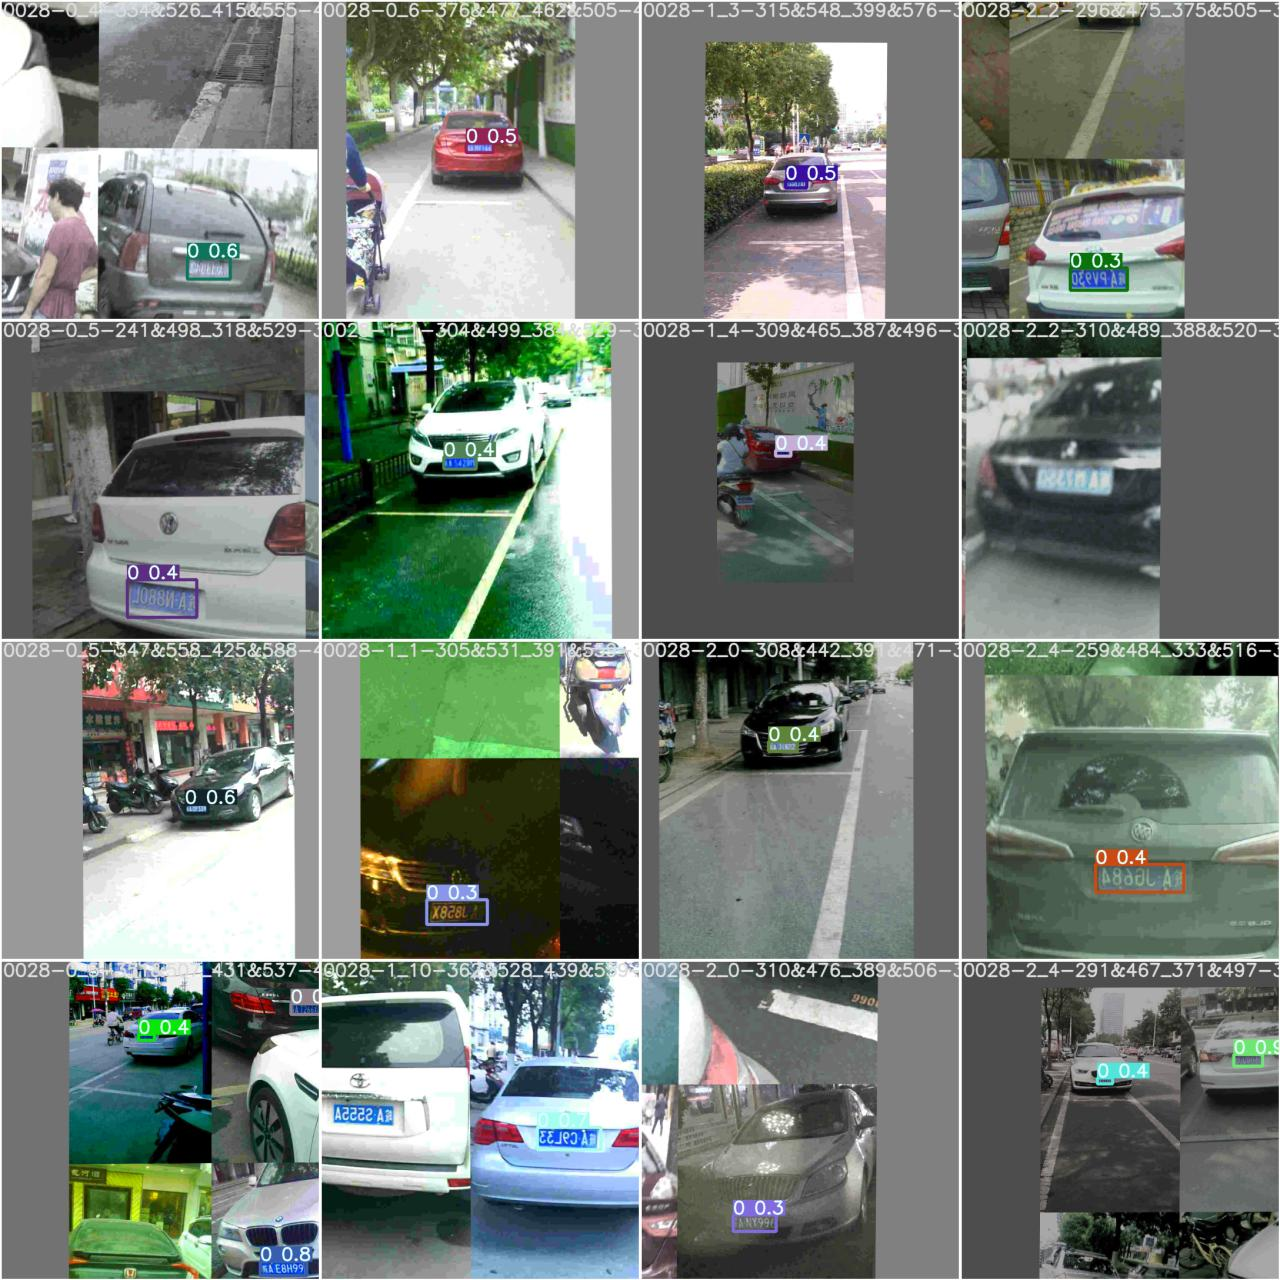
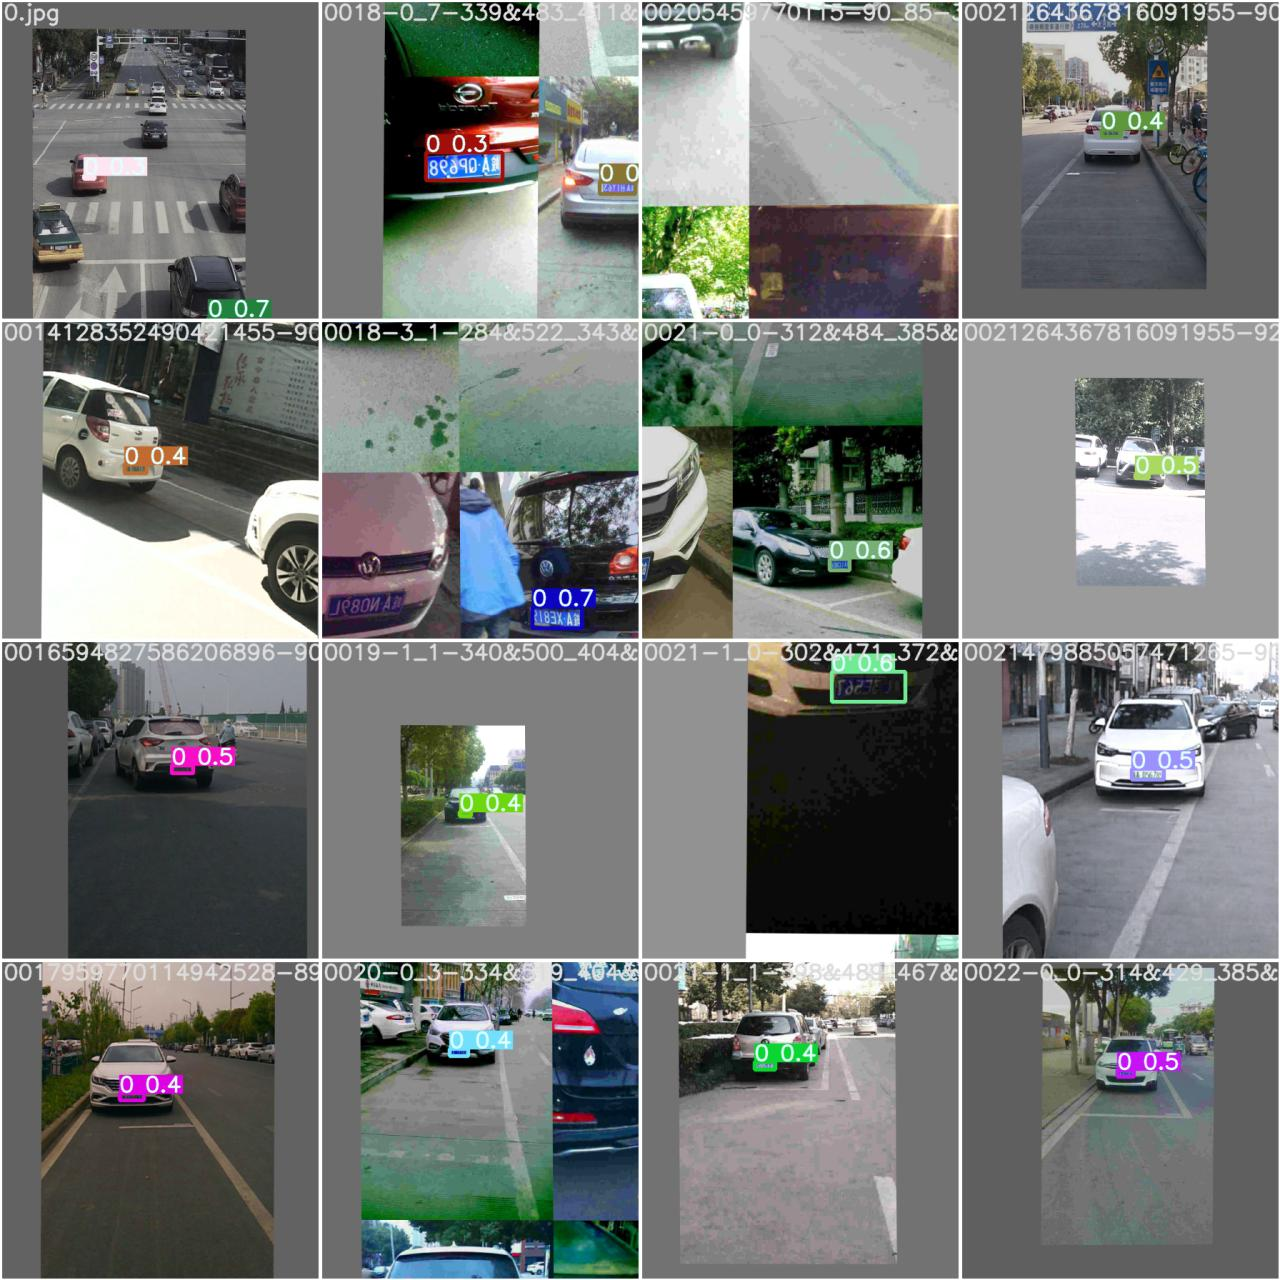
大约包含25w+的各种场景图片,如下图所示:
| 类别 | 描述 | 图片数 |
|---|---|---|
| CCPD-Base | 通用车牌图片 | 200k |
| CCPD-FN | 车牌离摄像头拍摄位置相对较近或较远 | 20k |
| CCPD-DB | 车牌区域亮度较亮、较暗或者不均匀 | 20k |
| CCPD-Rotate | 车牌水平倾斜 20 到 50 度,竖直倾斜-10到 10 度 | 10k |
| CCPD-Tilt | 车牌水平倾斜 15 到 45 度,竖直倾斜 15 到 45 度 | 10k |
| CCPD-Weather | 车牌在雨雪雾天气拍摄得到 | 10k |
| CCPD-Challenge | 在车牌检测识别任务中较有挑战性的图片 | 10k |
| CCPD-Blur | 由于摄像机镜头抖动导致的模楜车牌图片 | 5k |
| CCPD-NP | 没有安装车牌的新车图片 | 5k |
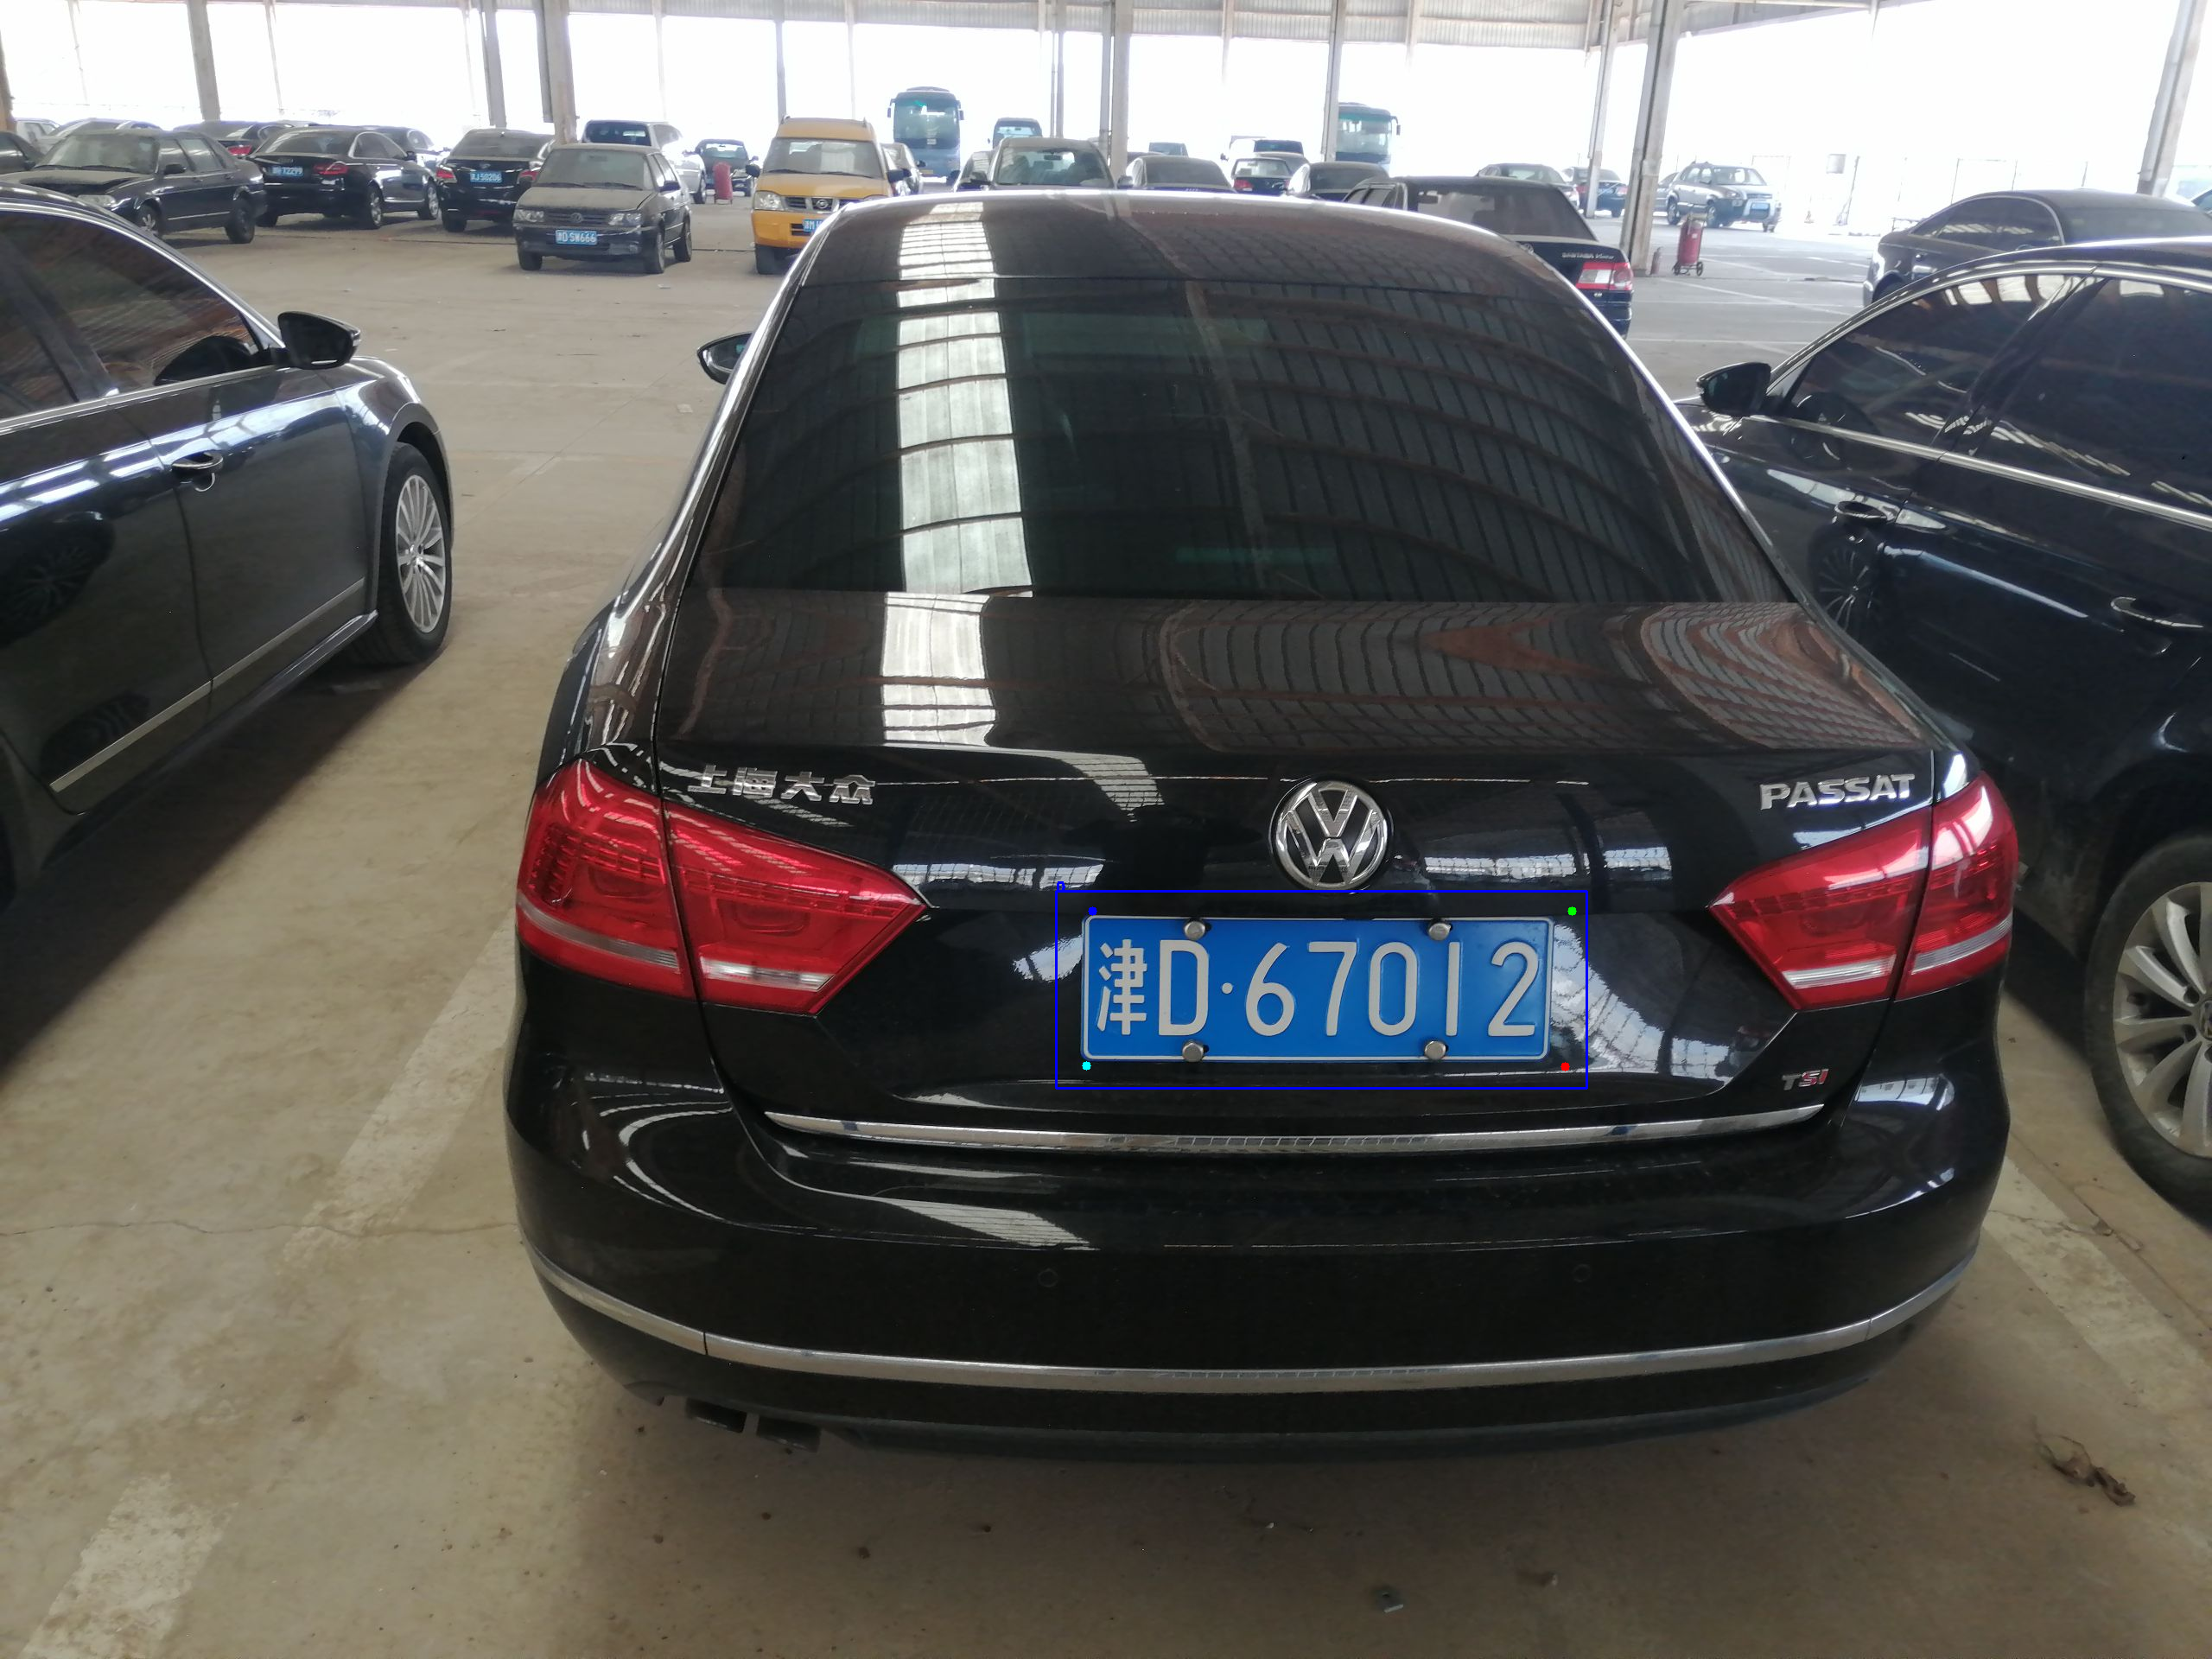
2.1.2 文件名字解析
1、01:车牌占整个界面比例;(一般没用,可忽略)
2、86_91: 车牌的水平角度和垂直角度
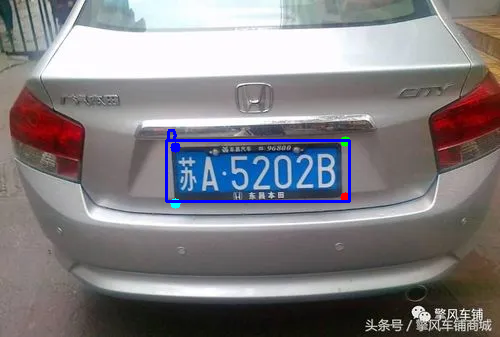
3、298\&341_449\&414: 车牌标注框左上角和右下角的坐标
4、458\&394_308\&410_304\&357_454\&341:车牌四个顶点的坐标,顺序为右下、左下、左上、右上
5、0_0_14_28_24_26_29: 这个代表着和省份 (第一位)、地市 (第二位)、车牌号 (剩余部分) 的映射关系
6、124: 亮度,值越大亮度越高(仅供参考)
7、24:模糊度,值越小越模糊(仅供参考)
2.2数据集处理
2.2.1 CCPD数据处理
1.解压ccpd,cprd数据集2019,ccpd文件太大,解压慢,利用程序进行解压
import tarfile
# 指定tar文件路径
tar_path = r".\CCPD2019\CCPD2019.tar"
# 打开tar文件
with tarfile.open(tar_path, "r") as tar:# 解压所有文件到指定目录tar.extractall(r".\ccpd")
# 解压完成
print("解压完成")
ccpd数据集处理方法
import os
import shutil
import cv2
import numpy as np
from tqdm import tqdmdef allFilePath(rootPath, allFIleList):'''获取指定目录下所有以.jpg结尾的文件的路径,并将这些路径存储在一个列表中。'''fileList = os.listdir(rootPath)for temp in fileList:if os.path.isfile(os.path.join(rootPath, temp)):if temp.endswith(".jpg"):allFIleList.append(os.path.join(rootPath, temp))else:allFilePath(os.path.join(rootPath, temp), allFIleList)def order_points(pts):'''对给定的坐标点进行排序,使得列表中的第一个点是左上角,第二个点是右上角,第三个点是右下角,第四个点是左下角。返回排序后的坐标点列表。'''# initialzie a list of coordinates that will be ordered# such that the first entry in the list is the top-left,# the second entry is the top-right, the third is the# bottom-right, and the fourth is the bottom-leftpts = pts[:4, :]rect = np.zeros((5, 2), dtype="float32")# the top-left point will have the smallest sum, whereas# the bottom-right point will have the largest sums = pts.sum(axis=1)rect[0] = pts[np.argmin(s)]rect[2] = pts[np.argmax(s)]# now, compute the difference between the points, the# top-right point will have the smallest difference,# whereas the bottom-left will have the largest differencediff = np.diff(pts, axis=1)rect[1] = pts[np.argmin(diff)]rect[3] = pts[np.argmax(diff)]# return the ordered coordinatesreturn rectdef get_rect_and_landmarks(img_path):'''该函数用于从图像文件路径中解析出矩形框和关键点的坐标,并返回解析后的结果。'''file_name = img_path.split("/")[-1].split("-")landmarks_np = np.zeros((5, 2))rect = file_name[2].split("_")landmarks = file_name[3].split("_")rect_str = "&".join(rect)landmarks_str = "&".join(landmarks)rect = rect_str.split("&")landmarks = landmarks_str.split("&")rect = [int(x) for x in rect]landmarks = [int(x) for x in landmarks]for i in range(4):landmarks_np[i][0] = landmarks[2 * i]landmarks_np[i][1] = landmarks[2 * i + 1]#    middle_landmark_w =int((landmarks[4]+landmarks[6])/2)#    middle_landmark_h =int((landmarks[5]+landmarks[7])/2)#    landmarks.append(middle_landmark_w)#    landmarks.append(middle_landmark_h)landmarks_np_new = order_points(landmarks_np)#    landmarks_np_new[4]=np.array([middle_landmark_w,middle_landmark_h])return rect, landmarks, landmarks_np_newdef x1x2y1y2_yolo(rect, landmarks, img):h, w, c = img.shaperect[0] = max(0, rect[0])rect[1] = max(0, rect[1])rect[2] = min(w - 1, rect[2] - rect[0])rect[3] = min(h - 1, rect[3] - rect[1])annotation = np.zeros((1, 14))annotation[0, 0] = (rect[0] + rect[2] / 2) / w  # cxannotation[0, 1] = (rect[1] + rect[3] / 2) / h  # cyannotation[0, 2] = rect[2] / w  # wannotation[0, 3] = rect[3] / h  # hannotation[0, 4] = landmarks[0] / w  # l0_xannotation[0, 5] = landmarks[1] / h  # l0_yannotation[0, 6] = landmarks[2] / w  # l1_xannotation[0, 7] = landmarks[3] / h  # l1_yannotation[0, 8] = landmarks[4] / w  # l2_xannotation[0, 9] = landmarks[5] / h  # l2_yannotation[0, 10] = landmarks[6] / w  # l3_xannotation[0, 11] = landmarks[7] / h  # l3_y# annotation[0, 12] = landmarks[8] / w  # l4_x# annotation[0, 13] = landmarks[9] / h  # l4_yreturn annotationdef xywh2yolo(rect, landmarks_sort, img):h, w, c = img.shaperect[0] = max(0, rect[0])rect[1] = max(0, rect[1])rect[2] = min(w - 1, rect[2] - rect[0])rect[3] = min(h - 1, rect[3] - rect[1])annotation = np.zeros((1, 12))annotation[0, 0] = (rect[0] + rect[2] / 2) / w  # cxannotation[0, 1] = (rect[1] + rect[3] / 2) / h  # cyannotation[0, 2] = rect[2] / w  # wannotation[0, 3] = rect[3] / h  # hannotation[0, 4] = landmarks_sort[0][0] / w  # l0_xannotation[0, 5] = landmarks_sort[0][1] / h  # l0_yannotation[0, 6] = landmarks_sort[1][0] / w  # l1_xannotation[0, 7] = landmarks_sort[1][1] / h  # l1_yannotation[0, 8] = landmarks_sort[2][0] / w  # l2_xannotation[0, 9] = landmarks_sort[2][1] / h  # l2_yannotation[0, 10] = landmarks_sort[3][0] / w  # l3_xannotation[0, 11] = landmarks_sort[3][1] / h  # l3_y# annotation[0, 12] = landmarks_sort[4][0] / w  # l4_x# annotation[0, 13] = landmarks_sort[4][1] / h  # l4_yreturn annotation
def yolo2x1y1x2y2(annotation, img):h, w, c = img.shaperect = annotation[:, 0:4].squeeze().tolist()landmarks = annotation[:, 4:].squeeze().tolist()rect_w = w * rect[2]rect_h = h * rect[3]rect_x = int(rect[0] * w - rect_w / 2)rect_y = int(rect[1] * h - rect_h / 2)new_rect = [rect_x, rect_y, rect_x + rect_w, rect_y + rect_h]for i in range(5):landmarks[2 * i] = landmarks[2 * i] * wlandmarks[2 * i + 1] = landmarks[2 * i + 1] * hreturn new_rect, landmarksdef update_txt(file_root = r"I:/CCPD2019/ccpd",save_img_path=r"H:\data\images",save_txt_path="H:\data\labels"):print(file_root, "start!!!!!")file_list = []count = 0allFilePath(file_root, file_list)# print(file_list)# exit()for img_path in file_list:count += 1# img_path = r"ccpd_yolo_test/02-90_85-173&466_452&541-452&553_176&556_178&463_454&460-0_0_6_26_15_26_32-68-53.jpg"text_path = img_path.replace(".jpg", ".txt")# 读取图片img = cv2.imread(img_path)rect, landmarks, landmarks_sort = get_rect_and_landmarks(img_path)# annotation=x1x2y1y2_yolo(rect,landmarks,img)annotation = xywh2yolo(rect, landmarks_sort, img)str_label = "0 "for i in range(len(annotation[0])):str_label = str_label + " " + str(annotation[0][i])str_label = str_label.replace('[', '').replace(']', '')str_label = str_label.replace(',', '') + '\n'# if os.path.exists(text_path):#     continue# else:shutil.move(img_path,os.path.join(os.path.join(save_img_path,os.path.basename(img_path))))text_path_save = os.path.join(save_txt_path,os.path.basename(text_path))# print(text_path_save)# exit()with open(text_path_save, "w") as f:f.write(str_label)print(text_path,"finished!")# print(count, img_path)print(os.getpid(),"end!!!")def delete_non_jpg_images(image_folder):for filename in os.listdir(image_folder):if not filename.endswith(".jpg"):file_path = os.path.join(image_folder, filename)os.remove(file_path)print("删除完毕")def move_files_to_folders(images_folder, folders_folder, labels_folder):for filename in os.listdir(images_folder):if filename.endswith(".jpg"):image_path = os.path.join(images_folder, filename)label_path = os.path.join(images_folder, os.path.splitext(filename)[0] + ".txt")folder_path = os.path.join(folders_folder, filename)labels_folder_path = os.path.join(labels_folder, os.path.splitext(filename)[0] + ".txt")if not os.path.exists(folder_path) and not os.path.exists(labels_folder_path) and os.path.exists(label_path):# 不存在同名shutil.move(image_path, folder_path)shutil.move(label_path, labels_folder_path)if __name__ == '__main__':# 1. 处理ccpd文件夹import multiprocessingpool = multiprocessing.Pool(processes=14)  # 这里使用4个进程files = []for dir in os.listdir(r"I:/CCPD2019/ccpd"):files.append(os.path.join(r"I:/CCPD2019/ccpd",dir))# 使用进程池执行任务results = pool.map(update_txt,files)# 关闭进程池,防止新任务被提交pool.close()# 等待所有任务完成pool.join()# 2. 清理异常文件夹# 调用删除非jpg图像的函数image_folder = r"H:\data\images"# 删除文件delete_non_jpg_images(image_folder)# 3.加入一些新增文件夹文件# 指定文件夹路径# images_folder = r"single_yellow_val"# folders_folder = r"H:\data\images"# labels_folder = r"H:\data\labels"# # 调用移动文件的函数# move_files_to_folders(images_folder, folders_folder, labels_folder)
处理后文件,共计329499个文件
处理后为类别+左上角+右下角+4个角点
2.2.2 CPRD数据集处理
Unified Chinese License Plate Detection and Recognition with High Efficiency(Arxiv 2022)
这段话描述了标签文件夹中的txt文件的注释格式。每个txt文件的文件名与相应图像的名称相同。
在txt文件中,每一行表示图像中的一个车牌(LP)的注释。
一个LP的注释格式如下:
x1,y1,x2,y2,x3,y3,x4,y4,type,content
前八个数字表示边界四边形的坐标。
"type"注释表示LP的类型,0表示蓝色车牌,1表示黄色单线车牌,2表示黄色双线车牌,3表示白色车牌。
"content"注释表示LP的内容。
2.3 检测算法
YOLOv5-Face是YOLOv5的一个改进版本,特别针对人脸检测任务。它添加了一个5-Point Landmark Regression Head(关键点回归),并对Landmark Regression Head使用了Wing loss进行约束。此外,YOLOv5-Face还设计了不同模型尺寸的检测器,从大模型到超小模型,以实现在嵌入式或移动设备上的实时检测。在WiderFace数据集上的实验结果表明,YOLOv5-Face在几乎所有的Easy、Medium和Hard子集上都能达到最先进的性能,超过了特定设计的人脸检测器。与许多其他的人脸检测器不同,YOLOv5-Face把人脸检测作为一个一般的目标检测任务来看待。
这里将yolov5-face 修改为四个关键点,做目标检测任务
2.3.1 数据配置car_plate.yaml
# PASCAL VOC dataset http://host.robots.ox.ac.uk/pascal/VOC/
# Train command: python train.py --data voc.yaml
# Default dataset location is next to /yolov5:
#   /parent_folder
#     /VOC
#     /yolov5# download command/URL (optional)
download: bash data/scripts/get_voc.sh# train and val data as 1) directory: path/images/, 2) file: path/images.txt, or 3) list: [path1/images/, path2/images/]
train: E:/data/train/images
val: E:/data/val_detect/val
# number of classes
nc: 2# class names
names: [ 'single_plate','double_plate']
2.3.2 模型配置
# parameters
nc: 2  # number of classes
depth_multiple: 1.0  # model depth multiple
width_multiple: 0.5  # layer channel multiple# anchors
anchors:- [4,5,  8,10,  13,16]  # P3/8- [23,29,  43,55,  73,105]  # P4/16- [146,217,  231,300,  335,433]  # P5/32# YOLOv5 backbone
backbone:# [from, number, module, args][[-1, 1, StemBlock, [32, 3, 2]],    # 0-P2/4[-1, 1, ShuffleV2Block, [128, 2]], # 1-P3/8[-1, 3, ShuffleV2Block, [128, 1]], # 2[-1, 1, ShuffleV2Block, [256, 2]], # 3-P4/16[-1, 7, ShuffleV2Block, [256, 1]], # 4[-1, 1, ShuffleV2Block, [512, 2]], # 5-P5/32[-1, 3, ShuffleV2Block, [512, 1]], # 6]# YOLOv5 head
head:[[-1, 1, Conv, [128, 1, 1]],[-1, 1, nn.Upsample, [None, 2, 'nearest']],[[-1, 4], 1, Concat, [1]],  # cat backbone P4[-1, 1, C3, [128, False]],  # 10[-1, 1, Conv, [128, 1, 1]],[-1, 1, nn.Upsample, [None, 2, 'nearest']],[[-1, 2], 1, Concat, [1]],  # cat backbone P3[-1, 1, C3, [128, False]],  # 14 (P3/8-small)[-1, 1, Conv, [128, 3, 2]],[[-1, 11], 1, Concat, [1]],  # cat head P4[-1, 1, C3, [128, False]],  # 17 (P4/16-medium)[-1, 1, Conv, [128, 3, 2]],[[-1, 7], 1, Concat, [1]],  # cat head P5[-1, 1, C3, [128, False]],  # 20 (P5/32-large)[[14, 17, 20], 1, Detect, [nc, anchors]],  # Detect(P3, P4, P5)]
2.3.3 train.py
parser = argparse.ArgumentParser()# 权重parser.add_argument('--weights', type=str, default='best.pt', help='initial weights path')# 默认配置文件parser.add_argument('--cfg', type=str, default='models/car_plate.yaml', help='model.yaml path')parser.add_argument('--data', type=str, default='data/car_plate.yaml', help='data.yaml path')parser.add_argument('--hyp', type=str, default='data/hyp.scratch.yaml', help='hyperparameters path')parser.add_argument('--epochs', type=int, default=10)parser.add_argument('--batch-size', type=int, default=64, help='total batch size for all GPUs')parser.add_argument('--img-size', nargs='+', type=int, default=[640, 640], help='[train, test] image sizes')parser.add_argument('--rect', action='store_true', help='rectangular training')parser.add_argument('--resume', nargs='?', const=True, default=False, help='resume most recent training')parser.add_argument('--nosave', action='store_true', help='only save final checkpoint')parser.add_argument('--notest', action='store_true', help='only test final epoch')parser.add_argument('--noautoanchor', action='store_true', help='disable autoanchor check')parser.add_argument('--evolve', action='store_true', help='evolve hyperparameters')parser.add_argument('--bucket', type=str, default='', help='gsutil bucket')parser.add_argument('--cache-images', action='store_true', help='cache images for faster training')parser.add_argument('--image-weights', action='store_true', help='use weighted image selection for training')parser.add_argument('--device', default='', help='cuda device, i.e. 0 or 0,1,2,3 or cpu')parser.add_argument('--multi-scale', action='store_true', default=True, help='vary img-size +/- 50%%')parser.add_argument('--single-cls', action='store_true', help='train multi-class data as single-class')parser.add_argument('--adam', action='store_true', help='use torch.optim.Adam() optimizer')parser.add_argument('--sync-bn', action='store_true', help='use SyncBatchNorm, only available in DDP mode')parser.add_argument('--local_rank', type=int, default=-1, help='DDP parameter, do not modify')parser.add_argument('--log-imgs', type=int, default=2, help='number of images for W&B logging, max 100')parser.add_argument('--log-artifacts', action='store_true', help='log artifacts, i.e. final trained model')parser.add_argument('--workers', type=int, default=4, help='maximum number of dataloader workers')parser.add_argument('--project', default='runs/train', help='save to project/name')parser.add_argument('--name', default='exp', help='save to project/name')parser.add_argument('--exist-ok', action='store_true', help='existing project/name ok, do not increment')
2.3.4 训练结果
2.4 部署
2.4.1 pth推理(detect.py)
#!/usr/bin/env python
import warnings
warnings.filterwarnings("ignore")
import os
import cv2
import numpy as np
import time
import torch
import copy
from models.experimental import attempt_load
from utils.datasets import letterbox
from utils.general import check_img_size, non_max_suppression_face, scale_coords
from utils.torch_utils import time_synchronizedclors = [(255, 0, 0), (0, 255, 0), (0, 0, 255), (255, 255, 0), (0, 255, 255)]def load_model(weights, device):model = attempt_load(weights, map_location=device)  # load FP32 modelreturn model
def scale_coords_landmarks(img1_shape, coords, img0_shape, ratio_pad=None):# Rescale coords (xyxy) from img1_shape to img0_shapeif ratio_pad is None:  # calculate from img0_shapegain = min(img1_shape[0] / img0_shape[0], img1_shape[1] / img0_shape[1])  # gain  = old / newpad = (img1_shape[1] - img0_shape[1] * gain) / 2, (img1_shape[0] - img0_shape[0] * gain) / 2  # wh paddingelse:gain = ratio_pad[0][0]pad = ratio_pad[1]coords[:, [0, 2, 4, 6]] -= pad[0]  # x paddingcoords[:, [1, 3, 5, 7]] -= pad[1]  # y paddingcoords[:, :10] /= gain# clip_coords(coords, img0_shape)coords[:, 0].clamp_(0, img0_shape[1])  # x1coords[:, 1].clamp_(0, img0_shape[0])  # y1coords[:, 2].clamp_(0, img0_shape[1])  # x2coords[:, 3].clamp_(0, img0_shape[0])  # y2coords[:, 4].clamp_(0, img0_shape[1])  # x3coords[:, 5].clamp_(0, img0_shape[0])  # y3coords[:, 6].clamp_(0, img0_shape[1])  # x4coords[:, 7].clamp_(0, img0_shape[0])  # y4# coords[:, 8].clamp_(0, img0_shape[1])  # x5# coords[:, 9].clamp_(0, img0_shape[0])  # y5return coords
def get_plate_rec_landmark(img, xyxy, conf, landmarks, class_num, device):h, w, c = img.shaperesult_dict = {}tl = 1 or round(0.002 * (h + w) / 2) + 1  # line/font thicknessx1 = int(xyxy[0])y1 = int(xyxy[1])x2 = int(xyxy[2])y2 = int(xyxy[3])landmarks_np = np.zeros((4, 2))rect = [x1, y1, x2, y2]for i in range(4):point_x = int(landmarks[2 * i])point_y = int(landmarks[2 * i + 1])landmarks_np[i] = np.array([point_x, point_y])class_label = int(class_num)  # 车牌的的类型0代表单牌,1代表双层车牌result_dict['box'] = rectresult_dict['landmarks'] = landmarks_np.tolist()result_dict['class'] = class_labelreturn result_dict
class Detect:def __init__(self, conf_thres=0.6, iou_thres=0.5, img_size=640):self.conf_thres = conf_thresself.iou_thres = iou_thresself.img_size = img_sizeself.device = "cuda" if torch.cuda.is_available() else "cpu"self.detect_model = load_model("weights/best.pt", self.device)def detect(self, orgimg):dict_list = []if orgimg is None:return []if orgimg.shape[-1] == 4:orgimg = cv2.cvtColor(orgimg, cv2.COLOR_BGRA2BGR)h0, w0 = orgimg.shape[:2]  # orig hwimg0 = copy.deepcopy(orgimg)r = self.img_size / max(h0, w0)  # resize image to img_sizeif r != 1:  # always resize down, only resize up if training with augmentationinterp = cv2.INTER_AREA if r < 1 else cv2.INTER_LINEARimg0 = cv2.resize(img0, (int(w0 * r), int(h0 * r)), interpolation=interp)imgsz = check_img_size(self.img_size, s=self.detect_model.stride.max())  # check img_sizeimg = letterbox(img0, new_shape=imgsz,auto=False)[0]# Convertimg = img[:, :, ::-1].transpose(2, 0, 1).copy()  # BGR to RGB, to 3x416x416# Run inferencet0 = time.time()img = torch.from_numpy(img).to(self.device)img = img.float()  # uint8 to fp16/32img /= 255.0  # 0 - 255 to 0.0 - 1.0if img.ndimension() == 3:img = img.unsqueeze(0)# Inferencet1 = time_synchronized()pred = self.detect_model(img)[0]print(pred.shape)t2 = time_synchronized()print(f"infer time is {(t2-t1)*1000} ms")# Apply NMSpred = non_max_suppression_face(pred, self.conf_thres, self.iou_thres)# print(pred.shape)# Process detectionsfor i, det in enumerate(pred):  # detections per imageif len(det):# Rescale boxes from img_size to im0 sizedet[:, :4] = scale_coords(img.shape[2:], det[:, :4], orgimg.shape).round()# Print resultsfor c in det[:, -1].unique():n = (det[:, -1] == c).sum()  # detections per classdet[:, 5:13] = scale_coords_landmarks(img.shape[2:], det[:, 5:13], orgimg.shape).round()for j in range(det.size()[0]):xyxy = det[j, :4].view(-1).tolist()conf = det[j, 4].cpu().numpy()landmarks = det[j, 5:13].view(-1).tolist()class_num = det[j, 13].cpu().numpy()result_dict = get_plate_rec_landmark(orgimg, xyxy, conf, landmarks, class_num, self.device)dict_list.append(result_dict)return dict_listdef draw_result(self, orgimg, dict_list):'''返回绘制之后的原图'''for result in dict_list:rect_area = result['box']x, y, w, h = rect_area[0], rect_area[1], rect_area[2] - rect_area[0], rect_area[3] - rect_area[1]padding_w = 0.05 * wpadding_h = 0.11 * hrect_area[0] = max(0, int(x - padding_w))rect_area[1] = max(0, int(y - padding_h))rect_area[2] = min(orgimg.shape[1], int(rect_area[2] + padding_w))rect_area[3] = min(orgimg.shape[0], int(rect_area[3] + padding_h))landmarks = result['landmarks']label = result['class']# result_str+=result+" "for i in range(4):  # 关键点cv2.circle(orgimg, (int(landmarks[i][0]), int(landmarks[i][1])), 5, clors[i], -1)cv2.rectangle(orgimg, (rect_area[0], rect_area[1]), (rect_area[2], rect_area[3]), clors[label], 2)  # 画框cv2.putText(img, str(label), (rect_area[0], rect_area[1]), cv2.FONT_HERSHEY_SIMPLEX, 0.5, clors[label], 2)return orgimg
if __name__ == '__main__':det = Detect()img_dir = "images"save_dir = "result"if not os.path.exists(save_dir):os.makedirs(save_dir)for file in os.listdir(img_dir):img_path = os.path.join(img_dir,file)img = cv2.imdecode(np.fromfile(img_path, dtype=np.uint8), -1)dict_list = det.detect(img)# print(dict_list)result_img = det.draw_result(img, dict_list)save_dir_path = os.path.join(save_dir,file)cv2.imwrite(save_dir_path,result_img)
2.4.2 onnx推理
import argparse
import time, os
import torch
from detect import scale_coords_landmarks, get_plate_rec_landmark
from torch2trt.trt_model import TrtModel
from utils.general import non_max_suppression_face, scale_coords, check_img_size
import cv2
import copy
from utils.torch_utils import time_synchronized
import numpy as npclors = [(255, 0, 0), (0, 255, 0), (0, 0, 255), (255, 255, 0), (0, 255, 255)]def letterbox(img, size=(640, 640)):h, w, c = img.shape# 缩放因子ratio = min(size[0] / h, size[1] / w)new_h, new_w = int(h * ratio), int(w * ratio)top = int((size[0] - new_h) / 2)left = int((size[1] - new_w) / 2)bottom = size[0] - new_h - topright = size[1] - new_w - leftimg_resize = cv2.resize(img, (new_w, new_h))img = cv2.copyMakeBorder(img_resize, top, bottom, left, right, borderType=cv2.BORDER_CONSTANT,value=(114, 114, 114))return img, ratio, left, topdef nms(boxes, iou_thresh):# numpy nmsindex = np.argsort(boxes[:, 4])[::-1]keep = []while index.size > 0:i = index[0]keep.append(i)x1 = np.maximum(boxes[i, 0], boxes[index[1:], 0])y1 = np.maximum(boxes[i, 1], boxes[index[1:], 1])x2 = np.minimum(boxes[i, 2], boxes[index[1:], 2])y2 = np.minimum(boxes[i, 3], boxes[index[1:], 3])w = np.maximum(0, x2 - x1)h = np.maximum(0, y2 - y1)inter_area = w * hunion_area = (boxes[i, 2] - boxes[i, 0]) * (boxes[i, 3] - boxes[i, 1]) + (boxes[index[1:], 2] - boxes[index[1:], 0]) * (boxes[index[1:], 3] - boxes[index[1:], 1])iou = inter_area / (union_area - inter_area)idx = np.where(iou <= iou_thresh)[0]index = index[idx + 1]return keepdef restore_box(boxes, r, left, top):  # 返回原图上面的坐标boxes[:, [0, 2, 5, 7, 9, 11]] -= leftboxes[:, [1, 3, 6, 8, 10, 12]] -= topboxes[:, [0, 2, 5, 7, 9, 11]] /= rboxes[:, [1, 3, 6, 8, 10, 12]] /= rreturn boxesdef post_precessing(dets, ratio, left, top, conf_thresh=0.3, iou_thresh=0.5):  # 检测后处理# 选取大于置信度的choice = dets[:, :, 4] > conf_threshdets = dets[choice]dets[:, 13:15] *= dets[:, 4:5]box = dets[:, :4]boxes = xywh2xyxy(box)score = np.max(dets[:, 13:15], axis=-1, keepdims=True)index = np.argmax(dets[:, 13:15], axis=-1).reshape(-1, 1)output = np.concatenate((boxes, score, dets[:, 5:13], index), axis=1)reserve_ = nms(output, iou_thresh)output = output[reserve_]output = restore_box(output, ratio, left, top)return outputdef xywh2xyxy(boxes):  # xywh坐标变为 左上 ,右下坐标 x1,y1  x2,y2xywh = copy.deepcopy(boxes)xywh[:, 0] = boxes[:, 0] - boxes[:, 2] / 2xywh[:, 1] = boxes[:, 1] - boxes[:, 3] / 2xywh[:, 2] = boxes[:, 0] + boxes[:, 2] / 2xywh[:, 3] = boxes[:, 1] + boxes[:, 3] / 2return xywhclass Detect:def __init__(self, conf_thres=0.6, iou_thres=0.5, img_size=640, trt_path="weights/best.trt"):self.conf_thres = conf_thresself.iou_thres = iou_thresself.img_size = img_sizeself.device = "cuda" if torch.cuda.is_available() else "cpu"self.detect_model = TrtModel(trt_path)def detect_processing(self, img, img_size=(640, 640)):img, ratio, left, top = letterbox(img, size=img_size)img = img[:, :, ::-1].transpose(2, 0, 1).copy().astype(np.float32)img = img / 255img = img.reshape(1, *img.shape)return img, ratio, left, topdef detect(self, orgimg):dict_list = []if orgimg is None:return []if orgimg.shape[-1] == 4:orgimg = cv2.cvtColor(orgimg, cv2.COLOR_BGRA2BGR)h0, w0 = orgimg.shape[:2]  # orig hwimg0 = copy.deepcopy(orgimg)# imgsz = check_img_size(self.img_size, s=32)  # check img_sizeimg, ratio, left, top = self.detect_processing(img0)if img.ndim == 3:img = img[None, ...]# Inferencet1 = time_synchronized()pred = self.detect_model(img).reshape([1, 25200, 15])output = post_precessing(pred, ratio, left, top, conf_thresh=self.conf_thres, iou_thresh=self.iou_thres)for output in output:result_dict = {}rect = output[:4].astype(int).tolist()land_marks = output[5:13].astype(int).reshape(4, 2)conf =  output[4].astype(int).tolist()result_dict['box'] = rectresult_dict['class'] = confresult_dict['landmarks'] = land_marks.tolist()dict_list.append(result_dict)return dict_listdef draw_result(self, orgimg, dict_list):'''返回绘制之后的原图'''for result in dict_list:rect_area = result['box']x, y, w, h = rect_area[0], rect_area[1], rect_area[2] - rect_area[0], rect_area[3] - rect_area[1]padding_w = 0.05 * wpadding_h = 0.11 * hrect_area[0] = max(0, int(x - padding_w))rect_area[1] = max(0, int(y - padding_h))rect_area[2] = min(orgimg.shape[1], int(rect_area[2] + padding_w))rect_area[3] = min(orgimg.shape[0], int(rect_area[3] + padding_h))landmarks = result['landmarks']label = result['class']# result_str+=result+" "for i in range(4):  # 关键点cv2.circle(orgimg, (int(landmarks[i][0]), int(landmarks[i][1])), 5, clors[i], -1)cv2.rectangle(orgimg, (rect_area[0], rect_area[1]), (rect_area[2], rect_area[3]), clors[label], 2)  # 画框cv2.putText(img, str(label), (rect_area[0], rect_area[1]), cv2.FONT_HERSHEY_SIMPLEX, 0.5, clors[label], 2)return orgimgdef __del__(self):self.detect_model.destroy()if __name__ == '__main__':# ============可视化================# img_vis(img, orgimg, pred)det = Detect()img_dir = "images"save_dir = "result"if not os.path.exists(save_dir):os.makedirs(save_dir)for file in os.listdir(img_dir):img_path = os.path.join(img_dir, file)img = cv2.imdecode(np.fromfile(img_path, dtype=np.uint8), -1)dict_list = det.detect(img)print(dict_list)result_img = det.draw_result(img, dict_list)save_dir_path = os.path.join(save_dir, file)cv2.imwrite(save_dir_path, result_img)
2.4.3 trt推理
import argparse
import time,os
import torch
from detect import scale_coords_landmarks, get_plate_rec_landmark
from torch2trt.trt_model import TrtModel
from utils.datasets import letterbox
from utils.general import non_max_suppression_face, scale_coords, check_img_size
import cv2
import copy
from utils.torch_utils import time_synchronized
import numpy as np
clors = [(255, 0, 0), (0, 255, 0), (0, 0, 255), (255, 255, 0), (0, 255, 255)]
def img_process(img_path,long_side=640,stride_max=32):'''图像预处理'''orgimg=cv2.imread(img_path)img0 = copy.deepcopy(orgimg)h0, w0 = orgimg.shape[:2]  # orig hwr = long_side/ max(h0, w0)  # resize image to img_sizeif r != 1:  # always resize down, only resize up if training with augmentationinterp = cv2.INTER_AREA if r < 1 else cv2.INTER_LINEARimg0 = cv2.resize(img0, (int(w0 * r), int(h0 * r)), interpolation=interp)imgsz = check_img_size(long_side, s=stride_max)  # check img_sizeimg = letterbox(img0, new_shape=imgsz,auto=False)[0] # auto True最小矩形   False固定尺度# Convertimg = img[:, :, ::-1].transpose(2, 0, 1).copy()  # BGR to RGB, to 3x416x416img = torch.from_numpy(img)img = img.float()  # uint8 to fp16/32img /= 255.0  # 0 - 255 to 0.0 - 1.0if img.ndimension() == 3:img = img.unsqueeze(0)return img,orgimgclass Detect:def __init__(self, conf_thres=0.6, iou_thres=0.5, img_size=640,trt_path="weights/best.trt"):self.conf_thres = conf_thresself.iou_thres = iou_thresself.img_size = img_sizeself.device = "cuda" if torch.cuda.is_available() else "cpu"self.detect_model = TrtModel(trt_path)def detect(self, orgimg):dict_list = []if orgimg is None:return []if orgimg.shape[-1] == 4:orgimg = cv2.cvtColor(orgimg, cv2.COLOR_BGRA2BGR)h0, w0 = orgimg.shape[:2]  # orig hwimg0 = copy.deepcopy(orgimg)r = self.img_size / max(h0, w0)  # resize image to img_sizeif r != 1:  # always resize down, only resize up if training with augmentationinterp = cv2.INTER_AREA if r < 1 else cv2.INTER_LINEARimg0 = cv2.resize(img0, (int(w0 * r), int(h0 * r)), interpolation=interp)imgsz = check_img_size(self.img_size, s=32)  # check img_sizeimg = letterbox(img0, new_shape=imgsz,auto=False)[0]# Convertimg = img[:, :, ::-1].transpose(2, 0, 1).copy()  # BGR to RGB, to 3x416x416# Run inferencet0 = time.time()# img = torch.from_numpy(img).to(self.device)img = img.astype(float)  # uint8 to fp16/32img /= 255.0  # 0 - 255 to 0.0 - 1.0if img.ndim == 3:img = img[None,...]# Inferencet1 = time_synchronized()pred = self.detect_model(img).reshape([1, 25200, 15])t2 = time_synchronized()print(f"infer time is {(t2-t1)*1000} ms")# Apply NMS# pred = torch.tensor(pred)pred = non_max_suppression_face(torch.tensor(pred), self.conf_thres, self.iou_thres)# print(type(pred))# Process detectionsfor i, det in enumerate(pred):  # detections per imageif len(det):# Rescale boxes from img_size to im0 size# print(type(det))det[:, :4] = scale_coords(img.shape[2:], det[:, :4], orgimg.shape).round()# Print resultsfor c in det[:, -1].unique():n = (det[:, -1] == c).sum()  # detections per classdet[:, 5:13] = scale_coords_landmarks(img.shape[2:], det[:, 5:13], orgimg.shape).round()for j in range(det.size()[0]):xyxy = det[j, :4].view(-1).tolist()conf = det[j, 4].cpu().numpy()landmarks = det[j, 5:13].view(-1).tolist()class_num = det[j, 13].cpu().numpy()result_dict = get_plate_rec_landmark(orgimg, xyxy, conf, landmarks, class_num, self.device)dict_list.append(result_dict)return dict_listdef draw_result(self, orgimg, dict_list):'''返回绘制之后的原图'''for result in dict_list:rect_area = result['box']x, y, w, h = rect_area[0], rect_area[1], rect_area[2] - rect_area[0], rect_area[3] - rect_area[1]padding_w = 0.05 * wpadding_h = 0.11 * hrect_area[0] = max(0, int(x - padding_w))rect_area[1] = max(0, int(y - padding_h))rect_area[2] = min(orgimg.shape[1], int(rect_area[2] + padding_w))rect_area[3] = min(orgimg.shape[0], int(rect_area[3] + padding_h))landmarks = result['landmarks']label = result['class']# result_str+=result+" "for i in range(4):  # 关键点cv2.circle(orgimg, (int(landmarks[i][0]), int(landmarks[i][1])), 5, clors[i], -1)cv2.rectangle(orgimg, (rect_area[0], rect_area[1]), (rect_area[2], rect_area[3]), clors[label], 2)  # 画框cv2.putText(img, str(label), (rect_area[0], rect_area[1]), cv2.FONT_HERSHEY_SIMPLEX, 0.5, clors[label], 2)return orgimgdef __del__(self):self.detect_model.destroy()if __name__ == '__main__':# ============可视化================# img_vis(img, orgimg, pred)det = Detect()img_dir = "images"save_dir = "result"if not os.path.exists(save_dir):os.makedirs(save_dir)for file in os.listdir(img_dir):img_path = os.path.join(img_dir, file)img = cv2.imdecode(np.fromfile(img_path, dtype=np.uint8), -1)dict_list = det.detect(img)print(dict_list)result_img = det.draw_result(img, dict_list)save_dir_path = os.path.join(save_dir, file)cv2.imwrite(save_dir_path, result_img)
2.4.4 numpy版本trt推理
import argparse
import time, os
import torch
from detect import scale_coords_landmarks, get_plate_rec_landmark
from torch2trt.trt_model import TrtModel
from utils.general import non_max_suppression_face, scale_coords, check_img_size
import cv2
import copy
from utils.torch_utils import time_synchronized
import numpy as np
clors = [(255, 0, 0), (0, 255, 0), (0, 0, 255), (255, 255, 0), (0, 255, 255)]
def letterbox(img, size=(640, 640)):h, w, c = img.shape# 缩放因子ratio = min(size[0] / h, size[1] / w)new_h, new_w = int(h * ratio), int(w * ratio)top = int((size[0] - new_h) / 2)left = int((size[1] - new_w) / 2)bottom = size[0] - new_h - topright = size[1] - new_w - leftimg_resize = cv2.resize(img, (new_w, new_h))img = cv2.copyMakeBorder(img_resize, top, bottom, left, right, borderType=cv2.BORDER_CONSTANT,value=(114, 114, 114))return img, ratio, left, topdef nms(boxes, iou_thresh):# numpy nmsindex = np.argsort(boxes[:, 4])[::-1]keep = []while index.size > 0:i = index[0]keep.append(i)x1 = np.maximum(boxes[i, 0], boxes[index[1:], 0])y1 = np.maximum(boxes[i, 1], boxes[index[1:], 1])x2 = np.minimum(boxes[i, 2], boxes[index[1:], 2])y2 = np.minimum(boxes[i, 3], boxes[index[1:], 3])w = np.maximum(0, x2 - x1)h = np.maximum(0, y2 - y1)inter_area = w * hunion_area = (boxes[i, 2] - boxes[i, 0]) * (boxes[i, 3] - boxes[i, 1]) + (boxes[index[1:], 2] - boxes[index[1:], 0]) * (boxes[index[1:], 3] - boxes[index[1:], 1])iou = inter_area / (union_area - inter_area)idx = np.where(iou <= iou_thresh)[0]index = index[idx + 1]return keepdef restore_box(boxes, r, left, top):  # 返回原图上面的坐标boxes[:, [0, 2, 5, 7, 9, 11]] -= leftboxes[:, [1, 3, 6, 8, 10, 12]] -= topboxes[:, [0, 2, 5, 7, 9, 11]] /= rboxes[:, [1, 3, 6, 8, 10, 12]] /= rreturn boxesdef post_precessing(dets, ratio, left, top, conf_thresh=0.3, iou_thresh=0.5):  # 检测后处理# 选取大于置信度的choice = dets[:, :, 4] > conf_threshdets = dets[choice]dets[:, 13:15] *= dets[:, 4:5]box = dets[:, :4]boxes = xywh2xyxy(box)score = np.max(dets[:, 13:15], axis=-1, keepdims=True)index = np.argmax(dets[:, 13:15], axis=-1).reshape(-1, 1)output = np.concatenate((boxes, score, dets[:, 5:13], index), axis=1)reserve_ = nms(output, iou_thresh)output = output[reserve_]output = restore_box(output, ratio, left, top)return outputdef xywh2xyxy(boxes):  # xywh坐标变为 左上 ,右下坐标 x1,y1  x2,y2xywh = copy.deepcopy(boxes)xywh[:, 0] = boxes[:, 0] - boxes[:, 2] / 2xywh[:, 1] = boxes[:, 1] - boxes[:, 3] / 2xywh[:, 2] = boxes[:, 0] + boxes[:, 2] / 2xywh[:, 3] = boxes[:, 1] + boxes[:, 3] / 2return xywhclass Detect:def __init__(self, conf_thres=0.6, iou_thres=0.5, img_size=640, trt_path="weights/best.trt"):self.conf_thres = conf_thresself.iou_thres = iou_thresself.img_size = img_sizeself.device = "cuda" if torch.cuda.is_available() else "cpu"self.detect_model = TrtModel(trt_path)def detect_processing(self, img, img_size=(640, 640)):img, ratio, left, top = letterbox(img, size=img_size)img = img[:, :, ::-1].transpose(2, 0, 1).copy().astype(np.float32)img = img / 255img = img.reshape(1, *img.shape)return img, ratio, left, topdef detect(self, orgimg):dict_list = []if orgimg is None:return []if orgimg.shape[-1] == 4:orgimg = cv2.cvtColor(orgimg, cv2.COLOR_BGRA2BGR)h0, w0 = orgimg.shape[:2]  # orig hwimg0 = copy.deepcopy(orgimg)# imgsz = check_img_size(self.img_size, s=32)  # check img_sizeimg, ratio, left, top = self.detect_processing(img0)if img.ndim == 3:img = img[None, ...]# Inferencet1 = time_synchronized()pred = self.detect_model(img).reshape([1, 25200, 15])output = post_precessing(pred, ratio, left, top, conf_thresh=self.conf_thres, iou_thresh=self.iou_thres)for output in output:result_dict = {}rect = output[:4].astype(int).tolist()land_marks = output[5:13].astype(int).reshape(4, 2)conf =  output[4].astype(int).tolist()result_dict['box'] = rectresult_dict['class'] = confresult_dict['landmarks'] = land_marks.tolist()dict_list.append(result_dict)return dict_listdef draw_result(self, orgimg, dict_list):'''返回绘制之后的原图'''for result in dict_list:rect_area = result['box']x, y, w, h = rect_area[0], rect_area[1], rect_area[2] - rect_area[0], rect_area[3] - rect_area[1]padding_w = 0.05 * wpadding_h = 0.11 * hrect_area[0] = max(0, int(x - padding_w))rect_area[1] = max(0, int(y - padding_h))rect_area[2] = min(orgimg.shape[1], int(rect_area[2] + padding_w))rect_area[3] = min(orgimg.shape[0], int(rect_area[3] + padding_h))landmarks = result['landmarks']label = result['class']# result_str+=result+" "for i in range(4):  # 关键点cv2.circle(orgimg, (int(landmarks[i][0]), int(landmarks[i][1])), 5, clors[i], -1)cv2.rectangle(orgimg, (rect_area[0], rect_area[1]), (rect_area[2], rect_area[3]), clors[label], 2)  # 画框cv2.putText(img, str(label), (rect_area[0], rect_area[1]), cv2.FONT_HERSHEY_SIMPLEX, 0.5, clors[label], 2)return orgimgdef __del__(self):self.detect_model.destroy()if __name__ == '__main__':# ============可视化================# img_vis(img, orgimg, pred)det = Detect()img_dir = "images"save_dir = "result"if not os.path.exists(save_dir):os.makedirs(save_dir)for file in os.listdir(img_dir):img_path = os.path.join(img_dir, file)img = cv2.imdecode(np.fromfile(img_path, dtype=np.uint8), -1)dict_list = det.detect(img)print(dict_list)result_img = det.draw_result(img, dict_list)save_dir_path = os.path.join(save_dir, file)cv2.imwrite(save_dir_path, result_img)
2.4.5 推理结果展示

参考开源
Chinese_license_plate_detection_recognition
相关文章:
计算机视觉基础——基于yolov5-face算法的车牌检测
文章目录 车牌检测算法检测实现1.环境布置2.数据处理2.1 CCPD数据集介绍2.1.1 ccpd2019及20202.1.2 文件名字解析 2.2数据集处理2.2.1 CCPD数据处理2.2.2 CPRD数据集处理 2.3 检测算法2.3.1 数据配置car_plate.yaml2.3.2 模型配置2.3.3 train.py2.3.4 训练结果 2.4 部署2.4.1 p…...

【好书推荐】AI时代架构师修炼之道:ChatGPT让架构师插上翅膀
目录 前言 ChatGPT对架构师工作的帮助 快速理解和分析需求 提供代码建议和解决方案 辅助系统设计和优化 提高团队协作效率 如何使用ChatGPT提高架构师工作效率 了解用户需求和分析问题 编码实践和问题解决 系统设计和优化建议 团队协作和沟通效率提升 知识管理和文…...

全局代理和局部代理的区别
在计算机领域中,代理是一种常见的网络技术,它可以帮助用户更好地控制网络访问和数据传输。代理可以分为全局代理和局部代理两种,它们有着不同的作用和适用场景。 一、全局代理 全局代理指的是在系统级别设置的代理,它可以代理所…...
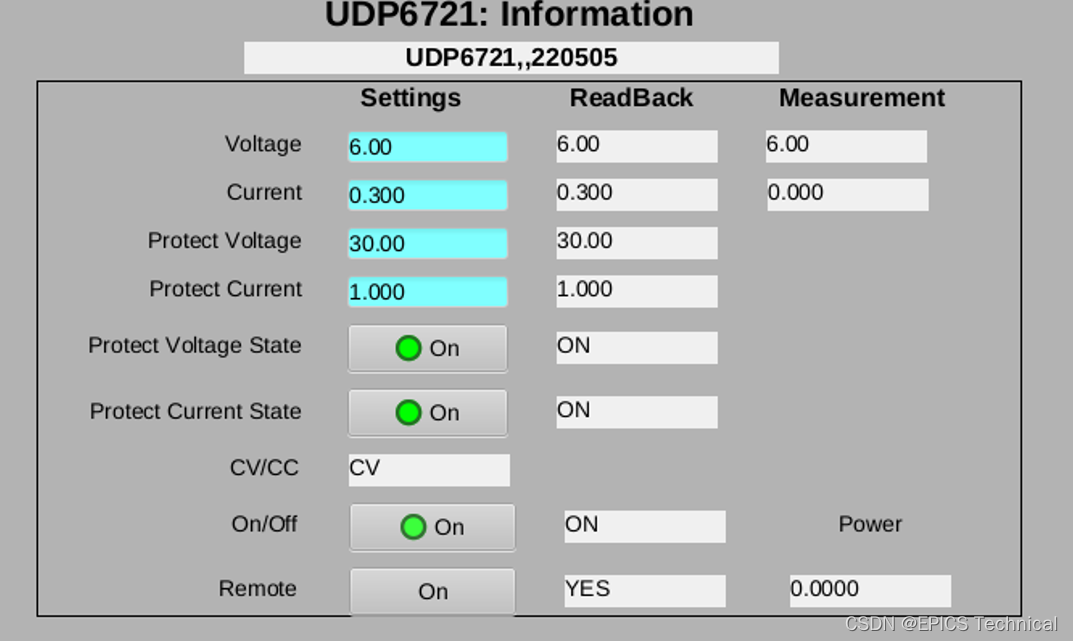
基于EPICS stream模块的直流电源的IOC控制程序实例
本实例程序实现了对优利德UDP6720系列直流电源的网络控制和访问,先在此介绍这个项目中使用的硬件: 1、UDP6721直流电源:受控设备 2、moxa串口服务器5150:将UDP6721直流电源设备串口连接转成网络连接 3、香橙派Zero3:运…...

Unity3D ECS架构适合作为主架构还是局部架构
前言 前言 Unity3D是一款广泛应用于游戏开发的跨平台游戏引擎,提供了丰富的功能和工具来简化游戏开发的过程。而Entity-Component-System(ECS)架构则是一种面向数据的设计模式,它将游戏对象(Entity)分解为…...
从零开始的目标检测和关键点检测(三):训练一个Glue的RTMPose模型
从零开始的目标检测和关键点检测(三):训练一个Glue的RTMPose模型 一、重写config文件二、开始训练三、ncnn部署 从零开始的目标检测和关键点检测(一):用labelme标注数据集 从零开始的目标检测和关键点检测…...

Qt6 中弹出消息框,一段时间后自动退出
以下代码功能,弹出模态消息框,然后,等待 3 秒,消息框自动退出 QMessageBox msgbox;msgbox.setText("sleep 3s");QTimer::singleShot(3000, &msgbox, &QMessageBox::close);msgbox.exec();...
elementUI树节点全选,反选,半选状态
// <template>部分 <div class"check-block"><el-divider></el-divider><el-checkbox :indeterminate"indeterminate" v-model"checkAll" change"handleCheckAllChange">全选</el-checkbox><e…...

Kafka、RabbitMQ、RocketMQ中间件的对比
消息中间件现在有不少,网上很多文章都对其做过对比,在这我对其做进一步总结与整理。 RocketMQ 淘宝内部的交易系统使用了淘宝自主研发的Notify消息中间件,使用Mysql作为消息存储媒介,可完全水平扩容,为了进一步降低成…...

Mac 创建并使用 .zshrc 文件
1,打开终端输入指令 touch .zshrc 2,你可能希望将 .bash_profile 文件中的内容复制到 .zshrc 文件中,那建议复制过来。 3,使用 .zshrc 文件 执行以下指令: source .zshrc 注:以后希望使用 .bash_prof…...

Unity3D移动开发如何依据性能选择Shader
前言 在Unity3D移动开发中,选择合适的Shader是非常重要的,它直接影响到游戏的性能和画面效果。本文将介绍如何依据性能选择Shader,并给出相应的技术详解以及代码实现。 对惹,这里有一个游戏开发交流小组,希望大家可以…...
基于stm32F4的智能宠物喂食器的设计:LVGL界面、定时喂食喂水通风
宠物喂食器 一、功能设计二、元器件选型三、UI设计四、原理图设计五、源代码设计六、成品展示 实物链接:https://m.tb.cn/h.5iCUX6H?tkPL65WXCEipQ CZ3457 一、功能设计 1、设计一个触摸屏作为人机交互 2、通过触摸屏设置时间定时喂食喂水通风 3、获取当前水槽的…...

jumpserver堡垒机docker方式安装部署
1、环境要求 请先自行创建 数据库 和 Redis, 版本要求参考上面环境要求说明 mysql>5.7 redis >5.0 2、创建数据库 mysql: create database jumpserver default charset utf8; GRANT ALL PRIVILEGES ON jumpserver.* TO jumpserver% IDENTIFIED BY nu4x599…...

在基于亚马逊云科技的湖仓一体架构上构建数据血缘的探索和实践
背景介绍 随着大数据技术的进步,企业和组织越来越依赖数据驱动的决策。数据的质量、来源及其流动性因此显得非常关键。数据血缘分析为我们提供了一种追踪数据从起点到终点的方法,有助于理解数据如何被转换和消费,同时对数据治理和合规性起到关…...
VScode clangd 插件浏览 linux 源码
文章目录 VScode clangd 插件浏览 linux 源码clangd 安装与配置VScode 插件安装clangd 安装方法一方法二 clangd 配置 cmake 生成bear 生成 compile_commands.json触发 clangd linux 内核脚本生成 compile_commands.json 文件三种方式对比 VScode clangd 插件浏览 linux 源码 …...
GZ035 5G组网与运维赛题第8套
2023年全国职业院校技能大赛 GZ035 5G组网与运维赛项(高职组) 赛题第8套 一、竞赛须知 1.竞赛内容分布 竞赛模块1--5G公共网络规划部署与开通(35分) 子任务1:5G公共网络部署与调试(15分) 子…...
)
《golang设计模式》第三部分·行为型模式-02-命令模式(Command)
文章目录 1. 概述1.1 角色1.2 类图 2. 代码示例2.1 设计2.2 代码2.3 类图 1. 概述 命令模式(Command)将类的业务行为以对象的方式封装,以便实现行为的参数化、撤销或重做等需求。 非命令模式的困惑: 类的行为在运行时是以实例方法…...

【linux进程控制(一)】进程终止--如何干掉一个进程?
💓博主CSDN主页:杭电码农-NEO💓 ⏩专栏分类:Linux从入门到精通⏪ 🚚代码仓库:NEO的学习日记🚚 🌹关注我🫵带你学更多操作系统知识 🔝🔝 进程终止 1. 前言2. 文章整体…...
言情小说怎么推广?如何推广网络小说?
网络小说是一种文学形式,它的受众群体相当广泛,其实也面临着很强的竞争,因此,网络推广是小说宣传的一项重要工作,这里小马识途营销顾问就分享一下小说推广的渠道和方法。 1、软文推广 在推广小说的过程中,…...

TensorFlow 的应用场景有哪些
TensorFlow是一个开源的人工智能框架,由Google公司开发。它是一个强大的工具,可以用于数值计算、机器学习和深度学习等领域,具有灵活性、可扩展性、可移植性等特点。 TensorFlow的基本概念包括: Tensor:Tensor是Tens…...

2026年第二次答辩前论文降AI攻略:二次答辩AIGC超标4.8元彻底解决完整处理方案
2026年第二次答辩前论文降AI攻略:二次答辩AIGC超标4.8元彻底解决完整处理方案 关于第二次答辩论文降AI,我总结了一个最重要的教训:别只降标红段落,要全文处理。 之前逐段降,整体检测还是超标。换成全文上传ÿ…...

【BUUCTF】【WEB】Unicorn shop
考点:Unicode数字字符,python的int()函数打开题目,发现这个页面很像买东西的网站,一共有四个商品,每个商品的价格不一样,但是第4个的商品最贵,而且超出了其他商品特别多,由此合理猜测…...

ReTerraForged终极指南:5个技巧打造专业级Minecraft地形生成
ReTerraForged终极指南:5个技巧打造专业级Minecraft地形生成 【免费下载链接】ReTerraForged TerraForged for modern MC versions 项目地址: https://gitcode.com/gh_mirrors/re/ReTerraForged ReTerraForged是一款专为Minecraft 1.19版本设计的革命性地形生…...
)
YOLOv8无人机红外识别检测系统(项目源码+YOLO数据集+模型权重+UI界面+python+深度学习+环境配置)
摘要 面向无人机平台的红外目标检测在夜间及低能见度环境下具有重要应用价值。本文基于YOLOv8构建了一套针对车辆与行人的红外检测系统,数据集包含4类目标(Car、DontCare、OtherVehicle、Person),共计10128张训练图像、715张验证…...

大学生选择网络工程,后期就业方向有哪些?
每年高考填志愿那阵子,总有学弟学妹跑来问:"网络工程这个专业怎么样?毕业了好找工作吗?"说实话,这个问题不太好回答。不是方向少,而是方向太多,而且每个方向的天花板和薪资差距不小。 我当年也是稀里糊涂选的网络工程,入学才知道跟计算机科学不是一回事。但…...
)
收藏!程序员转AI工程师的3条死路+3条真路(内含2026年最新就业方向)
本文揭示了2026年程序员转AI工程师的3条死路和3条真路。死路包括从零学ML训练想做研究员、靠Prompt工程当主修、装AI App做评测自媒体,这些路径因入门方向被误导而难以成功。真路则包括用现有领域跳板转AI应用工程、AI Infra/MLOps方向、AI Agent工程师方向…...

OpCore-Simplify技术解构:自动化OpenCore EFI配置引擎的架构剖析
OpCore-Simplify技术解构:自动化OpenCore EFI配置引擎的架构剖析 【免费下载链接】OpCore-Simplify A tool designed to simplify the creation of OpenCore EFI 项目地址: https://gitcode.com/GitHub_Trending/op/OpCore-Simplify 在开源系统定制领域&…...

酷安UWP桌面客户端:在Windows电脑上高效刷酷安的完整指南
酷安UWP桌面客户端:在Windows电脑上高效刷酷安的完整指南 【免费下载链接】Coolapk-UWP 一个基于 UWP 平台的第三方酷安客户端 项目地址: https://gitcode.com/gh_mirrors/co/Coolapk-UWP 还在为手机小屏幕刷酷安而感到眼睛酸痛吗?想在27寸大屏幕…...
上安装 WinQSB——无需虚拟机)
Windows 10/11(64位)上安装 WinQSB——无需虚拟机
以下是在 Windows 10/11(64位) 上安装 WinQSB 的完整步骤,无需虚拟机,并安装在 D 盘。原理说明 WinQSB 是一个 16位 Windows 程序,64位 Windows 原生不支持运行它。解决方案是使用 winevdm(otvdm࿰…...

OBS背景移除插件:零绿幕实现专业直播效果的完整指南
OBS背景移除插件:零绿幕实现专业直播效果的完整指南 【免费下载链接】obs-backgroundremoval An OBS plugin for removing background in portrait images (video), making it easy to replace the background when recording or streaming. 项目地址: https://gi…...