debian11 安装 k8s,containerd ,阿里云镜像(已成功)
1. 环境准备
系统要求:至少 2GB RAM(建议 4GB 或更多),网络连接。
节点准备:至少 3 台机器,1 台作为 Master 节点,2 台作为 Worker 节点。
安装sudo
apt update
apt install sudo
设置主机名(在每台机器上):
sudo hostnamectl set-hostname <主机名>
替换 <主机名> 为 k8s-master、k8s-node1、k8s-node2
配置 /etc/hosts(在所有节点上):
将所有节点的 IP 地址和主机名添加到 /etc/hosts 文件中。
root@k8s-node1:~# echo “192.168.0.147 k8s-master” >> /etc/hosts
root@k8s-node1:~# echo “192.168.0.217 k8s-node1” >> /etc/hosts
更新系统:
sudo apt update && sudo apt upgrade -y
2. 安装 containerd
在所有节点上执行以下步骤:
安装 containerd:
sudo apt install -y containerd
2.2 更新containered到最新版本1.7
默认安装的版本是1.4,如果不更新,后面 init 的时候会报如下错误
[ERROR CRI]: container runtime is not running: output: time="2024-02-03T22:17:09+08:00" level=fatal msg="validate service connection: CRI v1 runtime API is not implemented for endpoint \"unix:///var/run/containerd/containerd.sock\": rpc error: code = Unimplemented desc = unknown service runtime.v1.RuntimeService"
, error: exit status 1[ERROR FileContent--proc-sys-net-bridge-bridge-nf-call-iptables]: /proc/sys/net/bridge/bridge-nf-call-iptables does not exist
[preflight] If you know what you are doing, you can make a check non-fatal with `--ignore-preflight-errors=...`
到 https://github.com/containerd/containerd/releases 下载最新版本
- 解压缩文件
首先,您需要解压下载的压缩包。打开终端,切换到包含下载文件的目录,然后运行:
tar xzvf containerd-1.7.13-linux-amd64.tar.gz
sudo mv bin/* /usr/bin/
containerd --version 可以查看版本号为1.7
2.3 配置 containerd:
生成默认配置文件
sudo mkdir -p /etc/containerd
sudo containerd config default | sudo tee /etc/containerd/config.toml > /dev/null
修改配置文件
nano /etc/containerd/config.toml文件中 sandbox_image做如下修改,因为后面init的时候指定的是阿里云的sandbox_image = "registry.aliyuncs.com/google_containers/pause:3.9"[plugins."io.containerd.grpc.v1.cri".containerd.runtimes.runc.options]SystemdCgroup = true #这个很重要,否则,k8s启动起来后会自动停止,kubectl get pods -n kube-system 也会出现监听端口6443访问失败的报错
启用并启动 containerd:
sudo systemctl restart containerd
sudo systemctl enable containerd
sudo systemctl status containerd 可查看状态
3. 安装 Kubernetes
在所有节点上执行以下步骤:
安装必需的包:首先,确保你的系统安装了 apt-transport-https、ca-certificates 和 curl:
sudo apt-get update
sudo apt-get install -y apt-transport-https ca-certificates curl
添加 Kubernetes 的 GPG 密钥:
curl -s https://mirrors.aliyun.com/kubernetes/apt/doc/apt-key.gpg | sudo apt-key add -
添加 Kubernetes 仓库:
echo "deb https://mirrors.aliyun.com/kubernetes/apt/ kubernetes-xenial main" | sudo tee /etc/apt/sources.list.d/kubernetes.list
更新软件包列表:
sudo apt-get update
安装 kubeadm、kubelet 和 kubectl:
sudo apt-get install -y kubelet=1.28.2-00 kubeadm=1.28.2-00 kubectl=1.28.2-00 sudo apt-mark hold kubelet kubeadm kubectl
安装配置br_netfilter 模块:
sudo modprobe br_netfilter
确保 IP 转发被启用:
echo "net.ipv4.ip_forward=1" | sudo tee -a /etc/sysctl.confecho "net.bridge.bridge-nf-call-iptables=1" | sudo tee -a /etc/sysctl.confsudo sysctl -p
# 4. 初始化 Kubernetes 集群(在 Master 节点上执行)
4.2 初始化集群:(Master节点)
直接执行下面的会报错
sudo kubeadm init --pod-network-cidr=10.244.0.0/16
报错:
[ERROR ImagePull]: failed to pull image registry.k8s.io/kube-apiserver:v1.28.6: output: E0212 19:15:37.560180 22897 remote_image.go:171] "P
应该执行下面的
sudo kubeadm init --pod-network-cidr=10.244.0.0/16 --image-repository=registry.aliyuncs.com/google_containers --kubernetes-version=v1.28.2
以下是 kubeadm init 命令的输出。
 root@ecs-2144:~# sudo kubeadm init --pod-network-cidr=10.244.0.0/16 --image-repository=registry.aliyuncs.com/google_containerssudo kubeadm init --pod-network-cidr=10.244.0.0/16 --image-repository=registry.aliyuncs.com/google_containers --kubernetes-version=v1.28.6
unknown command "kubeadm" for "kubeadm init"
To see the stack trace of this error execute with --v=5 or higher
root@ecs-2144:~# sudo kubeadm init --pod-network-cidr=10.244.0.0/16 --image-repository=registry.aliyuncs.com/google_containers --kubernetes-version=v1.28.6
[init] Using Kubernetes version: v1.28.6
[preflight] Running pre-flight checks
[preflight] Pulling images required for setting up a Kubernetes cluster
[preflight] This might take a minute or two, depending on the speed of your internet connection
[preflight] You can also perform this action in beforehand using 'kubeadm config images pull'
[certs] Using certificateDir folder "/etc/kubernetes/pki"
[certs] Generating "ca" certificate and key
[certs] Generating "apiserver" certificate and key
[certs] apiserver serving cert is signed for DNS names [k8s-master kubernetes kubernetes.default kubernetes.default.svc kubernetes.default.svc.cluster.local] and IPs [10.96.0.1 192.168.0.147]
[certs] Generating "apiserver-kubelet-client" certificate and key
[certs] Generating "front-proxy-ca" certificate and key
[certs] Generating "front-proxy-client" certificate and key
[certs] Generating "etcd/ca" certificate and key
[certs] Generating "etcd/server" certificate and key
[certs] etcd/server serving cert is signed for DNS names [k8s-master localhost] and IPs [192.168.0.147 127.0.0.1 ::1]
[certs] Generating "etcd/peer" certificate and key
[certs] etcd/peer serving cert is signed for DNS names [k8s-master localhost] and IPs [192.168.0.147 127.0.0.1 ::1]
[certs] Generating "etcd/healthcheck-client" certificate and key
[certs] Generating "apiserver-etcd-client" certificate and key
[certs] Generating "sa" key and public key
[kubeconfig] Using kubeconfig folder "/etc/kubernetes"
[kubeconfig] Writing "admin.conf" kubeconfig file
[kubeconfig] Writing "kubelet.conf" kubeconfig file
[kubeconfig] Writing "controller-manager.conf" kubeconfig file
[kubeconfig] Writing "scheduler.conf" kubeconfig file
[etcd] Creating static Pod manifest for local etcd in "/etc/kubernetes/manifests"
[control-plane] Using manifest folder "/etc/kubernetes/manifests"
[control-plane] Creating static Pod manifest for "kube-apiserver"
[control-plane] Creating static Pod manifest for "kube-controller-manager"
[control-plane] Creating static Pod manifest for "kube-scheduler"
[kubelet-start] Writing kubelet environment file with flags to file "/var/lib/kubelet/kubeadm-flags.env"
[kubelet-start] Writing kubelet configuration to file "/var/lib/kubelet/config.yaml"
[kubelet-start] Starting the kubelet
[wait-control-plane] Waiting for the kubelet to boot up the control plane as static Pods from directory "/etc/kubernetes/manifests". This can take up to 4m0s
[apiclient] All control plane components are healthy after 4.001658 seconds
[upload-config] Storing the configuration used in ConfigMap "kubeadm-config" in the "kube-system" Namespace
[kubelet] Creating a ConfigMap "kubelet-config" in namespace kube-system with the configuration for the kubelets in the cluster
[upload-certs] Skipping phase. Please see --upload-certs
[mark-control-plane] Marking the node k8s-master as control-plane by adding the labels: [node-role.kubernetes.io/control-plane node.kubernetes.io/exclude-from-external-load-balancers]
[mark-control-plane] Marking the node k8s-master as control-plane by adding the taints [node-role.kubernetes.io/control-plane:NoSchedule]
[bootstrap-token] Using token: c5ir0f.h8x43oj54kb1gppe
[bootstrap-token] Configuring bootstrap tokens, cluster-info ConfigMap, RBAC Roles
[bootstrap-token] Configured RBAC rules to allow Node Bootstrap tokens to get nodes
[bootstrap-token] Configured RBAC rules to allow Node Bootstrap tokens to post CSRs in order for nodes to get long term certificate credentials
[bootstrap-token] Configured RBAC rules to allow the csrapprover controller automatically approve CSRs from a Node Bootstrap Token
[bootstrap-token] Configured RBAC rules to allow certificate rotation for all node client certificates in the cluster
[bootstrap-token] Creating the "cluster-info" ConfigMap in the "kube-public" namespace
[kubelet-finalize] Updating "/etc/kubernetes/kubelet.conf" to point to a rotatable kubelet client certificate and key
[addons] Applied essential addon: CoreDNS
[addons] Applied essential addon: kube-proxyYour Kubernetes control-plane has initialized successfully!To start using your cluster, you need to run the following as a regular user:mkdir -p $HOME/.kubesudo cp -i /etc/kubernetes/admin.conf $HOME/.kube/configsudo chown $(id -u):$(id -g) $HOME/.kube/configAlternatively, if you are the root user, you can run:export KUBECONFIG=/etc/kubernetes/admin.confYou should now deploy a pod network to the cluster.
Run "kubectl apply -f [podnetwork].yaml" with one of the options listed at:https://kubernetes.io/docs/concepts/cluster-administration/addons/Then you can join any number of worker nodes by running the following on each as root:kubeadm join 192.168.0.147:6443 --token c5ir0f.h8x43oj54kb1gppe \--discovery-token-ca-cert-hash sha256:42dc8386b03f8c6c415e06153c4b978e2020ca48d19b7b8b383d1c5d311a36e7
5. 设置 kubectl(仅限 Master 节点)
mkdir -p $HOME/.kube
sudo cp -i /etc/kubernetes/admin.conf $HOME/.kube/config
sudo chown $(id -u):$(id -g) $HOME/.kube/config
6. 安装网络插件(在 Master 节点上)
kubectl apply -f https://docs.projectcalico.org/manifests/calico.yaml --request-timeout='0'
#不加–request-timeout=‘0’ 可能会导致超时
如果出现连接连接端口错误
运行 journalctl -u kubelet 可以看日志,如果看到以下错误
err="failed to load kubelet config file, path: /var/lib/kubelet/config.yaml, err>
可能是没有授权访问权限,运行以下即可
sudo chown root:root /var/lib/kubelet/config.yaml
sudo chmod 644 /var/lib/kubelet/config.yaml
然后重新运行kubelet
sudo systemctl restart kubelet //经测试只需要这一行即可
sudo systemctl status kubelet
sudo systemctl restart containerd
sudo systemctl status containerd
然后重新运行上面的 kubectl apply …
可能还会出现报错 unable to connect to the server: net/http: TLS handshake timeout
重新执行一遍一般就会成功
7. 将 Worker 节点加入集群
在每个 Worker 节点上,运行在初始化 Master 节点时得到的 kubeadm join 命令。
效果如下:
root@ecs-7d63:~# kubeadm join 192.168.0.147:6443 --token lj3ooj.2x39tu70gyx5uj3v --discovery-token-ca-cert-hash sha256:7ce5191c1581dfcee7b33457bdd9341fa1ee128a19ac248c8daf9e69a57a8b18
[preflight] Running pre-flight checks
[preflight] Reading configuration from the cluster...
[preflight] FYI: You can look at this config file with 'kubectl -n kube-system get cm kubeadm-config -o yaml'
[kubelet-start] Writing kubelet configuration to file "/var/lib/kubelet/config.yaml"
[kubelet-start] Writing kubelet environment file with flags to file "/var/lib/kubelet/kubeadm-flags.env"
[kubelet-start] Starting the kubelet
[kubelet-start] Waiting for the kubelet to perform the TLS Bootstrap...This node has joined the cluster:
* Certificate signing request was sent to apiserver and a response was received.
* The Kubelet was informed of the new secure connection details.Run 'kubectl get nodes' on the control-plane to see this node join the cluster.
- 验证集群状态
在 M
aster 节点上,运行:
kubectl get nodes
你应该能看到所有节点的状态为 Ready。
支持基础安装完成,下一步就是配置k8s
开放端口
API Server:
6443: Kubernetes API server。这是最关键的端口,用于集群管理通信。
etcd:
2379-2380: 用于etcd服务器客户端API通信。只有Kubernetes的API server才需要访问etcd,所以这些端口只需要在Master节点之间开放。
Kubelet:
10250: Kubelet API。这个端口用于API server获取节点和Pod的信息。
Kube-proxy:
Kubernetes中的Controller Manager和Scheduler虽然主要与API Server进行通信,但它们也监听在特定端口上,主要用于健康检查和指标收集。这些端口主要用于集群内部通信,而不是外部访问。下面是Controller Manager和Scheduler所监听的端口:
Kubernetes Controller Manager
默认端口:
10252: 用于健康检查和指标(metrics)的非安全HTTP访问。
安全端口:
当配置了安全访问(例如,通过启用HTTPS或认证和授权),Controller Manager可以配置为通过安全端口提供服务,但这需要手动配置,包括证书和相关的安全设置。
Kubernetes Scheduler
默认端口:
10251: 用于健康检查和指标的非安全HTTP访问。
排错
列出所有系统pod
kubectl get pods -n kube-system
calico-kube-controllers-7ddc4f45bc-snh9v 1/1 Running 1 (2m10s ago) 158m
calico-node-5mnpd 1/1 Running 1 (2m10s ago) 158m
calico-node-s6w74 1/1 Running 0 156m
coredns-66f779496c-cvwjx 1/1 Running 1 (2m10s ago) 171m
coredns-66f779496c-qx7fr 1/1 Running 1 (2m10s ago) 171m
etcd-k8s-master 1/1 Running 1 (2m10s ago) 171m
kube-apiserver-k8s-master 1/1 Running 1 (2m10s ago) 171m
kube-controller-manager-k8s-master 1/1 Running 1 (2m10s ago) 171m
kube-proxy-k7c6l 1/1 Running 1 (2m10s ago) 171m
kube-proxy-stft6 1/1 Running 0 156m
kube-scheduler-k8s-master 1/1 Running 1 (2m10s ago) 171m
找出名称后,可以查看该pod的日志
kubectl logs -n kube-system
调用 kubectl get pods -n kube-system
如果响应
root@k8s-master:~# kubectl get pods -n kube-system
The connection to the server 192.168.0.147:6443 was refused - did you specify the right host or port?
说明kubelet停了,需要调用
sudo systemctl restart kubelet 重启,
journalctl -u kubelet 可查看kubelet日志
相关文章:
)
debian11 安装 k8s,containerd ,阿里云镜像(已成功)
1. 环境准备 系统要求:至少 2GB RAM(建议 4GB 或更多),网络连接。 节点准备:至少 3 台机器,1 台作为 Master 节点,2 台作为 Worker 节点。 安装sudo apt update apt install sudo设置主机名&a…...

Spring Task定时任务
目录 1、介绍 2、cron表达式 2.1、在线生成器 2.2、通配符 3、代码示例 3.1、使用步骤 3.2、 代码开发 3.3、测试 🍃作者介绍:双非本科大三网络工程专业在读,阿里云专家博主,专注于Java领域学习,擅长web应用开发…...
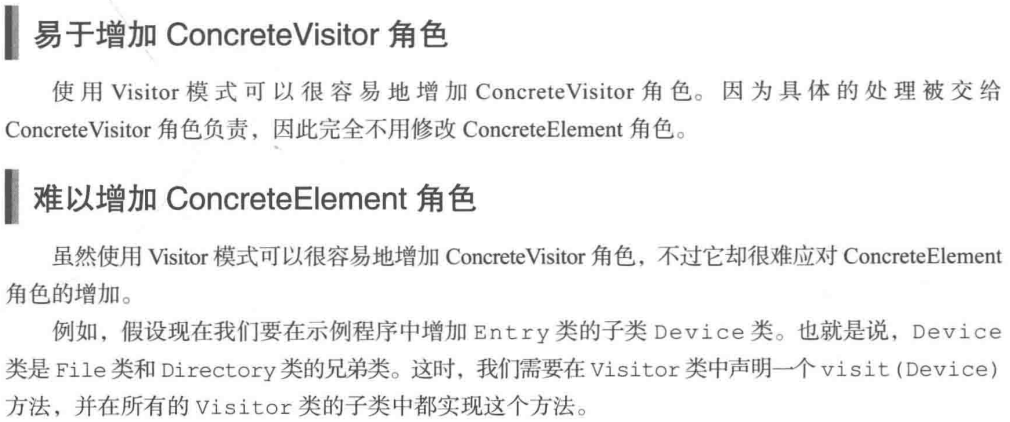
【设计模式】23中设计模式笔记
设计模式分类 模板方法模式 核心就是设计一个部分抽象类。 这个类具有少量具体的方法,和大量抽象的方法,具体的方法是为外界提供服务的点,具体方法中定义了抽象方法的执行序列 装饰器模式 现在有一个对象A,希望A的a方法被修饰 …...

类加载过程介绍
一、类的生命周期 类被加载到jvm虚拟机内存开始,到卸载出内存为止,他的生命周期可以分为:加载->验证->准备->解析->初始化->使用->卸载。 其中验证、准备、解析统一称为链接阶段 1、加载 将类的字节码载入方法区中…...

pytorch创建模型方式
1.继承自nn.Module的方式 from torch import nn import torch.nn.functional as F 继承自nn.Moduleclass LModel(nn.Module):def __init__(self):super().__init__()self.L1 nn.Linear(10,10)self.L2 nn.Linear(10,64)self.L3 nn.Linear(64,10)self.L4 nn.Linear(10,5)se…...
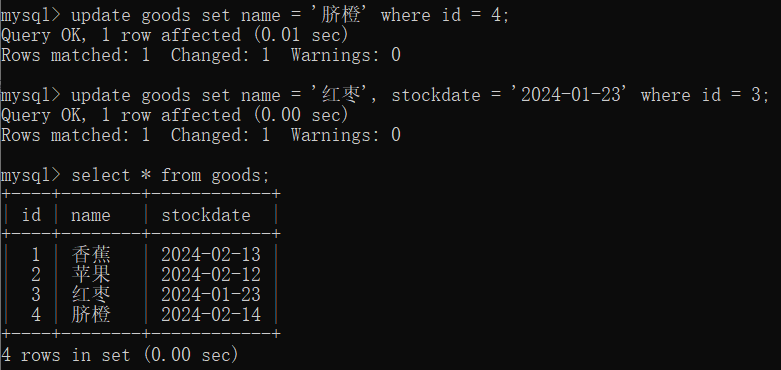
MySQL 基础知识(五)之数据增删改
目录 1 插入数据 2 删除数据 3 更改数据 创建 goods 表 drop table if exists goods; create table goods ( id int(10) primary key auto_increment, name varchar(14) unique, stockdate date )charsetutf8; 1 插入数据 当要插入的数据为日期/时间类型时,如果…...
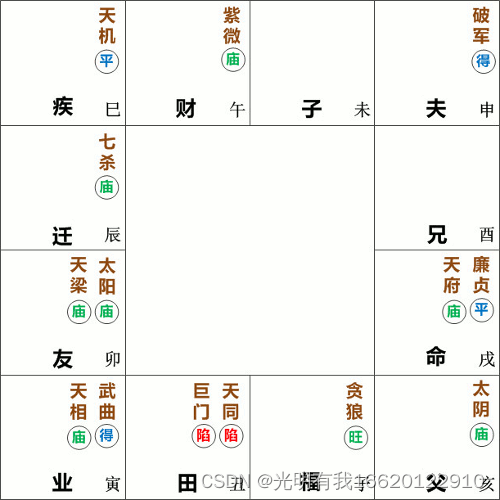
紫微斗数双星组合:廉贞天府在辰戌
文章目录 前言内容总结 前言 紫微斗数双星组合:廉贞天府在辰戌 内容 紫微斗数双星组合:廉贞天府在辰戌 性格分析 廉贞天府同坐辰、戌宫,若无煞星冲破,为“天府朝垣格”,也为“府相朝垣格”,富贵双全&am…...

人工智能|深度学习——基于全局注意力的改进YOLOv7-AC的水下场景目标检测系统
代码下载: 基于全局注意力的改进YOLOv7-AC的水下场景目标检测系统.zip资源-CSDN文库 1.研究的背景 水下场景目标检测是水下机器人、水下无人机和水下监控等领域中的重要任务之一。然而,由于水下环境的复杂性和特殊性,水下目标检测面临着许多挑…...
:最简CPU)
使用 C++23 从零实现 RISC-V 模拟器(1):最简CPU
👉🏻 文章汇总「从零实现模拟器、操作系统、数据库、编译器…」:https://okaitserrj.feishu.cn/docx/R4tCdkEbsoFGnuxbho4cgW2Yntc 本节实现一个最简的 CPU ,最终能够解析 add 和 addi 两个指令。如果对计算机组成原理已经有所了…...
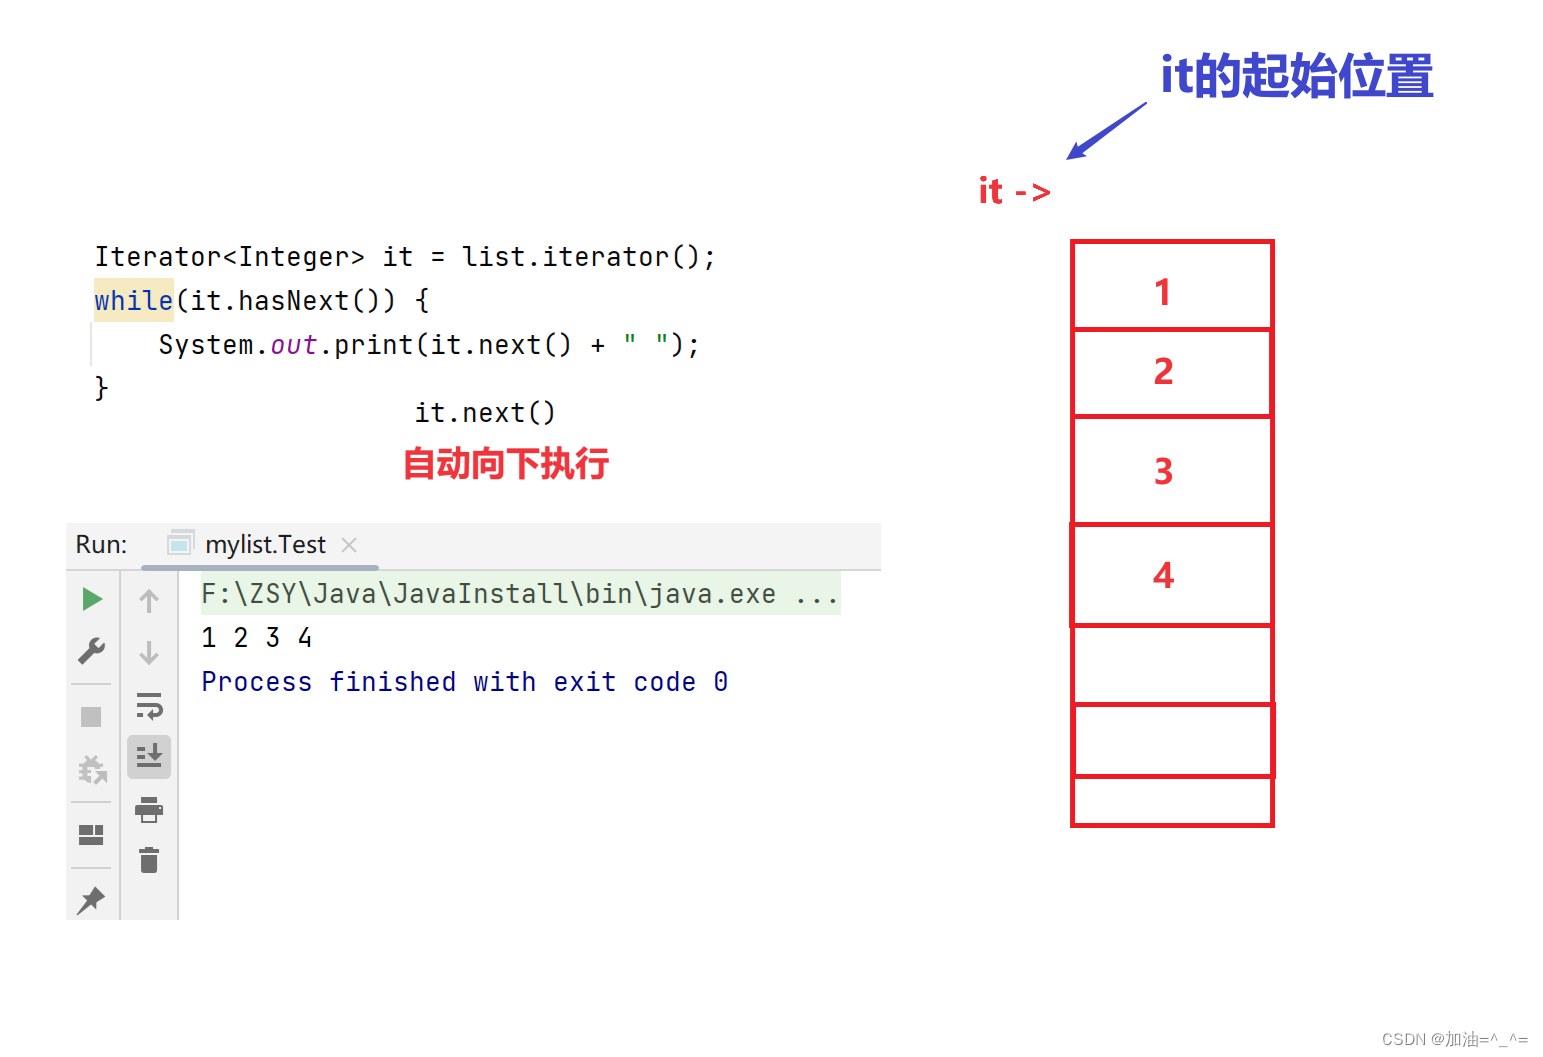
顺序表、链表(ArrayList、LinkedList)
目录 前言: 顺序表(ArrayList): 顺序表的原理: ArrayList源码: 的含义:编辑 ArrayList的相关方法:编辑 向上转型List: 练习题(杨辉三角&#x…...

第11讲投票创建后端实现
投票创建页面实现 文件选择上传组件 uni-file-picker 扩展组件 安装 https://ext.dcloud.net.cn/plugin?nameuni-file-picker 日期选择器uni-datetime-picker组件 安装 https://ext.dcloud.net.cn/plugin?nameuni-datetime-picker iconfont小图标 https://www.iconfont…...

SNMP 简单网络管理协议、网络管理
目录 1 网络管理 1.1 网络管理的五大功能 1.2 网络管理的一般模型 1.3 网络管理模型中的主要构件 1.4 被管对象 (Managed Object) 1.5 代理 (agent) 1.6 网络管理协议 1.6.1 简单网络管理协议 SNMP 1.6.2 SNMP 的指导思想 1.6.3 SNMP 的管理站和委托代理 1.6.4 SNMP…...

计算机设计大赛 深度学习YOLOv5车辆颜色识别检测 - python opencv
文章目录 1 前言2 实现效果3 CNN卷积神经网络4 Yolov56 数据集处理及模型训练5 最后 1 前言 🔥 优质竞赛项目系列,今天要分享的是 🚩 **基于深度学习YOLOv5车辆颜色识别检测 ** 该项目较为新颖,适合作为竞赛课题方向࿰…...

OpenCV-36 多边形逼近与凸包
目录 一、多边形的逼近 二、凸包 一、多边形的逼近 findContours后的轮廓信息countours可能过于复杂不平滑,可以用approxPolyDP函数对该多边形曲线做适当近似,这就是轮廓的多边形逼近。 apporxPolyDP就是以多边形去逼近轮廓,采用的是Doug…...
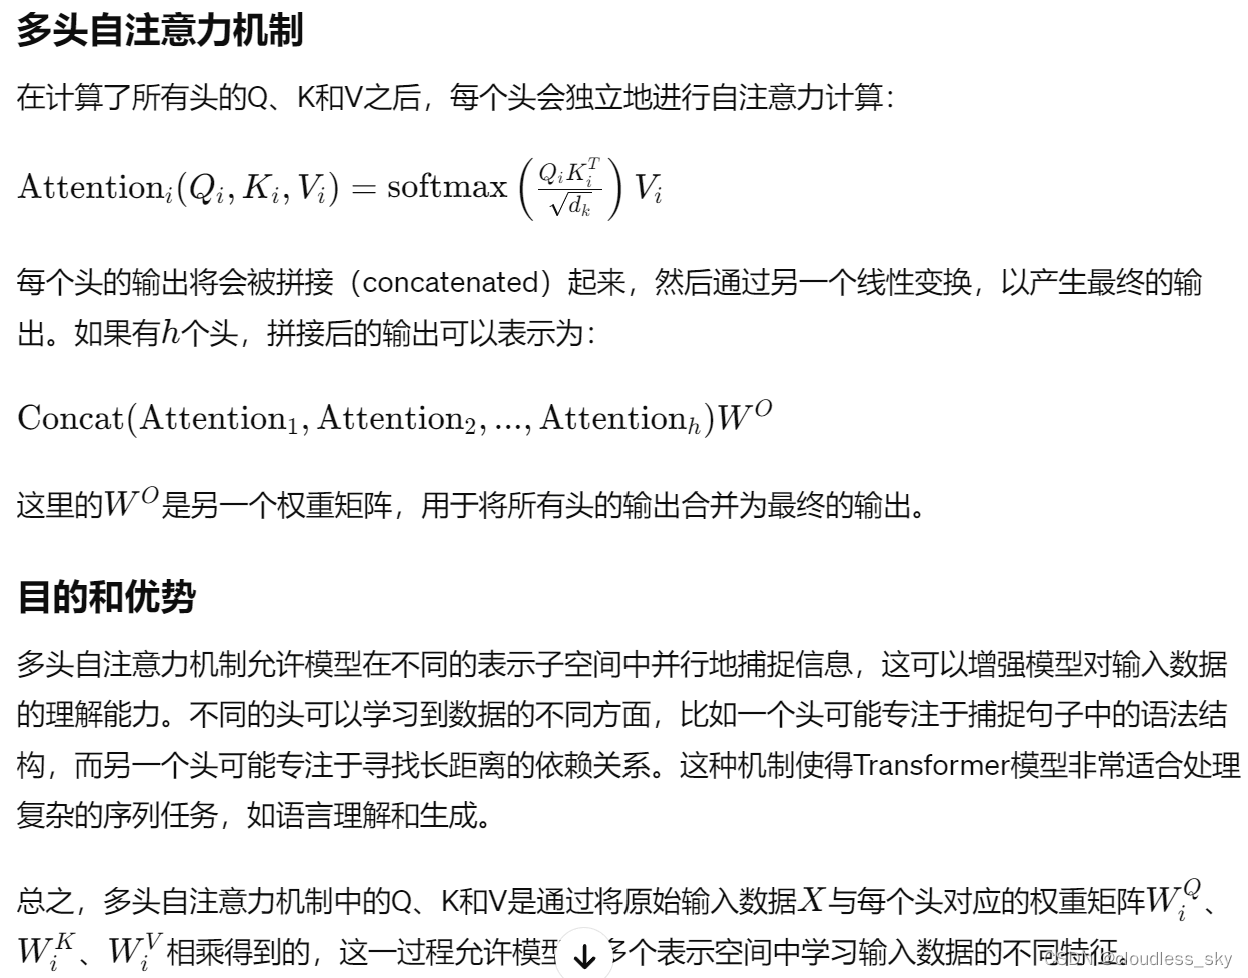
transformer中的QKV是如何得到的?
多头自注意力机制:...

console.log导致内存泄露 打包时自动去掉console.log方法
webpack通过工具:terser 使用前需要先安装一下 vue.config.js const { defineConfig } require(vue/cli-servise); module.exports defineConfig({transpileDependencies:true,terser:{terserOptions:{compress:{drop_console:true,drop_debugger:true,},},},}…...

《合成孔径雷达成像算法与实现》FIgure6.20
% rho_r c/(2*Fr)而不是rho_r c/(2*Bw) % Hsrcf exp函数里忘记乘pi了 clc clear close all参数设置 距离向参数设置 R_eta_c 20e3; % 景中心斜距 Tr 2.5e-6; % 发射脉冲时宽 Kr 20e12; % 距离向调频率 alpha_os_r 1.2; …...
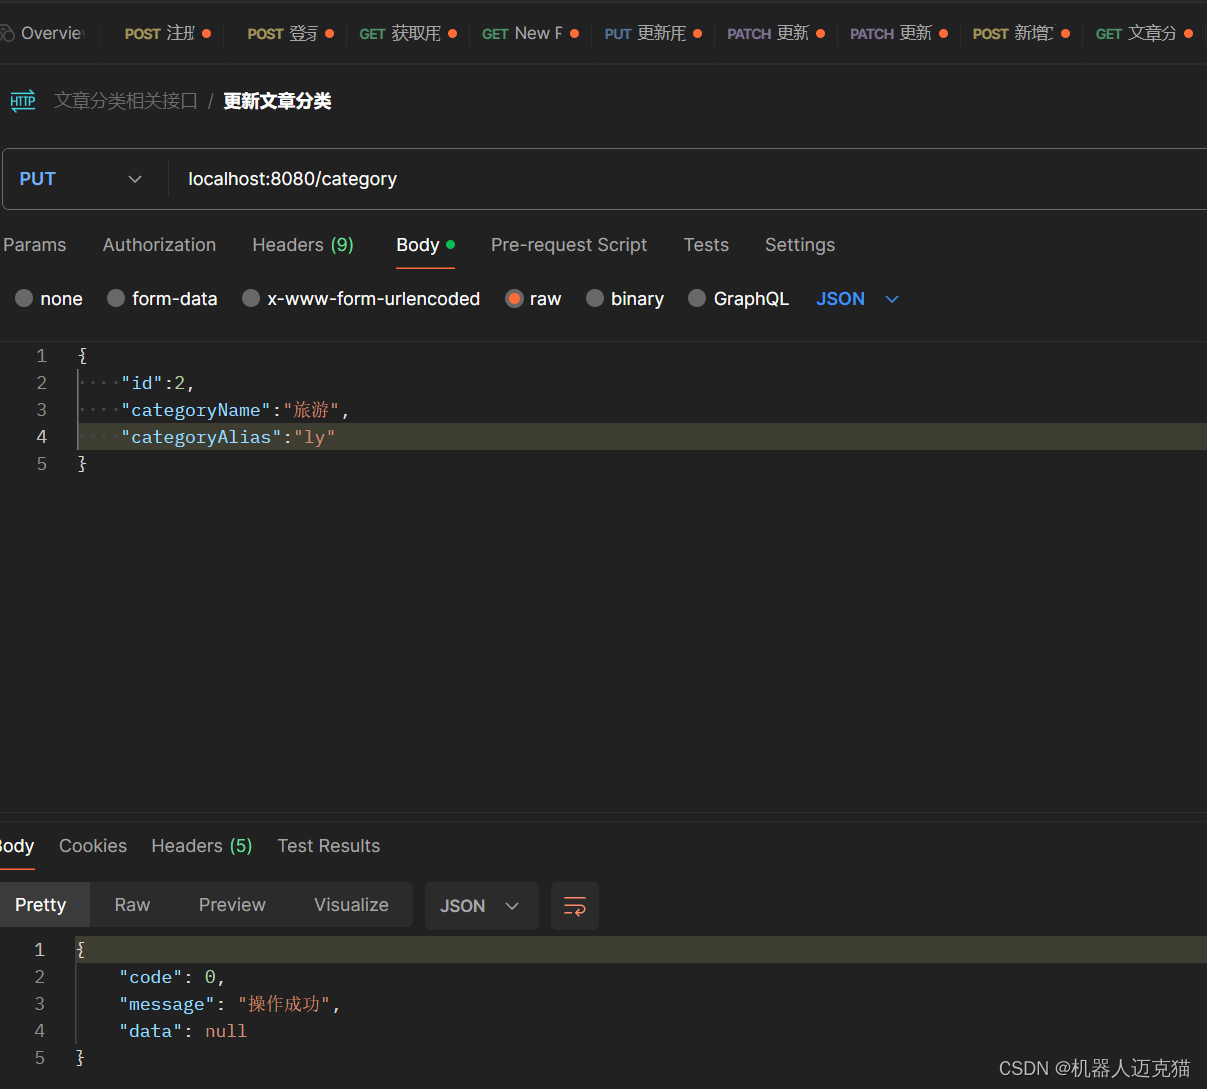
Spring Boot 笔记 015 创建接口_更新文章分类
1.1.1 实体类id增加NotNull注释,并做分组校验 1.1.1.1 定义分组 1.1.1.2 实体类中指定校验项属于哪个分组 如果说某个校验项没有指定分组,默认属于Default分组 分组之间可以继承, A extends B 那么A中拥有B中所有的校验项package com.geji.pojo;import com.faste…...

【Java基础题型】判断是否是回文数
需求:如果给你一个正数x。 如果x是一个回文整数,打印true,否则,返回false 解释: 回文数是指正序(从左到右)和从倒序(从右到左)都是一样的整数数字。 eg.121是回文数,123不是,2112是回文数&…...
)
Linux paste命令教程:并行合并文件的利器(附案例详解和注意事项)
Linux paste命令介绍 paste 是一个在 Unix 或 Linux 操作系统中非常有用的命令。它用于通过在标准输出中输出由每个指定文件的行组成的行,以制表符为分隔符,来水平(并行)合并文件。 Linux paste命令适用的Linux版本 paste 命令…...

Ardupilot无人船新手必看:从遥控器开关到地面站,3档模式设置保姆级教程
Ardupilot无人船控制模式全解析:从基础配置到高阶应用实战 第一次接触Ardupilot无人船时,最让人困惑的莫过于各种控制模式的区别与适用场景。作为开源自动驾驶系统的标杆,Ardupilot为无人船提供了多达14种控制模式,每种模式都有其…...

2026 OpenTiny NEXT 产品调研启动!
各位开发者朋友们! OpenTiny NEXT 系列产品(NEXT SDK / TinyRobot / GenUI SDK / AI Extension / WebAgent 等)已陪伴大家走过一段时间。为了更精准地解决实际开发中的痛点,我们正式启动 2026 年度用户体验调研。 ⏰ 调研时间&…...

为初创团队构建AI应用时如何利用Taotoken控制初期成本
🚀 告别海外账号与网络限制!稳定直连全球优质大模型,限时半价接入中。 👉 点击领取海量免费额度 为初创团队构建AI应用时如何利用Taotoken控制初期成本 对于资源有限的初创团队而言,在开发AI功能原型时,最…...

基于ENVI、eCognition与ArcGIS的南京江北新区土地利用变化监测与驱动分析
1. 南京江北新区土地利用变化监测的技术路线 我第一次接触南京江北新区土地利用监测项目时,被这个区域的快速发展震撼到了。作为国家级新区,这里从2015年设立至今,土地利用格局发生了翻天覆地的变化。要准确捕捉这些变化,我们采用…...

Cortex-R52+中断控制器与定时器深度解析
1. Cortex-R52中断控制器架构解析 在嵌入式实时系统中,中断管理机制直接影响系统的响应速度和确定性。Cortex-R52采用GICv2架构的中断控制器,通过硬件级优先级管理和虚拟化支持,为实时应用提供可靠的中断处理能力。我曾在一个汽车ECU项目中&a…...

Python结构化日志实战:5 个让AI Agent 输出可调试的工程技巧
读完你能直接把“turn_id / tokens / tool / latency”这些关键字段写进 JSON 日志,并用一段 Python 在 10 秒内定位最费 token 的轮次。你可能遇到过:Agent 一开始很稳,过一阵子开始不稳定;你去查原因,日志只有 Turn …...

Beyond Compare 5终极激活指南:3分钟获取永久授权密钥
Beyond Compare 5终极激活指南:3分钟获取永久授权密钥 【免费下载链接】BCompare_Keygen Keygen for BCompare 5 项目地址: https://gitcode.com/gh_mirrors/bc/BCompare_Keygen 你是否还在为Beyond Compare 5的30天试用期到期而烦恼?每次打开软件…...

3步解决Mac读写NTFS难题:免费开源工具完全指南
3步解决Mac读写NTFS难题:免费开源工具完全指南 【免费下载链接】Free-NTFS-for-Mac Nigate: An open-source NTFS utility for Mac. It supports all Mac models (Intel and Apple Silicon), providing full read-write access, mounting, and management for NTFS …...

深入解析PCI中断路由:从硬件引脚到操作系统中断处理的完整链路
1. 项目概述与核心问题在计算机硬件系统里,中断机制是设备与处理器高效通信的生命线。它允许设备在需要处理器服务时,主动“打断”处理器当前的工作流,而不是让处理器不断地去“询问”设备的状态。对于PCI(Peripheral Component I…...

LabVIEW虚拟仪表:数据流编程与测控应用的核心交互范式
1. 项目概述:为什么虚拟仪表是LabVIEW的灵魂如果你用过LabVIEW,或者哪怕只是看过它的界面,第一印象大概率是那些花花绿绿的旋钮、开关、仪表盘和波形图。很多人觉得这就是LabVIEW的“皮肤”,一个为了让程序看起来像真实仪器而做的…...