初识Nginx
摘要:最近几个项目中的接口总是访问受限,需要后端同事配置Nginx代理,了解下Nginx后面自己配置。
Nginx 是一款高性能的开源 Web 服务器和反向代理服务器。它具有轻量级、高并发、低内存消耗等特点,常被用作静态资源服务、负载均衡、反向代理和缓存等方面的解决方案。
下面是 Nginx 的一些重要特点和主要用途:
- 高并发处理能力:Nginx 使用事件驱动的异步非阻塞架构,能够处理大量并发连接而不会因为连接数增加而导致性能下降。
- 轻量级:Nginx 的代码精简,占用的系统资源较少,启动速度快。
- 配置灵活简单:Nginx 的配置文件采用简洁的语法,易于理解和修改,支持动态加载配置。
- 静态资源服务:Nginx 可用于提供静态文件的服务,如 HTML、CSS、JavaScript、图片等。
- 反向代理:Nginx 可以作为反向代理,将客户端的请求转发到后端的多台服务器,实现负载均衡和高可用。
- 缓存加速:Nginx 可以缓存部分静态内容,提高访问速度。
- SSL/TLS 支持:Nginx 支持 SSL/TLS 协议,可以配置 HTTPS 服务,提供安全的数据传输。
- 动态模块支持:Nginx 支持第三方模块的插件扩展,可以根据需求加载相应的模块。
Nginx 可以作为独立的 Web 服务器使用,也可以与其他应用服务器(如 Node.js、Tomcat 等)配合使用,通过反向代理实现负载均衡和高可用性。
官网: https://nginx.org/
1. Nginx的安装
1.1 Nginx 在CentOS安装
1. 首先登录阿里云
# 登录阿里云
czh12@czh12deiMac ~ % ssh root@47.98.211.985
root@47.98.211.985's password:
Last failed login: Tue Jan 30 12:57:24 CST 2024 from 182.47.189.139 on ssh:notty
There were 79 failed login attempts since the last successful login.
Last login: Thu Jan 25 16:33:33 2024 from 39.144.157.59Welcome to Alibaba Cloud Elastic Compute Service !
2. 安装yum包管理器
# 安装了yum包管理器
[root@izbp1fwu8k6txnl7pd2enpz ~]# sudo yum install yum-utils
已加载插件:fastestmirror
...
3. 配置Nginx的地址
# 配置Nginx的地址
# 打开配置文件
[root@izbp1fwu8k6txnl7pd2enpz ~]# vim /etc/yum.repos.d/nginx.repo
# 删除原有配置文件
[root@izbp1fwu8k6txnl7pd2enpz ~]# rm /etc/yum.repos.d/nginx.repo
rm:是否删除普通文件 "/etc/yum.repos.d/nginx.repo"?y
# 新配置文件中粘贴如下内容,并保存
[root@izbp1fwu8k6txnl7pd2enpz ~]# vim /etc/yum.repos.d/nginx.repo# 新配置文件中粘贴的内容
[nginx-stable]
name=nginx stable repo
baseurl=http://nginx.org/packages/centos/7/$basearch/
gpgcheck=1
enabled=1
gpgkey=https://nginx.org/keys/nginx_signing.key
module_hotfixes=true[nginx-mainline]
name=nginx mainline repo
baseurl=http://nginx.org/packages/mainline/centos/7/$basearch/
gpgcheck=1
enabled=0
gpgkey=https://nginx.org/keys/nginx_signing.key
module_hotfixes=true#######上述配置内容说明#######
这是一个Yum仓库的配置文件示例,其中定义了两个不同的仓库:nginx-stable 和 nginx-mainline。
[nginx-stable]:这是一个名为 nginx-stable 的仓库的配置部分。
name=nginx stable repo:指定了仓库的名称。
baseurl=http://nginx.org/packages/centos/7/$basearch/:指定了仓库的基本URL,即软件包的下载
地址。在此示例中,它指向Nginx稳定版本的CentOS 7软件包。
gpgcheck=1:启用GPG检查,以确保从该仓库下载的软件包是经过验证的。
enabled=1:启用该仓库,表示可以使用这个仓库中的软件包。
gpgkey=https://nginx.org/keys/nginx_signing.key:指定了GPG密钥的URL,用于验证软件包的完整性
和真实性。
module_hotfixes=true:启用模块热修复功能。
[nginx-mainline]:这是一个名为 nginx-mainline 的仓库的配置部分。
与 nginx-stable 类似,它指定了不同的 baseurl,并且 enabled 设置为 0,表示该仓库当前被禁用。
这意味着默认情况下,系统将使用 nginx-stable 仓库中的软件包。这个配置文件允许你在系统上使用 yum 命令安装、更新和管理来自Nginx仓库的软件包。要使用这些仓库中的软件
包,你需要确保已安装了相应的GPG密钥,并且将 enabled 设置为 1(
或者你可以使用 yum --enablerepo=<仓库名称> 指定启用的仓库)
4. 查看源,Yum包管理器的系统上列出所有与 "nginx" 相关的软件包;
yum list | grep nginx 具体而言,该命令执行以下操作:
yum list:列出系统上可用的所有软件包;
|:管道符号,将前一个命令的输出作为后一个命令的输入;
grep nginx:使用grep命令过滤包含 "nginx" 字符串的行。
[root@izbp1fwu8k6txnl7pd2enpz ~]# yum list|grep nginx
nginx.x86_64                             1:1.25.3-1.el7.ngx            installed
collectd-nginx.x86_64                    5.8.1-1.el7                   epel
lemonldap-ng-nginx.noarch                2.18.1-1.el7                  epel
munin-nginx.noarch                       2.0.75-1.el7                  epel
nginx-all-modules.noarch                 1:1.20.1-10.el7               epel
nginx-debug.x86_64                       1:1.8.0-1.el7.ngx             nginx-stable
nginx-debuginfo.x86_64                   1:1.24.0-1.el7.ngx            nginx-stable
nginx-filesystem.noarch                  1:1.20.1-10.el7               epel
nginx-mod-devel.x86_64                   1:1.20.1-10.el7               epel
nginx-mod-http-image-filter.x86_64       1:1.20.1-10.el7               epel
nginx-mod-http-perl.x86_64               1:1.20.1-10.el7               epel
nginx-mod-http-xslt-filter.x86_64        1:1.20.1-10.el7               epel
nginx-mod-mail.x86_64                    1:1.20.1-10.el7               epel
nginx-mod-stream.x86_64                  1:1.20.1-10.el7               epel
nginx-module-geoip.x86_64                1:1.24.0-1.el7.ngx            nginx-stable
nginx-module-geoip-debuginfo.x86_64      1:1.24.0-1.el7.ngx            nginx-stable
nginx-module-image-filter.x86_64         1:1.24.0-1.el7.ngx            nginx-stable
nginx-module-image-filter-debuginfo.x86_641:1.24.0-1.el7.ngx            nginx-stable
nginx-module-njs.x86_64                  1:1.24.0+0.8.2-1.el7.ngx      nginx-stable
nginx-module-njs-debuginfo.x86_64        1:1.24.0+0.8.2-1.el7.ngx      nginx-stable
nginx-module-perl.x86_64                 1:1.24.0-1.el7.ngx            nginx-stable
nginx-module-perl-debuginfo.x86_64       1:1.24.0-1.el7.ngx            nginx-stable
nginx-module-xslt.x86_64                 1:1.24.0-1.el7.ngx            nginx-stable
nginx-module-xslt-debuginfo.x86_64       1:1.24.0-1.el7.ngx            nginx-stable
nginx-nr-agent.noarch                    2.0.0-12.el7.ngx              nginx-stable
pagure-web-nginx.noarch                  5.13.3-10.el7                 epel
pcp-pmda-nginx.x86_64                    4.3.2-13.el7_9                updates
python2-certbot-nginx.noarch             1.11.0-1.el7                  epel
sympa-nginx.x86_64                       6.2.72-3.el7                  epel
[root@izbp1fwu8k6txnl7pd2enpz ~]# yum install nginx
已加载插件:fastestmirror
Loading mirror speeds from cached hostfile
匹配 1:nginx-1.24.0-1.el7.ngx.x86_64 的软件包已经安装。正在检查更新。
无须任何处理
5. 查看版本验证是否安装成功
[root@izbp1fwu8k6txnl7pd2enpz ~]# nginx -v
nginx version: nginx/1.25.3
6. 查看安装位置
[root@izbp1fwu8k6txnl7pd2enpz ~]# whereis nginx
nginx: /usr/sbin/nginx /usr/lib64/nginx /etc/nginx /usr/share/nginx /usr/share/man/man8/nginx.8.gz
1.2 MacOS 和Windows的安装
MacOS中 安装homebrew,然后nginx使用安装brew:
$ brew install nginx后续按提示安装即可,通常zoo.conf是直接配置好的。
windows不推荐安装nginx,nginx不适合运行在Windows上,尽量运行在linux上。
2. Nginx 的常用命令
/usr/sbin/nginx : 启动Nginx
/usr/sbin/nginx# 正常启动不会有反馈;重复启动会有绑定失败提示nginx -h :帮助指令
[root@izbp1fwu8k6txnl7pd2enpz ~]# nginx -h
nginx version: nginx/1.25.3
Usage: nginx [-?hvVtTq] [-s signal] [-p prefix][-e filename] [-c filename] [-g directives]Options:-?,-h         : this help-v            : show version and exit-V            : show version and configure options then exit-t            : test configuration and exit-T            : test configuration, dump it and exit-q            : suppress non-error messages during configuration testing-s signal     : send signal to a master process: stop, quit, reopen, reload-p prefix     : set prefix path (default: /etc/nginx/)-e filename   : set error log file (default: /var/log/nginx/error.log)-c filename   : set configuration file (default: /etc/nginx/nginx.conf)-g directives : set global directives out of configuration file
nginx -c 配置文件 : 更换配置文件启动
[root@izbp1fwu8k6txnl7pd2enpz ~]# nginx -t
nginx: the configuration file /etc/nginx/nginx.conf syntax is ok
nginx: configuration file /etc/nginx/nginx.conf test is successful
# 相当于以这个配置文件重新启动
[root@izbp1fwu8k6txnl7pd2enpz ~]# nginx -c /etc/nginx/nginx.conf
nginx: [emerg] bind() to 0.0.0.0:80 failed (98: Address already in use)
nginx: [emerg] bind() to 0.0.0.0:80 failed (98: Address already in use)
nginx: [emerg] bind() to 0.0.0.0:80 failed (98: Address already in use)
nginx: [emerg] bind() to 0.0.0.0:80 failed (98: Address already in use)
nginx: [emerg] bind() to 0.0.0.0:80 failed (98: Address already in use)
nginx: [emerg] still could not bind()
nginx -t : 测试配置文件,并查看在使用的配置文件是那个
[root@izbp1fwu8k6txnl7pd2enpz ~]# nginx -t
nginx: the configuration file /etc/nginx/nginx.conf syntax is ok
nginx: configuration file /etc/nginx/nginx.conf test is successful
nginx -v : 查看版本
nginx -V: 查看版本V和配置信息
[root@izbp1fwu8k6txnl7pd2enpz ~]# nginx -v
nginx version: nginx/1.25.3
[root@izbp1fwu8k6txnl7pd2enpz ~]# nginx -V
nginx version: nginx/1.25.3
built by gcc 4.8.5 20150623 (Red Hat 4.8.5-44) (GCC)
built with OpenSSL 1.0.2k-fips  26 Jan 2017
TLS SNI support enabled
configure arguments: --prefix=/etc/nginx --sbin-path=/usr/sbin/nginx --modules-path=/usr/lib64/nginx/modules --conf-path=/etc/nginx/nginx.conf --error-log-path=/var/log/nginx/error.log --http-log-path=/var/log/nginx/access.log --pid-path=/var/run/nginx.pid --lock-path=/var/run/nginx.lock --http-client-body-temp-path=/var/cache/nginx/client_temp --http-proxy-temp-path=/var/cache/nginx/proxy_temp --http-fastcgi-temp-path=/var/cache/nginx/fastcgi_temp --http-uwsgi-temp-path=/var/cache/nginx/uwsgi_temp --http-scgi-temp-path=/var/cache/nginx/scgi_temp --user=nginx --group=nginx --with-compat --with-file-aio --with-threads --with-http_addition_module --with-http_auth_request_module --with-http_dav_module --with-http_flv_module --with-http_gunzip_module --with-http_gzip_static_module --with-http_mp4_module --with-http_random_index_module --with-http_realip_module --with-http_secure_link_module --with-http_slice_module --with-http_ssl_module --with-http_stub_status_module --with-http_sub_module --with-http_v2_module --with-mail --with-mail_ssl_module --with-stream --with-stream_realip_module --with-stream_ssl_module --with-stream_ssl_preread_module --with-cc-opt='-O2 -g -pipe -Wall -Wp,-D_FORTIFY_SOURCE=2 -fexceptions -fstack-protector-strong --param=ssp-buffer-size=4 -grecord-gcc-switches -m64 -mtune=generic -fPIC' --with-ld-opt='-Wl,-z,relro -Wl,-z,now -pie'
nginx -s stop : 立即停止(强制);
nginx -s quit : 优雅停止,已经建立连接的会继续服务,直到退出;
nginx -s reload : 重新加载配置文件;
[root@izbp1fwu8k6txnl7pd2enpz ~]# nginx -s stop
[root@izbp1fwu8k6txnl7pd2enpz ~]# nginx -s quit
nginx: [error] open() "/var/run/nginx.pid" failed (2: No such file or directory)
[root@izbp1fwu8k6txnl7pd2enpz ~]# /usr/sbin/nginx
[root@izbp1fwu8k6txnl7pd2enpz ~]# /usr/sbin/nginx
nginx: [emerg] bind() to 0.0.0.0:80 failed (98: Address already in use)
nginx: [emerg] bind() to 0.0.0.0:80 failed (98: Address already in use)
nginx: [emerg] bind() to 0.0.0.0:80 failed (98: Address already in use)
nginx: [emerg] bind() to 0.0.0.0:80 failed (98: Address already in use)
nginx: [emerg] bind() to 0.0.0.0:80 failed (98: Address already in use)
nginx: [emerg] still could not bind()
[root@izbp1fwu8k6txnl7pd2enpz ~]# nginx -s quit
[root@izbp1fwu8k6txnl7pd2enpz ~]# nginx -t
nginx: the configuration file /etc/nginx/nginx.conf syntax is ok
nginx: configuration file /etc/nginx/nginx.conf test is successful
[root@izbp1fwu8k6txnl7pd2enpz ~]# vim /etc/nginx/nginx.conf
[root@izbp1fwu8k6txnl7pd2enpz ~]# nginx -t
nginx: [emerg] unknown directive "uuuser" in /etc/nginx/nginx.conf:2
nginx: configuration file /etc/nginx/nginx.conf test failed
[root@izbp1fwu8k6txnl7pd2enpz ~]# nginx -s reload
nginx: [emerg] unknown directive "uuuser" in /etc/nginx/nginx.conf:2
[root@izbp1fwu8k6txnl7pd2enpz ~]# vim /etc/nginx/nginx.conf
[root@izbp1fwu8k6txnl7pd2enpz ~]# nginx -s reload
nginx: [error] invalid PID number "" in "/var/run/nginx.pid"
[root@izbp1fwu8k6txnl7pd2enpz ~]# /usr/sbin/nginx
[root@izbp1fwu8k6txnl7pd2enpz ~]# nginx -s reload
3. 配置文件讲解
使用nginx -t 找到配置文件位置,并打开配置文件。
[root@izbp1fwu8k6txnl7pd2enpz ~]# nginx -t
nginx: the configuration file /etc/nginx/nginx.conf syntax is ok
nginx: configuration file /etc/nginx/nginx.conf test is successful
[root@izbp1fwu8k6txnl7pd2enpz ~]# cd /etc/nginx
[root@izbp1fwu8k6txnl7pd2enpz ~]# vim nginx.conf
nginx.conf配置文件中主要的配置项讲解:
一些重要的配置项列举如下:# 运行用户
user  nginx;
# 工作进程数,可以和CPU核心数一致,也可以设置为auto
worker_processes  1;
# 错误日志路径
error_log  /var/log/nginx/error.log;
pid      /run/nginx.pid;
# 把对应的配置文件导入
include /usr/share/nginx/modules/*.conf;
events {
# 连接数worker_connections  1024;
}
# http服务器的配置
http {
# 日志的格式log_format main '$remote_addr - $remote_user [$time_local]...'
# 访问日志access_log  /var/log/nginx/access.log  main;
# 是否开启高效的传输模式sendfile        on;
# keepalive超时时间keepalive_timeout  65;
#加载其他各模块的配置文件
include /etc/nginx/conf.d/*.conf;server {
#监听端口号listen       80;listen       [::]:80;server_name  _;#root路径的位置root         /usr/share/nginx/html2;# Load configuration files for the default server block.include /etc/nginx/default.d/*.conf;error_page 404 /404.html;location = /404.html {}error_page 500 502 503 504 /50x.html;location = /50x.html {}}
}
需要注意Nginx并不是将所有配置写入一个文件,会在nginx.conf中使用include加载其他配置文件,例如,此处将加载/usr/share/nginx/modules/*目录下所有以.conf结尾的文件;如此可以实现多模块的配置,当同一个nginx服务于多个服务器,将不同服务器的配置文件单独配置后引入即可。
# 把对应的配置文件导入
include /usr/share/nginx/modules/*.conf;
4. 搭建静态资源服务器
尝试使用Nginx搭建静态服务器,基本步骤如下:
1. 使用mkdir + 文件夹名称,在root路径的位置创建新的文件夹,用于存储静态文件;
2. 新开终端,使用scp命令上传文件到指定目录
# scp命令上传文件: scp [参数] [原路径] [目标路径]; 提示输入的密码是ECS的密码
czh12@czh12deiMac ~ % scp -r /Users/czh12/Learning/video/templatemo_560_astro_motion/. root@47.98.211.211:/usr/share/nginx/html2/
root@47.98.211.211's password:
watermark.jpg                                                     100%   52KB 301.5KB/s   00:00
0c5adc4f-334c-4183-91b1-21276ee7a980.jpeg                         100%   13KB  78.9KB/s   00:00
e566fb7c-c578-44dc-9541-7af868c42b67.jpeg                         100%   13KB  77.6KB/s   00:00
new-xia.png ……
## 注意此处上传多文件,但不希望重新创建原文件夹(templatemo_560_astro_motion),需要在文件夹后加  **/.**  ; 表示上传其中的所有文件
```
3. 修改配置文件nginx.conf;将root路径的位置配置成上述新建文件夹;在使用nginx -s reload重nginx
相关文章:

初识Nginx
摘要:最近几个项目中的接口总是访问受限,需要后端同事配置Nginx代理,了解下Nginx后面自己配置。 Nginx 是一款高性能的开源 Web 服务器和反向代理服务器。它具有轻量级、高并发、低内存消耗等特点,常被用作静态资源服务、负载…...

Rust语言之多线程
文章目录 一、简介二、创建线程1.创建一个线程2.创建多个线程生成随机数尝试让程序睡一会儿引入多线程 三、线程返回值的处理1.每个线程处理一个独立的值2.多个线程处理一个值Arc(原子引用计数)Mutex(互斥锁)RwLock(读…...

现有的通用模型中融入少量中文数据没有太大意义少量的数据就能影响整个大模型
相关链接:只修改一个关键参数,就会毁了整个百亿参数大模型? | 新程序员-CSDN博客 现象 1:mBERT 模型的跨语言迁移 现象 2:大语言模型同样存在显著的语言对齐 现象 3:知识与语言分离 现象 4:…...

vscode 开发代码片段插件
环境准备 node - 20v版本 ,推荐使用nvm进行版本控制全局安装 "yo" 是 Yeoman 工具的命令行工具, npm i yo -g全局安装 generator-code 是一个 Yeoman 脚手架 gernerator-code npm i gernerator-code -g全局安装 npm install -g vsce官方文档 …...

算法竞赛STL:array的使用方法
算法竞赛STL:array的使用方法 文章目录 算法竞赛STL:array的使用方法array array 容器描述: array是一种固定大小的容器,它包含指定数量的元素。每个元素都有一个非负整数索引,用于访问或修改它。 使用方法ÿ…...

MyBatis sql拦截器实现一个自动根据租户进行分表的方案
需求描述: 在一个多租户系统中,通过 MyBatis 实现动态数据表分离。具体来说,您希望通过 MyBatis 拦截器在执行 SQL 时自动将表名根据当前租户 ID (tenantId) 进行修改。这样,每个租户的数据就可以存储在专属于它们的表中…...
TiDB in 2023, 一次简单的回顾丨PingCAP 唐刘
2023 年已经过去,TiDB 经过了一年的迭代,又往前进步了一点点,我们非常自豪的看到,TiDB 正在不断地帮助我们的客户成功,包括但不限于: ○ 首个云原生、分布式、全栈国产化银行核心业务系统投产上线丨TiDB …...
debug - 只要在内存中有显示相关的数据, 就会被CE找到
文章目录 debug - 只要在内存中有显示相关的实际数据, 就会被CE找到概述笔记demo实现demo运行效果用CE查找实际数据地址找到自己的调试点 - 方法1找到自己的调试点 - 方法2打补丁备注END debug - 只要在内存中有显示相关的实际数据, 就会被CE找到 概述 自己写了一个demo, 想验…...
Redis 单个与多节点如何实现分布式锁
分布式锁 在许多环境中,分布式锁是非常有用的原语,在这些环境中,不同的进程必须以互斥的方式操作共享资源。在应对并发问题时,Redis 客户端还可以通过加锁的方式,来控制并发写操作对共享数据的修改,从而保…...

频段划分学习射频知识的意义
一、射频电路设计与低频电路设计的不同点 随着频率提高,相应电磁波的波长与变得可与分立电路元件的尺寸相比拟时,电阻、电容和电感这些元件的电响应,将偏离他们的理想频率特性。以 WIFI 2.4G 频段为例,当频率为 2437MHz࿰…...
)
Effective Objective-C 学习(四)
掌握GCD及操作队列的使用时机 在执行后台任务时,GCD 并不一定是最佳方式。还有一种技术叫做 NSOperationQueue,它虽然与 GCD 不同,但是却与之相关,开发者可以把操作以 NSOperation 子类的形式放在队列中,而这些操作也…...

欢迎来到IT时代----盘点曾经爆火全网的计算机电影
计算机专业必看的几部电影 计算机专业必看的几部电影,就像一场精彩的编程盛宴!《黑客帝国》让你穿越虚拟世界,感受高科技的魅力;《社交网络》揭示了互联网巨头的创业之路,《源代码》带你穿越时间解救世界,这…...

光芒绽放:妙用“GLAD原则”打造标准的数据可视化图表
光芒绽放:妙用“GLAD原则”打造标准的数据可视化图表 文章目录 光芒绽放:妙用“GLAD原则”打造标准的数据可视化图表前言一、可视化工具有哪些?二、那如何做出正确可视化图表 ?GLAD原则1.G原则2.L原则3.A原则4.D原则 三、总结最后…...

如何设计出用于喜欢的界面
要设计出用户喜欢的界面,你可以考虑以下几个方面: 用户研究:首先要了解用户的需求和偏好。你可以通过用户调研、用户访谈和数据分析来获取这些信息。了解用户的行为模式、喜好和痛点,有助于设计出更吸引人的界面。 直观的布局&am…...

第三篇【传奇开心果系列】Python的文本和语音相互转换库技术点案例示例:pyttsx3实现语音助手经典案例
传奇开心果短博文系列 系列短博文目录Python的文本和语音相互转换库技术点案例示例系列 短博文目录一、项目背景和目标二、雏形示例代码三、扩展思路介绍四、与其他库和API集成示例代码五、自定义语音示例代码六、多语言支持示例代码七、语音控制应用程序示例代码八、文本转语音…...

JS中数组的常用方法
concat() 连接两个或更多的数组,并返回结果。 let array1 [1, 2, 3]; let array2 [4, 5, 6]; let concatenatedArray array1.concat(array2); console.log(concatenatedArray); // [1, 2, 3, 4, 5, 6]join() 把数组的所有元素放入一个字符串。元素通过指定…...

最好用的论文检索网站
网站展示: 网站链接 sci-hub文献检索 用途: 可以用文章的DOI来检索并下载文章...
AI专题:AI巨轮滚滚向前
今天分享的是电子系列深度研究报告:《AI专题:AI巨轮滚滚向前》。 (报告出品方:方正证券) 报告共计:65页 来源:人工智能学派 Gemini 1.5 Pro 性能显著增强,长上下文理解取得突破 …...

SpringBoot常见问题
1 引言 Spring Boot是一个基于Spring框架的快速开发脚手架,它简化了Spring应用的初始化和搭建过程,提供了众多便利的功能和特性,比如自动配置、嵌入式Tomcat等,让开发人员可以更加专注于业务逻辑的实现。 Spring Boot还提供了…...
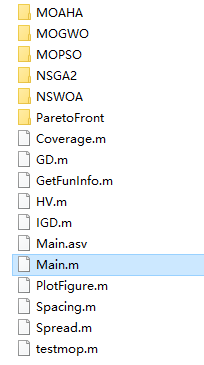
五种多目标优化算法(MOAHA、MOGWO、NSWOA、MOPSO、NSGA2)性能对比,包含6种评价指标,9个测试函数(提供MATLAB代码)
一、5种多目标优化算法简介 1.1MOAHA 1.2MOGWO 1.3NSWOA 1.4MOPSO 1.5NSGA2 二、5种多目标优化算法性能对比 为了测试5种算法的性能将其求解9个多目标测试函数(zdt1、zdt2 、zdt3、 zdt4、 zdt6 、Schaffer、 Kursawe 、Viennet2、 Viennet3)ÿ…...
)
【独家实测】ChatGPT-4 Turbo vs GPT-3.5 Turbo单位token成本对比:附Python自动核算脚本(限免24h)
更多请点击: https://codechina.net 第一章:ChatGPT API价格计算的底层逻辑与成本认知 ChatGPT API 的计费并非基于会话时长或请求次数,而是严格依据模型实际处理的 token 数量——包括输入(prompt)和输出(…...

在Nodejs后端服务中集成稳定可靠的大模型能力
🚀 告别海外账号与网络限制!稳定直连全球优质大模型,限时半价接入中。 👉 点击领取海量免费额度 在Nodejs后端服务中集成稳定可靠的大模型能力 应用场景类,针对需要构建智能对话或内容生成功能的后端工程师࿰…...

如何用bsf创建第一个3D场景:从零开始的完整教程
如何用bsf创建第一个3D场景:从零开始的完整教程 【免费下载链接】B3DFramework Modern C library for the development of real-time graphical applications 项目地址: https://gitcode.com/gh_mirrors/bs/B3DFramework bsf(B3DFramework&#x…...

如何快速配置FanControl风扇控制:从安装到优化的完整指南
如何快速配置FanControl风扇控制:从安装到优化的完整指南 【免费下载链接】FanControl.Releases This is the release repository for Fan Control, a highly customizable fan controlling software for Windows. 项目地址: https://gitcode.com/GitHub_Trending…...

FRED的光路和光路历史记录
对于杂散光分析,通常会使用“高级光线追迹”对话框,并选择“创建/使用光线历史文件”和“确定光路”选项。下面是对这两个选项的简要解释。确定光线路径选择此选项会使得FRED存储所有光路信息。这允许用户之后使用诊断工具,如光路追迹路径报告…...

QuantConnect Lean引擎架构深度剖析:构建模块化量化交易系统的技术实现
QuantConnect Lean引擎架构深度剖析:构建模块化量化交易系统的技术实现 【免费下载链接】Lean Lean Algorithmic Trading Engine by QuantConnect (Python, C#) 项目地址: https://gitcode.com/GitHub_Trending/le/Lean QuantConnect Lean引擎是一个开源的量…...
)
用 5 款全栈电商微系统打通你的前后端核心逻辑链路(附级联 Prompt)
各位大前端、全栈开发以及正在寻求技术进阶的同仁们,大家好。在日常的技术社区里,我们经常能看到各种流于表面的前端 UI 静态页或者几行代码拼凑的后端 CRUD 示例。但真正能在一个全栈工程师的履历中起到定海神针作用的,往往是那些功能内敛、…...
:状态管理选型)
React 从入门到生产(五):状态管理选型
创作者: Yardon | GitHub: github.com/YardonYan | 版本: v1.0 什么时候需要状态管理 先泼一盆冷水:大多数 React 应用不需要 Redux。 这句话不是我说的,是 Redux 的作者 Dan Abramov 本人说的。他在 2020 年就公…...

单物体最优抓取轨迹生成
基于 3D 位姿规划直线平滑抓取轨迹,包含趋近 - 抓取 - 复位三段最优运动路径,适配机械臂点位运动核心规划逻辑基准位:机械臂初始安全待机点趋近段:直线匀速靠近物体上方预备抓取点抓取段:垂直下落至物体抓取中心位姿抬…...

C++ 重载与重写的区别与实现
1 . 前言在面向对象语言中,经常提到重载与重写,以下内容直观描述两者差异成员函数被重载的特征: (1)相同的范围(在同一个类中); (2)函数名字相同;…...