源码编译安装LNMP
LNMP包含:
linux、Nginx、Mysql、php
LNMP的工作原理 :
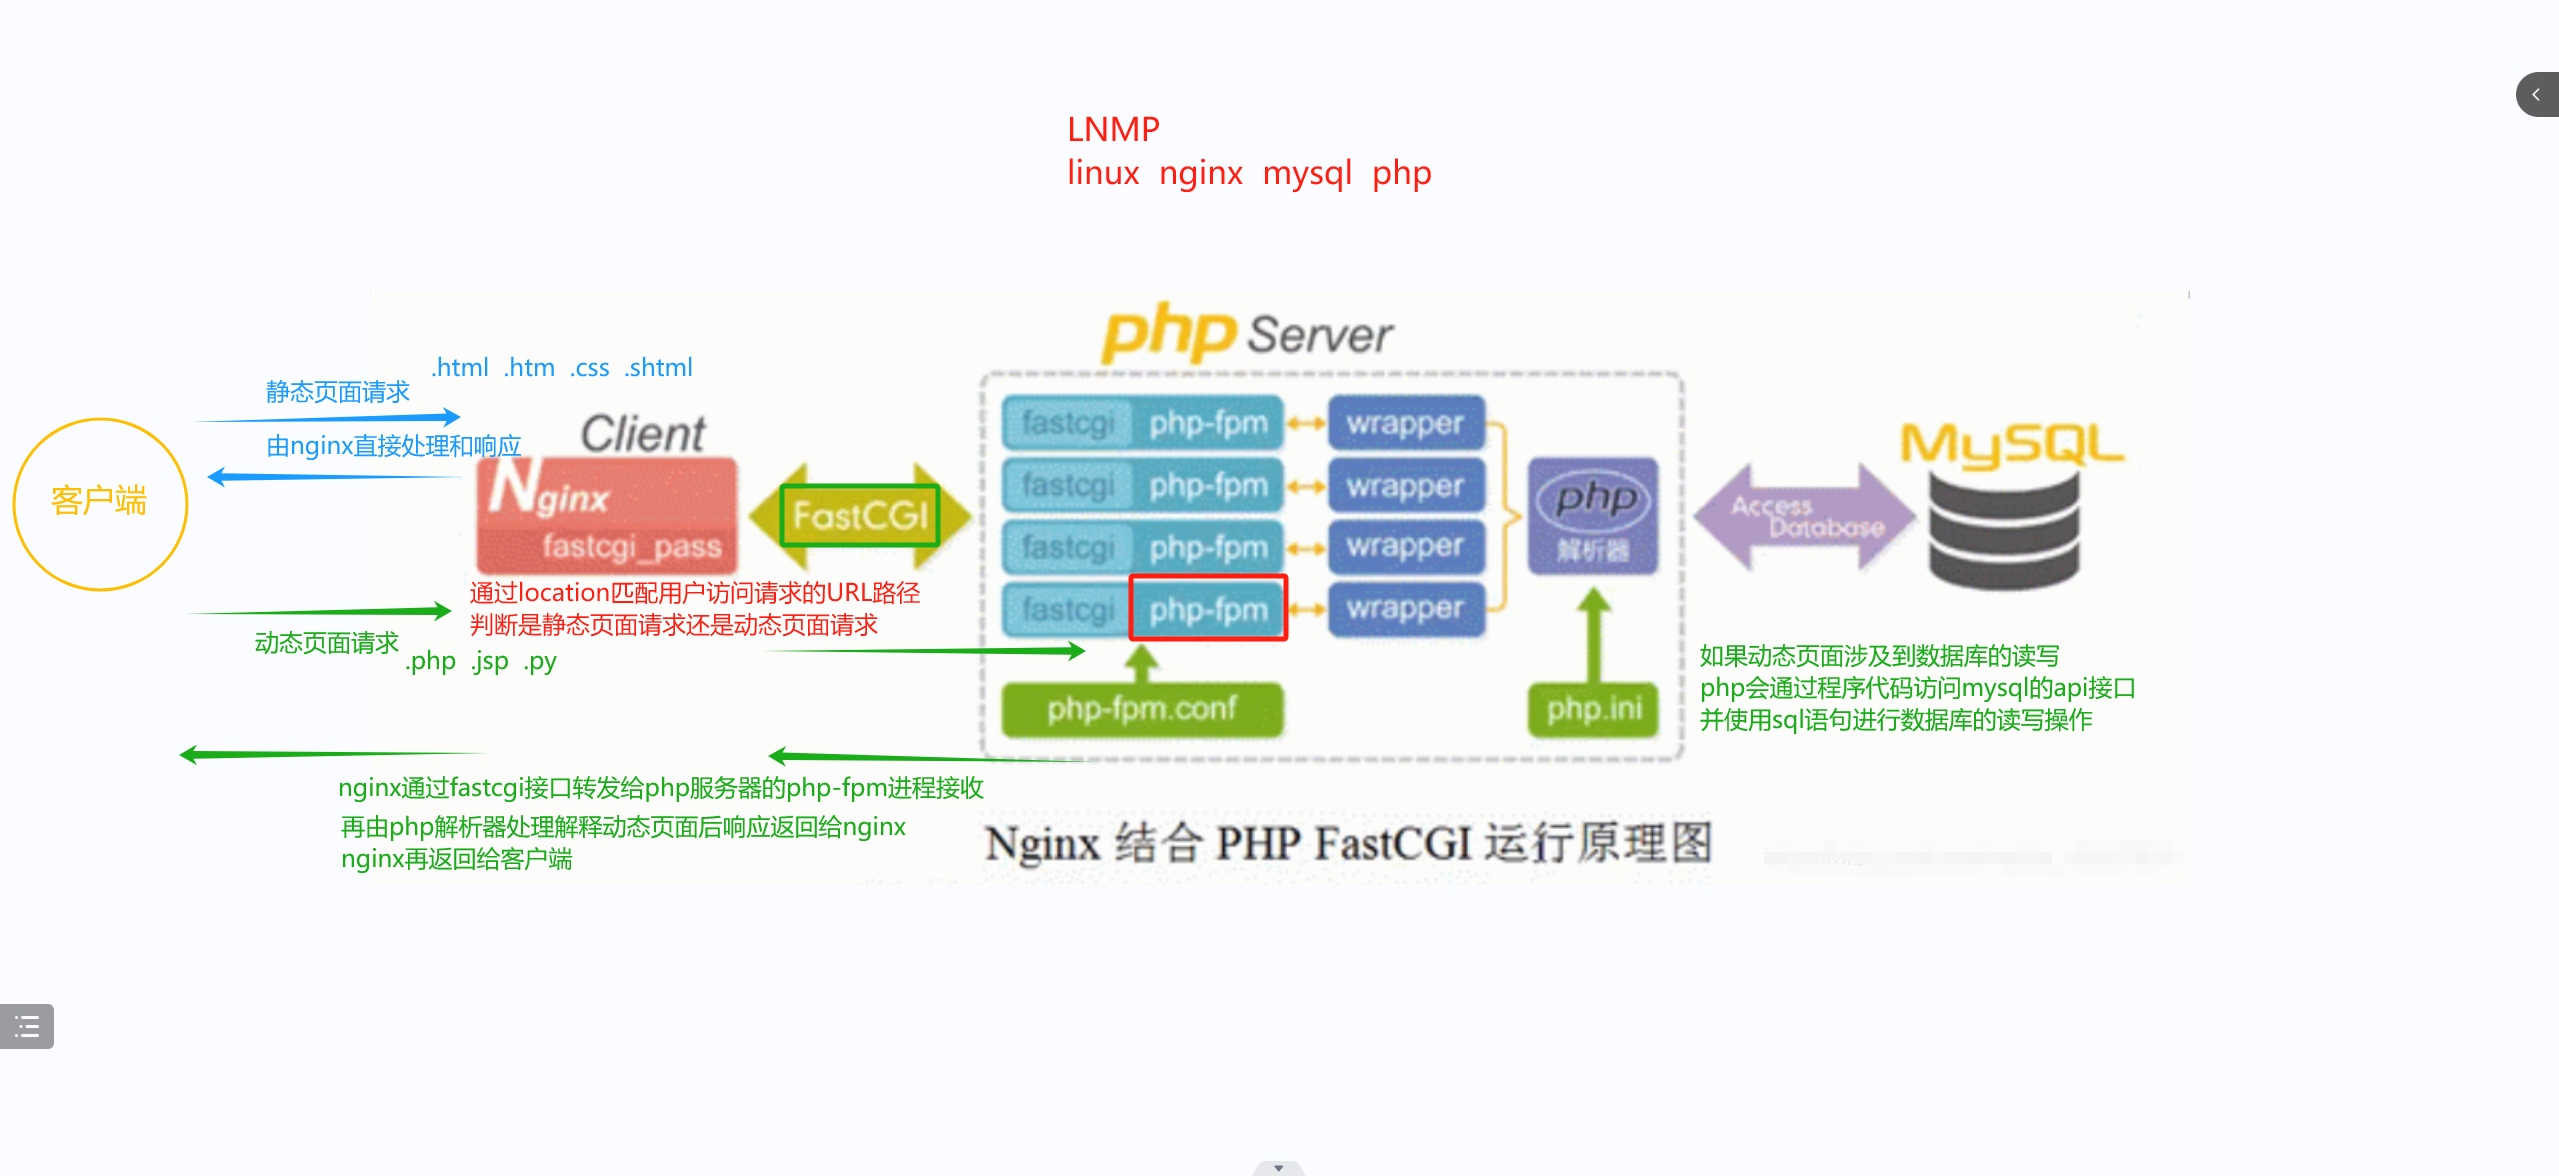
由客户端发送页面请求给Nginx,Nginx会根据location匹配用户访问请求的URL路径判断是静态还是动态,静态的一般是以 .html .htm .css .shtml结尾,动态的一般是以 .php .jsp .py结尾。
如果是静态,由Nginx直接处理和响应。如果是动态,Nginx会通过fastcgi接口转发给php-fpm进程接受,
然后再由php解析器处理解释动态页面后响应返回给Nginx,Nginx再返回给客户端。如果动态页面涉及到数据库的读写,php会通过程序代码访问,mysql的api接口,并使用sql语句进行数据库的速写操作
编译安装:
三台虚拟机,Nginx服务器,Mysql服务器,php服务器。
三台虚拟机系统初始化 :
[root@l1 ~]# systemctl stop firewalld
[root@l1 ~]# setenforce 0
[root@l1 ~]#
[root@l2 ~]# systemctl stop firewalld
[root@l2 ~]# setenforce 0
[root@l2 ~]#
[root@l3 ~]# systemctl stop firewalld
[root@l3 ~]# setenforce 0
[root@l3 ~]#
nginx服务器配置
安装依赖包
[root@l1 ~]# df
文件系统                   1K-块    已用     可用 已用% 挂载点
devtmpfs                  480736       0   480736    0% /dev
tmpfs                     497816       0   497816    0% /dev/shm
tmpfs                     497816   14912   482904    3% /run
tmpfs                     497816       0   497816    0% /sys/fs/cgroup
/dev/mapper/centos-root 38770180 5435772 33334408   15% /
/dev/sda1                1038336  177472   860864   18% /boot
tmpfs                      99564      32    99532    1% /run/user/0
/dev/sr0                 4635056 4635056        0  100% /mnt
[root@l1 ~]# yum -y install pcre-devel zlib-devel openssl-devel gcc gcc-c++ make
//安装依赖包
创建用户
[root@l1 ~]# useradd -M -s /sbin/nologin nginx   //创建用户
[root@l1 ~]# cat /etc/passwd | grep nginx:
nginx:x:1001:1001::/home/nginx:/sbin/nologin
[root@l1 ~]#
上传软件包至/opt目录下并解压

[root@l1 opt]# ls
nginx-1.26.0.tar.gz  rh
[root@l1 opt]# tar xf nginx-1.26.0.tar.gz   //解压
[root@l1 opt]# ls
nginx-1.26.0  nginx-1.26.0.tar.gz  rh
[root@l1 opt]# cd nginx-1.26.0/
[root@l1 nginx-1.26.0]#
编译安装
[root@l1 nginx-1.26.0]# ./configure --prefix=/usr/local/nginx --user=nginx --group=nginx --with-http_stub_status_module --with-http_ssl_module[root@l1 nginx-1.26.0]# make -j4 && make install设置软链接,可以直接调用nginx命令来进行管理
[root@l1 nginx-1.26.0]# cd /usr/local/nginx/
[root@l1 nginx]# ls sbin/
nginx
[root@l1 nginx]# ln -s /usr/local/nginx/sbin/nginx /usr/local/sbin/    //软连接
[root@l1 nginx]# nginx -t
nginx: the configuration file /usr/local/nginx/conf/nginx.conf syntax is ok
nginx: configuration file /usr/local/nginx/conf/nginx.conf test is successful
[root@l1 nginx]#
添加Nginx系统服务
[root@l1 nginx]# cd /usr/lib/systemd/system
[root@l1 system]# vim nginx.service

[Unit]
Description=nginx
After=network.target[Service]
Type=forking
PIDFile=/usr/local/nginx/logs/nginx.pid
ExecStart=/usr/local/nginx/sbin/nginx
ExecReload=/bin/kill -s HUP $MAINPID
ExecStop=/bin/kill -s QUIT $MAINPID
PrivateTmp=true[Install]
WantedBy=multi-user.target
[root@l1 system]# systemctl daemon-reload
[root@l1 system]# systemctl start nginx
[root@l1 system]# systemctl enable nginx
Created symlink from /etc/systemd/system/multi-user.target.wants/nginx.service to /usr/lib/systemd/system/nginx.service.
[root@l1 system]# netstat -lntp | grep nginx
tcp 0 0 0.0.0.0:80 0.0.0.0:* LISTEN 10947/nginx: master
[root@l1 system]#配置Nginx支持php解析(7 8 9 的操作是在配置完后面的mysql和php才开始的)
[root@l1 nginx]# cd /usr/local/nginx/
[root@l1 nginx]# cd conf/
[root@l1 conf]# ls
fastcgi.conf            koi-win             scgi_params
fastcgi.conf.default    mime.types          scgi_params.default
fastcgi_params          mime.types.default  uwsgi_params
fastcgi_params.default  nginx.conf          uwsgi_params.default
koi-utf                 nginx.conf.default  win-utf
[root@l1 conf]# vim nginx.conf
[root@l1 conf]#


[root@l1 conf]# nginx -t
nginx: the configuration file /usr/local/nginx/conf/nginx.conf syntax is ok
nginx: configuration file /usr/local/nginx/conf/nginx.conf test is successful
[root@l1 conf]#
验证php测试页
动态页面
[root@l1 conf]# mkdir -p /var/www/html
[root@l1 conf]# cd /var/www/html/
[root@l1 html]# vim test.php
[root@l1 html]#

静态页面
[root@l1 html]# cd /usr/local/nginx/html/
[root@l1 html]# ls
50x.html  index.html
[root@l1 html]# rz -E
rz waiting to receive.
[root@l1 html]# vim m.html
[root@l1 html]# ls
50x.html  index.html  m.html  w.jpg
[root@l1 html]#

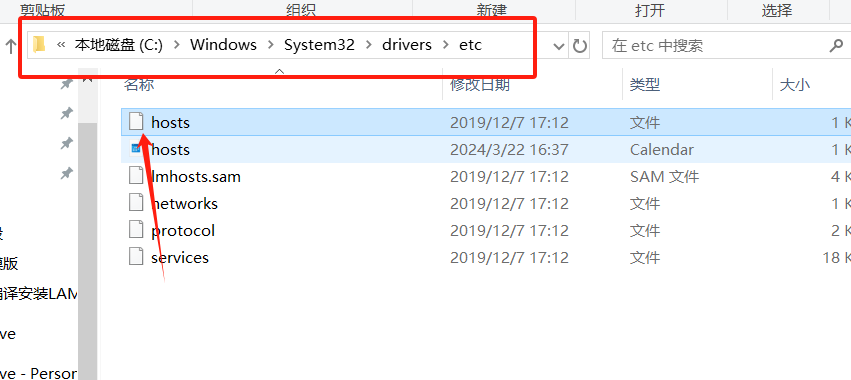


此时动态页面现在是查不到的,静态页面是由Nginx直接处理和响应的,而动态页面是Nginx通过fastcgi接口转发给php-fpm进程接受,然后再由php解析器处理解释动态页面后响应返回给Nginx,Nginx再返回给客户端的,所以我们要在将动态页面位置也放入到php服务器中
在本服务器中安装NFS
yum安装rbcbind和nfs-utils
[root@l1 html]# vim /etc/exports

[root@l1 html]# systemctl --now enable rpcbind nfs
Created symlink from /etc/systemd/system/multi-user.target.wants/nfs-server.service to /usr/lib/systemd/system/nfs-server.service.
[root@l1 html]# showmount -e
Export list for l1:
/var/www/html 192.168.18.0/24
[root@l1 html]#
挂载目录
[root@localhost opt]# vim /etc/fstab

php服务器进行操作
能查到我们Nginx服务器共享的目录
[root@localhost ~]# showmount -e 192.168.18.10
Export list for 192.168.18.10:
/var/www/html 192.168.18.0/24
[root@localhost ~]#
挂载目录

[root@localhost ~]# vim /etc/fstab
[root@localhost ~]# mkdir -p /var/www/html
[root@localhost ~]# mount -a
[root@localhost ~]# df -h
文件系统                     容量  已用  可用 已用% 挂载点
devtmpfs                     470M     0  470M    0% /dev
tmpfs                        487M     0  487M    0% /dev/shm
tmpfs                        487M  8.5M  478M    2% /run
tmpfs                        487M     0  487M    0% /sys/fs/cgroup
/dev/mapper/centos-root       37G  5.1G   32G   14% /
/dev/sda1                   1014M  174M  841M   18% /boot
tmpfs                         98M   60K   98M    1% /run/user/0
/dev/sr0                     4.5G  4.5G     0  100% /mnt
192.168.18.10:/var/www/html   37G  5.3G   32G   15% /var/www/html
[root@localhost ~]#
[root@localhost ~]# ls /var/www/html/      //查看目录,显示成功
test.php
[root@localhost ~]#

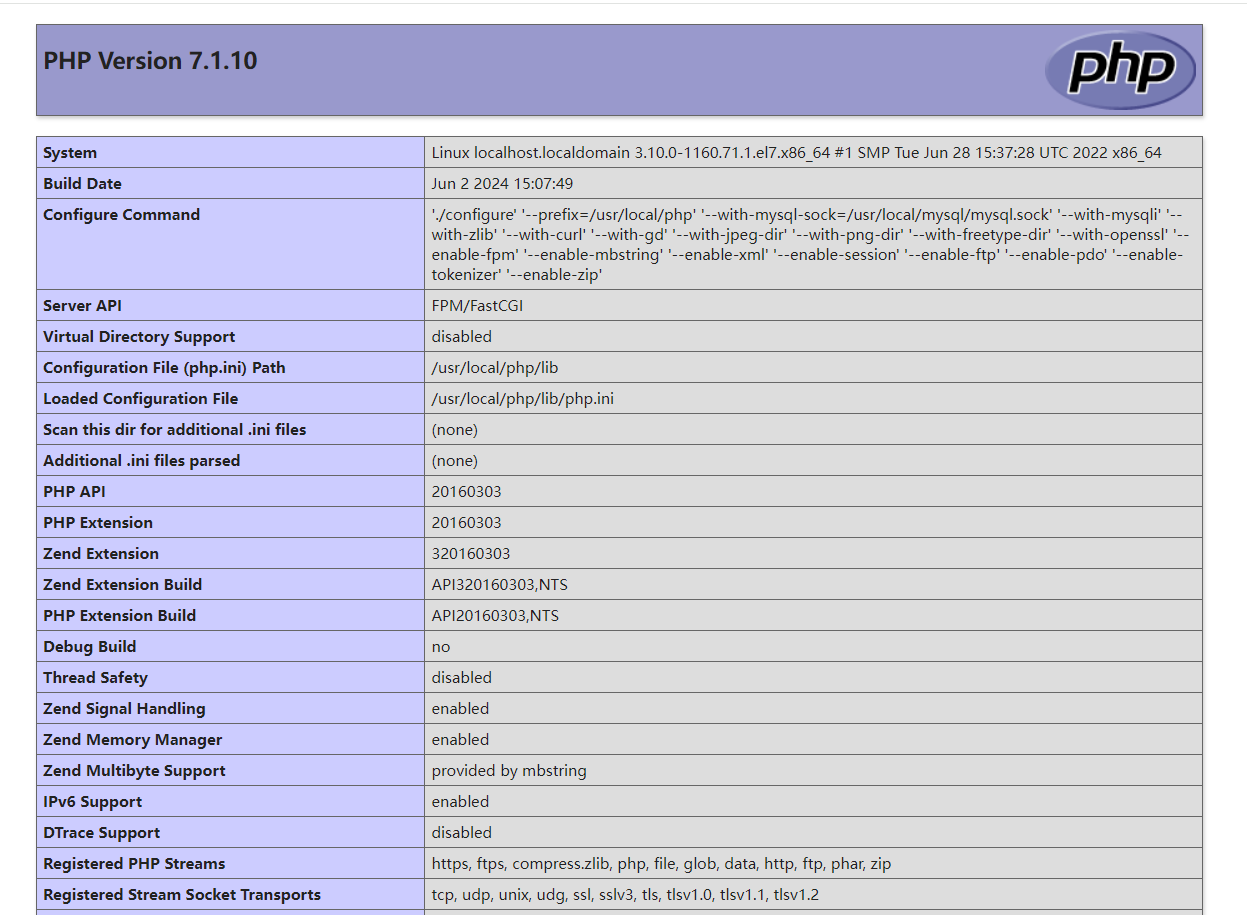
验证mysql测试页
随便在nginx还是php服务器的/var/www/html目录下创建一个mysql.php文件
我这是在php服务器创建的,文件里面的IP地址是mysql服务器的IP地址
[root@localhost php-7.1.10]# cd /var/www/html/
[root@localhost html]# ls
test.php
[root@localhost html]# vim mysql.php
[root@localhost html]#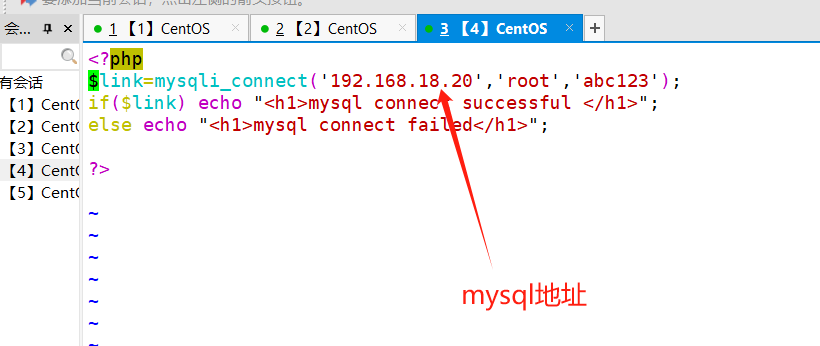
<?php
$link=mysqli_connect('192.168.18.20','root','abc123');
if($link) echo "<h1>mysql connect successful </h1>";
else echo "<h1>mysql connect failed</h1>";?> 


Mysql服务器配置
上传压缩包至/opt目录中并解压
[root@l2 ~]# cd /opt
[root@l2 opt]# ls
abc.txt  cywl  cywl.txt  rh
[root@l2 opt]# rz -E
rz waiting to receive.
[root@l2 opt]# ls
abc.txt  cywl  cywl.txt  mysql-boost-5.7.44.tar.gz  rh

[root@l2 opt]# tar xf mysql-boost-5.7.44.tar.gz  //解压
[root@l2 opt]# ls
abc.txt  cywl  cywl.txt  mysql-5.7.44  mysql-boost-5.7.44.tar.gz  rh
[root@l2 opt]# cd mysql-5.7.44/
安装环境依赖包
[root@l2 mysql-5.7.44]# mount /dev/sr0 /mnt/
mount: /dev/sr0 写保护,将以只读方式挂载
[root@l2 mysql-5.7.44]# df
文件系统                   1K-块    已用     可用 已用% 挂载点
devtmpfs                 1913548       0  1913548    0% /dev
tmpfs                    1930628       0  1930628    0% /dev/shm
tmpfs                    1930628   12528  1918100    1% /run
tmpfs                    1930628       0  1930628    0% /sys/fs/cgroup
/dev/mapper/centos-root 38770180 6265016 32505164   17% /
/dev/sda1                1038336  191100   847236   19% /boot
tmpfs                     386128      12   386116    1% /run/user/42
tmpfs                     386128       0   386128    0% /run/user/0
/dev/sr0                 4635056 4635056        0  100% /mnt
[root@l2 mysql-5.7.44]# yum -y install gcc gcc-c++ ncurses ncurses-devel bison cmake openssl-devel
创建用户
[root@zx3 mysql-5.7.44]# useradd -M -s /sbin/nologin  mysql
[root@zx3 mysql-5.7.44]# cat /etc/passwd | grep mysql:
mysql:x:1001:1001::/home/mysql:/sbin/nologin
[root@zx3 mysql-5.7.44]#
配置软件模块
[root@l2 mysql-5.7.44]# cmake \
> -DCMAKE_INSTALL_PREFIX=/usr/local/mysql \
> -DMYSQL_UNIX_ADDR=/usr/local/mysql/mysql.sock \
> -DSYSCONFDIR=/etc \
> -DSYSTEMD_PID_DIR=/usr/local/mysql \
> -DDEFAULT_CHARSET=utf8  \
> -DDEFAULT_COLLATION=utf8_general_ci \
> -DWITH_EXTRA_CHARSETS=all \
> -DWITH_INNOBASE_STORAGE_ENGINE=1 \
> -DMYSQL_DATADIR=/usr/local/mysql/data \
> -DWITH_BOOST=boost \
> -DWITH_SYSTEMD=1
cmake \
-DCMAKE_INSTALL_PREFIX=/usr/local/mysql \
-DMYSQL_UNIX_ADDR=/usr/local/mysql/mysql.sock \
-DSYSCONFDIR=/etc \
-DSYSTEMD_PID_DIR=/usr/local/mysql \
-DDEFAULT_CHARSET=utf8  \
-DDEFAULT_COLLATION=utf8_general_ci \
-DWITH_EXTRA_CHARSETS=all \
-DWITH_INNOBASE_STORAGE_ENGINE=1 \
-DMYSQL_DATADIR=/usr/local/mysql/data \
-DWITH_BOOST=boost \
-DWITH_SYSTEMD=1
编译安装
[root@l2 mysql-5.7.44]# make -j 4 && make install
清除mariadb缓存
[root@l2 mysql-5.7.44]# yum remove -y mariadb*
修改mysql配置文件
[root@l2 mysql-5.7.44]# vim /etc/my.cnf
[client]
port = 3306
socket=/usr/local/mysql/mysql.sock[mysqld]
user = mysql
basedir=/usr/local/mysql
datadir=/usr/local/mysql/data
port = 3306
character-set-server=utf8
pid-file = /usr/local/mysql/mysqld.pid
socket=/usr/local/mysql/mysql.sock
bind-address = 0.0.0.0
skip-name-resolve
max_connections=2048
default-storage-engine=INNODB
max_allowed_packet=16M
server-id = 1sql_mode=NO_ENGINE_SUBSTITUTION,STRICT_TRANS_TABLES,NO_AUTO_CREATE_USER,NO_AUTO_VALUE_ON_ZERO,NO_ZERO_IN_DATE,NO_ZERO_DATE,ERROR_FOR_DIVISION_BY_ZERO,PIPES_AS_CONCAT,ANSI_QUOTES
更换mysql配置文件和安装目录的属主属组
[root@l2 mysql-5.7.44]# chown mysql:mysql /etc/my.cnf
[root@l2 mysql-5.7.44]# ll /etc/my.cnf
-rw-r--r--. 1 mysql mysql 555 6月   2 13:20 /etc/my.cnf
[root@l2 mysql-5.7.44]# cd /usr/local/
[root@l2 local]# ll
总用量 0
drwxr-xr-x.  2 root root   6 4月  11 2018 bin
drwxr-xr-x.  2 root root   6 4月  11 2018 etc
drwxr-xr-x.  2 root root   6 4月  11 2018 games
drwxr-xr-x.  2 root root   6 4月  11 2018 include
drwxr-xr-x.  2 root root   6 4月  11 2018 lib
drwxr-xr-x.  2 root root   6 4月  11 2018 lib64
drwxr-xr-x.  2 root root   6 4月  11 2018 libexec
drwxr-xr-x. 11 root root 177 6月   2 12:57 mysql
drwxr-xr-x.  2 root root   6 4月  11 2018 sbin
drwxr-xr-x.  5 root root  49 4月  30 23:03 share
drwxr-xr-x.  2 root root   6 4月  11 2018 src
[root@l2 local]# chown -R mysql:mysql mysql/
[root@l2 local]# ll
总用量 0
drwxr-xr-x.  2 root  root    6 4月  11 2018 bin
drwxr-xr-x.  2 root  root    6 4月  11 2018 etc
drwxr-xr-x.  2 root  root    6 4月  11 2018 games
drwxr-xr-x.  2 root  root    6 4月  11 2018 include
drwxr-xr-x.  2 root  root    6 4月  11 2018 lib
drwxr-xr-x.  2 root  root    6 4月  11 2018 lib64
drwxr-xr-x.  2 root  root    6 4月  11 2018 libexec
drwxr-xr-x. 11 mysql mysql 177 6月   2 12:57 mysql
drwxr-xr-x.  2 root  root    6 4月  11 2018 sbin
drwxr-xr-x.  5 root  root   49 4月  30 23:03 share
drwxr-xr-x.  2 root  root    6 4月  11 2018 src
[root@l2 local]#
在环境变量中添加mysql的bin和lib目录
[root@l2 local]# cd mysql/bin/
[root@l2 bin]# pwd
/usr/local/mysql/bin
[root@l2 bin]# ls
innochecksum                mysql_config               mysqlslap
lz4_decompress              mysql_config_editor        mysql_ssl_rsa_setup
myisamchk                   mysqld                     mysqltest
myisam_ftdump               mysqld_pre_systemd         mysqltest_embedded
myisamlog                   mysqldump                  mysql_tzinfo_to_sql
myisampack                  mysqldumpslow              mysql_upgrade
my_print_defaults           mysql_embedded             mysqlxtest
mysql                       mysqlimport                perror
mysqladmin                  mysql_install_db           replace
mysqlbinlog                 mysql_plugin               resolveip
mysqlcheck                  mysqlpump                  resolve_stack_dump
mysql_client_test           mysql_secure_installation  zlib_decompress
mysql_client_test_embedded  mysqlshow
[root@l2 bin]# vim /etc/profile
[root@l2 bin]# source /etc/profile
[root@l2 bin]# echo $PATH
/usr/local/sbin:/usr/local/bin:/usr/sbin:/usr/bin:/root/bin:/usr/local/mysql/bin:/usr/local/mysql/lib
[root@l2 bin]#
mysql初始化操作
./mysqld \
--initialize-insecure \
--user=mysql \
--basedir=/usr/local/mysql \
--datadir=/usr/local/mysql/data
[root@l2 bin]# ./mysqld \
> --initialize-insecure \
> --user=mysql \
> --basedir=/usr/local/mysql \
> --datadir=/usr/local/mysql/data
添加mysqld系统服务
[root@l2 bin]# cd /usr/local/mysql/usr/lib/systemd/system/
[root@l2 system]# ls
mysqld.service  mysqld@.service
[root@l2 system]# cp mysqld.service /usr/lib/systemd/system
[root@l2 system]# systemctl daemon-reload
[root@l2 system]# systemctl enable mysqld
Created symlink from /etc/systemd/system/multi-user.target.wants/mysqld.service to /usr/lib/systemd/system/mysqld.service.
[root@l2 system]# systemctl start mysqld
[root@l2 system]# netstat -lntp | grep mysqld
tcp        0      0 0.0.0.0:3306            0.0.0.0:*               LISTEN      33819/mysqld
[root@l2 system]#
修改mysql密码
[root@l2 system]# mysqladmin -u root -p password "abc123"
Enter password:    //直接回车,因为原先是没有密码的
mysqladmin: [Warning] Using a password on the command line interface can be insecure.
Warning: Since password will be sent to server in plain text, use ssl connection to ensure password safety.
[root@l2 system]# mysql -u root -pabc123
mysql: [Warning] Using a password on the command line interface can be insecure.
Welcome to the MySQL monitor. Commands end with ; or \g.
Your MySQL connection id is 3
Server version: 5.7.44 Source distributionCopyright (c) 2000, 2023, Oracle and/or its affiliates.Oracle is a registered trademark of Oracle Corporation and/or its
affiliates. Other names may be trademarks of their respective
owners.Type 'help;' or '\h' for help. Type '\c' to clear the current input statement.mysql> show databases;
+--------------------+
| Database |
+--------------------+
| information_schema |
| mysql |
| performance_schema |
| sys |
+--------------------+
4 rows in set (0.00 sec)mysql> quit
Bye
[root@l2 system]# 授权并刷新
[root@l2 system]# mysql -u root -pabc123
mysql: [Warning] Using a password on the command line interface can be insecure.
Welcome to the MySQL monitor.  Commands end with ; or \g.
Your MySQL connection id is 4
Server version: 5.7.44 Source distributionCopyright (c) 2000, 2023, Oracle and/or its affiliates.Oracle is a registered trademark of Oracle Corporation and/or its
affiliates. Other names may be trademarks of their respective
owners.Type 'help;' or '\h' for help. Type '\c' to clear the current input statement.
mysql> grant all on *.* to 'root'@'%' identified by 'abc123';
Query OK, 0 rows affected, 1 warning (0.00 sec)
mysql> flush privileges;
Query OK, 0 rows affected (0.00 sec)mysql>
php服务器配置
上传压缩包至/opt目录中并解压
[root@l3 ~]# cd /opt/
[root@l3 opt]# ls
rh
[root@l3 opt]# ls
php-7.1.10.tar.bz2  rh
[root@l3 opt]# tar xf php-7.1.10.tar.bz2
[root@l3 opt]#
安装环境依赖包
[root@l3 opt]# cd php-7.1.10/
[root@l3 php-7.1.10]# df
文件系统                   1K-块    已用     可用 已用% 挂载点
devtmpfs                 1913544       0  1913544    0% /dev
tmpfs                    1930624       0  1930624    0% /dev/shm
tmpfs                    1930624   12528  1918096    1% /run
tmpfs                    1930624       0  1930624    0% /sys/fs/cgroup
/dev/mapper/centos-root 38770180 5624548 33145632   15% /
/dev/sda1                1038336  191100   847236   19% /boot
tmpfs                     386128       8   386120    1% /run/user/42
tmpfs                     386128       0   386128    0% /run/user/0
[root@l3 php-7.1.10]# mount /dev/sr0 /mnt
mount: /dev/sr0 写保护,将以只读方式挂载
[root@l3 php-7.1.10]#yum -y install gd \
libjpeg libjpeg-devel \
libpng libpng-devel \
freetype freetype-devel \
libxml2 libxml2-devel \
zlib zlib-devel \
curl curl-devel \
openssl openssl-devel
yum -y install gd \
libjpeg libjpeg-devel \
libpng libpng-devel \
freetype freetype-devel \
libxml2 libxml2-devel \
zlib zlib-devel \
curl curl-devel \
openssl openssl-devel
配置软件模块
[root@l3 php-7.1.10]# ./configure \
> --prefix=/usr/local/php \
> --with-mysql-sock=/usr/local/mysql/mysql.sock \
> --with-mysqli \
> --with-zlib \
> --with-curl \
> --with-gd \
> --with-jpeg-dir \
> --with-png-dir \
> --with-freetype-dir \
> --with-openssl \
> --enable-fpm \
> --enable-mbstring \
> --enable-xml \
> --enable-session \
> --enable-ftp \
> --enable-pdo \
> --enable-tokenizer \
> --enable-zip
./configure \
--prefix=/usr/local/php \
--with-mysql-sock=/usr/local/mysql/mysql.sock \
--with-mysqli \
--with-zlib \
--with-curl \
--with-gd \
--with-jpeg-dir \
--with-png-dir \
--with-freetype-dir \
--with-openssl \
--enable-fpm \
--enable-mbstring \
--enable-xml \
--enable-session \
--enable-ftp \
--enable-pdo \
--enable-tokenizer \
--enable-zip编译安装
make && make install路径优化
[root@localhost php-7.1.10]# cd /usr/local/php/
[root@localhost php]# ls
bin  etc  include  lib  php  sbin  var
[root@localhost php]# ln -s /usr/local/php/bin/* /usr/local/bin/
[root@localhost php]# ln -s /usr/local/php/sbin/* /usr/local/sbin/
[root@localhost php]#
修改php配置文件(共三个)
修改主配置文件
[root@localhost php]# php --ini
Configuration File (php.ini) Path: /usr/local/php/lib
Loaded Configuration File:         (none)
Scan for additional .ini files in: (none)
Additional .ini files parsed:      (none)
[root@localhost php]# cd /opt/php-7.1.10/
[root@localhost php-7.1.10]# ls
acinclude.m4      ltmain.sh                 README.PARAMETER_PARSING_API
aclocal.m4        main                      README.REDIST.BINS
appveyor          makedist                  README.RELEASE_PROCESS
build             Makefile                  README.SELF-CONTAINED-EXTENSIONS
buildconf         Makefile.frag             README.STREAMS
buildconf.bat     Makefile.fragments        README.SUBMITTING_PATCH
CODING_STANDARDS  Makefile.gcov             README.TESTING
config.guess      Makefile.global           README.TESTING2
config.log        Makefile.objects          README.UNIX-BUILD-SYSTEM
config.nice       makerpm                   README.WIN32-BUILD-SYSTEM
config.status     missing                   run-tests.php
config.sub        mkinstalldirs             sapi
configure         modules                   scripts
configure.in      netware                   server-tests-config.php
CONTRIBUTING.md   NEWS                      server-tests.php
CREDITS           pear                      snapshot
ext               php7.spec                 stamp-h.in
EXTENSIONS        php7.spec.in              stub.c
footer            php.gif                   tests
generated_lists   php.ini-development       travis
genfiles          php.ini-production        TSRM
header            README.EXT_SKEL           UPGRADING
include           README.GIT-RULES          UPGRADING.INTERNALS
INSTALL           README.input_filter       vcsclean
install-sh        README.MAILINGLIST_RULES  win32
libs              README.md                 Zend
libtool           README.namespaces
LICENSE           README.NEW-OUTPUT-API
[root@localhost php-7.1.10]#
[root@localhost php-7.1.10]# cp php.ini-production /usr/local/php/lib/php.ini
[root@localhost php-7.1.10]# cd /usr/local/php/lib/
[root@localhost lib]# ls
php  php.ini
[root@localhost lib]#
[root@localhost lib]# vim php.ini
[root@localhost lib]#

修改进程服务配置文件
[root@localhost php]# cd /usr/local/php/etc/
[root@localhost etc]# ls
pear.conf  php-fpm.conf.default  php-fpm.d
[root@localhost etc]#
[root@localhost etc]# cp php-fpm.conf.default php-fpm.conf
[root@localhost etc]# ls
pear.conf  php-fpm.conf  php-fpm.conf.default  php-fpm.d
[root@localhost etc]#
[root@localhost etc]# vim php-fpm.conf
[root@localhost etc]#
修改扩展配置文件
[root@localhost etc]# cd php-fpm.d/
[root@localhost php-fpm.d]# ls
www.conf.default
[root@localhost php-fpm.d]#
[root@localhost php-fpm.d]# cp www.conf.default www.conf
[root@localhost php-fpm.d]# vim www.conf
[root@localhost php-fpm.d]#


 创建用户
创建用户
[root@localhost php-fpm.d]# useradd -M -s /sbin/nologin php
[root@localhost php-fpm.d]# cat /etc/passwd | grep php:
php:x:1001:1001::/home/php:/sbin/nologin
[root@localhost php-fpm.d]#
启动php-fpm
[root@localhost php-fpm.d]# cd /opt/php-7.1.10/
[root@localhost php-7.1.10]# ls
acinclude.m4      ltmain.sh                 README.PARAMETER_PARSING_API
aclocal.m4        main                      README.REDIST.BINS
appveyor          makedist                  README.RELEASE_PROCESS
build             Makefile                  README.SELF-CONTAINED-EXTENSIONS
buildconf         Makefile.frag             README.STREAMS
buildconf.bat     Makefile.fragments        README.SUBMITTING_PATCH
CODING_STANDARDS  Makefile.gcov             README.TESTING
config.guess      Makefile.global           README.TESTING2
config.log        Makefile.objects          README.UNIX-BUILD-SYSTEM
config.nice       makerpm                   README.WIN32-BUILD-SYSTEM
config.status     missing                   run-tests.php
config.sub        mkinstalldirs             sapi
configure         modules                   scripts
configure.in      netware                   server-tests-config.php
CONTRIBUTING.md   NEWS                      server-tests.php
CREDITS           pear                      snapshot
ext               php7.spec                 stamp-h.in
EXTENSIONS        php7.spec.in              stub.c
footer            php.gif                   tests
generated_lists   php.ini-development       travis
genfiles          php.ini-production        TSRM
header            README.EXT_SKEL           UPGRADING
include           README.GIT-RULES          UPGRADING.INTERNALS
INSTALL           README.input_filter       vcsclean
install-sh        README.MAILINGLIST_RULES  win32
libs              README.md                 Zend
libtool           README.namespaces
LICENSE           README.NEW-OUTPUT-API
[root@localhost php-7.1.10]# cd sapi/
[root@localhost sapi]# ls
apache2handler  cgi  cli  embed  fpm  litespeed  phpdbg  tests
[root@localhost sapi]# cd fpm/
[root@localhost fpm]# ls
config.m4          LICENSE        php-fpm.conf        status.html.in
CREDITS            Makefile.frag  php-fpm.conf.in     tests
fpm                php-fpm        php-fpm.service     www.conf
init.d.php-fpm     php-fpm.8      php-fpm.service.in  www.conf.in
init.d.php-fpm.in  php-fpm.8.in   status.html
[root@localhost fpm]# cp php-fpm.service /usr/lib/systemd/system
[root@localhost fpm]# systemctl daemon-reload
[root@localhost fpm]# systemctl start php-fpm.service
[root@localhost fpm]# systemctl enable php-fpm.service
Created symlink from /etc/systemd/system/multi-user.target.wants/php-fpm.service to /usr/lib/systemd/system/php-fpm.service.
[root@localhost fpm]# netstat -lntp | grep php
tcp        0      0 192.168.18.40:9000      0.0.0.0:*               LISTEN      86042/php-fpm: mast
[root@localhost fpm]#
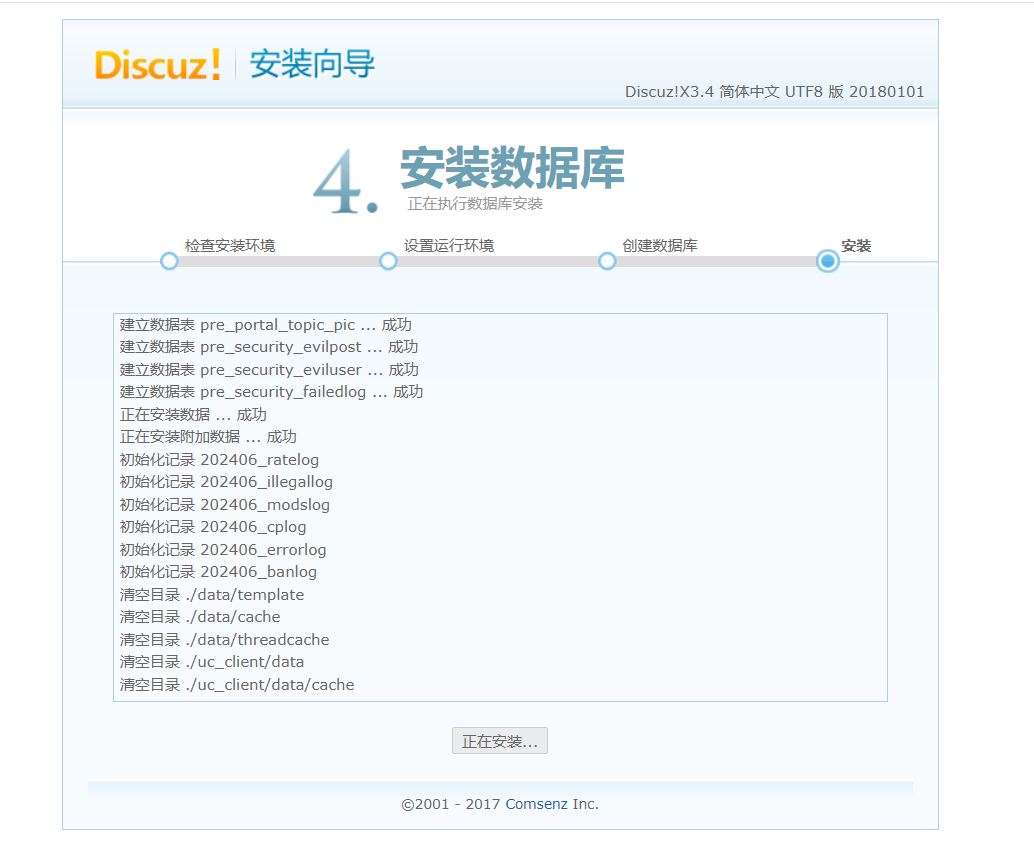
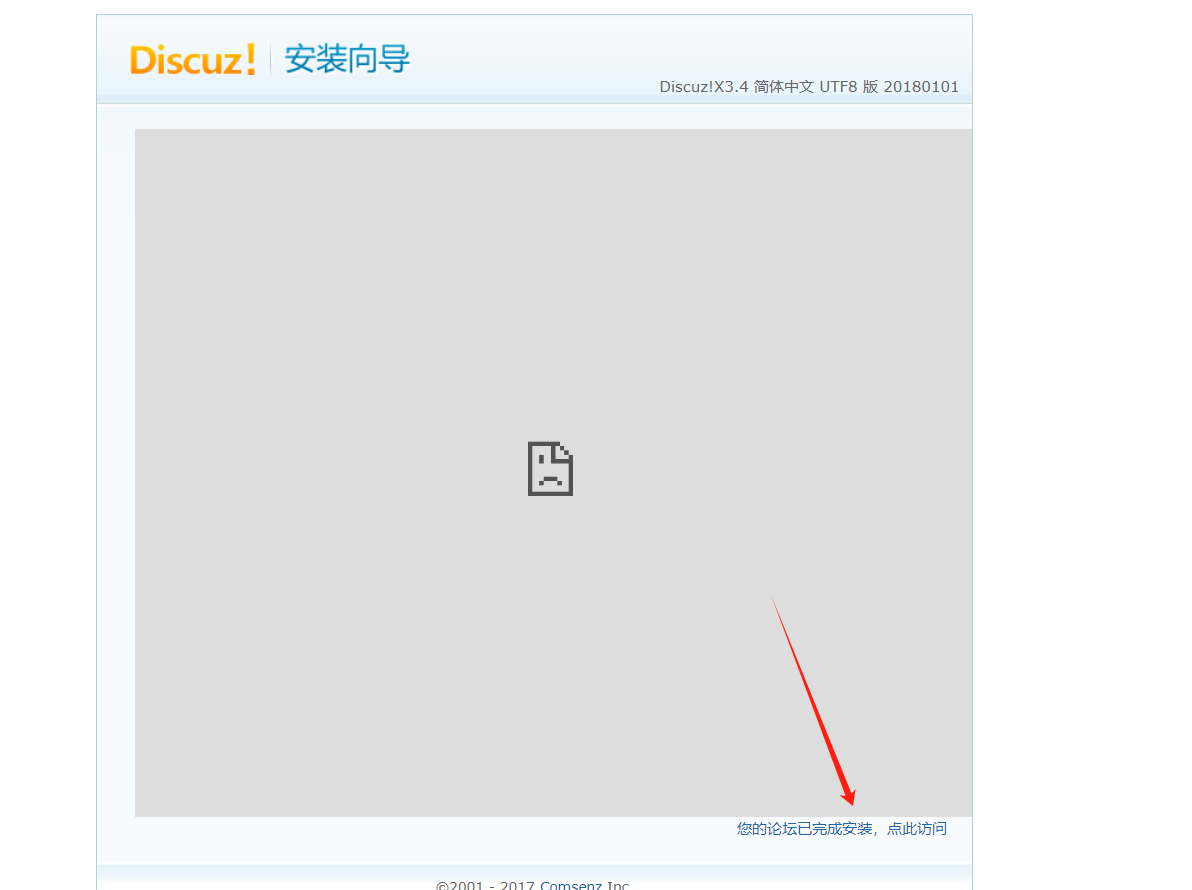
安装论坛
上传压缩包到Nginx服务器的/opt目录下并解压
[root@l1 system]# cd /opt/
[root@l1 opt]# ls
nginx-1.26.0  nginx-1.26.0.tar.gz  rh

[root@l1 opt]# ls
Discuz_X3.4_SC_UTF8.zip  nginx-1.26.0  nginx-1.26.0.tar.gz  rh
[root@l1 opt]# unzip Discuz_X3.4_SC_UTF8.zip
[root@l1 opt]# cd dir_SC_UTF8/
[root@l1 dir_SC_UTF8]# cp -r upload/ /var/www/html/discuz
[root@l1 dir_SC_UTF8]# cd /var/www/html/
[root@l1 html]#
设置属主属组
php服务器
[root@localhost html]# cd /usr/local/php/etc/php-fpm.d/
[root@localhost php-fpm.d]# vim www.conf
[root@localhost php-fpm.d]# 
[root@localhost php-fpm.d]# useradd -M -s /sbin/nologin nginx
[root@localhost php-fpm.d]# cat /etc/passwd | grep nginx:
nginx:x:1002:1002::/home/nginx:/sbin/nologin
[root@localhost php-fpm.d]# systemctl restart php-fpm.service
[root@localhost php-fpm.d]# ps aux | grep php
root      88567  0.2  0.7 216796  7656 ?        Ss   20:00   0:00 php-fpm: master process (/usr/local/php/etc/php-fpm.conf)
nginx     88568  0.0  0.3 218880  3932 ?        S    20:00   0:00 php-fpm: pool www
nginx     88569  0.0  0.3 218880  3932 ?        S    20:00   0:00 php-fpm: pool www
root      88571  0.0  0.0 112824   972 pts/2    S+   20:00   0:00 grep --color=auto php
[root@localhost php-fpm.d]# cd /var/www/html/
[root@localhost html]# chown -R nginx:nginx discuz/
[root@localhost html]# ll
总用量 12
drwxr-xr-x. 13 nginx nginx 4096 6月   2 19:55 discuz
-rw-r--r--.  1 root  root   163 6月   2 19:50 mysql.php
-rw-r--r--.  1 root  root    20 6月   2 19:25 test.php
[root@localhost html]#
Nginx服务器
[root@l1 html]# chown -R nginx:nginx discuz/
[root@l1 html]# ll
总用量 12
drwxr-xr-x. 13 nginx nginx 4096 6月   2 19:55 discuz
-rw-r--r--.  1 root  root   163 6月   2 19:50 mysql.php
-rw-r--r--.  1 root  root    20 6月   2 19:25 test.php
[root@l1 html]#
修改文件
[root@l1 html]# cd /usr/local/nginx/conf/
[root@l1 conf]# vim nginx.conf
[root@l1 conf]#
创建数据库
创建数据库
mysql服务器
[root@l2 system]# mysql -u root -pabc123
mysql: [Warning] Using a password on the command line interface can be insecure.
Welcome to the MySQL monitor.  Commands end with ; or \g.
Your MySQL connection id is 6
Server version: 5.7.44 Source distributionCopyright (c) 2000, 2023, Oracle and/or its affiliates.Oracle is a registered trademark of Oracle Corporation and/or its
affiliates. Other names may be trademarks of their respective
owners.Type 'help;' or '\h' for help. Type '\c' to clear the current input statement.
mysql> create database discuz;
Query OK, 1 row affected (0.00 sec)mysql>
mysql> show databases;
+--------------------+
| Database           |
+--------------------+
| information_schema |
| discuz             |
| mysql              |
| performance_schema |
| sys                |
+--------------------+
5 rows in set (0.00 sec)mysql>
mysql>  grant all on discuz. * to 'zy'@'%' identified by 'zy1234';
Query OK, 0 rows affected, 1 warning (0.00 sec)mysql>
mysql> flush privileges;
Query OK, 0 rows affected (0.00 sec)mysql>
nginx服务器
[root@l1 conf]# nginx -s reload //刷新



相关文章:

源码编译安装LNMP
LNMP包含: linux、Nginx、Mysql、php LNMP的工作原理 : 由客户端发送页面请求给Nginx,Nginx会根据location匹配用户访问请求的URL路径判断是静态还是动态,静态的一般是以 .html .htm .css .shtml结尾,动态的一般是以 .…...

安装Chrome扩展程序来 一键禁用页面上的所有动画和过渡。有那些扩展程序推荐一下
要安装Chrome扩展程序来一键禁用页面上的所有动画和过渡,以下是一些推荐的扩展程序: Toggle CSS Animations and Transitions 功能:此扩展程序允许用户轻松地在网页上切换CSS动画和过渡的开启与关闭状态。使用方法:安装后&#x…...
读人工智能时代与人类未来笔记19_读后总结与感想兼导读
1. 基本信息 人工智能时代与人类未来 (美)亨利基辛格,(美)埃里克施密特,(美)丹尼尔胡滕洛赫尔 著 中信出版社,2023年6月出版 1.1. 读薄率 书籍总字数145千字,笔记总字数39934字。 读薄率39934145000≈27.5% 1.2. 读厚方向 千脑智能 脑机穿越 未来呼啸而来 …...

个人影响力
华人出了个黄仁勋,世界级影响力,还是近代华人历史首次出现具有如此影响力的人。凭借的逻辑是什呢?在人工智能领域有巨大影响力。...
OBS实现多路并发推流
OBS实现多路并发推流 解决方案速览相关依赖下载安装多路推流 解决方案速览 利用OBS进行本地直播画面的构建。 使用Multiple RTMP outputs plugin进行多路并发推流。 相关依赖下载安装 OBS软件 # OBS官网 https://obsproject.com/zh-cnMultiple RTMP outputs plugin # 插件官网…...
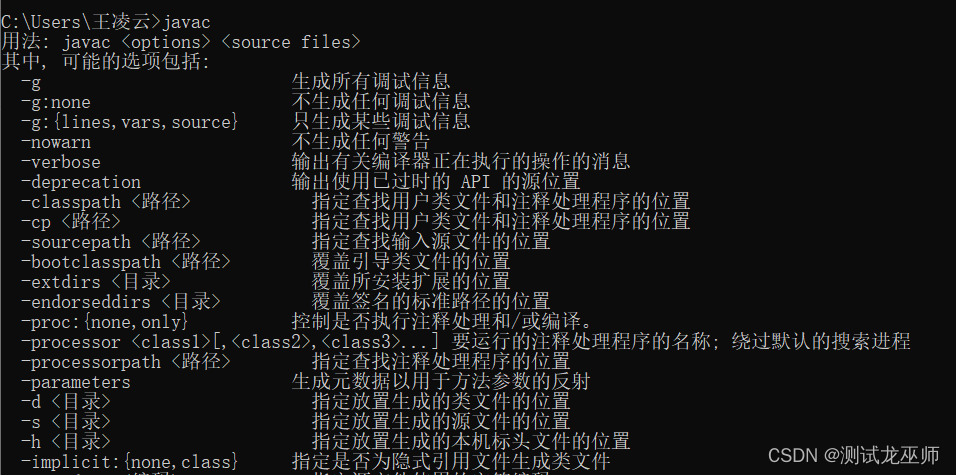
JDK环境配置、安装
DK环境配置(备注:分32位与64位JDK,32位电脑只能按照32位JDK,64位电脑兼容32、64位JDK) 一、检查自己电脑是否安装过JDK 1.在电脑屏幕左下角,输入命令提示符CMD,打开命令提示符应用 2.在打开界…...
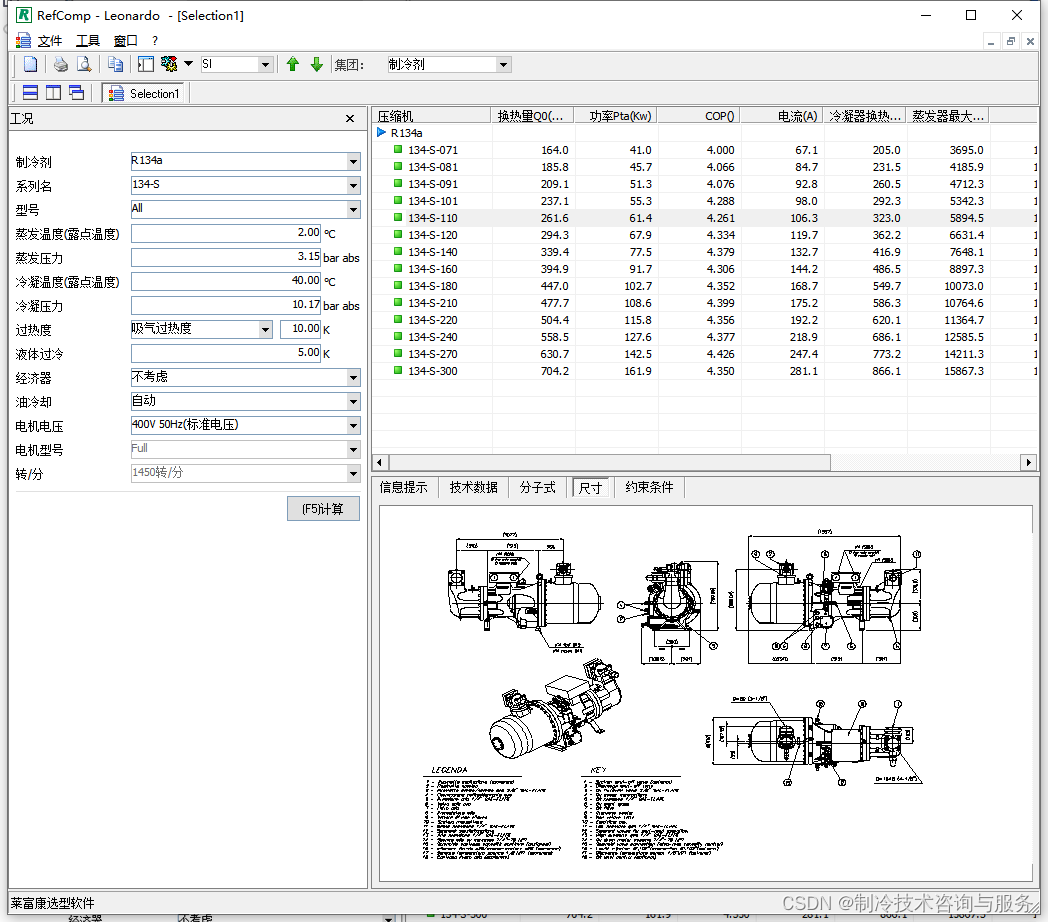
莱富康压缩机的选型软件介绍
下载地址 https://download.csdn.net/download/jintaihu/16295771 安装步骤 这里可以选制冷系统的参数,最后在压缩机列表内选择推荐的型号。...

Pr 2024下载安装,Adobe Premiere专业视频编辑软件安装包获取!
Premiere Pro,简称PR,无论是想要剪辑家庭录像,还是制作专业的影视作品,Premiere Pro都能为您提供强大的支持。 Premiere Pro以其卓越的编辑功能和强大的性能,助力用户在视频创作的道路上不断突破自我。 它具备丰富的视…...
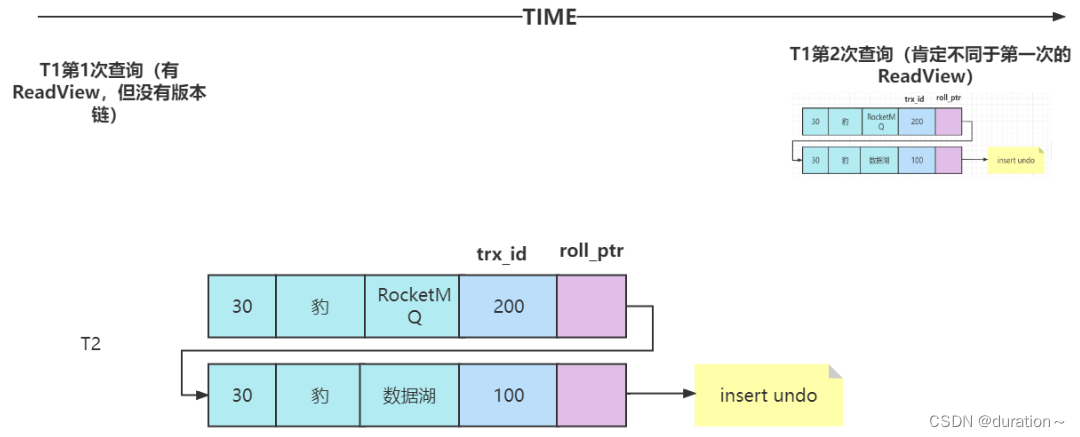
MySQL事务与MVCC
文章目录 事务和事务的隔离级别1.为什么需要事务2.事务特性1_原子性(atomicity)2_一致性(consistency)3_持久性(durability)4_隔离性(isolation) 3.事务并发引发的问题1_脏读2_不可重…...

【数据结构】链式二叉树详解
个人主页~ 链式二叉树基本内容~ 链式二叉树详解 1、通过前序遍历的数组来构建二叉树2、二叉树的销毁3、二叉树节点个数4、二叉树叶子节点个数5、二叉树第k层节点个数6、二叉树查找7、前序遍历8、中序遍历9、后序遍历10、层序遍历与检查二叉树是否为完全二叉树Queue.hQueue.c层序…...

PHP面向对象编程总结
PHP面向对象编程总结 学习PHP时,面向对象编程(OOP)往往是一个重要的里程碑。PHP的OOP功能提供了一种更加模块化、可扩展和易于维护的代码结构。在本文中,我们将深入探讨PHP面向对象编程的各个方面,包括类与对象、访问控…...

linux中的“->“符号
问: "->“符号在Linux中是什么意思。 例如:当我在一个特定的文件夹中执行ls -l时,我得到了以下结果。 lrwxrwxrwx 1 root root 11 May 16 13:30 nexus3 -> /nexus-data lrwxrwxrwx 1 root root 29 Feb 27 12:23 ojdbc.jar -&g…...

MySql 数据类型选择与优化
选择优化的数据类型 更小的通常更好 一般情况下尽量使用可以正确存储数据的最小类型。更小的数据类型通常更快,因为它们占用更少的磁盘,内存和CPU缓存,并且处理时需要的CPU周期也更少。但也要确保没有低估需要存储值的范围。 简单就好 简单的…...

HTML静态网页成品作业(HTML+CSS)——家乡常德介绍网页(1个页面)
🎉不定期分享源码,关注不丢失哦 文章目录 一、作品介绍二、作品演示三、代码目录四、网站代码HTML部分代码 五、源码获取 一、作品介绍 🏷️本套采用HTMLCSS,未使用Javacsript代码,共有1个页面。 二、作品演示 三、代…...

【ARMv7-A】——CP15 协处理器
文章目录 CP15 协处理器指令格式MCR 示例MRC 示例寄存器C0 identification registersC1 system control registersC2 memory protection and control registersC3 memory protection and control registersC4 Not usedC5 Memory system fault registers...

学习笔记:(2)荔枝派Nano开机显示log(全志F1C200S)
学习笔记:TF卡启动荔枝派Nano(全志F1C200S) 1.u-boot配置2.需要配置LCD的显示设备树1.u-boot配置 ARM architecture Enable graphical uboot console on HDMI, LCD or VGAx:480,y:272,depth:...
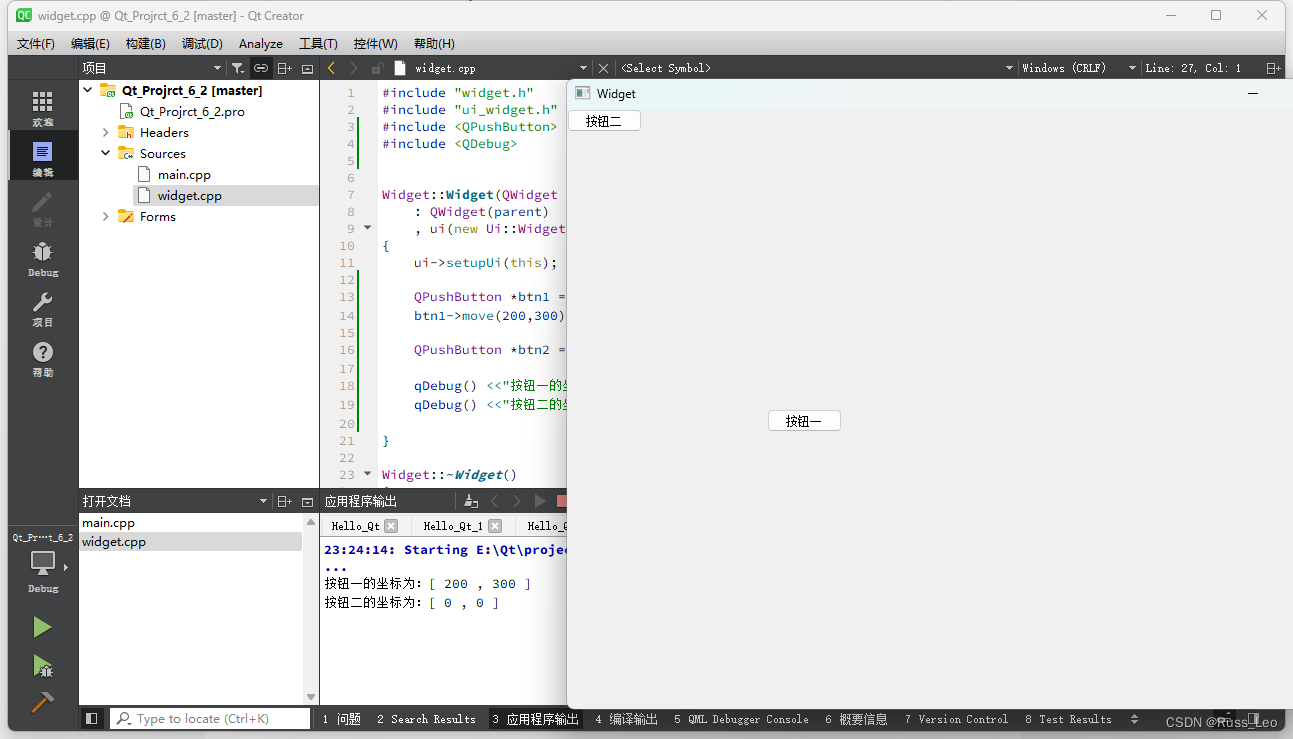
Qt——升级系列(Level Two):Hello Qt 程序实现、项目文件解析、
Hello Qt 程序实现 使用“按钮”实现 纯代码方式实现: // Widget构造函数的实现 Widget::Widget(QWidget *parent): QWidget(parent) // 使用父类构造函数初始化QWidget,传入父窗口指针, ui(new Ui::Widget) // 创建Ui::Widget类的实例,并…...
)
VUE阻止浏览器记住密码若依CLOUD(INPUT框密码替换圆点)
网上找的要不就是缺少方法要不就是不好用,故发一个完整的 粘贴可用版本 <el-form-item prop"password"><el-input v-model"loginForm.pwdCover" type"text" name"pwd" id"pwd" placeholder"密码" autoco…...

GPT-4o:人工智能新纪元的启航者
引言 随着人工智能技术的不断进步,我们见证了从简单的自动化工具到复杂的决策支持系统的演变。在这一演变过程中,OpenAI的GPT系列无疑占据了领导地位。最近,GPT-4o的推出再次引发了关于AI能力的广泛讨论。本文将对GPT-4o进行详细评价&#x…...

CSRF跨站请求伪造漏洞
CSRF跨站请求伪造漏洞 1.CSRF漏洞概述2.防御CSRF攻击3.CSRF防御绕过CSRF令牌未绑定到用户会话自定义标头令牌绕过绕过Referer检查关键词绕过 4.利用示例使用HTML标签进行GET表单 GET 请求表单POST请求通过 iframe 发送表单 POST 请求Ajax POST 请求 5.CSRF BP 验证方法6.CSRF测…...

中南大学无人机智能体的全面评估!BEDI:用于评估无人机上具身智能体的综合性基准测试
作者:Mingning Guo, Mengwei Wu, Jiarun He, Shaoxian Li, Haifeng Li, Chao Tao单位:中南大学地球科学与信息物理学院论文标题:BEDI: A Comprehensive Benchmark for Evaluating Embodied Agents on UAVs论文链接:https://arxiv.…...

8k长序列建模,蛋白质语言模型Prot42仅利用目标蛋白序列即可生成高亲和力结合剂
蛋白质结合剂(如抗体、抑制肽)在疾病诊断、成像分析及靶向药物递送等关键场景中发挥着不可替代的作用。传统上,高特异性蛋白质结合剂的开发高度依赖噬菌体展示、定向进化等实验技术,但这类方法普遍面临资源消耗巨大、研发周期冗长…...
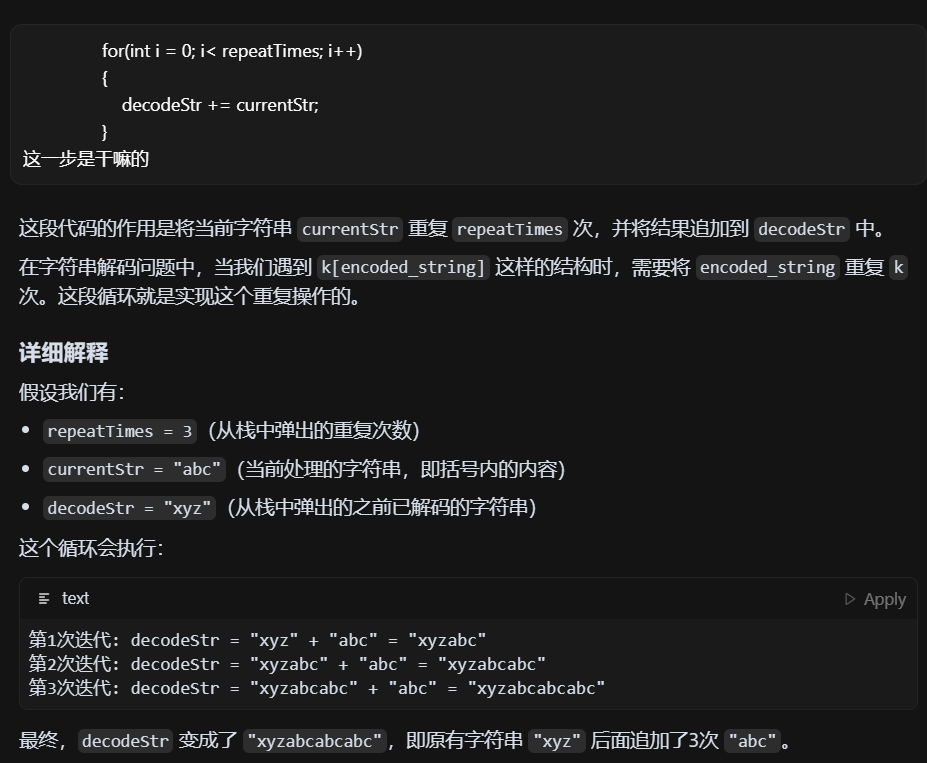
LeetCode - 394. 字符串解码
题目 394. 字符串解码 - 力扣(LeetCode) 思路 使用两个栈:一个存储重复次数,一个存储字符串 遍历输入字符串: 数字处理:遇到数字时,累积计算重复次数左括号处理:保存当前状态&a…...

前端导出带有合并单元格的列表
// 导出async function exportExcel(fileName "共识调整.xlsx") {// 所有数据const exportData await getAllMainData();// 表头内容let fitstTitleList [];const secondTitleList [];allColumns.value.forEach(column > {if (!column.children) {fitstTitleL…...

[10-3]软件I2C读写MPU6050 江协科技学习笔记(16个知识点)
1 2 3 4 5 6 7 8 9 10 11 12 13 14 15 16...

Android15默认授权浮窗权限
我们经常有那种需求,客户需要定制的apk集成在ROM中,并且默认授予其【显示在其他应用的上层】权限,也就是我们常说的浮窗权限,那么我们就可以通过以下方法在wms、ams等系统服务的systemReady()方法中调用即可实现预置应用默认授权浮…...

第 86 场周赛:矩阵中的幻方、钥匙和房间、将数组拆分成斐波那契序列、猜猜这个单词
Q1、[中等] 矩阵中的幻方 1、题目描述 3 x 3 的幻方是一个填充有 从 1 到 9 的不同数字的 3 x 3 矩阵,其中每行,每列以及两条对角线上的各数之和都相等。 给定一个由整数组成的row x col 的 grid,其中有多少个 3 3 的 “幻方” 子矩阵&am…...

Java数值运算常见陷阱与规避方法
整数除法中的舍入问题 问题现象 当开发者预期进行浮点除法却误用整数除法时,会出现小数部分被截断的情况。典型错误模式如下: void process(int value) {double half = value / 2; // 整数除法导致截断// 使用half变量 }此时...

Ubuntu Cursor升级成v1.0
0. 当前版本低 使用当前 Cursor v0.50时 GitHub Copilot Chat 打不开,快捷键也不好用,当看到 Cursor 升级后,还是蛮高兴的 1. 下载 Cursor 下载地址:https://www.cursor.com/cn/downloads 点击下载 Linux (x64) ,…...
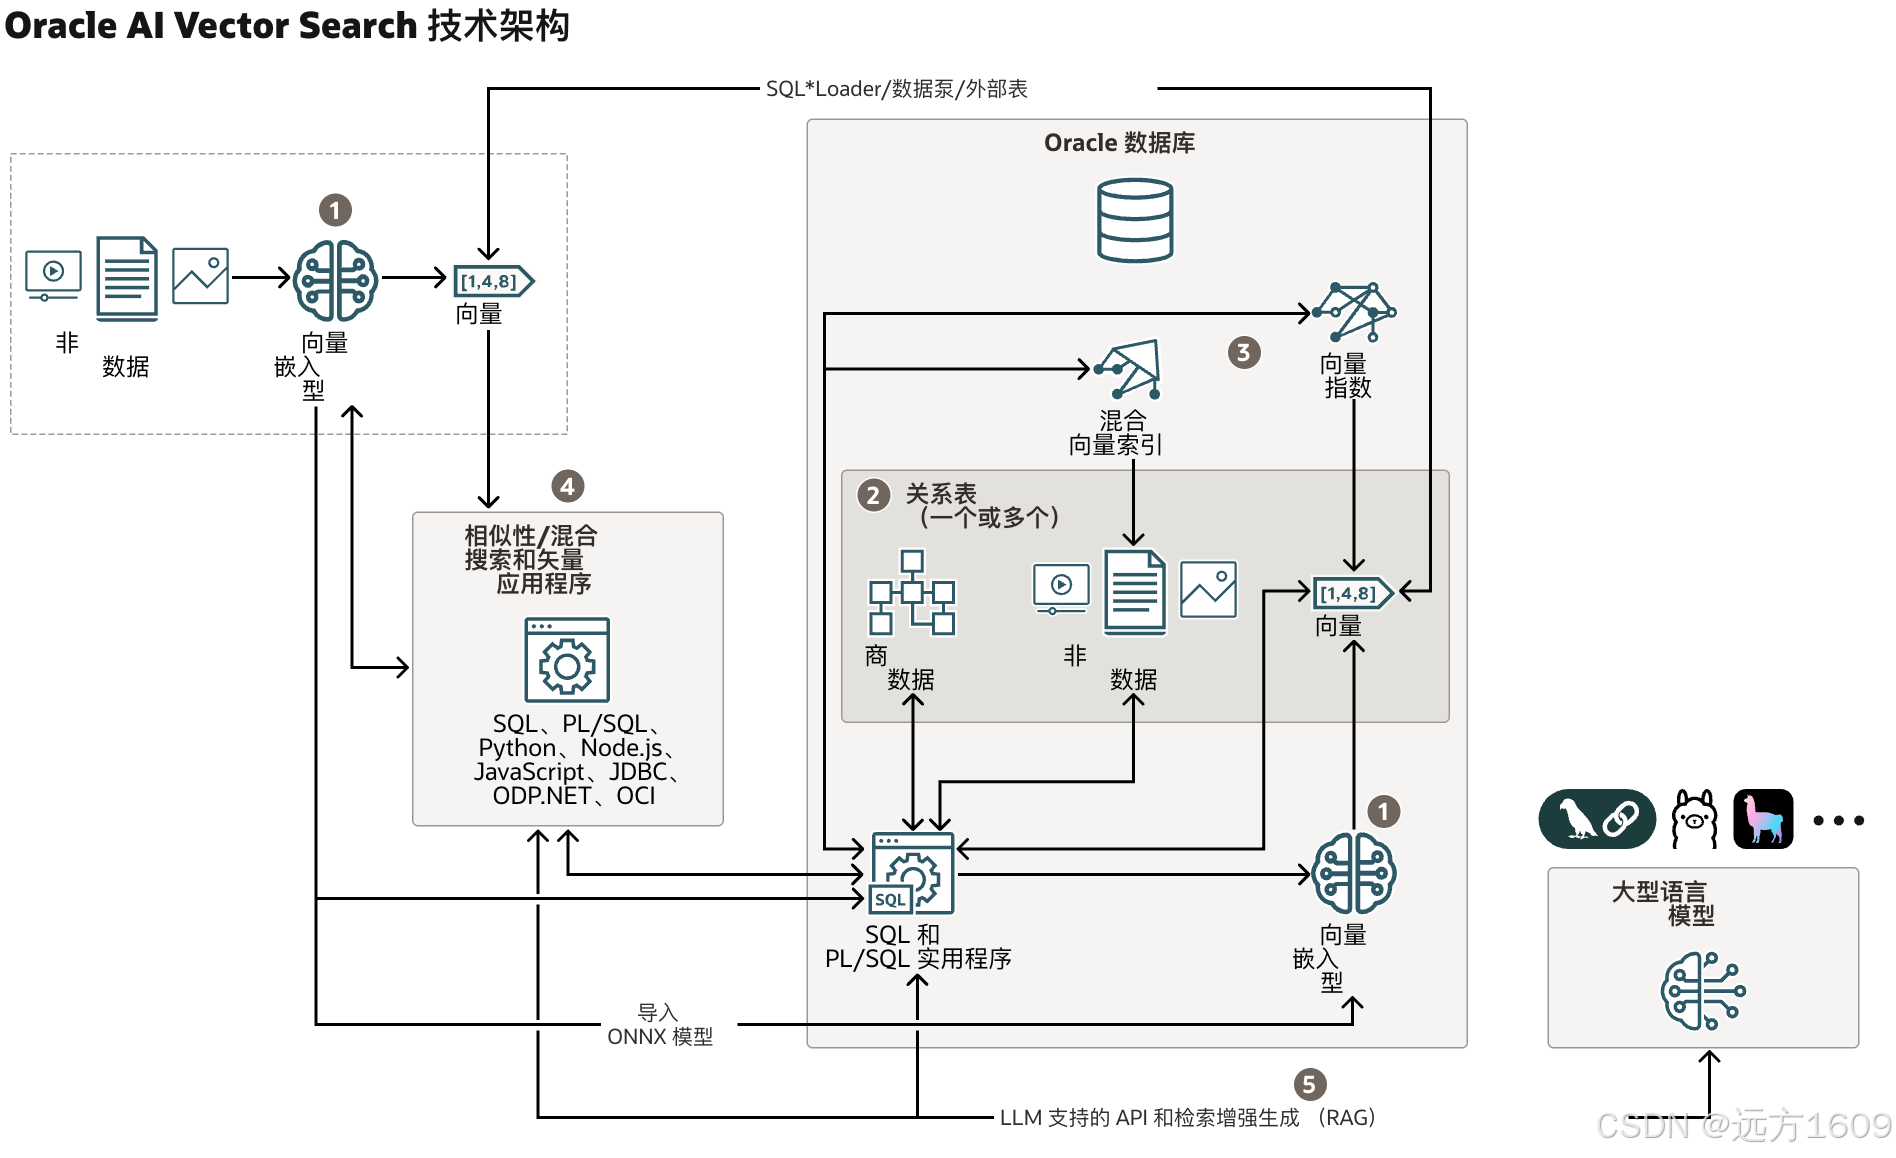
9-Oracle 23 ai Vector Search 特性 知识准备
很多小伙伴是不是参加了 免费认证课程(限时至2025/5/15) Oracle AI Vector Search 1Z0-184-25考试,都顺利拿到certified了没。 各行各业的AI 大模型的到来,传统的数据库中的SQL还能不能打,结构化和非结构的话数据如何和…...


