【鸿蒙学习笔记】@Prop装饰器:父子单向同步
官方文档:@Prop装饰器:父子单向同步
[Q&A] @Prop装饰器作用
@Prop装饰的变量可以和父组件建立单向的同步关系。@Prop装饰的变量是可变的,但是变化不会同步回其父组件。
[Q&A] @Prop装饰器特点
1・@Prop装饰器不能在@Entry装饰的自定义组件中使用。
2・@Prop装饰变量时会进行深拷贝,在拷贝的过程中除了基本类型、Map、Set、Date、Array外,都会丢失类型。
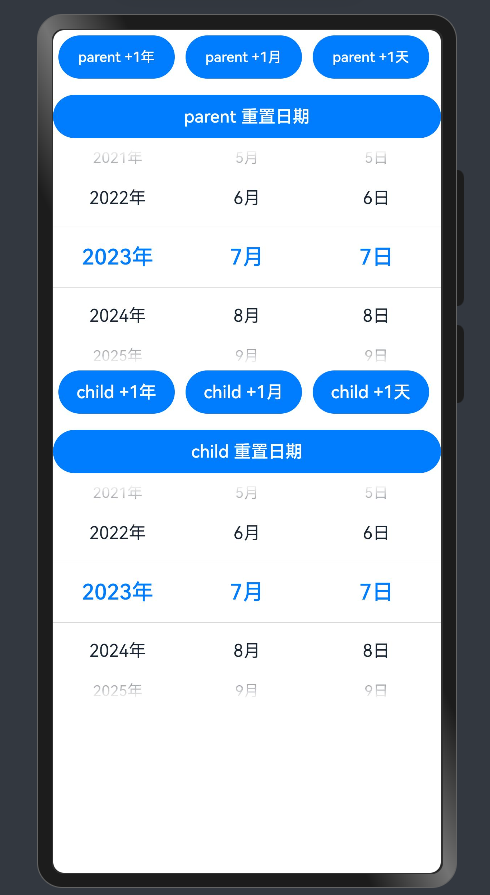
样例1:Date
@Component
struct DateComponent {@Prop childSelectedDate: Date = new Date('');build() {Column() {Row() {Button('child +1年').margin(5).width('30%').onClick(() => {this.childSelectedDate.setFullYear(this.childSelectedDate.getFullYear() + 1)})Button('child +1月').margin(5).width('30%').onClick(() => {this.childSelectedDate.setMonth(this.childSelectedDate.getMonth() + 1)})Button('child +1天').margin(5).width('30%').onClick(() => {this.childSelectedDate.setDate(this.childSelectedDate.getDate() + 1)})}.width('100%')Button('child 重置日期').margin(10).width('100%').onClick(() => {this.childSelectedDate = new Date('2023-07-07')})DatePicker({start: new Date('1970-1-1'),end: new Date('2100-1-1'),selected: this.childSelectedDate})}}
}@Entry
@Component
struct SizeExample {@State parentSelectedDate: Date = new Date('2008-08-08');build() {Column() {Row() {Button('parent +1年').margin(5).width('30%').onClick(() => {this.parentSelectedDate.setFullYear(this.parentSelectedDate.getFullYear() + 1)})Button('parent +1月').margin(5).width('30%').onClick(() => {this.parentSelectedDate.setMonth(this.parentSelectedDate.getMonth() + 1)})Button('parent +1天').margin(5).width('30%').onClick(() => {this.parentSelectedDate.setDate(this.parentSelectedDate.getDate() + 1)})}.width('100%')Button('parent 重置日期').margin(10).width('100%').onClick(() => {this.parentSelectedDate = new Date('2023-07-07')})DatePicker({start: new Date('1970-1-1'),end: new Date('2100-1-1'),selected: this.parentSelectedDate})DateComponent({ childSelectedDate: this.parentSelectedDate })}}
}
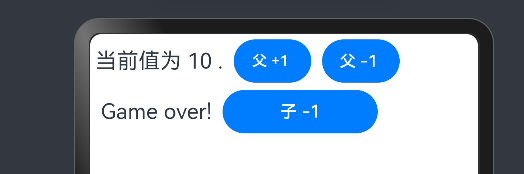
样例2:父组件@State简单数据类型→子组件@Prop简单数据类型同步
@Component
struct CountDownComponent {@Prop count: number = 0;costOfOneAttempt: number = 1;build() {Row() {if (this.count > 0) {Text(`当前值为 ${this.count} .`).fontSize(20).margin(10).textAlign(TextAlign.Center)} else {Text('Game over!').fontSize(20).margin(10)}Button('子 -1').onClick(() => {this.count -= this.costOfOneAttempt;}).width("40%")}.width('100%')}
}@Entry
@Component
struct SizeExample {@State countDownStartValue: number = 10;build() {Column() {Row() {if (this.countDownStartValue > 0) {Text(`当前值为 ${this.countDownStartValue} .`).fontSize(20).margin(5).textAlign(TextAlign.Center)} else {Text('Game over!').fontSize(20).margin(10)}Button('父 +1 ').onClick(() => {this.countDownStartValue += 1;}).margin(5).width("20%")Button('父 -1 ').onClick(() => {this.countDownStartValue -= 1;}).margin(5).width("20%")}.width('100%')CountDownComponent({ count: this.countDownStartValue, costOfOneAttempt: 2 })}}
}
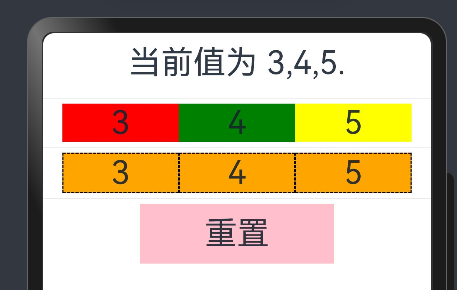
样例3:父组件@State数组项→子组件@Prop简单数据类型同步
@Component
struct Child {@Prop value: number = 0;build() {Text(`${this.value}`).fontSize(30).onClick(() => {this.value++})}
}@Entry
@Component
struct SizeExample {@State arr: number[] = [1, 2, 3];build() {Row() {Column() {Text(`当前值为 ${this.arr[0]},${this.arr[1]},${this.arr[2]}.`).fontSize(30).margin(10).textAlign(TextAlign.Center)Divider().height(10)Row() {Child({ value: this.arr[0] }).width('30%').align(Alignment.Center).backgroundColor(Color.Red)Child({ value: this.arr[1] }).width('30%').align(Alignment.Center).backgroundColor(Color.Green)Child({ value: this.arr[2] }).width('30%').align(Alignment.Center).backgroundColor(Color.Yellow)}.alignItems(VerticalAlign.Center)Divider().height(10)Row() {ForEach(this.arr, (item: number) => {Child({ value: item }).width('30%').align(Alignment.Center).backgroundColor(Color.Orange).border({ width: 1, style: BorderStyle.Dashed })}, (item: string) => item.toString())}.alignItems(VerticalAlign.Center)Divider().height(10)Text('重置').fontSize(30).backgroundColor(Color.Pink).width('50%').textAlign(TextAlign.Center).padding(10).onClick(() => {// 两个数组都包含项“3”。this.arr = this.arr[0] == 1 ? [3, 4, 5] : [1, 2, 3];})}}}
}
样例4:父组件@State类对象属性→@Prop简单类型的同步
class Book {public title: string;public pages: number;public readIt: boolean = false;constructor(title: string, pages: number) {this.title = title;this.pages = pages;}
}@Component
struct ReaderComp {@Prop book: Book = new Book("", 0);build() {Row() {Text(this.book.title).fontSize(20)Text(` 有 ${this.book.pages} 页! `).fontSize(20)Text(`${this.book.readIt ? " 我读了" : ' 我还没开始读'}`).fontSize(20).onClick(() => this.book.readIt = true).backgroundColor(Color.Pink)}}
}@Entry
@Component
struct SizeExample {@State book: Book = new Book('资治通鉴', 765);build() {Column() {ReaderComp({ book: this.book })ReaderComp({ book: this.book })}}
}

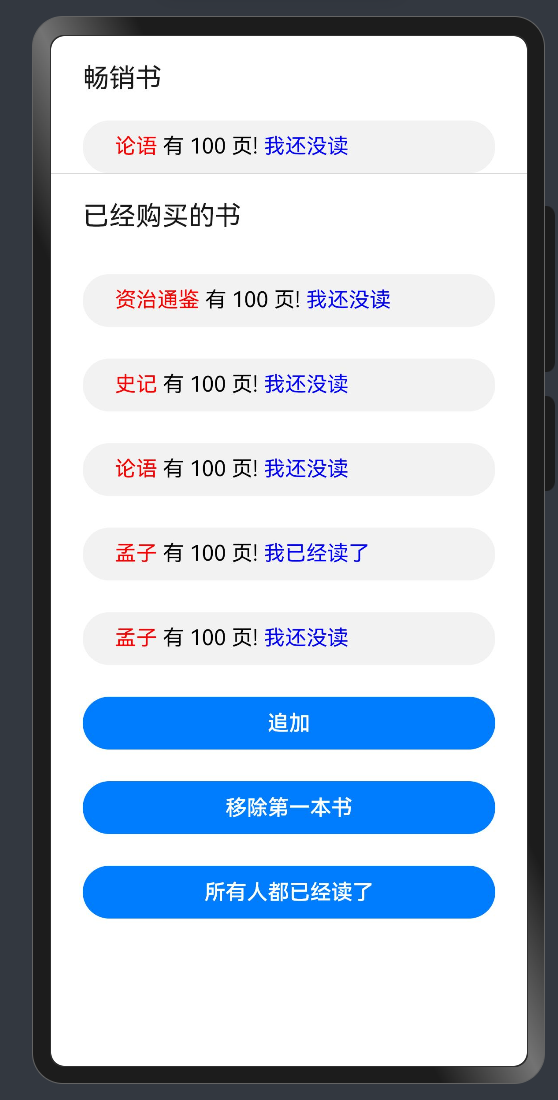
样例5:父组件@State数组项→@Prop class类型的同步
let nextId: number = 1;@Observed // @Prop在子组件装饰的状态变量和父组件的数据源是单向同步关系,需要使用@Observed装饰class Book,Book的属性将被观察。
class Book {public id: number;public title: string;public pages: number;public readIt: boolean = false;constructor(title: string, pages: number) {this.id = nextId++;this.title = title;this.pages = pages;}
}@Component
struct ReaderComp {@Prop book: Book = new Book("", 1);build() {Row() {Text(` ${this.book ? this.book.title : "未定义"}`).fontColor(Color.Red)Text(` 有 ${this.book ? this.book.pages : "未定义"} 页!`).fontColor(Color.Black)Text(` ${this.book ? (this.book.readIt ? "我已经读了" : '我还没读' ): "未定义"}`).fontColor(Color.Blue).onClick(() => this.book.readIt = true)}}
}@Entry
@Component
struct SizeExample {@State allBooks: Book[] = [new Book("资治通鉴", 100), new Book("史记", 100), new Book("论语", 100)];build() {Column() {Text('畅销书').width(312).height(40).fontSize(20).margin(12).fontColor('#e6000000')ReaderComp({ book: this.allBooks[2] }).backgroundColor('#0d000000').width(312).height(40).padding({ left: 20, top: 10 }).borderRadius(20).colorBlend('#e6000000')Divider()Text('已经购买的书').width(312).height(40).fontSize(20).margin(12).fontColor('#e6000000')ForEach(this.allBooks, (book: Book) => {ReaderComp({ book: book }).margin(12).width(312).height(40).padding({ left: 20, top: 10 }).backgroundColor('#0d000000').borderRadius(20)},(book: Book) => book.id.toString())Button('追加').width(312).height(40).margin(12).fontColor('#FFFFFF 90%').onClick(() => {this.allBooks.push(new Book("孟子", 100));})Button('移除第一本书').width(312).height(40).margin(12).fontColor('#FFFFFF 90%').onClick(() => {if (this.allBooks.length > 0){this.allBooks.shift();} else {console.log("length <= 0")}})Button("所有人都已经读了").width(312).height(40).margin(12).fontColor('#FFFFFF 90%').onClick(() => {this.allBooks.forEach((book) => book.readIt = true)})}}
}
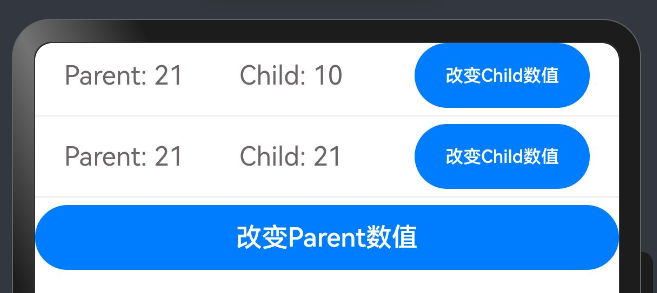
样例6:@Prop本地初始化不和父组件同步
@Component
struct MyComponent {@Prop count1: number;@Prop count2: number = 5;build() {Column() {Row() {Text(`Parent: ${this.count1}`).fontColor('#ff6b6565').width('30%')Text(`Child: ${this.count2}`).fontColor('#ff6b6565').width('30%')Button('改变Child数值').width('30%').height(40).fontColor('#FFFFFF,90%').onClick(() => {this.count2++})}}}
}@Entry
@Component
struct SizeExample {@State mainCount: number = 10;build() {Column() {Row() {Column() {MyComponent({ count1: this.mainCount })Divider().height(10)MyComponent({ count1: this.mainCount, count2: this.mainCount })}}Divider().height(10)Column() {Button('改变Parent数值').width(288).height(40).width('100%').fontColor('#FFFFFF,90%').onClick(() => {this.mainCount++})}}}
}
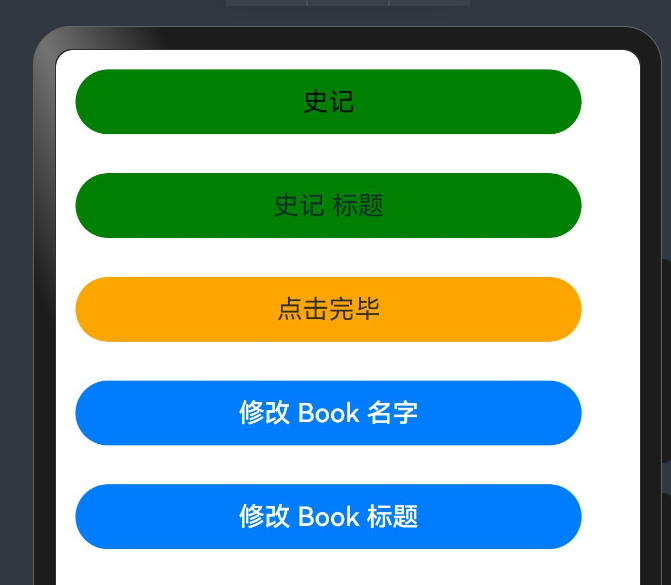
样例7:@Prop嵌套场景
几个按钮跳的乱,需要消化
@Entry
@Component
struct SizeExample {@State book: Book = new Book('Book名字', new Title('Book标题'))build() {Column() {Flex({ direction: FlexDirection.Column, alignItems: ItemAlign.Center }) {Text(this.book.name).fontSize(16).margin(12).width(312).height(40).backgroundColor(Color.Green).borderRadius(20).textAlign(TextAlign.Center).fontColor('#e6000000').onClick(() => {this.book.name = '资治通鉴'})Text(this.book.title.title).fontSize(16).margin(12).width(312).height(40).backgroundColor(Color.Green).borderRadius(20).textAlign(TextAlign.Center).onClick(() => {this.book.title.title = "资治通鉴 标题"})ShowTitle({ title: this.book.title })Button('修改 Book 名字').width(312).height(40).margin(12).fontColor('#FFFFFF,90%').onClick(() => {this.book.name = "史记"})Button('修改 Book 标题').width(312).height(40).margin(12).fontColor('#FFFFFF,90%').onClick(() => {this.book.title.title = "史记 标题"})}}}
}@Component
struct ShowTitle {@Prop title: Title = new Title('');build() {Column() {Text(this.title.title).fontSize(16).margin(12).width(312).height(40).backgroundColor(Color.Orange).borderRadius(20).textAlign(TextAlign.Center).onClick(() => {this.title.title = '点击完毕'})}}
}// 以下是嵌套类对象的数据结构。
@Observed
class Title {public title: string;constructor(title: string) {this.title = title;}
}@Observed
class Book {public name: string;public title: Title;constructor(name: string, cla: Title) {this.name = name;this.title = cla;}
}
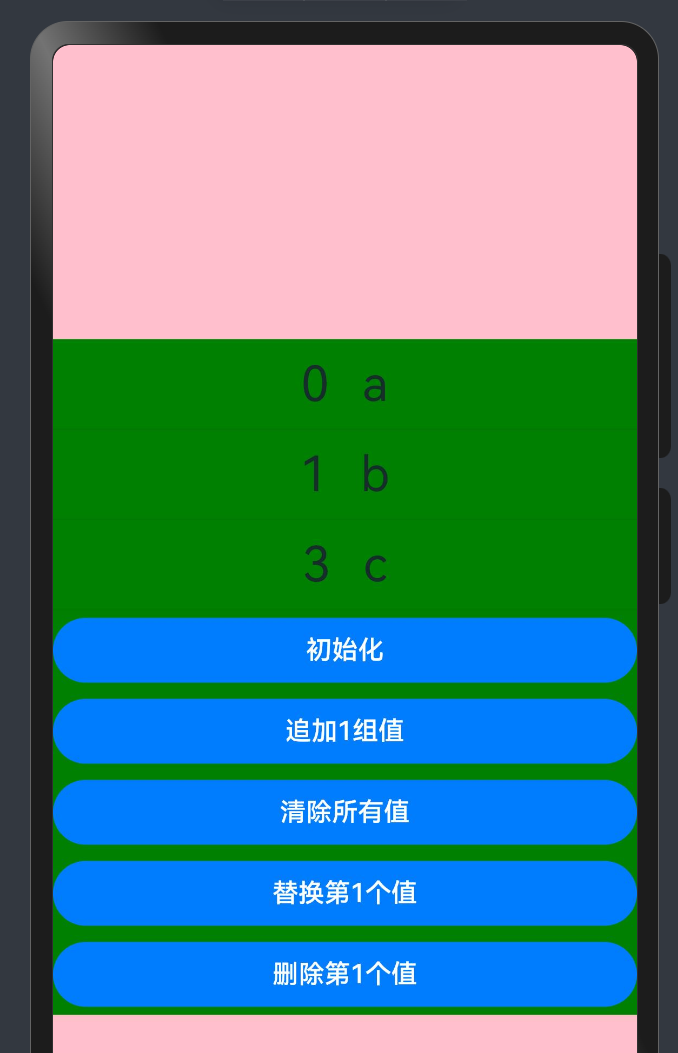
样例8:装饰Map类型变量
@Component
struct MapComponent {@Prop map: Map<number, string> = new Map([[0, "a"], [1, "b"], [3, "c"]])build() {Column() {ForEach(Array.from(this.map.entries()), (item: [number, string]) => {Row(){Text(`${item[0]}`).fontSize(30).margin(10)Text(`${item[1]}`).fontSize(30).margin(10)}Divider()})Button('初始化').margin(5).width('100%').onClick(() => {this.map = new Map([[0, "a"], [1, "b"], [3, "c"]])})Button('追加1组值').margin(5).width('100%').onClick(() => {this.map.set(4, "d")})Button('清除所有值').margin(5).width('100%').onClick(() => {this.map.clear()})Button('替换第1个值').margin(5).width('100%').onClick(() => {this.map.set(0, "aa")})Button('删除第1个值').margin(5).width('100%').onClick(() => {this.map.delete(0)})}}
}@Entry
@Component
struct SizeExample {@State message: Map<number, string> = new Map([[1, "a"], [2, "b"], [3, "c"]])build() {Row() {Column() {MapComponent({ map: this.message })}.width('100%').backgroundColor(Color.Green)}.height('100%').backgroundColor(Color.Pink)}
}
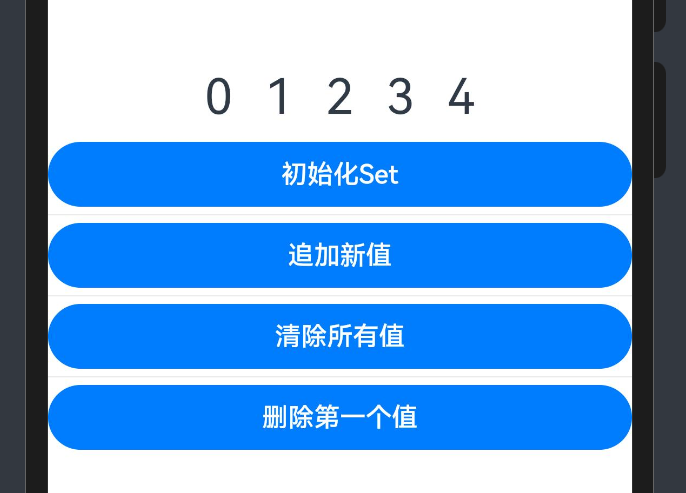
样例9:装饰Set类型变量
@Component
struct Child {@Prop message: Set<number> = new Set([0, 1, 2, 3, 4])build() {Column() {Row() {ForEach(Array.from(this.message.entries()), (item: [number, string]) => {Text(`${item[0]}`).fontSize(30).margin(10)})}Button('初始化Set').width('100%').onClick(() => {this.message = new Set([0, 1, 2, 3, 4])})Divider().height(10)Button('追加新值').width('100%').onClick(() => {this.message.add(5)})Divider().height(10)Button('清除所有值').width('100%').onClick(() => {this.message.clear()})Divider().height(10)Button('删除第一个值').width('100%').onClick(() => {this.message.delete(0)})}.width('100%')}
}@Entry
@Component
struct SizeExample {@State message: Set<number> = new Set([0, 1, 2, 3, 4])build() {Row() {Column() {Child({ message: this.message })}.width('100%')}.height('100%')}
}
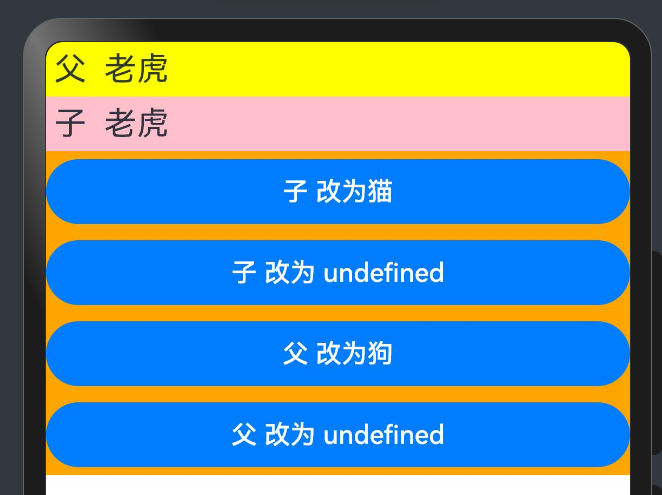
样例10:Prop支持联合类型实例
class Animals {public name: string;constructor(name: string) {this.name = name;}
}@Component
struct Child {@Prop animal: Animals | undefined;build() {Column() {Text(`子  ${this.animal instanceof Animals ? this.animal.name : '未定义'}`).fontSize(20).backgroundColor(Color.Pink).width('100%').padding(5)Button('子 改为猫').width('100%').margin(5).onClick(() => {// 赋值为Animals的实例this.animal = new Animals("猫")})Button('子 改为 undefined').width('100%').margin(5).onClick(() => {// 赋值为undefinedthis.animal = undefined})}.width('100%')}
}@Entry
@Component
struct SizeExample {@State animal: Animals | undefined = new Animals("老虎");build() {Column() {Text(`父  ${this.animal instanceof Animals ? this.animal.name : '未定义'}`).fontSize(20).textAlign(TextAlign.Start).backgroundColor(Color.Yellow).width('100%').padding(5)Child({ animal: this.animal })Button('父 改为狗').width('100%').margin(5).onClick(() => {if (this.animal instanceof Animals) {this.animal.name = "狗"} else {console.info('num is undefined, cannot change property')}})Button('父 改为 undefined').width('100%').margin(5).onClick(() => {this.animal = undefined})}.backgroundColor(Color.Orange)}
}
相关文章:
【鸿蒙学习笔记】@Prop装饰器:父子单向同步
官方文档:Prop装饰器:父子单向同步 [Q&A] Prop装饰器作用 Prop装饰的变量可以和父组件建立单向的同步关系。Prop装饰的变量是可变的,但是变化不会同步回其父组件。 [Q&A] Prop装饰器特点 1・Prop装饰器不能在Entry装饰的…...
-状态模式)
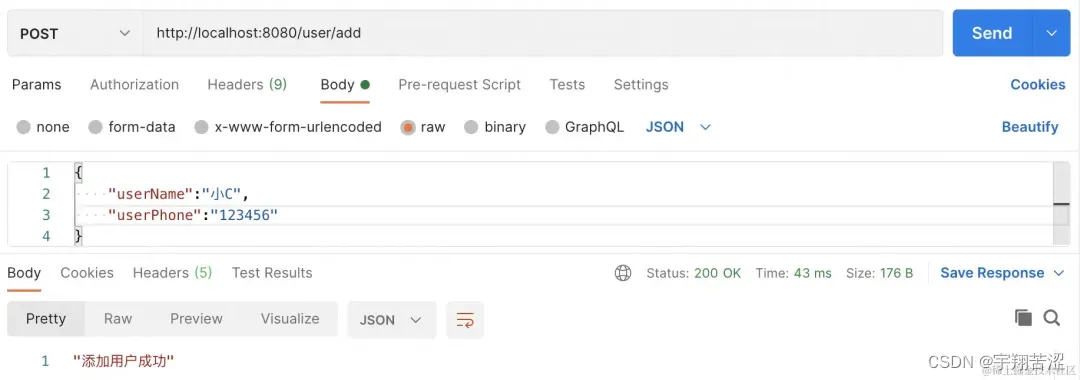
设计模式(实战项目)-状态模式
需求背景:存在状态流转的预约单 一.数据库设计 CREATE TABLE appointment (id bigint(20) unsigned NOT NULL AUTO_INCREMENT COMMENT 主键id,appoint_type int(11) NOT NULL COMMENT 预约类型(0:线下查房...),appoint_user_id bigint(20) NOT NULL COMMENT 预约人…...

【python】OpenCV—Color Map
文章目录 cv2.applyColorMapcv2.putText小试牛刀自定义颜色 参考学习来自 OpenCV基础(21)使用 OpenCV 中的applyColorMap实现伪着色 cv2.applyColorMap cv2.applyColorMap() 是 OpenCV 中的一个函数,用于将灰度图像或单通道图像应用一个颜色…...

MySQL:表的内连接和外连接、索引
文章目录 1.内连接2.外连接2.1 左外连接2.2 右外连接 3.综合练习4.索引4.1见一见索引4.2 硬件理解4.3 MySQL 与磁盘交互基本单位(软件理解)4.4 (MySQL选择的数据结构)索引的理解4.5 聚簇索引 VS 非聚簇索引 5.索引操作5.1 创建索引5.2 查询索引5.3 删除索引 1.内连接 内连接实…...
Chrome备份数据
Chrome备份数据 1、 导出谷歌浏览器里的历史记录 参考:https://blog.csdn.net/qq_32824605/article/details/127504219 在资源管理器中找到History文件,文件路径: C:\Users\你的电脑用户名\AppData\Local\Google\Chrome\User Data\Default …...
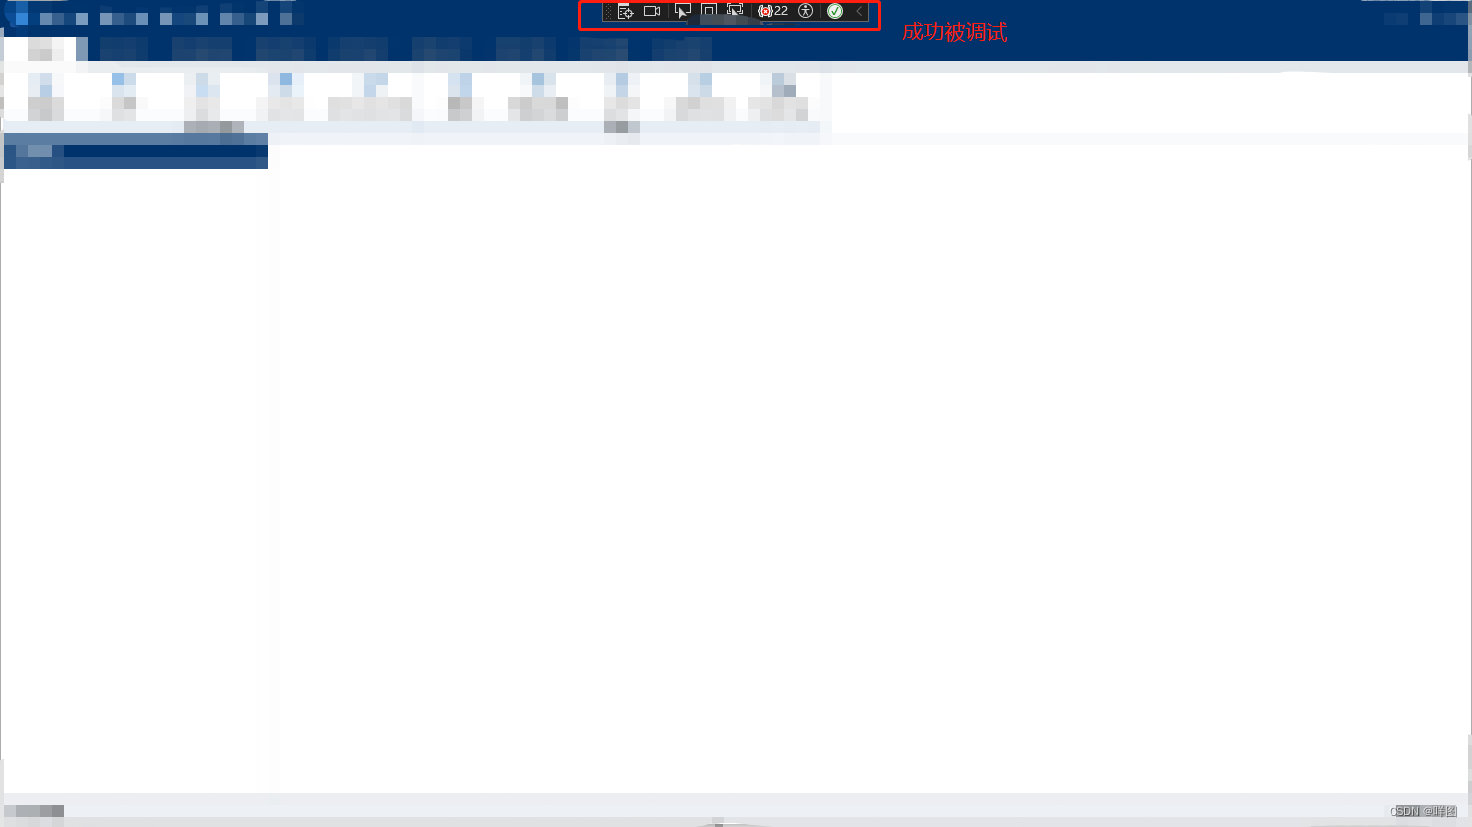
visual studio远程调试
场景一(被远程调试的电脑) 确定系统位数 我这里是x64的 找到msvsmon.exe msvsmon.exe目录位置解释: “F:\App\VisualStudio\an\Common7\IDE\”是visual studio所在位置、 “Remote Debugger\”是固定位置、 “x64”是系统位数。 拼起来就是…...

if __name__ == “__main__“
在Python中,if __name__ "__main__": 这行代码非常常见,它用于判断当前运行的脚本是否是主程序。这里的 __name__ 是一个特殊变量,当Python文件被直接运行时,__name__ 被自动设置为字符串 "__main__"。但是&…...

数据识别概述
数据识别场景 数据识别确实可以分为两种主要类型:直接识别和间接识别(或称为从文本中发现)。下面我将详细解释这两种类型: 直接识别: 定义:直接识别是指直接判断某个数据是否符合特定的标准或条件。应用场…...
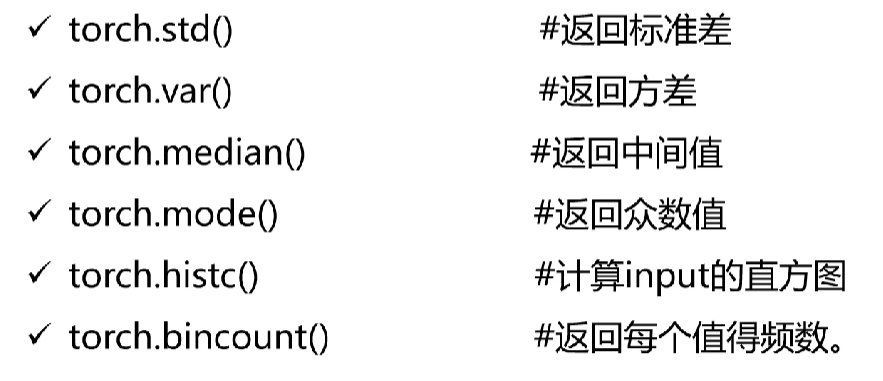
pytorch统计学分布
1、pytorch统计学函数 import torcha torch.rand(2,2) print(a) print(torch.sum(a, dim0)) print(torch.mean(a, dim0)) print(torch.prod(a, dim0))print(torch.argmax(a, dim0)) print(torch.argmin(a, dim0)) print(torch.std(a)) print(torch.var(a)) print(torch.median…...
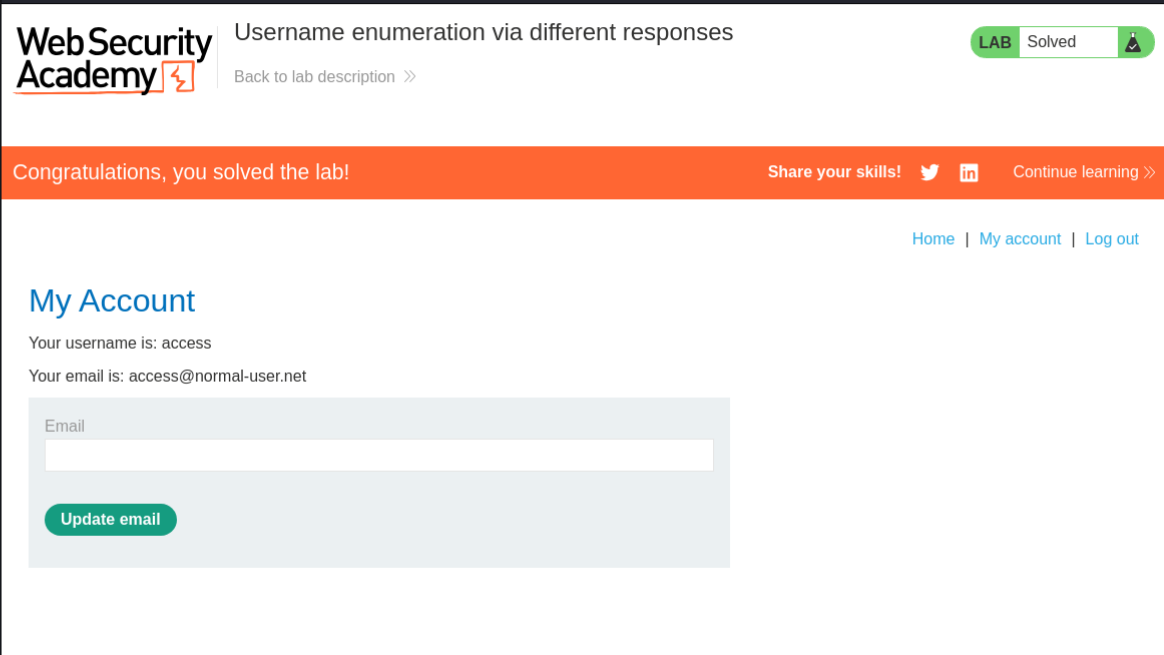
【网络安全学习】漏洞利用:BurpSuite的使用-03-枚举攻击案例
如何使用BurpSuite进行枚举攻击 1.靶场选择 BurpSuite官方也是有渗透的教学与靶场的,这次就使用BurpSuite的靶场进行练习。 靶场地址:https://portswigger.net/web-security 登录后如下图所示,选择**【VIEW ALL PATHS】**: 找…...

redis 消息订阅命令
在 Redis 中,消息订阅和发布是一种用于实现消息传递的机制。主要命令包括 SUBSCRIBE、UNSUBSCRIBE、PUBLISH 和 PSUBSCRIBE 等。下面是如何使用这些命令的详细说明和示例。 1. SUBSCRIBE 命令 SUBSCRIBE 命令用于订阅一个或多个频道,以接收这些频道发布…...
springboot接口防抖【防重复提交】
什么是防抖 所谓防抖,一是防用户手抖,二是防网络抖动。在Web系统中,表单提交是一个非常常见的功能,如果不加控制,容易因为用户的误操作或网络延迟导致同一请求被发送多次,进而生成重复的数据记录。要针对用…...
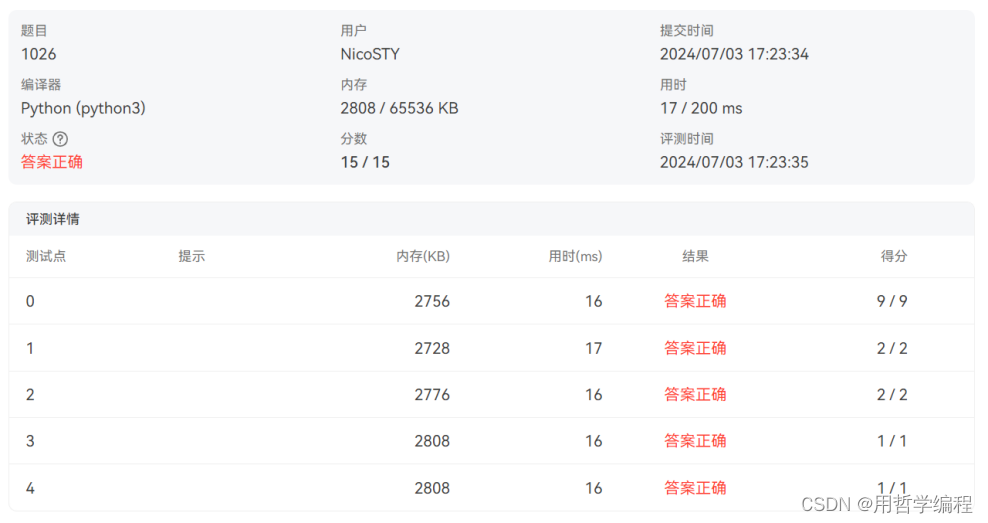
每日一题——Python实现PAT乙级1026 程序运行时间(举一反三+思想解读+逐步优化)五千字好文
一个认为一切根源都是“自己不够强”的INTJ 个人主页:用哲学编程-CSDN博客专栏:每日一题——举一反三Python编程学习Python内置函数 Python-3.12.0文档解读 目录 我的写法 代码结构和逻辑 时间复杂度 空间复杂度 代码优化建议 总结 我要更强 …...

还在Excel中管理您的持续改进项目吗?
对于大多数公司来说,Microsoft Excel是一种可靠的资源,它确实提供了极高的价值。然而,当它被用来跟踪持续改进项目时,它的价值就减少了。浪费时间从不同内部系统的不同报告中收集数据,会占用推动重要变革的时间。让我们…...

CentOS 7 内存占用过大导致 OOM Killer 杀掉了 Java 进程
说明 Linux进程被杀掉(OOM killer),查看系统日志 oom killer 详解 测试服务器, 有一个 Java 应用, 其进程偶尔会消失掉, 已排除人为杀死的可能 该服务器内存常年处于快被占满的状态, 怀疑是内存原因, 导致服务器主动杀死了该应用的 Java 进程…...

在postgrel中使用hints
在 PostgreSQL 中,可以使用查询提示(Query Hints)来影响查询优化器的行为,但需要注意的是,PostgreSQL 并不像一些商业数据库那样有丰富的提示语法,而是提供了一些基本的方式来引导优化器。 使用查询提示的…...

OceanBase Meetup北京站|跨行业应用场景中的一体化分布式数据库:AI赋能下的探索与实践
随着业务规模的不断扩张和数据处理需求的日益复杂化,传统数据库架构逐渐暴露出业务稳定性波动、扩展性受限、处理效率降低以及运营成本高等一系列问题。众多行业及其业务场景纷纷踏上了数据库现代化升级之路。 为应对这些挑战,7月6日,OceanB…...

Spring Boot:轻松设置全局异常处理
Spring Boot:轻松设置全局异常处理 在软件开发中,异常处理是一项至关重要的任务。对于使用Spring Boot的开发者来说,设置全局异常处理不仅可以提高代码的整洁度,还可以提升用户体验。本文将详细介绍如何在Spring Boot中轻松设置全…...
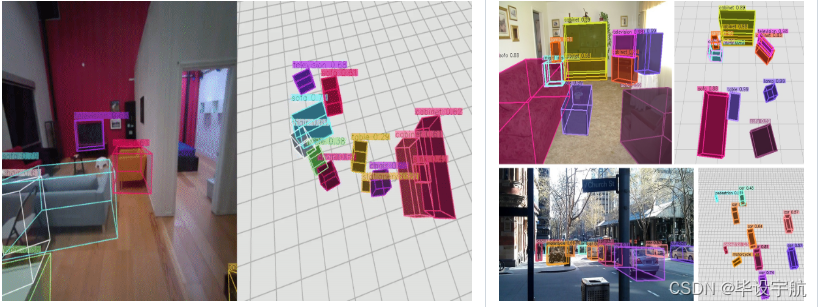
Omni3D目标检测
Omni3D是一个针对现实场景中的3D目标检测而构建的大型基准和模型体系。该项目旨在推动从单一图像中识别3D场景和物体的能力,这对于计算机视觉领域而言是一个长期的研究目标,并且在机器人、增强现实(AR)、虚拟现实(VR&a…...

前端三件套开发模版——产品介绍页面
今天有空,使用前端三件套html、css、js制作了一个非常简单的产品制作页面,与大家分享,希望可以满足大家应急的需求。本页面可以对产品进行“抢购”、对产品进行介绍,同时可以安排一张产品的高清大图,我也加入了页面的背…...

如何快速掌握开源UE资产编辑器:UAssetGUI完整配置与实战指南
如何快速掌握开源UE资产编辑器:UAssetGUI完整配置与实战指南 【免费下载链接】UAssetGUI A tool designed for low-level examination and modification of Unreal Engine game assets by hand. 项目地址: https://gitcode.com/gh_mirrors/ua/UAssetGUI UAss…...

三十岁想从零转行现实吗?带你分辨真正有前景的好工作
我是29岁那年,完成从转行裸辞副业的职业转型。 如果你把职业生涯看成是从现在开始30岁,到你退休那年,中间这么漫长的30年,那么30岁转行完全来得及…...
:支持Anthropic API兼容、流式响应、模型热切换与RBAC权限隔离)
Claude本地化部署终极方案(企业级容器化全栈手册):支持Anthropic API兼容、流式响应、模型热切换与RBAC权限隔离
更多请点击: https://codechina.net 第一章:Claude本地化部署的架构全景与企业级价值定位 Claude本地化部署并非简单地将模型权重下载后运行,而是一套融合推理引擎优化、安全沙箱隔离、API网关治理与可观测性集成的端到端架构体系。其核心目…...

为内部知识库问答机器人接入Taotoken多模型增强回答效果
🚀 告别海外账号与网络限制!稳定直连全球优质大模型,限时半价接入中。 👉 点击领取海量免费额度 为内部知识库问答机器人接入Taotoken多模型增强回答效果 构建一个高效的企业内部知识库问答机器人,核心挑战在于如何让…...

Sangfor文件夹可以删除吗?【图文讲解】深信服文件夹残留清理?如何彻底删除深信服?Sangfor文件夹是什么?
(1)问题背景打开C盘,突然冒出个Sangfor 文件夹,占用好几个 GB 空间,想删又不敢删,怕删坏系统、断网崩溃;上网一查,说法五花八门,有人说是病毒,有人说是办公软…...

随机森林算法在儿童出行方式预测中的实战应用与优化
1. 项目概述:用随机森林预测孩子怎么上学做城市交通规划或者做家长接送方案的时候,你肯定想过一个问题:孩子们到底是怎么上学的?是走路、骑车、坐公交还是家长开车送?这个问题看似简单,背后却牵扯到城市规划…...

从开题到定稿零焦虑:okbiye AI 论文写作,帮你把毕业季的 “大山” 变成坦途
okbiye-免费查重复率aigc检测/开题报告/毕业论文/智能排版/文献综述/AI PPT毕业论文 - Okbiye智能写作https://www.okbiye.com/ai/bylw 毕业季的深夜,宿舍台灯下的屏幕亮着刺眼的光,文档里的字数停留在三位数,而 deadline 正一天天逼近。你是…...

Keil µVision反汇编窗口内容导出方案与调试技巧
1. 问题背景与需求解析在嵌入式开发过程中,调试环节往往占据大量时间。Keil Vision作为业界广泛使用的集成开发环境(IDE),其调试器功能强大但某些细节功能仍有提升空间。最近我在使用C251架构开发汽车电子控制单元时,就遇到了一个看似简单却影…...

NBTExplorer:让Minecraft数据编辑从专业工具变成人人可用的可视化平台
NBTExplorer:让Minecraft数据编辑从专业工具变成人人可用的可视化平台 【免费下载链接】NBTExplorer A graphical NBT editor for all Minecraft NBT data sources 项目地址: https://gitcode.com/gh_mirrors/nb/NBTExplorer 你是否曾经面对Minecraft世界文件…...
3分钟搞定专业短视频!Pixelle-Video终极AI创作指南
3分钟搞定专业短视频!Pixelle-Video终极AI创作指南 【免费下载链接】Pixelle-Video 🚀 AI 全自动短视频引擎 | AI Fully Automated Short Video Engine 项目地址: https://gitcode.com/GitHub_Trending/pi/Pixelle-Video 还在为视频制作发愁吗&am…...