Spring中Bean的相关注解
目录
1.Spring IoC&DI
2.关于Bean存储的相关注解(类注解与方法注解)
Bean的获取方式
类注解和方法注解的重命名
2.1 类注解
2.1.1 @Controller
2.1.2 @Service
2.1.3 @Repository
2.1.4 @Component
2.1.5 @Configuration
2.2 方法注解-@Bean
2.2.1 定义多个对象
2.2.2 扫描路径-@ComponentScan
3.DI注入方式-@Autowired
3.1 属性注入
3.2 Setter方法注入
3.3 构造方法注入
3.4 三种注入方式的优缺点
3.5 @Autowired存在的问题及解决方法
1.Spring IoC&DI
Spring是包含了众多工具方法的一个IoC容器
- IoC(Inversion of Control,控制反转),是Spring的一个核心思想,简单来说就是将对象之间层层的依赖关系反转过来(一开始是使用方创建并控制依赖对象,现在是把依赖对象注入到当前对象中),使得依赖对象无论发生什么改变,当前类都不受影响,大大降低了代码的耦合度
- IoC容器就是创建并管理这些对象的容器,不再需要用户自己去创建对象,而是交给IoC容器去创建并对对象进行统一管理(将对象的控制权交给Spring)
- DI(Dependency Injection,依赖注入),是IoC的一种具体实现,依赖注入是一个过程,在Ioc容器在创建Bean时,去提供运行时所依赖的资源,这个资源就是对象,简单点说,依赖注入就是把对象取出来放到某个类的属性中
2.关于Bean存储的相关注解(类注解与方法注解)
Bean:Spring是一个IoC容器,而IoC容器中装的就是Bean(对象)
Bean的获取方式
Bean的获取方式有很多,常用的是以下三种
| Object getBean(String name) throws BeansException | 根据Bean名称获取Bean |
| <T> T getBean(String name, Class<T> requiredType) throws BeansException | 根据Bean名称和类型获取Bean |
| <T> T getBean(Class<T> requiredType) throws BeansException | 根据类型获取Bean |
Bean名称:当使用的是类注解时,Bean的名称为类名的小驼峰(第一个单词以小写字母开始,后面每个单词首字母大写),如果类名前两个字母都是大写,则Bean名称为类名;当使用的是方法注解时,Bean名称就是方法名
注:对同一个类获取多次Bean,指向的是同一个对象(类似单例模式,有且仅有一个对象)
类注解和方法注解的重命名
类注解重命名:类注解+(新名称)
//启动类代码
package com.example.demo;
import org.springframework.boot.SpringApplication;
import org.springframework.boot.autoconfigure.SpringBootApplication;
import org.springframework.context.ApplicationContext;
@SpringBootApplication
public class Demo3Application {public static void main(String[] args) {ApplicationContext context=SpringApplication.run(Demo3Application.class, args);UserComponent userComponent=(UserComponent) context.getBean("user1");//获取名称为user1的Bean//如果再去获取原来名称为userComponent的Bean,会报错userComponent.sayHi();}
}//UserComponent类
package com.example.demo;
import org.springframework.stereotype.Component;
@Component("user1")//重命名为user1
public class UserComponent {public void sayHi(){System.out.println("Hi, I'm UserComponent");}
}
方法注解重命名:@Bean+(新名称)
//启动类代码
package com.example.demo;
import org.springframework.boot.SpringApplication;
import org.springframework.boot.autoconfigure.SpringBootApplication;
import org.springframework.context.ApplicationContext;
@SpringBootApplication
public class Demo3Application {public static void main(String[] args) {ApplicationContext context=SpringApplication.run(Demo3Application.class, args);UserInfo userInfo1=(UserInfo) context.getBean("user1");UserInfo userInfo2=(UserInfo) context.getBean("user2");System.out.println(userInfo1);System.out.println(userInfo2);}
}//BeanTest类
package com.example.demo;
import org.springframework.context.annotation.Bean;
import org.springframework.stereotype.Component;
@Component
public class BeanTest {@Bean("user1")//重命名为user1public UserInfo userInfo1(){return new UserInfo("zhangsan",1);}@Bean("user2")//重命名为user2public UserInfo userInfo2(){return new UserInfo("lisi",2);}
}
注:类注解和方法注解的重命名的名称可以有多个, 使用{ }来标识,例如@Component({"user1","user2"})
2.1 类注解
类注解总共有五种,这些注解都有各自不同的应用场景
- @Controller:控制层(Controller),接收请求,对请求进行处理并进行响应
- @Service:业务逻辑层(Service),处理具体的业务逻辑
- @Repository:数据访问层(Dao),负责数据访问操作
- @Configuration:配置层,处理项目中的一些配置信息
- @Component:元注解,上述四种注解都含有@Component
2.1.1 @Controller
//启动类代码(从Spring中获取Bean)
package com.example.demo;
import org.springframework.boot.SpringApplication;
import org.springframework.boot.autoconfigure.SpringBootApplication;
import org.springframework.context.ApplicationContext;
@SpringBootApplication
public class Demo3Application {public static void main(String[] args) {ApplicationContext context=SpringApplication.run(Demo3Application.class, args);UserController userController=(UserController) context.getBean("userController");userController.sayHi();}
}//UserController类
package com.example.demo;
import org.springframework.stereotype.Controller;
@Controller//将对象存储到Spring中
public class UserController {public void sayHi(){System.out.println("Hi,I'm UserController");}
}
2.1.2 @Service
//启动类代码(从Spring中获取Bean)
package com.example.demo;
import org.springframework.boot.SpringApplication;
import org.springframework.boot.autoconfigure.SpringBootApplication;
import org.springframework.context.ApplicationContext;
@SpringBootApplication
public class Demo3Application {public static void main(String[] args) {ApplicationContext context=SpringApplication.run(Demo3Application.class, args);UserService userService=(UserService) context.getBean("userService");userService.sayHi();}
}//UserService类
package com.example.demo;
import org.springframework.stereotype.Service;
@Service//将对象存储到Spring中
public class UserService {public void sayHi(){System.out.println("Hi, I'm UserService");}
}
2.1.3 @Repository
//启动类代码(从Spring中获取Bean)
package com.example.demo;
import org.springframework.boot.SpringApplication;
import org.springframework.boot.autoconfigure.SpringBootApplication;
import org.springframework.context.ApplicationContext;
@SpringBootApplication
public class Demo3Application {public static void main(String[] args) {ApplicationContext context=SpringApplication.run(Demo3Application.class, args);UserRepository userRepository=(UserRepository) context.getBean("userRepository");userRepository.sayHi();}
}//UserRepository类
package com.example.demo;
import org.springframework.stereotype.Repository;
@Repository//将对象存储到Spring中
public class UserRepository {public void sayHi(){System.out.println("Hi,I'm UserRepository");}
}
2.1.4 @Component
//启动类代码(从Spring中获取Bean)
package com.example.demo;
import org.springframework.boot.SpringApplication;
import org.springframework.boot.autoconfigure.SpringBootApplication;
import org.springframework.context.ApplicationContext;
@SpringBootApplication
public class Demo3Application {public static void main(String[] args) {ApplicationContext context=SpringApplication.run(Demo3Application.class, args);UserComponent userComponent=(UserComponent) context.getBean("userComponent");userComponent.sayHi();}
}//UserComponent类
package com.example.demo;
import org.springframework.stereotype.Component;
@Component//将对象存储到Spring中
public class UserComponent {public void sayHi(){System.out.println("Hi, I'm UserComponent");}
}
2.1.5 @Configuration
//启动类代码(从Spring中获取Bean)
package com.example.demo;
import org.springframework.boot.SpringApplication;
import org.springframework.boot.autoconfigure.SpringBootApplication;
import org.springframework.context.ApplicationContext;
@SpringBootApplication
public class Demo3Application {public static void main(String[] args) {ApplicationContext context=SpringApplication.run(Demo3Application.class, args);UserConfiguration userConfiguration=(UserConfiguration) context.getBean("userConfiguration");userConfiguration.sayHi();}
}//UserConfiguration类
package com.example.demo;
import org.springframework.context.annotation.Configuration;
@Configuration//将对象存储到Spring中
public class UserConfiguration {public void sayHi(){System.out.println("Hi,I'm UserConfiguration");}
}
2.2 方法注解-@Bean
当一个类需要多个对象,或者需要使用外部包里的类时,使用类注解无法满足需求,这时就需要用到方法注解@Bean
2.2.1 定义多个对象
//启动类代码(从Spring中获取Bean)
package com.example.demo;
import org.springframework.boot.SpringApplication;
import org.springframework.boot.autoconfigure.SpringBootApplication;
import org.springframework.context.ApplicationContext;
@SpringBootApplication
public class Demo3Application {public static void main(String[] args) {ApplicationContext context=SpringApplication.run(Demo3Application.class, args);//如果这里使用类名获取Bean,会由于得到多个Bean而报错,所以需要使用上述Bean获取方式中的第1或第2种UserInfo userInfo1=(UserInfo) context.getBean("userInfo1");//获取方法名为userInfo1对应的BeanUserInfo userInfo2=(UserInfo) context.getBean("userInfo2");//获取方法名为userInfo2对应的BeanSystem.out.println(userInfo1);System.out.println(userInfo2);}
}//BeanTest类
package com.example.demo;
import org.springframework.context.annotation.Bean;
import org.springframework.stereotype.Component;
@Component//方法注解需要搭配类注解一起使用,否则会报错
public class BeanTest {@Beanpublic UserInfo userInfo1(){return new UserInfo("zhangsan",1);}@Beanpublic UserInfo userInfo2(){return new UserInfo("lisi",2);}
}
2.2.2 扫描路径-@ComponentScan
Spring的扫描路径默认为启动类(@SpringBootApplication注释的类)所在的路径,如果路径下有被类注解注释的类,就会将该类的对象存储到Spring中。如果想要修改默认路径,可以通过@ComponentScan来指定扫描路径
//添加到启动类中,路径要和默认路径不同
@ComponentScan("com.example.demo.test")
//指定单个扫描路径
@ComponentScan({"com.example.demo.test","com.example.demo.test1"})
//指定多个扫描路径
3.DI注入方式-@Autowired
@Autowired注释的作用主要是从Spring中获取对象,注入到对象的使用方(根据类型注入)。对于DI注入,Spring提供了三种方式,分别是属性注入,Setter方法注入以及构造方法注入
3.1 属性注入
属性注入使用@Autowire实现,以下是使用属性注入实现Service类注入到Controller类的一个简单例子
//启动类代码(获取UserController对象中,调用sayHi方法)
package com.example.demo;
import org.springframework.boot.SpringApplication;
import org.springframework.boot.autoconfigure.SpringBootApplication;
import org.springframework.context.ApplicationContext;
@SpringBootApplication
public class Demo3Application {public static void main(String[] args) {ApplicationContext context=SpringApplication.run(Demo3Application.class, args);UserController userController=(UserController) context.getBean("userController");userController.sayHi();}
}//UserController类
package com.example.demo;
import org.springframework.beans.factory.annotation.Autowired;
import org.springframework.stereotype.Controller;
@Controller
public class UserController {//使用属性注入将Service类注入到Controller类中@Autowiredprivate UserService userService;public void sayHi(){System.out.println("Hi,I'm UserController");userService.sayHi();}
}//UserService类
package com.example.demo;
import org.springframework.stereotype.Service;
@Service
public class UserService {public void sayHi(){System.out.println("Hi, I'm UserService");}
}
3.2 Setter方法注入
Setter方法注入即在设置set方法时加上@Autowired注解
//UserController类
//启动类代码和UserService类与属性注入中一致
package com.example.demo;
import org.springframework.beans.factory.annotation.Autowired;
import org.springframework.stereotype.Controller;
@Controller
public class UserController {private UserService userService;//使用Setter方法注入将Service类注入到Controller类中@Autowiredpublic void setUserService(UserService userService) {this.userService = userService;}public void sayHi(){System.out.println("Hi,I'm UserController");userService.sayHi();}
}
3.3 构造方法注入
构造方法注入即在类的构造方法中实现注入
注:使用构造方法注入时,如果注入的类只有一个构造方法,那么@Autowired可以省略,如果注入的类有多个构造方法,那么需要添加@Autowired来明确指定使用哪个构造方法,否则会报错
//UserController类
//启动类代码和UserService类与属性注入中一致
package com.example.demo;
import org.springframework.beans.factory.annotation.Autowired;
import org.springframework.stereotype.Controller;
@Controller
public class UserController {private UserService userService;//使用构造方法注入将Service类注入到Controller类中@Autowiredpublic UserController(UserService userService) {this.userService = userService;}public void sayHi(){System.out.println("Hi,I'm UserController");userService.sayHi();}
}
3.4 三种注入方式的优缺点
属性注入
- 优点:简介,方便使用
- 缺点:只能用于Ioc容器;不能注入一个Final修饰的属性
Setter方法注入
- 优点:方便在类实例之后,重新对该对象进行配置或者注入
- 缺点:不能注入一个Final修饰的属性;注入对象可能会被改变
构造方法注入
- 优点:可以注入Final修饰的属性;注入的对象不会被修改;依赖对象被使用前一定会被完全初始化;通用性好,更换任何框架都可适用
- 缺点:注入多个对象时,代码比较繁琐
3.5 @Autowired存在的问题及解决方法
当同一个类型存在多个Bean时,使用@Autowired会存在问题
//启动类代码
package com.example.demo;
import org.springframework.boot.SpringApplication;
import org.springframework.boot.autoconfigure.SpringBootApplication;
import org.springframework.context.ApplicationContext;
@SpringBootApplication
public class Demo3Application {public static void main(String[] args) {ApplicationContext context=SpringApplication.run(Demo3Application.class, args);UserController userController=context.getBean(UserController.class);userController.sayHi();}
}//UserController类
package com.example.demo;
import org.springframework.beans.factory.annotation.Autowired;
import org.springframework.stereotype.Controller;
@Controller
public class UserController {@Autowired//注入UserInfoprivate UserInfo userInfo;public void sayHi(){System.out.println("Hi,I'm UserController");System.out.println(userInfo);}
}//BeanTest类
package com.example.demo;
import org.springframework.context.annotation.Bean;
import org.springframework.stereotype.Component;
@Component
public class BeanTest {@Beanpublic UserInfo userInfo1(){return new UserInfo("zhangsan",1);}@Beanpublic UserInfo userInfo2(){return new UserInfo("lisi",2);}
}
@Autowired注解会根据类型UserInfo去查找Bean,找到userInfo1和userInfo2两个方法,由于查找到的Bean只能是唯一的,所以程序会报错(非唯一的Bean)。那么如何解决这个问题呢?Spring提供了几个解决方法:@Primary,@Qualifier,@Resource
@Primary:当同个类型存在多个Bean注入时,添加@Primary注解用来确定默认的实现
import org.springframework.context.annotation.Bean;
import org.springframework.context.annotation.Primary;
import org.springframework.stereotype.Component;
@Component
public class BeanTest {@Primary//指定该Bean为Bean的默认实现@Beanpublic UserInfo userInfo1(){return new UserInfo("zhangsan",1);}@Beanpublic UserInfo userInfo2(){return new UserInfo("lisi",2);}
}
@Qualifier:添加@Qualifier(Bean的名称),指定当前要注入的Bean(@Qualifier需要搭配@Autowired使用,不能单独使用)
package com.example.demo;
import org.springframework.beans.factory.annotation.Autowired;
import org.springframework.beans.factory.annotation.Qualifier;
import org.springframework.stereotype.Controller;
@Controller
public class UserController {@Qualifier("userInfo1")//指定Bean名称为userInfo1@Autowiredprivate UserInfo userInfo;public void sayHi(){System.out.println("Hi,I'm UserController");System.out.println(userInfo);}
}
@Resource:与@Qualifier用法相同,也是指定Bean的名称进行注入,但不需要搭配@Autowired
package com.example.demo;
import jakarta.annotation.Resource;
import org.springframework.stereotype.Controller;
@Controller
public class UserController {@Resource(name="userInfo1")//指定Bean名称为userInfo1并注入private UserInfo userInfo;public void sayHi(){System.out.println("Hi,I'm UserController");System.out.println(userInfo);}
}
除了上述三种使用注解的解决方法,还可以通过改变对象名称,使其与要注入的Bean的名称相同
package com.example.demo;
import org.springframework.beans.factory.annotation.Autowired;
import org.springframework.stereotype.Controller;
@Controller
public class UserController {@Autowiredprivate UserInfo userInfo1;//注入Bean名称为userInfo1,则对象名称也为userInfo1public void sayHi(){System.out.println("Hi,I'm UserController");System.out.println(userInfo1);}
}
相关文章:

Spring中Bean的相关注解
目录 1.Spring IoC&DI 2.关于Bean存储的相关注解(类注解与方法注解) Bean的获取方式 类注解和方法注解的重命名 2.1 类注解 2.1.1 Controller 2.1.2 Service 2.1.3 Repository 2.1.4 Component 2.1.5 Configuration 2.2 方法注解-Bean 2.2.1 定义多个对象 2.2…...

Golang | Leetcode Golang题解之第385题迷你语法分析器
题目: 题解: func deserialize(s string) *NestedInteger {if s[0] ! [ {num, _ : strconv.Atoi(s)ni : &NestedInteger{}ni.SetInteger(num)return ni}stack, num, negative : []*NestedInteger{}, 0, falsefor i, ch : range s {if ch - {negati…...

【Java 优选算法】双指针(上)
欢迎关注个人主页:逸狼 创造不易,可以点点赞吗~ 如有错误,欢迎指出~ 目录 移动零 分析 代码 复写零 分析 代码 快乐数 分析 代码 盛最多水的容器 分析 代码 移动零 题目链接 分析 双指针算法,利用两个指针cur和dest将数组划分为三个区间…...

【自动驾驶】控制算法(八)横向控制Ⅰ | 算法与流程
写在前面: 🌟 欢迎光临 清流君 的博客小天地,这里是我分享技术与心得的温馨角落。📝 个人主页:清流君_CSDN博客,期待与您一同探索 移动机器人 领域的无限可能。 🔍 本文系 清流君 原创之作&…...

Android SSE 单向接收数据
Server-Sent Events(SSE)是一种在客户端和服务器之间实现单向实时通信的技术。它允许服务器向客户端推送数据,但客户端无法使用 SSE 向服务器发送数据。这使得其适用于需要持续接收服务器数据的应用场景(如实时通知、股票行情、社…...

排序《数据结构》
排序 《数据结构》 1.排序的概念及其运用1.1 排序的概念1.2 排序运用1.3常见的排序算法1.4 排序动图演示 2.常见排序算法的实现2.1 插入排序2.2希尔排序2.3 快排左边做keyi,右边先走,可以保证相遇位置比keyi小 2.4 快速排序优化快排(非递归&a…...

flutter 提示框2 Dialog
flutter 提示框 写在点击的方法体中 child里放自己喜欢的 showDialog( context: context, builder: (BuildContext context) { final Dialog alertDialog Dialog( backgroundColor: Colors.transparent,shadowColor:Colors.transparent,child: Container(height: mediawi…...

如何选择SDR无线图传方案
在开源软件定义无线电(SDR)领域,有几个项目提供了无线图传的解决方案。以下是一些开源SDR无线图传方案: 1. **OpenHD**:这是一个远程高清数字图像传输的开源解决方案,它使用SDR技术来实现高清视频的无线传…...
解析)
关于Python类中方法__init__()解析
# import numpy as npclass Car():def __init__(self, maker, name, year):self.maker makerself.name nameself.year yearprint(self.searchMakrt() "123")def searchMakrt(self):print("汽车制作厂家为: " self.maker)# passreturn &quo…...

微信小程序 自定义组件
1. 微信小程序 自定义组件 微信小程序支持组件化开发,这有助于我们复用代码,提高开发效率。下面我将给出一个简单的微信小程序组件化示例,包括一个自定义组件的创建和使用。 1.1. 创建自定义组件 首先,在项目的 components 目录…...

Mac+Pycharm配置PyQt6教程
安装包 pip install PyQt6 PyQt6-tools #查看Qt版本 pip show PyQt6 pip show pyqt6-tools 配置扩展工具 QTD(界面设计) Program:/Users/wan/PycharmProjects/NewDemo/venv/lib/python3.11/site-packages/qt6_applications/Qt/bin/Designer.app Working directo…...

如何保证Redis与Mysql双写一致性?
https://www.cnblogs.com/coderacademy/p/18137480 延迟双删 对于上面链接的文章,里面的延迟双删没有给出具体的例子,也没有直接指出具体解决的问题是针对那种缓存策略,这里补充一下,延时双删缓存针对的是Cache aside pattern(缓…...

9.8笔试记录
1.在c中哪些运算符不能重载? 在 C 中,有以下几个运算符不能被重载: . :成员访问运算符。例如obj.member中的.不能被重载。 :: :作用域解析运算符。用于指定命名空间、类等的作用域,不能被重载。 ?: ࿱…...

SRE-系统管理篇
SRE-系统管理篇 进程管理 进程的概念: 运行起来的程序,命令,服务等等都可以称作进行,进程都是运行在内存当中的。 程序的概念: 一般指安装包,程序代码,应用它们存放在磁盘上面的。 守护进程的概念: 守护进程,一直运行的进程,也可以叫做服务。 进程的分类 僵…...
傅里叶级数,傅里叶变换
先读文章:傅里叶分析之掐死教程(完整版)更新于2014.06.06 - 知乎 (zhihu.com) 傅里叶级数 一、内容:每个周期性函数都可以表示为无穷多个不同频率的正弦函数的叠加。 二、公式: 三、从时域到频域所保留的三点信息&…...

零知识证明在BSV网络上的应用
发表时间:2023年6月15日 2024年7月19日,BSV区块链主网上成功通过使用零知识证明验证了一笔交易。 零知识证明是一种技术,它允许一方(证明者)在不透露任何秘密的情况下,向另一方(验证者&…...
无任何门槛!3分钟5步,发布属于你的第一个智能体小程序,99%的人还不知道怎么用
相信大家都用微信小程序,但是大部分人应该还没有过属于自己的小程序吧。 今天程哥就带大家花三分钟用五步,来创建一个属于自己的微信小程序。 之前Coze在发布渠道里也有发布小程序的渠道,但是试过的人都知道,这个是有一定门槛的…...
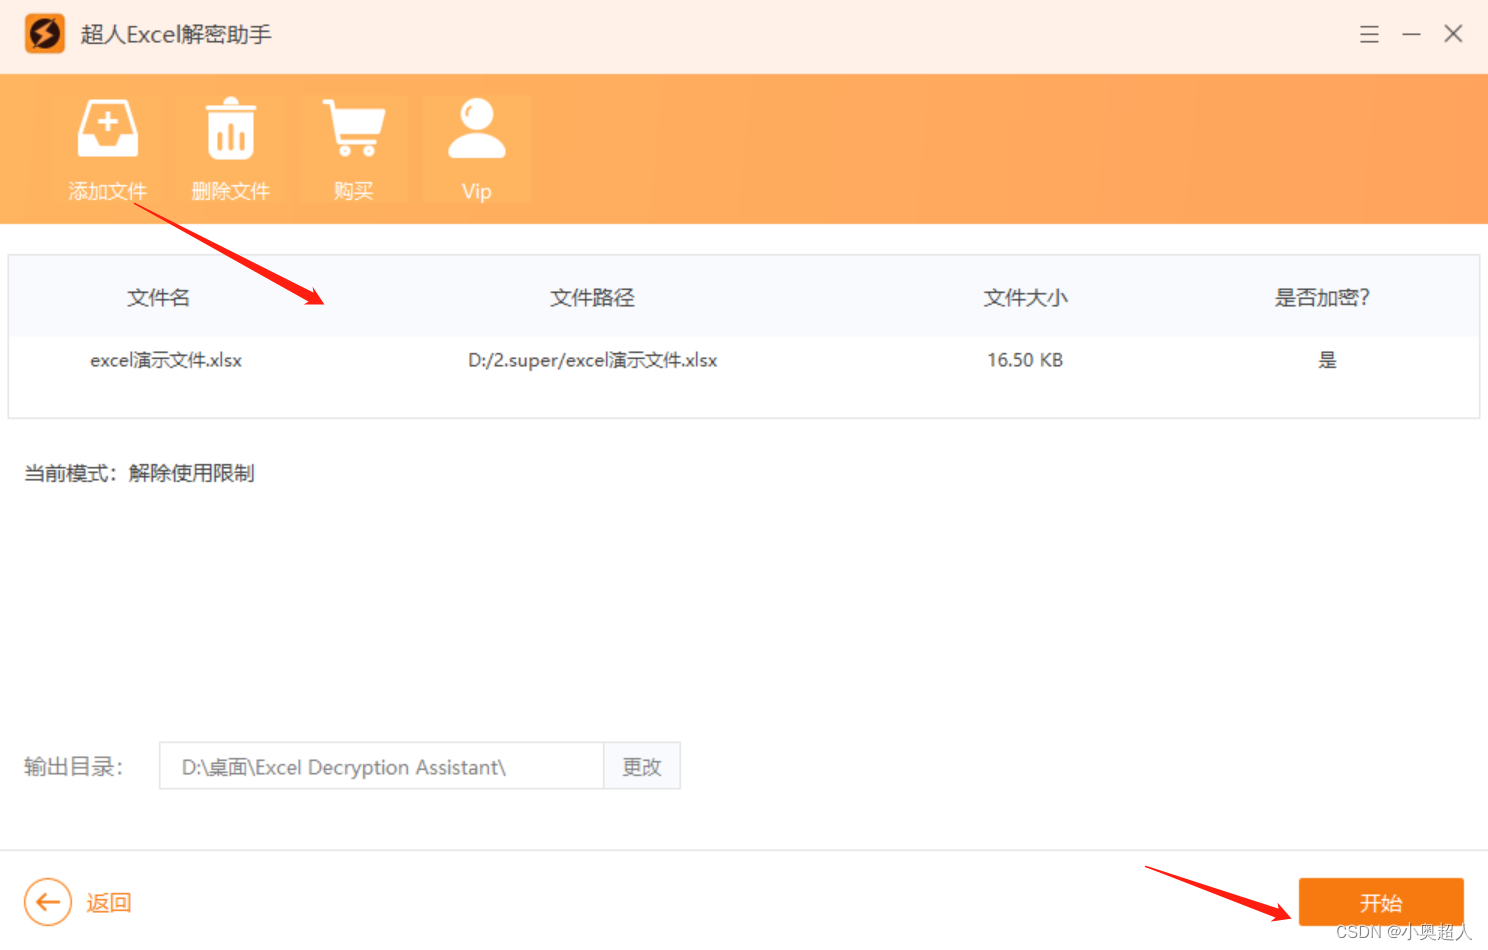
怎么强制撤销excel工作表保护?
经常不是用的Excel文件设置了工作表保护,偶尔打开文件的时候想要编辑文件,但是发现忘记了密码,那么这种情况,我们怎么强制撤销excel工作表保护?今天分享两种解决方法。 方法一、 将excel文件转换为其他文件格式&…...

每天学习一个字符串类函数之memmove函数
目录 前言: 一、头文件 二、memmove函数的作用 三、理解memmove函数的定义 1、返回类型 2、参数 四、使用memmove函数 案例1: 案例2: 五、解决数据拷贝之前被覆盖的方法 六、模拟实现memmove函数 前言: 上一篇博客,我…...
】三自由度机器人圆弧轨迹规划仿真实例)
【机器人工具箱Robotics Toolbox开发笔记(十三)】三自由度机器人圆弧轨迹规划仿真实例
在实际应用场景中,我们通常预先明确了目标末端的运动轨迹,随后引导机器人进行相应的动作。本实例具体展示了如何基于给定的两个点,计算出末端的精确位姿,并以此为基础,进一步规划出一条平滑的圆弧轨迹供机器人执行。这样的流程确保了机器人能够沿着预定的路径,精准且高效…...

如何精准识别高校院所与企业之间的潜在合作机会?
核心要点 传统“相亲角”式校企对接效率低下,根源在于科研供给与市场需求间的信息断层,必须转向以数据驱动、模型研判为核心的精准识别机制,才能将模糊的产学研线索转化为可落地的合作机会。精准识别合作机会的关键在于分拆为“供给侧”与“需…...

Week1:机器学习入门
Week1:机器学习入门摘要:本周完成李宏毅《机器学习》课程第 1 讲的入门学习,建立对机器学习的整体认知。首先梳理了人工智能、机器学习与深度学习的层级关系,剖析了传统 “人工设定规则” 方法的局限性;在此基础上&…...

STM32中断优先级到底怎么分?用医生叫号系统讲透NVIC抢占与响应优先级
STM32中断优先级到底怎么分?用医生叫号系统讲透NVIC抢占与响应优先级 在嵌入式系统开发中,实时响应能力往往是衡量系统性能的关键指标。想象一下,当您正在全神贯注地编写代码时,突然手机来电、微信消息和邮件通知同时响起——您会…...

WordPress AI: 7.0如何为AI驱动的网站奠定基础
此前,所有集成人工智能的 WordPress 插件都必须自行构建基础架构。 即将推出的 WordPress 7.0 版本改变了这一现状,它引入了共享的基础架构,支持 AI 在各个站点上的运行。 AI 工具现在可以发现网站的功能,通过统一的层访问 Word…...

原生态部署librenms
为什么写这个?1、别的帖子都要钱,我真看不惯。2、要了钱程序还搭不起来,恶心。3、法布施是智慧聪明才艺地修因。正题开始:一、部署目标 本次 LibreNMS 部署以官方推荐架构为基础,目标是搭建一套结构清晰、运行稳定、便…...

AlphaEvolve:LLM与进化算法融合的自动代码优化系统
1. 项目概述:AlphaEvolve系统架构与核心思想AlphaEvolve代表了当前算法自动优化领域最前沿的技术突破。这个由Google DeepMind团队开发的系统,创造性地将大语言模型(LLM)的代码生成能力与进化算法的迭代优化机制相结合,形成了一个自主进化的编…...

耦合振荡器模型在MPI并行计算同步分析中的应用
1. 耦合振荡器系统概述耦合振荡器模型为理解复杂系统中的同步行为提供了强有力的数学框架。在分布式计算领域,特别是MPI(Message Passing Interface)并行程序中,这种模型能够精确刻画计算节点间的动态交互过程。每个计算进程可视为…...

raft一致性协议
Raft 协议raft协议是基于TCP的选举机制:时间 日志 版本核心三要素:时间 (随机超时):Follower 都有一个选举超时时间(例如 150ms ~ 300ms 的随机值)。作用:防止多个 Follower 同时变成 Candidate 导致选票…...

给客户打电话经常被挂?电话号码企业认证来帮忙
忙碌的销售部门里,电话铃声此起彼伏,但回应往往是沉默。销售员小张今天拨出了150个电话,其中有120个被直接挂断,剩下的30个里,有一半在听到自我介绍的一瞬间就收到了“嘟嘟”的忙音。这种困境不是个案。在防骚扰软件普…...

一小时搭建爬虫数据提取智能体 · 数据矿工
🧑💻 博主介绍 & 诚邀关注 作者:专注于 Java、Python、前端开发的技术博主 | 全网粉丝 30 万 在校期间协助导师完成毕业设计课题分类、论文格式初审及代码整理工作;工作后持续分享毕设思路,助力毕业生顺利完成…...