【TVM 教程】在 Relay 中使用 Pipeline Executor
Apache TVM 是一个端到端的深度学习编译框架,适用于 CPU、GPU 和各种机器学习加速芯片。更多 TVM 中文文档可访问 →
Apache TVM 中文站tvm.hyper.ai/
作者:Hua Jiang
本教程介绍如何将「Pipeline Executor」与 Relay 配合使用。
import tvm
from tvm import te
import numpy as np
from tvm.contrib import graph_executor as runtime
from tvm.relay.op.contrib.cutlass import partition_for_cutlass
from tvm import relay
from tvm.relay import testing
import tvm.testing
from tvm.contrib.cutlass import finalize_modulesimg_size = 8
创建一个简单的网络,这个网络也可以是一个预训练的模型。
创建一个由 convolution、batch normalization、dense 和 ReLU activation 组成的网络用于演示。
def get_network():out_channels = 16batch_size = 1data = relay.var("data", relay.TensorType((batch_size, 3, img_size, img_size), "float16"))dense_weight = relay.var("dweight", relay.TensorType((batch_size, 16 * img_size * img_size), "float16"))weight = relay.var("weight")bn_gamma = relay.var("bn_gamma")bn_beta = relay.var("bn_beta")bn_mmean = relay.var("bn_mean")bn_mvar = relay.var("bn_var")simple_net = relay.nn.conv2d(data=data, weight=weight, kernel_size=(3, 3), channels=out_channels, padding=(1, 1))simple_net = relay.nn.batch_norm(simple_net, bn_gamma, bn_beta, bn_mmean, bn_mvar)[0]simple_net = relay.nn.relu(simple_net)simple_net = relay.nn.batch_flatten(simple_net)simple_net = relay.nn.dense(simple_net, dense_weight)simple_net = relay.Function(relay.analysis.free_vars(simple_net), simple_net)data_shape = (batch_size, 3, img_size, img_size)net, params = testing.create_workload(simple_net)return net, params, data_shapenet, params, data_shape = get_network()
将网络拆分成两个子图。
这个来自单元测试的名为「graph_split」的函数只是一个例子。用户可以创建自定义逻辑来拆分计算图。
import inspect
import ostutorial_dir = os.path.dirname(inspect.getfile(lambda: None))
os.sys.path.append(os.path.join(tutorial_dir, "../../../tests/python/relay"))
from test_pipeline_executor import graph_split
将网络拆分成两个子图。
split_config = [{"op_name": "nn.relu", "op_index": 0}]
subgraphs = graph_split(net["main"], split_config, params)
生成的子图如下所示。
"""
#subgraphs[0])def @main(%data: Tensor[(1, 3, img_size, img_size), float16]) {%0 = nn.conv2d(%data, meta[relay.Constant][0] /* ty=Tensor[(16, 3, 3, 3), float16] */, padding=[1, 1, 1, 1], channels=16, kernel_size=[3, 3]) /* ty=Tensor[(1, 16, img_size, img_size), float16] */;%1 = nn.batch_norm(%0, meta[relay.Constant][1] /* ty=Tensor[(16), float16] */, meta[relay.Constant][2] /* ty=Tensor[(16), float16]*/, meta[relay.Constant][3] /* ty=Tensor[(16), float16] */, meta[relay.Constant][4] /* ty=Tensor[(16), float16] */) /* ty=(Tensor[(1,16, img_size, img_size), float16], Tensor[(16), float16], Tensor[(16), float16]) */;%2 = %1.0;nn.relu(%2) /* ty=Tensor[(1, 16, img_size, img_size), float16] */}#subgraphs[1]def @main(%data_n_0: Tensor[(1, 16, 8, 8), float16] /* ty=Tensor[(1, 16, 8, 8), float16] */) {%0 = nn.batch_flatten(%data_n_0) /* ty=Tensor[(1, 1024), float16] */;nn.dense(%0, meta[relay.Constant][0] /* ty=Tensor[(1, 1024), float16] */, units=None) /* ty=Tensor[(1, 1), float16] */}"""
用 cutlass target 构建子图。
cutlass = tvm.target.Target({"kind": "cutlass","sm": int(tvm.target.Target("cuda").arch.split("_")[1]),"use_3xtf32": True,"split_k_slices": [1],"profile_all_alignments": False,"find_first_valid": True,"use_multiprocessing": True,"use_fast_math": False,"tmp_dir": "./tmp",},host=tvm.target.Target("llvm"),
)def cutlass_build(mod, target, params=None, target_host=None, mod_name="default"):target = [target, cutlass]lib = relay.build_module.build(mod, target=target, params=params, target_host=target_host, mod_name=mod_name)return lib
使用 pipeline executor 在 pipeline 中运行两个子图。
在 cmake 中将 USE_PIPELINE_EXECUTOR 和 USE_CUTLASS 设置为 ON。
from tvm.contrib import graph_executor, pipeline_executor, pipeline_executor_build
创建子图 pipeline 配置。将子图模块与 target 关联起来。使用 CUTLASS BYOC 构建第二个子图模块。
mod0, mod1 = subgraphs[0], subgraphs[1]
# 将 cutlass 作为 codegen。
mod1 = partition_for_cutlass(mod1)
获取 pipeline executor 配置对象。
pipe_config = pipeline_executor_build.PipelineConfig()
设置子图模块的编译 target。
pipe_config[mod0].target = "llvm"
pipe_config[mod0].dev = tvm.cpu(0)
将第二个子图模块的编译 target 设置为 cuda。
pipe_config[mod1].target = "cuda"
pipe_config[mod1].dev = tvm.device("cuda", 0)
pipe_config[mod1].build_func = cutlass_build
pipe_config[mod1].export_cc = "nvcc"
# 通过连接子图模块创建 pipeline。
# 全局输入将被转发到第一个名为 mod0 的模块的输入接口
pipe_config["input"]["data"].connect(pipe_config[mod0]["input"]["data"])
# mod0 的第一个输出会转发到 mod1 的输入接口
pipe_config[mod0]["output"][0].connect(pipe_config[mod1]["input"]["data_n_0"])
# mod1 的第一个输出将是第一个全局输出。
pipe_config[mod1]["output"][0].connect(pipe_config["output"][0])
pipeline 配置如下:
"""
print(pipe_config)Inputs|data: mod0:dataoutput|output(0) : mod1.output(0)connections|mod0.output(0)-> mod1.data_n_0
"""
构建 pipeline executor。
with tvm.transform.PassContext(opt_level=3):pipeline_mod_factory = pipeline_executor_build.build(pipe_config)
输出结果:
/workspace/python/tvm/driver/build_module.py:267: UserWarning: target_host parameter is going to be deprecated. Please pass in tvm.target.Target(target, host=target_host) instead."target_host parameter is going to be deprecated. "
将参数配置导出到一个文件中。
directory_path = tvm.contrib.utils.tempdir().temp_dir
os.makedirs(directory_path, exist_ok=True)
config_file_name = pipeline_mod_factory.export_library(directory_path)
使用 load 函数创建和初始化 PipelineModule。
pipeline_module = pipeline_executor.PipelineModule.load_library(config_file_name)
运行 pipeline executor。
分配输入数据。
data = np.random.uniform(-1, 1, size=data_shape).astype("float16")
pipeline_module.set_input("data", tvm.nd.array(data))
以 pipeline 模式运行两个子图,异步或同步获取输出。以下示例为同步获取输出。
pipeline_module.run()
outputs = pipeline_module.get_output()
使用 graph_executor 进行验证。
用 graph_executor 依次运行这两个子图,得到输出。
target = "llvm"
dev0 = tvm.device(target, 0)
lib0 = relay.build_module.build(mod0, target, params=params)
module0 = runtime.GraphModule(lib0["default"](dev0))
cuda = tvm.target.Target("cuda", host=tvm.target.Target("llvm"))
lib1 = relay.build_module.build(mod1, [cuda, cutlass], params=params)
lib1 = finalize_modules(lib1, "compile.so", "./tmp")dev1 = tvm.device("cuda", 0)module1 = runtime.GraphModule(lib1["default"](dev1))module0.set_input("data", data)
module0.run()
out_shape = (1, 16, img_size, img_size)
out = module0.get_output(0, tvm.nd.empty(out_shape, "float16"))
module1.set_input("data_n_0", out)
module1.run()
out_shape = (1, 1)
out = module1.get_output(0, tvm.nd.empty(out_shape, "float16"))
输出结果:
/workspace/python/tvm/driver/build_module.py:267: UserWarning: target_host parameter is going to be deprecated. Please pass in tvm.target.Target(target, host=target_host) instead."target_host parameter is going to be deprecated. "
验证结果。
tvm.testing.assert_allclose(outputs[0].numpy(), out.numpy())
下载 Python 源代码:using_pipeline_executor.py
下载 Jupyter Notebook:using_pipeline_executor.ipynb
相关文章:

【TVM 教程】在 Relay 中使用 Pipeline Executor
Apache TVM 是一个端到端的深度学习编译框架,适用于 CPU、GPU 和各种机器学习加速芯片。更多 TVM 中文文档可访问 → Apache TVM 中文站tvm.hyper.ai/ 作者:Hua Jiang 本教程介绍如何将「Pipeline Executor」与 Relay 配合使用。 import tvm from t…...
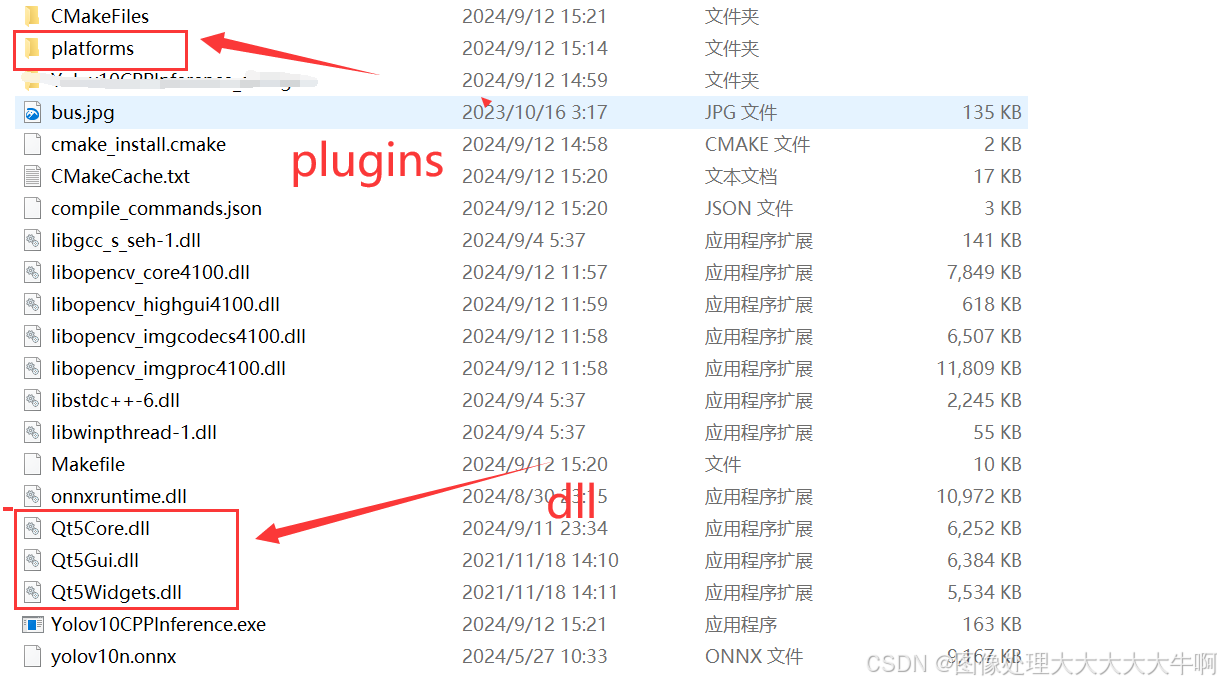
使用mingw64 编译 QT开发流程
1. 安装QT5 QT5.12.12 安装时选择mingw的开发包 2. 使用qtdesigner 进行ui设计 生成ui文件 3. 将ui文件转换为.h 文件 uic mywindow.ui -o ui_mywindow.h代码中指向生成的 UI 对象的地方 要改成这个Form 4. 编译 创建mainwindow.cpp #include "mainwindow.h"…...

品读 Java 经典巨著《Effective Java》90条编程法则,第3条:用私有构造器或者枚举类型强化Singleton属性
《Effective Java》中的第3条编程法则主要是针对在开发过程如何实现单例模式,作者 Joshua Bloch 在书中给出了3种单例模式的实现方式:私有构造器和公有静态域、私有构造器和公有静态方法、枚举式。 什么是单例模式? 单例模式是一种设计模式…...

如何在Flask中处理表单数据
在Flask中处理表单数据是一个常见的任务,它涉及从客户端接收数据并在服务器端进行解析和处理。Flask本身不直接提供表单验证的功能,但它可以与WTForms等库结合使用来简化表单处理过程。不过,即使没有WTForms,你仍然可以直接通过Fl…...
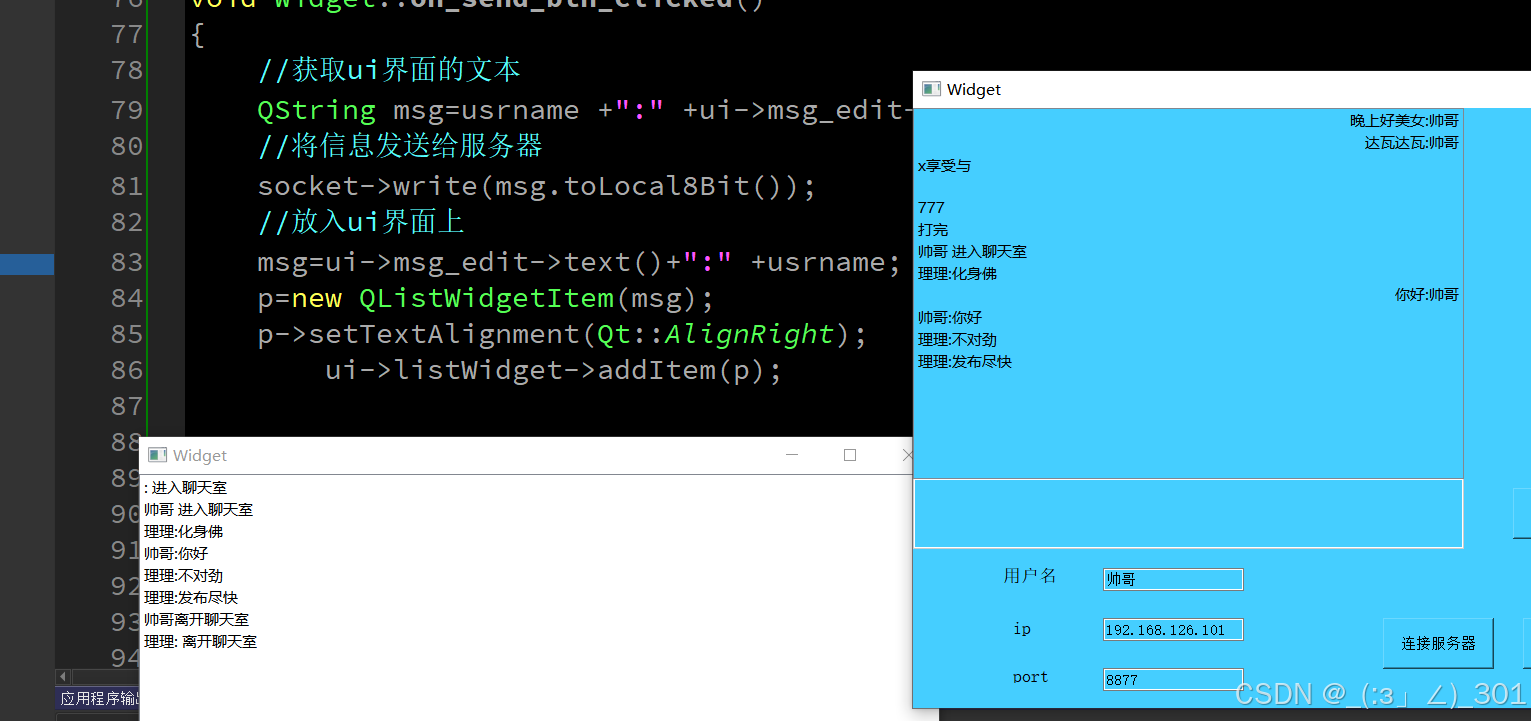
9月12日的学习
练习 #include "widget.h" #include "ui_widget.h" QListWidgetItem *p; Widget::Widget(QWidget *parent): QWidget(parent), ui(new Ui::Widget),socket(new QTcpSocket(this))//给客户端指针实例化空间及关联父组件 {ui->setupUi(this);//初始化,ui-…...

Java架构师未来篇大模型
目录 1. 大模型的定义2 大模型相关概念区分3 大模型的发展历程4. 大模型的特点5 大模型的分类6 大模型的泛化与微调7 大模型岗位需求8 理解大模型8.1 生活中的比喻8.2 大模型的定义9 大模型工作9.1 数据的积累9.2 模型的训练9.3 预测和应用10 大模型的实际应用10.1 语言处理10.…...
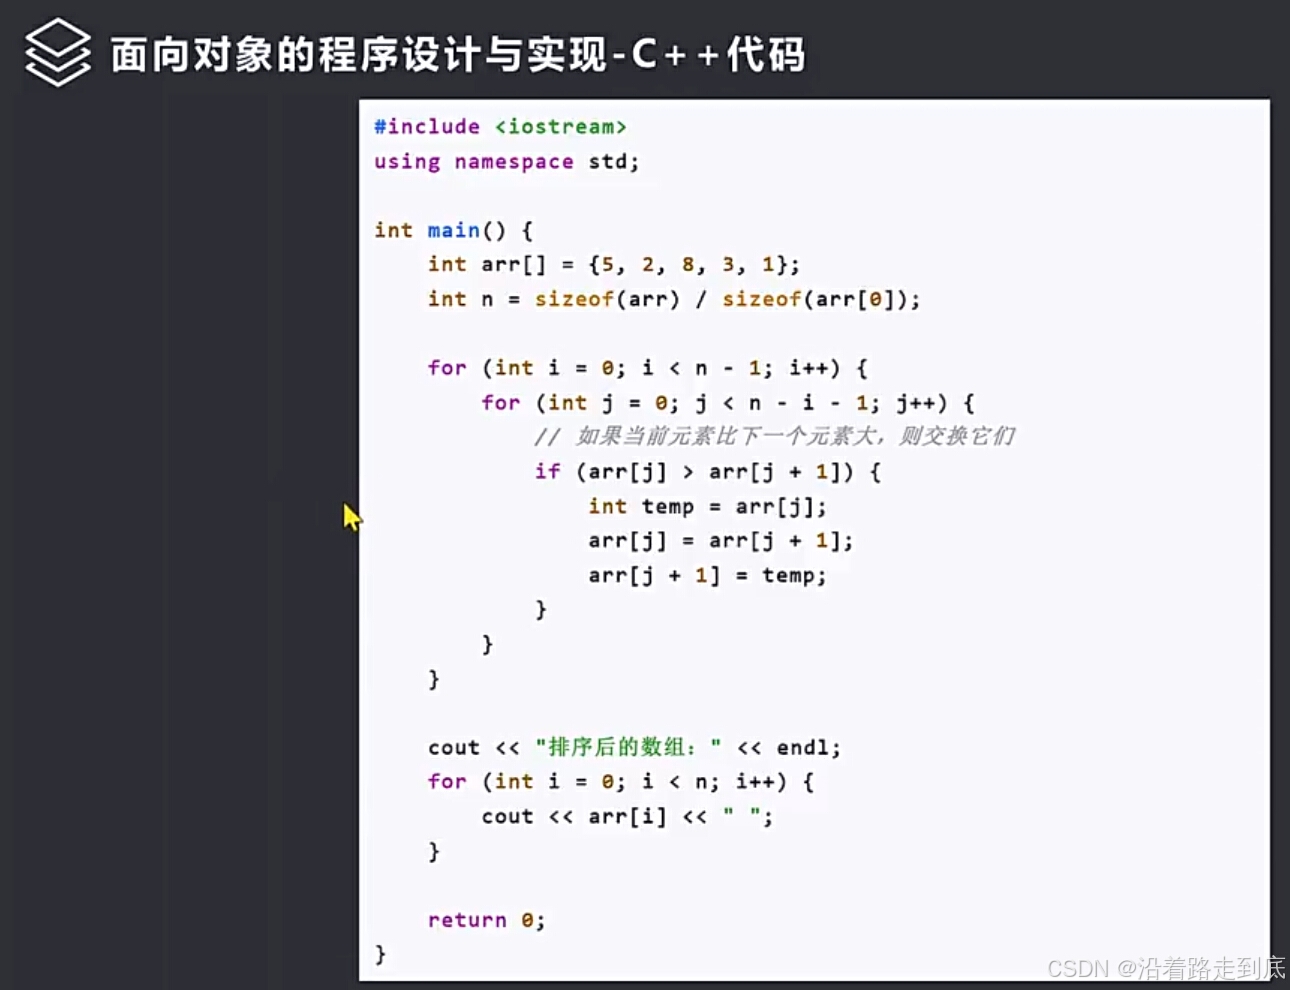
11.5.软件系统分析与设计-面向对象的程序设计与实现
面向对象的程序设计与实现 设计模式 Java代码 C代码...

中电金信:金融级数字底座“源启”:打造新型数字基础设施 筑牢千行百业数字化转型发展基石
近期,金融级数字底座“源启”登录中国电子《最轻大国重器》融媒体报道。从数字底座到数智底座,从金融行业到千行百业,“源启”用数智化转型的中国电子解决方案,为全球企业转型及安全发展提供强大动能。 立足中国电子科技创新成果&…...

IDEA怎么让控制台自动换行
IDEA怎么让控制台自动换行 操作流程 菜单>File>Settings>Editor>General>Console>勾选Use soft wraps in console 换行效果...

大模型笔记02--基于fastgpt和oneapi构建大模型应用平台
大模型笔记02--基于fastgpt和oneapi构建大模型应用平台 介绍部署&测试部署fastgptoneapi服务部署向量模型m3e和nomic-embed-text测试大模型 注意事项说明 介绍 随着大模型的快速发展,众多IT科技厂商都开发训练了各自的大模型,并提供了各具特色的AI产…...

linux-用户与权限管理-组管理
在 Linux 系统中,用户、组与权限管理是保障系统安全的重要机制。用户和组的管理不仅涉及对系统资源的访问控制,还用于权限的分配和共享。组管理在 Linux 中尤其重要,它能够帮助管理员组织用户并为不同的组分配特定权限,从而控制用…...
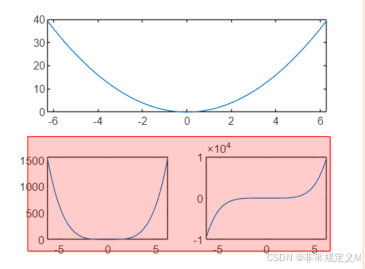
Day23_0.1基础学习MATLAB学习小技巧总结(23)——句柄图形
利用空闲时间把碎片化的MATLAB知识重新系统的学习一遍,为了在这个过程中加深印象,也为了能够有所足迹,我会把自己的学习总结发在专栏中,以便学习交流。 参考书目:《MATLAB基础教程 (第三版) (薛山)》 之前的章节都是…...

同步io和异步io
同步 I/O 和异步 I/O 是处理输入输出操作的两种不同策略,它们各有优缺点,适用于不同的场景。下面是它们的主要区别: 同步 I/O 定义:在同步 I/O 模型中,发起 I/O 操作的线程会被阻塞,直到操作完成。换句话说…...
AI基础 L19 Quantifying Uncertainty and Reasoning with Probabilities I 量化不确定性和概率推理
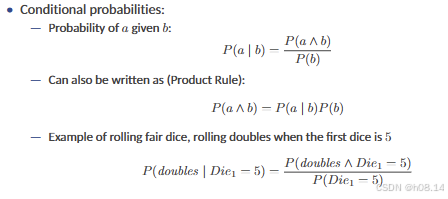
Acting Under Uncertainty 1 Reasoning Under Uncertainty • Real world problems contain uncertainties due to: — partial observability, — nondeterminism, or — adversaries. • Example of dental diagnosis using propositional logic T oothache ⇒ C av ity • H…...

C++ 关于时间的轮子
时间字符串转chrono::system_clock std::chrono::system_clock::time_point parse_date(const std::string& date_str) {std::tm tm {};std::istringstream ss(date_str);ss >> std::get_time(&tm, "%Y-%m-%d"); // 假设日期字符串格式为YYYY-MM-DDr…...

阿里达摩院:FunASR - onnxruntime 部署
阿里达摩院:FunASR - onnxruntime 部署 git clone https://github.com/alibaba/FunASR.git 切换到 onnxruntime cd FunASR/runtime/onnxruntime1下载 onnxruntime wget https://isv-data.oss-cn-hangzhou.aliyuncs.com/ics/MaaS/ASR/dep_libs/onnxruntime-linux-x64-1.14.0.t…...
SpringMvc注解
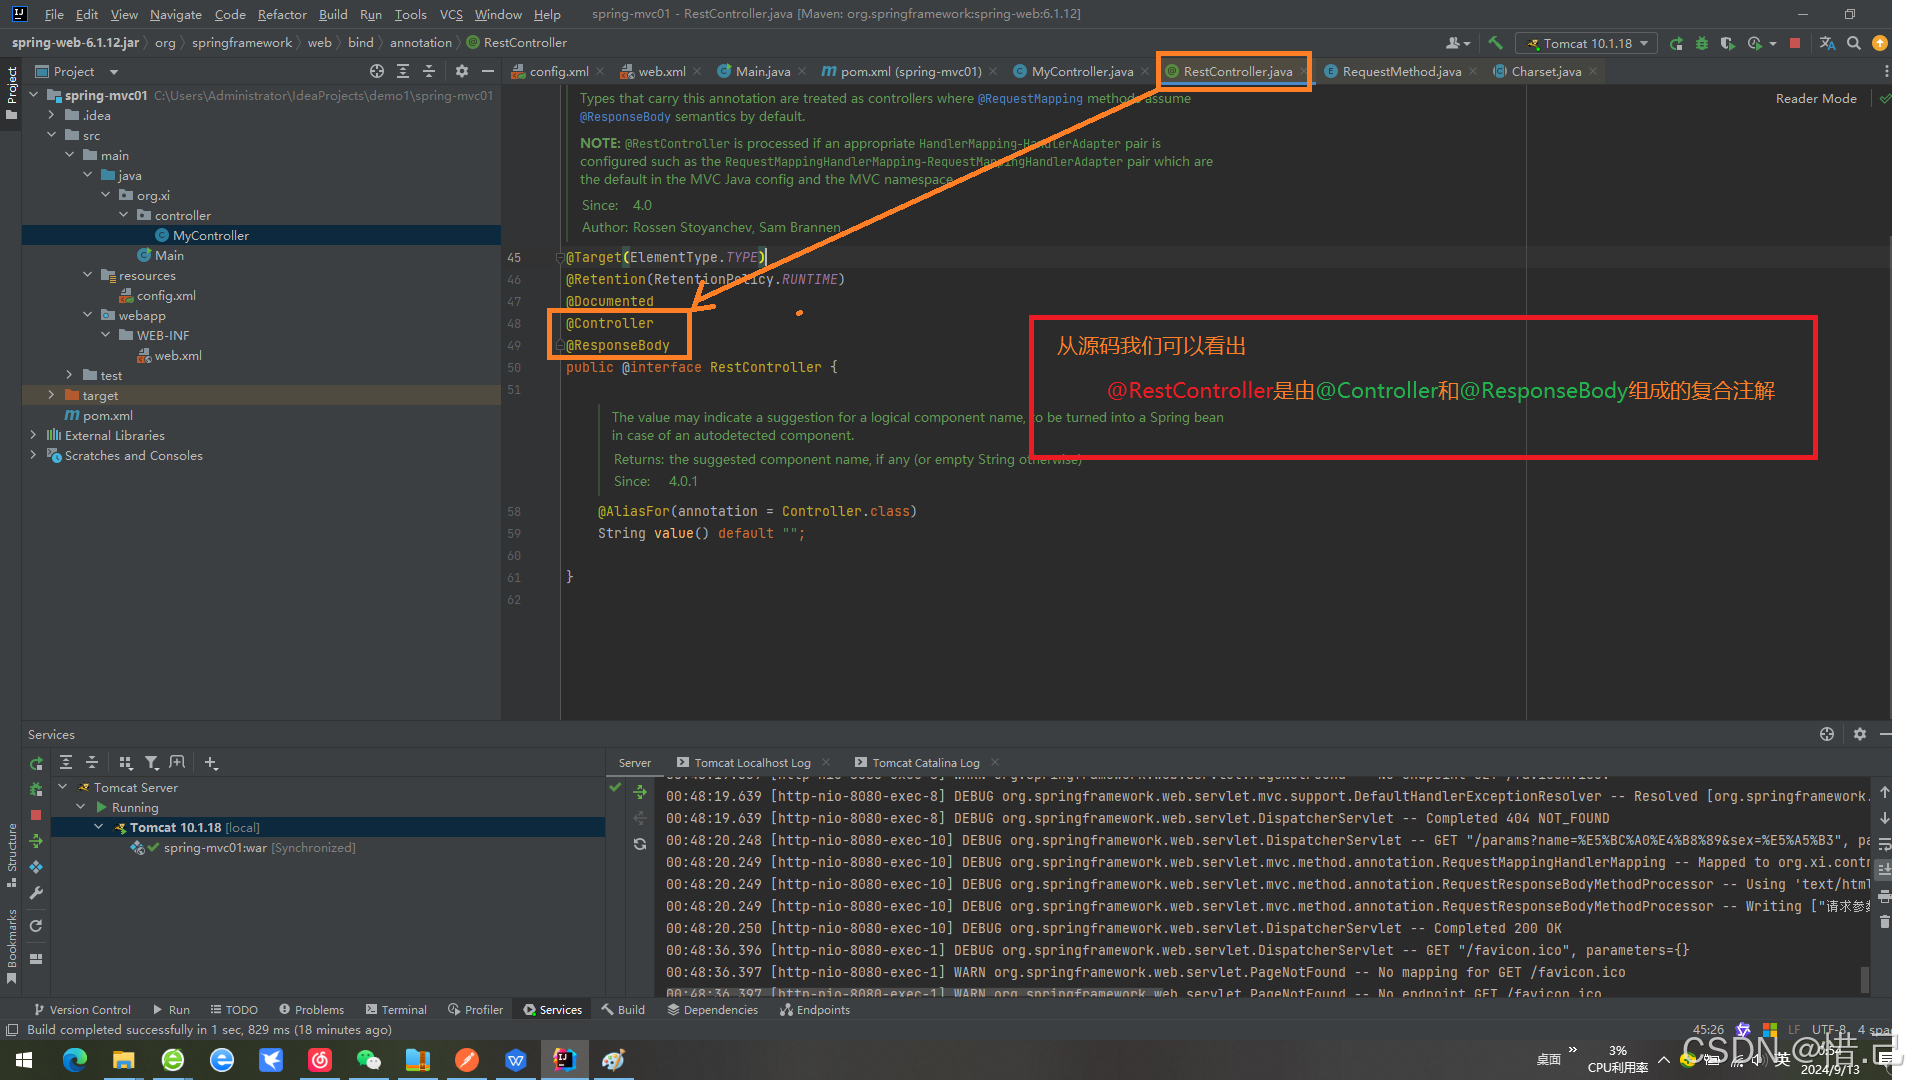
SpringMvc注解 1 SpringMcv基础环境搭建 注:如果已经有SpringMvc项目直接跳过这个就可以了 1 新建项目 2.修改文件为packaging 为war包 <packaging>war</packaging> <?xml version"1.0" encoding"UTF-8"?> <pr…...

队列的基本概念及顺序实现
队列的基本概念 队列的定义 队列(Queue)简称队,也是一宗操作受限的线性表,只允许在表的一段进行插入,而在表的另一端进行删除。向队列中插入元素成为入队或进队;删除元素成为出队或离队。 特性:先进先出 (Fir…...
Leetcode 最长连续序列
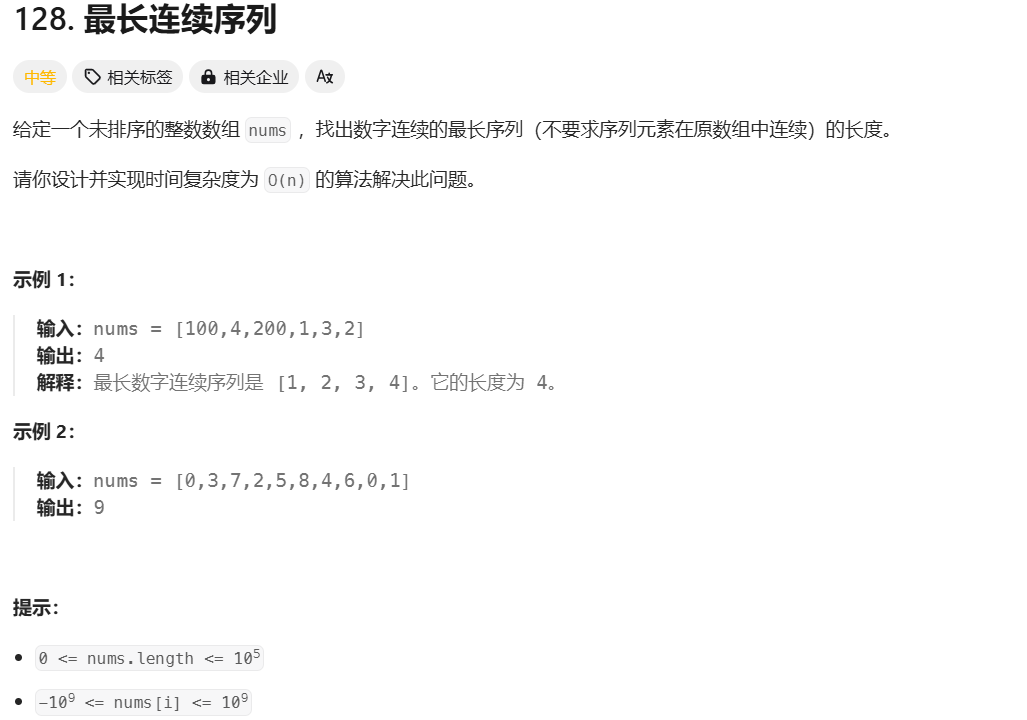
算法流程: 哈希集合去重: 通过将数组中的所有元素放入 unordered_set,自动去除重复元素。集合的查找操作是 O(1),这为后续的快速查找提供了保证。 遍历数组: 遍历数组中的每一个元素。对于每个元素,首先检…...

linux网络编程——UDP编程
写在前边 本文是B站up主韦东山的4_8-3.UDP编程示例_哔哩哔哩_bilibili视频的笔记,其中有些部分博主也没有理解,希望各位辩证的看。 UDP协议简介 UDP 是一个简单的面向数据报的运输层协议,在网络中用于处理数据包,是一种无连接的…...

变量 varablie 声明- Rust 变量 let mut 声明与 C/C++ 变量声明对比分析
一、变量声明设计:let 与 mut 的哲学解析 Rust 采用 let 声明变量并通过 mut 显式标记可变性,这种设计体现了语言的核心哲学。以下是深度解析: 1.1 设计理念剖析 安全优先原则:默认不可变强制开发者明确声明意图 let x 5; …...

零门槛NAS搭建:WinNAS如何让普通电脑秒变私有云?
一、核心优势:专为Windows用户设计的极简NAS WinNAS由深圳耘想存储科技开发,是一款收费低廉但功能全面的Windows NAS工具,主打“无学习成本部署” 。与其他NAS软件相比,其优势在于: 无需硬件改造:将任意W…...

以下是对华为 HarmonyOS NETX 5属性动画(ArkTS)文档的结构化整理,通过层级标题、表格和代码块提升可读性:
一、属性动画概述NETX 作用:实现组件通用属性的渐变过渡效果,提升用户体验。支持属性:width、height、backgroundColor、opacity、scale、rotate、translate等。注意事项: 布局类属性(如宽高)变化时&#…...
Redis相关知识总结(缓存雪崩,缓存穿透,缓存击穿,Redis实现分布式锁,如何保持数据库和缓存一致)
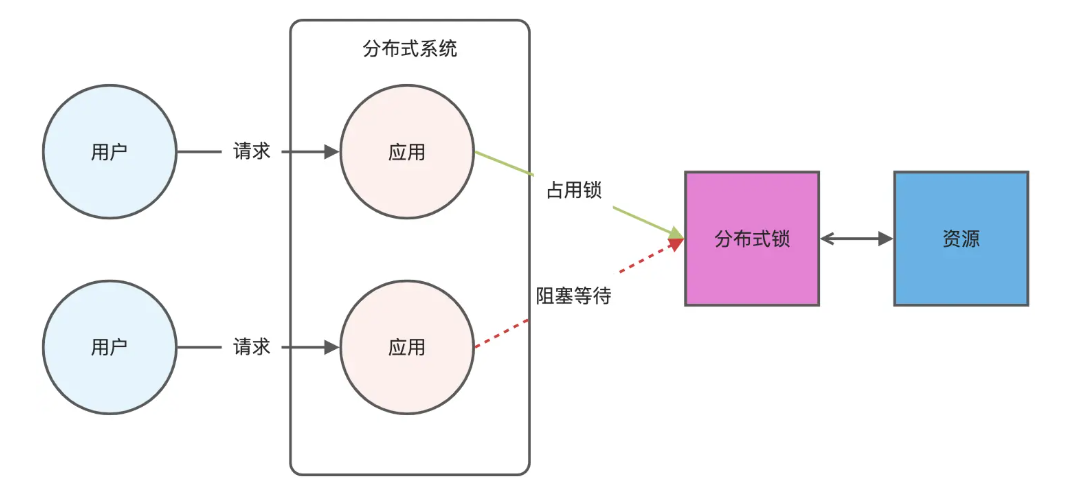
文章目录 1.什么是Redis?2.为什么要使用redis作为mysql的缓存?3.什么是缓存雪崩、缓存穿透、缓存击穿?3.1缓存雪崩3.1.1 大量缓存同时过期3.1.2 Redis宕机 3.2 缓存击穿3.3 缓存穿透3.4 总结 4. 数据库和缓存如何保持一致性5. Redis实现分布式…...

Leetcode 3577. Count the Number of Computer Unlocking Permutations
Leetcode 3577. Count the Number of Computer Unlocking Permutations 1. 解题思路2. 代码实现 题目链接:3577. Count the Number of Computer Unlocking Permutations 1. 解题思路 这一题其实就是一个脑筋急转弯,要想要能够将所有的电脑解锁&#x…...

连锁超市冷库节能解决方案:如何实现超市降本增效
在连锁超市冷库运营中,高能耗、设备损耗快、人工管理低效等问题长期困扰企业。御控冷库节能解决方案通过智能控制化霜、按需化霜、实时监控、故障诊断、自动预警、远程控制开关六大核心技术,实现年省电费15%-60%,且不改动原有装备、安装快捷、…...
苍穹外卖--缓存菜品
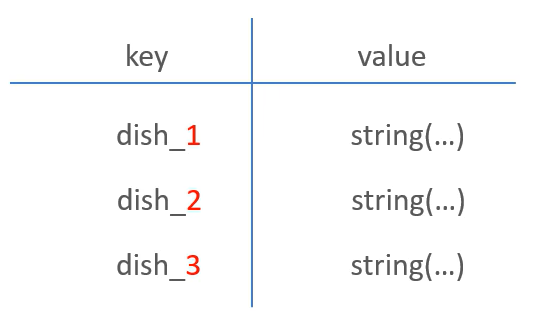
1.问题说明 用户端小程序展示的菜品数据都是通过查询数据库获得,如果用户端访问量比较大,数据库访问压力随之增大 2.实现思路 通过Redis来缓存菜品数据,减少数据库查询操作。 缓存逻辑分析: ①每个分类下的菜品保持一份缓存数据…...

【C语言练习】080. 使用C语言实现简单的数据库操作
080. 使用C语言实现简单的数据库操作 080. 使用C语言实现简单的数据库操作使用原生APIODBC接口第三方库ORM框架文件模拟1. 安装SQLite2. 示例代码:使用SQLite创建数据库、表和插入数据3. 编译和运行4. 示例运行输出:5. 注意事项6. 总结080. 使用C语言实现简单的数据库操作 在…...

NFT模式:数字资产确权与链游经济系统构建
NFT模式:数字资产确权与链游经济系统构建 ——从技术架构到可持续生态的范式革命 一、确权技术革新:构建可信数字资产基石 1. 区块链底层架构的进化 跨链互操作协议:基于LayerZero协议实现以太坊、Solana等公链资产互通,通过零知…...

爬虫基础学习day2
# 爬虫设计领域 工商:企查查、天眼查短视频:抖音、快手、西瓜 ---> 飞瓜电商:京东、淘宝、聚美优品、亚马逊 ---> 分析店铺经营决策标题、排名航空:抓取所有航空公司价格 ---> 去哪儿自媒体:采集自媒体数据进…...
