Python爬虫使用实例-wallpaper
1/ 排雷避坑
🥝 中文乱码问题
print(requests.get(url=url,headers=headers).text)

出现中文乱码
原因分析:
<meta charset="gbk" />
解决方法:
法一:
response = requests.get(url=url,headers=headers)
response.encoding = response.apparent_encoding # 自动转码, 防止中文乱码
print(response.text)
法二:
print(requests.get(url=url,headers=headers).content.decode('gbk'))
2/ 数据来源
css解析

for li in lis:href = li.css('a::attr(href)').get()title = li.css('b::text').get()print(href, title)


删掉标题为空的那一张图

获取图片url
有的网站,保存的数据是裂开的图片,可能是因为这个参数:

3/ 正则处理
处理图片url和标题的时候用了re模块
电脑壁纸
通过匹配非数字字符并在遇到数字时截断字符串
title1 = selector1.css('.photo .photo-pic img::attr(title)').get()
modified_title = re.split(r'\d', title1, 1)[0].strip()
re.split(r'\d', title, 1)将 title 字符串按第一个数字进行分割。返回的列表的第一个元素就是数字前面的部分。strip() 去掉字符串首尾的空白字符。
url图片路径替换,因为从点开图片到达的那个页面无法得到的图片路径还是html页面,不是https://····.jpg,所以替换成另一个可以获取到的页面。
https://sj.zol.com.cn/bizhi/detail_{num1}_{num2}.html
正则替换修改为
https://app.zol.com.cn/bizhi/detail_{num1}.html
例如 https://sj.zol.com.cn/bizhi/detail_12901_139948.html 转换为 https://app.zol.com.cn/bizhi/detail_12901.html .
# https://sj.zol.com.cn/bizhi/detail_12901_139948.html
url = "https://sj.zol.com.cn/bizhi/detail_12901_139948.html"
pattern = r'https://sj\.zol\.com\.cn/bizhi/detail_(\d+)_\d+\.html'
replacement = r'https://app.zol.com.cn/bizhi/detail_\1.html'
new_url = re.sub(pattern, replacement, url)
print(url,new_url)
4/ 电脑壁纸
🥝 单线程单页
适用于当页面和第一页
# python单线程爬取高清4k壁纸图片
import os
import re
import requests
import parsel
url = 'https://pic.netbian.com/4kmeinv/' # 请求地址
# 模拟伪装
headers = {'user-agent': 'Mozilla/5.0 (Windows NT 10.0; Win64; x64) AppleWebKit/537.36 (KHTML, like Gecko) Chrome/98.0.4758.139 Safari/537.36'}
# response = requests.get(url=url,headers=headers)
# response.encoding = response.apparent_encoding # 自动转码, 防止中文乱码
# print(response.text)
html_data = requests.get(url=url,headers=headers).content.decode('gbk')
# print(html_data)
selector = parsel.Selector(html_data)
lis = selector.css('.slist li')
for li in lis:#href = li.css('a::attr(href)').get()title = li.css('b::text').get()if title:href = 'https://pic.netbian.com' + li.css('a::attr(href)').get()response = requests.get(url=href, headers=headers)#print(href, title)# 这里只是获取页面# img_content = requests.get(url=href, headers=headers).content# 不可行, 都是同一张图 https://pic.netbian.com/uploads/allimg/230813/221347-16919360273e05.jpghref = 'https://pic.netbian.com' + li.css('a::attr(href)').get()response1 = requests.get(url=href, headers=headers).content.decode('gbk')selector1 = parsel.Selector(response1)# 若要标题乱码,此处可不解码# response1 = requests.get(url=href, headers=headers)# selector1 = parsel.Selector(response1.text)# img_url = selector1.css('.slist li img::attr(src)').get()# 这一步错了, 要去href页面找img_url, 这是在原来的url页面找了img_url = 'https://pic.netbian.com' + selector1.css('.photo .photo-pic img::attr(src)').get()img_content = requests.get(url=img_url,headers=headers).content# 顺便更新一下title, 因为原来的是半截的, 不全title1 = selector1.css('.photo .photo-pic img::attr(title)').get()modified_title = re.split(r'\d', title1, 1)[0].strip()with open('img\\'+modified_title+'.jpg',mode='wb') as f:f.write(img_content)#print(href, title)print('正在保存:', modified_title, img_url)
🥝 单线程多page
适用于从第二页开始的多页
# python单线程爬取高清4k壁纸图片
import os
import re
import time
import requests
import parsel
# url的规律
# https://pic.netbian.com/new/index.html
# https://pic.netbian.com/new/index_1.html
# https://pic.netbian.com/new/index_2.html
# ...
start_time = time.time()
for page in range(2,10):print(f'--------- 正在爬取第{page}的内容 ----------')url = f'https://pic.netbian.com/4kmeinv/index_{page}.html'  # 请求地址# 模拟伪装headers = {'user-agent': 'Mozilla/5.0 (Windows NT 10.0; Win64; x64) AppleWebKit/537.36 (KHTML, like Gecko) Chrome/98.0.4758.139 Safari/537.36'}# response = requests.get(url=url,headers=headers)# response.encoding = response.apparent_encoding # 自动转码, 防止中文乱码# print(response.text)html_data = requests.get(url=url, headers=headers).content.decode('gbk')# print(html_data)selector = parsel.Selector(html_data)lis = selector.css('.slist li')for li in lis:# href = li.css('a::attr(href)').get()title = li.css('b::text').get()if title:href = 'https://pic.netbian.com' + li.css('a::attr(href)').get()response = requests.get(url=href, headers=headers)# print(href, title)# 这里只是获取页面# img_content = requests.get(url=href, headers=headers).content# 不可行, 都是同一张图 https://pic.netbian.com/uploads/allimg/230813/221347-16919360273e05.jpghref = 'https://pic.netbian.com' + li.css('a::attr(href)').get()response1 = requests.get(url=href, headers=headers).content.decode('gbk')selector1 = parsel.Selector(response1)# 若要标题乱码,此处可不解码# response1 = requests.get(url=href, headers=headers)# selector1 = parsel.Selector(response1.text)# img_url = selector1.css('.slist li img::attr(src)').get()# 这一步错了, 要去href页面找img_url, 这是在原来的url页面找了img_url = 'https://pic.netbian.com' + selector1.css('.photo .photo-pic img::attr(src)').get()img_content = requests.get(url=img_url, headers=headers).content# 顺便更新一下title, 因为原来的是半截的, 不全title1 = selector1.css('.photo .photo-pic img::attr(title)').get()modified_title = re.split(r'\d', title1, 1)[0].strip()with open('img\\' + modified_title + '.jpg', mode='wb') as f:f.write(img_content)# print(href, title)print('正在保存:', modified_title, img_url)stop_time = time.time()
print(f'耗时:{int(stop_time)-int(start_time)}秒')
运行效果:


🥝 多线程多页
# python多线程爬取高清4k壁纸图片
import os
import re
import time
import requests
import parsel
import concurrent.futuresdef get_img(url):# 模拟伪装headers = {'user-agent': 'Mozilla/5.0 (Windows NT 10.0; Win64; x64) AppleWebKit/537.36 (KHTML, like Gecko) Chrome/98.0.4758.139 Safari/537.36'}# response = requests.get(url=url,headers=headers)# response.encoding = response.apparent_encoding # 自动转码, 防止中文乱码# print(response.text)html_data = requests.get(url=url, headers=headers).content.decode('gbk')# print(html_data)selector = parsel.Selector(html_data)lis = selector.css('.slist li')for li in lis:# href = li.css('a::attr(href)').get()title = li.css('b::text').get()if title:href = 'https://pic.netbian.com' + li.css('a::attr(href)').get()response = requests.get(url=href, headers=headers)# print(href, title)# 这里只是获取页面# img_content = requests.get(url=href, headers=headers).content# 不可行, 都是同一张图 https://pic.netbian.com/uploads/allimg/230813/221347-16919360273e05.jpghref = 'https://pic.netbian.com' + li.css('a::attr(href)').get()response1 = requests.get(url=href, headers=headers).content.decode('gbk')selector1 = parsel.Selector(response1)# 若要标题乱码,此处可不解码# response1 = requests.get(url=href, headers=headers)# selector1 = parsel.Selector(response1.text)# img_url = selector1.css('.slist li img::attr(src)').get()# 这一步错了, 要去href页面找img_url, 这是在原来的url页面找了img_url = 'https://pic.netbian.com' + selector1.css('.photo .photo-pic img::attr(src)').get()img_content = requests.get(url=img_url, headers=headers).content# 顺便更新一下title, 因为原来的是半截的, 不全title1 = selector1.css('.photo .photo-pic img::attr(title)').get()modified_title = re.split(r'\d', title1, 1)[0].strip()img_folder = 'img1\\'if not os.path.exists(img_folder):os.makedirs(img_folder)with open(img_folder + modified_title + '.jpg', mode='wb') as f:f.write(img_content)# print(href, title)print('正在保存:', modified_title, img_url)
def main(url):get_img(url)start_time = time.time()
executor = concurrent.futures.ThreadPoolExecutor(max_workers=5)
for page in range(2, 12):print(f'--------- 正在爬取第{page}的内容 ----------')url = f'https://pic.netbian.com/4kmeinv/index_{page}.html'  # 请求地址executor.submit(main, url)
executor.shutdown()
stop_time = time.time()
print(f'耗时:{int(stop_time) - int(start_time)}秒')
5/ 手机壁纸
类似地,另一个网站,图片集合多页,点开之后里面有多张图片
先试图获取外部的,再获取里面的,然后2个一起
🥝 单线程单页0
import os
import re
import requests
import parsel
url = 'https://sj.zol.com.cn/bizhi/5/' # 请求地址
# 模拟伪装
headers = {'user-agent': 'Mozilla/5.0 (Windows NT 10.0; Win64; x64) AppleWebKit/537.36 (KHTML, like Gecko) Chrome/98.0.4758.139 Safari/537.36'}
# response = requests.get(url=url,headers=headers)
# response.encoding = response.apparent_encoding # 自动转码, 防止中文乱码
# print(response.text)
response = requests.get(url=url,headers=headers)
#print(response.text)
selector = parsel.Selector(response.text)
lis = selector.css('.pic-list2 li')
#img_name=1
for li in lis:#href = li.css('a::attr(href)').get()title = li.css('.pic img::attr(title)').get()#href = li.css('.pic img::attr(src)').get()#print(title, href)if title:#href = 'https://sj.zol.com.cn' +li.css('a::attr(href)').get()# https://sj.zol.com.cn/bizhi/detail_12901_139948.html# https://app.zol.com.cn/bizhi/detail_12901_139948.html#p1#href = 'https://app.zol.com.cn' + li.css('a::attr(href)').get() + '#p1'href=li.css('img::attr(src)').get()#print(href, title)#href = 'https://app.zol.com.cn' + li.css('a::attr(href)').get() + '#p1'#response1 = requests.get(url=href, headers=headers).content.decode('utf-8')#selector1 = parsel.Selector(response1)#img_url=selector1.css('.gallery li img::attr(src)').get()#print(img_url)# 这里只是获取页面img_content = requests.get(url=href, headers=headers).content# 不可行, 都是同一张图 https://pic.netbian.com/uploads/allimg/230813/221347-16919360273e05.jpg# https://sj.zol.com.cn/bizhi/detail_12901_139948.html# https://app.zol.com.cn/bizhi/detail_12901_139948.html#p1#href= selector1.css('.photo-list-box li::attr(href)').get()#href = 'https://app.zol.com.cn' +  + '#p1'#response2 = requests.get(url=href, headers=headers)#selector2 = parsel.Selector(response2.text)#print(href)# 若要标题乱码,此处可不解码# response1 = requests.get(url=href, headers=headers)# selector1 = parsel.Selector(response1.text)# img_url = selector1.css('.slist li img::attr(src)').get()# 这一步错了, 要去href页面找img_url, 这是在原来的url页面找了#img_url = selector1.css('.gallery img::attr(src)').get()#img_content = requests.get(url=img_url, headers=headers).content#print(img_url)# 顺便更新一下title, 因为原来的是半截的, 不全# title1 = selector1.css('.photo .photo-pic img::attr(title)').get()img_folder = 'img3\\'if not os.path.exists(img_folder):os.makedirs(img_folder)with open(img_folder + title + '.jpg', mode='wb') as f:f.write(img_content)# print(href, title)print('正在保存:', title, href)#img_name += 1
🥝 单线程单页1
# 下载子页面全部
import os
import requests
import parselurl = 'https://app.zol.com.cn/bizhi/detail_12901.html' # 请求地址
# 模拟伪装
headers = {'user-agent': 'Mozilla/5.0 (Windows NT 10.0; Win64; x64) AppleWebKit/537.36 (KHTML, like Gecko) Chrome/98.0.4758.139 Safari/537.36'}
response = requests.get(url=url,headers=headers)
selector = parsel.Selector(response.text)
lis = selector.css('.album-list li')
i = 0
for li in lis:# Get all img elements within the current liimg_tags = li.css('img::attr(src)').getall()  # This gets all the img src attributesfor href in img_tags:  # Iterate over all img src attributesimg_content = requests.get(url=href, headers=headers).contentimg_folder = 'img4\\'if not os.path.exists(img_folder):os.makedirs(img_folder)with open(img_folder + str(i) + '.jpg', mode='wb') as f:f.write(img_content)# print(href, i)print('正在保存:', i, href)i += 1  # Increment i for each image saved
🥝 单线程单页
import os
import re
import requests
import parselurl = 'https://sj.zol.com.cn/bizhi/5/' # 请求地址
# 模拟伪装
headers = {'user-agent': 'Mozilla/5.0 (Windows NT 10.0; Win64; x64) AppleWebKit/537.36 (KHTML, like Gecko) Chrome/98.0.4758.139 Safari/537.36'}
response = requests.get(url=url,headers=headers)
#print(response.text)
selector = parsel.Selector(response.text)
#lis = selector.css('.pic-list2 li')
# 筛除包含的底部 3个 猜你喜欢
lis=selector.css('.pic-list2 .photo-list-padding')
for li in lis:#href = li.css('a::attr(href)').get()title = li.css('.pic img::attr(title)').get()href = li.css('a::attr(href)').get()#print(title, href)# https://sj.zol.com.cn/bizhi/detail_12901_139948.html#url = "https://sj.zol.com.cn/bizhi/detail_12901_139948.html"pattern = r'/bizhi/detail_(\d+)_\d+\.html'replacement = r'https://app.zol.com.cn/bizhi/detail_\1.html'new_url = re.sub(pattern, replacement, href)#print(href, new_url)#url = 'https://app.zol.com.cn/bizhi/detail_12901.html'  # 请求地址# 模拟伪装headers = {'user-agent': 'Mozilla/5.0 (Windows NT 10.0; Win64; x64) AppleWebKit/537.36 (KHTML, like Gecko) Chrome/98.0.4758.139 Safari/537.36'}response = requests.get(url=new_url, headers=headers)selector = parsel.Selector(response.text)lis1 = selector.css('.album-list li')i = 0for li1 in lis1:# Get all img elements within the current liimg_tags = li1.css('img::attr(src)').getall()  # This gets all the img src attributesfor href in img_tags:  # Iterate over all img src attributesimg_content = requests.get(url=href, headers=headers).contentimg_folder = 'img5\\'if not os.path.exists(img_folder):os.makedirs(img_folder)with open(img_folder + title+'_'+str(i) + '.jpg', mode='wb') as f:f.write(img_content)# print(href, i)print('正在保存:',title+'_'+str(i), href)i += 1  # Increment i for each image saved
🥝 单线程多页
import os
import re
import requests
import parselfor page in range(1,3):print(f'--------- 正在爬取第{page}的内容 ----------')if page==1:url = 'https://sj.zol.com.cn/bizhi/5/'  # 请求地址else:url = f'https://sj.zol.com.cn/bizhi/5/{page}.html'  # 请求地址# 模拟伪装headers = {'user-agent': 'Mozilla/5.0 (Windows NT 10.0; Win64; x64) AppleWebKit/537.36 (KHTML, like Gecko) Chrome/98.0.4758.139 Safari/537.36'}response = requests.get(url=url, headers=headers)# print(response.text)selector = parsel.Selector(response.text)# lis = selector.css('.pic-list2 li')# 筛除包含的底部 3个 猜你喜欢lis = selector.css('.pic-list2 .photo-list-padding')for li in lis:# href = li.css('a::attr(href)').get()title = li.css('.pic img::attr(title)').get()href = li.css('a::attr(href)').get()# print(title, href)# https://sj.zol.com.cn/bizhi/detail_12901_139948.html# url = "https://sj.zol.com.cn/bizhi/detail_12901_139948.html"pattern = r'/bizhi/detail_(\d+)_\d+\.html'replacement = r'https://app.zol.com.cn/bizhi/detail_\1.html'new_url = re.sub(pattern, replacement, href)# print(href, new_url)# url = 'https://app.zol.com.cn/bizhi/detail_12901.html'  # 请求地址# 模拟伪装headers = {'user-agent': 'Mozilla/5.0 (Windows NT 10.0; Win64; x64) AppleWebKit/537.36 (KHTML, like Gecko) Chrome/98.0.4758.139 Safari/537.36'}response = requests.get(url=new_url, headers=headers)selector = parsel.Selector(response.text)lis1 = selector.css('.album-list li')i = 0for li1 in lis1:# Get all img elements within the current liimg_tags = li1.css('img::attr(src)').getall()  # This gets all the img src attributesfor href in img_tags:  # Iterate over all img src attributesimg_content = requests.get(url=href, headers=headers).contentimg_folder = 'img6\\'if not os.path.exists(img_folder):os.makedirs(img_folder)with open(img_folder + title + '_' + str(i) + '.jpg', mode='wb') as f:f.write(img_content)# print(href, i)print('正在保存:', title + '_' + str(i), href)i += 1  # Increment i for each image saved
🥝 多线程多页
import os
import re
import time
import requests
import parsel
import concurrent.futuresdef get_imgs(url):# 模拟伪装headers = {'user-agent': 'Mozilla/5.0 (Windows NT 10.0; Win64; x64) AppleWebKit/537.36 (KHTML, like Gecko) Chrome/98.0.4758.139 Safari/537.36'}response = requests.get(url=url, headers=headers)# print(response.text)selector = parsel.Selector(response.text)# lis = selector.css('.pic-list2 li')# 筛除包含的底部 3个 猜你喜欢lis = selector.css('.pic-list2 .photo-list-padding')for li in lis:# href = li.css('a::attr(href)').get()title = li.css('.pic img::attr(title)').get()href = li.css('a::attr(href)').get()# print(title, href)# https://sj.zol.com.cn/bizhi/detail_12901_139948.html# url = "https://sj.zol.com.cn/bizhi/detail_12901_139948.html"pattern = r'/bizhi/detail_(\d+)_\d+\.html'replacement = r'https://app.zol.com.cn/bizhi/detail_\1.html'new_url = re.sub(pattern, replacement, href)# print(href, new_url)# url = 'https://app.zol.com.cn/bizhi/detail_12901.html'  # 请求地址# 模拟伪装headers = {'user-agent': 'Mozilla/5.0 (Windows NT 10.0; Win64; x64) AppleWebKit/537.36 (KHTML, like Gecko) Chrome/98.0.4758.139 Safari/537.36'}response = requests.get(url=new_url, headers=headers)selector = parsel.Selector(response.text)lis1 = selector.css('.album-list li')i = 0for li1 in lis1:# Get all img elements within the current liimg_tags = li1.css('img::attr(src)').getall()  # This gets all the img src attributesfor href in img_tags:  # Iterate over all img src attributesimg_content = requests.get(url=href, headers=headers).contentimg_folder = 'img7\\'if not os.path.exists(img_folder):os.makedirs(img_folder)with open(img_folder + title + '_' + str(i) + '.jpg', mode='wb') as f:f.write(img_content)# print(href, i)print('正在保存:', title + '_' + str(i), href)i += 1  # Increment i for each image saveddef main(url):get_imgs(url)start_time = time.time()
executor = concurrent.futures.ThreadPoolExecutor(max_workers=4)
for page in range(1, 9):#print(f'--------- 正在爬取第{page}的内容 ----------')if page == 1:url = 'https://sj.zol.com.cn/bizhi/5/'  # 请求地址else:url = f'https://sj.zol.com.cn/bizhi/5/{page}.html'  # 请求地址executor.submit(main, url)
executor.shutdown()
stop_time = time.time()
print(f'耗时:{int(stop_time) - int(start_time)}秒')
相关文章:
Python爬虫使用实例-wallpaper
1/ 排雷避坑 🥝 中文乱码问题 print(requests.get(urlurl,headersheaders).text)出现中文乱码 原因分析: <meta charset"gbk" />解决方法: 法一: response requests.get(urlurl,headersheaders) response.en…...

探索Go语言中的随机数生成、矩阵运算与数独验证
1. Go中的随机数生成 在许多编程任务中,随机数的生成是不可或缺的。Go语言通过 math/rand 包提供了伪随机数生成方式。伪随机数由种子(seed)决定,如果种子相同,生成的数列也会相同。为了确保每次程序运行时产生不同的随机数,我们…...
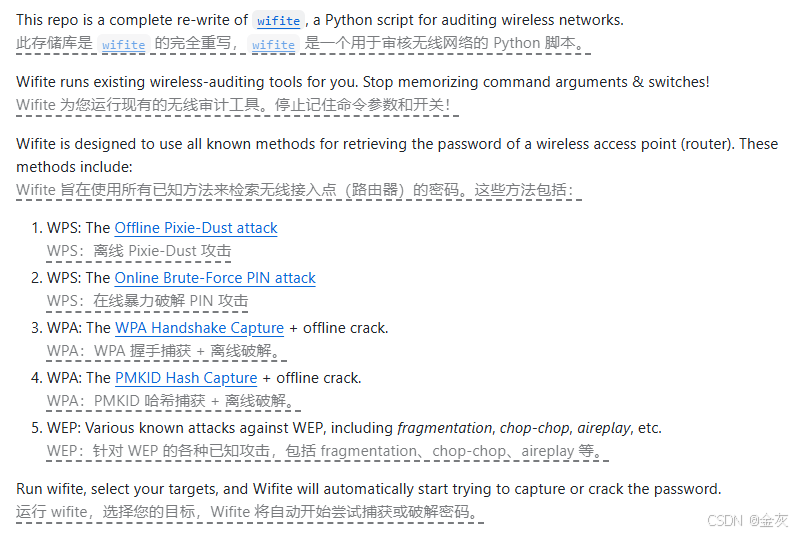
无线安全(WiFi)
免责声明:本文仅做分享!!! 目录 WEP简介 WPA简介 安全类型 密钥交换 PMK PTK 4次握手 WPA攻击原理 网卡选购 攻击姿态 1-暴力破解 脚本工具 字典 2-Airgeddon 破解 3-KRACK漏洞 4-Rough AP 攻击 5-wifi钓鱼 6-wifite 其他 WEP简介 WEP是WiredEquivalentPri…...
)
牛客练习赛128:Cidoai的平均数对(背包dp)
题目描述 给定 nnn 对数 (ai,bi)(a_i,b_i)(ai,bi) 和参数 kkk,你需要选出一些对使得在满足 bib_ibi 的平均值不超过 kkk 的同时,aia_iai 的和最大,求出这个最大值。 输入描述: 第一行两个整数分别表示 n,kn,kn,k。 接下来 nnn 行&…...

Python世界:简易地址簿增删查改算法实践
Python世界:简易地址簿增删查改算法实践 任务背景编码思路代码实现本文小结 任务背景 该任务来自简明Python教程中迈出下一步一章的问题: 编写一款你自己的命令行地址簿程序, 你可以用它浏览、 添加、 编辑、 删除或搜索你的联系人ÿ…...

网络安全-intigriti-0422-XSS-Challenge Write-up
目录 一、环境 二、解题 2.1看源码 一、环境 Intigriti April Challenge 二、解题 要求:弹出域名就算成功 2.1看源码 我们看到marge方法,肯定是原型链污染题目 接的是传参,我们可控的点在于qs.config和qs.settings,这两个可…...

Debian Linux 11 使用crash
文章目录 前言一、环境安装1.1 安装debug package1.2 安装crash 二、使用crash 前言 # cat /etc/os-release PRETTY_NAME"Debian GNU/Linux 11 (bullseye)" NAME"Debian GNU/Linux" VERSION_ID"11" VERSION"11 (bullseye)" VERSION_C…...

python列表 — 按顺序找出b表中比a表多出的元素
目录 一、功能描述 二、适用场景 三、代码实现 一、功能描述 有a、b两个列表,a列表有3个元素;b列表有7个元素。b列表多出的一个元素可能在随机的位置,在不影响其他元素的情况下,找到b列表多出的那四个元素,并按照在…...

如何使用Python创建目录或文件路径列表
在 Python 中,创建目录或生成文件路径列表通常涉及使用 os、os.path 或 pathlib 模块。下面是一些常见的任务和方法,用于在 Python 中创建目录或获取文件路径列表。 问题背景 在初始阶段的 Python 学习过程中,可能遇到这样的问题:…...

领夹麦克风哪个品牌好,哪种领夹麦性价比高,无线麦克风推荐
在音频录制需求日益多样化的今天,无线领夹麦克风作为提升音质的关键设备,其重要性不言而喻。市场上鱼龙混杂,假冒伪劣、以次充好的现象屡见不鲜。这些产品往往以低价吸引消费者,却在音质、稳定性、耐用性等方面大打折扣࿰…...
)
苍穹外卖学习笔记(五)
文章目录 二.新增菜品1.图片上传2.具体新增菜品 二.新增菜品 1.图片上传 这里采用了阿里云oss对象存储服务 application.yml alioss:endpoint: ${sky.alioss.endpoint}access-key-id: ${sky.alioss.access-key-id}access-key-secret: ${sky.alioss.access-key-secret}bucket…...

什么是卷积层、池化层、BN层,有什么作用?
什么是卷积层、池化层、BN层,有什么作用? 卷积层池化层BN层 卷积层 定义: 卷积层是CNN中的核心组件,它通过卷积运算对输入数据进行特征提取。卷积层由多个卷积单元组成,每个卷积单元的参数通过反向传播算法优化得到。…...

[学习笔记]《CSAPP》深入理解计算机系统 - Chapter 4 处理器体系结构Chapter 5 优化程序性能
总结一些第四章和第五章的一些关键信息 Chapter 4 处理器体系结构将处理组织成阶段 Chapter 5 优化程序性能 Chapter 4 处理器体系结构 在硬件中,寄存器直接将它的输入和输出线连接到电路的其他盆。 在机器级变成中,寄存器代表的是 CPU 中为数不多的可寻…...

案例分享|我是这样转型做数据产品经理的?
本文为才聚学员投稿的原创作品,现在才聚正面向专业项目管理者征集“项目管理实战案例”原创文章,被采纳即可获得丰厚稿酬,欢迎大家关注公众号踊跃投稿。 如您有意向投稿,可将稿件投递给我们。 故事介绍 三段故事,讲…...

ffmpeg面向对象-rtsp拉流相关对象
目录 1.AVFormatContext和FFFormatContext类。1.1 概述1.2 构造函数1.3 oopc的继承实现 2. AVInputFormat 类。2.1 多态的实现 3.所用设计模式3.1模板模式3.2 工厂模式? 3.3 rtsp拉流建链 4.this指针5.小结6.rtsp拉流流程 1.AVFormatContext和FFFormatContext类。 …...

feign client发送Post请求,发送对象参数,服务端接收不到正确参数报错排查
记一次feignclient发送请求服务端接收不到正确参数排查 服务端代码: Operation(summary "Create team")PostMapping("post")RequiresPermissions("team:add")public RestResponse addTeam(Valid Team team) {this.teamService.crea…...

Hadoop林子雨安装
文章目录 hadoop安装教程注意事项: hadoop安装教程 链接: 安装教程 注意事项: 可以先安装ububtu增强功能,完成共享粘贴板和共享文件夹 ubuntu增强功能 2.这里就可以使用共享文件夹 或者在虚拟机浏览器,用 微信文件传输助手 传文…...

Springboot项目总结
1.为了调用写在其他包里面的类的方法 但是不使用new来实现调用这个类里面的方法,这个时候我们就需要将这个类注入到ioc容器里面,通过ioc容器来实现自动生成一个对象。 对ioc容器的理解:自动将一个对象实现new. 考察了and 和 or组合使用&…...

目标检测从入门到精通——数据增强方法总结
以下是YOLO系列算法(从YOLOv1到YOLOv7)中使用的数据增强方法的总结,包括每种方法的数学原理、相关论文以及对应的YOLO版本。 YOLO系列数据增强方法总结 数据增强方法数学原理相关论文图像缩放将输入图像缩放到固定大小(如448x44…...

SQL server 的异常处理 一个SQL异常 如何不影响其他SQL执行
在 SQL Server 中,存储过程中的 SQL 语句是顺序执行的。如果其中任何一个 SQL 语句遇到了错误或异常,那么默认情况下,这个错误会导致整个事务(如果有的话)回滚,并且存储过程会立即停止执行,不会…...

终极指南:Windows平台APK安装器如何让安卓应用无缝运行
终极指南:Windows平台APK安装器如何让安卓应用无缝运行 【免费下载链接】APK-Installer An Android Application Installer for Windows 项目地址: https://gitcode.com/GitHub_Trending/ap/APK-Installer 在Windows电脑上运行安卓应用曾经是一个技术难题&am…...

模拟IC设计避坑指南:用Cadence Virtuoso仿真,揭秘电流镜精度下降的3个元凶
模拟IC设计避坑指南:用Cadence Virtuoso仿真,揭秘电流镜精度下降的3个元凶 在模拟CMOS集成电路设计中,电流镜作为基础模块广泛应用于偏置电路、有源负载等场景。然而许多工程师在Cadence Virtuoso IC617中完成电流镜设计后,常会遇…...

δ - mem:提升大型语言模型内存效率,得分最高可达 1.31 倍!
快速通道可了解 arXiv 成为独立非营利组织的情况,也能直达康奈尔大学官网。同时,还能通过链接进行捐赠,支持 arXiv 的发展。搜索与导航提供了多种搜索途径,可在所有字段(标题、作者、摘要等)进行搜索。还有…...
深入Transformer内部:LoRA到底改动了哪部分权重才让模型“学会”新任务?
深入Transformer内部:LoRA如何通过低秩更新重塑大模型能力 在自然语言处理领域,大型预训练模型的微调一直是个计算密集型任务。传统全参数微调需要更新数十亿甚至数千亿参数,这对大多数研究者和企业来说都是难以承受的负担。低秩适应(LoRA)技…...

从TPM到机密计算:远程证明技术原理与zap1项目实践指南
1. 项目概述与核心价值最近在整理一些零散的学习笔记时,发现了一个挺有意思的项目,叫Frontier-Compute/zap1-learning-attestation。乍一看这个标题,可能有点让人摸不着头脑,尤其是对于刚接触可信计算或者硬件安全领域的朋友来说。…...

Supabase AI Agent技能库:安全集成数据库操作与边缘函数调用
1. 项目概述:当Supabase遇上AI Agent,一个技能库的诞生最近在捣鼓AI Agent应用开发,发现一个挺有意思的现象:大家都能用LangChain、LlamaIndex这些框架快速搭出个Agent的架子,但真想让这个Agent去干点具体、有用的活儿…...

Windows鼠标指针主题定制:从.cur/.ani文件到个性化交互体验
1. 项目概述:一个为Windows终端注入灵魂的鼠标指针主题如果你和我一样,每天有超过8小时的时间是与Windows操作系统相伴的,那么你对那个千篇一律的白色箭头鼠标指针,恐怕早已感到审美疲劳。它就像一个沉默的、功能性的背景板&#…...

Cursor编辑器状态快照插件开发:一键保存与恢复工作区
1. 项目概述:一个专为开发者设计的“后悔药”如果你是一名重度使用 Cursor 编辑器的开发者,那么你一定经历过这样的场景:在沉浸式编码时,为了快速定位或修改,你可能会频繁地使用CtrlClick跳转到函数定义,或…...

AI攻防时间差:当漏洞发现速度碾压修复速度— 聚焦技术核心
AI攻防时间差:当漏洞发现速度碾压修复速度 — 聚焦技术核心 引言:当两个世界碰撞 2026年5月,对于网络安全领域而言,是一个具有分水岭意义的月份。 一边是360人工智能安全研究院在5月12日发布的重磅报告,首次提出**“AI…...

嵌入式开发革命:LuatOS云编译实战指南与效率提升
1. 项目概述:为什么我们需要云编译?作为一名在嵌入式领域摸爬滚打了十多年的老鸟,我太懂那种“买板一时爽,环境火葬场”的痛了。尤其是这几年,合宙、乐鑫、兆易这些厂商的产品线越来越丰富,Air780E、ESP32-…...