Android列表组件api
目录
1.ListView控件
1)android:divider
2)android:dividerHeight
3)android:entries
5)android:headerDividersEnabled
6)android:listSelector
7)android:scrollbars
8)android:smoothScrollbar
9)android:stackFromBottom
10)android:transcriptMode
11)android:cacheColorHint
12)android:choiceMode
13)android:drawSelectorOnTop
14)android:fadingEdge
15)android:fadingEdgeLength
16)android:fastScrollEnabled
17)android:fastScrollAlwaysVisible
18)android:scrollingCache
19 java中操作
20.ListView的简单使用
1.代码
1-xml布局代码
2-java代码
3-适配器代码
2.效果
2.RecyclerView控件
1..属性
1)android:layout_width 和 android:layout_height
2)android:scrollbars
3)android:overScrollMode
4)android:nestedScrollingEnabled
5)android:clipToPadding
6)android:padding
7)app:layoutManager
8)app:spanCount
9)app:reverseLayout
10)app:stackFromEnd
2..Java/Kotlin 代码中的属性设置
1)设置 LayoutManager
2)设置 ItemAnimator
3)设置适配器
4)设置项目装饰
5)设置 HasFixedSize
6)设置 NestedScrollingEnabled
7)设置 OnScrollListener
8)设置 ItemTouchHelper
9)设置 OverScrollMode
10)设置 ItemViewCacheSize
11)设置 RecycledViewPool
12)设置 AccessibilityDelegateCompat
13)设置 EdgeEffectFactory
14)设置 Focusable 和 FocusableInTouchMode
15)设置 DescendantFocusability
16.案例:Recyclerview 的简单使用
1.代码
1-xml布局代码
2-java代码
3-适配器代码
2.效果
1.ListView控件
1)android:divider
设置列表项之间的分隔线的颜色。
android:divider="@color/your_color"
2)android:dividerHeight
设置分隔线的高度。
android:dividerHeight="2dp"
3)android:entries
直接在 XML 文件中指定列表项的内容(通常用于简单的情况)。
android:entries="@array/your_array_resource"
4)android:footerDividersEnabled
是否在底部视图之前显示分隔线。
android:footerDividersEnabled="true"
5)android:headerDividersEnabled
是否在顶部视图之后显示分隔线。
android:headerDividersEnabled="false"
6)android:listSelector
设置当用户点击或触摸某个列表项时显示的选择器背景。
android:listSelector="@drawable/your_selector_drawable"
7)android:scrollbars
指定哪些方向上应显示滚动条。
android:scrollbars="vertical"
8)android:smoothScrollbar
启用平滑滚动条。
android:smoothScrollbar="true"
9)android:stackFromBottom
如果为 true,则从底部开始堆叠列表项;默认为 false。
android:stackFromBottom="true"
10)android:transcriptMode
设置转录模式,这对于聊天应用等场景很有用。
android:transcriptMode="alwaysScroll"
11)android:cacheColorHint
设置缓存颜色提示,影响滚动性能。
android:cacheColorHint="@null" <!-- 或者指定其他颜色 -->
12)android:choiceMode
定义选择模式,如单选或多选。
android:choiceMode="singleChoice" <!-- 可以是 "none", "singleChoice", "multipleChoice" -->
13)android:drawSelectorOnTop
选择器是否绘制在内容之上,默认为 false。
android:drawSelectorOnTop="true"
14)android:fadingEdge
设置渐变边缘效果的方向。
android:fadingEdge="vertical"
15)android:fadingEdgeLength
设置渐变边缘长度。
android:fadingEdgeLength="30dp"
16)android:fastScrollEnabled
启用快速滚动条。
android:fastScrollEnabled="true"
17)android:fastScrollAlwaysVisible
即使没有足够的项目也总是显示快速滚动条。
android:fastScrollAlwaysVisible="true"
18)android:scrollingCache
控制是否使用滚动缓存。
android:scrollingCache="false"
19 java中操作
// 设置适配器
listView.setAdapter(adapter);// 设置选择模式
listView.setChoiceMode(ListView.CHOICE_MODE_SINGLE);// 设置点击监听器
listView.setOnItemClickListener(new AdapterView.OnItemClickListener() {@Overridepublic void onItemClick(AdapterView<?> parent, View view, int position, long id) {// 处理点击事件}
});// 添加头部视图
listView.addHeaderView(headerView);// 添加尾部视图
listView.addFooterView(footerView);
20.ListView的简单使用
1.代码
1-xml布局代码
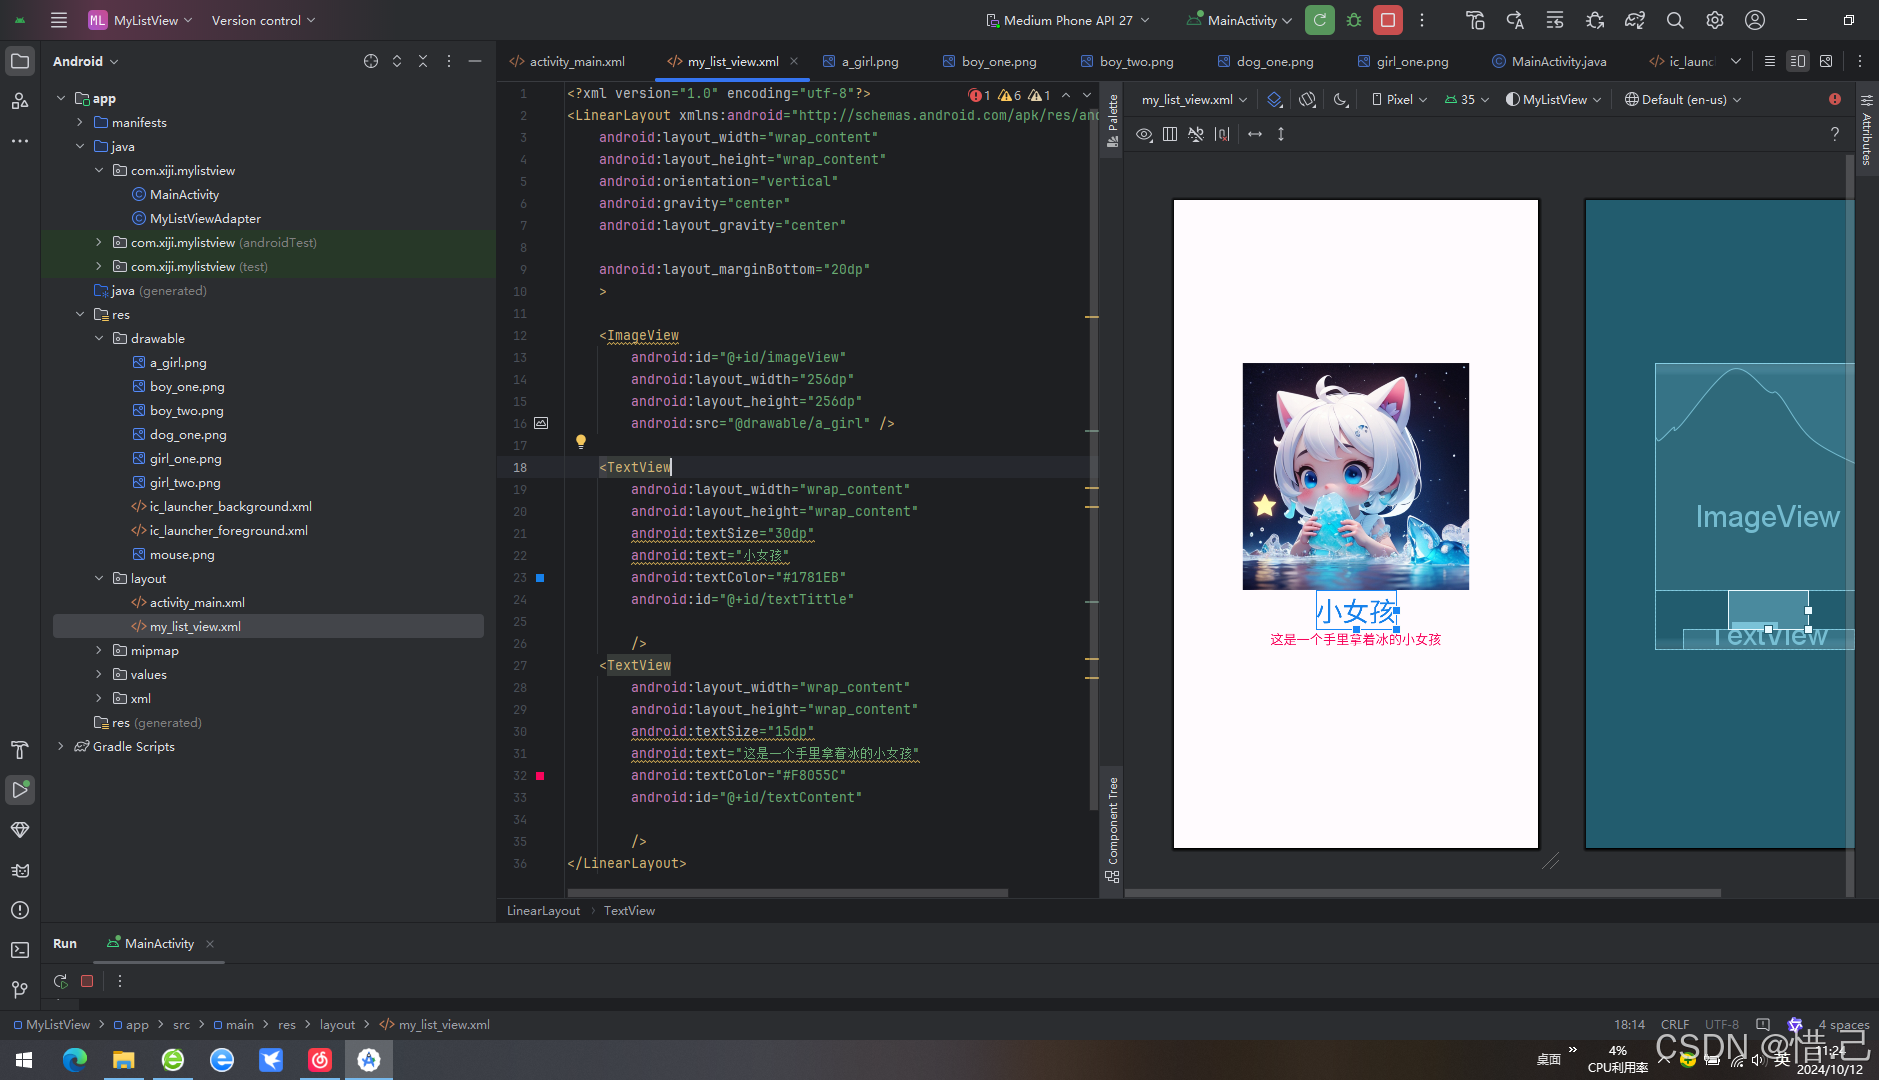
my_list_view.xml文件内容
<?xml version="1.0" encoding="utf-8"?>
<LinearLayout xmlns:android="http://schemas.android.com/apk/res/android"android:layout_width="wrap_content"android:layout_height="wrap_content"android:orientation="vertical"android:gravity="center"android:layout_gravity="center"android:layout_marginBottom="20dp"><ImageViewandroid:id="@+id/imageView"android:layout_width="256dp"android:layout_height="256dp"android:src="@drawable/a_girl" /><TextViewandroid:layout_width="wrap_content"android:layout_height="wrap_content"android:textSize="30dp"android:text="小女孩"android:textColor="#1781EB"android:id="@+id/textTittle"/><TextViewandroid:layout_width="wrap_content"android:layout_height="wrap_content"android:textSize="15dp"android:text="这是一个手里拿着冰的小女孩"android:textColor="#F8055C"android:id="@+id/textContent"/>
</LinearLayout>
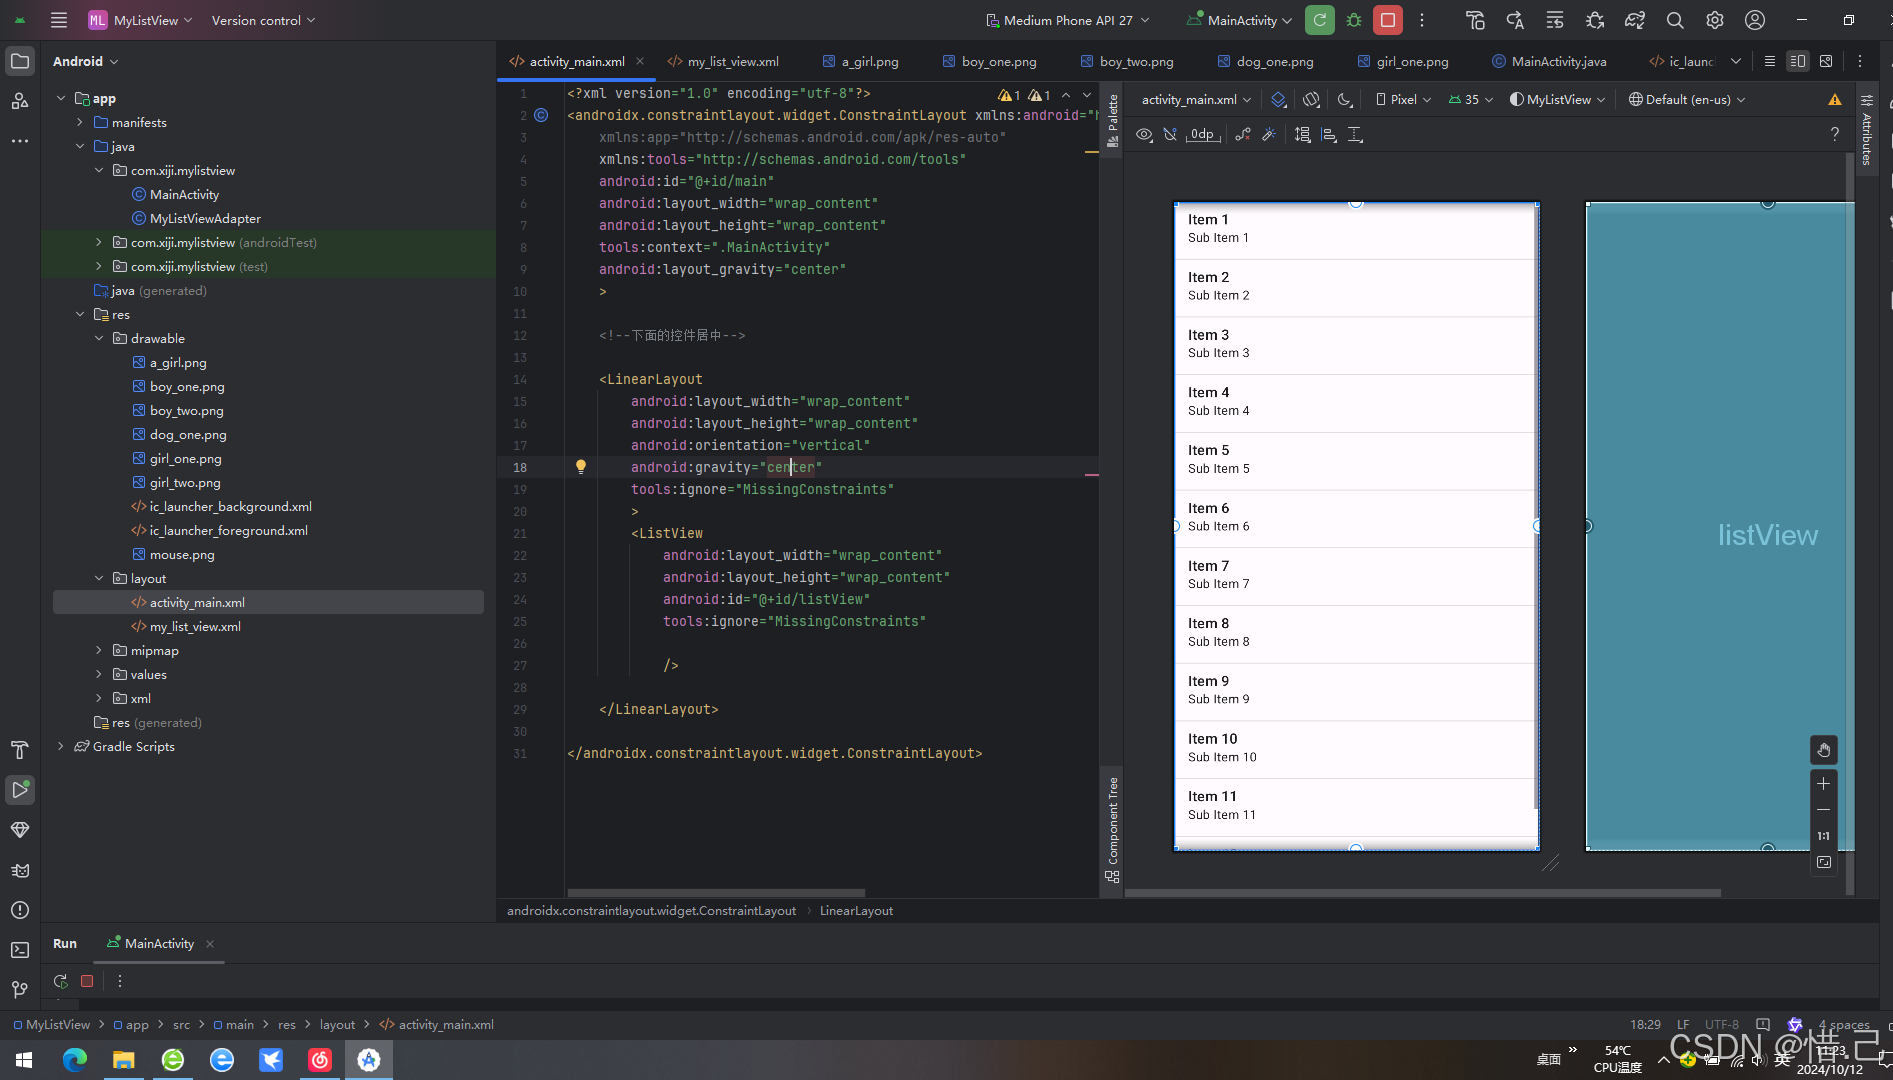
activity_main.xml内容
<?xml version="1.0" encoding="utf-8"?>
<androidx.constraintlayout.widget.ConstraintLayout xmlns:android="http://schemas.android.com/apk/res/android"xmlns:app="http://schemas.android.com/apk/res-auto"xmlns:tools="http://schemas.android.com/tools"android:id="@+id/main"android:layout_width="wrap_content"android:layout_height="wrap_content"tools:context=".MainActivity"android:layout_gravity="center"><!--下面的控件居中--><LinearLayoutandroid:layout_width="wrap_content"android:layout_height="wrap_content"android:orientation="vertical"android:gravity="center"tools:ignore="MissingConstraints"><ListViewandroid:layout_width="wrap_content"android:layout_height="wrap_content"android:id="@+id/listView"tools:ignore="MissingConstraints"/></LinearLayout></androidx.constraintlayout.widget.ConstraintLayout>
2-java代码
package com.xiji.mylistview;import android.os.Bundle;
import android.widget.ListView;import androidx.activity.EdgeToEdge;
import androidx.appcompat.app.AppCompatActivity;
import androidx.core.graphics.Insets;
import androidx.core.view.ViewCompat;
import androidx.core.view.WindowInsetsCompat;public class MainActivity extends AppCompatActivity {private MyListViewAdapter  myListViewAdapter;private ListView listView;@Overrideprotected void onCreate(Bundle savedInstanceState) {super.onCreate(savedInstanceState);EdgeToEdge.enable(this);setContentView(R.layout.activity_main);ViewCompat.setOnApplyWindowInsetsListener(findViewById(R.id.main), (v, insets) -> {Insets systemBars = insets.getInsets(WindowInsetsCompat.Type.systemBars());v.setPadding(systemBars.left, systemBars.top, systemBars.right, systemBars.bottom);return insets;});//创建适配器initView();}//初始化public void initView() {listView = findViewById(R.id.listView);myListViewAdapter = new MyListViewAdapter();listView.setAdapter(myListViewAdapter);}
}
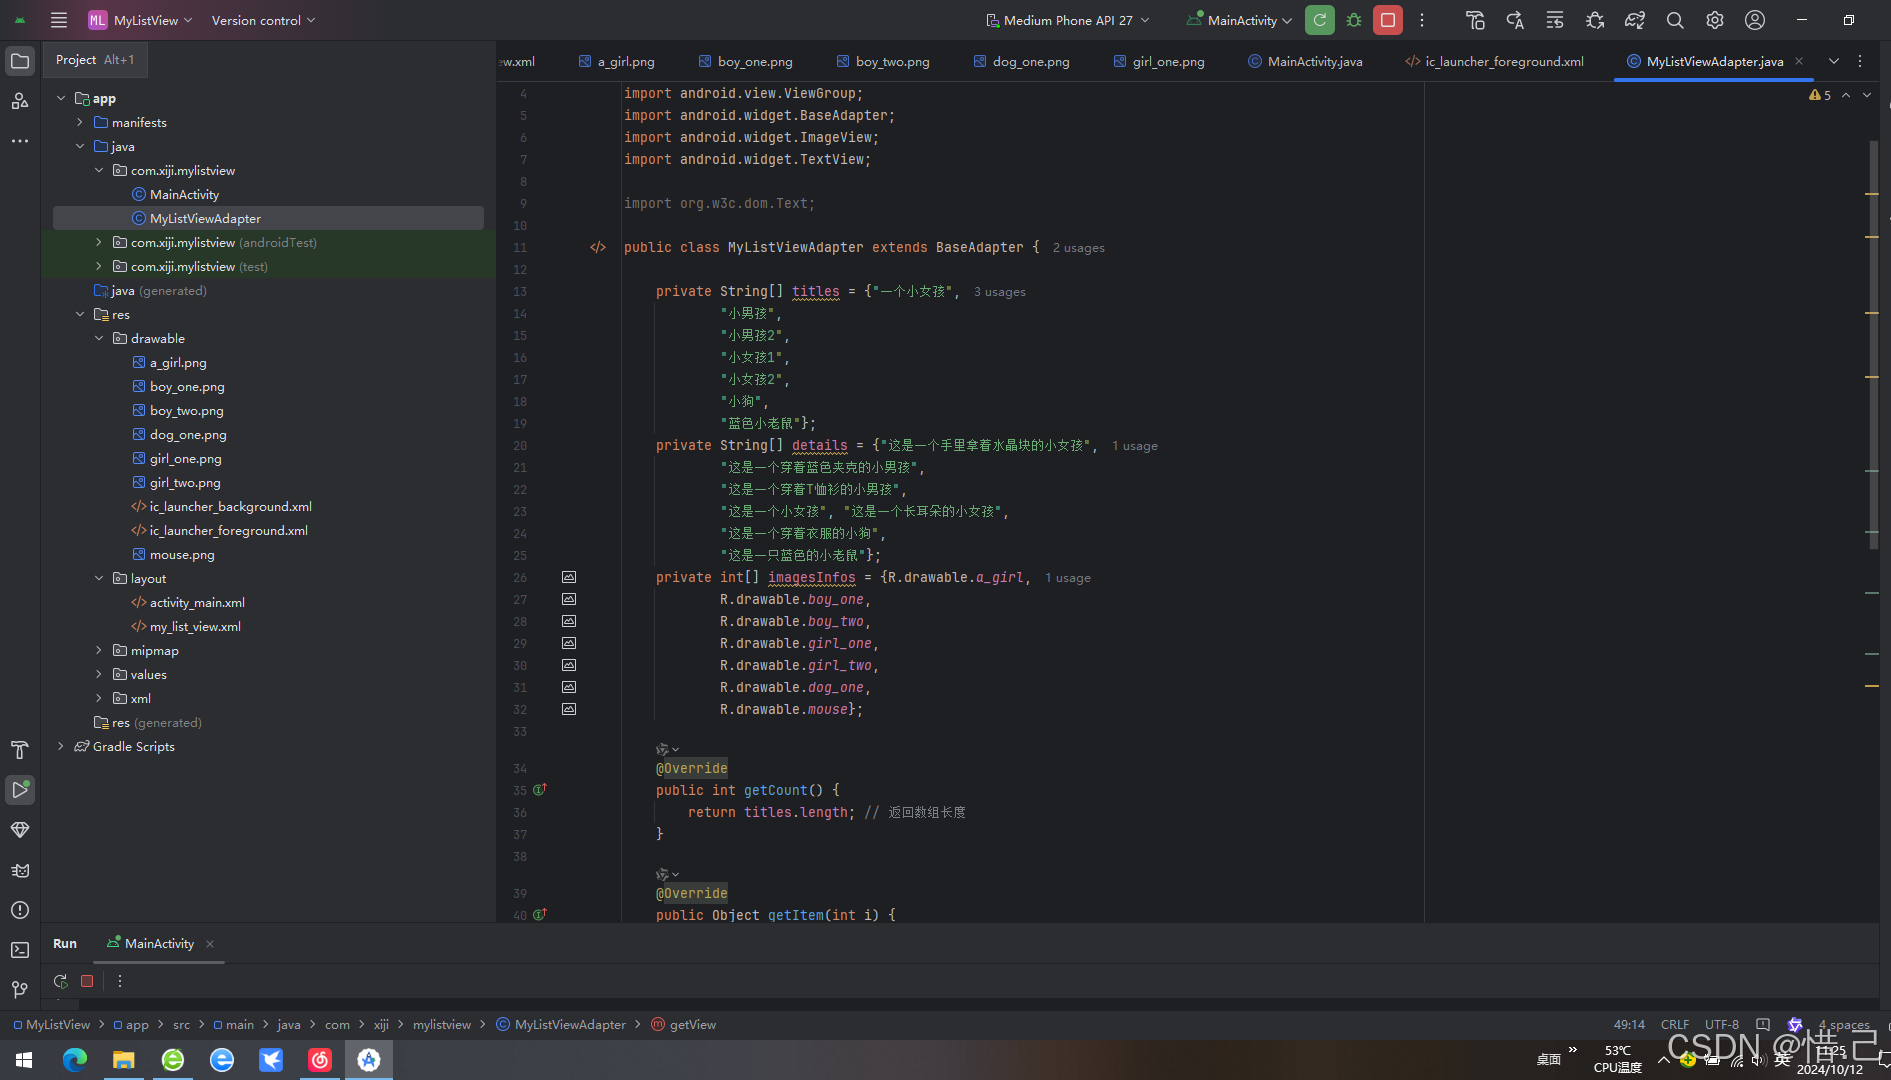
3-适配器代码
package com.xiji.mylistview;import android.view.View;
import android.view.ViewGroup;
import android.widget.BaseAdapter;
import android.widget.ImageView;
import android.widget.TextView;import org.w3c.dom.Text;public class MyListViewAdapter extends BaseAdapter {private String[] titles = {"一个小女孩","小男孩", "小男孩2", "小女孩1", "小女孩2", "小狗", "蓝色小老鼠"};private String[] details = {"这是一个手里拿着水晶块的小女孩", "这是一个穿着蓝色夹克的小男孩", "这是一个穿着T恤衫的小男孩","这是一个小女孩", "这是一个长耳朵的小女孩", "这是一个穿着衣服的小狗", "这是一只蓝色的小老鼠"};private int[] imagesInfos = {R.drawable.a_girl, R.drawable.boy_one, R.drawable.boy_two, R.drawable.girl_one, R.drawable.girl_two, R.drawable.dog_one, R.drawable.mouse};@Overridepublic int getCount() {return titles.length; // 返回数组长度}@Overridepublic Object getItem(int i) {return titles[i]; // 返回对应位置的标题}@Overridepublic long getItemId(int i) {return i; // 返回索引作为 ID}@Overridepublic View getView(int position, View convertView, ViewGroup parent) {// 这里可以添加自定义视图逻辑View inflate = View.inflate(parent.getContext(), R.layout.my_list_view, null);TextView textInfo = inflate.findViewById(R.id.textTittle);textInfo.setText(titles[position]);TextView textDetail = inflate.findViewById(R.id.textContent);textDetail.setText(details[position]);//图片ImageView imageView = inflate.findViewById(R.id.imageView);imageView.setImageResource(imagesInfos[position]);return inflate;}
}
2.效果
2.RecyclerView控件
1..属性
1)android:layout_width 和 android:layout_height
定义 RecyclerView 的宽度和高度。
android:layout_width="match_parent"
android:layout_height="match_parent"
2)android:scrollbars
指定滚动条的方向。
android:scrollbars="vertical"
3)android:overScrollMode
控制过度滚动的效果。
android:overScrollMode="always" <!-- 可以是 "always", "ifContentScrolls", "never" -->
4)android:nestedScrollingEnabled
启用嵌套滚动,默认为 true。
android:nestedScrollingEnabled="true"
5)android:clipToPadding
是否将内容裁剪到内边距区域,默认为 true。
android:clipToPadding="false"
6)android:padding
设置 RecyclerView 的内边距。
android:padding="10dp"
7)app:layoutManager
通过 XML 设置 LayoutManager(需要使用 app 命名空间)。
app:layoutManager="androidx.recyclerview.widget.LinearLayoutManager"
8)app:spanCount
当使用 GridLayoutManager 时,设置每行/列的项数。
app:spanCount="2"
9)app:reverseLayout
反转布局方向。
app:reverseLayout="true"
10)app:stackFromEnd
从底部开始堆叠列表项。
app:stackFromEnd="true"
2..Java/Kotlin 代码中的属性设置
除了 XML 属性外,还可以通过 Java 或 Kotlin 代码动态地修改 RecyclerView 的属性:
1)设置 LayoutManager
recyclerView.setLayoutManager(new LinearLayoutManager(context));
// 或者 GridLayoutManager, StaggeredGridLayoutManager 等
2)设置 ItemAnimator
recyclerView.setItemAnimator(new DefaultItemAnimator());
3)设置适配器
recyclerView.setAdapter(adapter);
4)设置项目装饰
recyclerView.addItemDecoration(new DividerItemDecoration(context, DividerItemDecoration.VERTICAL));
5)设置 HasFixedSize
recyclerView.setHasFixedSize(true); // 如果所有项大小相同,可以提高性能
6)设置 NestedScrollingEnabled
recyclerView.setNestedScrollingEnabled(false); // 默认为 true
7)设置 OnScrollListener
recyclerView.addOnScrollListener(new RecyclerView.OnScrollListener() {@Overridepublic void onScrolled(@NonNull RecyclerView recyclerView, int dx, int dy) {super.onScrolled(recyclerView, dx, dy);// 处理滚动事件}
});
8)设置 ItemTouchHelper
ItemTouchHelper itemTouchHelper = new ItemTouchHelper(simpleCallback);
itemTouchHelper.attachToRecyclerView(recyclerView);
9)设置 OverScrollMode
recyclerView.setOverScrollMode(View.OVER_SCROLL_ALWAYS); // 可以是 OVER_SCROLL_ALWAYS, OVER_SCROLL_IF_CONTENT_SCROLLS, OVER_SCROLL_NEVER
10)设置 ItemViewCacheSize
recyclerView.setItemViewCacheSize(20); // 设置缓存的视图数量
11)设置 RecycledViewPool
RecyclerView.RecycledViewPool pool = new RecyclerView.RecycledViewPool();
recyclerView.setRecycledViewPool(pool);
12)设置 AccessibilityDelegateCompat
recyclerView.setAccessibilityDelegateCompat(new RecyclerViewAccessibilityDelegate(recyclerView));
13)设置 EdgeEffectFactory
recyclerView.setEdgeEffectFactory(new CustomEdgeEffectFactory());
14)设置 Focusable 和 FocusableInTouchMode
recyclerView.setFocusable(true);
recyclerView.setFocusableInTouchMode(true);
15)设置 DescendantFocusability
recyclerView.setDescendantFocusability(ViewGroup.FOCUS_BLOCK_DESCENDANTS);
16.案例:Recyclerview 的简单使用
1.代码
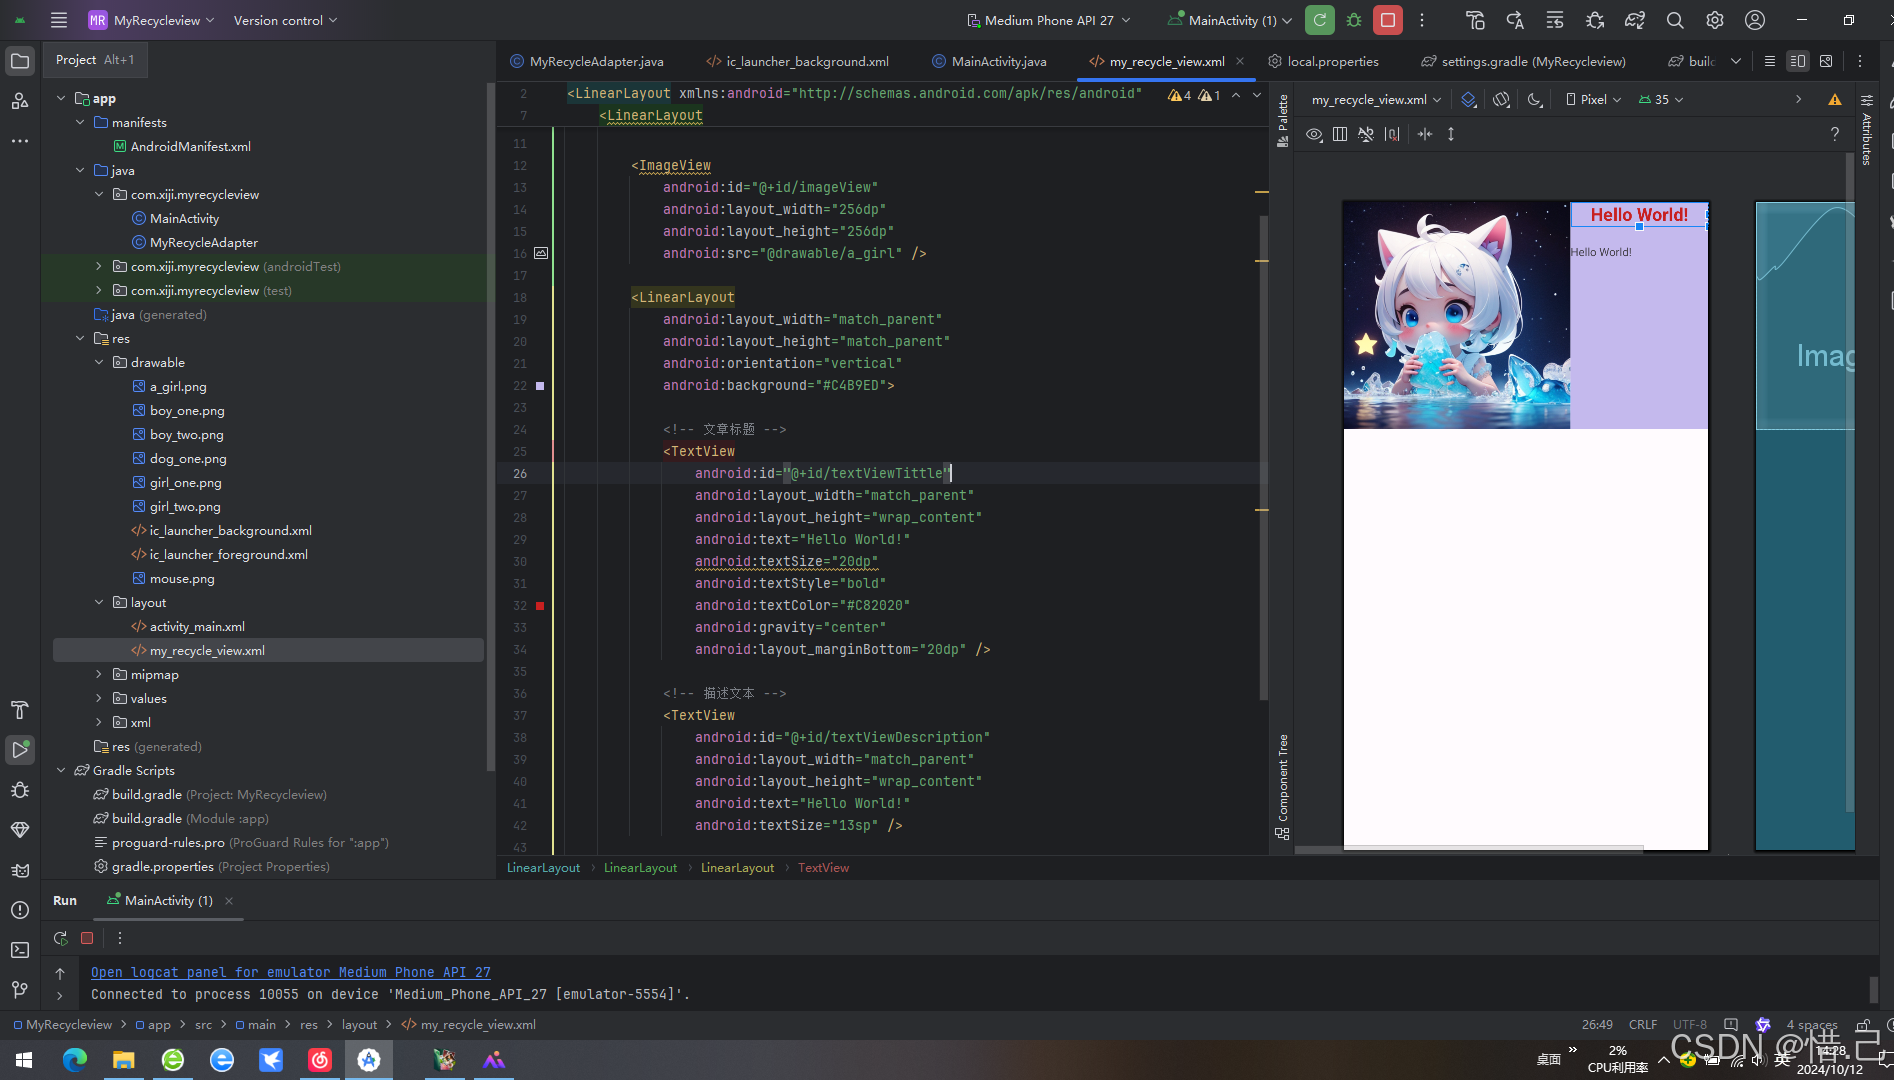
1-xml布局代码
<?xml version="1.0" encoding="utf-8"?>
<LinearLayout xmlns:android="http://schemas.android.com/apk/res/android"android:layout_width="match_parent"android:layout_height="wrap_content"android:orientation="vertical"><LinearLayoutandroid:layout_width="match_parent"android:layout_height="wrap_content"android:orientation="horizontal"><ImageViewandroid:id="@+id/imageView"android:layout_width="256dp"android:layout_height="256dp"android:src="@drawable/a_girl" /><LinearLayoutandroid:layout_width="match_parent"android:layout_height="match_parent"android:orientation="vertical"android:background="#C4B9ED"><!-- 文章标题 --><TextViewandroid:id="@+id/textViewTittle"android:layout_width="match_parent"android:layout_height="wrap_content"android:text="Hello World!"android:textSize="20dp"android:textStyle="bold"android:textColor="#C82020"android:gravity="center"android:layout_marginBottom="20dp" /><!-- 描述文本 --><TextViewandroid:id="@+id/textViewDescription"android:layout_width="match_parent"android:layout_height="wrap_content"android:text="Hello World!"android:textSize="13sp" /></LinearLayout></LinearLayout></LinearLayout>
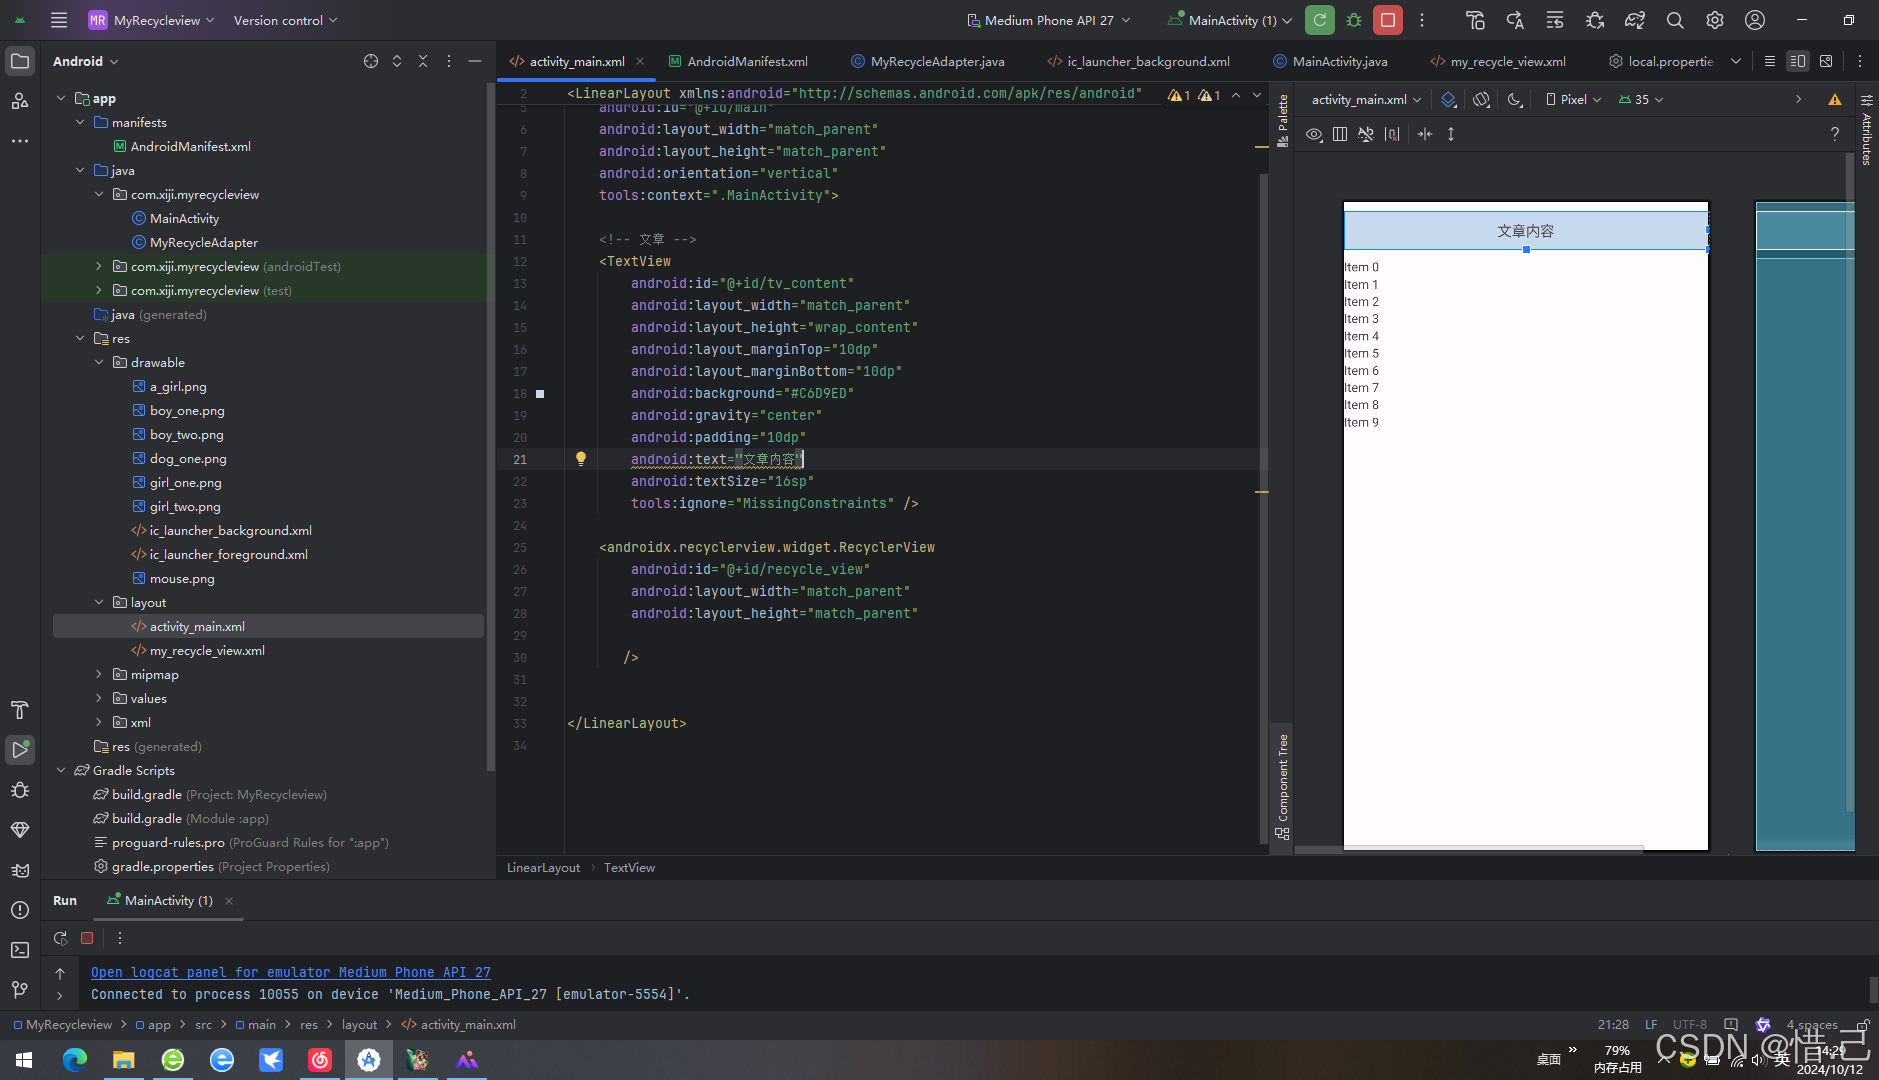
activity_main.xml文件
<?xml version="1.0" encoding="utf-8"?>
<LinearLayout xmlns:android="http://schemas.android.com/apk/res/android"xmlns:app="http://schemas.android.com/apk/res-auto"xmlns:tools="http://schemas.android.com/tools"android:id="@+id/main"android:layout_width="match_parent"android:layout_height="match_parent"android:orientation="vertical"tools:context=".MainActivity"><!-- 文章 --><TextViewandroid:id="@+id/tv_content"android:layout_width="match_parent"android:layout_height="wrap_content"android:layout_marginTop="10dp"android:layout_marginBottom="10dp"android:background="#C6D9ED"android:gravity="center"android:padding="10dp"android:text="文章内容"android:textSize="16sp"tools:ignore="MissingConstraints" /><androidx.recyclerview.widget.RecyclerViewandroid:id="@+id/recycle_view"android:layout_width="match_parent"android:layout_height="match_parent"/></LinearLayout>
2-java代码
package com.xiji.myrecycleview;import android.os.Bundle;import androidx.activity.EdgeToEdge;
import androidx.appcompat.app.AppCompatActivity;
import androidx.core.graphics.Insets;
import androidx.core.view.ViewCompat;
import androidx.core.view.WindowInsetsCompat;
import androidx.recyclerview.widget.LinearLayoutManager;
import androidx.recyclerview.widget.RecyclerView;public class MainActivity extends AppCompatActivity {// 适配器MyRecycleAdapter adapter;// 视图RecyclerView recyclerView;@Overrideprotected void onCreate(Bundle savedInstanceState) {super.onCreate(savedInstanceState);EdgeToEdge.enable(this);setContentView(R.layout.activity_main);ViewCompat.setOnApplyWindowInsetsListener(findViewById(R.id.main), (v, insets) -> {Insets systemBars = insets.getInsets(WindowInsetsCompat.Type.systemBars());v.setPadding(systemBars.left, systemBars.top, systemBars.right, systemBars.bottom);return insets;});initView();}private void initView() {recyclerView = findViewById(R.id.recycle_view);//设置布局管理器recyclerView.setLayoutManager(new LinearLayoutManager(this));adapter = new MyRecycleAdapter();//设置数据适配器recyclerView.setAdapter(adapter);}
}
3-适配器代码
package com.xiji.myrecycleview;import android.view.LayoutInflater;
import android.view.View;
import android.view.ViewGroup;
import android.widget.ImageView;
import android.widget.TextView;import androidx.recyclerview.widget.RecyclerView;public class MyRecycleAdapter extends RecyclerView.Adapter<MyRecycleAdapter.MyView> {private String[] titles = {"一个小女孩","小男孩","小男孩2","小女孩1","小女孩2","小狗","蓝色小老鼠"};private String[] details = {"这是一个手里拿着水晶块的小女孩","这是一个穿着蓝色夹克的小男孩","这是一个穿着T恤衫的小男孩","这是一个小女孩", "这是一个长耳朵的小女孩","这是一个穿着衣服的小狗","这是一只蓝色的小老鼠"};private int[] imagesInfos = {R.drawable.a_girl,R.drawable.boy_one,R.drawable.boy_two,R.drawable.girl_one,R.drawable.girl_two,R.drawable.dog_one,R.drawable.mouse};@Overridepublic MyView onCreateViewHolder( ViewGroup parent, int viewType) {View view = LayoutInflater.from(parent.getContext()).inflate(R.layout.my_recycle_view, parent, false);return new MyView(view);}@Overridepublic void onBindViewHolder( MyView holder, int position) {holder.title.setText(titles[position]);holder.detail.setText(details[position]);holder.image.setImageResource(imagesInfos[position]);}@Overridepublic int getItemCount() {return titles.length;}class MyView extends RecyclerView.ViewHolder {TextView title;TextView detail;ImageView image;public MyView(View itemView) {super(itemView);title = itemView.findViewById(R.id.textViewTittle);detail = itemView.findViewById(R.id.textViewDescription);image = itemView.findViewById(R.id.imageView);}}
}
2.效果
相关文章:
Android列表组件api
目录 1.ListView控件 1)android:divider 2)android:dividerHeight 3)android:entries 4)android:footerDividersEnabled 5)android:headerDividersEnabled 6)android:listSelector 7)android:sc…...
:利用ldap.js实现与windows AD对接实现用户搜索、认证、密码修改等功能 - 以及针对中文转义问题的补丁方法介绍)
ToB项目身份认证AD集成(完):利用ldap.js实现与windows AD对接实现用户搜索、认证、密码修改等功能 - 以及针对中文转义问题的补丁方法介绍
在前面的两篇文章中,我详细的介绍了使用ldap与window AD服务集成,实现ToB项目中的身份认证集成方案,包括技术方案介绍、环境配置: ToB项目身份认证AD集成(一):基于目录的用户管理、LDAP和Active…...

SpringBoot+SeetaFace6搭建人脸识别平台
前言 最近多个项目需要接入人脸识别功能,之前的方案是使用百度云api集成,但是后续部分项目是内网部署及使用,考虑到接入复杂程度及收费等多种因素,决定参考开源方案自己搭建,保证服务的稳定性与可靠性 项目地址&…...

MySQL-06.DDL-表结构操作-创建
一.DDL(表操作) create database db01;use db01;create table tb_user(id int comment ID,唯一标识,username varchar(20) comment 用户名,name varchar(10) comment 姓名,age int comment 年龄,gender char(1) comment 性别 ) comment 用户表; 此时并没有限制ID为…...

在Visual Studio中使用CMakeLists.txt集成EasyX库的详细指南
EasyX库是一款专为Windows平台设计的轻量级C图形库,适合初学者和教育领域使用。结合Visual Studio和CMake工具链,用户可以轻松创建C项目,并集成EasyX库,实现丰富的图形编程效果。本文将详细介绍如何在Visual Studio中通过CMakeLis…...

CRC码计算原理
CRC8这里先以CRC8来说明CRC的计算过程1、CRC8在线计算器通过CRC在线计算器可以看见CRC8的特征多项式:x8+x2+x+1,初始值为0000’0000。CRC计算的核心是:反转+异或+移位(此处的CRC8没有涉及反转,见后面CRC16)。2、CRC8计算过程(1)、取值从高到低依次取需校验数据的位,这里…...

对高危漏洞“Docker Engine API is accessible without authentication”的修复
一.背景 之前文章maven项目容器化运行之1-基于1Panel软件将docker镜像构建能力分享给局域网_1panel 构建镜像-CSDN博客将1Panel软件的Doocker端口给到了局域网,安全组兄弟扫描认为是高危漏洞,可能导致攻击者获取对Docker主机的完全控制权。 二.修复的建…...

两种方式创建Vue项目
文章目录 引言利用Vue命令创建Vue项目准备工作安装Vue CLI创建Vue项目方法一:使用vue init命令方法二:使用vue create命令启动Vue项目 利用Vite工具创建Vue项目概述利用Vite创建项目启动项目 结语 引言 大家好,今天我将向大家展示如何使用不…...

深入理解 C/C++ 指针
深入理解 C 指针:指针、解引用与指针变量的详细解析 前言 在 C 编程语言中,指针 是一个非常强大且重要的概念。对于初学者来说,指针往往会让人感到困惑不解。本文将通过形象的比喻,帮助大家深入理解指针、解引用与指针变量的概念…...
有什么方法可以保护ppt文件不被随意修改呢?
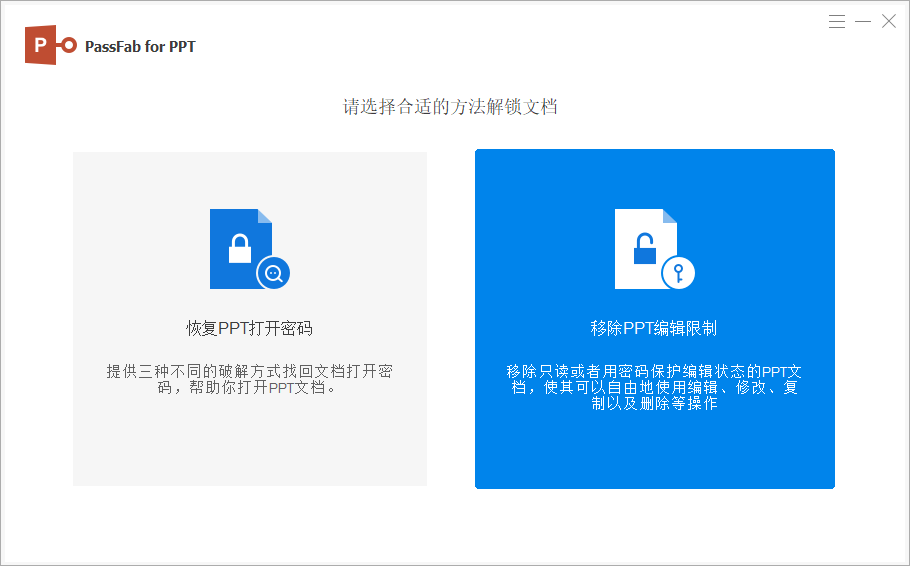
在工作或学习中,我们常常需要制作powerpoint演示文稿,担心自己不小心改动了或者不想他人随意更改,我们可以如何保护PPT呢?下面小编就来分享两个常用的方法。 方法一:为PPT设置打开密码 为PPT设置打开密码是最直接有效…...

[C#]项目中如何用 GraphQL 代替传统 WebAPI服务
在现代应用程序开发中,传统的 WebAPI 通常使用 RESTful 设计风格,然而近年来 GraphQL 作为一种新的 API 查询语言逐渐获得广泛应用。GraphQL 允许客户端精确地查询所需的数据,减少了过度请求和不足请求的问题。本文将详细讨论在项目中用 Grap…...

对后端返回的日期属性进行格式化(扩展 Spring MVC 的消息转换器)
格式化之前 格式化之后: 解决方式 方式一 在属性中加上注解,对日期进行格式化 JsonFormat(pattern "yyyy-MM-dd HH:mm:ss")private LocalDateTime createTime;//JsonFormat(pattern &quo…...

踩坑记录-用python解析php Laravel8生成的jwt token一直提示 Invalid audience
import jwtdef token_required(token):with open(storage/oauth-public.key, r) as f:public_key f.read()try:# 尝试使用当前算法解码 token,同时指定受众decoded jwt.decode(token, public_key, algorithms[RS256], options{"verify_aud": False})# p…...

使用IOT-Tree Server制作一个边缘计算设备(Arm Linux)
最近实现了一个小项目,现场有多个不同厂家的设备,用户需要对此进行简单的整合,并实现一些联动控制。 我使用了IOT-Tree Server这个软件轻松实现了,不外乎有如下过程: 1)使用Modbus协议对接现有设备&#…...

(JAVA)B树和B+树的实现原理阐述
1. B 树 2-3树中,一个节点最多能有两个key,它的实现红黑树中适用对链接染色的方式去表达这两个key。下面将学习另一种树形结构B树,这种数据结构中,一个节点允许多余两个key的存在。 B树是一种树状数据结构,它能够存储…...

JC系列CAN通信说明
目录 一、CAN协议二、指令格式三、通信接线3.1、一对一通信3.2、组网通信 四、寄存器定义五、指令说明4、读取电源电压5、读取母线电流6、读取实时速度8、读取实时位置10、读取驱动器温度11、读取电机温度12、读取错误信息32、设定电流33、设定速度35、设定绝对位置37、设定相对…...

Ubuntu22——安装并配置局域网文件共享系统Samba
我们将共享目录设置为 /home/takway/share。以下是基于这个新目录的详细步骤: 在Ubuntu上安装并配置Samba 更新系统包列表 打开终端,执行以下命令来确保你的包列表是最新的: sudo apt update安装Samba 安装Samba及其相关工具: sud…...
HTML CSS 基础
HTML & CSS 基础 HTML一、HTML简介1、网页1.1 什么是网页1.2 什么是HTML1.3 网页的形成1.4总结 2、web标准2.1 为什么需要web标准2.2 Web 标准的构成 二、HTML 标签1、HTML 语法规范1.1基本语法概述1.2 标签关系 2、 HTML 基本结构标签2.1 第一个 HTML 网页2.2 基本结构标签…...

Nginx 使用 GeoIP 模块阻止特定国家 IP 地址的最佳实践
一、概述 为什么要阻止特定国家的 IP 地址? 在全球化的互联网上,网站和服务器可能会面对来自不同国家和地区的用户流量。虽然大多数情况下,我们希望网站能为全球用户提供服务,但在某些特定场景下,阻止来自特定国家的…...
vue3 + vite + cesium项目
GitHub - tingyuxuan2302/cesium-vue3-vite: 项目基于 vue3 vite cesium,已实现常见三维动画场,欢迎有兴趣的同学加入共建,官网服务器相对拉胯,请耐心等候...https://github.com/tingyuxuan2302/cesium-vue3-vite/tree/github...

C++/WinRT安全编程:Windows Runtime安全模型和最佳实践
C/WinRT安全编程:Windows Runtime安全模型和最佳实践 【免费下载链接】cppwinrt C/WinRT 项目地址: https://gitcode.com/gh_mirrors/cp/cppwinrt C/WinRT是Windows Runtime(WinRT)的现代C语言投影,它提供了类型安全的API访…...

Java OCR实战:精准提取与解析身份证信息
1. 为什么选择Java OCR处理身份证信息? 在企业级应用开发中,身份证信息录入是个高频需求场景。传统人工录入不仅效率低下,还容易出错。我去年参与过一个政务系统改造项目,工作人员每天要处理300张身份证照片,手动录入的…...

永强数据恢复硬盘设备加密数据专业解锁恢复服务
在当今数字化时代,数据的重要性不言而喻。无论是个人用户存储的珍贵照片、视频,还是企业存储的关键商业数据,一旦丢失,都可能带来巨大的损失。而硬盘设备加密数据的丢失或无法解锁,更是让人头疼不已。北京永强数据恢复…...

AI 驱动多渠道网络钓鱼攻击演化与闭环防御体系研究
摘要 2026 年全球网络空间中,AI 技术全面渗透使网络钓鱼攻击呈现工业化、多渠道、高仿真、强隐蔽的演化趋势,攻击载体从传统邮件快速扩散至即时通讯、协作平台、二维码与短链接等多元场景,传统基于特征库与规则匹配的防御机制失效风险显著上升…...

Linux 安全 - 从SUID到Capabilities:细粒度权限控制的演进与实践
1. 从SUID到Capabilities:权限控制的进化史 记得我第一次接触Linux权限管理时,被那个神秘的SUID位搞得晕头转向。当时为了给团队搭建一个共享日志分析工具,需要让普通用户能够读取/var/log下的敏感日志文件。老同事建议我"给那个脚本加个…...

AI智能体技能开发实战:从awesome-agent-skills到高效智能体构建
1. 项目概述:从技能清单到智能体构建的实战指南最近在折腾AI智能体(Agent)开发的朋友,估计都绕不开一个名字:awesome-agent-skills。这个由VoltAgent维护的开源项目,乍一看就是个GitHub上常见的“Awesome”…...

深入解析mootdx:Python通达信数据接口的架构设计与性能优化
深入解析mootdx:Python通达信数据接口的架构设计与性能优化 【免费下载链接】mootdx 通达信数据读取的一个简便使用封装 项目地址: https://gitcode.com/GitHub_Trending/mo/mootdx 在量化交易和金融数据分析领域,高效稳定的数据获取是成功的关键…...

从SystemTap到ftrace:为什么Linux内核‘原装’的追踪工具更适合日常调试?
从SystemTap到ftrace:为什么Linux内核原生追踪工具更适合日常调试? 在Linux内核开发与性能优化领域,追踪工具的选择往往决定了问题排查的效率与系统稳定性。当面对SystemTap、eBPF/BCC和ftrace等工具时,资深开发者常陷入选择困境—…...

ThinkPad嵌入式控制器深度解析:TPFanCtrl2散热优化实践方案
ThinkPad嵌入式控制器深度解析:TPFanCtrl2散热优化实践方案 【免费下载链接】TPFanCtrl2 ThinkPad Fan Control 2 (Dual Fan) for Windows 10 and 11 项目地址: https://gitcode.com/gh_mirrors/tp/TPFanCtrl2 在移动工作站领域,ThinkPad以其卓越…...

告别臃肿软件!OmenSuperHub:惠普暗影精灵的纯净硬件控制神器
告别臃肿软件!OmenSuperHub:惠普暗影精灵的纯净硬件控制神器 【免费下载链接】OmenSuperHub 使用 WMI BIOS控制性能和风扇速度,自动解除DB功耗限制。 项目地址: https://gitcode.com/gh_mirrors/om/OmenSuperHub 厌倦了官方Omen Gamin…...