Redis应用—9.简单应用汇总
大纲
1.基于Redis实现的简单缓存机制(String数据结构)
2.实现一个最简单的分布式锁(String数据结构)
3.博客网站的文章发布与查看(String数据结构)
4.博客字数统计与文章预览(String数据结构)
5.用户操作日志审计功能(String数据结构)
6.实现一个简单的唯一ID生成器(incr命令)
7.实现博客点赞次数计数器(incr命令 + decr命令)
8.社交网站的网址点击追踪机制(长网址转短网址)(Hash数据结构)
9.基于Hash实现博客基本功能(Hash数据结构)
10.基于令牌的用户登录会话机制(Hash数据结构)
11.秒杀活动下的公平队列抢购机制(List数据结构)
12.基于List实现博客的分页浏览(List数据结构)
13.实现OA系统中的待办事项管理(List数据结构)
14.网站用户注册时的邮件验证机制(List数据结构)
15.网站每日UV数据指标去重统计(Set数据结构)
16.博客网站的文章标签管理(Set数据结构)
17.朋友圈点赞功能的实现(Set数据结构)
18.实现一个网站投票统计程序(Set数据结构)
19.实现微博的社交关系(Set数据结构)
20.实现网站上的抽奖程序(Set数据结构)
21.为商品搜索构建反向索引(Set数据结构)
22.实现音乐网站的排行榜(Sorted Set数据结构)
23.实现获取指定时间的新闻(Sorted Set数据结构)
24.实现购买某商品时也会购买其他商品的推荐功能(Sorted Set数据结构)
25.实现搜索框的自动补全(Sorted Set数据结构)
26.基于HyperLogLog的网站UV统计程序(HyperLogLog数据结构)
27.网站重复垃圾数据的快速去重和过滤(HyperLogLog数据结构)
28.周活月活年活的统计(HyperLogLog数据结构)
29.基于位图的用户行为记录(BitMap数据结构)
30.基于Geo的距离计算程序(Geo数据结构)
31.陌生人社交里的查找附近的人(Geo数据结构)
32.带有自动过期时间的分布式缓存(expire命令)
33.支持超时自动释放的简单分布式锁(expire命令)
34.支持自动过期的用户登录会话实现(expire命令)
35.支持冷数据自动淘汰的自动补全(expire命令)
36.支持身份验证的分布式锁释放(pipeline命令)
1.基于Redis实现的简单缓存机制(String数据结构)
Redis里存放了大量的key-value对,可以先通过"set key value"命令往Redis里存放一些数据,然后再通过"get key"命令从Redis里获取这些数据。
基于Redis的缓存机制可以实现高并发和高性能。比如可以把复杂查询后的结果放入Redis里作为缓存,下次查询时就直接从Redis缓存里取出,无需再到数据库中查询复杂SQL。比如可以将HTML页面存放在Redis缓存里,下次查询时就直接从Redis缓存里获取,无需先基于JSP动态渲染页面,再从磁盘上读取出来返回给浏览器。
public class JedisTest {public static void main(String[] args) throws Exception {Jedis jedis = new Jedis("127.0.0.1");//最简单的缓存读写示例jedis.set("key1", "value1");System.out.println(jedis.get("key1"));}
}
2.实现一个最简单的分布式锁(String数据结构)
通过Redis的"set key value nx"命令可实现一个最简单的分布式锁。
当key不存在时,才能设置成功,返回true。当key存在时,会设置失败,返回false。
public class JedisTest {public static void main(String[] args) throws Exception {Jedis jedis = new Jedis("127.0.0.1");//最简单的基于nx选项实现的分布式锁jedis.del("lock_test");String result = jedis.set("lock_test", "value_test", SetParams.setParams().nx());System.out.println("第一次加锁的结果:" + result);result = jedis.set("lock_test", "value_test", SetParams.setParams().nx());System.out.println("第二次加锁的结果:" + result);jedis.del("lock_test");result = jedis.set("lock_test", "value_test", SetParams.setParams().nx());System.out.println("第二次加锁的结果:" + result);}
}
3.博客网站的文章发布与查看(String数据结构)
Redis有mset、mget、msetnx等命令。其中mset可一次性设置多个key-value对,mget可获取多个key的value,msetnx就是在多个key都不存在的情况下一次性设置多个key的value。mset和mget,相当于batch批量设置和查询,可节省网络通讯时间。
public class JedisTest {public static void main(String[] args) throws Exception {Jedis jedis = new Jedis("127.0.0.1");//博客的发布、修改与查看Long publishBlogResult = jedis.msetnx("article:1:title", "学习Redis","article:1:content", "如何学好Redis的使用","article:1:author", "Test","article:1:time", "2020-01-01 00:00:00");System.out.println("发布博客的结果:" + publishBlogResult);List<String> blog = jedis.mget("article:1:title", "article:1:content","article:1:author", "article:1:time");System.out.println("查看博客:" + blog);String updateBlogResult = jedis.mset("article:1:title", "修改后的学习redis","article:1:content", "修改后的如何学好redis的使用");System.out.println("修改博客的结果:" + updateBlogResult);blog = jedis.mget("article:1:title", "article:1:content","article:1:author", "article:1:time");System.out.println("再次查看博客:" + blog);}
}
4.博客字数统计与文章预览(String数据结构)
使用Redis的strlen命令可以统计value值的字数,getrange命令可以截取value值的内容。
public class JedisTest {public static void main(String[] args) throws Exception {Jedis jedis = new Jedis("127.0.0.1");Long blogLength = jedis.strlen("article:1:content");System.out.println("博客的长度统计:" + blogLength);String blogContentPreview = jedis.getrange("article:1:content", 0, 5);System.out.println("博客内容预览:" + blogContentPreview);}
}
5.用户操作日志审计功能(String数据结构)
使用Redis的append命令可以向value值追加内容,比如需要记录用户每天的核心操作日志,就可以使用Redis的append命令。
public class JedisTest {public static void main(String[] args) throws Exception {Jedis jedis = new Jedis("127.0.0.1");//操作日志的审计功能jedis.del("operation_log_2020_01_01");jedis.setnx("operation_log_2020_01_01", "");for (int i = 0; i < 10; i++) {jedis.append("operation_log_2020_01_01", "今天的第" + (i + 1) + "条操作日志\n");}String operationLog = jedis.get("operation_log_2020_01_01");System.out.println("今天所有的操作日志:\n" + operationLog);}
}
6.实现一个简单的唯一ID生成器(incr命令)
在单库单表中,唯一ID可以通过自增主键来生成。在分库分表中,唯一ID可以通过SnowFlake来生成。当然,Redis的incr命令也可以生成唯一ID。
public class JedisTest {public static void main(String[] args) throws Exception {Jedis jedis = new Jedis("127.0.0.1");//唯一ID生成器jedis.del("order_id_counter");for (int i = 0; i < 10; i++) {Long orderId = jedis.incr("order_id_counter");System.out.println("生成的第" + (i + 1) + "个唯一ID:" + orderId);}}
}
7.实现博客点赞次数计数器(incr命令 + decr命令)
使用Redis的incr命令和decr命令可维护点赞次数。
public class JedisTest {public static void main(String[] args) throws Exception {Jedis jedis = new Jedis("127.0.0.1");//博客的点赞计数器jedis.del("article:1:dianzan");for (int i = 0; i < 10; i++) {jedis.incr("article:1:dianzan");}Long dianzanCounter = Long.valueOf(jedis.get("article:1:dianzan"));System.out.println("博客的点赞次数为:" + dianzanCounter);jedis.decr("article:1:dianzan");dianzanCounter = Long.valueOf(jedis.get("article:1:dianzan"));System.out.println("再次查看博客的点赞次数为:" + dianzanCounter);}
}
8.社交网站的网址点击追踪机制(长网址转短网址)(Hash数据结构)
Redis的Hash数据结构可以实现网址点击追踪机制。需要对某个原地址进行追踪时:首先通过Redis的incr命令获取一个自增的10进制数。然后将10进制数转换为36进制数,并将转换后的36进制数作为短网址。接着通过hset命令设置短网址的点击次数为0,以及通过hset命令设置短网址和原地址的映射关系。当有用户访问该短网址时,就可以通过hincrBy命令对点击次数进行自增。
//短网址追踪案例
public class ShortUrlDemo {private static final String[] X36_ARRAY = "0,1,2,3,4,5,6,7,8,9,A,B,C,D,E,F,G,H,I,J,K,L,M,N,O,P,Q,R,S,T,U,V,W,X,Y,Z".split(",");private Jedis jedis = new Jedis("127.0.0.1");public ShortUrlDemo() {jedis.set("short_url_seed", "51167890045");}//获取短网址public String getShortUrl(String url) {//通过Redis的incr命令获取一个自增的10进制数long shortUrlSeed = jedis.incr("short_url_seed");//将10进制数转换为36进制数,并将转换后的36进制数作为短网址StringBuffer buffer = new StringBuffer();while (shortUrlSeed > 0) {buffer.append(X36_ARRAY[(int)(shortUrlSeed % 36)]);shortUrlSeed = shortUrlSeed / 36;}String shortUrl = buffer.reverse().toString();jedis.hset("short_url_access_count", shortUrl, "0");jedis.hset("url_mapping", shortUrl, url);return shortUrl;}//增加短网址的访问次数public void incrementShortUrlAccessCount(String shortUrl) {jedis.hincrBy("short_url_access_count", shortUrl, 1);}//获取短网址的访问次数public long getShortUrlAccessCount(String shortUrl) {return Long.valueOf(jedis.hget("short_url_access_count", shortUrl));}public static void main(String[] args) throws Exception {ShortUrlDemo shortUrlDemo = new ShortUrlDemo();String shortUrl = shortUrlDemo.getShortUrl("http://redis.com/index.html");System.out.println("页面上展示的短网址为:" + shortUrl);//假设访问152次for (int i = 0; i < 152; i++) {shortUrlDemo.incrementShortUrlAccessCount(shortUrl);}long accessCount = shortUrlDemo.getShortUrlAccessCount(shortUrl);System.out.println("短网址被访问的次数为:" + accessCount);}
}
9.基于Hash实现博客基本功能(Hash数据结构)
Java对象特别适合使用Hash数据结构来存放到Redis中。如果先将Java对象序列化成字符串,再以字符串形式存放到Redis里,那么在Redis中操作Java对象就不太方便了。其中使用Redis的命令有:hexists、hset、hgetAll、hincrBy。
//博客网站案例
public class BlogDemo {private Jedis jedis = new Jedis("127.0.0.1");//获取博客idpublic long getBlogId() {return jedis.incr("blog_id_counter");}//发表一篇博客public boolean publishBlog(long id, Map<String, String> blog) {if (jedis.hexists("article::" + id, "title")) {return false;}blog.put("content_length", String.valueOf(blog.get("content").length()));jedis.hset("article::" + id, blog);return true;}//查看一篇博客public Map<String, String> findBlogById(long id) {Map<String, String> blog = jedis.hgetAll("article::" + id);incrementBlogViewCount(id);return blog;}//更新一篇博客public void updateBlog(long id, Map<String, String> updatedBlog) {String updatedContent = updatedBlog.get("content");if (updatedContent != null && !"".equals(updatedContent)) {updatedBlog.put("content_length", String.valueOf(updatedContent.length()));}jedis.hset("article::" + id, updatedBlog);}//对博客进行点赞public void incrementBlogLikeCount(long id) {jedis.hincrBy("article::" + id, "like_count", 1);}//增加博客浏览次数public void incrementBlogViewCount(long id) {jedis.hincrBy("article::" + id, "view_count", 1);}public static void main(String[] args) {BlogDemo demo = new BlogDemo();//发表一篇博客long id = demo.getBlogId();Map<String, String> blog = new HashMap<String, String>();blog.put("id", String.valueOf(id));blog.put("title", "我喜欢学习Redis");blog.put("content", "学习Redis是一件特别快乐的事情");blog.put("author", "test");blog.put("time", "2020-01-01 10:00:00");demo.publishBlog(id, blog);//更新一篇博客Map<String, String> updatedBlog = new HashMap<String, String>();updatedBlog.put("title", "我特别喜欢学习Redis");updatedBlog.put("content", "我平时喜欢到官方网站上去学习Redis");demo.updateBlog(id, updatedBlog);//其他用户点击查看博客的详细内容,并进行点赞Map<String, String> blogResult = demo.findBlogById(id);System.out.println("查看博客的详细内容:" + blogResult);demo.incrementBlogLikeCount(id);//查看博客的浏览次数和点赞次数blogResult = demo.findBlogById(id);System.out.println("查看博客的详细内容:" + blogResult);}
}
10.基于令牌的用户登录会话机制(Hash数据结构)
用户中心在处理用户请求时,会先检查请求是否有令牌及令牌是否合法,此时可以使用Redis的hset和hget命令来实现令牌对应的session检查。
//用户会话管理案例
public class SessionDemo {private Jedis jedis = new Jedis("127.0.0.1");//检查session是否有效public boolean isSessionValid(String token) throws Exception {//校验token是否为空if (token == null || "".equals(token)) {return false;}//假设session是一个value为user_id的json字符串String session = jedis.hget("sessions", "session::" + token);if (session == null || "".equals(session)) {return false;}//检查这个session是否在有效期内String expireTime = jedis.hget("sessions::expire_time", "session::" + token);if (expireTime == null || "".equals(expireTime)) {return false;}SimpleDateFormat dateFormat = new SimpleDateFormat("yyyy-MM-dd HH:mm:ss");Date expireTimeDate = dateFormat.parse(expireTime);Date now = new Date();if (now.after(expireTimeDate)) {return false;}//如果token不为空,且获取到的session不为空,而且session没过期,则认为session在有效期内return true;}//模拟的登录方法public String login(String username, String password) {//基于用户名和密码去登录System.out.println("基于用户名和密码登录:" + username + ", " + password);Random random = new Random();long userId = random.nextInt() * 100;//登录成功后,生成一块令牌String token = UUID.randomUUID().toString().replace("-", "");//基于令牌和用户id去初始化用户的sessioninitSession(userId, token);//返回这个令牌给用户return token;}//用户登录成功之后,初始化一个sessionpublic void initSession(long userId, String token) {SimpleDateFormat dateFormat = new SimpleDateFormat("yyyy-MM-dd HH:mm:ss");Calendar calendar = Calendar.getInstance();calendar.setTime(new Date());calendar.add(Calendar.HOUR, 24);Date expireTime = calendar.getTime();//通过hset来设置sessionjedis.hset("sessions", "session::" + token, String.valueOf(userId));jedis.hset("sessions::expire_time", "session::" + token, dateFormat.format(expireTime));}public static void main(String[] args) throws Exception {SessionDemo demo = new SessionDemo();//第一次访问系统,token都是空的boolean isSessionValid = demo.isSessionValid(null);System.out.println("第一次访问系统的session校验结果:" + (isSessionValid == true ? "通过" : "不通过"));//强制性进行登录,获取到tokenString token = demo.login("test","123456");System.out.println("登录过后拿到令牌:" + token);//第二次再次访问系统,此时是可以访问的isSessionValid = demo.isSessionValid(token);System.out.println("第二次访问系统的session校验结果:" + (isSessionValid == true ? "通过" : "不通过"));}
}
11.秒杀活动下的公平队列抢购机制(List数据结构)
秒杀系统有很多实现方案,其中一种方案就是公平队列方案。对所有涌入系统的秒杀抢购请求,都放入Redis的一个List数据结构里排队,然后请求入队后就让请求等待秒杀结果。接着通过一个消费者从List中按顺序获取抢购请求,按顺序进行库存扣减。扣减成功才响应请求抢购成功,可以通过Redis的rpush和lpop命令实现一个公平队列。
//秒杀活动案例
public class SecKillDemo {private Jedis jedis = new Jedis("127.0.0.1");//秒杀抢购请求入队public void enqueueSecKillRequest(String secKillRequest) {jedis.rpush("sec_kill_request_queue", secKillRequest);}//秒杀抢购请求出队public String dequeueSecKillRequest() {return jedis.lpop("sec_kill_request_queue");}public static void main(String[] args) throws Exception {SecKillDemo demo = new SecKillDemo();for (int i = 0; i < 10; i++) {demo.enqueueSecKillRequest("第" + (i + 1) + "个秒杀请求");}while (true) {String secKillRequest = demo.dequeueSecKillRequest();if (secKillRequest == null || "null".equals(secKillRequest) || "".equals(secKillRequest)) {break;}System.out.println(secKillRequest);}}
}
12.基于List实现博客的分页浏览(List数据结构)
发表博客时就把博客数据lpush到一个List里,分页查询时就通过"lrange list start_index end_index"命令查询某一页的数据,获取所有数据量时就通过"llen list"命令来获取。
//博客网站案例
public class BlogDemo {private Jedis jedis = new Jedis("127.0.0.1");//获取博客idpublic long getBlogId() {return jedis.incr("blog_id_counter");}//发表一篇博客public boolean publishBlog(long id, Map<String, String> blog) {if (jedis.hexists("article::" + id, "title")) {return false;}blog.put("content_length", String.valueOf(blog.get("content").length()));jedis.hset("article::" + id, blog);jedis.lpush("blog_list", String.valueOf(id));return true;}//查看一篇博客public Map<String, String> findBlogById(long id) {Map<String, String> blog = jedis.hgetAll("article::" + id);incrementBlogViewCount(id);return blog;}//更新一篇博客public void updateBlog(long id, Map<String, String> updatedBlog) {String updatedContent = updatedBlog.get("content");if (updatedContent != null && !"".equals(updatedContent)) {updatedBlog.put("content_length", String.valueOf(updatedContent.length()));}jedis.hset("article::" + id, updatedBlog);}//对博客进行点赞public void incrementBlogLikeCount(long id) {jedis.hincrBy("article::" + id, "like_count", 1);}//增加博客浏览次数public void incrementBlogViewCount(long id) {jedis.hincrBy("article::" + id, "view_count", 1);}//分页查询博客public List<String> findBlogByPage(int pageNo, int pageSize) {int startIndex = (pageNo - 1) * pageSize;int endIndex = pageNo * pageSize - 1;return jedis.lrange("blog_list", startIndex, endIndex);}public static void main(String[] args) {BlogDemo demo = new BlogDemo();//发表一篇博客long id = demo.getBlogId();Map<String, String> blog = new HashMap<String, String>();blog.put("id", String.valueOf(id));blog.put("title", "我喜欢学习Redis");blog.put("content", "学习Redis是一件特别快乐的事情");blog.put("author", "test");blog.put("time", "2020-01-01 10:00:00");demo.publishBlog(id, blog);//更新一篇博客Map<String, String> updatedBlog = new HashMap<String, String>();updatedBlog.put("title", "我特别的喜欢学习Redis");updatedBlog.put("content", "我平时喜欢到官方网站上去学习Redis");demo.updateBlog(id, updatedBlog);//构造20篇博客数据for (int i = 0; i < 20; i++) {id = demo.getBlogId();blog = new HashMap<String, String>();blog.put("id", String.valueOf(id));blog.put("title", "第" + (i + 1) + "篇博客");blog.put("content", "学习第" + (i + 1) + "篇博客,是一件很有意思的事情");blog.put("author", "test");blog.put("time", "2020-01-01 10:00:00");demo.publishBlog(id, blog);}//分页浏览所有的博客,先浏览第一页int pageNo = 1;int pageSize = 10;List<String> blogPage = demo.findBlogByPage(pageNo, pageSize);System.out.println("展示第一页的博客......");for (String blogId : blogPage) {blog = demo.findBlogById(Long.valueOf(blogId));System.out.println(blog);}pageNo = 2;blogPage = demo.findBlogByPage(pageNo, pageSize);System.out.println("展示第二页的博客......");for (String blogId : blogPage) {blog = demo.findBlogById(Long.valueOf(blogId));System.out.println(blog);}//点击查看博客的详细内容,并进行点赞Random random = new Random();int blogIndex = random.nextInt(blogPage.size());String blogId = blogPage.get(blogIndex);Map<String, String> blogResult = demo.findBlogById(Long.valueOf(blogId));System.out.println("查看博客的详细内容:" + blogResult);demo.incrementBlogLikeCount(Long.valueOf(blogId));//查看博客的浏览次数和点赞次数blogResult = demo.findBlogById(Long.valueOf(blogId));System.out.println("查看博客的详细内容:" + blogResult);}
}
13.实现OA系统中的待办事项管理(List数据结构)
使用Redis的lindex、lset、linsert、lrange、lrem可实现待办事项管理。
新增待办事项:lpush list event
插入待办事项:linsert list index event
查询待办事项列表:lrange list 0 -1
完成待办事项:lrem list 0 event
添加已办事项:lpush done_list event
修改待办事项:lindex和lset
查询已办事项列表:lrange done_list 0 -01
//OA系统的待办事项的管理案例
public class TodoEventDemo {private Jedis jedis = new Jedis("127.0.0.1");//添加待办事项public void addTodoEvent(long userId, String todoEvent) {jedis.lpush("todo_event::" + userId, todoEvent);}//分页查询待办事项列表public List<String> findTodoEventByPage(long userId, int pageNo, int pageSize) {int startIndex = (pageNo - 1) * pageSize;int endIndex = pageNo * pageSize - 1;return jedis.lrange("todo_event::" + userId, startIndex, endIndex);}//插入待办事项public void insertTodoEvent(long userId, ListPosition position, String targetTodoEvent, String todoEvent) {jedis.linsert("todo_event::" + userId, position, targetTodoEvent, todoEvent);}//修改一个待办事项public void updateTodoEvent(long userId, int index, String updatedTodoEvent) {jedis.lset("todo_event::" + userId, index, updatedTodoEvent);}//完成(移除)一个待办事项public void finishTodoEvent(long userId, String todoEvent) {jedis.lrem("todo_event::" + userId, 0, todoEvent);}public static void main(String[] args) throws Exception {TodoEventDemo demo = new TodoEventDemo();//添加20个待办事项long userId = 2;for (int i = 0; i < 20; i++) {demo.addTodoEvent(userId, "第" + (i + 1) + "个待办事项");}//查询第一页待办事项int pageNo = 1;int pageSize = 10;List<String> todoEventPage = demo.findTodoEventByPage(userId, pageNo, pageSize);System.out.println("第一次查询第一页待办事项......");for (String todoEvent :todoEventPage) {System.out.println(todoEvent);}//插入一个待办事项Random random = new Random();int index = random.nextInt(todoEventPage.size());String targetTodoEvent = todoEventPage.get(index);demo.insertTodoEvent(userId, ListPosition.BEFORE, targetTodoEvent, "插入的待办事项");System.out.println("在" + targetTodoEvent + "前面插入了一个待办事项");//重新分页查询第一页待办事项todoEventPage = demo.findTodoEventByPage(userId, pageNo, pageSize);System.out.println("第二次查询第一页待办事项......");for (String todoEvent :todoEventPage) {System.out.println(todoEvent);}//修改一个待办事项index = random.nextInt(todoEventPage.size());demo.updateTodoEvent(userId, index, "修改后的待办事项");//完成一个待办事项demo.finishTodoEvent(userId, todoEventPage.get(0));//最后查询一次待办事项todoEventPage = demo.findTodoEventByPage(userId, pageNo, pageSize);System.out.println("第三次查询第一页待办事项......");for (String todoEvent :todoEventPage) {System.out.println(todoEvent);}}
}
14.网站用户注册时的邮件验证机制(List数据结构)
用户注册时使用Redis的lpush命令将发送邮件任务放入List,发送邮件时就用Redis的brpop命令阻塞式地从List队列里获取任务。
//注册之后发送邮件的案例
public class SendMailDemo {private Jedis jedis = new Jedis("127.0.0.1");//将发送邮件的任务进入队列public void enqueueSendMailTask(String sendMailTask) {jedis.lpush("send_mail_task_queue", sendMailTask);}//阻塞式获取发送邮件任务//即从List中获取不到元素会阻塞5秒public List<String> takeSendMailTask() {return jedis.brpop(5, "send_mail_task_queue");}public static void main(String[] args) {SendMailDemo demo = new SendMailDemo();System.out.println("尝试阻塞式地获取发送邮件任务......");//此时队列中没有任务,会进行阻塞List<String> sendMailTasks = demo.takeSendMailTask();demo.enqueueSendMailTask("第一个邮件发送任务");sendMailTasks = demo.takeSendMailTask();System.out.println(sendMailTasks);}
}
15.网站每日UV数据指标去重统计(Set数据结构)
每日UV就是每日的独立访客,可以使用Redis的Set数据结构来实现,具体可以使用Redis的sadd命令添加访客和scard命令统计访客。
//网站UV统计案例
public class UVDemo {private Jedis jedis = new Jedis("127.0.0.1");//添加一次用户访问记录public void addUserAccess(long userId) {SimpleDateFormat dateFormat = new SimpleDateFormat("yyyy-MM-dd");String today = dateFormat.format(new Date());jedis.sadd("user_access::" + today, String.valueOf(userId));}//获取当天的网站uv的值public long getUV() {SimpleDateFormat dateFormat = new SimpleDateFormat("yyyy-MM-dd");String today = dateFormat.format(new Date());return jedis.scard("user_access::" + today);}public static void main(String[] args) throws Exception {UVDemo demo = new UVDemo();for (int i = 0; i < 100; i++) {long userId = i + 1;for (int j = 0; j < 10; j++) {demo.addUserAccess(userId);}}long uv = demo.getUV();System.out.println("当日uv为:" + uv);}
}
16.博客网站的文章标签管理(Set数据结构)
使用Redis的sadd和smembers命令可管理标签。
//博客网站案例
public class BlogDemo {private Jedis jedis = new Jedis("127.0.0.1");//获取博客idpublic long getBlogId() {return jedis.incr("blog_id_counter");}//发表一篇博客public boolean publishBlog(long id, Map<String, String> blog, String[] tags) {if (jedis.hexists("article::" + id, "title")) {return false;}blog.put("content_length", String.valueOf(blog.get("content").length()));jedis.hmset("article::" + id, blog);jedis.lpush("blog_list", String.valueOf(id));jedis.sadd("article::" + id + "::tags", tags);return true;}//查看一篇博客public Map<String, String> findBlogById(long id) {Map<String, String> blog = jedis.hgetAll("article::" + id);Set<String> tags = jedis.smembers("article::" + id + "::tags");blog.put("tags", tags.toString());incrementBlogViewCount(id);return blog;}...
}
17.朋友圈点赞功能的实现(Set数据结构)
用户对某条朋友圈进行点赞,可以使用sadd命令。用户对某条朋友圈取消点赞,可以使用srem命令。查看某个用户是否对某条朋友圈进行过点赞,可以使用sismember命令。查看某条朋友圈具体被哪些人点赞,可以使用smembers命令。查看某条朋友圈的点赞次数,可以使用scard命令。
//朋友圈点赞案例
public class MomentsDemo {private Jedis jedis = new Jedis("127.0.0.1");//对某条朋友圈进行点赞public void likeMoment(long userId, long momentId) {jedis.sadd("moment_like_users::" + momentId, String.valueOf(userId));}//对某条朋友圈取消点赞public void dislikeMoment(long userId, long momentId) {jedis.srem("moment_like_users::" + momentId, String.valueOf(userId));}//查看自己是否对某条朋友圈点赞过public boolean hasLikedMoment(long userId, long momentId) {return jedis.sismember("moment_like_users::" + momentId, String.valueOf(userId));}//获取某条朋友圈有哪些人点赞了public Set<String> getMomentLikeUsers(long momentId) {return jedis.smembers("moment_like_users::" + momentId);}//获取某条朋友圈被几个人点赞了public long getMomentLikeUsersCount(long momentId) {return jedis.scard("moment_like_users::" + momentId);}public static void main(String[] args) throws Exception {MomentsDemo demo = new MomentsDemo();//用户idlong userId = 11;//朋友圈idlong momentId = 151;//朋友1的用户idlong friendId = 12;//朋友2的用户idlong otherFriendId = 13;//朋友1对你的朋友圈进行点赞,再取消点赞demo.likeMoment(friendId, momentId);demo.dislikeMoment(friendId, momentId);boolean hasLikedMoment = demo.hasLikedMoment(friendId, momentId);System.out.println("朋友1刷朋友圈,看到是否对自己的朋友圈点赞过:" + (hasLikedMoment ? "是" : "否"));//朋友2对你的朋友圈进行点赞demo.likeMoment(otherFriendId, momentId);hasLikedMoment = demo.hasLikedMoment(otherFriendId, momentId);System.out.println("朋友2刷朋友圈,看到是否对自己的朋友圈点赞过:" + (hasLikedMoment ? "是" : "否"));//查看自己的朋友圈的点赞情况Set<String> momentLikeUsers = demo.getMomentLikeUsers(momentId);long momentLikeUsersCount = demo.getMomentLikeUsersCount(momentId);System.out.println("自己刷朋友圈,看到自己发的朋友圈被" + momentLikeUsersCount + "个人点赞了,点赞的用户为:" + momentLikeUsers);}
}
18.实现一个网站投票统计程序(Set数据结构)
使用Redis的sadd和scard命令可实现投票功能。
//投票统计案例
public class VoteDemo {private Jedis jedis = new Jedis("127.0.0.1");//投票public void vote(long userId, long voteItemId) {jedis.sadd("vote_item_users::" + voteItemId, String.valueOf(userId));}//检查用户对投票项是否投过票public boolean hasVoted(long userId, long voteItemId) {return jedis.sismember("vote_item_users::" + voteItemId, String.valueOf(userId));}//获取一个投票项被哪些人投票public Set<String> getVoteItemUsers(long voteItemId) {return jedis.smembers("vote_item_users::" + voteItemId);}//获取一个投票项被多少人投票public long getVoteItemUsersCount(long voteItemId) {return jedis.scard("vote_item_users::" + voteItemId);}public static void main(String[] args) throws Exception {VoteDemo demo = new VoteDemo();//定义用户idlong userId = 1;//定义投票项idlong voteItemId = 110;//进行投票demo.vote(userId, voteItemId);//检查我是否投票过boolean hasVoted = demo.hasVoted(userId, voteItemId);System.out.println("用户查看自己是否投票过:" +(hasVoted ? "是" : "否"));//归票统计Set<String> voteItemUsers = demo.getVoteItemUsers(voteItemId);long voteItemUsersCount = demo.getVoteItemUsersCount(voteItemId);System.out.println("投票项有哪些人投票:" + voteItemUsers + ",有几个人投票:" + voteItemUsersCount);}
}
19.实现微博的社交关系(Set数据结构)
使用Redis的sadd命令和srem命令可以实现类似微博的关注和取关功能,使用Redis的sinter命令可以获取共同关注的人(两个Set取交集),使用Redis的sdiff命令可以获取没有关注的人(两个Set取差集)。
//微博案例
public class MicroBlogDemo {private Jedis jedis = new Jedis("127.0.0.1");//关注别人,userId关注followUserIdpublic void follow(long userId, long followUserId) {jedis.sadd("user::" + followUserId + "::followers", String.valueOf(userId));//关注者都有谁jedis.sadd("user::" + userId + "::follow_users", String.valueOf(followUserId));//都关注了谁}//取消关注别人public void unfollow(long userId, long followUserId) {jedis.srem("user::" + followUserId + "::followers", String.valueOf(userId));//关注者都有谁jedis.srem("user::" + userId + "::follow_users", String.valueOf(followUserId));//都关注了谁}//查看有哪些人关注了自己public Set<String> getFollowers(long userId) {return jedis.smembers("user::" + userId + "::followers");//关注者都有谁}//查看关注了自己的人数public long getFollowersCount(long userId) {return jedis.scard("user::" + userId + "::followers");//关注者都有谁}//查看自己关注了哪些人public Set<String> getFollowUsers(long userId) {return jedis.smembers("user::" + userId + "::follow_users");//都关注了谁}//查看自己关注的人数public long getFollowUsersCount(long userId) {return jedis.scard("user::" + userId + "::follow_users");//都关注了谁}//获取用户跟其他用户之间共同关注的人有哪些public Set<String> getSameFollowUsers(long userId, long otherUserId) {return jedis.sinter("user::" + userId + "::follow_users", "user::" + otherUserId + "::follow_users");}//获取otherUserId关注的,但userId没有关注的人,这些人可以推荐给userIdpublic Set<String> getRecommendFollowUsers(long userId, long otherUserId) {return jedis.sdiff("user::" + otherUserId + "::follow_users", "user::" + userId + "::follow_users");}public static void main(String[] args) throws Exception {MicroBlogDemo demo = new MicroBlogDemo();//定义用户idlong userId = 31;long friendId = 32;long superstarId = 33;long classmateId = 34;long motherId = 35;//定义关注的关系链demo.follow(userId, friendId);demo.follow(userId, motherId);demo.follow(userId, superstarId);demo.follow(friendId, superstarId);demo.follow(friendId, classmateId);//明星看看自己被哪些人关注了Set<String> superstarFollowers = demo.getFollowers(superstarId);long superstarFollowersCount = demo.getFollowersCount(superstarId);System.out.println("明星被哪些人关注了:" + superstarFollowers + ",被关注的人数为:" + superstarFollowersCount);//朋友看看自己被哪些人关注了,自己又关注了哪些人Set<String> friendFollowers = demo.getFollowers(friendId);long friendFollowersCount = demo.getFollowersCount(friendId);System.out.println("朋友被哪些人关注了:" + friendFollowers + ",被多少人关注了:" + friendFollowersCount);Set<String> friendFollowUsers = demo.getFollowUsers(friendId);long friendFollowUsersCount = demo.getFollowUsersCount(friendId);System.out.println("朋友关注了哪些人:" + friendFollowUsers + ",关注了多少人:" + friendFollowUsersCount);//查看我关注了哪些人Set<String> myFollowUsers = demo.getFollowUsers(userId);long myFollowUsersCount = demo.getFollowUsersCount(userId);System.out.println("我关注了哪些人:" + myFollowUsers + ", 我关注的人数:" + myFollowUsersCount);//获取我和朋友共同关注的用户Set<String> sameFollowUsers = demo.getSameFollowUsers(userId, friendId);System.out.println("我和朋友共同关注的人有哪些:" + sameFollowUsers);//获取可以推荐给我关注的人Set<String> recommendFollowUsers = demo.getRecommendFollowUsers(userId, friendId);System.out.println("推荐给我关注的人有哪些:" + recommendFollowUsers);}
}
20.实现网站上的抽奖程序(Set数据结构)
使用Redis的sadd命令和srandmember命令可以实现抽奖功能。
//抽奖案例
public class LotteryDrawDemo {private Jedis jedis = new Jedis("127.0.0.1");//添加抽奖候选人public void addLotteryDrawCandidate(long userId, long lotteryDrawEventId) {jedis.sadd("lottery_draw_event::" + lotteryDrawEventId +"::candidates", String.valueOf(userId));}//实际进行抽奖public List<String> doLotteryDraw(long lotteryDrawEventId, int count) {return jedis.srandmember("lottery_draw_event::" + lotteryDrawEventId +"::candidates", count);}public static void main(String[] args) throws Exception {LotteryDrawDemo demo = new LotteryDrawDemo();int lotteryDrawEventId = 120;for (int i = 0; i < 20; i++) {demo.addLotteryDrawCandidate(i + 1, lotteryDrawEventId);}List<String> lotteryDrawUsers = demo.doLotteryDraw(lotteryDrawEventId, 3);System.out.println("获奖人选为:" + lotteryDrawUsers);}
}
21.为商品搜索构建反向索引(Set数据结构)
使用Redis的sadd命令和sinter命令可以为商品搜索构建反向索引。
//商品搜索案例
public class ProductSearchDemo {private Jedis jedis = new Jedis("127.0.0.1");//添加商品的时候附带一些关键词public void addProduct(long productId, String[] keywords) {for (String keyword : keywords) {jedis.sadd("keyword::" + keyword + "::products", String.valueOf(productId));}}//根据多个关键词搜索商品public Set<String> searchProduct(String[] keywords) {List<String> keywordSetKeys = new ArrayList<String>();for (String keyword : keywords) {keywordSetKeys.add("keyword::" + keyword + "::products");}String[] keywordArray = keywordSetKeys.toArray(new String[keywordSetKeys.size()]);return jedis.sinter(keywordArray);}public static void main(String[] args) throws Exception {ProductSearchDemo demo = new ProductSearchDemo();//添加一批商品demo.addProduct(11, new String[]{"手机", "iphone", "潮流"});demo.addProduct(12, new String[]{"iphone", "潮流", "炫酷"});demo.addProduct(13, new String[]{"iphone", "天蓝色"});//根据关键词搜索商品Set<String> searchResult = demo.searchProduct(new String[]{"iphone", "潮流"});System.out.println("商品搜索结果为:" + searchResult);}
}
22.实现音乐网站的排行榜(Sorted Set数据结构)
Redis的Sorted Set里的元素会按照分数进行排序。使用zadd命令可以把音乐加入排行榜中(刚开始分数可能就是0),使用zscore命令可以获取音乐的分数,使用zrem命令可以删除某首音乐,使用zincrby命令可以给某首音乐增加分数(比如播放、分享、点赞时),使用zrevrank命令可以获取音乐在排行榜里的排名,使用zrevrange set 0 100 withscores(可以获取排名前100首热门歌曲)。
//音乐排行榜案例
public class MusicRankingListDemo {private Jedis jedis = new Jedis("127.0.0.1");//把新的音乐加入到排行榜里去public void addSong(long songId) {jedis.zadd("music_ranking_list", 0, String.valueOf(songId));}//增加歌曲的分数public void incrementSongScore(long songId, double score) {jedis.zincrby("music_ranking_list", score, String.valueOf(songId));}//获取歌曲在排行榜里的排名public long getSongRank(long songId) {return jedis.zrevrank("music_ranking_list", String.valueOf(songId));}//获取音乐排行榜public Set<Tuple> getMusicRankingList() {return jedis.zrevrangeWithScores("music_ranking_list", 0, 2);}public static void main(String[] args) throws Exception {MusicRankingListDemo demo = new MusicRankingListDemo();for (int i = 0; i < 20; i++) {demo.addSong(i + 1);}demo.incrementSongScore(5, 3.2);demo.incrementSongScore(15, 5.6);demo.incrementSongScore(7, 9.6);long songRank = demo.getSongRank(5);System.out.println("查看id为5的歌曲的排名:" + (songRank + 1));Set<Tuple> musicRankingList = demo.getMusicRankingList();System.out.println("查看音乐排行榜排名前3的歌曲:" + musicRankingList);}
}
23.实现获取指定时间的新闻(Sorted Set数据结构)
可以对Redis里的Sorted Set的数据进行倒序排序,然后可以选择其中指定的分数区间范围内的数据,并进行分页查询。
可以维护一个新闻数据集合,里面的分数都是新闻的时间戳。使用zadd命令可以把当日最新的新闻加入到一个集合里,使用zrem命令可以删除某个新闻,使用zcard命令可以统计当日最新新闻,使用zrevrangeByScoreWithScores命令可以按时间分数进行倒序排序,使用zcount命令可以获取指定分数范围的数量。
//新闻浏览案例
public class NewsDemo {private Jedis jedis = new Jedis("127.0.0.1");//加入一篇新闻public void addNews(long newsId, long timestamp) {jedis.zadd("news", timestamp, String.valueOf(newsId));}//搜索新闻public Set<Tuple> searchNews(long maxTimestamp, long minTimestamp, int index , int count) {return jedis.zrevrangeByScoreWithScores("news", maxTimestamp, minTimestamp, index, count);}public static void main(String[] args) throws Exception {NewsDemo demo = new NewsDemo();for (int i = 0; i < 20; i++) {demo.addNews(i + 1, i + 1);}long maxTimestamp = 18;long minTimestamp = 2;int pageNo = 1;int pageSize = 10;int startIndex = (pageNo - 1) * 10;Set<Tuple> searchResult = demo.searchNews(maxTimestamp, minTimestamp, startIndex, pageSize);System.out.println("搜索指定时间范围内的新闻的第一页:" + searchResult);}
}
24.实现购买某商品时也会购买其他商品的推荐功能(Sorted Set数据结构)
用户购买两个商品时,其中一个商品可以作为key,另一个商品作为value,商品的购买数量作为score,设置到Redis的Sorted Set数据结构中,这样后续就可以根据score分数来获取购买某商品时应该推荐那些商品,对应的Redis命令是zincrby命令和zrevrangeWithScores命令。
//推荐其他商品案例
public class RecommendProductDemo {private Jedis jedis = new Jedis("127.0.0.1");//购买商品productId的同时,也购买了商品otherProductIdpublic void continuePurchase(long productId, long otherProductId) {jedis.zincrby("continue_purchase_products::" + productId, 1, String.valueOf(otherProductId));}//推荐其他人购买productId时也会购买的其他商品public Set<Tuple> getRecommendProducts(long productId) {return jedis.zrevrangeWithScores("continue_purchase_products::" + productId, 0, 2);}public static void main(String[] args) throws Exception {RecommendProductDemo demo = new RecommendProductDemo();int productId = 1;for (int i = 0; i < 20; i++) {demo.continuePurchase(productId, i + 2);}for (int i = 0; i < 3; i++) {demo.continuePurchase(productId, i + 2);}Set<Tuple> recommendProducts = demo.getRecommendProducts(productId);System.out.println("推荐其他人购买过的商品:" + recommendProducts);}
}
25.实现搜索框的自动补全(Sorted Set数据结构)
使用zincrby命令和zrevrange命令可以实现搜索框的自动补全功能。每次搜索时,key为潜在搜索词,value为完整搜索词,score为当前时间。
//自动补全案例
public class AutoCompleteDemo {private Jedis jedis = new Jedis("127.0.0.1");//搜索某个关键词public void search(String keyword) {char[] keywordCharArray = keyword.toCharArray();StringBuffer potentialKeyword = new StringBuffer("");for (char keywordChar : keywordCharArray) {potentialKeyword.append(keywordChar);//key为潜在搜索词,value为完整搜索词,score为当前时间jedis.zincrby("potential_Keyword::" + potentialKeyword.toString() + "::keywords", new Date().getTime(), keyword);}}//获取自动补全列表//按照score排序,就可以获取最新搜索的搜索词public Set<String> getAutoCompleteList(String potentialKeyword) {return jedis.zrevrange("potential_Keyword::" + potentialKeyword + "::keywords", 0, 2);}public static void main(String[] args) throws Exception {AutoCompleteDemo demo = new AutoCompleteDemo();demo.search("我爱大家");demo.search("我喜欢学习Redis");demo.search("我很喜欢一个城市");demo.search("我不太喜欢玩儿");demo.search("我喜欢学习Spark");Set<String> autoCompleteList = demo.getAutoCompleteList("我");System.out.println("第一次自动补全推荐:" + autoCompleteList);autoCompleteList = demo.getAutoCompleteList("我喜");System.out.println("第二次自动补全推荐:" + autoCompleteList);}
}
26.基于HyperLogLog的网站UV统计程序(HyperLogLog数据结构)
Redis的HyperLogLog可以得到去重统计的近似数。如果基于Redis的set来统计UV,则太耗费内存了,而且也没必要太精准。如果基于HyperLogLog来统计UV,则只占12KB内存,且误差只有0.8%。
使用Redis的HyperLogLog的具体方式是:先通过pfadd命令对数据进行计数,再通过pfcount命令获取计数结果。
//基于HyperLogLog统计UV的案例
public class HyperLogLogUVDemo {private Jedis jedis = new Jedis("127.0.0.1");//初始化uv数据public void initUVData() {SimpleDateFormat dateFormat = new SimpleDateFormat("yyyy-MM-dd");String today = dateFormat.format(new Date());for (int i = 0; i < 1358; i++) {for (int j = 0; j < 10; j++) {jedis.pfadd("hyperloglog_uv_" + today, String.valueOf((i + 1)));}}}//获取uv值public long getUV() {SimpleDateFormat dateFormat = new SimpleDateFormat("yyyy-MM-dd");String today = dateFormat.format(new Date());return jedis.pfcount("hyperloglog_uv_" + today);}public static void main(String[] args) throws Exception {HyperLogLogUVDemo demo = new HyperLogLogUVDemo();demo.initUVData();long uv = demo.getUV();System.out.println("今天uv的值是:" + uv);}
}
27.网站重复垃圾数据的快速去重和过滤(HyperLogLog数据结构)
可以使用Redis的HyperLogLog对垃圾数据进行快速过滤,比如通过执行"pfadd key content"命令。如果返回的是1,那么说明之前没见过这条数据。如果返回的是0,说明之前见过这条数据了。
//垃圾内容过滤案例
public class GarbageContentFilterDemo {private Jedis jedis = new Jedis("127.0.0.1");//判断当前内容是否是垃圾内容public Boolean isGarbageContent(String content) {return jedis.pfadd("hyperloglog_contennt", content) == 0;}public static void main(String[] args) {GarbageContentFilterDemo demo = new GarbageContentFilterDemo();String content = "正常的内容";System.out.println("是否为垃圾内容:" + (demo.isGarbageContent(content) ? "是" : "否"));content = "垃圾内容";System.out.println("是否为垃圾内容:" + (demo.isGarbageContent(content) ? "是" : "否"));content = "垃圾内容";System.out.println("是否为垃圾内容:" + (demo.isGarbageContent(content) ? "是" : "否"));}
}
28.周活月活年活的统计(HyperLogLog数据结构)
首先使用pfadd命令对每天日活进行计数,然后再通过pfcount命令获取每天日活结果,周活跃用户数和年活跃用户数都可以基于日活跃用户数来进行统计。
//网站日常指标统计案例
public class WebsiteStatisticsDemo {private Jedis jedis = new Jedis("127.0.0.1");//初始化某一天的uv数据public void initUVData(String date) {Random random = new Random();int startIndex = random.nextInt(1000);System.out.println("今日访问uv起始id为:" + startIndex);for (int i = startIndex; i < startIndex + 1358; i++) {for (int j = 0; j < 10; j++) {jedis.pfadd("hyperloglog_uv_" + date, String.valueOf((i + 1)));}}}//获取某日的uv值public long getUV(String date) {return jedis.pfcount("hyperloglog_uv_" + date);}//获取周活跃用户数public long getWeeklyUV() {List<String> keys = new ArrayList<String>();SimpleDateFormat dateFormat = new SimpleDateFormat("yyyy-MM-dd");Calendar calendar = Calendar.getInstance();calendar.setTime(new Date());for (int i = 0; i < 7; i++) {calendar.add(Calendar.DAY_OF_YEAR, 1);String date = dateFormat.format(calendar.getTime());keys.add("hyperloglog_uv_" + date);}String[] keyArray = keys.toArray(new String[keys.size()]);jedis.pfmerge("weekly_uv", keyArray);return jedis.pfcount("weekly_uv");}public static void main(String[] args) throws Exception {WebsiteStatisticsDemo demo = new WebsiteStatisticsDemo();SimpleDateFormat dateFormat = new SimpleDateFormat("yyyy-MM-dd");Calendar calendar = Calendar.getInstance();calendar.setTime(new Date());long duplicateUv = 0;for (int i = 0; i < 7; i++) {calendar.add(Calendar.DAY_OF_YEAR, 1);String date = dateFormat.format(calendar.getTime());demo.initUVData(date);long uv = demo.getUV(date);System.out.println("日期为" + date + "的uv值为:" + uv);duplicateUv += uv;}long weeklyUV = demo.getWeeklyUV();System.out.println("实际的周活跃用户数为:" + weeklyUV);}
}
29.基于位图的用户行为记录(BitMap数据结构)
Redis的位图命令setbit:一个字节(byte)8个位(bit),每个位是0或者1。"setbit key offset value",指将左起向右偏移offset的位置设置value。
如果用户系统需要统计某用户登录天数,且统计窗口随机。那么这时可这样设计:以用户ID为位图的key,登录日期天数作为偏移量。
所以这个key是有365个位的。用户在某一天登录了,就在这个key上对应的偏移量设1。用户user1在第2天登录了,可以设置:"setbit user1 1 1"。用户user1在第8天登录了,可以设置:"setbit user1 7 1"。用户user1在第365天登录了,可以设置:"setbit user1 364 1"。这样一个用户总共就只需要46个字节而已,1亿用户 * 46byte = 4G。查看用户最后两周是否登录,可以执行:"bitcount user1 -2 -1"。
如果要把活跃用户统计出来,比如1号~3号连续登录要去重。那么可以这样设计:以日期为位图的key,用户ID作为偏移量。固定好对应于二进制位的那一个位,id和二进制位做好映射。
比如1号用户在2020年1月1号登录了,那么"setbit 20200101 1 1"。比如1号用户在2020年1月2号登录了,那么"setbit 20200102 1 1"。比如7号用户在2020年1月2号登录了,那么"setbit 20200102 7 1"。因此可以通过位或算出2020年1月2号到2020年1月2号的活跃用户数是:"bitop or destkey 20200101 20200102"。然后获取destkey有多少个1即可:"bitcount destkey 0 -1"。
如果要记录用户是否执行过某些操作,也可以使用位图来实现高效记录。此时可这样设计:以操作类型为位图的key,用户ID作为位图的偏移量。
//网站用户操作日志案例
public class UserOperationLogDemo {private Jedis jedis = new Jedis("127.0.0.1");//记录用户的操作日志public void recordUserOperationLog(String operation, long userId) {SimpleDateFormat dateFormat = new SimpleDateFormat("yyyy-MM-dd");String today = dateFormat.format(new Date());jedis.setbit("operation::" + operation + "::" + today + "::log", userId, String.valueOf(1));}//判断用户今天是否执行过某个操作public Boolean hasOperated(String operation, long userId) {SimpleDateFormat dateFormat = new SimpleDateFormat("yyyy-MM-dd");String today = dateFormat.format(new Date());return jedis.getbit("operation::" + operation + "::" + today + "::log", userId);}public static void main(String[] args) {UserOperationLogDemo demo = new UserOperationLogDemo();demo.recordUserOperationLog("操作1", 110);System.out.println("用户110是否执行过操作:" + (demo.hasOperated("操作1", 110) ? "是" : "否"));System.out.println("用户111是否执行过操作:" + (demo.hasOperated("操作1", 111) ? "是" : "否"));}
}
30.基于Geo的距离计算程序(Geo数据结构)
使用Redis的geoadd命令和geodist命令可以计算两个经纬度的距离。
//用户与商家的距离计算案例
public class UserShopDistanceDemo {private Jedis jedis = new Jedis("127.0.0.1");//添加一个地理位置public void addLocation(String name, double longitude, double latitude) {jedis.geoadd("location_data", longitude, latitude, name);}//获取用户到商家的位置public double getDistance(String user, String shop) {return jedis.geodist("location_data", user, shop, GeoUnit.KM);}public static void main(String[] args) {UserShopDistanceDemo demo = new UserShopDistanceDemo();demo.addLocation("张三", 116.49428833935545, 39.86700462665782);demo.addLocation("丫丫小吃店", 116.45961274121092, 39.87517301328063);System.out.println("用户到商家的距离为:" + demo.getDistance("张三", "丫丫小吃店"));}
}
31.陌生人社交里的查找附近的人(Geo数据结构)
使用Redis的georadiusByMember命令可以查找某位置附近的位置。
//查找附近的人案例
public class NearbyShopsDemo {private Jedis jedis = new Jedis("127.0.0.1");//添加一个地理位置public void addLocation(String name, double longitude, double latitude) {jedis.geoadd("location_data", longitude, latitude, name);}//查找附近5公里内的店铺public List<GeoRadiusResponse> getNearbyShops() {return jedis.georadiusByMember("location_data", "张三", 5.0, GeoUnit.KM);}public static void main(String[] args) {NearbyShopsDemo demo = new NearbyShopsDemo();List<String> nearbyShops = new ArrayList<String>();List<GeoRadiusResponse> results = demo.getNearbyShops();for (GeoRadiusResponse result : results) {String name = result.getMemberByString();if (!name.equals("张三")) {nearbyShops.add(name);}}System.out.println("附近5公里内的商家:" + nearbyShops);}
}
32.带有自动过期时间的分布式缓存(expire命令)
其实就是使用Redis的expire命令设置过期时间。
//数据自动过期的案例
public class ExpireDemo {private static Jedis jedis = new Jedis("127.0.0.1");public static void main(String[] args) throws Exception {jedis.set("test_key", "test_value");jedis.expire("test_key", 10);Thread.sleep(12 * 1000);String testValue = jedis.get("test_key");System.out.println("数据是否过期:" + (testValue == null || "null".equals(testValue) ? "是" : "否"));}
}
33.支持超时自动释放的简单分布式锁(expire命令)
其实就是使用Redis的setnx命令和expire命令设置锁及其过期时间。
//支持超时自动释放的简单分布式锁案例
public class TimeoutDistributedLockDemo {private static Jedis jedis = new Jedis("127.0.0.1");//加锁public Boolean lock(String key, String value, int timeout) {long result = jedis.setnx(key, value);jedis.expire(key, timeout);return result > 0;}public static void main(String[] args) throws Exception {TimeoutDistributedLockDemo demo = new TimeoutDistributedLockDemo();demo.lock("test_lock", "test_value", 10);Thread.sleep(12 * 1000);Boolean result = demo.lock("test_lock", "test_value", 10);System.out.println("第二次加锁结果:" + (result ? "成功" : "失败"));}
}
34.支持自动过期的用户登录会话实现(expire命令)
通过expire命令设置过期时间让用户登录自动过期。
//用户会话管理案例
public class SessionDemo {private Jedis jedis = new Jedis("127.0.0.1");//检查session是否有效public boolean isSessionValid(String token) throws Exception {//校验token是否为空if (token == null || "".equals(token)) {return false;}String session = jedis.get( "session::" + token);if (session == null || "".equals(session) || "null".equals(session)) {return false;}//如果token不为空,且获取到的Session不为空,且Session没过期,此时可以认为Session在有效期内return true;}//模拟的登录方法public String login(String username, String password) {//基于用户名和密码去登录System.out.println("基于用户名和密码登录:" + username + ", " + password);Random random = new Random();long userId = random.nextInt() * 100;//登录成功后,生成一块令牌String token = UUID.randomUUID().toString().replace("-", "");//基于令牌和用户id去初始化用户的Sessionjedis.set("session::" + token, String.valueOf(userId));jedis.expire("session::" + token, 10);//返回这个令牌给用户return token;}public static void main(String[] args) throws Exception {SessionDemo demo = new SessionDemo();//第一次访问系统,token都是空的boolean isSessionValid = demo.isSessionValid(null);System.out.println("第一次访问系统的Session校验结果:" + (isSessionValid == true ? "通过" : "不通过"));//强制性进行登录,获取到tokenString token = demo.login("test","123456");System.out.println("登陆过后拿到令牌:" + token);//第二次再次访问系统,此时是可以访问的isSessionValid = demo.isSessionValid(token);System.out.println("第二次访问系统的Session校验结果:" + (isSessionValid == true ? "通过" : "不通过"));Thread.sleep(12 * 1000);//第三次再次访问系统,Session已过期,此时是不可以访问的isSessionValid = demo.isSessionValid(token);System.out.println("第三次访问系统的Session校验结果:" + (isSessionValid == true ? "通过" : "不通过"));}
}
35.支持冷数据自动淘汰的自动补全(expire命令)
通过expire命令设置过期时间让冷数据自动淘汰实现冷热分离。
//自动补全案例
public class AutoCompleteDemo {private Jedis jedis = new Jedis("127.0.0.1");//搜索某个关键词public void search(String keyword) {char[] keywordCharArray = keyword.toCharArray();StringBuffer potentialKeyword = new StringBuffer("");for (char keywordChar : keywordCharArray) {potentialKeyword.append(keywordChar);jedis.zincrby("potential_Keyword::" + potentialKeyword.toString() + "::keywords", new Date().getTime(), keyword);//通过设置过期时间,冷数据就会自动淘汰jedis.expire("potential_Keyword::" + potentialKeyword.toString() + "::keywords", 10);}}//获取自动补全列表public Set<String> getAutoCompleteList(String potentialKeyword) {return jedis.zrevrange("potential_Keyword::" + potentialKeyword + "::keywords", 0, 2);}public static void main(String[] args) throws Exception {AutoCompleteDemo demo = new AutoCompleteDemo();demo.search("我爱大家");demo.search("我喜欢学习Redis");demo.search("我很喜欢一个城市");demo.search("我不太喜欢玩儿");demo.search("我喜欢学习Spark");Set<String> autoCompleteList = demo.getAutoCompleteList("我");System.out.println("第一次自动补全推荐:" + autoCompleteList);autoCompleteList = demo.getAutoCompleteList("我喜");System.out.println("第二次自动补全推荐:" + autoCompleteList);Thread.sleep(12 * 1000);autoCompleteList = demo.getAutoCompleteList("我");System.out.println("第三次自动补全推荐:" + autoCompleteList);}
}
36.支持身份验证的分布式锁释放(pipeline命令)
通过Redis的pipeline命令和事务操作可以保证多个命令在一个事务内全部完成,从而减少多次网络请求带来的开销。
pipeline的watch命令可以在事务开始执行前对所要操作的key执行监测,从而保证了事务的完整性和一致性。因此,为了防止锁篡改,可以在加锁完成之后对锁进行watch操作,一旦锁发生变化,则终止事务,回滚操作。
//支持超时自动释放的分布式锁案例
public class TimeoutDistributedLockDemo {private static Jedis jedis = new Jedis("127.0.0.1");//加锁public Boolean lock(String key, String value, int timeout) {long result = jedis.setnx(key, value);jedis.expire(key, timeout);return result > 0;}//释放锁,需要判断是否是当前线程加的锁,才可以释放//key是锁的名称,value是线程名称public Boolean unlock(String key, String value) {String currentValue = jedis.get(key);Pipeline pipeline = jedis.pipelined();try {pipeline.watch(key);if (currentValue == null || currentValue.equals("") || currentValue.equals("null")) {return true;}if (currentValue.equals(value)) {//通过pipeline.multi()命令开启事务pipeline.multi();pipeline.del(key);//通过pipeline.exec()提交事务pipeline.exec();return true;} else {return false;}} catch (Exception e) {e.printStackTrace();return false;} finally {pipeline.unwatch();pipeline.close();}}public static void main(String[] args) throws Exception {TimeoutDistributedLockDemo demo = new TimeoutDistributedLockDemo();demo.lock("test_lock", "test_value", 10);Thread.sleep(12 * 1000);Boolean result = demo.lock("test_lock", "test_value", 10);System.out.println("第二次加锁结果:" + (result ? "成功" : "失败"));System.out.println("不是加锁线程能否释放锁:" + (demo.unlock("test_lock", "非加锁线程的名称") ? "能" : "否"));System.out.println("加锁线程能否释放锁:" + (demo.unlock("test_lock", "加锁线程的名称") ? "能" : "否"));}
}
相关文章:

Redis应用—9.简单应用汇总
大纲 1.基于Redis实现的简单缓存机制(String数据结构) 2.实现一个最简单的分布式锁(String数据结构) 3.博客网站的文章发布与查看(String数据结构) 4.博客字数统计与文章预览(String数据结构) 5.用户操作日志审计功能(String数据结构) 6.实现一个简单的唯一ID生成器(incr…...

powershell基础(1)
powershell基础(1) 1. 安装PowerShell 首先,确保你的计算机上已经安装了PowerShell。对于Windows 10及更高版本,PowerShell通常是默认安装的。你也可以从微软官网下载并安装最新版本的PowerShell Core。 2. 打开PowerShell 在Windows搜索栏中输入“P…...

【NLP 18、新词发现和TF·IDF】
目录 一、新词发现 1.新词发现的衡量标准 ① 内部稳固 ② 外部多变 2.示例 ① 初始化类 NewWordDetect ② 加载语料信息,并进行统计 ③ 统计指定长度的词频及其左右邻居字符词频 ④ 计算熵 ⑤ 计算左右熵 编辑 ⑥ 统计词长总数 ⑦ 计算互信息 ⑧ 计算每个词…...

C# 从控制台应用程序入门
总目录 前言 从创建并运行第一个控制台应用程序,快速入门C#。 一、新建一个控制台应用程序 控制台应用程序是C# 入门时,学习基础语法的最佳应用程序。 打开VS2022,选择【创建新项目】 搜索【控制台】,选择控制台应用(.NET Framew…...

怿星科技联合赛力斯举办workshop活动,进一步推动双方合作
12月18日,由怿星科技与赛力斯汽车联合举办的workshop活动在赛力斯五云湖总部展开,双方嘉宾围绕智能汽车发展趋势、行业前沿技术、汽车电子网络与功能测试等核心议题展开了深度对话与交流,并现场参观演示了多套前沿产品。怿星科技CEO潘凯、汽车…...

JVM和数据库面试知识点
JVM内存结构 主要有几部分:堆、栈、方法区和程序计数器 堆是JVM中最大的一块内存区域,用于存储对象实例,一般通过new创建的对象都存放在堆中。堆被所有的线程共享,但是它的访问时线程不安全的,通常通过锁的机制来保证线…...

批量提取zotero的论文构建知识库做问答的大模型(可选)——含转存PDF-分割统计PDF等
文章目录 提取zotero的PDF上传到AI平台保留文件名代码分成20个PDF视频讲解 提取zotero的PDF 右键查看目录 发现目录为 C:\Users\89735\Zotero\storage 写代码: 扫描路径‘C:\Users\89735\Zotero\storage’下面的所有PDF文件,全部复制一份汇总到"C:\Users\89735\Downl…...

Codeforces Round 993 (Div. 4)个人训练记录
Codeforces Round 993 (Div. 4) 只选择对我有价值的题目记录 E. Insane Problem 题目描述 给定五个整数 k k k, l 1 l_1 l1, r 1 r_1 r1, l 2 l_2 l2 和 r 2 r_2 r2,Wave 希望你帮助她计算满足以下所有条件的有序对 …...

【优选算法---分治】快速排序三路划分(颜色分类、快速排序、数组第K大的元素、数组中最小的K个元素)
一、颜色分类 题目链接: 75. 颜色分类 - 力扣(LeetCode) 题目介绍: 给定一个包含红色、白色和蓝色、共 n 个元素的数组 nums ,原地 对它们进行排序,使得相同颜色的元素相邻,并按照红色、白色、蓝色顺序…...

Spring Cloud OpenFeign
概述 Feign是一个声明式web服务客户端。可以像写接口一样定义http客户端。Feign还支持可插拔的编码器和解码器。Spring Cloud增加了对Spring MVC注释和使用Spring Web中默认使用的HttpMessageConverter的支持。Spring Cloud集成了Ribbon和Eureka,以及Spring Cloud L…...
)
Oracle 数据库函数的用法(一)
Oracle数据库提供了大量的内置函数,可以用于完成各种操作,如字符串操作,数学计算,日期时间处理,条件判断,序列生成,聚合统计等。以下是一些常用的Oracle数据库函数: 一、oracle 使用…...

【C2C+GRCC】Exploring Disentangled Content Information for Face Forgery Detection
文章目录 Exploring Disentangled Content Information for Face Forgery Detection背景key points研究贡献方法增强解纠缠特性的独立性实验数据内评估跨方法评估跨数据集评估消融实验总结Exploring Disentangled Content Information for Face Forgery Detection 会议/期刊:…...

springboot461学生成绩分析和弱项辅助系统设计(论文+源码)_kaic
摘 要 传统办法管理信息首先需要花费的时间比较多,其次数据出错率比较高,而且对错误的数据进行更改也比较困难,最后,检索数据费事费力。因此,在计算机上安装学生成绩分析和弱项辅助系统软件来发挥其高效地信息处理的作…...

Unity复刻胡闹厨房复盘 模块一 新输入系统订阅链与重绑定
本文仅作学习交流,不做任何商业用途 郑重感谢siki老师的汉化教程与代码猴的免费教程以及搬运烤肉的小伙伴 版本:Unity6 模板:3D 核心 渲染管线:URP ------------------------------…...

使用“NodeMCU”、“红外模块”实现空调控制
项目思路 空调遥控器之所以能够实现对空调的控制,是因为它能够向空调发射出特定的红外信号。从理论上来说,任何能够发射出这种相同红外信号的红外发射器,都可以充当空调遥控器(这也正是手机能够控制多种不同品牌空调的原因所在&a…...

2023年西南大学数学建模C题天气预报解题全过程文档及程序
2023年西南大学数学建模 C题 天气预报 原题再现: 天气现象与人类的生产生活、社会经济、军事活动等方方面面都密切相关,大到国家,小到个人,都受到极端天气的影响。2022年6月,全球陆地地区出现了自1850年代末人类有系…...

【大模型】使用DPO技术对大模型Qwen2.5进行微调
前言 定义 DPO(Direct Preference Optimization)即直接偏好优化算法,是一种在自然语言处理领域,特别是在训练语言模型时使用的优化策略。它的主要目的是使语言模型的输出更符合人类的偏好。 背景和原理 在传统的语言模型训练中&a…...

Maven 生命周期
文章目录 Maven 生命周期- Clean 生命周期- Build 生命周期- Site 生命周期 Maven 生命周期 Maven 有以下三个标准的生命周期: Clean 生命周期: clean:删除目标目录中的编译输出文件。这通常是在构建之前执行的,以确保项目从一个…...
网络不通该如何手动下载torch
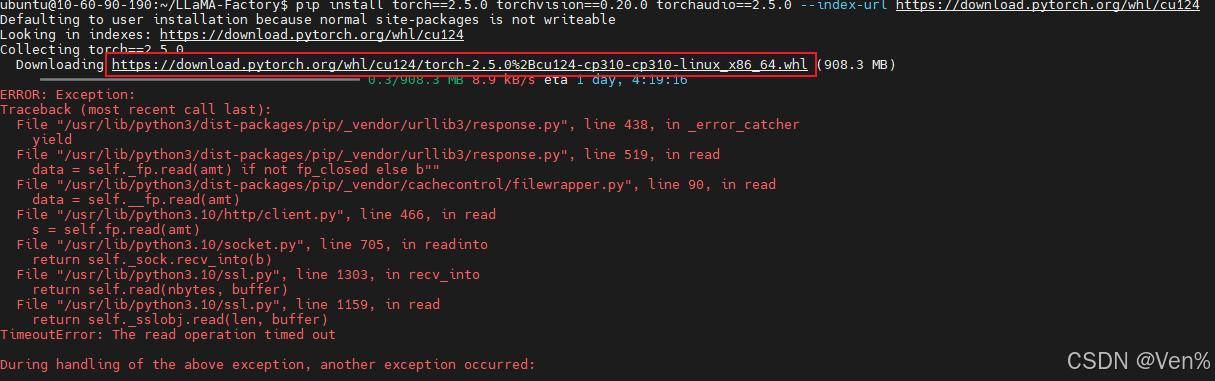
如果遇到pip install torch2.5.0 下载不了的情况,大部分是网络的问题.可以考虑下载wheel文件在去安装 查看对应的cuda版本(举个例子:cuda为12.4,找到这个版本的 复制到服务器上下载): 有conda和pip下载的两种方式,二者选其一:如果没有安装anaconda,就直接使用pip的方式下载 如…...

基础电路的学习
1、戴维南定理 ①左边的图可简化为一个电阻+一个电压源。② ③电压源可相当于开路。将R2移到左边,R1和R2相当于并联。RR1//R2 Rx和Rt相等时,灵敏度最大,因此使Rt10K。 104电容是0.1uf。 三位数字的前两位数字为标称容量的有效数…...

58_《智能体微服务架构企业级实战教程》授权与认证之认证方案设计
前言 配套视频教程: 在 Bilibili课堂、CSDN课程、51CTO学堂 同步发售,提供:源码+部署脚本+文档。 bilibili课堂视频教程:智能体微服务架构企业级实战教程_哔哩哔哩_bilibili CSDN课程视频教程:智能体微服务架构企业级实战教程_在线视频教程-CSDN程序员研修院 51CTO学堂…...

Kernel-Bridge API完全参考手册:从CPU操作到内存管理
Kernel-Bridge API完全参考手册:从CPU操作到内存管理 【免费下载链接】Kernel-Bridge Windows kernel hacking framework, driver template, hypervisor and API written on C 项目地址: https://gitcode.com/gh_mirrors/ke/Kernel-Bridge Kernel-Bridge是一…...

母线槽核心部件解析 —— 高纯铜导体与绝缘层的技术价值
在低压配电系统中,母线槽凭借大电流传输能力、高安全性及长寿命特性,成为大型基建、工业厂房、商业建筑等场景的核心配电设备。 扬中金展电气深耕母线槽研发生产 16 年,以严苛的材质标准与精密工艺,打造高可靠母线槽产品ÿ…...

嵌入式异构多处理器评估板:从核心原理到工业应用实战
1. 项目概述:当“异构”不再是PPT上的概念在嵌入式开发领域,尤其是边缘计算、工业控制和智能物联网设备中,我们正面临一个越来越普遍的困境:单一架构的处理器越来越难以满足复杂且矛盾的系统需求。一方面,我们需要强大…...
)
从YOLOv5实战反推:手把手在WSL2里搭建PyTorch 1.12 + CUDA 11.3 环境(附国内镜像加速)
逆向工程视角:在WSL2中构建YOLOv5专属PyTorch 1.12CUDA 11.3开发环境 当目标检测项目的截止日期迫在眉睫,却卡在环境配置环节,这种体验对开发者而言无异于噩梦。本文将以结果导向的逆向思维,从YOLOv5的最终运行需求出发࿰…...

从环境变量到Git Bash:给Plink找个‘家’,让你的遗传数据分析命令随处可跑
从环境变量到Git Bash:打造遗传数据分析的高效工作流 在遗传数据分析的日常工作中,Plink作为核心工具几乎出现在每个分析流程中。但许多研究者都会遇到这样的困扰:每次打开新的终端窗口,要么需要反复输入冗长的路径,要…...
)
从场景到代码:如何用研华Navigator为PCIE1751规划数据采集方案(AI/AO/DI/DO全解析)
从场景到代码:如何用研华Navigator为PCIE1751规划数据采集方案(AI/AO/DI/DO全解析) 在工业自动化领域,数据采集系统的设计往往面临一个核心矛盾:硬件性能的丰富性与实际需求的精准匹配。研华PCIE-1751作为一款多功能数…...

如何在5分钟内解锁所有Steam成就:Steam Achievement Manager完整使用指南
如何在5分钟内解锁所有Steam成就:Steam Achievement Manager完整使用指南 【免费下载链接】SteamAchievementManager A manager for game achievements in Steam. 项目地址: https://gitcode.com/gh_mirrors/st/SteamAchievementManager 还在为Steam游戏中那…...
:QEMU启动方式分析)
QEMU理解与分析系列(16):QEMU启动方式分析
QEMU启动方式分析启动流程RISC-V specific│┌──────────────────┼──────────────────┐▼ ▼ ▼┌──────────────┐ ┌──────────────┐ ┌───────────…...

有这5个迹象,说明你公司内斗很严重!
见字如面,我是军哥!昨天,一位读者小王给我留言。他在某大厂担任项目经理,最近工作推进得很艰难。同一件事开了好几次会,领导就是不拍板。跨部门协作费力不讨好,谁都不愿负责,项目卡在那里没有进…...