scrapy 教程
Scrapy Tutorial
In this tutorial, we’ll assume that Scrapy is already installed on your system. If that’s not the case, see Installation guide.
We are going to scrape quotes.toscrape.com, a website that lists quotes from famous authors.
This tutorial will walk you through these tasks:
-
Creating a new Scrapy project
-
Writing a spider to crawl a site and extract data
-
Exporting the scraped data using the command line
-
Changing spider to recursively follow links
-
Using spider arguments
Scrapy is written in Python. The more you learn about Python, the more you can get out of Scrapy.
If you’re already familiar with other languages and want to learn Python quickly, the Python Tutorial is a good resource.
If you’re new to programming and want to start with Python, the following books may be useful to you:
-
Automate the Boring Stuff With Python
-
How To Think Like a Computer Scientist
-
Learn Python 3 The Hard Way
You can also take a look at this list of Python resources for non-programmers, as well as the suggested resources in the learnpython-subreddit.
Creating a project
Before you start scraping, you will have to set up a new Scrapy project. Enter a directory where you’d like to store your code and run:
scrapy startproject tutorial
This will create a tutorial directory with the following contents:
tutorial/scrapy.cfg # deploy configuration filetutorial/ # project's Python module, you'll import your code from here__init__.pyitems.py # project items definition filemiddlewares.py # project middlewares filepipelines.py # project pipelines filesettings.py # project settings filespiders/ # a directory where you'll later put your spiders__init__.py
Our first Spider
Spiders are classes that you define and that Scrapy uses to scrape information from a website (or a group of websites). They must subclass Spider and define the initial requests to be made, and optionally, how to follow links in pages and parse the downloaded page content to extract data.
This is the code for our first Spider. Save it in a file named quotes_spider.py under the tutorial/spiders directory in your project:
from pathlib import Pathimport scrapyclass QuotesSpider(scrapy.Spider):name = "quotes"def start_requests(self):urls = ["https://quotes.toscrape.com/page/1/","https://quotes.toscrape.com/page/2/",]for url in urls:yield scrapy.Request(url=url, callback=self.parse)def parse(self, response):page = response.url.split("/")[-2]filename = f"quotes-{page}.html"Path(filename).write_bytes(response.body)self.log(f"Saved file {filename}")
As you can see, our Spider subclasses scrapy.Spider and defines some attributes and methods:
-
name: identifies the Spider. It must be unique within a project, that is, you can’t set the same name for different Spiders.
-
start_requests(): must return an iterable of Requests (you can return a list of requests or write a generator function) which the Spider will begin to crawl from. Subsequent requests will be generated successively from these initial requests.
-
parse(): a method that will be called to handle the response downloaded for each of the requests made. The response parameter is an instance of TextResponse that holds the page content and has further helpful methods to handle it.
The parse() method usually parses the response, extracting the scraped data as dicts and also finding new URLs to follow and creating new requests (
Request) from them.
How to run our spider
To put our spider to work, go to the project’s top level directory and run:
scrapy crawl quotes
This command runs the spider named quotes that we’ve just added, that will send some requests for the quotes.toscrape.com domain. You will get an output similar to this:
... (omitted for brevity)
2016-12-16 21:24:05 [scrapy.core.engine] INFO: Spider opened
2016-12-16 21:24:05 [scrapy.extensions.logstats] INFO: Crawled 0 pages (at 0 pages/min), scraped 0 items (at 0 items/min)
2016-12-16 21:24:05 [scrapy.extensions.telnet] DEBUG: Telnet console listening on 127.0.0.1:6023
2016-12-16 21:24:05 [scrapy.core.engine] DEBUG: Crawled (404) <GET https://quotes.toscrape.com/robots.txt> (referer: None)
2016-12-16 21:24:05 [scrapy.core.engine] DEBUG: Crawled (200) <GET https://quotes.toscrape.com/page/1/> (referer: None)
2016-12-16 21:24:05 [scrapy.core.engine] DEBUG: Crawled (200) <GET https://quotes.toscrape.com/page/2/> (referer: None)
2016-12-16 21:24:05 [quotes] DEBUG: Saved file quotes-1.html
2016-12-16 21:24:05 [quotes] DEBUG: Saved file quotes-2.html
2016-12-16 21:24:05 [scrapy.core.engine] INFO: Closing spider (finished)
...
Now, check the files in the current directory. You should notice that two new files have been created: quotes-1.html and quotes-2.html, with the content for the respective URLs, as our parse method instructs.
Note
If you are wondering why we haven’t parsed the HTML yet, hold on, we will cover that soon.
What just happened under the hood?
Scrapy schedules the scrapy.Request objects returned by the start_requests method of the Spider. Upon receiving a response for each one, it instantiates Response objects and calls the callback method associated with the request (in this case, the parse method) passing the response as an argument.
A shortcut to the start_requests method
Instead of implementing a start_requests() method that generates scrapy.Request objects from URLs, you can just define a start_urls class attribute with a list of URLs. This list will then be used by the default implementation of start_requests() to create the initial requests for your spider.
from pathlib import Pathimport scrapyclass QuotesSpider(scrapy.Spider):name = "quotes"start_urls = ["https://quotes.toscrape.com/page/1/","https://quotes.toscrape.com/page/2/",]def parse(self, response):page = response.url.split("/")[-2]filename = f"quotes-{page}.html"Path(filename).write_bytes(response.body)
The parse() method will be called to handle each of the requests for those URLs, even though we haven’t explicitly told Scrapy to do so. This happens because parse() is Scrapy’s default callback method, which is called for requests without an explicitly assigned callback.
Extracting data
The best way to learn how to extract data with Scrapy is trying selectors using the Scrapy shell. Run:
scrapy shell 'https://quotes.toscrape.com/page/1/'
Note
Remember to always enclose URLs in quotes when running Scrapy shell from the command line, otherwise URLs containing arguments (i.e. & character) will not work.
On Windows, use double quotes instead:
scrapy shell "https://quotes.toscrape.com/page/1/"
You will see something like:
[ ... Scrapy log here ... ]
2016-09-19 12:09:27 [scrapy.core.engine] DEBUG: Crawled (200) <GET https://quotes.toscrape.com/page/1/> (referer: None)
[s] Available Scrapy objects:
[s]   scrapy     scrapy module (contains scrapy.Request, scrapy.Selector, etc)
[s]   crawler    <scrapy.crawler.Crawler object at 0x7fa91d888c90>
[s]   item       {}
[s]   request    <GET https://quotes.toscrape.com/page/1/>
[s]   response   <200 https://quotes.toscrape.com/page/1/>
[s]   settings   <scrapy.settings.Settings object at 0x7fa91d888c10>
[s]   spider     <DefaultSpider 'default' at 0x7fa91c8af990>
[s] Useful shortcuts:
[s]   shelp()           Shell help (print this help)
[s]   fetch(req_or_url) Fetch request (or URL) and update local objects
[s]   view(response)    View response in a browser
Using the shell, you can try selecting elements using CSS with the response object:
>>> response.css("title")
[<Selector query='descendant-or-self::title' data='<title>Quotes to Scrape</title>'>]
The result of running response.css('title') is a list-like object called SelectorList, which represents a list of Selector objects that wrap around XML/HTML elements and allow you to run further queries to refine the selection or extract the data.
To extract the text from the title above, you can do:
>>> response.css("title::text").getall()
['Quotes to Scrape']
There are two things to note here: one is that we’ve added ::text to the CSS query, to mean we want to select only the text elements directly inside <title> element. If we don’t specify ::text, we’d get the full title element, including its tags:
>>> response.css("title").getall()
['<title>Quotes to Scrape</title>']
The other thing is that the result of calling .getall() is a list: it is possible that a selector returns more than one result, so we extract them all. When you know you just want the first result, as in this case, you can do:
>>> response.css("title::text").get()
'Quotes to Scrape'
As an alternative, you could’ve written:
>>> response.css("title::text")[0].get()
'Quotes to Scrape'
Accessing an index on a SelectorList instance will raise an IndexError exception if there are no results:
>>> response.css("noelement")[0].get()
Traceback (most recent call last):
...
IndexError: list index out of range
You might want to use .get() directly on the SelectorList instance instead, which returns None if there are no results:
>>> response.css("noelement").get()
There’s a lesson here: for most scraping code, you want it to be resilient to errors due to things not being found on a page, so that even if some parts fail to be scraped, you can at least get some data.
Besides the getall() and get() methods, you can also use the re() method to extract using regular expressions:
>>> response.css("title::text").re(r"Quotes.*")
['Quotes to Scrape']
>>> response.css("title::text").re(r"Q\w+")
['Quotes']
>>> response.css("title::text").re(r"(\w+) to (\w+)")
['Quotes', 'Scrape']
In order to find the proper CSS selectors to use, you might find it useful to open the response page from the shell in your web browser using view(response). You can use your browser’s developer tools to inspect the HTML and come up with a selector (see Using your browser’s Developer Tools for scraping).
Selector Gadget is also a nice tool to quickly find CSS selector for visually selected elements, which works in many browsers.
XPath: a brief intro
Besides CSS, Scrapy selectors also support using XPath expressions:
>>> response.xpath("//title")
[<Selector query='//title' data='<title>Quotes to Scrape</title>'>]
>>> response.xpath("//title/text()").get()
'Quotes to Scrape'
XPath expressions are very powerful, and are the foundation of Scrapy Selectors. In fact, CSS selectors are converted to XPath under-the-hood. You can see that if you read the text representation of the selector objects in the shell closely.
While perhaps not as popular as CSS selectors, XPath expressions offer more power because besides navigating the structure, it can also look at the content. Using XPath, you’re able to select things like: the link that contains the text “Next Page”. This makes XPath very fitting to the task of scraping, and we encourage you to learn XPath even if you already know how to construct CSS selectors, it will make scraping much easier.
We won’t cover much of XPath here, but you can read more about using XPath with Scrapy Selectors here. To learn more about XPath, we recommend this tutorial to learn XPath through examples, and this tutorial to learn “how to think in XPath”.
Extracting quotes and authors
Now that you know a bit about selection and extraction, let’s complete our spider by writing the code to extract the quotes from the web page.
Each quote in https://quotes.toscrape.com is represented by HTML elements that look like this:
<div class="quote"><span class="text">“The world as we have created it is a process of ourthinking. It cannot be changed without changing our thinking.”</span><span>by <small class="author">Albert Einstein</small><a href="/author/Albert-Einstein">(about)</a></span><div class="tags">Tags:<a class="tag" href="/tag/change/page/1/">change</a><a class="tag" href="/tag/deep-thoughts/page/1/">deep-thoughts</a><a class="tag" href="/tag/thinking/page/1/">thinking</a><a class="tag" href="/tag/world/page/1/">world</a></div>
</div>
Let’s open up scrapy shell and play a bit to find out how to extract the data we want:
scrapy shell 'https://quotes.toscrape.com'
We get a list of selectors for the quote HTML elements with:
>>> response.css("div.quote")
[<Selector query="descendant-or-self::div[@class and contains(concat(' ', normalize-space(@class), ' '), ' quote ')]" data='<div class="quote" itemscope itemtype...'>,
<Selector query="descendant-or-self::div[@class and contains(concat(' ', normalize-space(@class), ' '), ' quote ')]" data='<div class="quote" itemscope itemtype...'>,
...]
Each of the selectors returned by the query above allows us to run further queries over their sub-elements. Let’s assign the first selector to a variable, so that we can run our CSS selectors directly on a particular quote:
>>> quote = response.css("div.quote")[0]
Now, let’s extract the text, author and tags from that quote using the quote object we just created:
>>> text = quote.css("span.text::text").get()
>>> text
'“The world as we have created it is a process of our thinking. It cannot be changed without changing our thinking.”'
>>> author = quote.css("small.author::text").get()
>>> author
'Albert Einstein'
Given that the tags are a list of strings, we can use the .getall() method to get all of them:
>>> tags = quote.css("div.tags a.tag::text").getall()
>>> tags
['change', 'deep-thoughts', 'thinking', 'world']
Having figured out how to extract each bit, we can now iterate over all the quote elements and put them together into a Python dictionary:
>>> for quote in response.css("div.quote"):
...     text = quote.css("span.text::text").get()
...     author = quote.css("small.author::text").get()
...     tags = quote.css("div.tags a.tag::text").getall()
...     print(dict(text=text, author=author, tags=tags))
...
{'text': '“The world as we have created it is a process of our thinking. It cannot be changed without changing our thinking.”', 'author': 'Albert Einstein', 'tags': ['change', 'deep-thoughts', 'thinking', 'world']}
{'text': '“It is our choices, Harry, that show what we truly are, far more than our abilities.”', 'author': 'J.K. Rowling', 'tags': ['abilities', 'choices']}
...
Extracting data in our spider
Let’s get back to our spider. Until now, it hasn’t extracted any data in particular, just saving the whole HTML page to a local file. Let’s integrate the extraction logic above into our spider.
A Scrapy spider typically generates many dictionaries containing the data extracted from the page. To do that, we use the yield Python keyword in the callback, as you can see below:
import scrapyclass QuotesSpider(scrapy.Spider):name = "quotes"start_urls = ["https://quotes.toscrape.com/page/1/","https://quotes.toscrape.com/page/2/",]def parse(self, response):for quote in response.css("div.quote"):yield {"text": quote.css("span.text::text").get(),"author": quote.css("small.author::text").get(),"tags": quote.css("div.tags a.tag::text").getall(),}
To run this spider, exit the scrapy shell by entering:
quit()
Then, run:
scrapy crawl quotes
Now, it should output the extracted data with the log:
2016-09-19 18:57:19 [scrapy.core.scraper] DEBUG: Scraped from <200 https://quotes.toscrape.com/page/1/>
{'tags': ['life', 'love'], 'author': 'André Gide', 'text': '“It is better to be hated for what you are than to be loved for what you are not.”'}
2016-09-19 18:57:19 [scrapy.core.scraper] DEBUG: Scraped from <200 https://quotes.toscrape.com/page/1/>
{'tags': ['edison', 'failure', 'inspirational', 'paraphrased'], 'author': 'Thomas A. Edison', 'text': "“I have not failed. I've just found 10,000 ways that won't work.”"}
Storing the scraped data
The simplest way to store the scraped data is by using Feed exports, with the following command:
scrapy crawl quotes -O quotes.json
That will generate a quotes.json file containing all scraped items, serialized in JSON.
The -O command-line switch overwrites any existing file; use -o instead to append new content to any existing file. However, appending to a JSON file makes the file contents invalid JSON. When appending to a file, consider using a different serialization format, such as JSON Lines:
scrapy crawl quotes -o quotes.jsonl
The JSON Lines format is useful because it’s stream-like, so you can easily append new records to it. It doesn’t have the same problem as JSON when you run twice. Also, as each record is a separate line, you can process big files without having to fit everything in memory, there are tools like JQ to help do that at the command-line.
In small projects (like the one in this tutorial), that should be enough. However, if you want to perform more complex things with the scraped items, you can write an Item Pipeline. A placeholder file for Item Pipelines has been set up for you when the project is created, in tutorial/pipelines.py. Though you don’t need to implement any item pipelines if you just want to store the scraped items.
Following links
Let’s say, instead of just scraping the stuff from the first two pages from https://quotes.toscrape.com, you want quotes from all the pages in the website.
Now that you know how to extract data from pages, let’s see how to follow links from them.
The first thing to do is extract the link to the page we want to follow. Examining our page, we can see there is a link to the next page with the following markup:
<ul class="pager"><li class="next"><a href="/page/2/">Next <span aria-hidden="true">→</span></a></li> </ul>
We can try extracting it in the shell:
>>> response.css('li.next a').get()
'<a href="/page/2/">Next <span aria-hidden="true">→</span></a>'
This gets the anchor element, but we want the attribute href. For that, Scrapy supports a CSS extension that lets you select the attribute contents, like this:
>>> response.css("li.next a::attr(href)").get()
'/page/2/'
There is also an attrib property available (see Selecting element attributes for more):
>>> response.css("li.next a").attrib["href"]
'/page/2/'
Now let’s see our spider, modified to recursively follow the link to the next page, extracting data from it:
import scrapyclass QuotesSpider(scrapy.Spider):name = "quotes"start_urls = ["https://quotes.toscrape.com/page/1/",]def parse(self, response):for quote in response.css("div.quote"):yield {"text": quote.css("span.text::text").get(),"author": quote.css("small.author::text").get(),"tags": quote.css("div.tags a.tag::text").getall(),}next_page = response.css("li.next a::attr(href)").get()if next_page is not None:next_page = response.urljoin(next_page)yield scrapy.Request(next_page, callback=self.parse)
Now, after extracting the data, the parse() method looks for the link to the next page, builds a full absolute URL using the urljoin() method (since the links can be relative) and yields a new request to the next page, registering itself as callback to handle the data extraction for the next page and to keep the crawling going through all the pages.
What you see here is Scrapy’s mechanism of following links: when you yield a Request in a callback method, Scrapy will schedule that request to be sent and register a callback method to be executed when that request finishes.
Using this, you can build complex crawlers that follow links according to rules you define, and extract different kinds of data depending on the page it’s visiting.
In our example, it creates a sort of loop, following all the links to the next page until it doesn’t find one – handy for crawling blogs, forums and other sites with pagination.
A shortcut for creating Requests
As a shortcut for creating Request objects you can use response.follow:
import scrapyclass QuotesSpider(scrapy.Spider):name = "quotes"start_urls = ["https://quotes.toscrape.com/page/1/",]def parse(self, response):for quote in response.css("div.quote"):yield {"text": quote.css("span.text::text").get(),"author": quote.css("span small::text").get(),"tags": quote.css("div.tags a.tag::text").getall(),}next_page = response.css("li.next a::attr(href)").get()if next_page is not None:yield response.follow(next_page, callback=self.parse)
Unlike scrapy.Request, response.follow supports relative URLs directly - no need to call urljoin. Note that response.follow just returns a Request instance; you still have to yield this Request.
You can also pass a selector to response.follow instead of a string; this selector should extract necessary attributes:
for href in response.css("ul.pager a::attr(href)"):yield response.follow(href, callback=self.parse)
For <a> elements there is a shortcut: response.follow uses their href attribute automatically. So the code can be shortened further:
for a in response.css("ul.pager a"):yield response.follow(a, callback=self.parse)
To create multiple requests from an iterable, you can use response.follow_all instead:
anchors = response.css("ul.pager a")
yield from response.follow_all(anchors, callback=self.parse)
or, shortening it further:
yield from response.follow_all(css="ul.pager a", callback=self.parse)
More examples and patterns
Here is another spider that illustrates callbacks and following links, this time for scraping author information:
import scrapyclass AuthorSpider(scrapy.Spider):name = "author"start_urls = ["https://quotes.toscrape.com/"]def parse(self, response):author_page_links = response.css(".author + a")yield from response.follow_all(author_page_links, self.parse_author)pagination_links = response.css("li.next a")yield from response.follow_all(pagination_links, self.parse)def parse_author(self, response):def extract_with_css(query):return response.css(query).get(default="").strip()yield {"name": extract_with_css("h3.author-title::text"),"birthdate": extract_with_css(".author-born-date::text"),"bio": extract_with_css(".author-description::text"),}
This spider will start from the main page, it will follow all the links to the authors pages calling the parse_author callback for each of them, and also the pagination links with the parse callback as we saw before.
Here we’re passing callbacks to response.follow_all as positional arguments to make the code shorter; it also works for Request.
The parse_author callback defines a helper function to extract and cleanup the data from a CSS query and yields the Python dict with the author data.
Another interesting thing this spider demonstrates is that, even if there are many quotes from the same author, we don’t need to worry about visiting the same author page multiple times. By default, Scrapy filters out duplicated requests to URLs already visited, avoiding the problem of hitting servers too much because of a programming mistake. This can be configured in the DUPEFILTER_CLASS setting.
Hopefully by now you have a good understanding of how to use the mechanism of following links and callbacks with Scrapy.
As yet another example spider that leverages the mechanism of following links, check out the CrawlSpider class for a generic spider that implements a small rules engine that you can use to write your crawlers on top of it.
Also, a common pattern is to build an item with data from more than one page, using a trick to pass additional data to the callbacks.
Using spider arguments
You can provide command line arguments to your spiders by using the -a option when running them:
scrapy crawl quotes -O quotes-humor.json -a tag=humor
These arguments are passed to the Spider’s __init__ method and become spider attributes by default.
In this example, the value provided for the tag argument will be available via self.tag. You can use this to make your spider fetch only quotes with a specific tag, building the URL based on the argument:
import scrapyclass QuotesSpider(scrapy.Spider):name = "quotes"def start_requests(self):url = "https://quotes.toscrape.com/"tag = getattr(self, "tag", None)if tag is not None:url = url + "tag/" + tagyield scrapy.Request(url, self.parse)def parse(self, response):for quote in response.css("div.quote"):yield {"text": quote.css("span.text::text").get(),"author": quote.css("small.author::text").get(),}next_page = response.css("li.next a::attr(href)").get()if next_page is not None:yield response.follow(next_page, self.parse)
If you pass the tag=humor argument to this spider, you’ll notice that it will only visit URLs from the humor tag, such as https://quotes.toscrape.com/tag/humor.
You can learn more about handling spider arguments here.
Next steps
This tutorial covered only the basics of Scrapy, but there’s a lot of other features not mentioned here. Check the What else? section in the Scrapy at a glance chapter for a quick overview of the most important ones.
You can continue from the section Basic concepts to know more about the command-line tool, spiders, selectors and other things the tutorial hasn’t covered like modeling the scraped data. If you’d prefer to play with an example project, check the Examples section.
相关文章:

scrapy 教程
Scrapy Tutorial In this tutorial, we’ll assume that Scrapy is already installed on your system. If that’s not the case, see Installation guide. We are going to scrape quotes.toscrape.com, a website that lists quotes from famous authors. This tutorial …...
2025元旦源码免费送
我们常常在当下感到时间慢,觉得未来遥远,但一旦回头看,时间已经悄然流逝。对于未来,尽管如此,也应该保持一种从容的态度,相信未来仍有许多可能性等待着我们。 免费获取源码。 更多内容敬请期待。如有需要可…...

高级架构五 设计模式
一 设计模式七大原则 1.1. 设计模式目的 编写软件过程中,程序员面临着来自 耦合性,内聚性以及可维护性,可扩展性,重用性,灵活性 等多方面的挑战,设计模式是为了让程序(软件),具有更好的&#…...

RFID手持机与RFID工业平板在仓储物流管理系统中的选型
概述 随着物联网技术在仓储物流管理系统中的普及,RFID手持机与RFID工业平板作为基于RFID技术手持式读写器的两种重要终端设备形态,得到了广泛应用。尽管RFID手持机与RFID工业平板都具备读写 RFID标签的基本功能,使用场景较为类似,…...

IoC设计模式详解:控制反转的核心思想
前言:在软件开发中,设计模式是一种经过验证的、在特定场景下能有效解决问题的解决方案。控制反转(Inversion of Control,IoC) 作为一种设计模式,通过让程序的控制流和对象管理反转,从而使得代码…...

《云原生安全攻防》-- K8s安全配置:CIS安全基准与kube-bench工具
在本节课程中,我们来了解一下K8s集群的安全配置,通过对CIS安全基准和kube-bench工具的介绍,可以快速发现K8s集群中不符合最佳实践的配置项,及时进行修复,从而来提高集群的安全性。 在这个课程中,我们将学习…...

LINUX下载编译gtk
下载 选择自己合适的版本 GNOME / gtk GitLab 下载meson GNOME / gtk GitLab 编译 BUILD_DIRbuilddir INSTALL_DIR${HOME}/gtk-resultMESON_PATHpwd/meson-1.6.1/meson.py${MESON_PATH} setup \--prefix ${INSTALL_DIR} \${BUILD_DIR}cd builddir${MESON_PATH} compile…...
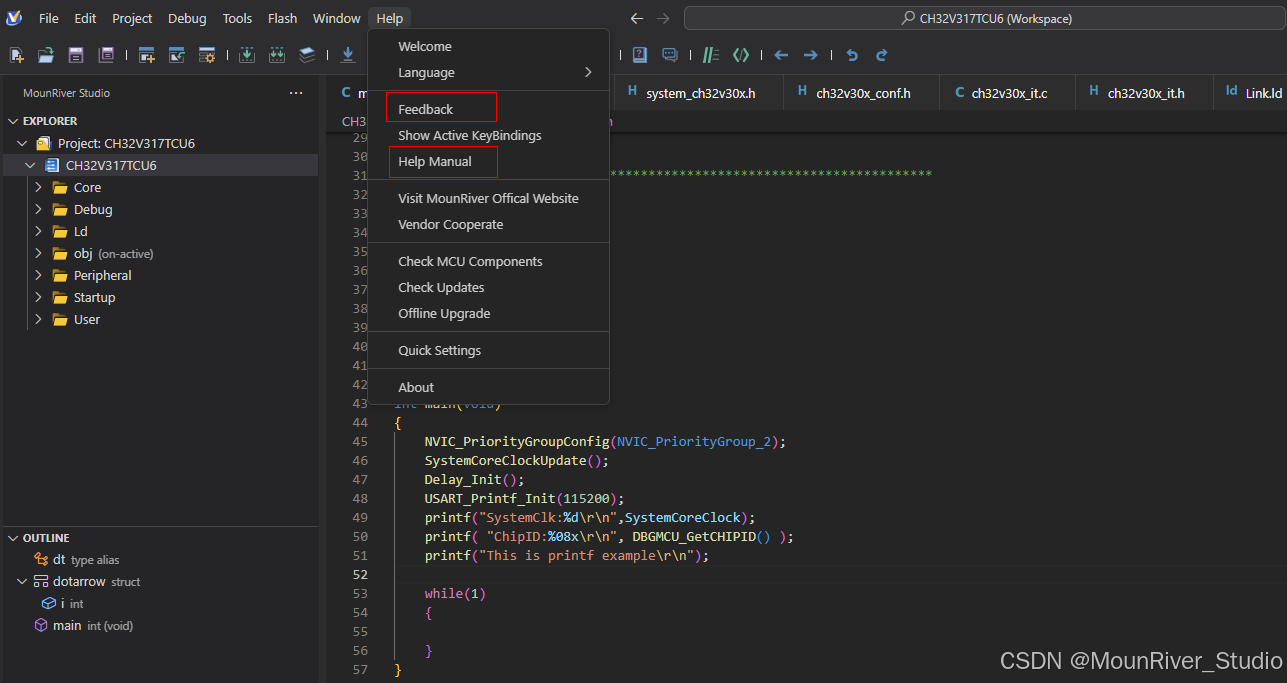
基于VSCode软件框架的RISC-V IDE MRS2正式上线发布
基于VSCode软件框架的RISC-V IDE MRS2正式上线发布 一、概述 MounRiver Studio Ⅱ(MRS2)为MounRiver Studio的换代版本,从V2.1开始,框架更换至更现代的VSCode,并深度定制开发。在工程管理、代码编辑、编译、调试等方面均兼容之前版本&#…...

AWS re:Invent 2024 - Dr. Werner Vogels 主题演讲
今年,我有幸亲临现场参加了所有的 keynote,每一场都让我感受到深深的震撼。无论是全新的功能发布,还是令人眼前一亮的新特性展示,每一场 keynote 都精彩纷呈,充满干货,值得反复学习和回味。 恰好ÿ…...

前端小案例——520表白信封
前言:我们在学习完了HTML和CSS之后,就会想着使用这两个东西去做一些小案例,不过又没有什么好的案例让我们去练手,本篇文章就提供里一个案例——520表白信封 ✨✨✨这里是秋刀鱼不做梦的BLOG ✨✨✨想要了解更多内容可以访问我的主…...

FPGA随记——过约束
什么是过约束? 从字面意思来看,所谓过约束是指约束过紧了。这个“过”体现在setup requirement变小了,对于单周期路径,这个值通常与时钟周期一致,但在过约束情况下,等效于这个值变小了,也就是时…...

如何利用云计算进行灾难恢复?
云计算环境下的灾难恢复实践指南 天有不测风云,企业的IT系统也一样,我见过太多因为没有做好灾备而吃大亏的案例。今天就和大家聊聊如何用云计算来做灾难恢复。 一个惊心动魄的真实案例:某电商平台的主数据中心因为市政施工不小心挖断了光纤…...
】)
【华为OD-E卷 - 九宫格按键输入 100分(python、java、c++、js、c)】
【华为OD-E卷 - 九宫格按键输入 100分(python、java、c、js、c)】 题目 九宫格按键输入,有英文和数字两个模式,默认是数字模式,数字模式直接输出数字,英文模式连续按同一个按键会依次出现这个按键上的字母…...

基于AI大模型的医院SOP优化:架构、实践与展望
一、引言 1.1 研究背景与意义 近年来,人工智能(AI)技术取得了迅猛发展,尤其是大模型的出现,为各个领域带来了革命性的变化。在医疗领域,AI 医疗大模型正逐渐崭露头角,展现出巨大的应用潜力。随着医疗数据的海量积累以及计算能力的大幅提升,AI 医疗大模型能够对复杂的…...

Linux快速入门-一道简单shell编程题目
编写一个 Shell 程序。 功能:在用户家目录下创建一个文件夹myshell;进入此文件夹;在文件中创建文件aa.sh,如果文件夹或文件存在,则提示对象已存在,不创建。 代码编写 #!/bin/bash#获取用户家目录:方便后…...
?)
Hive如何创建自定义函数(UDF)?
目录 1 自定义UDF函数基础 2 自定义UDF函数案例 3 创建临时函数 4 创建永久函数 1 自定义UDF函数基础 1. 内置函数:Hive 自带了一些函数...
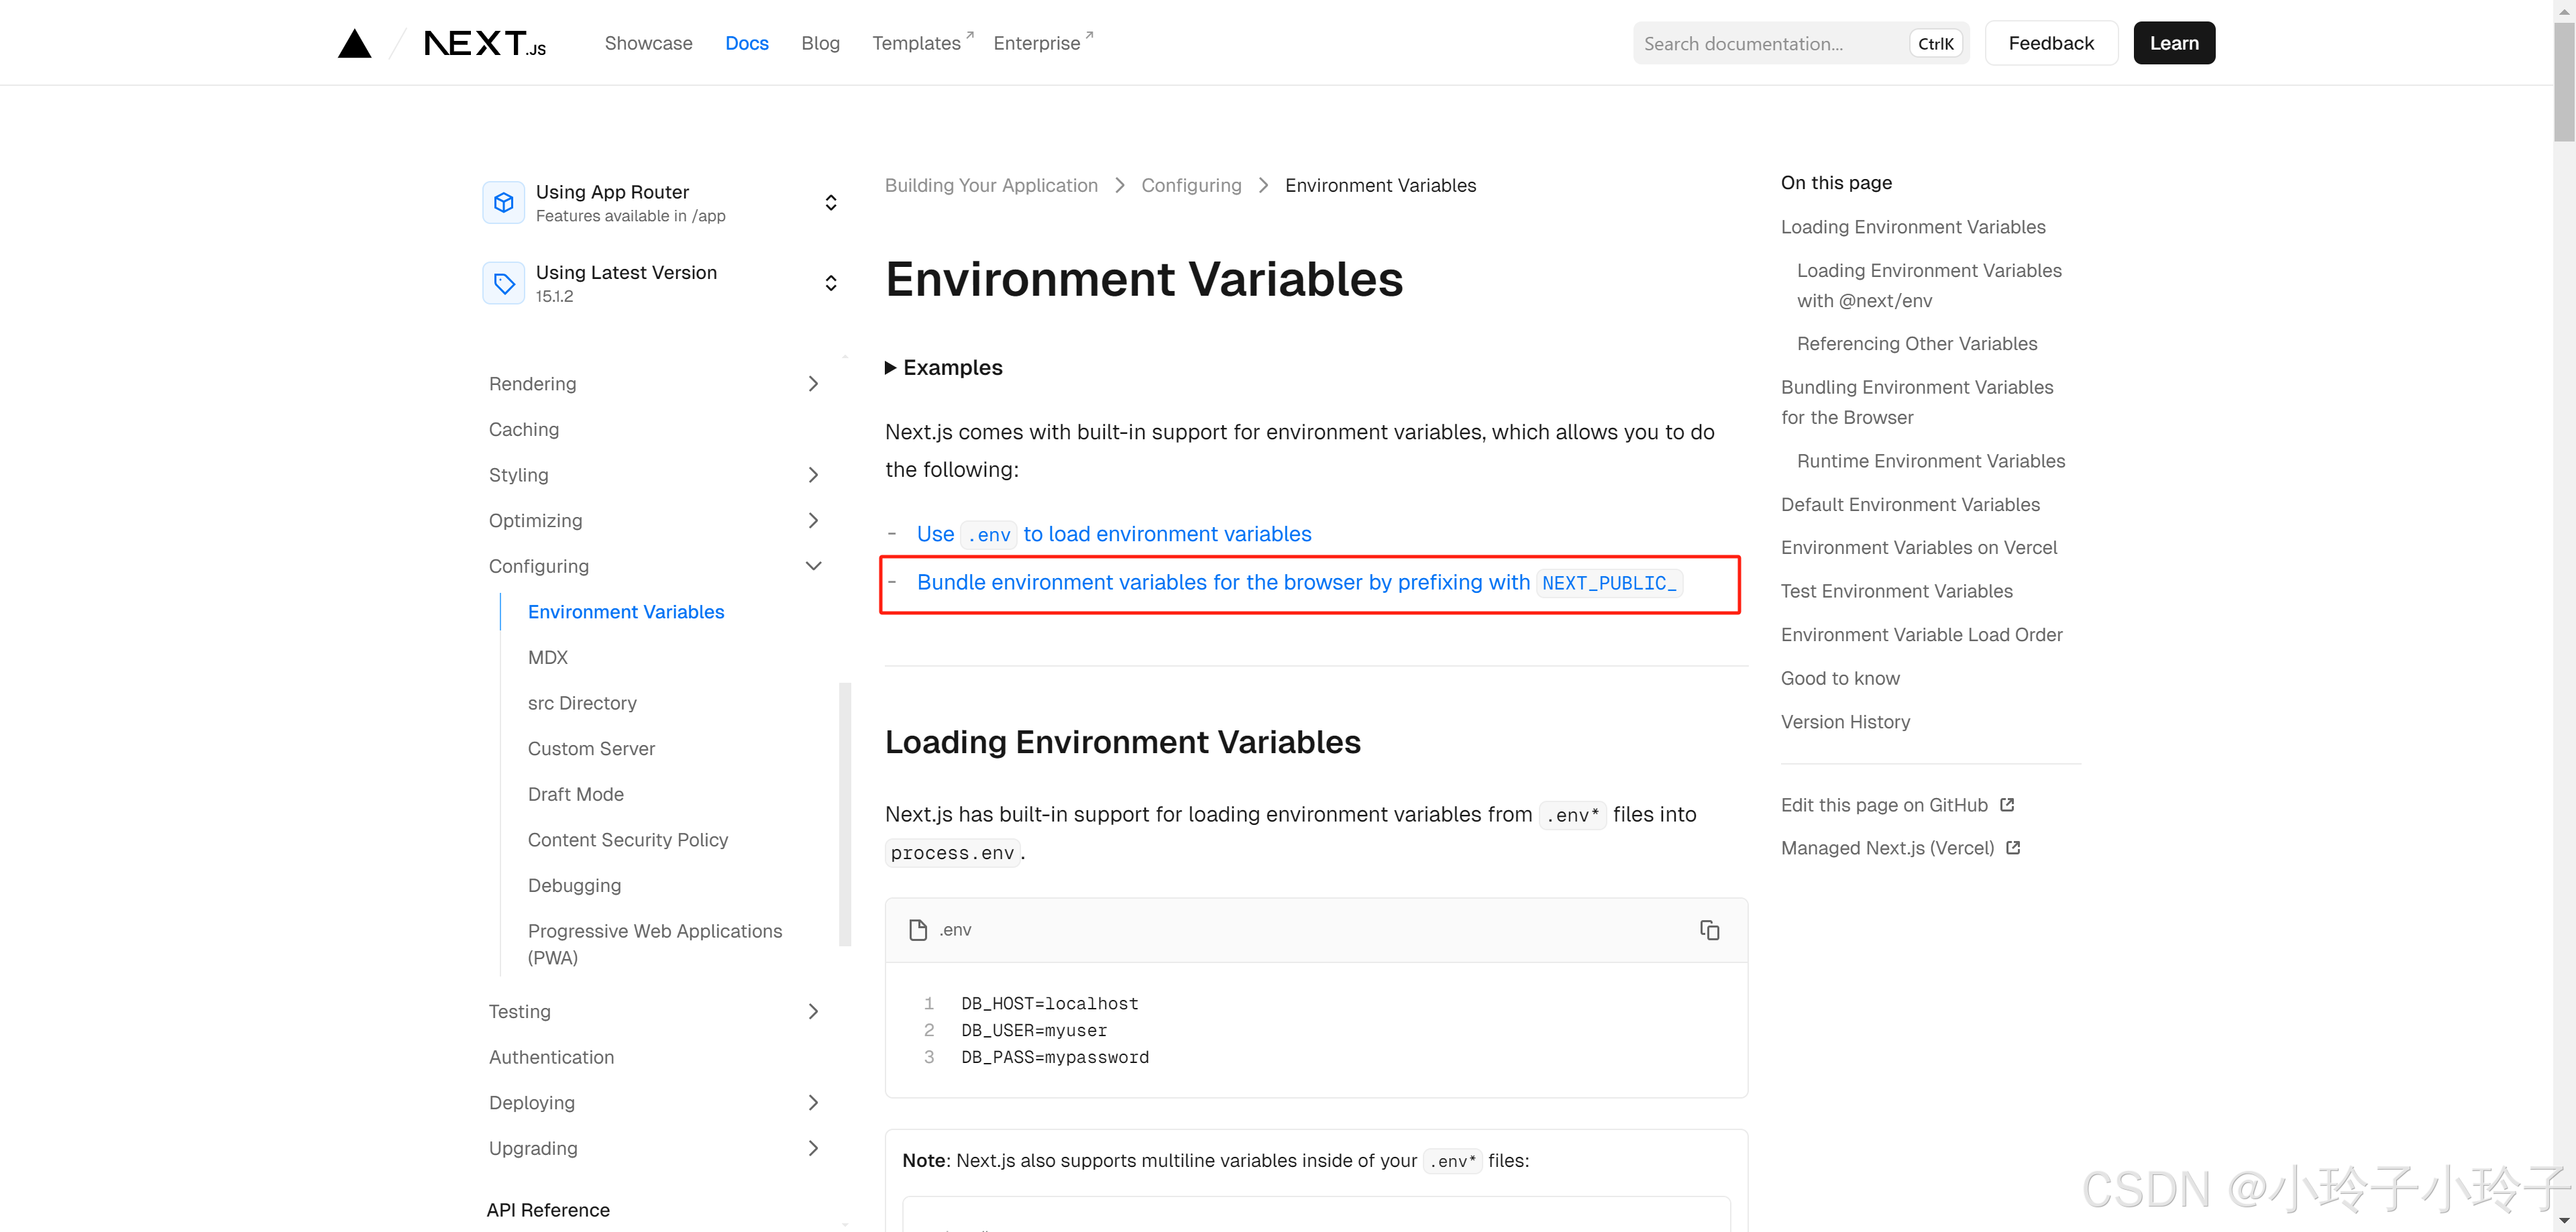
聊聊前端框架中的process.env,env的来源及优先级(next.js、vue-cli、vite)
在平时开发中,常常使用vue、react相关脚手架创建项目,在项目根目录可以创建.env、.env.[mode](mode为development、production、test)、.env.local等文件,然后在项目中就可以通过process.env来访问相关的环境变量了。 下面针对如下…...

linux shell脚本 【分支结构case...in 、循环结构、函数】内附练习
1.思维导图 2.练习 1.定义一个find函数,查找ubuntu和root的gid 2.定义一个数组,写一个函数完成对数组的冒泡排序 bubble() {n${#arr[*]}for((i0;i<n-1;i));dofor((j0;j<n-1-i;j));doif ((arr[j]>arr[j1]));thentemp${arr[j]}arr[j]${arr[j1]}a…...

VSCode 终端显示“pnpm : 无法加载文件 C:\Program Files\nodejs\npm.ps1,因为在此系统上禁止运行脚本”
VSCode 终端显示“pnpm : 无法加载文件 C:\Program Files\nodejs\npm.ps1,因为在此系统上禁止运行脚本”VSCode 终端显示“pnpm : 无法加载文件 C:\Program Files\nodejs\npm.ps1,因为在此系统上禁止运行脚本”解决方案: 1.用get-ExecutionP…...

Android ActionBar 技术深度解析
Android ActionBar 技术深度解析 概述 ActionBar 是 Android 应用中的一个核心 UI 组件,用于提供导航、操作和品牌展示。它通常位于应用窗口的顶部,包含应用的标题、导航按钮、操作项等。ActionBar 自 Android 3.0(API 11)引入,并在 Android 5.0(API 21)后被 Toolbar …...

Qdrant Python客户端全解析:从向量数据库连接到AI应用开发实战
1. 项目概述:从向量数据库到客户端,现代AI应用落地的关键拼图如果你最近在折腾大语言模型应用,或者想给自己的产品加上一个“智能大脑”,那你大概率已经听过“向量数据库”这个词了。简单来说,它就像一个专门为AI模型设…...

Google Labs Jules Awesome List:构建与维护高质量开发者资源清单指南
1. 项目概述:一份面向开发者的“Awesome List”清单在开源社区和开发者圈子里,有一个约定俗成的传统:当某个技术领域或工具生态变得足够庞大和复杂时,总会有热心的贡献者站出来,整理一份名为“Awesome List”的清单。这…...

PCL2启动器离线登录按钮消失?5分钟快速修复指南
PCL2启动器离线登录按钮消失?5分钟快速修复指南 【免费下载链接】PCL Minecraft 启动器 Plain Craft Launcher(PCL)。 项目地址: https://gitcode.com/gh_mirrors/pc/PCL 你是否遇到过PCL2启动器离线登录按钮突然消失的困扰࿱…...

Arm Cortex-A35 Cycle Model技术解析与SoC集成实战
1. Arm Cortex-A35 Cycle Model技术解析在SoC设计领域,虚拟平台验证已成为不可或缺的关键环节。作为Armv8-A架构中的能效比优化核心,Cortex-A35处理器通过Cycle Model提供了RTL级精度的硬件行为模拟能力。我在多个车载SoC项目中验证发现,其Cy…...

树莓派5驱动128x128 LED矩阵:打造复古PICO-8游戏艺术墙
1. 项目概述与核心思路我一直对复古游戏和像素艺术情有独钟,也一直想在家里弄一个既有科技感又能玩的装饰品。最近,我把树莓派5、四块64x64的RGB LED矩阵面板和PICO-8幻想游戏机捣鼓到了一起,成功在墙上挂起了一个128x128像素的“游戏艺术墙”…...

Step-by-Step知识蒸馏:让小模型学会大模型的推理过程
1. 项目概述:当“小个子”也能学会“大智慧”最近在模型压缩和知识蒸馏的圈子里,一个挺有意思的讨论点又热了起来:我们有没有可能让一个参数规模小得多的模型,通过一种更精细、更“手把手”的教学方式,达到甚至逼近那些…...

构建高质量Awesome清单:开源项目精选与维护实践指南
1. 项目概述:为什么我们需要一个“Awesome”清单?在开源的世界里,信息过载是每个开发者、技术爱好者乃至项目经理都面临的共同挑战。每天,GitHub、GitLab等平台上都会涌现出成千上万个新项目,从精巧的工具库到庞大的系…...

Svelte动态光标实现:状态驱动与Spring动画的交互设计
1. 项目概述:一个会“思考”的鼠标指针如果你在开发一个需要高度沉浸感和交互反馈的Web应用,比如一个设计工具、一个游戏界面,或者一个希望用户能“感受”到页面元素质感的网站,那么一个静态的、系统默认的鼠标指针就显得有些格格…...
)
救砖实录:河南联通B860AV2.1U变砖后,我是如何通过线刷救活的(S905LB+NAND闪存方案)
从绝望到重生:B860AV2.1U机顶盒线刷救砖全流程拆解 那天晚上十一点半,当我第七次按下机顶盒电源键却依然只看到指示灯诡异闪烁时,后背的冷汗已经浸透了T恤——这个价值四百多的联通定制设备,在我尝试刷入第三方固件后彻底变成了一…...
)
ElevenLabs匈牙利语音合成效果深度测评(实测12种场景+WAV/MP3/SSML对比数据)
更多请点击: https://intelliparadigm.com 第一章:ElevenLabs匈牙利语音合成技术概览 ElevenLabs 自 2023 年起逐步扩展其多语言支持能力,匈牙利语(hu-HU)作为东欧高复杂度音系语言的代表,于 v2.5 API 版本…...