Ubuntu部署ktransformers
准备工作
一台服务器
CPU:500G
GPU:48G(NVIDIA4090)
系统:Ubuntu20.04(github的文档好像用的是22.04)
第一步:下载权重文件
1.下载hfd
wget https://hf-mirror.com/hfd/hfd.shchmod a+x hfd.sh2.设置环境变量
export HF_ENDPOINT=https://hf-mirror.com3.下载模型(需要梯子,需要带上huggingface的token)
./hfd.sh gpt24.下载数据集(需要梯子,需要带上huggingface的token)
./hfd.sh wikitext --dataset5.下载大文件(需要梯子,文件很大,大约四五百G)
./hfd.sh unsloth/DeepSeek-R1-GGUF --include DeepSeek-R1-Q4_K_M/*
第二步:拉代码,编译代码
1.使用Anaconda3安装Python3.11
conda create --name ktransformers python=3.11
conda activate ktransformers
conda install -c conda-forge libstdcxx-ng2.安装其他依赖
pip3 install torch torchvision torchaudio --index-url https://download.pytorch.org/whl/cu126pip3 install packaging ninja cpufeature numpy
sudo add-apt-repository ppa: ubuntu-toolchain-r/test
sudo apt-get updatesudo apt-get install --only-upgrade libstdc++6pip install flash-attn --no-build-isolation3.查看显卡版本及cuda版本
以下两条指令显示的CUDA版本需要一致,若不一致,系统会以nvcc --version的为准
nvcc --version
nvidia-smi

4.拉代码
git clone https://github.com/kvcache-ai/ktransformers.git
cd ktransformers
git submodule init
git submodule update
5.编译
export USE_NUMA=1
make dev_install
第三部:运行
python ktransformers/local_chat.py --model_path deepseek-ai/DeepSeek-R1 --gguf_path /home/dpkj/deepseek/DeepSeek-R1-GGUF/DeepSeek-R1-Q4_K_M/ --cpu_infer 50 --cache_lens 1536 --max_new_tokens 8192
# --model_path:模型位置,不需要修改
# --gguf_path:前面下载的大文件,模型文件位置,按照实际情况而定
# --cpu_infer:CPU占用,单位百分比,如果服务器不死DDR5双路CPU,可以适量调低此占比
其他启动参数
python -m transformers.local_chat --model_path deepseek-ai/DeepSeek-R1 --gguf_path /root/DeepSeek-R1-GGUF/DeepSeek-R1-Q4_K_M/ --cpu_infer 53 --cache_lens 1536
python ./transformers/local_chat.py --model_path deepseek-ai/DeepSeek-R1 --gguf_path /home/shadeform/DeepSeek-R1-GGUF/DeepSeek-R1-Q4 K M/ --cpu_infer 53 --cache_lens 1536 --optimize_config_path transformers/optimize/optimize_rules/DeepSeek-V3-Chat-multi-gpu-marlin.yaml
python -m transformers.local_chat --model_path deepseek-ai/DeepSeek-R1 --gguf_path /root/autodi-tmp/DeepSeek-R1-GGUF/DeepSeek-R1-Q4 K M/ --cpu_infer 128 --cache_lens 1536 --max_new_tokens 8192 --optimize_config_path ./transformers/optimize/optimize_rules/DeepSeek-V3-Chat-multi-gpu-marlin-4.yaml
transformers --model_path deepseek-ai/DeepSeek-R1 --gguf_path /root/autodi-tmp/DeepSeek-R1-GGUF/DeepSeek-R1-Q4 K M/ --cpu_infer 65 --cache_lens 1536 --max_new_tokens 8192 --port 6006 --optimize_config_path /transformers/optimize/optimize_rules/DeepSeek-V3-Chat-multi-gpu-marlin-4.yaml
curl -X 'POST"
"http://localhost:6006/v1/chat/completions'\
-H 'accept: application/json' \
-H 'Content-Type: application/json' \
-d'{
"messages": [
"content": "tell a joke",
"role": "user"
],
"model": "ktranformers-model",
"stream": true
}'
外传
1. 使用API方式调用
新建文件:chat_openai.py
import argparse
import uvicorn
from typing import List, Dict, Optional, Any
from fastapi import FastAPI, HTTPException, status
from fastapi.middleware.cors import CORSMiddleware
from pydantic import BaseModel
import os
import sys
import time
from fastapi import Request
from fastapi.responses import StreamingResponse, JSONResponse
import json
import logging# 设置日志记录
logging.basicConfig(level=logging.INFO)
logger = logging.getLogger(__name__)project_dir = os.path.dirname(os.path.dirname(__file__))
sys.path.insert(0, project_dir)
import torch
from transformers import (
AutoTokenizer,
AutoConfig,
AutoModelForCausalLM,
GenerationConfig,
TextStreamer,
)
from ktransformers.optimize.optimize import optimize_and_load_gguf
from ktransformers.models.modeling_deepseek import DeepseekV2ForCausalLM
from ktransformers.models.modeling_qwen2_moe import Qwen2MoeForCausalLM
from ktransformers.models.modeling_deepseek_v3 import DeepseekV3ForCausalLM
from ktransformers.models.modeling_llama import LlamaForCausalLM
from ktransformers.models.modeling_mixtral import MixtralForCausalLM
from ktransformers.util.utils import prefill_and_generate
from ktransformers.server.config.config import Configcustom_models = {
"DeepseekV2ForCausalLM": DeepseekV2ForCausalLM,
"DeepseekV3ForCausalLM": DeepseekV3ForCausalLM,
"Qwen2MoeForCausalLM": Qwen2MoeForCausalLM,
"LlamaForCausalLM": LlamaForCausalLM,
"MixtralForCausalLM": MixtralForCausalLM,
}ktransformer_rules_dir = os.path.join(os.path.dirname(os.path.abspath(__file__)), "optimize", "optimize_rules")
default_optimize_rules = {
"DeepseekV2ForCausalLM": os.path.join(ktransformer_rules_dir, "DeepSeek-V2-Chat.yaml"),
"DeepseekV3ForCausalLM": os.path.join(ktransformer_rules_dir, "DeepSeek-V3-Chat.yaml"),
"Qwen2MoeForCausalLM": os.path.join(ktransformer_rules_dir, "Qwen2-57B-A14B-Instruct.yaml"),
"LlamaForCausalLM": os.path.join(ktransformer_rules_dir, "Internlm2_5-7b-Chat-1m.yaml"),
"MixtralForCausalLM": os.path.join(ktransformer_rules_dir, "Mixtral.yaml"),
}# 全局变量,存储初始化后的模型
chat_model = Noneclass OpenAIChat:
def __init__(
self,
model_path: str,
optimize_rule_path: str = None,
gguf_path: str = None,
cpu_infer: int = Config().cpu_infer,
use_cuda_graph: bool = True,
mode: str = "normal",
):
torch.set_grad_enabled(False)
Config().cpu_infer = cpu_inferself.tokenizer = AutoTokenizer.from_pretrained(model_path, trust_remote_code=True)
config = AutoConfig.from_pretrained(model_path, trust_remote_code=True)
self.streamer = TextStreamer(self.tokenizer, skip_prompt=True) if not Config().cpu_infer else None
if mode == 'long_context':
assert config.architectures[0] == "LlamaForCausalLM", "Only LlamaForCausalLM supports long_context mode"
torch.set_default_dtype(torch.float16)
else:
torch.set_default_dtype(config.torch_dtype)with torch.device("meta"):
if config.architectures[0] in custom_models:
if "Qwen2Moe" in config.architectures[0]:
config._attn_implementation = "flash_attention_2"
if "Llama" in config.architectures[0]:
config._attn_implementation = "eager"
if "Mixtral" in config.architectures[0]:
config._attn_implementation = "flash_attention_2"
model = custom_models[config.architectures[0]](config)
else:
model = AutoModelForCausalLM.from_config(
config, trust_remote_code=True, attn_implementation="flash_attention_2"
)if optimize_rule_path is None:
if config.architectures[0] in default_optimize_rules:
optimize_rule_path = default_optimize_rules[config.architectures[0]]optimize_and_load_gguf(model, optimize_rule_path, gguf_path, config)
try:
model.generation_config = GenerationConfig.from_pretrained(model_path)
except:
model.generation_config = GenerationConfig(
max_length=128,
temperature=0.7,
top_p=0.9,
do_sample=True
)
if model.generation_config.pad_token_id is None:
model.generation_config.pad_token_id = model.generation_config.eos_token_id
model.eval()
self.model = model
self.use_cuda_graph = use_cuda_graph
self.mode = mode
logger.info("Model loaded successfully!")def create_chat_completion(
self,
messages: List[Dict[str, str]],
temperature: float = 0.7,
max_tokens: int = 1000,
top_p: float = 0.9,
force_think: bool = False,
) -> Dict:
input_tensor = self.tokenizer.apply_chat_template(
messages, add_generation_prompt=True, return_tensors="pt"
)
if force_think:
token_thinks = torch.tensor([self.tokenizer.encode("<think>\\n", add_special_tokens=False)],
device=input_tensor.device)
input_tensor = torch.cat([input_tensor, token_thinks], dim=1)generation_config = GenerationConfig(
temperature=temperature,
top_p=top_p,
max_new_tokens=max_tokens,
do_sample=True # Ensure do_sample is True if using temperature or top_p
)generated = prefill_and_generate(
self.model,
self.tokenizer,
input_tensor.cuda(),
max_tokens,
self.use_cuda_graph,
self.mode,
force_think
)# Convert token IDs to text
generated_text = self.tokenizer.decode(generated, skip_special_tokens=True)return {
"choices": [{
"message": {
"role": "assistant",
"content": generated_text
}
}],
"usage": {
"prompt_tokens": input_tensor.shape[1],
"completion_tokens": len(generated),
"total_tokens": input_tensor.shape[1] + len(generated)
}
}class ChatMessage(BaseModel):
role: str
content: strclass ChatCompletionRequest(BaseModel):
messages: List[ChatMessage] # 确保 messages 是 Pydantic 模型实例的列表
model: str = "default-model"
temperature: Optional[float] = 0.7
top_p: Optional[float] = 0.9
max_tokens: Optional[int] = 1000
stream: Optional[bool] = False
force_think: Optional[bool] = Trueclass ChatCompletionResponse(BaseModel):
id: str = "chatcmpl-default"
object: str = "chat.completion"
created: int = 0
model: str = "default-model"
choices: List[Dict[str, Any]]
usage: Dict[str, int]app = FastAPI(title="KVCache.AI API Server")
@app.get("/health")
async def health_check():
return {"status": "healthy"}@app.middleware("http")
async def add_process_time_header(request: Request, call_next):
start_time = time.time()
response = await call_next(request)
process_time = time.time() - start_time
response.headers["X-Process-Time"] = f"{process_time:.4f}s"
return responseapp.add_middleware(
CORSMiddleware,
allow_origins=["*"],
allow_credentials=True,
allow_methods=["*"],
allow_headers=["*"],
)@app.post("/v1/chat/completions", response_model=ChatCompletionResponse)
async def chat_completion(request: ChatCompletionRequest):
try:
# 如果 messages 是 Pydantic 模型实例列表,使用 model_dump
messages = [m.model_dump() for m in request.messages]
response = chat_model.create_chat_completion(
messages=messages,
temperature=request.temperature,
max_tokens=request.max_tokens,
top_p=request.top_p,
force_think=request.force_think
)return {
"id": f"chatcmpl-{int(time.time())}",
"object": "chat.completion",
"created": int(time.time()),
"model": request.model,
"choices": [{
"index": 0,
"message": {
"role": "assistant",
"content": response['choices'][0]['message']['content']
},
"finish_reason": "stop"
}],
"usage": response['usage']
}
except Exception as e:
logger.error(f"API Error: {str(e)}")
raise HTTPException(
status_code=status.HTTP_500_INTERNAL_SERVER_ERROR,
detail=f"Internal server error: {str(e)}"
)def create_app(model_path: str, gguf_path: str, cpu_infer:int, optimize_rule_path: Optional[str] = None):
global chat_model
chat_model = OpenAIChat(
model_path=model_path,
gguf_path=gguf_path,
optimize_rule_path=optimize_rule_path,
cpu_infer=cpu_infer
)
return appdef main():
parser = argparse.ArgumentParser(description="KVCache.AI API Server")
parser.add_argument("--model_path", type=str, required=True, help="HuggingFace模型路径")
parser.add_argument("--gguf_path", type=str, required=True, help="GGUF模型文件路径")
parser.add_argument("--optimize_rule_path", type=str, help="优化规则文件路径")
parser.add_argument("--port", type=int, default=8000, help="服务端口号")
parser.add_argument("--cpu_infer", type=int, default=10, help="使用cpu数量")
parser.add_argument("--host", type=str, default="0.0.0.0", help="绑定地址")
args = parser.parse_args()create_app(
model_path=args.model_path,
gguf_path=args.gguf_path,
optimize_rule_path=args.optimize_rule_path,
cpu_infer=args.cpu_infer
)uvicorn.run(
app,
host=args.host,
port=args.port,
loop="uvloop",
http="httptools",
timeout_keep_alive=300,
log_level="info",
access_log=False
)if __name__ == "__main__":
main()
文件防止位置:

安装依赖:
pip install protobuf uvicorn httptools
pip install uvloop启动:
python ktransformers/chat_openai.py --model_path deepseek-ai/DeepSeek-R1 --gguf_path /home/dpkj/deepseek/DeepSeek-R1-GGUF/DeepSeek-R1-Q4_K_M/
2.使用open-WEBUI进行可视化对接
# 使用Pip下载OPEN-WEBUI
pip install open-webui# 下载完成后开启服务open-webui serve


import os
import json
import requests
from pydantic import BaseModel, Field
from typing import List, Union, Iterator# Set DEBUG to True to enable detailed logging
DEBUG = False
class Pipe:
class Valves(BaseModel):
openai_API_KEY: str = Field(default="none") # Optional API key if needed
DEFAULT_MODEL: str = Field(default="DeepSeek-R1") # Default model identifierdef __init__(self):
self.id = "DeepSeek-R1"
self.type = "manifold"
self.name = "KT: "
self.valves = self.Valves(
**{
"openai_API_KEY": os.getenv("openai_API_KEY", "none"),
"DEFAULT_MODEL": os.getenv("openai_DEFAULT_MODEL", "DeepSeek-R1"),
}
)
# Self-hosted FastAPI server details
self.api_url = (
"http://localhost:8000/v1/chat/completions" # FastAPI server endpoint
)
self.headers = {"Content-Type": "application/json"}def get_openai_models(self):
"""Return available models - for openai we'll return a fixed list"""
return [{"id": "KT", "name": "DeepSeek-R1"}]def pipes(self) -> List[dict]:
return self.get_openai_models()def pipe(self, body: dict) -> Union[str, Iterator[str]]:
try:
# Use default model ID since OpenAI has a single endpoint
model_id = self.valves.DEFAULT_MODEL
messages = []# Process messages including system, user, and assistant messages
for message in body["messages"]:
if isinstance(message.get("content"), list):
# For OpenAI, we'll join multiple content parts into a single text
text_parts = []
for content in message["content"]:
if content["type"] == "text":
text_parts.append(content["text"])
elif content["type"] == "image_url":
# OpenAI might not support image inputs - add a note about the image
text_parts.append(f"[Image: {content['image_url']['url']}]")
messages.append(
{"role": message["role"], "content": "".join(text_parts)}
)
else:
# Handle simple text messages
messages.append(
{"role": message["role"], "content": message["content"]}
)if DEBUG:
print("FastAPI API request:")
print(" Model:", model_id)
print(" Messages:", json.dumps(messages, indent=2))# Prepare the API call parameters
payload = {
"model": model_id,
"messages": messages,
"temperature": body.get("temperature", 0.7),
"top_p": body.get("top_p", 0.9),
"max_tokens": body.get("max_tokens", 8192),
"stream": body.get("stream", True),
}# Add stop sequences if provided
if body.get("stop"):
payload["stop"] = body["stop"]# Sending request to local FastAPI server
if body.get("stream", False):
# Streaming response
def stream_generator():
try:
response = requests.post(
self.api_url,
json=payload,
headers=self.headers,
stream=True,
)
for line in response.iter_lines():
if line:
yield line.decode("utf-8")
except Exception as e:
if DEBUG:
print(f"Streaming error: {e}")
yield f"Error during streaming: {str(e)}"return stream_generator()
else:
# Regular response
response = requests.post(
self.api_url, json=payload, headers=self.headers
)
if response.status_code == 200:
generated_content = (
response.json()
.get("choices", [{}])[0]
.get("message", {})
.get("content", "")
)
return generated_content
else:
return f"Error: {response.status_code}, {response.text}"
except Exception as e:
if DEBUG:
print(f"Error in pipe method: {e}")
return f"Error: {e}"def health_check(self) -> bool:
"""Check if the OpenAI API (local FastAPI service) is accessible"""
try:
# Simple health check with a basic prompt
response = requests.post(
self.api_url,
json={
"model": self.valves.DEFAULT_MODEL,
"messages": [{"role": "user", "content": "Hello"}],
"max_tokens": 5,
},
headers=self.headers,
)
return response.status_code == 200
except Exception as e:
if DEBUG:
print(f"Health check failed: {e}")
return False


相关文章:
Ubuntu部署ktransformers
准备工作 一台服务器 CPU:500G GPU:48G(NVIDIA4090) 系统:Ubuntu20.04(github的文档好像用的是22.04) 第一步:下载权重文件 1.下载hfd wget https://hf-mirror.com/hfd/hfd.s…...

助力DeepSeek私有化部署服务:让企业AI落地更简单、更安全
在数字化转型的浪潮中,越来越多的企业选择私有化部署AI技术,以保障数据安全、提升业务效率并实现自主可控。DeepSeek作为行业领先的AI开源技术,其技术可以支持企业私有化部署,企业需要一站式服务私有化部署,涵盖硬件采…...

面试官询问项目前后端人员配比之高分示范回答
面试官询问项目前后端人员配比之高分示范回答 以下是对两个项目前后端人员配置的精准分析,结合 技术复杂度、协作效率、风险控制 三个维度设计回答,突出合理性与团队协作意识: 一、《x能x服》项目(Vue重构) 1. 人员配置与分工 前端:1人(独立开发) 负责旧系统业务逻辑…...

MyBatis中的日志和映射器说明
1.MyBatis中的日志 1.1 什么是日志 在我们编写应用的时候,有一些信息需要及时查看,查看的时候有时需要输出到控制台,有时需要输出到文件。MyBatis也需要日志,一般情况下,使用log4j进行日志管理。 1.2 在MyBatis中…...
)
深入了解 Pinia:Vue 的下一代状态管理工具 (上篇)
引言 在现代前端开发中,状态管理是构建复杂应用的关键。Vue 生态系统中,Vuex 一直是官方推荐的状态管理工具。然而,随着 Vue 3 的发布,一个新的状态管理工具——Pinia,逐渐崭露头角。Pinia 不仅继承了 Vuex 的优点&am…...

Unity 中导入的VRM模型渲染为VRoid风格
按照前篇Unity VRoidBlenderUnity 3D人物模型导入使用-CSDN博客 导入到Unity之后,可以按需调整模型在场景中的渲染表现, 但是按照教程中完成的情况, 整个模型没有进行材质区分, 仅用一个材质表现整个模型, 导致不能给不同部位进行渲染调整. 这里我希望能够在Unity中获得跟VRoi…...

【ELK】【Elasticsearch 】DSL 和 DQL
1. DSL 查询(Query DSL) 全称:Domain Specific Language(领域特定语言)。 定义:Elasticsearch 提供的一种基于 JSON 的查询语言,用于构建复杂的查询逻辑。 特点: 支持多种查询类型…...

最新版本Exoplayer扩展FFmpeg音频软解码保姆级教程
ExoPlayer 是一个开源的 Android 媒体播放库,由 Google 开发和维护,用于替代 Android 系统自带的 MediaPlayer。它提供了更强大的功能、更好的性能和更高的灵活性,适用于各种复杂的媒体播放场景。所以被广泛用于各种播放器场景。 最近项目中…...

面对低消费欲人群,我们如何开发其需求?
在市场增量放缓的当下,开发深度开发各层次的人群已经成为现实需求。低消费欲人群并非“没有需求”,而是更谨慎、更理性。他们可能对价格敏感,但对实用性、情感共鸣和生活品质的追求依然存在。就让我们从以下四个角度,拆解如何激发…...
》)
《算法基础入门:最常用的算法详解与应用(持续更新实战与面试题)》
1. 排序算法 排序算法是将一组数据按特定的顺序排列起来的算法,常见的有: 冒泡排序(Bubble Sort)选择排序(Selection Sort)插入排序(Insertion Sort)归并排序(Merge So…...

Linux设备驱动-练习
练习要求: 一、设备树 1、配置设备树信息:将3个led灯和1个风扇使用到的设备信息配置到设备树中 二、设备驱动层 1、通过of_find_node_by_name、of_get_named_gpion等内核核心层统一的api接口调用外设; 2、通过udev设备管理器自动注册并创建设…...

蓝桥杯核心内容
核心内容 数学 质数与筛质数,分解质因数 分解质因数 所有的数都可以写成有限个数相乘质数:可以写成1✖本身(如131✖13)合数:ab1✖...✖bn-》把乘数里面是合数的再分(如b3是合数-》b3c1✖c2)进…...

Spring Boot拦截器(Interceptor)详解
拦截器Interceptor 拦截器我们主要分为三个方面进行讲解: 介绍下什么是拦截器,并通过快速入门程序上手拦截器拦截器的使用细节通过拦截器Interceptor完成登录校验功能 1. 快速入门 什么是拦截器? 是一种动态拦截方法调用的机制ÿ…...
非常好用的ssh工具Xterminal
免安装 Xterminal - 更好用的开发工具,但不止于(SSH/控制台/More)...
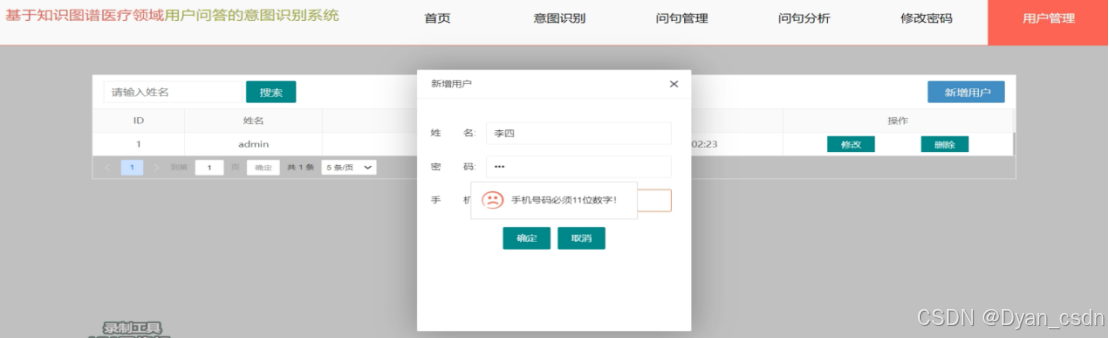
【Python项目】基于Django的医疗领域用户问答意图识别系统
【Python项目】基于Django的医疗领域用户问答意图识别系统 技术简介:采用Python技术、MySQL数据库、Neo4j图形数据库、Django框架、BERTLSTMCRF模型等技术实现。 系统简介: 医疗领域用户问答意图识别系统是一个基于知识图谱的智能问答平台,旨…...

深入理解指针(六)
一、字符指针变量 1.1字符指针变量 在指针的类型中我们知道有一种指针类型为字符指针char* 一般有以下两种使用方式: #include<stdio.h> int main() { char ch w; char* pc &ch; *pc w; return 0; } #include<stdio.h> int main()…...

Linux下基本指令(4)
Linux权限的概念 Linux下有两种用户:超级用户(root)、普通用户。 超级用户:可以再linux系统下做任何事情,不受限制 普通用户:在linux下做有限的事情。 超级用户的命令提示符是“#”,普通用户…...

vue 手写分页
【先看效果】 (1)内容小于2页 不展示页码 (2)1 < 内容页数< 限定展示页码 展示:页码、上下页;隐藏:首页、末页图标,上、下一区间码。即:(页数&#…...

Spring Boot项目接收前端参数的11种方式
大家好,我是。在前后端项目交互中,前端传递的数据可以通过HTTP请求发送到后端, 后端在Spring Boot中如何接收各种复杂的前端数据呢?这篇文章总结了11种在Spring Boot中接收前端数据的方式。 1 搭建项目 1.通过Spring Initializr…...
)
Springboot项目:使用MockMvc测试get和post接口(含单个和多个请求参数场景)
一、引入MockMvc依赖 使用MockMvc,必须要引入依赖 <dependency><groupId>org.springframework.boot</groupId><artifactId>spring-boot-starter-test</artifactId><scope>test</scope></dependency>二、具体演示…...

Path of Building 终极指南:三步掌握流放之路离线构筑模拟器
Path of Building 终极指南:三步掌握流放之路离线构筑模拟器 【免费下载链接】PathOfBuilding Offline build planner for Path of Exile. 项目地址: https://gitcode.com/gh_mirrors/pat/PathOfBuilding Path of Building是一款专为《流放之路》玩家设计的免…...

面试官最爱问的C++服务器项目:TinyWebServer中Epoll与Reactor模式如何协同工作?
C服务器开发实战:TinyWebServer中Epoll与Reactor模式的深度协同 在当今互联网服务架构中,高性能服务器开发始终是后端工程师的核心竞争力之一。TinyWebServer作为一个经典的C轻量级服务器实现,其设计思想和技术选型常常成为面试官考察候选人底…...
)
告别环境变量报错!JDK20在Windows 11下的保姆级安装与配置全流程(含Notepad++编写测试)
告别环境变量报错!JDK20在Windows 11下的保姆级安装与配置全流程(含Notepad编写测试) Java开发环境的搭建是每个初学者的必经之路,但很多人在安装JDK和配置环境变量时都会遇到各种问题。本文将带你一步步完成JDK20在Windows 11系…...

从Q235方钢仿真说起:Workbench静力学分析网格划分的‘质量’与‘速度’平衡术
从Q235方钢仿真说起:Workbench静力学分析网格划分的‘质量’与‘速度’平衡术 在工程仿真领域,网格划分往往被视为一项基础操作,但真正决定仿真成败的恰恰是这一环节的精细把控。当我们面对一根Q235材质的1001001000mm方钢进行静力学分析时&a…...

Phi-3.5-Mini-Instruct效果验证:对LLM幻觉内容主动标注‘不确定’并提供依据
Phi-3.5-Mini-Instruct效果验证:对LLM幻觉内容主动标注不确定并提供依据 1. 项目背景与核心价值 微软Phi-3.5-Mini-Instruct作为轻量级大模型的代表,在保持小体积的同时展现了出色的逻辑推理和问答能力。然而,与所有大语言模型一样…...
)
从Java线程状态到订单状态机:手把手教你用状态图设计清晰业务逻辑(避坑指南)
从Java线程状态到订单状态机:手把手教你用状态图设计清晰业务逻辑(避坑指南) 在构建复杂业务系统时,状态管理往往是系统稳定性的关键所在。想象一下电商平台中一个订单从创建到完成的完整生命周期,或是工单系统中一个…...
)
保姆级教程:用Vector Configurator配置Autosar CAN报文接收超时(Deadline Monitor)
保姆级教程:用Vector Configurator配置Autosar CAN报文接收超时(Deadline Monitor) 在汽车电子开发中,CAN总线通信的可靠性直接关系到整车功能的稳定性。当某个ECU节点依赖特定CAN报文进行关键决策时,报文接收超时监测…...

XGBoost决策树可视化:Python实战与原理详解
1. 项目概述:XGBoost决策树可视化实战指南在机器学习的实战领域,梯度提升决策树(GBDT)因其卓越的预测性能而广受欢迎,而XGBoost作为其优化实现更是成为数据科学竞赛中的常胜将军。但模型的可解释性一直是复杂集成算法的…...

别再只用@input了!UniApp搜索框实战:实时联想与回车确认的完整交互方案
UniApp搜索框交互进阶:实时联想与回车确认的工程实践 在移动应用开发中,搜索功能看似简单,实则暗藏玄机。一个优秀的搜索交互需要平衡实时响应与性能消耗,兼顾用户体验与系统资源。本文将带你深入UniApp搜索框的进阶实践ÿ…...

如何用FakeLocation实现应用级精准虚拟定位:3步搞定位置伪装
如何用FakeLocation实现应用级精准虚拟定位:3步搞定位置伪装 【免费下载链接】FakeLocation Xposed module to mock locations per app. 项目地址: https://gitcode.com/gh_mirrors/fak/FakeLocation 你是否曾想过,让某个应用认为你在巴黎埃菲尔铁…...