深度学习目标检测项目实战(四)—基于Tensorflow object detection API的骨折目标检测及其界面运行
深度学习目标检测项目实战(四)—基于Tensorflow object detection API的骨折目标检测及其界面运行
使用tensorflow object detection进行训练检测
参考原始代码:https://github.com/tensorflow/models/tree/master/research
我用的是1.x的版本
所以环境必须有gpu版本的tensorflow,训练才快。
数据整理
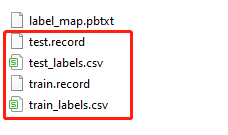
(1)原始数据集必须有jpg图片和对应的xml文件。
(2)将xml文件生成csv文件:
"""
Usage:
# Create train data:
python xml_to_csv.py -i [PATH_TO_IMAGES_FOLDER]/train -o [PATH_TO_ANNOTATIONS_FOLDER]/train_labels.csv# Create test data:
python xml_to_csv.py -i [PATH_TO_IMAGES_FOLDER]/test -o [PATH_TO_ANNOTATIONS_FOLDER]/test_labels.csv
"""import os
import glob
import pandas as pd
import argparse
import xml.etree.ElementTree as ETdef xml_to_csv(path):"""Iterates through all .xml files (generated by labelImg) in a given directory and combines them in a single Pandas datagrame.Parameters:----------path : {str}The path containing the .xml filesReturns-------Pandas DataFrameThe produced dataframe"""xml_list = []for xml_file in glob.glob(path + '/*.xml'):tree = ET.parse(xml_file)root = tree.getroot()for member in root.findall('object'):value = (root.find('filename').text,int(root.find('size')[0].text),int(root.find('size')[1].text),member[0].text,int(member[4][0].text),int(member[4][1].text),int(member[4][2].text),int(member[4][3].text))xml_list.append(value)column_name = ['filename', 'width', 'height','class', 'xmin', 'ymin', 'xmax', 'ymax']xml_df = pd.DataFrame(xml_list, columns=column_name)return xml_dfdef main():# Initiate argument parserparser = argparse.ArgumentParser(description="Sample TensorFlow XML-to-CSV converter")parser.add_argument("-i","--inputDir",help="Path to the folder where the input .xml files are stored",type=str)parser.add_argument("-o","--outputFile",help="Name of output .csv file (including path)", type=str)args = parser.parse_args()if(args.inputDir is None):args.inputDir = os.getcwd()if(args.outputFile is None):args.outputFile = args.inputDir + "/labels.csv"assert(os.path.isdir(args.inputDir))xml_df = xml_to_csv(args.inputDir)xml_df.to_csv(args.outputFile, index=None)print('Successfully converted xml to csv.')if __name__ == '__main__':main()
(3)将csv文件转为record文件:
"""
Usage:# Create train data:
python generate_tfrecord.py --label=<LABEL> --csv_input=<PATH_TO_ANNOTATIONS_FOLDER>/train_labels.csv  --output_path=<PATH_TO_ANNOTATIONS_FOLDER>/train.record# Create test data:
python generate_tfrecord.py --label=<LABEL> --csv_input=<PATH_TO_ANNOTATIONS_FOLDER>/test_labels.csv  --output_path=<PATH_TO_ANNOTATIONS_FOLDER>/test.record
"""from __future__ import division
from __future__ import print_function
from __future__ import absolute_importimport os
import io
import pandas as pd
import tensorflow as tf
import sys
sys.path.append("../../models/research")from PIL import Image
from object_detection.utils import dataset_util
from collections import namedtuple, OrderedDictflags = tf.app.flags
flags.DEFINE_string('csv_input', '', 'Path to the CSV input')
flags.DEFINE_string('output_path', '', 'Path to output TFRecord')
# flags.DEFINE_string('label', '', 'Name of class label')# if your image has more labels input them as
# flags.DEFINE_string('label0', '', 'Name of class[0] label')
# flags.DEFINE_string('label1', '', 'Name of class[1] label')
# and so on.
flags.DEFINE_string('label0', '', 'Name of class[0] label')
flags.DEFINE_string('label1', '', 'Name of class[1] label')
flags.DEFINE_string('label2', '', 'Name of class[2] label')
flags.DEFINE_string('label3', '', 'Name of class[3] label')
flags.DEFINE_string('label4', '', 'Name of class[4] label')
flags.DEFINE_string('label5', '', 'Name of class[5] label')flags.DEFINE_string('img_path', '', 'Path to images')
FLAGS = flags.FLAGS# TO-DO replace this with label map
# for multiple labels add more else if statements
def class_text_to_int(row_label):# if row_label == FLAGS.label:  # 'ship':#     return 1# comment upper if statement and uncomment these statements for multiple labellingif row_label == FLAGS.label0:return 1elif row_label == FLAGS.label1:return 2elif row_label == FLAGS.label2:return 3elif row_label == FLAGS.label3:return 4elif row_label == FLAGS.label4:return 5elif row_label == FLAGS.label5:return 6else:Nonedef split(df, group):data = namedtuple('data', ['filename', 'object'])gb = df.groupby(group)return [data(filename, gb.get_group(x)) for filename, x in zip(gb.groups.keys(), gb.groups)]def create_tf_example(group, path):with tf.gfile.GFile(os.path.join(path, '{}'.format(group.filename)), 'rb') as fid:encoded_jpg = fid.read()encoded_jpg_io = io.BytesIO(encoded_jpg)image = Image.open(encoded_jpg_io)width, height = image.sizefilename = group.filename.encode('utf8')image_format = b'jpg'# check if the image format is matching with your images.xmins = []xmaxs = []ymins = []ymaxs = []classes_text = []classes = []for index, row in group.object.iterrows():xmins.append(row['xmin'] / width)xmaxs.append(row['xmax'] / width)ymins.append(row['ymin'] / height)ymaxs.append(row['ymax'] / height)classes_text.append(row['class'].encode('utf8'))classes.append(class_text_to_int(row['class']))tf_example = tf.train.Example(features=tf.train.Features(feature={'image/height': dataset_util.int64_feature(height),'image/width': dataset_util.int64_feature(width),'image/filename': dataset_util.bytes_feature(filename),'image/source_id': dataset_util.bytes_feature(filename),'image/encoded': dataset_util.bytes_feature(encoded_jpg),'image/format': dataset_util.bytes_feature(image_format),'image/object/bbox/xmin': dataset_util.float_list_feature(xmins),'image/object/bbox/xmax': dataset_util.float_list_feature(xmaxs),'image/object/bbox/ymin': dataset_util.float_list_feature(ymins),'image/object/bbox/ymax': dataset_util.float_list_feature(ymaxs),'image/object/class/text': dataset_util.bytes_list_feature(classes_text),'image/object/class/label': dataset_util.int64_list_feature(classes),}))return tf_exampledef main(_):writer = tf.python_io.TFRecordWriter(FLAGS.output_path)path = os.path.join(os.getcwd(), FLAGS.img_path)examples = pd.read_csv(FLAGS.csv_input)grouped = split(examples, 'filename')for group in grouped:tf_example = create_tf_example(group, path)writer.write(tf_example.SerializeToString())writer.close()output_path = os.path.join(os.getcwd(), FLAGS.output_path)print('Successfully created the TFRecords: {}'.format(output_path))if __name__ == '__main__':tf.app.run()
(4)以上操作都是对训练数据集,验证数据集同时操作:
(5)编辑label_map.pbtxt文件:
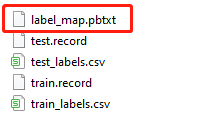
item {id: 1name: 'fracture'
}
因为项目只有一种类别,所以长这样。若有多个则继续往后加。
预训练模型下载
https://github.com/tensorflow/models/blob/master/research/object_detection/g3doc/tf1_detection_zoo.md
我这里选择ssd_mobilenet_v2_coco,下载下来解压:
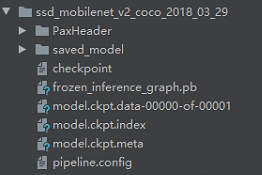
这里复制
object_detection\samples\configs\ssd_mobilenet_v2_coco.config
文件到里面。
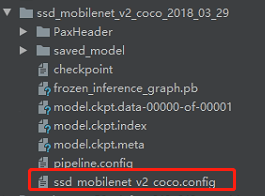
我们不使用自带的pipeline.config,可能有一些关键参数没有配置到,用源码自带的比较稳。要改的参数如下注释:
# SSD with Mobilenet v2 configuration for MSCOCO Dataset.
# Users should configure the fine_tune_checkpoint field in the train config as
# well as the label_map_path and input_path fields in the train_input_reader and
# eval_input_reader. Search for "PATH_TO_BE_CONFIGURED" to find the fields that
# should be configured.model {ssd {num_classes: 1     # 改------------------------------box_coder {faster_rcnn_box_coder {y_scale: 10.0x_scale: 10.0height_scale: 5.0width_scale: 5.0}}matcher {argmax_matcher {matched_threshold: 0.5unmatched_threshold: 0.5ignore_thresholds: falsenegatives_lower_than_unmatched: trueforce_match_for_each_row: true}}similarity_calculator {iou_similarity {}}anchor_generator {ssd_anchor_generator {num_layers: 6min_scale: 0.2max_scale: 0.95aspect_ratios: 1.0aspect_ratios: 2.0aspect_ratios: 0.5aspect_ratios: 3.0aspect_ratios: 0.3333}}image_resizer {fixed_shape_resizer {height: 300width: 300}}box_predictor {convolutional_box_predictor {min_depth: 0max_depth: 0num_layers_before_predictor: 0use_dropout: falsedropout_keep_probability: 0.8kernel_size: 1box_code_size: 4apply_sigmoid_to_scores: falseconv_hyperparams {activation: RELU_6,regularizer {l2_regularizer {weight: 0.00004}}initializer {truncated_normal_initializer {stddev: 0.03mean: 0.0}}batch_norm {train: true,scale: true,center: true,decay: 0.9997,epsilon: 0.001,}}}}feature_extractor {type: 'ssd_mobilenet_v2'min_depth: 16depth_multiplier: 1.0conv_hyperparams {activation: RELU_6,regularizer {l2_regularizer {weight: 0.00004}}initializer {truncated_normal_initializer {stddev: 0.03mean: 0.0}}batch_norm {train: true,scale: true,center: true,decay: 0.9997,epsilon: 0.001,}}}loss {classification_loss {weighted_sigmoid {}}localization_loss {weighted_smooth_l1 {}}hard_example_miner {num_hard_examples: 3000iou_threshold: 0.99loss_type: CLASSIFICATIONmax_negatives_per_positive: 3min_negatives_per_image: 3}classification_weight: 1.0localization_weight: 1.0}normalize_loss_by_num_matches: truepost_processing {batch_non_max_suppression {score_threshold: 1e-8iou_threshold: 0.6max_detections_per_class: 100max_total_detections: 100}score_converter: SIGMOID}}
}train_config: {batch_size: 4     # 改------------------------------optimizer {rms_prop_optimizer: {learning_rate: {exponential_decay_learning_rate {initial_learning_rate: 0.004decay_steps: 800720decay_factor: 0.95}}momentum_optimizer_value: 0.9decay: 0.9epsilon: 1.0}}fine_tune_checkpoint: "/model.ckpt"   # 改------------------------------fine_tune_checkpoint_type:  "detection"# Note: The below line limits the training process to 200K steps, which we# empirically found to be sufficient enough to train the pets dataset. This# effectively bypasses the learning rate schedule (the learning rate will# never decay). Remove the below line to train indefinitely.num_steps: 10000   # 改------------------------------data_augmentation_options {random_horizontal_flip {}}data_augmentation_options {ssd_random_crop {}}
}train_input_reader: {tf_record_input_reader {input_path: "/train.record"    # 改------------------------------}label_map_path: "label_map.pbtxt"    # 改------------------------------
}eval_config: {num_examples: 14   # 改为自己测试集的图片数量# Note: The below line limits the evaluation process to 10 evaluations.# Remove the below line to evaluate indefinitely.max_evals: 2   # 改------------------------------
}eval_input_reader: {tf_record_input_reader {input_path: "/test.record"  # 改------------------------------}label_map_path: "/label_map.pbtxt"   # 改------------------------------shuffle: falsenum_readers: 1
}
训练评估
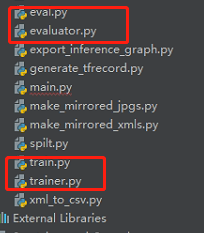
将object_detection\legacy\train.py,object_detection\legacy\trainer.py,object_detection\legacy\evaluator.py和object_detection\legacy\eval.py的复制到工程最外层:
接着就可以训练:
python train.py --logtostderr --pipeline_config_path=config文件的存放路径 --train_dir=训练模型存放的文件夹路径
python eval.py --logtostderr --pipeline_config_path=config文件的存放路径 --checkpoint_dir=训练模型存放的文件夹路径 --eval_dir=评估结果存放的文件夹路径
比如本项目的训练命令为:
python train.py --logtostderr --pipeline_config_path=ssd_mobilenet_v2_coco_2018_03_29/ssd_mobilenet_v2_coco.config --train_dir=training/
导出pb文件
将object_detection\export_inference_graph.py复制到最外层,方便运行。训练完之后,将ckpt文件导出为pb文件:
python export_inference_graph.py --pipeline_config_path=config文件的存放路径 --trained_checkpoint_prefix=训练模型存放的文件夹路径 --output_directory=导出的存放文件夹路径
注意这里的ckpt选择可以最后一次迭代的结果,比如我是10000次迭代,那么trained_checkpoint_prefix选择:model.ckpt-10000
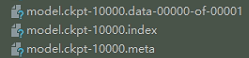
导出完的效果:

单个图片的检测
代码在object_detection\object_detection_tutorial.ipynb:
# Imports#%%import numpy as np
import os
import six.moves.urllib as urllib
import sys
import tarfile
import tensorflow as tf
import zipfilefrom distutils.version import StrictVersion
from collections import defaultdict
from io import StringIO
from matplotlib import pyplot as plt
from PIL import Image# This is needed since the notebook is stored in the object_detection folder.
sys.path.append("..")
from object_detection.utils import ops as utils_opsif StrictVersion(tf.__version__) < StrictVersion('1.9.0'):raise ImportError('Please upgrade your TensorFlow installation to v1.9.* or later!')#%% md## Env setup#%%# This is needed to display the images.
%matplotlib inline#%% md## Object detection imports
Here are the imports from the object detection module.#%%from utils import label_map_utilfrom utils import visualization_utils as vis_util#%% md# Model preparation #%% md## VariablesAny model exported using the `export_inference_graph.py` tool can be loaded here simply by changing `PATH_TO_FROZEN_GRAPH` to point to a new .pb file.  By default we use an "SSD with Mobilenet" model here. See the [detection model zoo](https://github.com/tensorflow/models/blob/master/research/object_detection/g3doc/detection_model_zoo.md) for a list of other models that can be run out-of-the-box with varying speeds and accuracies.#%%# What model to download.
MODEL_NAME = 'ssd_mobilenet_v1_coco_2017_11_17'
MODEL_FILE = MODEL_NAME + '.tar.gz'
DOWNLOAD_BASE = 'http://download.tensorflow.org/models/object_detection/'# Path to frozen detection graph. This is the actual model that is used for the object detection.
PATH_TO_FROZEN_GRAPH = MODEL_NAME + '/frozen_inference_graph.pb'# List of the strings that is used to add correct label for each box.
PATH_TO_LABELS = os.path.join('data', 'mscoco_label_map.pbtxt')#%% md## Download Model#%%opener = urllib.request.URLopener()
opener.retrieve(DOWNLOAD_BASE + MODEL_FILE, MODEL_FILE)
tar_file = tarfile.open(MODEL_FILE)
for file in tar_file.getmembers():file_name = os.path.basename(file.name)if 'frozen_inference_graph.pb' in file_name:tar_file.extract(file, os.getcwd())#%% md## Load a (frozen) Tensorflow model into memory.#%%detection_graph = tf.Graph()
with detection_graph.as_default():od_graph_def = tf.GraphDef()with tf.gfile.GFile(PATH_TO_FROZEN_GRAPH, 'rb') as fid:serialized_graph = fid.read()od_graph_def.ParseFromString(serialized_graph)tf.import_graph_def(od_graph_def, name='')#%% md## Loading label map
Label maps map indices to category names, so that when our convolution network predicts `5`, we know that this corresponds to `airplane`.  Here we use internal utility functions, but anything that returns a dictionary mapping integers to appropriate string labels would be fine#%%category_index = label_map_util.create_category_index_from_labelmap(PATH_TO_LABELS, use_display_name=True)#%% md## Helper code#%%def load_image_into_numpy_array(image):(im_width, im_height) = image.sizereturn np.array(image.getdata()).reshape((im_height, im_width, 3)).astype(np.uint8)#%% md# Detection#%%# For the sake of simplicity we will use only 2 images:
# image1.jpg
# image2.jpg
# If you want to test the code with your images, just add path to the images to the TEST_IMAGE_PATHS.
PATH_TO_TEST_IMAGES_DIR = 'test_images'
TEST_IMAGE_PATHS = [ os.path.join(PATH_TO_TEST_IMAGES_DIR, 'image{}.jpg'.format(i)) for i in range(1, 3) ]# Size, in inches, of the output images.
IMAGE_SIZE = (12, 8)#%%def run_inference_for_single_image(image, graph):with graph.as_default():with tf.Session() as sess:# Get handles to input and output tensorsops = tf.get_default_graph().get_operations()all_tensor_names = {output.name for op in ops for output in op.outputs}tensor_dict = {}for key in ['num_detections', 'detection_boxes', 'detection_scores','detection_classes', 'detection_masks']:tensor_name = key + ':0'if tensor_name in all_tensor_names:tensor_dict[key] = tf.get_default_graph().get_tensor_by_name(tensor_name)if 'detection_masks' in tensor_dict:# The following processing is only for single imagedetection_boxes = tf.squeeze(tensor_dict['detection_boxes'], [0])detection_masks = tf.squeeze(tensor_dict['detection_masks'], [0])# Reframe is required to translate mask from box coordinates to image coordinates and fit the image size.real_num_detection = tf.cast(tensor_dict['num_detections'][0], tf.int32)detection_boxes = tf.slice(detection_boxes, [0, 0], [real_num_detection, -1])detection_masks = tf.slice(detection_masks, [0, 0, 0], [real_num_detection, -1, -1])detection_masks_reframed = utils_ops.reframe_box_masks_to_image_masks(detection_masks, detection_boxes, image.shape[0], image.shape[1])detection_masks_reframed = tf.cast(tf.greater(detection_masks_reframed, 0.5), tf.uint8)# Follow the convention by adding back the batch dimensiontensor_dict['detection_masks'] = tf.expand_dims(detection_masks_reframed, 0)image_tensor = tf.get_default_graph().get_tensor_by_name('image_tensor:0')# Run inferenceoutput_dict = sess.run(tensor_dict,feed_dict={image_tensor: np.expand_dims(image, 0)})# all outputs are float32 numpy arrays, so convert types as appropriateoutput_dict['num_detections'] = int(output_dict['num_detections'][0])output_dict['detection_classes'] = output_dict['detection_classes'][0].astype(np.uint8)output_dict['detection_boxes'] = output_dict['detection_boxes'][0]output_dict['detection_scores'] = output_dict['detection_scores'][0]if 'detection_masks' in output_dict:output_dict['detection_masks'] = output_dict['detection_masks'][0]return output_dict#%%for image_path in TEST_IMAGE_PATHS:image = Image.open(image_path)# the array based representation of the image will be used later in order to prepare the# result image with boxes and labels on it.image_np = load_image_into_numpy_array(image)# Expand dimensions since the model expects images to have shape: [1, None, None, 3]image_np_expanded = np.expand_dims(image_np, axis=0)# Actual detection.output_dict = run_inference_for_single_image(image_np, detection_graph)# Visualization of the results of a detection.vis_util.visualize_boxes_and_labels_on_image_array(image_np,output_dict['detection_boxes'],output_dict['detection_classes'],output_dict['detection_scores'],category_index,instance_masks=output_dict.get('detection_masks'),use_normalized_coordinates=True,line_thickness=8)plt.figure(figsize=IMAGE_SIZE)plt.imshow(image_np)#%%
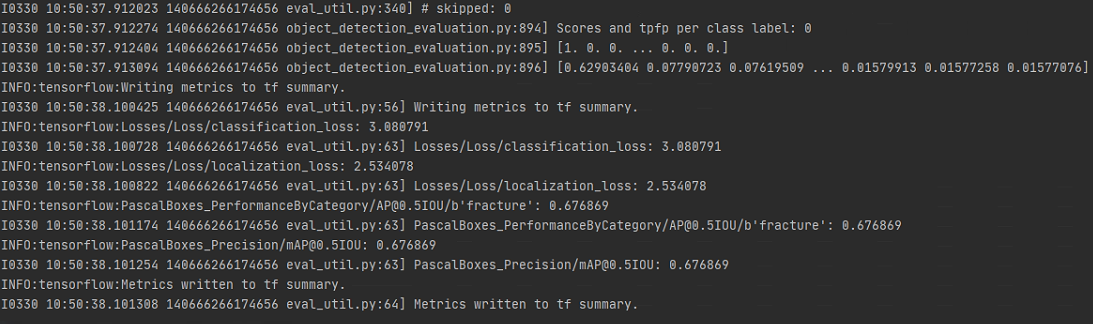
评估结果
注意
如果数据集不是特别多,则应该选用大型的模型。训练效果不是特别好,可以自行改良。
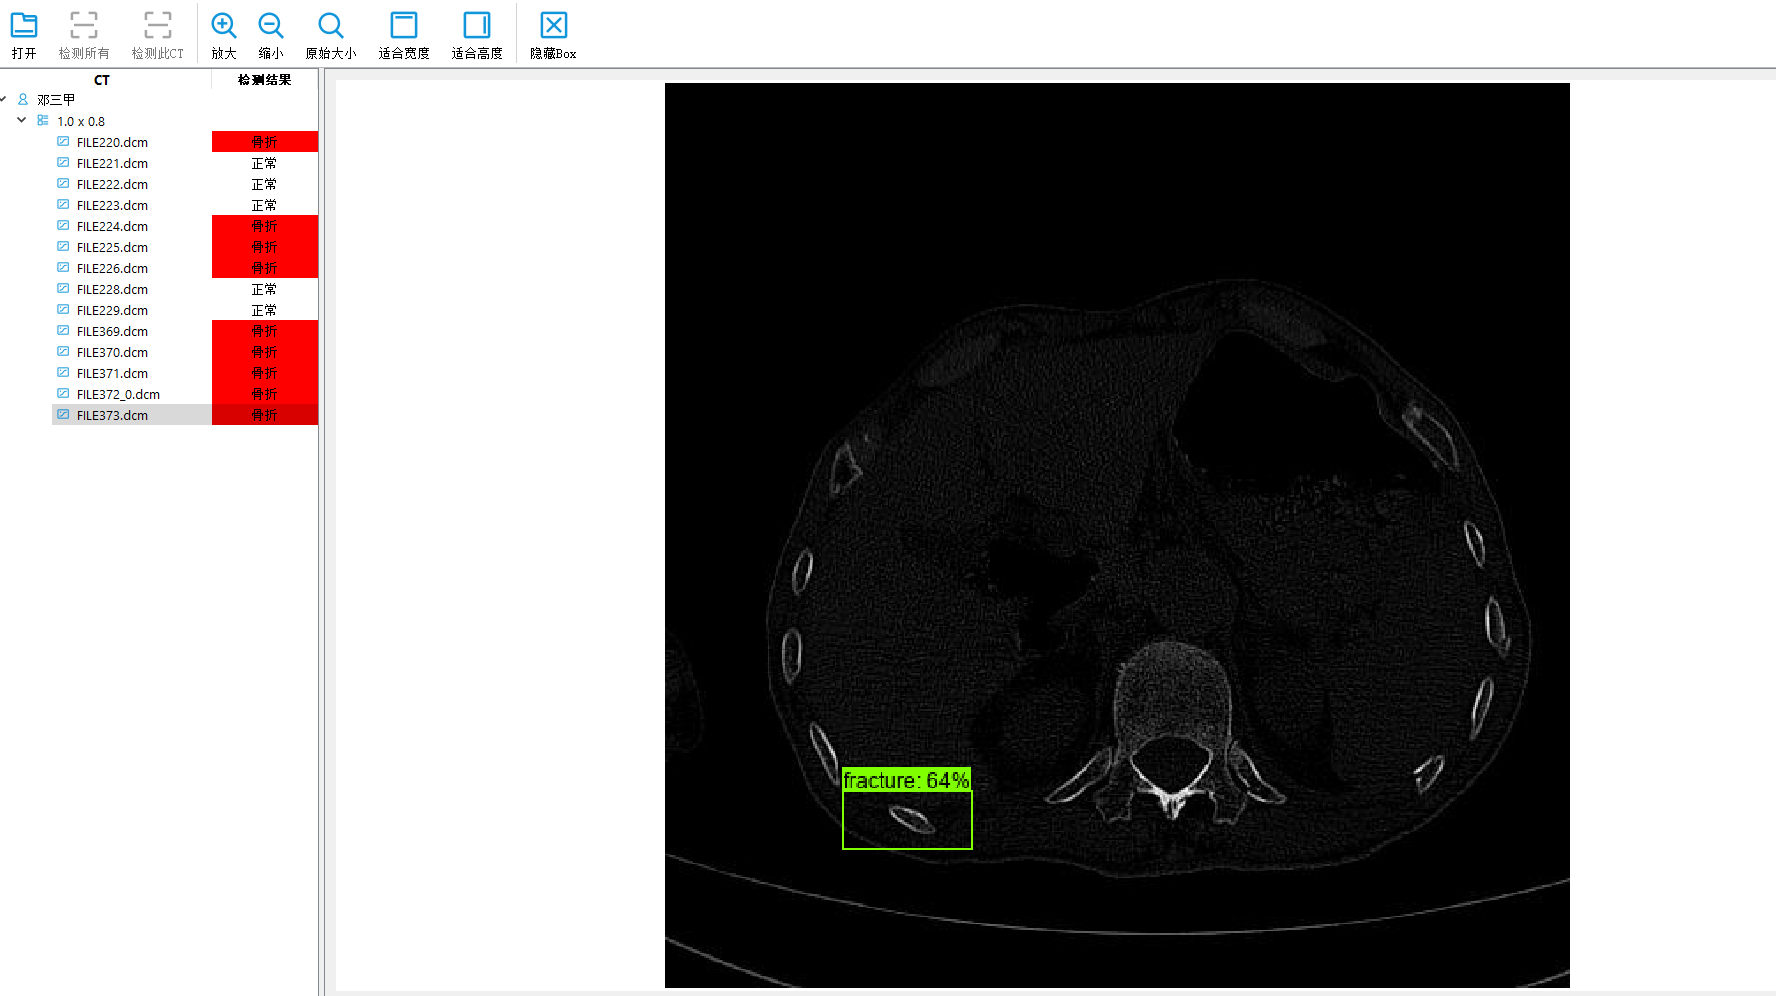
界面
相关文章:
深度学习目标检测项目实战(四)—基于Tensorflow object detection API的骨折目标检测及其界面运行
深度学习目标检测项目实战(四)—基于Tensorflow object detection API的骨折目标检测及其界面运行 使用tensorflow object detection进行训练检测 参考原始代码:https://github.com/tensorflow/models/tree/master/research 我用的是1.x的版本 所以环境必须有gpu版…...

嵌入式工程师如何快速的阅读datasheet的方法
目录 ▎从项目角度来看datasheet ▎各取所需 ▎最后 Datasheet(数据手册)的快速阅读能力,是每个工程师都应该具备的基本素养。 无论是项目开始阶段的选型还是后续的软硬件设计,到后期的项目调试,经常有工程师对着英…...
合约广告)
(三)合约广告
1. 广告位(CPT)合约 系统:广告排期系统 网站把某一个广告位卖给广告商,这段时间归广告商所有,到点了下线 (1)流量选择的维度:时间段、地域等 (2)典型场景…...
【Android -- 软技能】分享一个学习方法
前言 很多人都想通过学习来提升自己,但是,可能因为两个问题,阻碍了自己的高效提升: 学什么? 怎么学? 本文将从自己的学习实践出发,针对这两个问题,给出自己的一套学习流程。 1…...
)
Python-DQN代码阅读(10)
目录 1.代码 1.1 代码阅读 1.2 代码分解 1.2.1 f open("experiments/" str(env.spec.id) "/performance.txt", "a") 1.2.2 f.write(str(ep) " " str(time_steps) " " str(episode_rewards) " " str(…...
MongoDB入坑
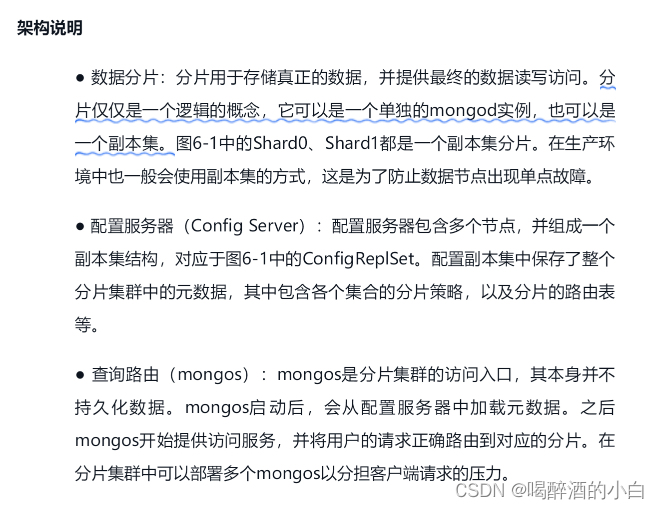
MongoDB入坑一、体系架构1、简介2、MongoDB VS RDBMS3、文件4、体系结构二、权限管理1、开启2、角色三、存储引擎四、备份 & 恢复五、高可用0、主从复制1、副本集2、分片一、体系架构 1、简介 DBMS No.5;NoSQL Document No.1 1)BSON BSON(Binary …...
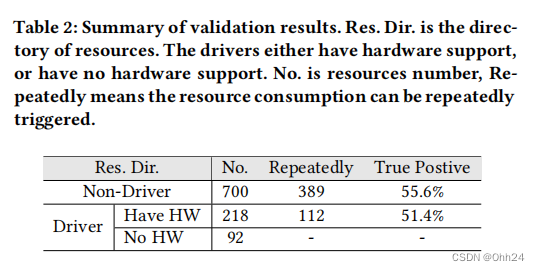
【论文总结】针对操作系统级虚拟化的抽象资源攻击
介绍 这是一篇来自2021CCS的论文,作者有Nanzi Yang, Wenbo Shen, Jinku Li, Yutian Yang, Kangjie Lu, Jietao Xiao, Tianyu Zhou, Chenggang Qin, Wang Yu, Jianfeng Ma, Kui Ren。 概述 本文的贡献如下: 新的攻击面:作者揭示了一个影响操…...

C# 提取 PDF 文档中的文本
C# .Net 使用 IText7 从PDF文件中提取出所有文本内容 【文 / 张赐荣】 首先在 Nuget 包管理器中,安装"itext7" 和 "itext7.font-asian"。 如果不安装 "itext7.font-asian" PDF 文件中有非Unicode编码的字符,将会抛出运行时异常:iText.IO.Excep…...
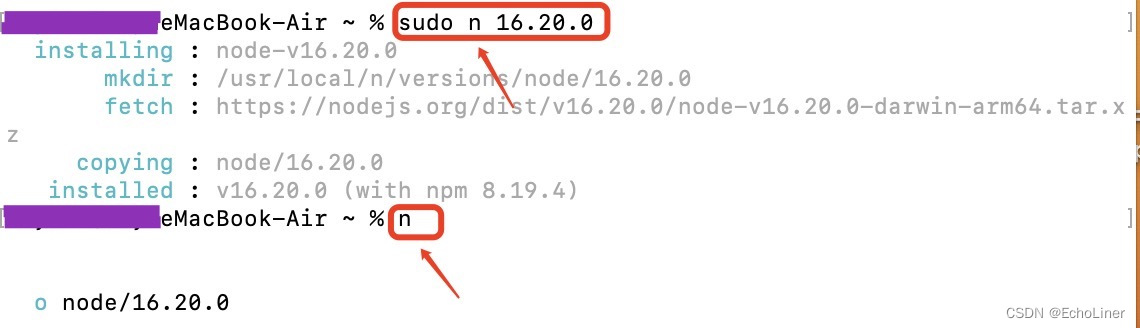
mac如何升级node版本、切换node版本
一、mac如何升级node版本 当前官网稳定版本是18.15.0 所以我从v14.17.4升级到v18.15.0 二、mac如何切换node版本 切换到16.20.0版本 三、这里是用node.js的多版本管理器n来升级和切换的,命令如下: 1、sudo npm cache clean -f //清除node.js的cache …...

一位大专学历的女程序员要求月薪25K,学历重要吗?来看看面试过程
“请提供一份完整的简历,以便我审查。从您的简历中,我感觉您写得还不错。方便的话,您可以自我简单介绍一下吗?“ ”好的,我叫李娟,拥有大专学位,目前正在寻找一份Java开发架构师的工作岗位。“…...
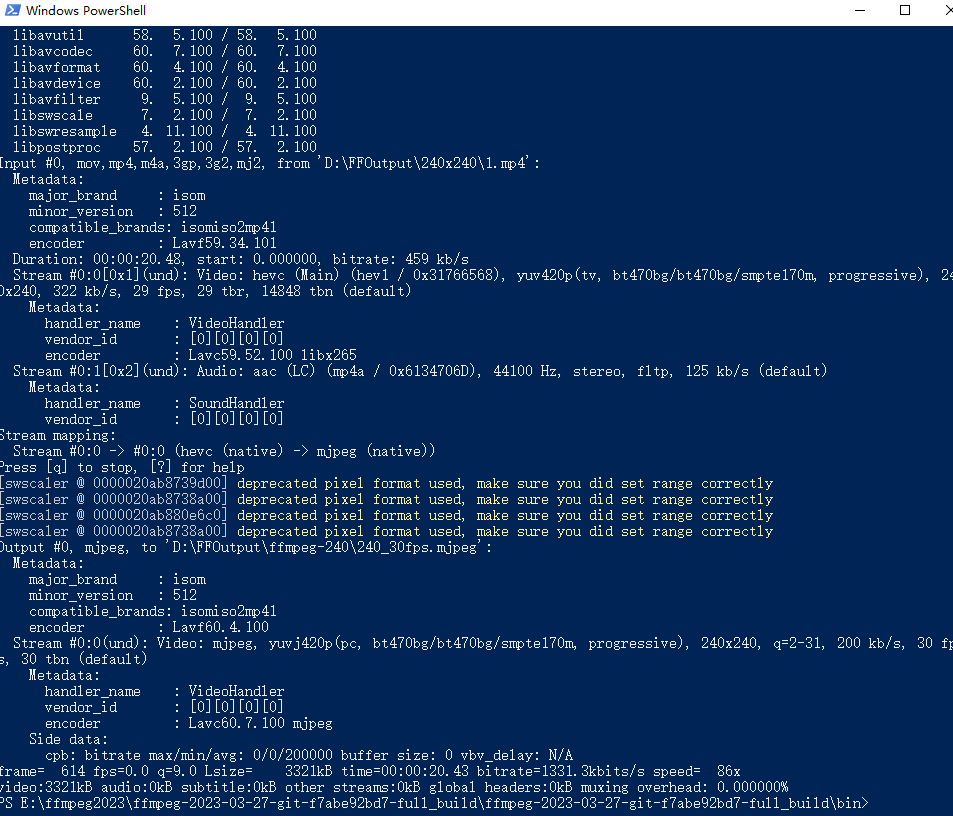
ESP32驱动1.28寸GC9A01播放视频(一、视频分辨率的调整和视频格式的转换)
ESP32驱动1.28寸GC9A01播放视频(一、视频分辨率的调整和视频格式的转换)播放前准备转换视频分辨率用FFmpeg将.MP4转换为.mjpeg格式FFmpeg的win10环境搭建FFmpeg的下载环境变量的搭建MP4转换成mjpeg格式总结播放前准备 1.28寸GC9A01屏幕的分辨率是240x24…...

epoll的LT模式(水平触发)和ET模式(边沿触发)
前言 epoll的触发模式是个引发讨论非常多的话题,网络上这方面总结的文章也很多,首先从名字上就不是很统一,LT模式常被称为水平触发、电平触发、条件触发,而ET模式常被称为边缘触发、边沿触发等,这些都是从英文翻译过来…...

Java基础面试20题
Java的八大基本数据类型 答:可以分4种类型:布尔类型(boolean),字符类型(char),浮点类型(double,float),整型(byte,short,int, long)。 String,StringBuffer与StringBuilder的区别? …...

Java面向对象封装
目录 封装的概念 封装具体实现步骤 示例代码如下 封装具体语法 封装的概念 Java封装是一种面向对象的编程方法,它的主要思想是将类的内部细节(包括数据和方法)隐藏起来,对外只提供公共的访问接口,从而保证了程序的安全性和稳定性。 封装具体实现步骤 1、声明类的成…...
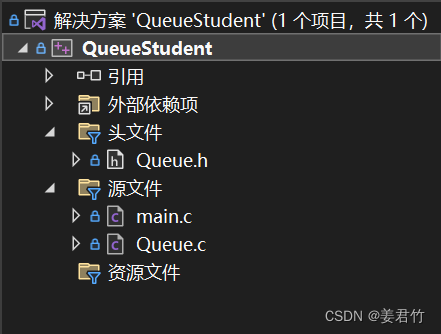
队列实现图书信息管理(C语言)
文章目录Queue.hmain.cQueue.c用队列实现一个图书信息管理,这里放一下有哪些文件。(ps:我之前写的是学生信息管理,但是有人说我们的作业是写图书,就该了下内容,没有改文件名)队列是用链表实现的…...
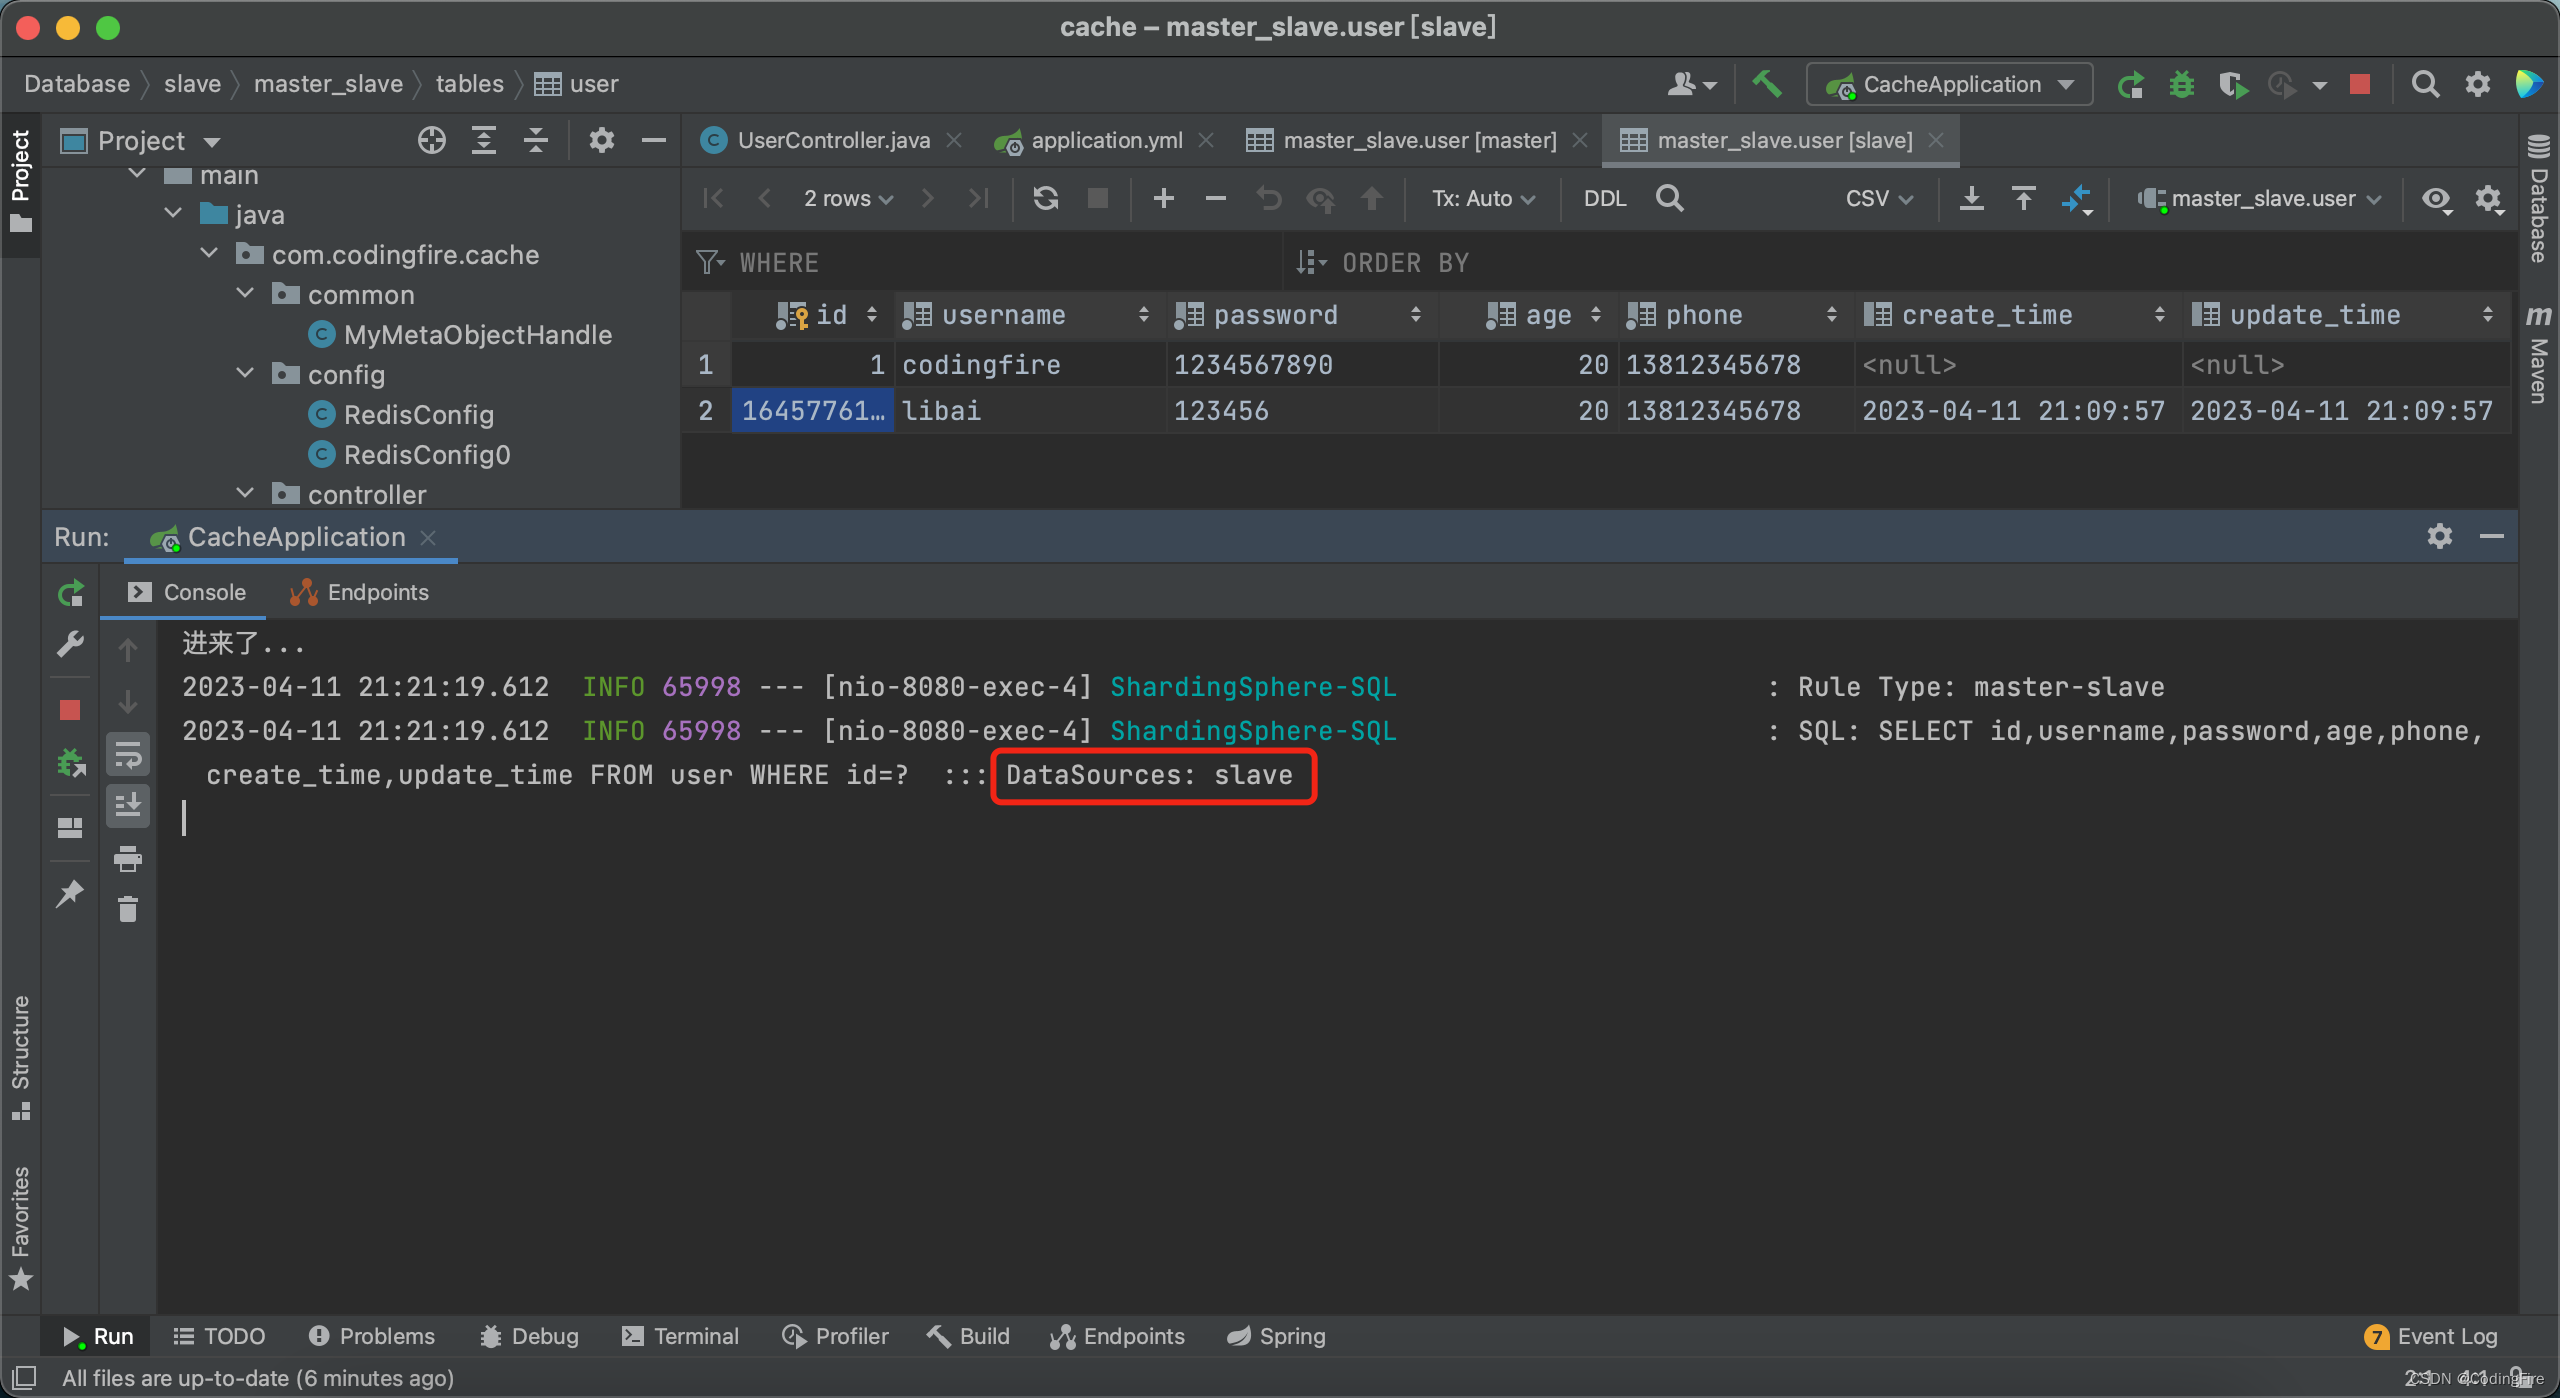
Java开发 - 读写分离初体验
前言 上一篇中,我们介绍了主从复制,相信学过的小伙伴已经能够很好的掌握主从复制的技术,实际上也并没有那么难,虽然没有讲一主多从,多主多从的配置,但是从一主一从的配置中也很容易联想到该怎么配置&#…...

图文详解CAN Log文件 - ASC文件格式
目录 1 CAN Log文件 -- ASC文件格式 1.1 Header 1.2 版本编号 1.3 经典CAN网络中的描述 1.3.1 经典CAN Standard标准帧的描述 1.3.2 经典CAN Extended扩展帧的描述 1.3.3 CAN Remote远程帧的描述 1.3.4 CAN Error错误帧的描述 1.4 CANFD网络中的描述 1.4.1 经典CAN S…...
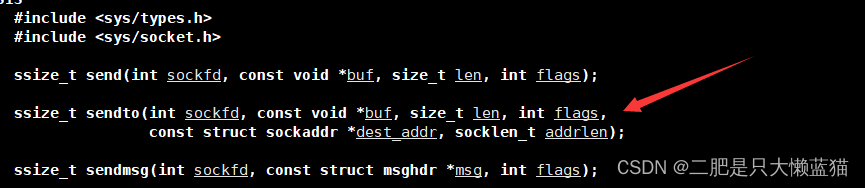
网络编程套接字(一)
学习任务: 我们先来认识端口号,区分好主机IP和端口号的区别,以及涉及到进程PID和端口号的区别。 然后简单认识一下TCP协议和UDP协议,这两个协议都是传输层的。接着了解什么是网络字节序,它有什么作用。然后是网络编程的…...

Mysql数据库存储过程
1、参数分类 存储过程的参数类型可以是IN、OUT和INOUT。根据这点分类如下: 1、没有参数(无参数无返回) 2、仅仅带 IN 类型(有参数无返回) 3、仅仅带 OUT 类型(无参数有返回) 4、既带 IN 又带 O…...

当我开始学习人工智能:人工智能的学派及研究目标
上课真是不认真啊,现在都写不来了作业了,真的会谢 一、人工智能的学派及其争论 1.1 对人工智能方法的争论 三个学派 符号主义 认为人的认知基元是符号,认知过程即符号操作过程。 认为人是一个物理符号系统,计算机也是一个物理符…...

Windows驱动管理终极指南:DriverStore Explorer完全使用手册,轻松解决磁盘空间和驱动冲突问题
Windows驱动管理终极指南:DriverStore Explorer完全使用手册,轻松解决磁盘空间和驱动冲突问题 【免费下载链接】DriverStoreExplorer Driver Store Explorer 项目地址: https://gitcode.com/gh_mirrors/dr/DriverStoreExplorer 你是否曾经因为C盘…...

RK3576开发板AIoT实战:从模型转换到边缘部署全流程解析
1. 项目概述:从一块开发板到AI应用落地的完整旅程 最近几年,AIoT(人工智能物联网)的概念越来越火,但很多开发者朋友拿到一块功能强大的开发板后,往往卡在“如何把AI模型真正跑起来”这一步。我手头这块RK35…...

2025届毕业生推荐的六大AI辅助论文方案实际效果
Ai论文网站排名(开题报告、文献综述、降aigc率、降重综合对比) TOP1. 千笔AI TOP2. aipasspaper TOP3. 清北论文 TOP4. 豆包 TOP5. kimi TOP6. deepseek 当人工智能技术广泛渗透开来,它于各行各业的应用在持续深入发展。在自动化客服方…...

从零到一:基于STM32CubeMX与USB3300的USB HS虚拟串口实战指南
1. 硬件准备与原理图设计 第一次接触STM32F4和USB3300芯片时,我完全被那些密密麻麻的引脚搞懵了。后来才发现,只要跟着CubeMX生成的配置走,硬件设计其实没那么可怕。我的开发板用的是STM32F407VET6,搭配USB3300作为PHY芯片。这里有…...

Ubuntu 22.04 下配置 Arduino IDE 2.x:从安装到第三方库的完整避坑指南
1. 准备工作:下载Arduino IDE 2.x 在Ubuntu 22.04上配置Arduino开发环境,第一步自然是获取官方IDE。我推荐直接从Arduino官网下载最新版本,避免使用老旧软件包带来的兼容性问题。打开浏览器访问arduino.cc/en/software,你会看到两…...

题解:学而思编程 3或5的倍数
本文分享的必刷题目是从蓝桥云课、洛谷、AcWing等知名刷题平台精心挑选而来,并结合各平台提供的算法标签和难度等级进行了系统分类。题目涵盖了从基础到进阶的多种算法和数据结构,旨在为不同阶段的编程学习者提供一条清晰、平稳的学习提升路径。 欢迎大…...

英雄联盟终极工具箱:5个实用技巧让你游戏效率翻倍
英雄联盟终极工具箱:5个实用技巧让你游戏效率翻倍 【免费下载链接】League-Toolkit An all-in-one toolkit for LeagueClient. Gathering power 🚀. 项目地址: https://gitcode.com/gh_mirrors/le/League-Toolkit League Akari英雄联盟工具箱是一…...

MAA助手:解放双手的明日方舟全自动游戏管理工具实战指南
MAA助手:解放双手的明日方舟全自动游戏管理工具实战指南 【免费下载链接】MaaAssistantArknights 《明日方舟》小助手,全日常一键长草!| A one-click tool for the daily tasks of Arknights, supporting all clients. 项目地址: https://g…...

城通网盘直连解析终极解决方案:告别限速,实现全速下载的完整指南
城通网盘直连解析终极解决方案:告别限速,实现全速下载的完整指南 【免费下载链接】ctfileGet 获取城通网盘一次性直连地址 项目地址: https://gitcode.com/gh_mirrors/ct/ctfileGet 还在为城通网盘的龟速下载而烦恼吗?每次下载大文件都…...

餐饮排烟5大误区,避开少走弯路
做餐饮这些年,见过太多后厨排烟出问题的门店。每家厨房格局、业态不同,排烟遇到的麻烦也五花八门。结合实操经验,整理出餐饮排烟最容易踩的 5 个坑,附上实用解决办法,看完能避开不少问题。一、居民区门店:大…...