Qt C++ 解析和处理 XML 文件示例
使用 Qt C++ 解析和处理 XML 文件
以下是使用 Qt C++ 实现 XML 文件处理的几种方法,包括解析、创建和修改 XML 文件。
1. 使用 QXmlStreamReader (推荐方式)
#include <QFile>
#include <QXmlStreamReader>
#include <QDebug>void parseXmlWithStream(const QString &filePath) {QFile file(filePath);if (!file.open(QIODevice::ReadOnly | QIODevice::Text)) {qDebug() << "无法打开文件:" << filePath;return;}QXmlStreamReader xml(&file);while (!xml.atEnd()) {xml.readNext();if (xml.isStartElement()) {qDebug() << "开始元素:" << xml.name();// 打印所有属性for (const auto &attr : xml.attributes()) {qDebug() << "  属性:" << attr.name() << "=" << attr.value();}} else if (xml.isEndElement()) {qDebug() << "结束元素:" << xml.name();} else if (xml.isCharacters() && !xml.isWhitespace()) {qDebug() << "文本内容:" << xml.text().trimmed();}}if (xml.hasError()) {qDebug() << "XML 解析错误:" << xml.errorString();}file.close();
}// 使用示例
int main() {parseXmlWithStream("example.xml");return 0;
}
2. 使用 QDomDocument (DOM 方式)
#include <QDomDocument>
#include <QFile>
#include <QDebug>void parseXmlWithDom(const QString &filePath) {QFile file(filePath);if (!file.open(QIODevice::ReadOnly)) {qDebug() << "无法打开文件:" << filePath;return;}QDomDocument doc;if (!doc.setContent(&file)) {qDebug() << "无法解析 XML 文件";file.close();return;}file.close();QDomElement root = doc.documentElement();qDebug() << "根元素:" << root.tagName();// 递归遍历所有节点std::function<void(const QDomNode &, int)> traverseNode = [&traverseNode](const QDomNode &node, int indent) {QDomNode n = node;while (!n.isNull()) {qDebug().noquote() << QString(indent, ' ') << "节点:" << n.nodeName();if (n.isElement()) {QDomElement e = n.toElement();if (e.hasAttributes()) {QDomNamedNodeMap attrs = e.attributes();for (int i = 0; i < attrs.length(); ++i) {QDomNode attr = attrs.item(i);qDebug().noquote() << QString(indent+2, ' ') << "属性:" << attr.nodeName() << "=" << attr.nodeValue();}}}if (n.hasChildNodes()) {QDomNode child = n.firstChild();while (!child.isNull()) {if (child.isText()) {QString text = child.nodeValue().trimmed();if (!text.isEmpty()) {qDebug().noquote() << QString(indent+2, ' ') << "文本:" << text;}} else {traverseNode(child, indent+2);}child = child.nextSibling();}}n = n.nextSibling();}};traverseNode(root.firstChild(), 0);
}// 使用示例
int main() {parseXmlWithDom("example.xml");return 0;
}
3. 解析 Qt UI 文件示例
#include <QDomDocument>
#include <QFile>
#include <QDebug>void parseUiFile(const QString &uiFile) {QFile file(uiFile);if (!file.open(QIODevice::ReadOnly)) {qDebug() << "无法打开 UI 文件:" << uiFile;return;}QDomDocument doc;if (!doc.setContent(&file)) {qDebug() << "无法解析 UI 文件";file.close();return;}file.close();QDomElement root = doc.documentElement();// 查找所有 widget 元素QDomNodeList widgets = root.elementsByTagName("widget");qDebug() << "找到" << widgets.count() << "个 widget";for (int i = 0; i < widgets.count(); ++i) {QDomElement widget = widgets.at(i).toElement();QString name = widget.attribute("name");QString className = widget.attribute("class");qDebug() << "Widget" << i+1 << ":" << name << "(" << className << ")";}// 查找所有连接QDomNodeList connections = root.elementsByTagName("connection");qDebug() << "\n找到" << connections.count() << "个连接";for (int i = 0; i < connections.count(); ++i) {QDomElement connection = connections.at(i).toElement();QString sender = connection.firstChildElement("sender").text();QString signal = connection.firstChildElement("signal").text();QString receiver = connection.firstChildElement("receiver").text();QString slot = connection.firstChildElement("slot").text();qDebug() << "连接" << i+1 << ":" << sender << "." << signal << "->" << receiver << "." << slot;}
}// 使用示例
int main() {parseUiFile("mainwindow.ui");return 0;
}
4. 创建 Qt XML 文件
#include <QDomDocument>
#include <QFile>
#include <QTextStream>
#include <QDebug>void createQtXml(const QString &outputFile) {QDomDocument doc("QtConfig");// 创建处理指令QDomProcessingInstruction instr = doc.createProcessingInstruction("xml", "version=\"1.0\" encoding=\"UTF-8\"");doc.appendChild(instr);// 创建根元素QDomElement root = doc.createElement("QtSettings");root.setAttribute("version", "1.0");doc.appendChild(root);// 添加窗口设置QDomElement window = doc.createElement("Window");window.setAttribute("name", "MainWindow");root.appendChild(window);QDomElement width = doc.createElement("Width");width.appendChild(doc.createTextNode("800"));window.appendChild(width);QDomElement height = doc.createElement("Height");height.appendChild(doc.createTextNode("600"));window.appendChild(height);// 添加按钮设置QDomElement button = doc.createElement("Button");button.setAttribute("name", "btnOK");root.appendChild(button);QDomElement text = doc.createElement("Text");text.appendChild(doc.createTextNode("OK"));button.appendChild(text);// 保存到文件QFile file(outputFile);if (!file.open(QIODevice::WriteOnly | QIODevice::Text)) {qDebug() << "无法写入文件:" << outputFile;return;}QTextStream stream(&file);doc.save(stream, 2);  // 2 表示缩进空格数file.close();qDebug() << "已创建 Qt XML 文件:" << outputFile;
}// 使用示例
int main() {createQtXml("qt_config.xml");return 0;
}
5. 修改 Qt XML 文件
#include <QDomDocument>
#include <QFile>
#include <QTextStream>
#include <QDebug>void modifyQtXml(const QString &inputFile, const QString &outputFile) {QFile file(inputFile);if (!file.open(QIODevice::ReadOnly)) {qDebug() << "无法打开文件:" << inputFile;return;}QDomDocument doc;if (!doc.setContent(&file)) {qDebug() << "无法解析 XML 文件";file.close();return;}file.close();QDomElement root = doc.documentElement();// 修改所有 Button 元素的文本QDomNodeList buttons = root.elementsByTagName("Button");for (int i = 0; i < buttons.count(); ++i) {QDomElement button = buttons.at(i).toElement();QDomElement textElem = button.firstChildElement("Text");if (!textElem.isNull()) {QDomNode textNode = textElem.firstChild();textNode.setNodeValue("New Text");}}// 添加新元素QDomElement newButton = doc.createElement("Button");newButton.setAttribute("name", "btnCancel");QDomElement newText = doc.createElement("Text");newText.appendChild(doc.createTextNode("Cancel"));newButton.appendChild(newText);root.appendChild(newButton);// 保存修改QFile outFile(outputFile);if (!outFile.open(QIODevice::WriteOnly | QIODevice::Text)) {qDebug() << "无法写入文件:" << outputFile;return;}QTextStream stream(&outFile);doc.save(stream, 2);outFile.close();qDebug() << "已修改并保存到:" << outputFile;
}// 使用示例
int main() {modifyQtXml("qt_config.xml", "qt_config_modified.xml");return 0;
}
6. 使用 SAX 解析器 (QXmlSimpleReader)
#include <QXmlSimpleReader>
#include <QXmlInputSource>
#include <QFile>
#include <QDebug>class MyXmlHandler : public QXmlDefaultHandler {
public:bool startElement(const QString &namespaceURI, const QString &localName,const QString &qName, const QXmlAttributes &attributes) override {qDebug() << "开始元素:" << qName;for (int i = 0; i < attributes.count(); ++i) {qDebug() << "  属性:" << attributes.qName(i) << "=" << attributes.value(i);}return true;}bool endElement(const QString &namespaceURI,const QString &localName,const QString &qName) override {qDebug() << "结束元素:" << qName;return true;}bool characters(const QString &ch) override {QString text = ch.trimmed();if (!text.isEmpty()) {qDebug() << "文本内容:" << text;}return true;}bool fatalError(const QXmlParseException &exception) override {qDebug() << "XML 解析错误:" << exception.message();return false;}
};void parseXmlWithSax(const QString &filePath) {QFile file(filePath);if (!file.open(QIODevice::ReadOnly | QIODevice::Text)) {qDebug() << "无法打开文件:" << filePath;return;}QXmlSimpleReader reader;MyXmlHandler handler;reader.setContentHandler(&handler);reader.setErrorHandler(&handler);QXmlInputSource source(&file);if (!reader.parse(&source)) {qDebug() << "解析失败";}file.close();
}// 使用示例
int main() {parseXmlWithSax("example.xml");return 0;
}
总结
- QXmlStreamReader - 流式解析器,内存效率高,适合大文件
- QDomDocument - DOM 解析器,适合小文件,便于随机访问和修改
- SAX 解析器 - 事件驱动模型,适合只需读取不需要修改的情况
- 对于 Qt UI 文件,可以使用上述任意方法解析
选择建议:
- 大文件或只需顺序读取 → QXmlStreamReader
- 需要频繁修改或随机访问 → QDomDocument
- 特殊需求或性能关键 → SAX 解析器
from PyQt5.QtCore import QFile, QIODevice, QXmlStreamReaderdef parse_xml_with_stream(file_path):file = QFile(file_path)if not file.open(QIODevice.ReadOnly | QIODevice.Text):print(f"无法打开文件: {file_path}")returnxml = QXmlStreamReader(file)while not xml.atEnd():xml.readNext()if xml.isStartElement():print(f"开始元素: {xml.name()}")# 打印所有属性for attr in xml.attributes():print(f" 属性: {attr.name()} = {attr.value()}")elif xml.isEndElement():print(f"结束元素: {xml.name()}")elif xml.isCharacters() and not xml.isWhitespace():print(f"文本内容: {xml.text().strip()}")if xml.hasError():print(f"XML 解析错误: {xml.errorString()}")file.close()if __name__ == "__main__":# 替换为你的 XML 文件路径xml_file_path = r"D:\shawei\temp\jpbalance\temp\TaskTemplates\Shock Pulse.xml"parse_xml_with_stream(xml_file_path)import xml.etree.ElementTree as ETdef parse_xml_with_et(file_path):try:tree = ET.parse(file_path)root = tree.getroot()# 命名空间处理ns = {'cm': 'http://www.pruftechnik.com/cm'}print("=== 任务模板 ===")print(f"版本: {root.get('version')}")print(f"任务ID: {root.get('task_id')}")print(f"名称: {root.get('name')}")print(f"来源: {root.get('source')}")meas_setup = root.find('cm:meas_setup', ns)print("\n=== 测量设置 ===")print(f"类型: {meas_setup.get('kind')}")spectrum = meas_setup.find('cm:spectrum', ns)print("\n=== 频谱配置 ===")print(f"名称: {spectrum.get('name')}")print(f"资源ID: {spectrum.get('res_id')}")print(f"量值: {spectrum.get('quant')}")print(f"线数: {spectrum.get('lines')}")print(f"窗函数: {spectrum.get('window')}")time_waveform = spectrum.find('cm:time_waveform_config', ns)print("\n=== 时域波形配置 ===")print(f"名称: {time_waveform.get('name')}")print(f"资源ID: {time_waveform.get('res_id')}")print(f"量值: {time_waveform.get('quant')}")average = spectrum.find('cm:average', ns)print("\n=== 平均设置 ===")print(f"平均次数: {average.get('num')}")print(f"重叠率: {average.get('overlap')}%")print(f"因子: {average.get('factor')}")print(f"类型: {average.get('type')}")freq_spectrum = spectrum.find('cm:freq_spectrum', ns)print("\n=== 频谱范围 ===")print(f"最大频率: {freq_spectrum.get('max')}Hz")print(f"最大类型: {freq_spectrum.get('max_type')}")print(f"最小频率: {freq_spectrum.get('min')}Hz")except ET.ParseError as e:print(f"XML 解析错误: {e}")except Exception as e:print(f"发生错误: {e}")if __name__ == "__main__":xml_file_path = r"D:\shawei\temp\jpbalance\temp\TaskTemplates\Shock Pulse.xml"parse_xml_with_et(xml_file_path)
<?xml version="1.0" encoding="UTF-8"?>
<task_template xmlns="http://www.xxxx.com/cm" version="4.0.0" task_id="00000000-0000-0000-0000-000000000003" name="Spec (a) 10Hz - 12800Hz" source="factory"><meas_setup kind="trending_spectrum_amplitude"><spectrum name="Spectrum Velocity" res_id="00000000-0000-0000-0000-000000000002" quant="acc" lines="51200" window="hanning"><time_waveform_config name="Time Waveform Velocity" res_id="00000000-0000-0000-0000-000000000001" quant="acc"/><average num="3" overlap="60" factor="0.5" type="lin"/><freq_spectrum max="12800" max_type="time_based" min="10"/></spectrum></meas_setup>
</task_template>
#include <QCoreApplication>
#include <QFile>
#include <QXmlStreamReader>
#include <QDebug>void parseTaskTemplateXml(const QString &filePath) {QFile file(filePath);if (!file.open(QIODevice::ReadOnly | QIODevice::Text)) {qDebug() << "无法打开文件:" << filePath;return;}QXmlStreamReader xml(&file);while (!xml.atEnd() && !xml.hasError()) {xml.readNext();if (xml.isStartElement()) {QString elementName = xml.name().toString();if (elementName == "task_template") {qDebug() << "=== 任务模板 ===";qDebug() << "命名空间:" << xml.namespaceUri();qDebug() << "版本:" << xml.attributes().value("version").toString();qDebug() << "任务ID:" << xml.attributes().value("task_id").toString();qDebug() << "名称:" << xml.attributes().value("name").toString();qDebug() << "来源:" << xml.attributes().value("source").toString();}else if (elementName == "meas_setup") {qDebug() << "\n=== 测量设置 ===";qDebug() << "类型:" << xml.attributes().value("kind").toString();}else if (elementName == "spectrum") {qDebug() << "\n=== 频谱配置 ===";qDebug() << "名称:" << xml.attributes().value("name").toString();qDebug() << "资源ID:" << xml.attributes().value("res_id").toString();qDebug() << "量值:" << xml.attributes().value("quant").toString();qDebug() << "线数:" << xml.attributes().value("lines").toString();qDebug() << "窗函数:" << xml.attributes().value("window").toString();}else if (elementName == "time_waveform_config") {qDebug() << "\n=== 时域波形配置 ===";qDebug() << "名称:" << xml.attributes().value("name").toString();qDebug() << "资源ID:" << xml.attributes().value("res_id").toString();qDebug() << "量值:" << xml.attributes().value("quant").toString();}else if (elementName == "average") {qDebug() << "\n=== 平均设置 ===";qDebug() << "平均次数:" << xml.attributes().value("num").toString();qDebug() << "重叠率:" << xml.attributes().value("overlap").toString() << "%";qDebug() << "因子:" << xml.attributes().value("factor").toString();qDebug() << "类型:" << xml.attributes().value("type").toString();}else if (elementName == "freq_spectrum") {qDebug() << "\n=== 频谱范围 ===";qDebug() << "最大频率:" << xml.attributes().value("max").toString() << "Hz";qDebug() << "最大类型:" << xml.attributes().value("max_type").toString();qDebug() << "最小频率:" << xml.attributes().value("min").toString() << "Hz";}}}if (xml.hasError()) {qDebug() << "XML 解析错误:" << xml.errorString();}file.close();
}int main(int argc, char *argv[]) {QCoreApplication a(argc, argv);parseTaskTemplateXml("task_template.xml");return a.exec();
}
相关文章:

Qt C++ 解析和处理 XML 文件示例
使用 Qt C 解析和处理 XML 文件 以下是使用 Qt C 实现 XML 文件处理的几种方法,包括解析、创建和修改 XML 文件。 1. 使用 QXmlStreamReader (推荐方式) #include <QFile> #include <QXmlStreamReader> #include <QDebug>void parseXmlWithStr…...

快手砍掉本地生活的门槛
一场本地商家的效率革命。 作者|景行 编辑|杨舟 “两斤鸡翅根七块九,两盒蓝莓九块钱,两公斤卫生纸十四块九一提。” 这是朝阳佳惠超市,在快手一则普通的短视频内容。 佳惠超市在辽宁省朝阳市有22家分店,打开佳惠超市的相关快手…...
Python基础语法3
目录 1、函数 1.1、语法格式 1.2、函数返回值 1.3、变量作用域 1.4、执行过程 1.5、链式调用 1.6、嵌套调用 1.7、函数递归 1.8、参数默认值 1.9、关键字参数 2、列表 2.1、创建列表 2.2、下标访问 2.3、切片操作 2.4、遍历列表元素 2.5、新增元素 2.6、查找元…...

Vue 3中如何封装API请求:提升开发效率的最佳实践
在现代前端开发中,API请求是不可避免的一部分,尤其是与后端交互时。随着Vue 3的广泛应用,如何高效地封装API请求,既能提升代码的可维护性,又能确保代码的高复用性,成为了很多开发者关注的话题。 在本文中&…...
)
GitHub 趋势日报 (2025年04月17日)
本日报由 TrendForge 系统生成 https://trendforge.devlive.org/ 📈 今日整体趋势 Top 10 排名项目名称项目描述今日获星总星数语言1Anduin2017/HowToCook程序员在家做饭方法指南。Programmer’s guide about how to cook at home (Simplified Chinese onl…⭐ 224…...

第5章-1 优化服务器设置
上一篇:《第4章-5 linux 网络管理》,接着服务器设置 本章我们将解释如何为MySQL服务器创建合适的配置文件。这是一个迂回的旅程,有许多兴趣点和可以俯瞰风景的短途旅程。这些短途旅程是必要的。确定合适配置的最短路径并不是从研究配置选项并…...

【AI】Windows环境安装SPAR3D单图三维重建心得
效果一览 左图为原始单个图像,右图为通过SPAR3D重建后的三维建模,可以看出效果还是不错的。 本地环境配置 系统:Windows 11 专业版CPU:i5-13400F内存:32GBGPU:RTX3060 12GBcuda:11.8conda&…...

桌面应用UI开发方案
一、基于 Web 技术的跨平台方案 Electron Python/Go 特点: 技术栈:前端使用 HTML/CSS/JS,后端通过 Node.js 集成 Python/Go 模块或服务。 跨平台:支持 Windows、macOS、Linux 桌面端,适合开发桌面应用。 生态成熟&…...
使用docker在manjaro linux系统上运行windows和ubuntu
因为最近项目必须要使用指定版本的solidworks和maxwell(都只能在win系统上使用), 且目前的ubuntu容器是没有桌面的,导致我运行不了一些带图形的ros2功能。无奈之下,决定使用docker-compose写一下配置文件,彻底解决问题…...

Agent智能体ReAct机制深度解读:推理与行动的完美闭环
一、从Chain-of-Thought到ReAct的范式演进 1.1 传统决策机制的局限 #mermaid-svg-Jf3ygvgHcGciJvX8 {font-family:"trebuchet ms",verdana,arial,sans-serif;font-size:16px;fill:#333;}#mermaid-svg-Jf3ygvgHcGciJvX8 .error-icon{fill:#552222;}#mermaid-svg-Jf3y…...

在 Node.js 中使用原生 `http` 模块,获取请求的各个部分:**请求行、请求头、请求体、请求路径、查询字符串** 等内容
在 Node.js 中使用原生 http 模块,可以通过 req 对象来获取请求的各个部分:请求行、请求头、请求体、请求路径、查询字符串 等内容。 ✅ 一、基础结构 const http require(http); const url require(url);const server http.createServer((req, res)…...

Redis(01)Redis连接报错Redis is running in protected mode……的解决方案
一、引言:从一个典型连接错误说起 在分布式系统开发中,Redis 作为高性能缓存中间件被广泛使用。 然而,当我们首次部署 Redis 并尝试从外部客户端连接时,常常会遇到以下错误: DENIED Redis is running in protected m…...
18487.1-2015-解读笔记之四-交流充电之流程分析
前面简单分析了国标交流充电桩插枪监测逻辑和PWM控制逻辑,下面简单分析一下交流充电流程 附录A 交流充电连接过程和控制时序如下: 由此可以将充电流程大概分为几个阶段: 1.充电连接阶段 充电连接阶段CC(电阻由无穷大到R4RC&…...

海外服务器安装Ubuntu 22.04图形界面并配置VNC远程访问指南
在云计算和远程工作日益普及的今天,如何高效地管理和使用海外服务器成为了一个热门话题。本文将详细介绍如何在海外的Ubuntu 22.04服务器上安装图形界面,并配置VNC服务来实现远程访问。无论您是开发者、系统管理员,还是只是想要更便捷地管理您的海外服务器,这篇指南都能为您…...
Linux 管道理解
一、什么是管道 1.1 unix中最古老的进程间通信 1.2 一个进程链接到另一个进程的数据流称为“管道”: 图解: 二、管道通信的原理 2.1当我们创建一个进程然后打开一个文件的时候 会经过以下步骤: ①首先要描述这个进程,为这个…...

国产RK3568+FPGA以 “实时控制+高精度采集+灵活扩展” 为核心的解决方案
RK3568FPGA方案在工业领域应用的核心优势 一、实时性与低延迟控制 AMP架构与GPIO中断技术 通过非对称多处理架构(AMP)实现Linux与实时操作系统(RTOS/裸机)协同,主核负责调度,从核通过GPIO中断响应紧…...
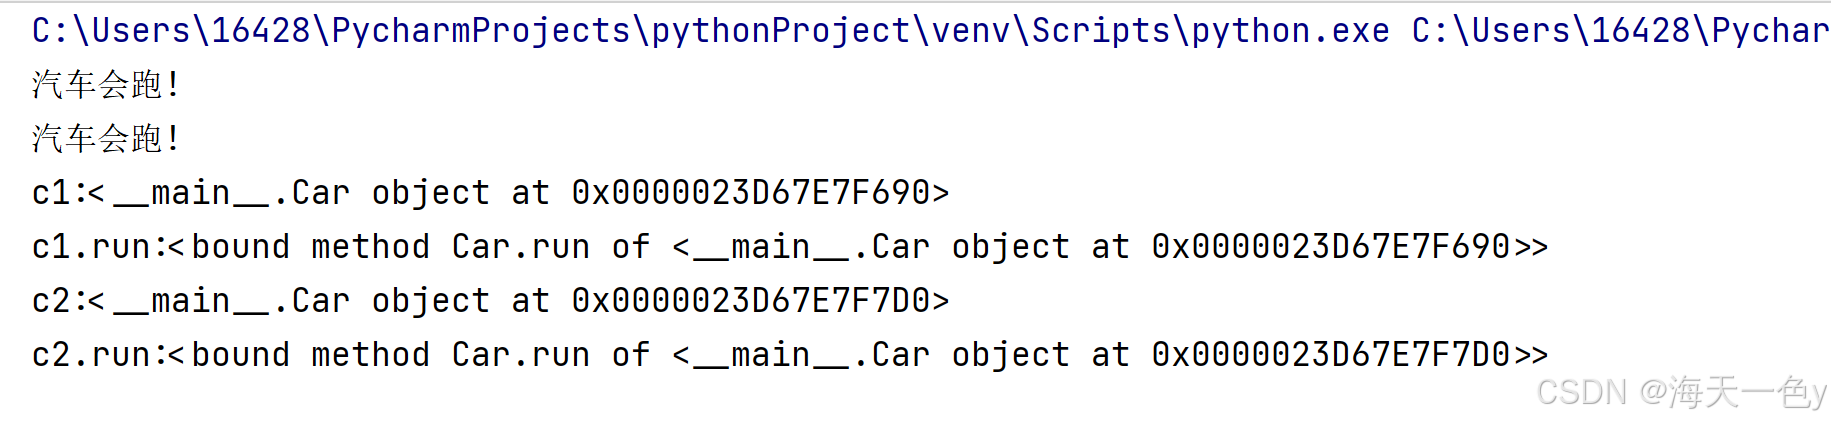
Pycharm(十五)面向对象程序设计基础
目录 一、面向对象基本概述 class 类名: 属性(类似于定义变量) 行为(类似于定义函数,只不过第一个形参要写self) 二、self关键字介绍 三、在类内部调用类中的函数 四、属性的定义和调用 五、魔法方法init方法 六、魔法方法str和del方法 七、案例-减肥 一、…...

华三(H3C)与华为(Huawei)设备配置IPsec VPN的详细说明,涵盖配置流程、参数设置及常见问题处理
以下是针对华三(H3C)与华为(Huawei)设备配置IPsec VPN的详细说明,涵盖配置流程、参数设置及常见问题处理: 一、华三(H3C)设备IPsec VPN配置详解 1. 配置流程 华三IPsec VPN配置主要…...

【消息队列RocketMQ】四、RocketMQ 存储机制与性能优化
一、RocketMQ 存储机制详解 1.1 存储文件结构 RocketMQ 的存储文件主要分布在store目录下,该目录是在broker.conf配置文件中通过storePathRootDir参数指定的,默认路径为${user.home}/store 。主要包含以下几种关键文件类型: 1.1.1 Comm…...

结合地理数据处理
CSV 文件不仅可以存储表格数据,还可以与地理空间数据结合,实现更强大的地理处理功能。例如,你可以将 CSV 文件中的坐标数据转换为点要素类,然后进行空间分析。 示例:将 CSV 文件中的坐标数据转换为点要素类 假设我们有…...

店匠科技摘得 36 氪“2025 AI Partner 创新大奖”
全场景 AI 方案驱动跨境电商数智化跃迁 4 月 18 日,36 氪 2025 AI Partner 大会于上海盛大开幕。大会紧扣“Super App 来了”主题,全力探寻 AI 时代的全新变量,探索 AI 领域下一个超级应用的无限可能性。在此次大会上,跨境电商独立站 SaaS 平台店匠科技(Shoplazza)凭借“店匠跨…...
Joint communication and state sensing under logarithmic loss
摘要——我们研究一种基本的联合通信与感知设置,其中发射机希望向接收机传输一条消息,并同时通过广义反馈估计其信道状态。我们假设感知目标是获得状态的软估计(即概率分布),而非通常假设的点估计;并且我们…...

测试基础笔记第十天
提示:文章写完后,目录可以自动生成,如何生成可参考右边的帮助文档 文章目录 一、查询语句1.基本查询2.条件查询3.模糊查询4.范围查询5.判断空 二、其他复杂查询1.排序2.聚合函数3.分组4.分页查询 一、查询语句 1.基本查询 – 需求1: 准备商…...

Geek强大的电脑卸载软件工具,免费下载
一款强大的卸载电脑软件工具,无需安装 免费下载...

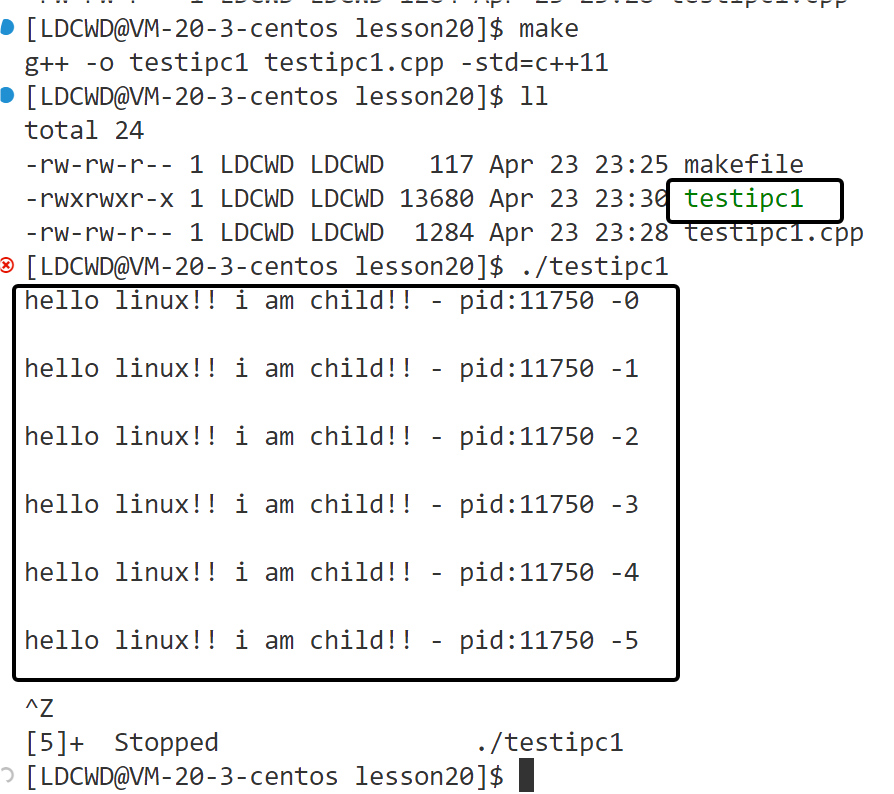
Linux:41线程控制lesson29
1.线程的优点: • 创建⼀个新线程的代价要⽐创建⼀个新进程⼩得多 创建好线程只要调度就好了 • 与进程之间的切换相⽐,线程之间的切换需要操作系统做的⼯作要少很多 为什么? ◦ 最主要的区别是线程的切换虚拟内存空间依然是相同的&#x…...

基于Flask与Ngrok实现Pycharm本地项目公网访问:从零部署
目录 概要 1. 环境与前置条件 2. 安装与配置 Flask 2.1 创建虚拟环境 2.2 安装 Flask 3. 安装与配置 Ngrok 3.1 下载 Ngrok 3.2 注册并获取 Authtoken 4. 在 PyCharm 中创建 Flask 项目 5. 运行本地 Flask 服务 6. 启动 Ngrok 隧道并获取公网地址 7. 完整示例代码汇…...

Ai晚报20250423
Kortix 发布全球首个开源通用型 AI Agent——Suna,能像人类一样学习、推理和适应,通过自然对话帮助用户完成多种现实任务,支持浏览器自动化、文件管理等 20 个用户场景。腾讯混元大模型 AI 阅读助手“企鹅读伴”正式上线,为中小学…...

密码学货币混币器详解及python实现
目录 一、前言二、混币器概述2.1 混币器的工作原理2.2 关键特性三、数据生成与预处理四、系统架构与流程五、核心数学公式六、异步任务调度与 GPU 加速七、PyQt6 GUI 设计八、完整代码实现九、自查测试与总结十、展望摘要 本博客聚焦 “密码学货币混币器实现”,以 Python + P…...
HTMLCSS实现网页轮播图
网页中轮播图区域的实现与解析 在现代网页设计中,轮播图是一种常见且实用的元素,能够在有限的空间内展示多个内容,吸引用户的注意力。下面将对上述代码中轮播图区域的实现方式进行详细介绍。 一、HTML 结构 <div class"carousel-c…...

如何确定置信水平的最佳大小
在统计学中,置信水平的选择并不是一成不变的,而是根据具体的研究目的、样本量、数据类型以及行业标准等因素来确定的。然而,在大多数情况下,95%的置信水平是最常用的。 选择95%置信水平的原因 平衡可靠性与精确性: •…...