封装了一个中间放大效果的iOS轮播视图
效果图

计算逻辑
设定在中间展示的size,即正常size,然后设置水平和竖直方向上的margin, 在view的origin和scrollView的contentoffset相等的时候,即
视图处在正中间的时候,最大,然后通过计算其他视图的origin和scrollView.contentoffset 的距离设置大小,和contentoffset这个位置的frame的距离为一个视图宽度的时候,达到最小size,即最大size减去margin。然后通过计算该视图的origin和 contentffset的差的绝对值,即距离 占 视图宽度的比例,计算需要缩小的size
核心代码
//
//  LBHorizontalLoopView.m
//  LBHorizontalLoopView
//
//  Created by liubo on 2021/8/29.
//#import "LBMiddleExpandLoopView.h"@interface LBMiddleExpandLoopView ()<UIScrollViewDelegate>@property (nonatomic, strong, readwrite) LBMiddleExpandLoopViewBaseCell *currentCell;@property (nonatomic, assign, readwrite) NSInteger currentSelectIndex;// 实际的个数
@property (nonatomic, assign) NSInteger realCount;// 显示的个数
@property (nonatomic, assign) NSInteger showCount;// 定时器
@property (nonatomic, weak) NSTimer     *timer;
@property (nonatomic, assign) NSInteger timerIndex;// 当前显示的cell大小
@property (nonatomic, assign) CGSize cellSize;@property (nonatomic, strong) NSMutableDictionary *viewClsDict;
@property (nonatomic, strong) NSMutableArray *visibleCells;
@property (nonatomic, strong) NSMutableArray *reusableCells;
@property (nonatomic, assign) NSRange        visibleRange;// 处理xib加载时导致的尺寸不准确问题
@property (nonatomic, assign) CGSize        originSize;@end@implementation LBMiddleExpandLoopView#pragma mark - Life Cycle
- (instancetype)initWithFrame:(CGRect)frame {if (self = [super initWithFrame:frame]) {[self initialization];}return self;
}- (instancetype)initWithCoder:(NSCoder *)aDecoder {if (self = [super initWithCoder:aDecoder]) {[self initialization];}return self;
}- (void)layoutSubviews {[super layoutSubviews];if (CGSizeEqualToSize(self.originSize, CGSizeZero)) return;// 解决xib加载时导致的布局错误问题if (!CGSizeEqualToSize(self.bounds.size, self.originSize)) {[self updateScrollViewAndCellSize];}
}// 解决当父视图释放时,当前视图因为NSTimer强引用而导致的不能释放
- (void)willMoveToSuperview:(UIView *)newSuperview {if (!newSuperview) {[self stopTimer];}
}- (void)dealloc {[self stopTimer];self.scrollView.delegate = nil;
}// 重新此方法是为了解决当cell超出UIScrollView时不能点击的问题
- (UIView *)hitTest:(CGPoint)point withEvent:(UIEvent *)event {if ([self pointInside:point withEvent:event]) {// 判断点击的点是否在cell上for (UIView *cell in self.scrollView.subviews) {// 将cell的frame转换到当前视图上CGRect convertFrame = CGRectZero;convertFrame.size = cell.frame.size;convertFrame.origin.x = cell.frame.origin.x + self.scrollView.frame.origin.x - self.scrollView.contentOffset.x;convertFrame.origin.y = self.scrollView.frame.origin.y + cell.frame.origin.y;// 判断点击的点是否在cell上if (CGRectContainsPoint(convertFrame, point)) {// 修复cell上添加其他点击事件无效的bugUIView *view = [super hitTest:point withEvent:event];if (view == self || view == cell || view == self.scrollView) return cell;return view;}}// 判断点击的点是否在UIScrollView上CGPoint newPoint = CGPointZero;newPoint.x = point.x - self.scrollView.frame.origin.x + self.scrollView.contentOffset.x;newPoint.y = point.y - self.scrollView.frame.origin.y + self.scrollView.contentOffset.y;if ([self.scrollView pointInside:newPoint withEvent:event]) {return [self.scrollView hitTest:newPoint withEvent:event];}// 系统处理return [super hitTest:point withEvent:event];}return nil;
}#pragma mark - Public Methods
- (void)reloadData {// 移除所有cell[self.scrollView.subviews makeObjectsPerformSelector:@selector(removeFromSuperview)];// 停止定时器[self stopTimer];// 加载数据if (self.dataSource && [self.dataSource respondsToSelector:@selector(numberOfCellsInCycleScrollView:)]) {// 实际个数self.realCount = [self.dataSource numberOfCellsInCycleScrollView:self];// 展示个数if (self.isInfiniteLoop) {self.showCount = self.realCount == 1 ? 1 : self.realCount * 3;}else {self.showCount = self.realCount;}}// 清除原始数据[self.visibleCells removeAllObjects];[self.reusableCells removeAllObjects];self.visibleRange = NSMakeRange(0, 0);//cell数量为1或defaultSelectIndex超过了当前数量if(self.defaultSelectIndex >= self.realCount) {self.defaultSelectIndex = 0;}if(self.realCount == 1) {self.timerIndex = 0;}for (NSInteger i = 0; i < self.showCount; i++){[self.visibleCells addObject:[NSNull null]];}__weak __typeof(self) weakSelf = self;[self refreshSizeCompletion:^{[weakSelf initialScrollViewAndCellSize];}];
}- (void)refreshSizeCompletion:(void(^)(void))completion {if (self.bounds.size.width == 0 || self.bounds.size.height == 0) {[self layoutIfNeeded];// 此处做延时处理是为了解决使用Masonry布局时导致的view的大小不能及时更新的bugdispatch_after(dispatch_time(DISPATCH_TIME_NOW, (int64_t)(0.0f * NSEC_PER_SEC)), dispatch_get_main_queue(), ^{if (self.bounds.size.width == 0 || self.bounds.size.height == 0) {[self refreshSizeCompletion:completion];}else {!completion ? : completion();}});}else {!completion ? : completion();}
}- (void)registerClass:(nonnull Class)cellClass forViewReuseIdentifier:(NSString *)identifier
{[self.viewClsDict setObject:NSStringFromClass(cellClass) forKey:identifier];
}- (__kindof LBMiddleExpandLoopViewBaseCell *)dequeueReusableCellWithIdentifier:(NSString *)identifier
{LBMiddleExpandLoopViewBaseCell *cell;for (LBMiddleExpandLoopViewBaseCell *cellReusable in self.reusableCells){if ([cellReusable.reuseIdentifier isEqualToString:identifier]) {cell = cellReusable;}}if (!cell) {Class cellCls = NSClassFromString(self.viewClsDict[identifier]);cell = [[cellCls alloc] initWithReuseIdentifier:identifier];cell.userInteractionEnabled = NO;} else {[self.reusableCells removeObject:cell];}return cell;
}- (void)scrollToCellAtIndex:(NSInteger)index animated:(BOOL)animated {if (index < self.realCount) {[self stopTimer];if (self.isInfiniteLoop) {self.timerIndex = self.realCount + index;[NSObject cancelPreviousPerformRequestsWithTarget:self selector:@selector(startTimer) object:nil];[self performSelector:@selector(startTimer) withObject:nil afterDelay:0.5];} else {self.timerIndex = index;}[self.scrollView setContentOffset:CGPointMake(self.cellSize.width * self.timerIndex, 0) animated:animated];[self setupCellsWithContentOffset:self.scrollView.contentOffset];[self updateVisibleCellAppearance];}
}- (void)adjustCurrentCell {if (self.isAutoScroll && self.realCount > 0) {self.scrollView.contentOffset = CGPointMake(self.cellSize.width * self.timerIndex, 0);}
}- (void)startTimer {if (self.realCount > 1 && self.isAutoScroll) {[self stopTimer];//        NSTimer *timer = [NSTimer scheduledTimerWithTimeInterval:self.autoScrollTime target:self selector:@selector(timerUpdate) userInfo:nil repeats:YES];
//        [[NSRunLoop mainRunLoop] addTimer:timer forMode:NSRunLoopCommonModes];//  self.timer = timer;}
}- (void)stopTimer {if (self.timer) {[self.timer invalidate];self.timer = nil;}
}#pragma mark Private Methods
- (void)initialization {// 初始化默认数据self.clipsToBounds      = YES;self.isAutoScroll       = YES;self.isInfiniteLoop     = YES;self.minimumCellAlpha   = 1.0f;self.autoScrollTime     = 3.0f;// 添加scrollView[self addSubview:self.scrollView];
}- (void)initialScrollViewAndCellSize {self.originSize = self.bounds.size;[self updateScrollViewAndCellSize];// 默认选中if (self.defaultSelectIndex >= 0 && self.defaultSelectIndex < self.realCount) {[self handleCellScrollWithIndex:self.defaultSelectIndex];}
}- (void)updateScrollViewAndCellSize {if (self.bounds.size.width <= 0 || self.bounds.size.height <= 0) return;// 设置cell尺寸self.cellSize = CGSizeMake(self.bounds.size.width - 2 * self.leftRightMargin, self.bounds.size.height);if (self.delegate && [self.delegate respondsToSelector:@selector(sizeForCellInCycleScrollView:)]) {self.cellSize = [self.delegate sizeForCellInCycleScrollView:self];}// 设置scrollView大小self.scrollView.frame = CGRectMake(0, 0, self.cellSize.width, self.cellSize.height);self.scrollView.contentSize = CGSizeMake(self.cellSize.width * self.showCount,0);self.scrollView.center = CGPointMake(CGRectGetMidX(self.bounds), CGRectGetMidY(self.bounds));if (self.realCount > 1) {CGPoint offset = CGPointZero;if (self.isInfiniteLoop) { // 开启无限轮播// 滚动到第二组offset = CGPointMake(self.cellSize.width * (self.realCount + self.defaultSelectIndex), 0);self.timerIndex = self.realCount + self.defaultSelectIndex;}else {offset = CGPointMake(self.cellSize.width * self.defaultSelectIndex, 0);self.timerIndex = self.defaultSelectIndex;}[self.scrollView setContentOffset:offset animated:NO];// 自动轮播if (self.isAutoScroll) {[self startTimer];}}// 根据当前scrollView的offset设置显示的cell[self setupCellsWithContentOffset:self.scrollView.contentOffset];// 更新可见cell的显示[self updateVisibleCellAppearance];
}- (void)setupCellsWithContentOffset:(CGPoint)offset {if (self.showCount == 0) return;if (self.cellSize.width <= 0 || self.cellSize.height <= 0) return;//计算_visibleRangeCGFloat originX = self.scrollView.frame.origin.x == 0 ? 0.01 : self.scrollView.frame.origin.x;CGFloat originY = self.scrollView.frame.origin.y == 0 ? 0.01 : self.scrollView.frame.origin.y;CGPoint startPoint = CGPointMake(offset.x - originX, offset.y - originY);CGPoint endPoint = CGPointMake(offset.x + self.scrollView.frame.size.width + originX, offset.y + self.scrollView.frame.size.height + originY);NSInteger startIndex = 0;for (NSInteger i = 0; i < self.visibleCells.count; i++) {if (self.cellSize.width * (i + 1) > startPoint.x) {startIndex = i;break;}}NSInteger endIndex = startIndex;for (NSInteger i = self.visibleCells.count - 1; i >= startIndex; i --) {if (self.cellSize.width * i < endPoint.x) {endIndex = i;break;}}// 可见页分别向前向后扩展一个,提高效率startIndex = MAX(startIndex, 0);endIndex = MIN(endIndex, self.visibleCells.count - 1);self.visibleRange = NSMakeRange(startIndex, endIndex - startIndex + 1);for (NSInteger i = startIndex; i <= endIndex; i++) {[self addCellAtIndex:i];}for (NSInteger i = 0; i < startIndex; i ++) {[self removeCellAtIndex:i];}for (NSInteger i = endIndex + 1; i < self.visibleCells.count; i ++) {[self removeCellAtIndex:i];}
}- (void)updateVisibleCellAppearance {if (self.showCount == 0) return;if (self.cellSize.width <= 0 || self.cellSize.height <= 0) return;CGFloat offsetX = self.scrollView.contentOffset.x;for (NSInteger i = self.visibleRange.location; i < NSMaxRange(self.visibleRange); i++) {LBMiddleExpandLoopViewBaseCell *cell = self.visibleCells[i];CGFloat originX = cell.frame.origin.x;CGFloat delta = fabs(originX - offsetX);CGRect originCellFrame = (CGRect){{self.cellSize.width * i, 0}, self.cellSize};CGFloat leftRightInset = 0;CGFloat topBottomInset = 0;CGFloat alpha = 0;if (delta < self.cellSize.width) {alpha = (delta / self.cellSize.width) * self.minimumCellAlpha;CGFloat adjustLeftRightMargin = self.leftRightMargin == 0 ? 0 : self.leftRightMargin + 1;CGFloat adjustTopBottomMargin = self.topBottomMargin == 0 ? 0 : self.topBottomMargin;leftRightInset = adjustLeftRightMargin * delta / self.cellSize.width;topBottomInset = adjustTopBottomMargin * delta / self.cellSize.width;NSInteger index = self.realCount == 0 ? 0 : i % self.realCount;if (index == self.currentSelectIndex) {[self.scrollView bringSubviewToFront:cell];}} else {alpha = self.minimumCellAlpha;leftRightInset = self.leftRightMargin;topBottomInset = self.topBottomMargin;[self.scrollView sendSubviewToBack:cell];}if (self.leftRightMargin == 0 && self.topBottomMargin == 0) {cell.frame = originCellFrame;}else {CGFloat scaleX = (self.cellSize.width - leftRightInset * 2) / self.cellSize.width;CGFloat scaleY = (self.cellSize.height - topBottomInset * 2) / self.cellSize.height;UIEdgeInsets insets = UIEdgeInsetsMake(topBottomInset, leftRightInset - 0.1, topBottomInset, leftRightInset);cell.layer.transform = CATransform3DMakeScale(scaleX, scaleY, 1.0);cell.frame = UIEdgeInsetsInsetRect(originCellFrame, insets);}// 获取当前cellif (cell.tag == self.currentSelectIndex) {self.currentCell = cell;}}
}- (void)addCellAtIndex:(NSInteger)index {NSParameterAssert(index >= 0 && index < self.visibleCells.count);LBMiddleExpandLoopViewBaseCell *cell = self.visibleCells[index];if ((NSObject *)cell == [NSNull null]) {cell = [self.dataSource cycleScrollView:self cellForViewAtIndex:index % self.realCount];if (cell) {[self.visibleCells replaceObjectAtIndex:index withObject:cell];cell.tag = index % self.realCount;__weak __typeof(self) weakSelf = self;cell.didCellClick = ^(NSInteger index) {[weakSelf handleCellSelectWithIndex:index];};cell.frame = CGRectMake(self.cellSize.width * index, 0, self.cellSize.width, self.cellSize.height);if (!cell.superview) {[self.scrollView addSubview:cell];}}}
}- (void)removeCellAtIndex:(NSInteger)index{LBMiddleExpandLoopViewBaseCell *cell = [self.visibleCells objectAtIndex:index];if ((NSObject *)cell == [NSNull null]) return;[self.reusableCells addObject:cell];if (cell.superview) {[cell removeFromSuperview];}[self.visibleCells replaceObjectAtIndex:index withObject:[NSNull null]];
}- (void)handleCellSelectWithIndex:(NSInteger)index {if ([self.delegate respondsToSelector:@selector(cycleScrollView:didSelectCellAtIndex:)]) {[self.delegate cycleScrollView:self didSelectCellAtIndex:index];}
}- (void)handleCellScrollWithIndex:(NSInteger)index {self.currentSelectIndex = index;// 获取当前cellfor (NSInteger i = self.visibleRange.location; i < NSMaxRange(self.visibleRange); i++) {LBMiddleExpandLoopViewBaseCell *cell = self.visibleCells[i];if (cell.tag == index) {self.currentCell = cell;}}if ([self.delegate respondsToSelector:@selector(cycleScrollView:didScrollCellToIndex:)]) {[self.delegate cycleScrollView:self didScrollCellToIndex:index];}
}- (void)timerUpdate {self.timerIndex++;// bug fixed:解决反向滑动停止后,可能出现的自动滚动错乱问题if (self.timerIndex > self.realCount * 2) {self.timerIndex = self.realCount * 2;}if (!self.isInfiniteLoop) {if (self.timerIndex >= self.realCount) {self.timerIndex = 0;}}[self.scrollView setContentOffset:CGPointMake(self.cellSize.width * self.timerIndex, 0) animated:YES];
}#pragma mark UIScrollView Delegate
- (void)scrollViewDidScroll:(UIScrollView *)scrollView{if (self.realCount == 0) return;if (self.cellSize.width <= 0 || self.cellSize.height <= 0) return;NSInteger index = 0;index = (NSInteger)round(self.scrollView.contentOffset.x / self.cellSize.width) % self.realCount;if (self.isInfiniteLoop) {if (self.realCount > 1) {CGFloat horIndex = scrollView.contentOffset.x / self.cellSize.width;if (horIndex >= 2 * self.realCount) {scrollView.contentOffset = CGPointMake(self.cellSize.width * self.realCount, 0);self.timerIndex = self.realCount;}if (horIndex <= (self.realCount - 1)) {scrollView.contentOffset = CGPointMake(self.cellSize.width * (2 * self.realCount - 1), 0);self.timerIndex = 2 * self.realCount - 1;}}}else {index = 0;}[self setupCellsWithContentOffset:scrollView.contentOffset];[self updateVisibleCellAppearance];if (index >= 0 && self.currentSelectIndex != index) {[self handleCellScrollWithIndex:index];}[self handleScrollViewDidScroll:scrollView];
}- (void)scrollViewWillBeginDragging:(UIScrollView *)scrollView {[self stopTimer];if ([self.delegate respondsToSelector:@selector(cycleScrollView:willBeginDragging:)]) {[self.delegate cycleScrollView:self willBeginDragging:scrollView];}
}// 结束拖拽时调用,decelerate是否有减速
- (void)scrollViewDidEndDragging:(UIScrollView *)scrollView willDecelerate:(BOOL)decelerate {if (!decelerate) {[self startTimer];}if ([self.delegate respondsToSelector:@selector(cycleScrollView:didEndDragging:willDecelerate:)]) {[self.delegate cycleScrollView:self didEndDragging:scrollView willDecelerate:decelerate];}
}// 结束减速是调用
- (void)scrollViewDidEndDecelerating:(UIScrollView *)scrollView {[self startTimer];if ([self.delegate respondsToSelector:@selector(cycleScrollView:didEndDecelerating:)]) {[self.delegate cycleScrollView:self didEndDecelerating:scrollView];}
}- (void)scrollViewWillEndDragging:(UIScrollView *)scrollView withVelocity:(CGPoint)velocity targetContentOffset:(inout CGPoint *)targetContentOffset {if (self.realCount > 1 && self.isAutoScroll) {NSInteger index = round(targetContentOffset->x / self.cellSize.width);self.timerIndex = index;}
}- (void)scrollViewDidEndScrollingAnimation:(UIScrollView *)scrollView {[self updateVisibleCellAppearance];if ([self.delegate respondsToSelector:@selector(cycleScrollView:didEndScrollingAnimation:)]) {[self.delegate cycleScrollView:self didEndScrollingAnimation:scrollView];}
}- (void)handleScrollViewDidScroll:(UIScrollView *)scrollView {if ([self.delegate respondsToSelector:@selector(cycleScrollView:didScroll:)]) {[self.delegate cycleScrollView:self didScroll:scrollView];}if ([self.delegate respondsToSelector:@selector(cycleScrollView:scrollingFromIndex:toIndex:ratio:)]) {BOOL isFirstRevirse = NO; // 是否在第一个位置反向滑动CGFloat ratio = 0;   // 滑动百分比CGFloat offsetX = scrollView.contentOffset.x;CGFloat maxW = self.realCount * scrollView.bounds.size.width;CGFloat changeOffsetX = self.isInfiniteLoop ? (offsetX - maxW) : offsetX;if (changeOffsetX < 0) {changeOffsetX = -changeOffsetX;isFirstRevirse = YES;}ratio = (changeOffsetX / scrollView.bounds.size.width);if (ratio > self.realCount || ratio < 0) return; // 越界,不作处理ratio = MAX(0, MIN(self.realCount, ratio));NSInteger baseIndex = floor(ratio);if (baseIndex + 1 > self.realCount) {// 右边越界了baseIndex = 0;}CGFloat remainderRatio = ratio - baseIndex;if (remainderRatio <= 0 || remainderRatio >= 1) return;NSInteger toIndex = 0;if (isFirstRevirse) {baseIndex = self.realCount - 1;toIndex = 0;remainderRatio = 1 - remainderRatio;}else if (baseIndex == self.realCount - 1) {toIndex = 0;}else {toIndex = baseIndex + 1;}[self.delegate cycleScrollView:self scrollingFromIndex:baseIndex toIndex:toIndex ratio:remainderRatio];}
}#pragma mark - 懒加载
- (UIScrollView *)scrollView {if (!_scrollView) {_scrollView = [[UIScrollView alloc] initWithFrame:self.bounds];_scrollView.scrollsToTop = NO;_scrollView.delegate = self;_scrollView.pagingEnabled = YES;_scrollView.clipsToBounds = NO;_scrollView.showsHorizontalScrollIndicator = NO;_scrollView.showsVerticalScrollIndicator = NO;}return _scrollView;
}- (NSMutableArray *)visibleCells {if (!_visibleCells) {_visibleCells = [NSMutableArray new];}return _visibleCells;
}- (NSMutableDictionary *)viewClsDict
{if (!_viewClsDict) {_viewClsDict = [NSMutableDictionary dictionary];}return _viewClsDict;
}- (NSMutableArray *)reusableCells {if (!_reusableCells) {_reusableCells = [NSMutableArray new];}return _reusableCells;
}@end
相关文章:

封装了一个中间放大效果的iOS轮播视图
效果图 计算逻辑 设定在中间展示的size,即正常size,然后设置水平和竖直方向上的margin, 在view的origin和scrollView的contentoffset相等的时候,即 视图处在正中间的时候,最大,然后通过计算其他视图的origin和scrollV…...
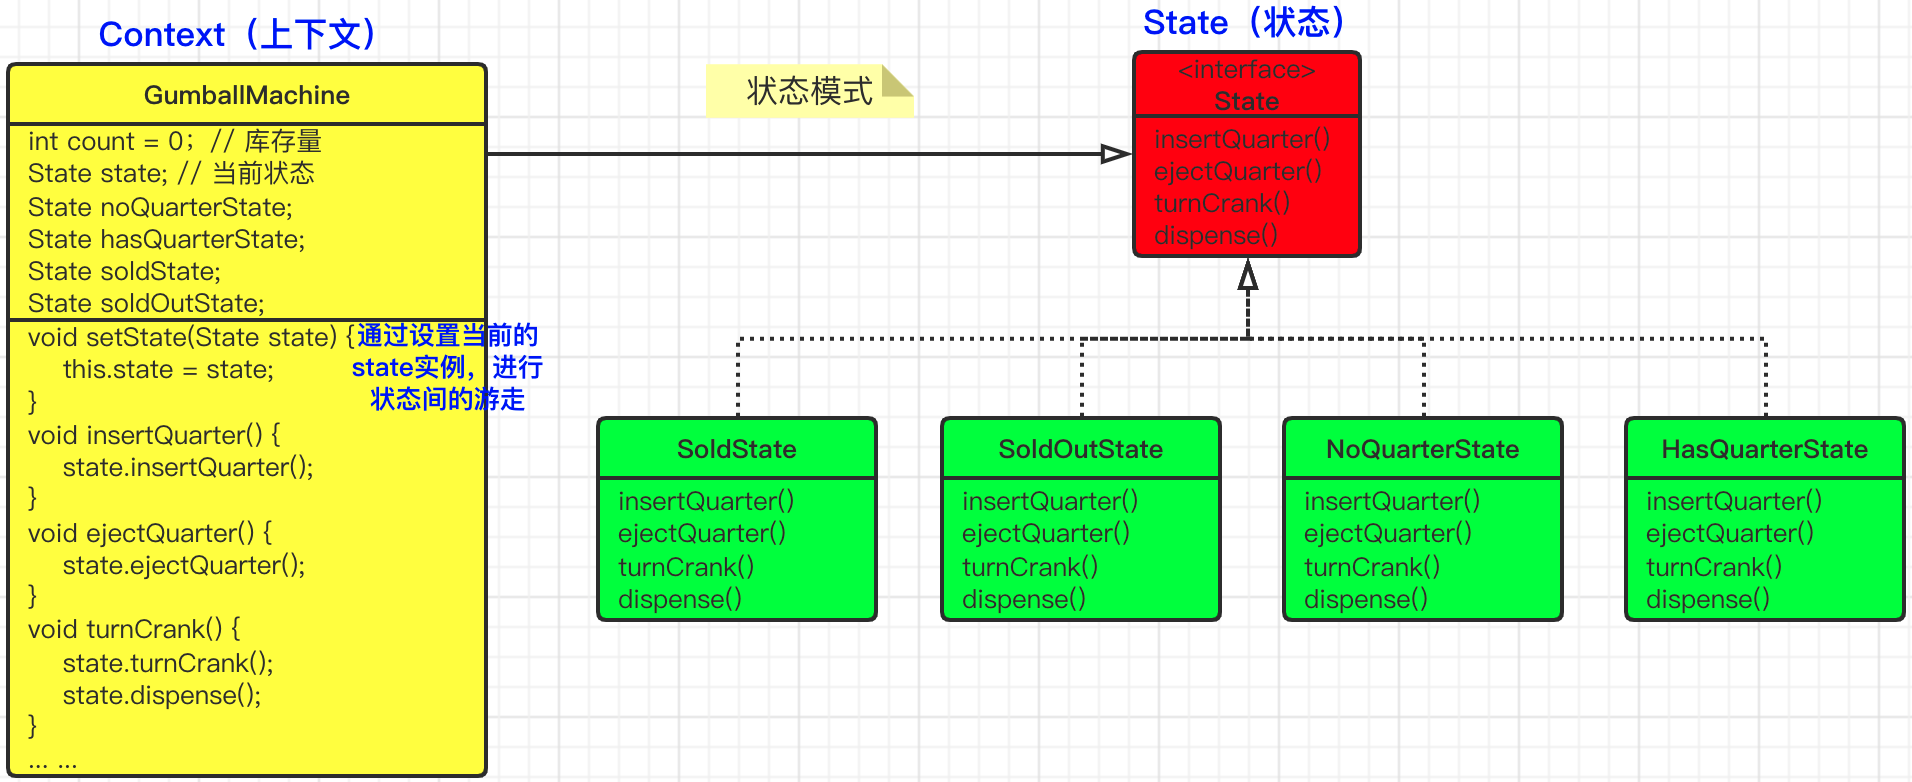
趣解设计模式之《小王的糖果售卖机》
〇、小故事 小王最近一直在寻找商机,他发现商场儿童乐园或者中小学校周围,会有很多小朋友喜欢吃糖果,那么他想设计一款糖果售卖机,让后将这些糖果售卖机布置到商场和学校旁边,这样就能获得源源不断的收益了。 想到这里…...
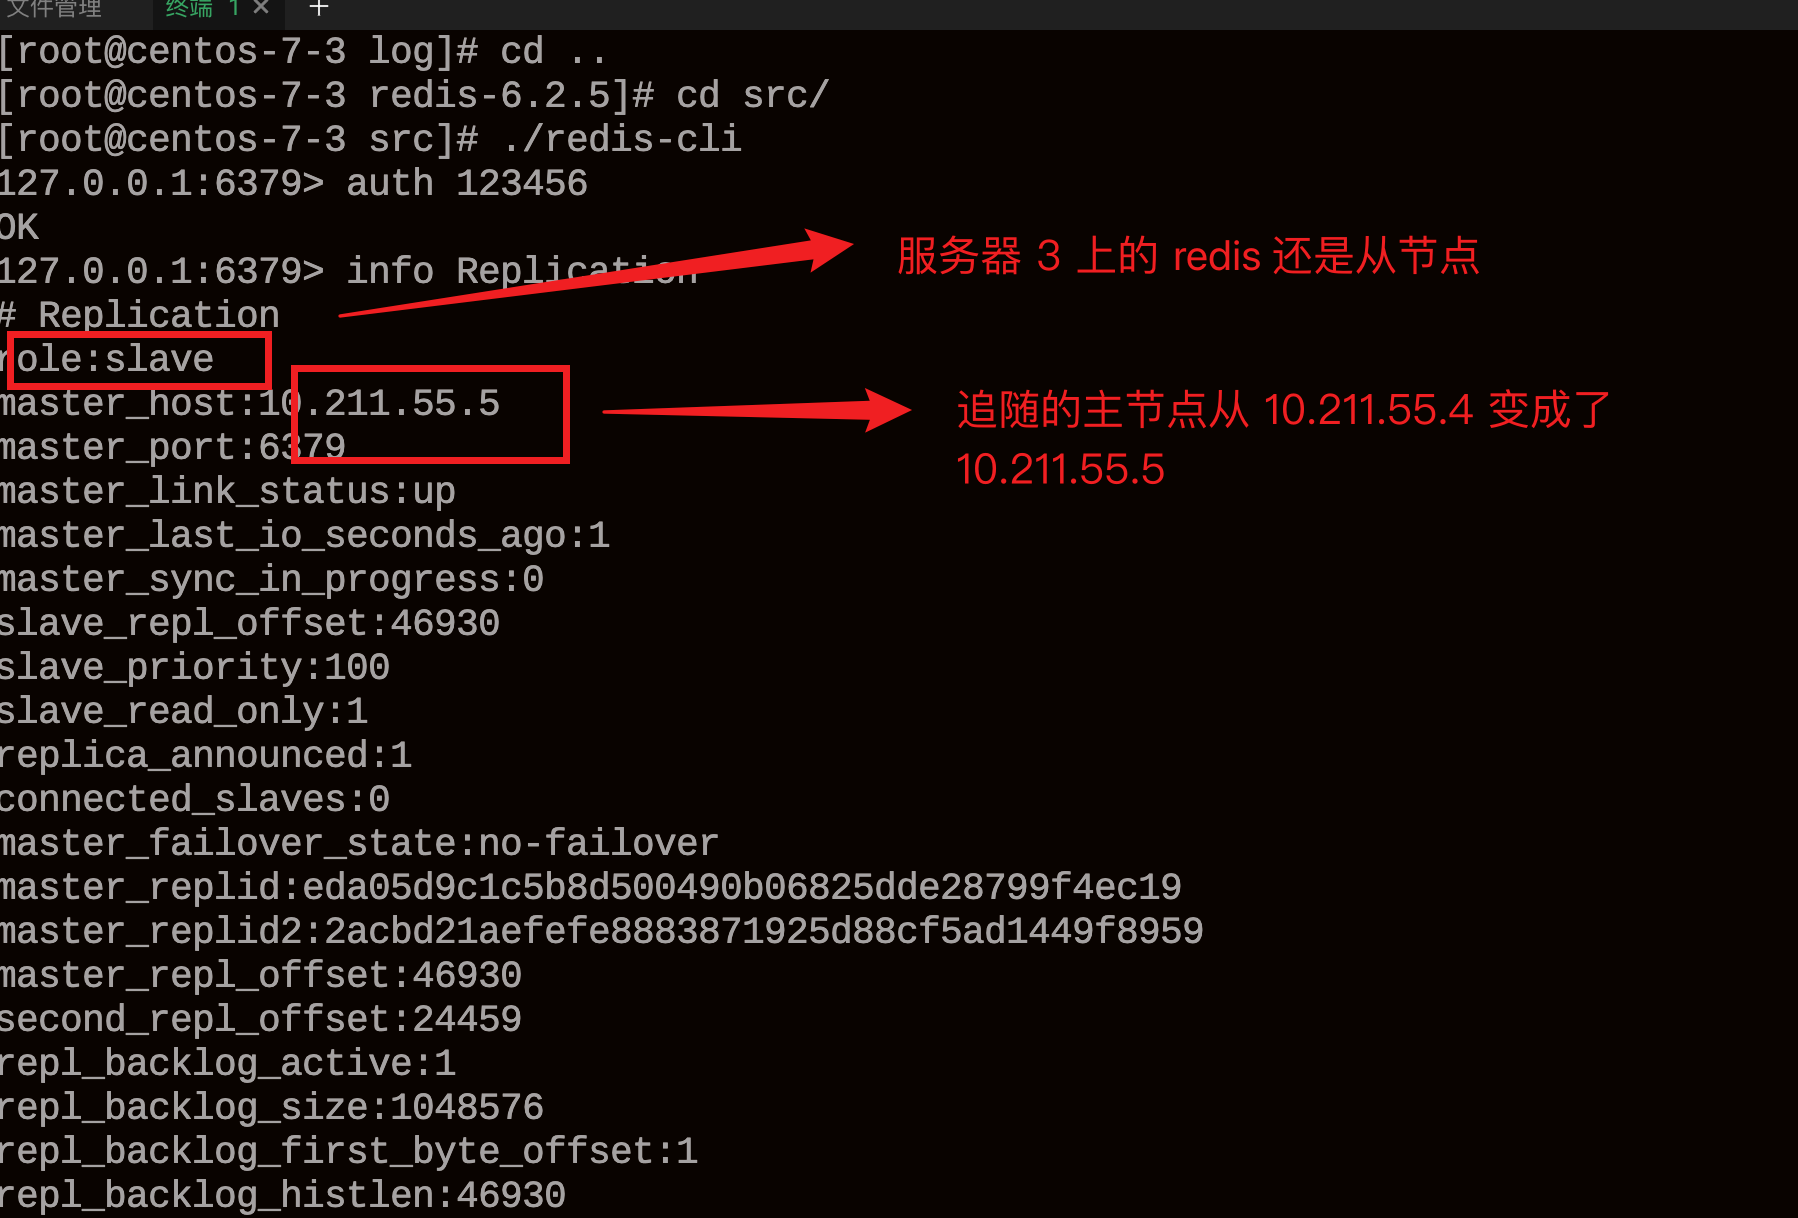
Redis 哨兵模式模式搭建教程
一、介绍 本文实战搭建一主两从三哨兵,通过使用哨兵模式,可以有效避免某台服务器的 Redis 挂掉出现的不可用问题,保障系统的高可用。 本文通过虚拟机搭建的三台 Centos7 服务器进行测试,使用的 Redis 版本为 6.25。 二、准备环…...
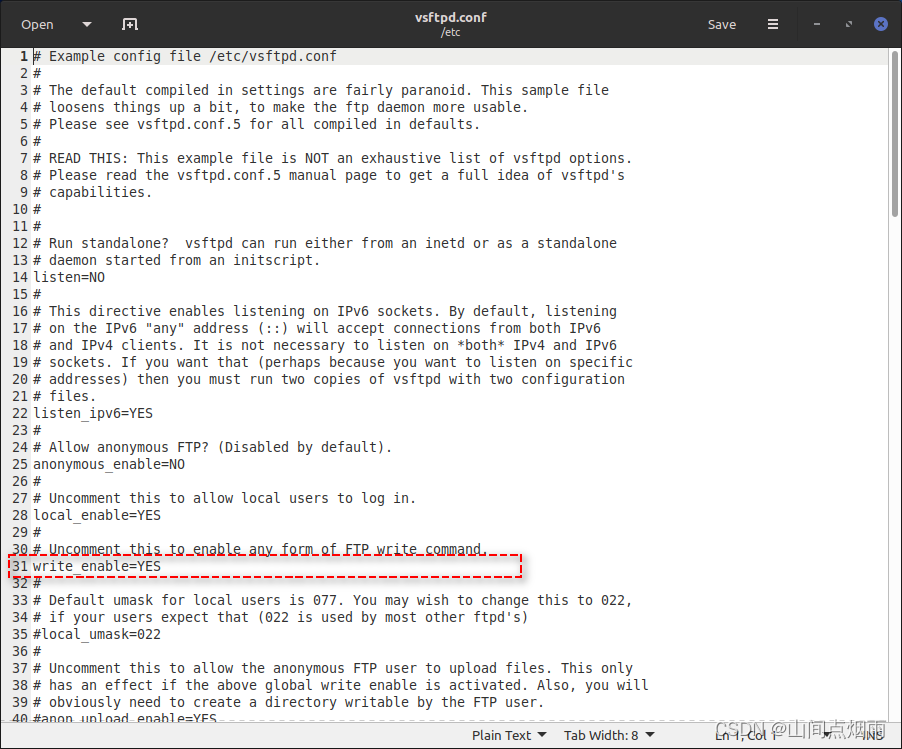
41. Linux系统配置FTP服务器并在QT中使用QFtp实现文件上传
1. 说明 这篇博客主要记录一些在Linux系统中搭建FTP服务器时踩过的一些坑,以及在使用QFtp上传文件时需要注意的问题。 2. FTP环境搭建 在linux系统中,需要安装vsftpd,可以在终端中输入下面的命令进行安装: sudo apt-get install vsftpd使用上述命令安装后,系统中会有一…...

【新版】系统架构设计师 - 案例分析 - 架构设计<架构风格和质量属性>
个人总结,仅供参考,欢迎加好友一起讨论 文章目录 架构 - 案例分析 - 架构设计<架构风格和质量属性>例题1例题2例题3例题4例题5例题6 架构 - 案例分析 - 架构设计<架构风格和质量属性> 例题1 某软件公司为…...

C++ - 红黑树 介绍 和 实现
前言 前面 学习了 AVL树,AVL树虽然在 查找方面始终拥有 O(log N )的极高效率,但是,AVL 树在插入 ,删除等等 修改的操作当中非常的麻烦,尤其是 删除操作,在实现当中细节非常多,在实现上非常难掌控…...

【蓝桥杯选拔赛真题62】Scratch判断小球 少儿编程scratch图形化编程 蓝桥杯选拔赛真题解析
目录 scratch判断小球 一、题目要求 编程实现 二、案例分析 1、角色分析...
Spring面试题15:Spring支持几种bean的作用域?singleton、prototype、request的区别是什么?
该文章专注于面试,面试只要回答关键点即可,不需要对框架有非常深入的回答,如果你想应付面试,是足够了,抓住关键点 面试官:Spring支持几种bean的作用域? Spring支持以下几种Bean的作用域: Singleton(单例):这是Spring默认的作用域。使用@Scope(“singleton”)注解或…...

Spring Boot中Tomcat服务器参数解析及高并发控制
Spring Boot中Tomcat服务器参数解析及高并发控制 Spring Boot 集成了多种服务器,默认使用了Tomcat 服务器。在高并发情况下,合理地配置 Tomcat 服务器参数对于控制请求量和提高系统的稳定性至关重要。本文将解释 Spring Boot 中涉及 Tomcat 服务器的一些…...

Python 运行代码
一、Python运行代码 可以使用三种方式运行Python,如下: 1、交互式 通过命令行窗口进入 Python 并开始在交互式解释器中开始编写 Python 代码 2、命令行脚本 可以把代码放到文件中,通过python 文件名.py命令执行代码,如下ÿ…...
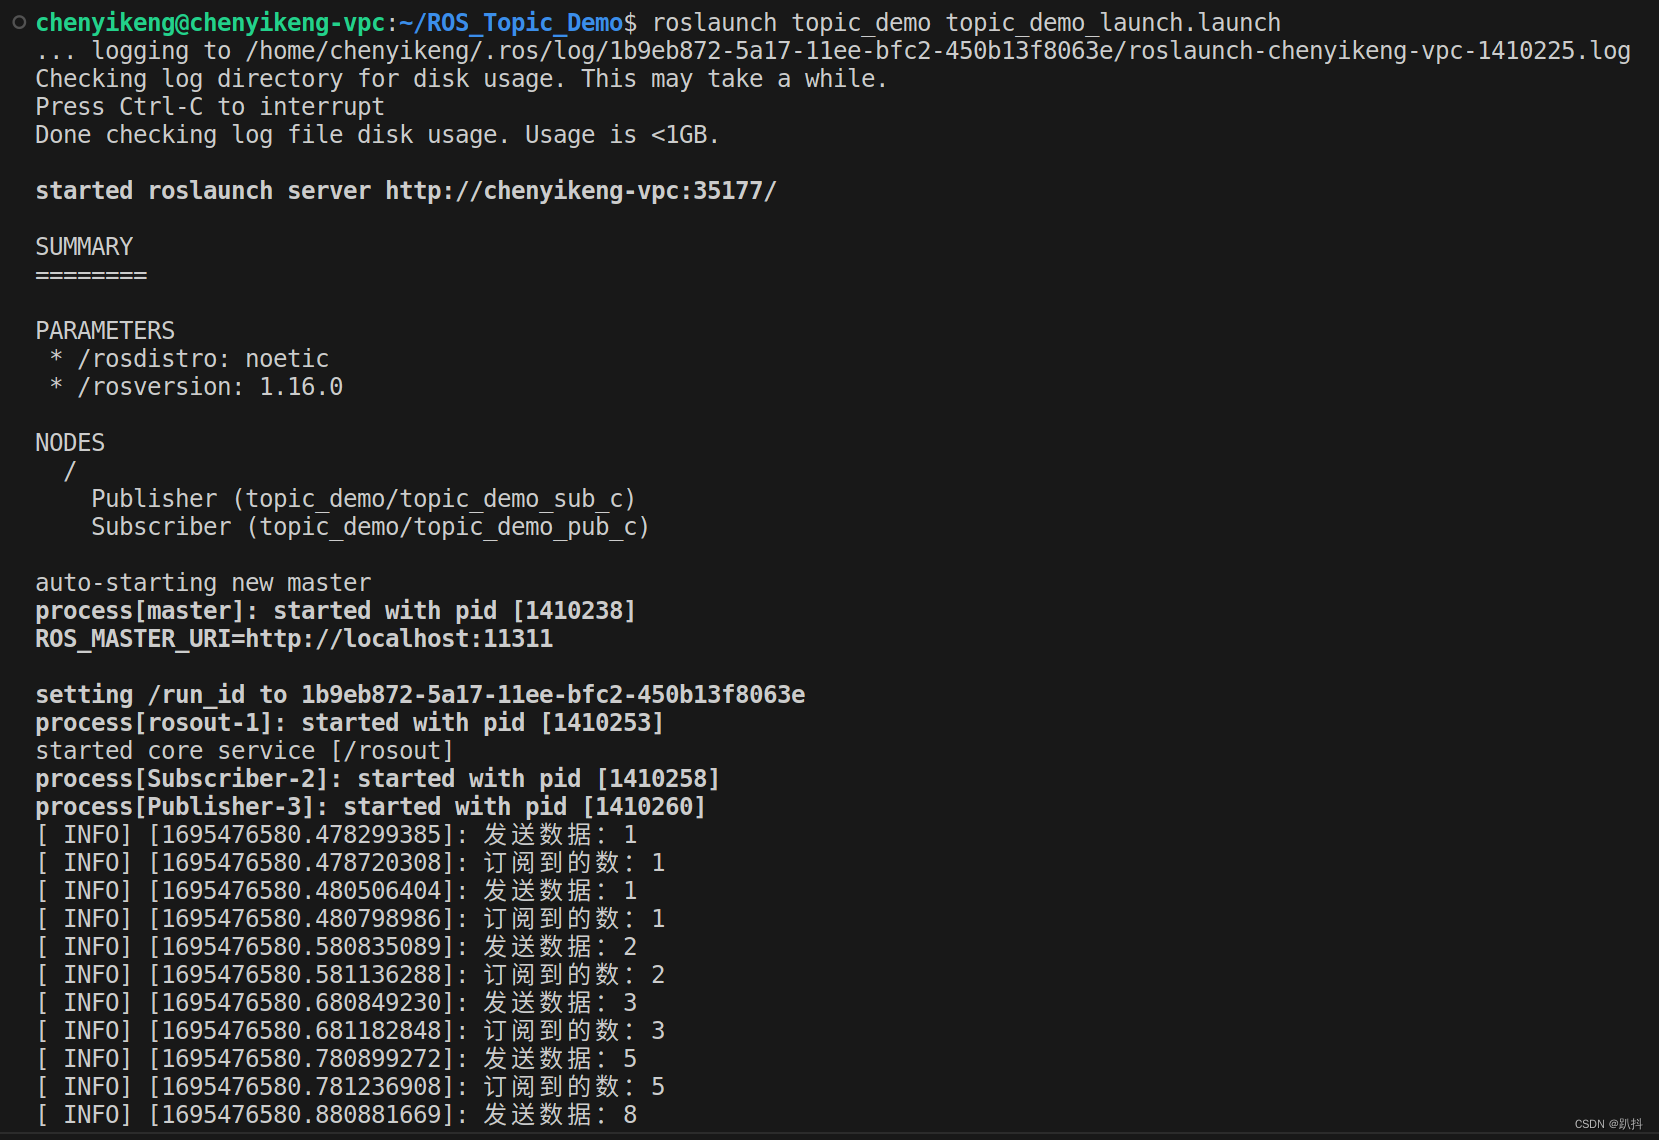
【ROS入门】使用 ROS 话题(Topic)机制实现消息发布与订阅及launch文件的封装
文章结构 任务要求话题模型实现步骤创建工作空间并初始化创建功能包并添加依赖创建发布者代码(C)创建订阅方代码(C)配置CMakeLists.txt执行启动roscore编译启动发布和订阅节点 launch封装执行 任务要求 使用 ROS 话题(Topic)机制…...
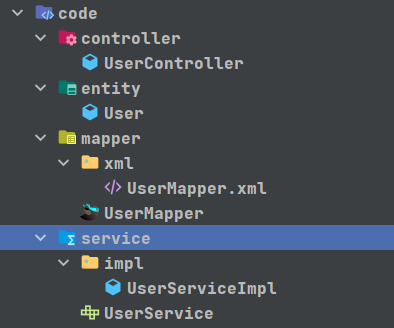
【企业级SpringBoot单体项目模板 】——Mybatis-plus自动代码生成
😜作 者:是江迪呀✒️本文关键词:SpringBoot项目模版、企业级、模版☀️每日 一言:我们之所以这样认为,是因为他们这样说。他们之所以那样说,是因为他们想让我们那样认为。所以实践才是检验真理…...
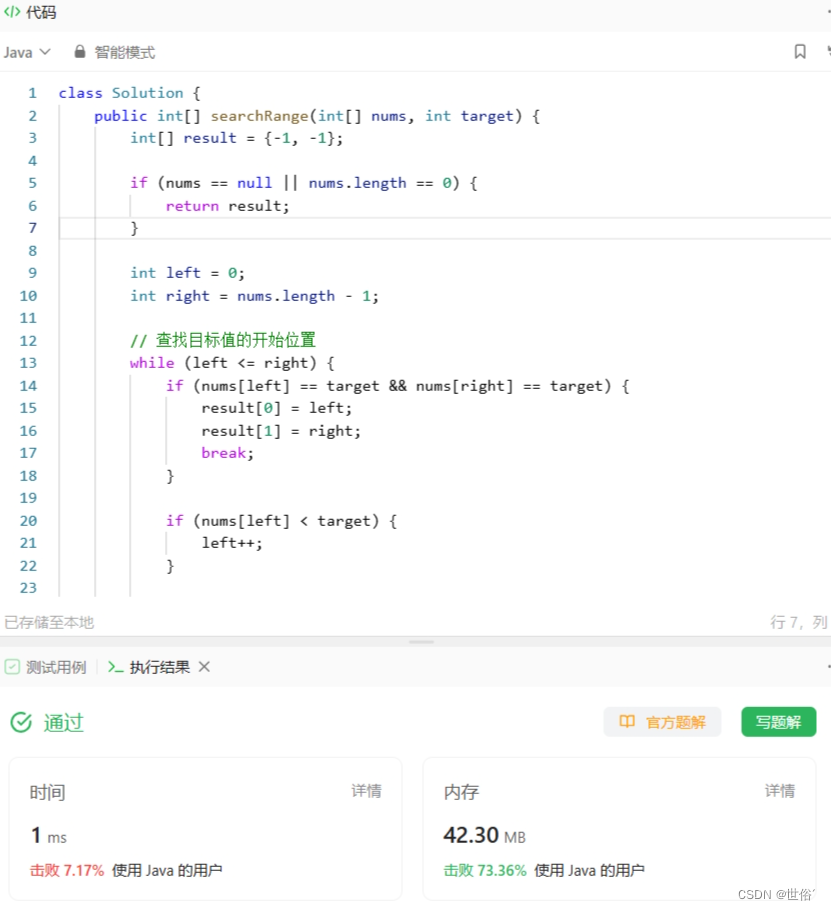
怒刷LeetCode的第14天(Java版)
目录 第一题 题目来源 题目内容 解决方法 方法一:动态规划 方法二:栈 方法三:双指针 第二题 题目来源 题目内容 解决方法 方法一:二分查找 方法二:线性扫描 方法三:递归 第三题 题目来源 …...
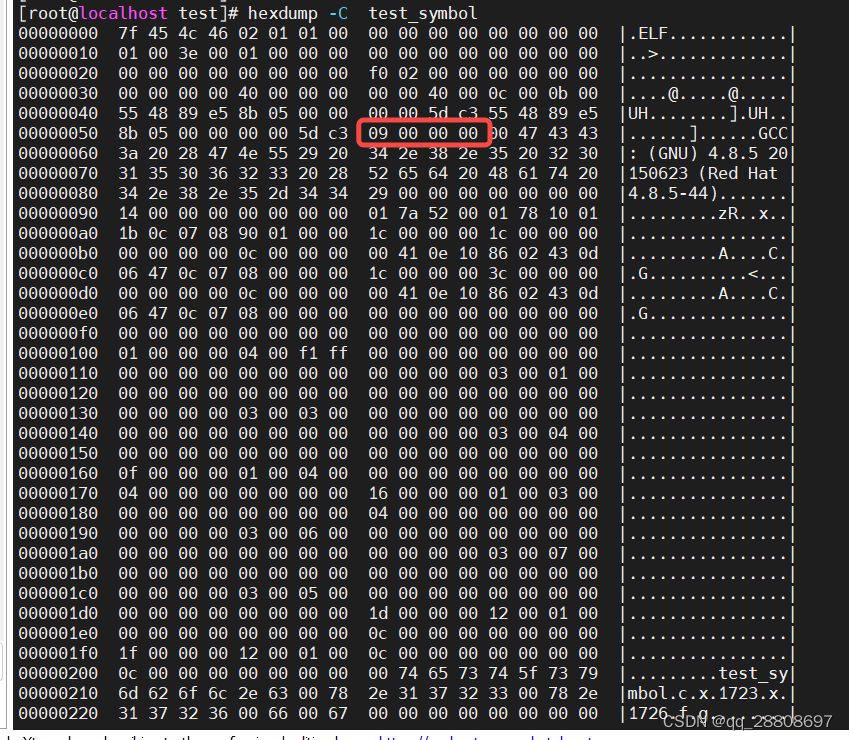
c语言 static
1、静态局部变量在程序加载时初始化,静态局部变量的初始值写入到了data段: 如下代码test_symbol.c int f() {static int x 0;return x; }int g() {static int x 9;return x; }使用命令gcc -c test_symbol.c -o test_symbol 编译 使用命令 readelf -a …...

java基础3
输入一个班学生的成绩,先显示所有及格的成绩,再显示所有不及格的成绩,最后显示及格人数和不及格人数 import java.util.Scanner; public class Hello{public static void main(String [] args) {int SIZE5;double grade[] new double[SIZE]…...
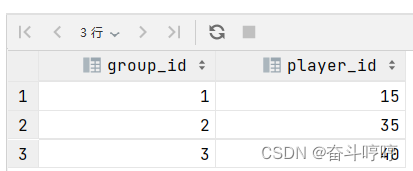
LeetCode 1194.锦标赛优胜者
数据准备 Create table If Not Exists Players (player_id int, group_id int); Create table If Not Exists Matches (match_id int, first_player int, second_player int, first_score int, second_score int); Truncate table Players; insert into Players (player_id, g…...
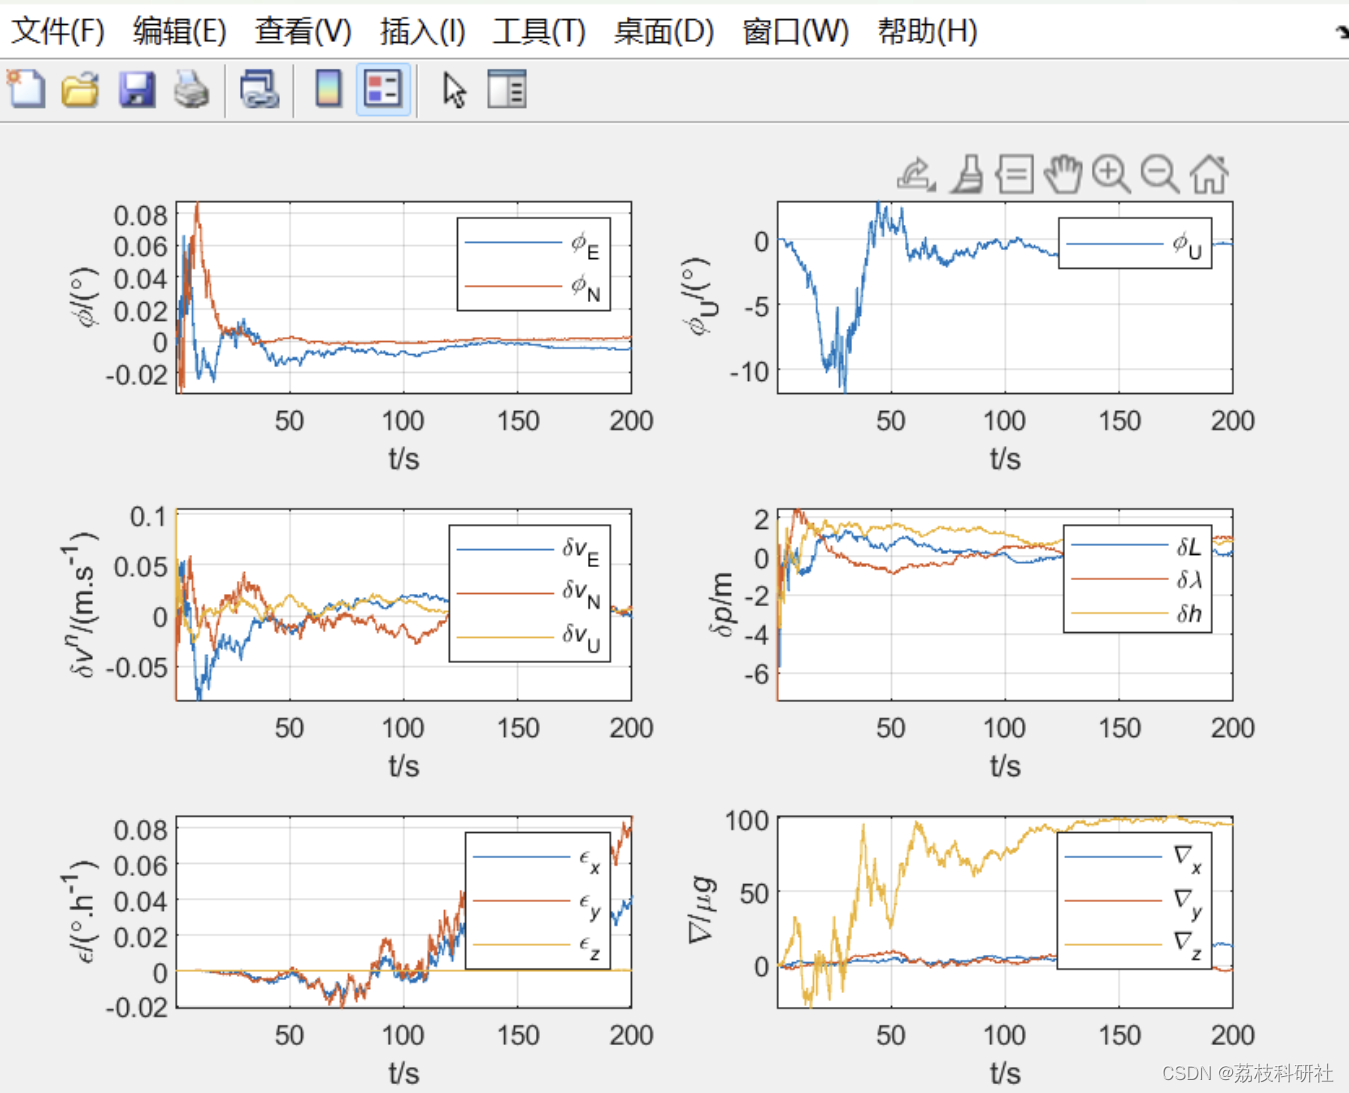
多旋翼无人机组合导航系统-多源信息融合算法(Matlab代码实现)
💥💥💞💞欢迎来到本博客❤️❤️💥💥 🏆博主优势:🌞🌞🌞博客内容尽量做到思维缜密,逻辑清晰,为了方便读者。 ⛳️座右铭&a…...

如何用ArkUI实现一个加入购物车效果?
关键词:ArkUI的动效能力,动效开发,ArkUI动画 我们在购买商品时,往往习惯将商品先加入购物车,然后在购物车里确认后再下订单,这是一个典型的访问者模式。对于这个高频场景,增添一些动效可以增加a…...
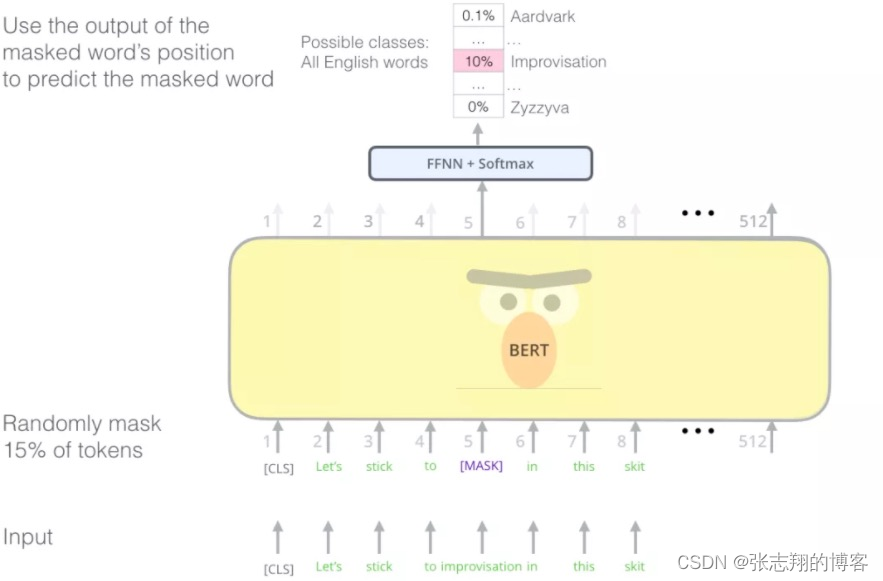
ChatGLM GPT原理介绍
图解GPT 除了BERT以外,另一个预训练模型GPT也给NLP领域带来了不少轰动,本节也对GPT做一个详细的讲解。 OpenAI提出的GPT-2模型(https://openai.com/blog/better-language-models/) 能够写出连贯并且高质量的文章,比之前语言模型效果好很多。GPT-2是基于Transformer搭建的,相…...
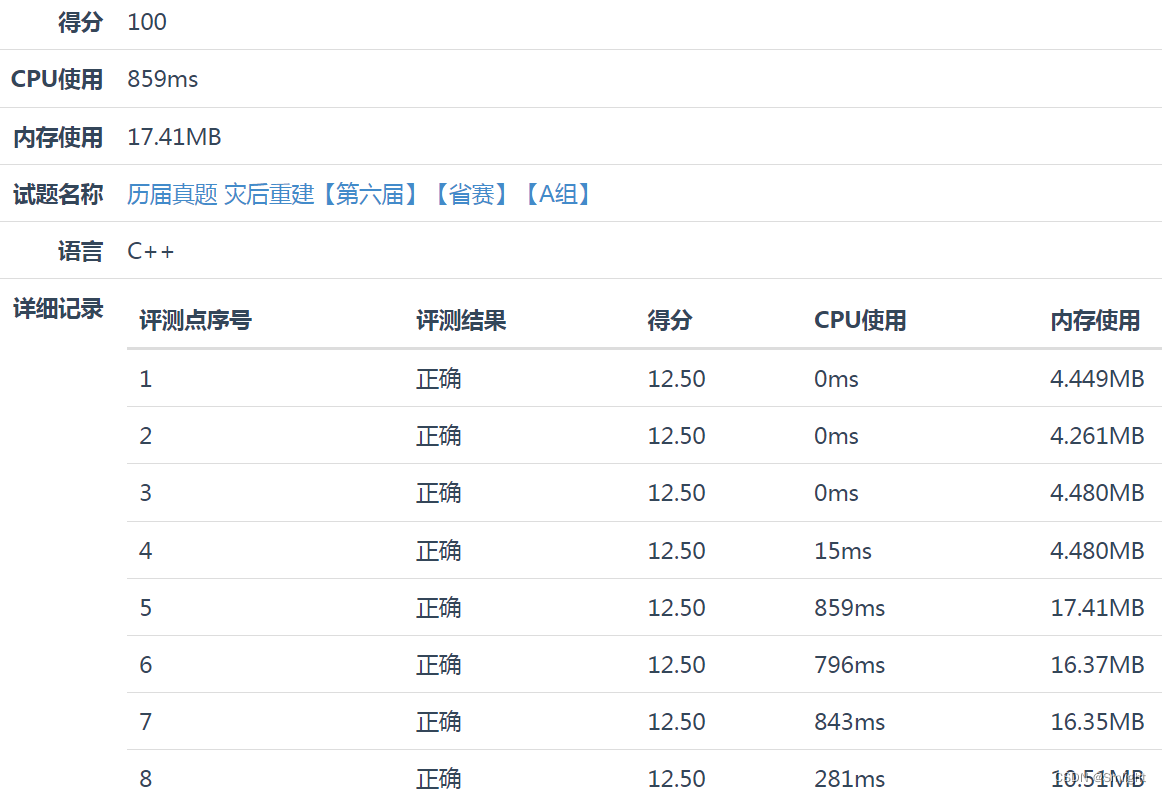
2015年蓝桥杯省赛C/C++ A组 灾后重建题解(100分)
10. 灾后重建 Pear市一共有N(<50000)个居民点,居民点之间有M(<200000)条双向道路相连。这些居民点两两之间都可以通过双向道路到达。这种情况一直持续到最近,一次严重的地震毁坏了全部M条道路。 震后…...
【kafka】Golang实现分布式Masscan任务调度系统
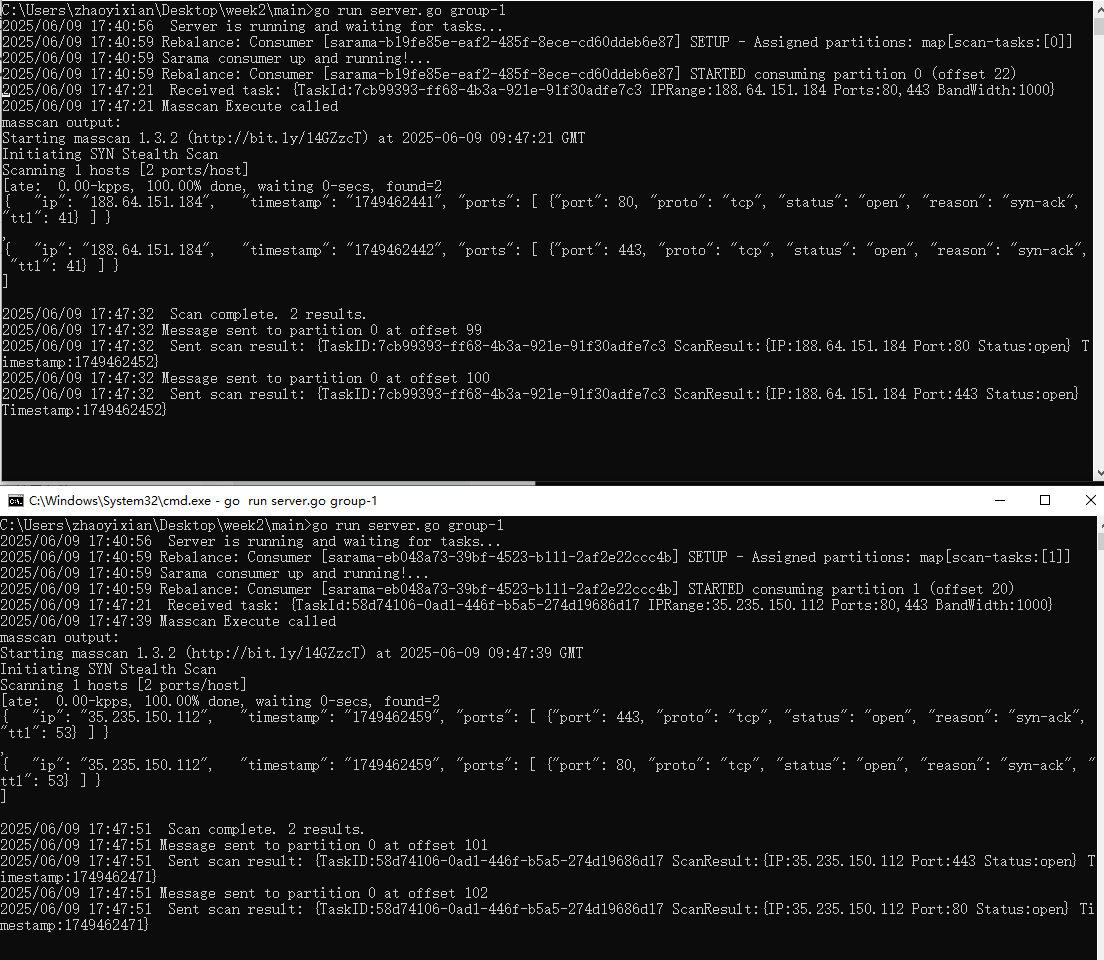
要求: 输出两个程序,一个命令行程序(命令行参数用flag)和一个服务端程序。 命令行程序支持通过命令行参数配置下发IP或IP段、端口、扫描带宽,然后将消息推送到kafka里面。 服务端程序: 从kafka消费者接收…...

AI Agent与Agentic AI:原理、应用、挑战与未来展望
文章目录 一、引言二、AI Agent与Agentic AI的兴起2.1 技术契机与生态成熟2.2 Agent的定义与特征2.3 Agent的发展历程 三、AI Agent的核心技术栈解密3.1 感知模块代码示例:使用Python和OpenCV进行图像识别 3.2 认知与决策模块代码示例:使用OpenAI GPT-3进…...

2024年赣州旅游投资集团社会招聘笔试真
2024年赣州旅游投资集团社会招聘笔试真 题 ( 满 分 1 0 0 分 时 间 1 2 0 分 钟 ) 一、单选题(每题只有一个正确答案,答错、不答或多答均不得分) 1.纪要的特点不包括()。 A.概括重点 B.指导传达 C. 客观纪实 D.有言必录 【答案】: D 2.1864年,()预言了电磁波的存在,并指出…...

解决本地部署 SmolVLM2 大语言模型运行 flash-attn 报错
出现的问题 安装 flash-attn 会一直卡在 build 那一步或者运行报错 解决办法 是因为你安装的 flash-attn 版本没有对应上,所以报错,到 https://github.com/Dao-AILab/flash-attention/releases 下载对应版本,cu、torch、cp 的版本一定要对…...
pikachu靶场通关笔记22-1 SQL注入05-1-insert注入(报错法)
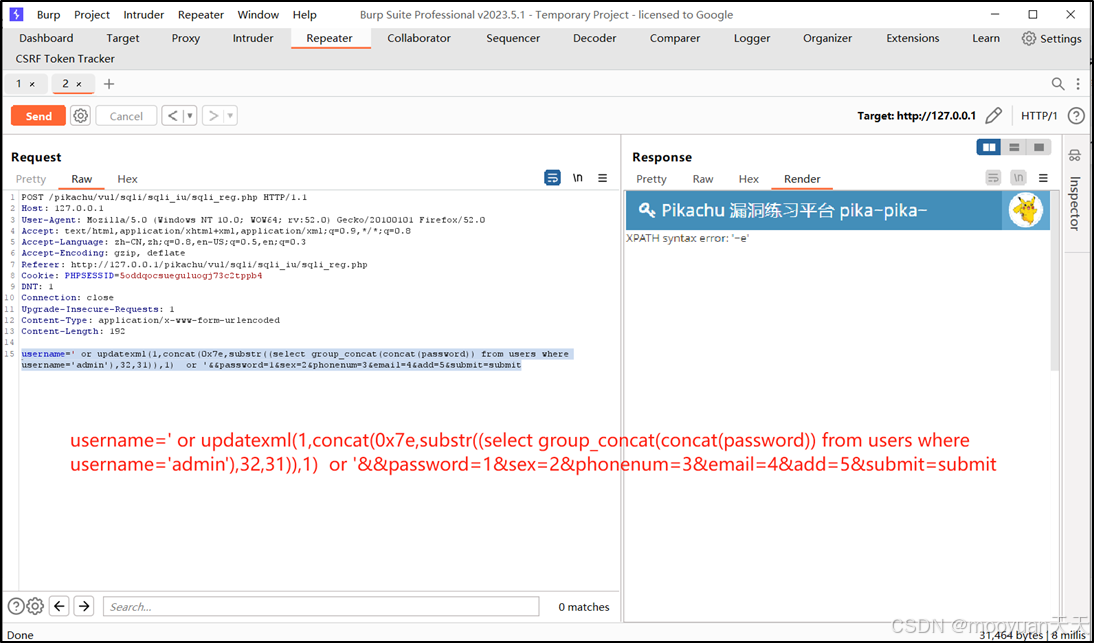
目录 一、SQL注入 二、insert注入 三、报错型注入 四、updatexml函数 五、源码审计 六、insert渗透实战 1、渗透准备 2、获取数据库名database 3、获取表名table 4、获取列名column 5、获取字段 本系列为通过《pikachu靶场通关笔记》的SQL注入关卡(共10关࿰…...
Spring数据访问模块设计
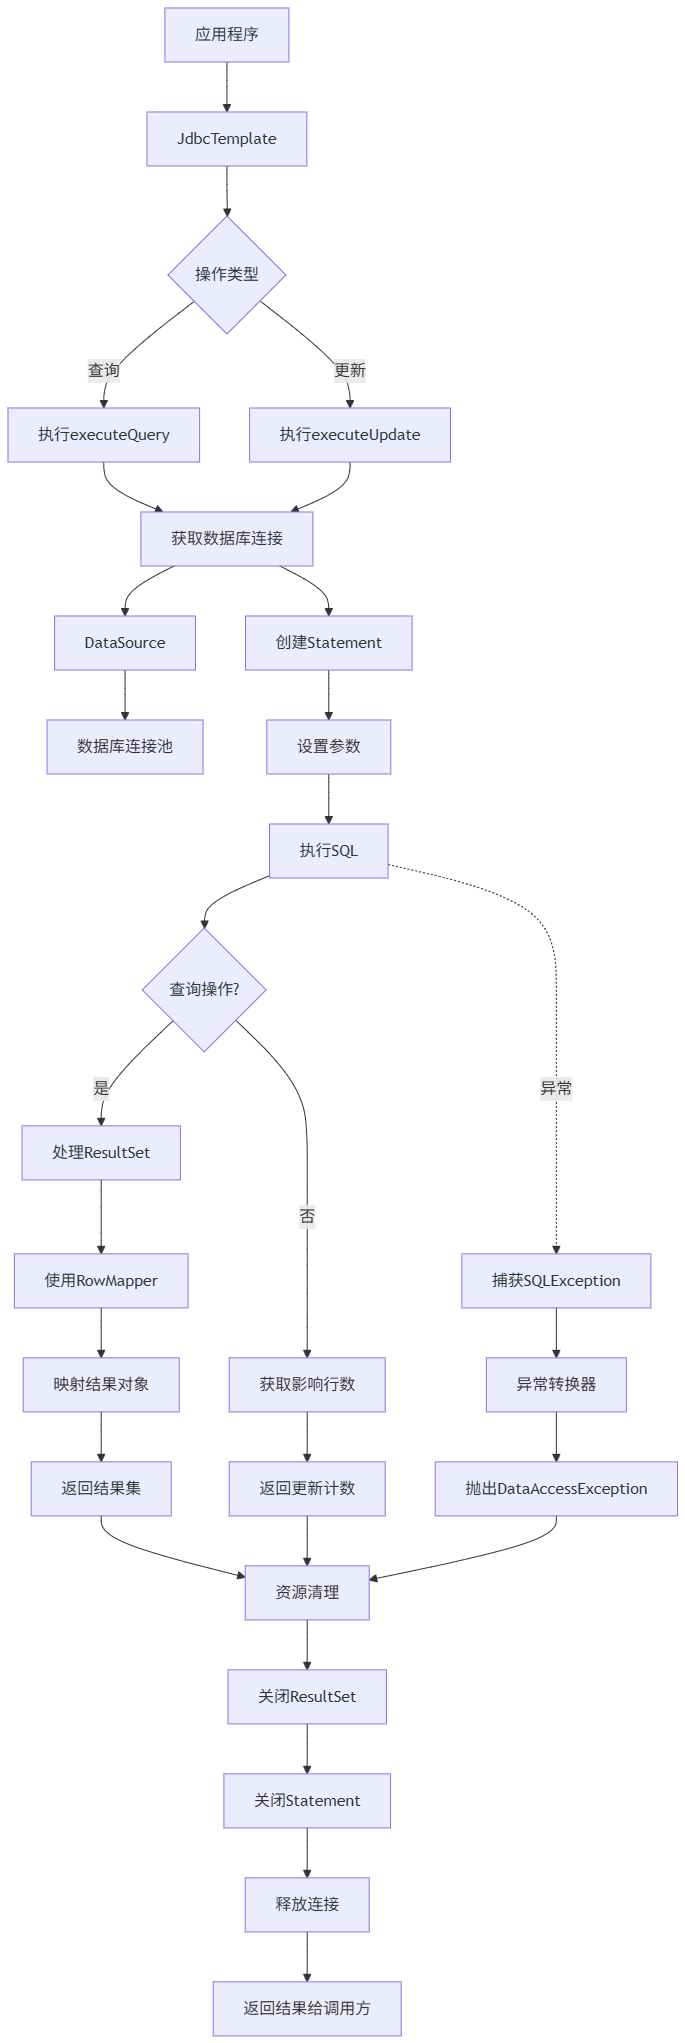
前面我们已经完成了IoC和web模块的设计,聪明的码友立马就知道了,该到数据访问模块了,要不就这俩玩个6啊,查库势在必行,至此,它来了。 一、核心设计理念 1、痛点在哪 应用离不开数据(数据库、No…...
python执行测试用例,allure报乱码且未成功生成报告
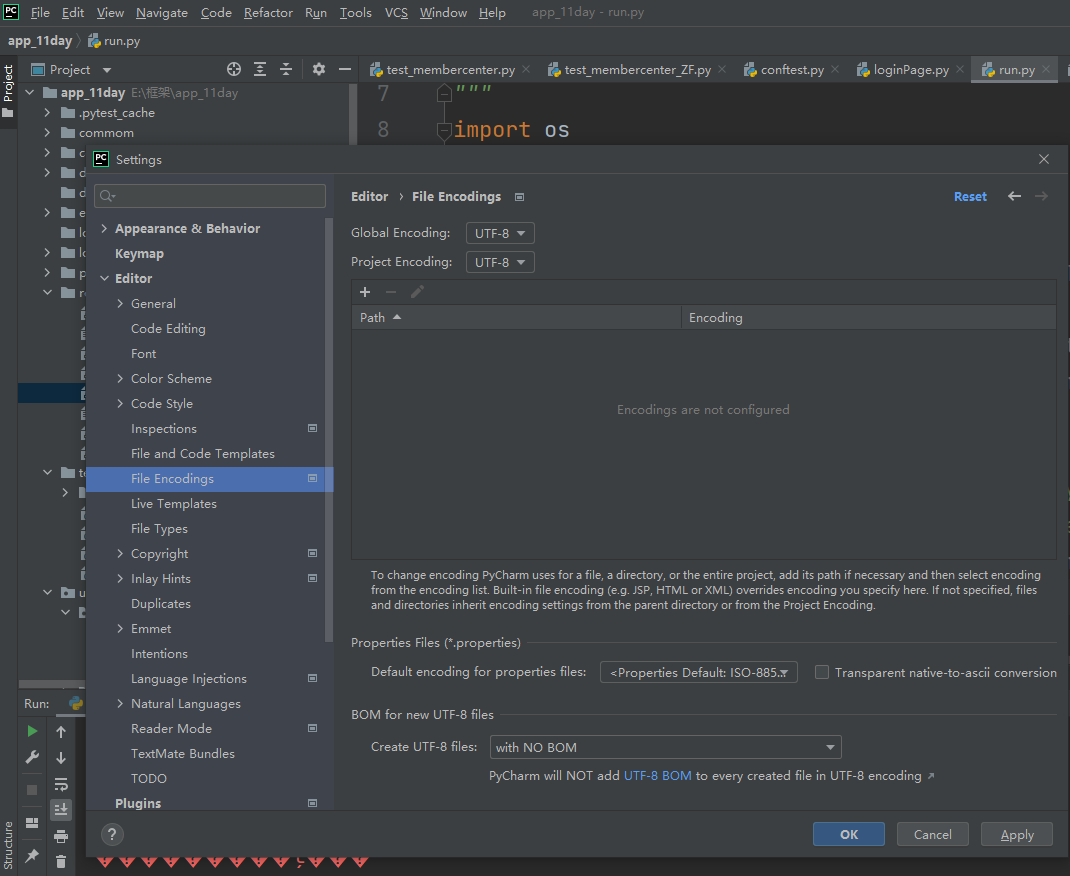
allure执行测试用例时显示乱码:‘allure’ �����ڲ����ⲿ���Ҳ���ǿ�&am…...

Java 二维码
Java 二维码 **技术:**谷歌 ZXing 实现 首先添加依赖 <!-- 二维码依赖 --><dependency><groupId>com.google.zxing</groupId><artifactId>core</artifactId><version>3.5.1</version></dependency><de…...
三分算法与DeepSeek辅助证明是单峰函数
前置 单峰函数有唯一的最大值,最大值左侧的数值严格单调递增,最大值右侧的数值严格单调递减。 单谷函数有唯一的最小值,最小值左侧的数值严格单调递减,最小值右侧的数值严格单调递增。 三分的本质 三分和二分一样都是通过不断缩…...

jmeter聚合报告中参数详解
sample、average、min、max、90%line、95%line,99%line、Error错误率、吞吐量Thoughput、KB/sec每秒传输的数据量 sample(样本数) 表示测试中发送的请求数量,即测试执行了多少次请求。 单位,以个或者次数表示。 示例:…...
