Spring Boot - 利用Resilience4j-RateLimiter进行流量控制和服务降级
文章目录
- Resilience4j概述
- Resilience4j官方地址
- Resilience4j-RateLimiter
- 微服务演示
- Payment processor
- POM
- 配置文件
- Service
- Controller
- Payment service
- POM
- Model
- Service
- RestConfig
- Controller
- 配置
- 验证
- 探究 Rate Limiting
- 请求三次 ,观察
- 等待15秒
- 连续访问6次
Resilience4j概述
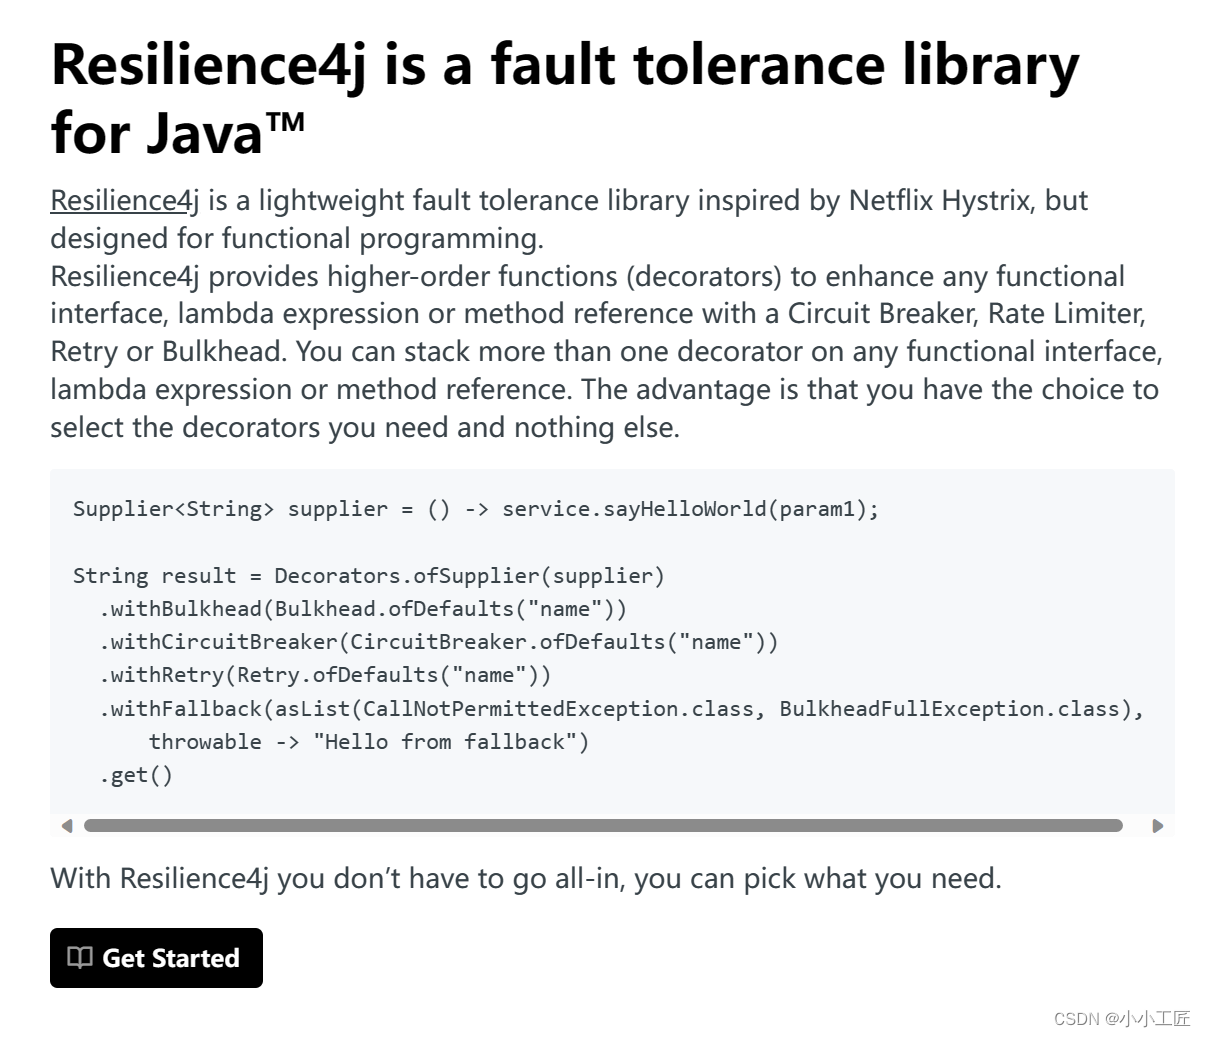
Resilience4J 是一个针对 Java 8 应用程序的轻量级容错和弹性库。它设计用于在分布式系统中的服务之间提供弹性和容错性。Resilience4J 的名字来源于它提供的核心功能,即让系统(服务)能够“弹性”(resilient)地应对各种失败情况,包括网络问题、第三方服务故障等。
Resilience4J 提供了以下功能:
- 断路器(Circuit Breaker):当检测到服务异常或超时,断路器会打开,阻止进一步的请求发送到该服务。一段时间后(通常是秒级),断路器会进入半开状态,允许一个测试请求通过以检查服务是否恢复。如果请求成功,断路器关闭;如果失败,断路器会再次打开。
- 限流(Rate Limiter):限制进入系统的请求速率,防止系统过载。这可以通过令牌桶算法或滑动窗口算法实现。
- 隔离(Isolation):通过信号量或线程池隔离不同的服务调用,防止一个服务的失败影响到其他服务。
- 超时(Timeouts):为服务调用设置超时时间,超过时间后会触发超时异常。
- 重试(Retry):在遇到特定异常时自动重试服务调用,可以配置重试次数和间隔。
- 缓存(Caching):提供缓存机制,以避免重复执行计算密集型或远程调用。
Resilience4J 的一大特点是它的轻量级特性,它只使用了 Vavr 库(一个函数式编程库),没有其他外部库依赖。这使得它在集成到现有系统时非常方便,且性能开销小。
Resilience4J 设计上易于配置,支持通过代码、配置文件或运行时参数进行配置。它也支持通过 actuator 模块与 Spring Boot 的监控和管理特性集成。
由于 Resilience4J 的这些特性和优势,它在现代分布式系统和微服务架构中得到了广泛应用,尤其是在需要高可用性和弹性的环境中。
Resilience4j官方地址
https://resilience4j.readme.io/
https://github.com/resilience4j/resilience4j
Resilience4j-RateLimiter
https://resilience4j.readme.io/docs/ratelimiter
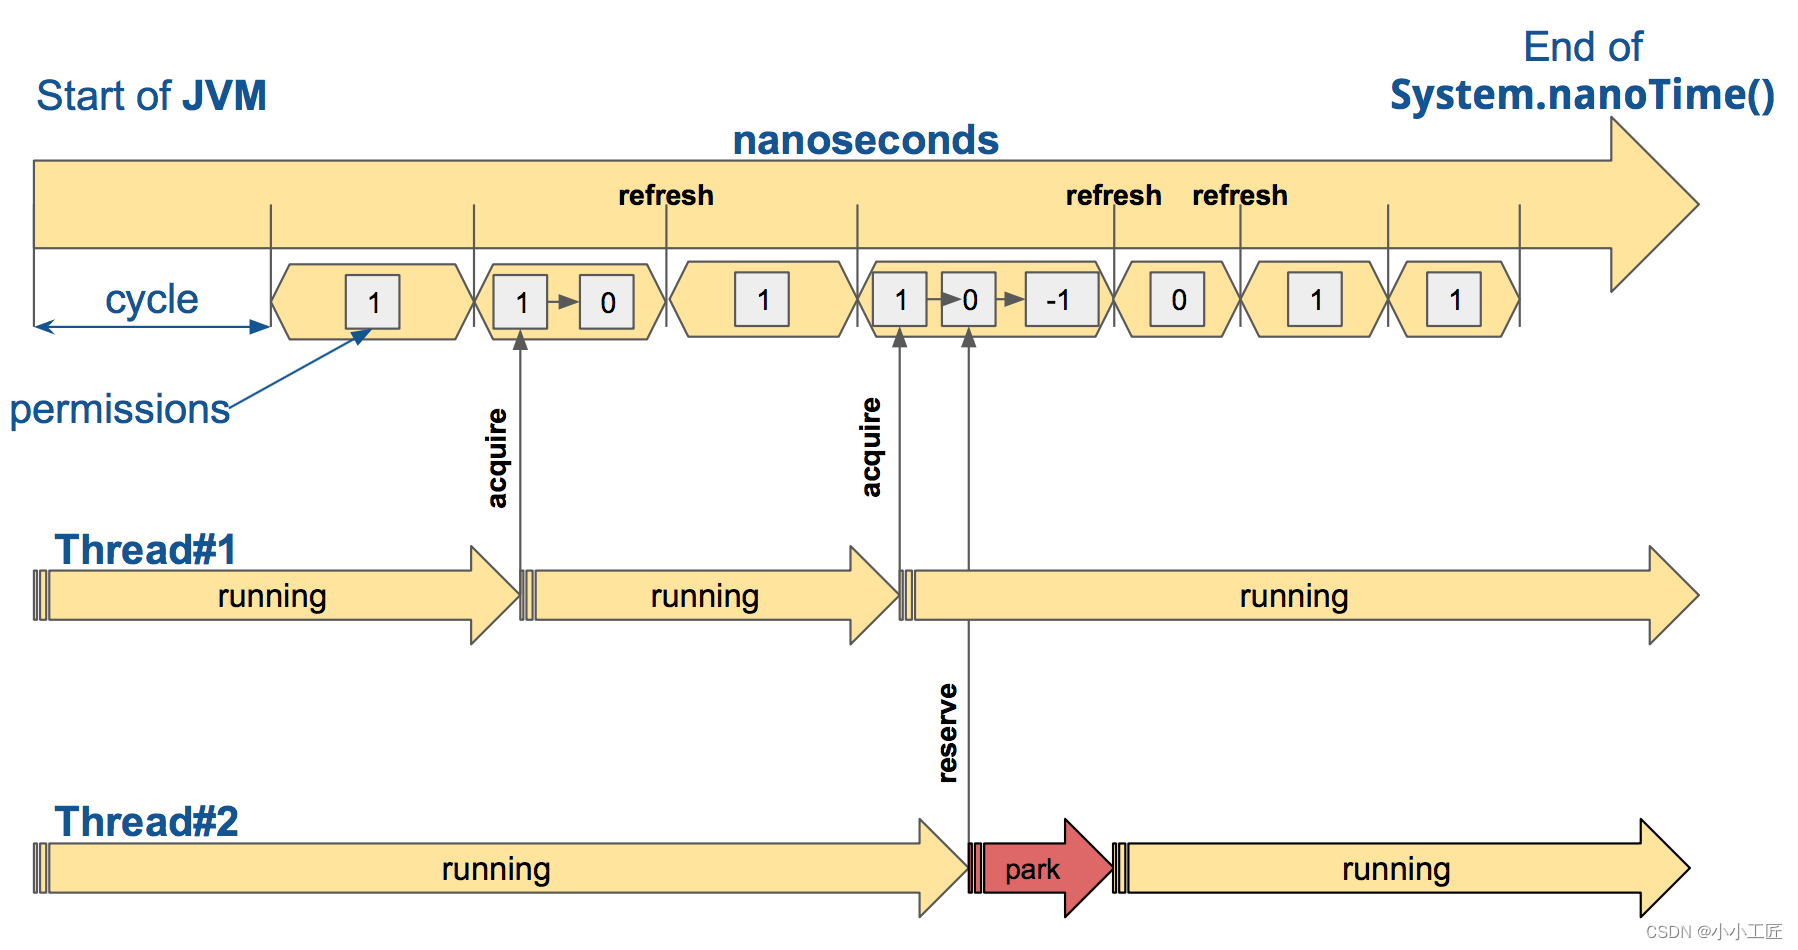
RateLimiter 的默认实现是 AtomicRateLimiter ,它通过 AtomicReference 管理其状态。 AtomicRateLimiter.State 是完全不可变的。
功能点:
-
Warm-Up Period: 当启动应用程序或重置后,可能会有一个预热期,在此期间速率限制器逐渐增加允许的请求速率。这是为了防止启动后流量突然激增,从而可能导致系统过载。
-
Steady State: 预热期结束后,速率限制器进入稳定状态。在此阶段,速率限制器根据配置的速率限制允许请求通过。例如,如果将限制设置为每分钟 100 个请求,则速率限制器将允许大约每 0.6 秒一个请求。
-
Limit Exceeded: 如果传入请求速率超过配置的限制,速率限制器立即开始拒绝超出的请求。
-
Replenishing Tokens: 速率限制器以与配置的限制相对应的速率持续补充“Token”。每个允许的请求消耗一个令牌。如果系统未充分利用允许的速率,则未使用的令牌会累积,从而允许偶尔爆发请求。
-
Cooldown Period: 如果速率限制器因超出速率限制而拒绝请求,则可能存在一个冷却期,在此期间速率限制器会再次逐渐增加允许的请求速率。这是为了防止限制放宽后流量突然激增。
微服务演示
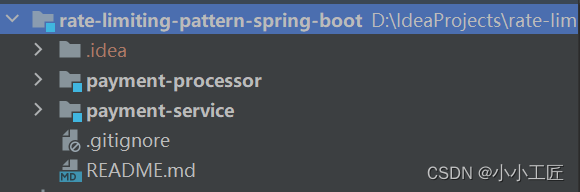
我们的演示有 2 个服务,名为支付服务和支付处理器。

- 付款服务处理来自购物者的传入付款请求,并将其转发到付款处理器进行处理。
- 支付处理器处理并发送结果。
我们将对支付服务实施速率限制,以控制传入付款请求的速率。
Payment processor
首先构建支付处理器,因为它是一个依赖服务.
为了演示的目的,将其简化为显示成功消息
POM
<?xml version="1.0" encoding="UTF-8"?>
<project xmlns="http://maven.apache.org/POM/4.0.0" xmlns:xsi="http://www.w3.org/2001/XMLSchema-instance"xsi:schemaLocation="http://maven.apache.org/POM/4.0.0 https://maven.apache.org/xsd/maven-4.0.0.xsd"><modelVersion>4.0.0</modelVersion><parent><groupId>org.springframework.boot</groupId><artifactId>spring-boot-starter-parent</artifactId><version>3.1.2</version><relativePath/> <!-- lookup parent from repository --></parent><groupId>com.artisan</groupId><artifactId>payment-processor</artifactId><version>0.0.1-SNAPSHOT</version><name>payment-processor</name><properties><java.version>17</java.version></properties><dependencies><dependency><groupId>org.springframework.boot</groupId><artifactId>spring-boot-starter-web</artifactId></dependency><dependency><groupId>org.projectlombok</groupId><artifactId>lombok</artifactId><optional>true</optional></dependency><dependency><groupId>org.springframework.boot</groupId><artifactId>spring-boot-starter-test</artifactId><scope>test</scope></dependency></dependencies><build><plugins><plugin><groupId>org.springframework.boot</groupId><artifactId>spring-boot-maven-plugin</artifactId><configuration><excludes><exclude><groupId>org.projectlombok</groupId><artifactId>lombok</artifactId></exclude></excludes></configuration></plugin></plugins></build></project>
配置文件
server:port: 1010
spring:application:name: payment-processor
Service
package com.artisan.paymentprocessor.service;
/*** @author 小工匠* @version 1.0* @mark: show me the code , change the world*/
public interface PaymentProcessorService {String processPayment(String paymentInfo);
}
package com.artisan.paymentprocessor.service.impl;import org.springframework.stereotype.Service;import com.artisan.paymentprocessor.service.PaymentProcessorService;
/*** @author 小工匠* @version 1.0* @mark: show me the code , change the world*/
@Service
public class PaymentProcessorServiceImpl implements PaymentProcessorService {@Overridepublic String processPayment(String paymentInfo) {// Simulated logic to process paymentreturn "Payment processed: " + paymentInfo;}
}
Controller
package com.artisan.paymentprocessor.controller;import com.artisan.paymentprocessor.service.PaymentProcessorService;
import org.springframework.web.bind.annotation.PostMapping;
import org.springframework.web.bind.annotation.RequestBody;
import org.springframework.web.bind.annotation.RequestMapping;
import org.springframework.web.bind.annotation.RestController;import lombok.RequiredArgsConstructor;/*** @author artisan*/
@RestController
@RequestMapping("/api/v1/processor-payment")
@RequiredArgsConstructor
public class PaymentProcessorController {private final PaymentProcessorService paymentProcessorService;@PostMappingpublic String processPayment(@RequestBody String paymentInfo) {return paymentProcessorService.processPayment(paymentInfo);}
}
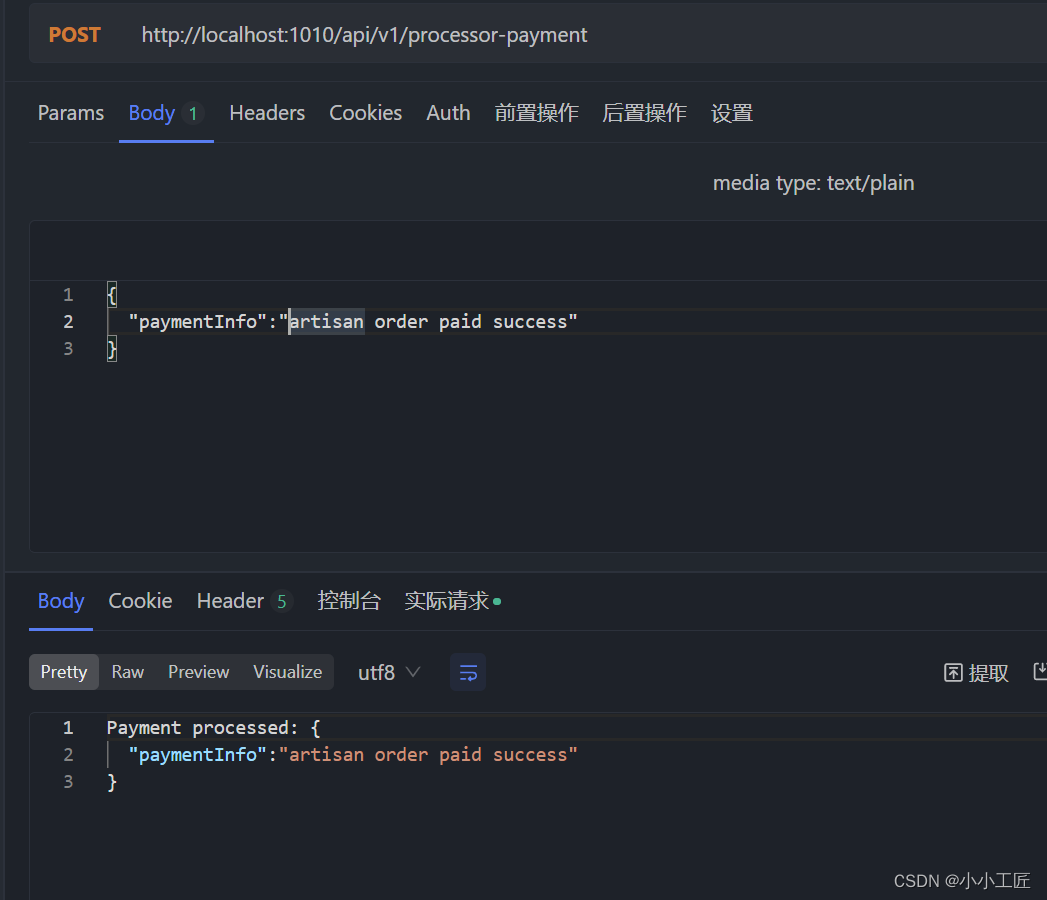
测试一下:
Payment service
我们将配置 Rate Limiter,并通过 Actuator 监控其状态 。
POM
<?xml version="1.0" encoding="UTF-8"?>
<project xmlns="http://maven.apache.org/POM/4.0.0" xmlns:xsi="http://www.w3.org/2001/XMLSchema-instance"xsi:schemaLocation="http://maven.apache.org/POM/4.0.0 https://maven.apache.org/xsd/maven-4.0.0.xsd"><modelVersion>4.0.0</modelVersion><parent><groupId>org.springframework.boot</groupId><artifactId>spring-boot-starter-parent</artifactId><version>3.1.2</version><relativePath/> <!-- lookup parent from repository --></parent><groupId>com.artisan</groupId><artifactId>payment-service</artifactId><version>0.0.1-SNAPSHOT</version><name>payment-service</name><properties><java.version>17</java.version><spring-cloud.version>2022.0.4</spring-cloud.version></properties><dependencies><dependency><groupId>org.springframework.boot</groupId><artifactId>spring-boot-starter-actuator</artifactId></dependency><dependency><groupId>org.springframework.boot</groupId><artifactId>spring-boot-starter-aop</artifactId></dependency><dependency><groupId>org.springframework.boot</groupId><artifactId>spring-boot-starter-web</artifactId></dependency><dependency><groupId>org.springframework.cloud</groupId><artifactId>spring-cloud-starter-circuitbreaker-resilience4j</artifactId></dependency><dependency><groupId>org.projectlombok</groupId><artifactId>lombok</artifactId><optional>true</optional></dependency><dependency><groupId>org.springframework.boot</groupId><artifactId>spring-boot-starter-test</artifactId><scope>test</scope></dependency></dependencies><dependencyManagement><dependencies><dependency><groupId>org.springframework.cloud</groupId><artifactId>spring-cloud-dependencies</artifactId><version>${spring-cloud.version}</version><type>pom</type><scope>import</scope></dependency></dependencies></dependencyManagement><build><plugins><plugin><groupId>org.springframework.boot</groupId><artifactId>spring-boot-maven-plugin</artifactId><configuration><excludes><exclude><groupId>org.projectlombok</groupId><artifactId>lombok</artifactId></exclude></excludes></configuration></plugin></plugins></build></project>
Model
public interface Type {
}
@Data
public class Success implements Type {private final String msg;
}
@Data
public class Failure implements Type {private final String msg;
}
Service
如何调用外部API -------------->我们这里使用 Spring的 RestTemplate 。
package com.artisan.paymentservice.service;import com.artisan.paymentservice.model.Type;/*** @author 小工匠* @version 1.0* @mark: show me the code , change the world*/
public interface PaymentService {Type submitPayment(String paymentInfo);
}
package com.artisan.paymentservice.service.impl;import com.artisan.paymentservice.model.Failure;
import com.artisan.paymentservice.model.Success;
import com.artisan.paymentservice.model.Type;
import com.artisan.paymentservice.service.PaymentService;
import org.springframework.http.*;
import org.springframework.stereotype.Service;
import org.springframework.web.client.RestTemplate;import io.github.resilience4j.ratelimiter.RequestNotPermitted;
import io.github.resilience4j.ratelimiter.annotation.RateLimiter;
import lombok.RequiredArgsConstructor;/*** @author 小工匠* @version 1.0* @mark: show me the code , change the world*/
@Service
@RequiredArgsConstructor
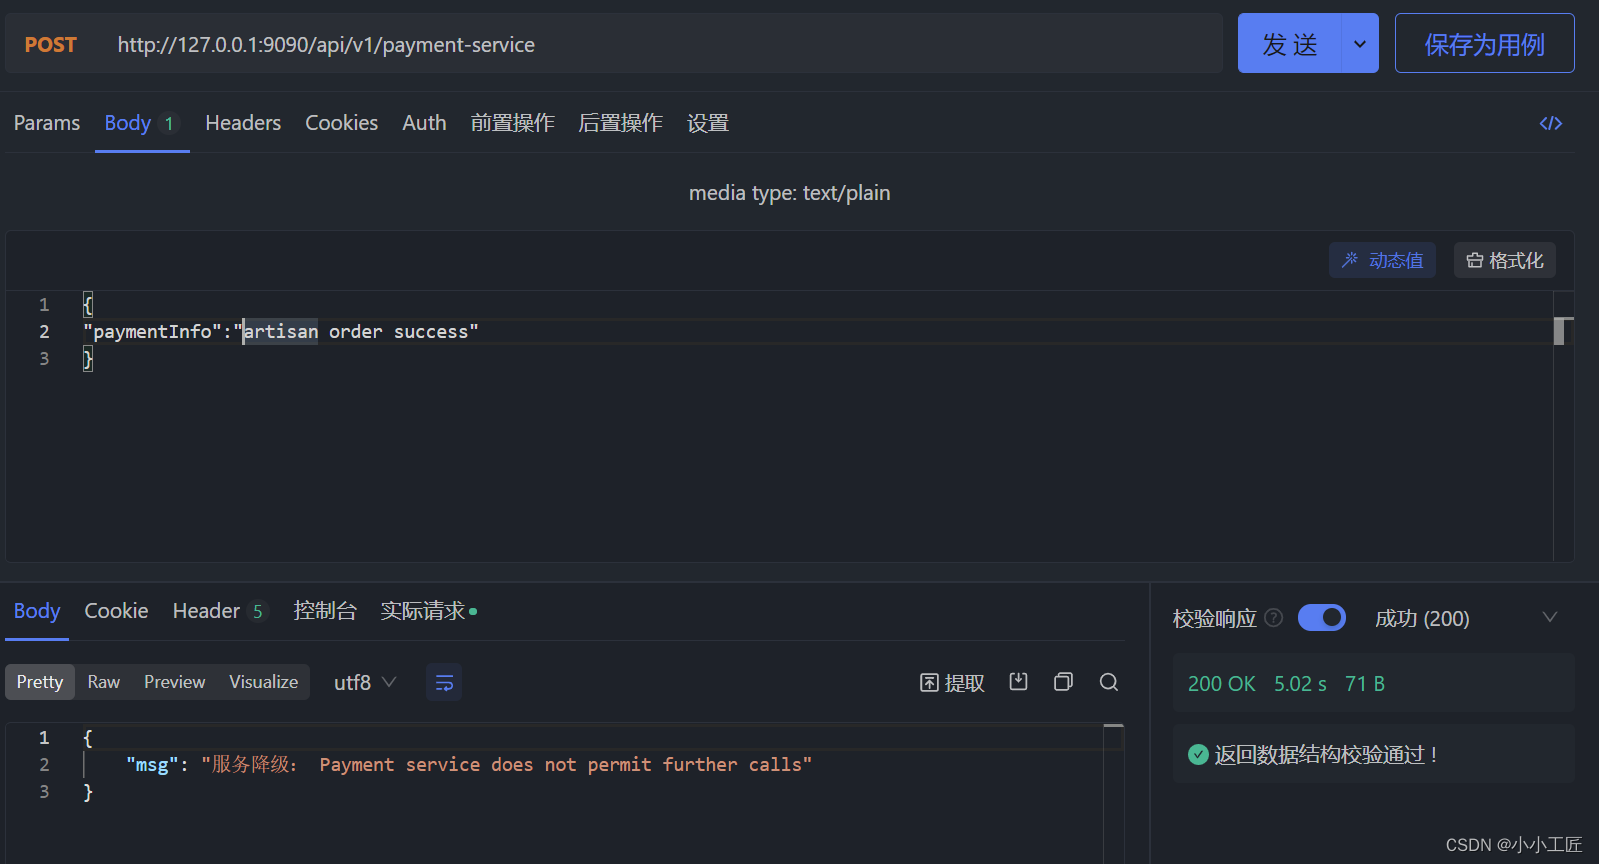
public class PaymentServiceImpl implements PaymentService {private final RestTemplate restTemplate;private static final String SERVICE_NAME = "payment-service";private static final String PAYMENT_PROCESSOR_URL = "http://localhost:1010/api/v1/processor-payment";@Override@RateLimiter(name = SERVICE_NAME, fallbackMethod = "fallbackMethod")public Type submitPayment(String paymentInfo) {HttpHeaders headers = new HttpHeaders();headers.setContentType(MediaType.APPLICATION_JSON);HttpEntity<String> entity = new HttpEntity<>(paymentInfo, headers);ResponseEntity<String> response = restTemplate.exchange(PAYMENT_PROCESSOR_URL,HttpMethod.POST, entity, String.class);Success success = new Success(response.getBody());return success;}private Type fallbackMethod(RequestNotPermitted requestNotPermitted) {return new Failure("服务降级: Payment service does not permit further calls");}
}重点关注: @RateLimiter(name = SERVICE_NAME, fallbackMethod = "fallbackMethod")
需要注意这两种方法应该返回相同的数据类型, 所以对两个模型类都使用“Type”来实现。
RestConfig
package com.artisan.paymentservice.config;import org.springframework.context.annotation.Bean;
import org.springframework.context.annotation.Configuration;
import org.springframework.web.client.RestTemplate;
/*** @author 小工匠* @version 1.0* @mark: show me the code , change the world*/
@Configuration
public class RestConfig {@Beanpublic RestTemplate restTemplate() {return new RestTemplate();}
}
Controller
package com.artisan.paymentservice.controller;import com.artisan.paymentservice.model.Type;
import com.artisan.paymentservice.service.PaymentService;
import org.springframework.web.bind.annotation.PostMapping;
import org.springframework.web.bind.annotation.RequestBody;
import org.springframework.web.bind.annotation.RequestMapping;
import org.springframework.web.bind.annotation.RestController;import lombok.RequiredArgsConstructor;
/*** @author 小工匠* @version 1.0* @mark: show me the code , change the world*/
@RestController
@RequestMapping("/api/v1/payment-service")
@RequiredArgsConstructor
public class PaymentController {private final PaymentService paymentService;@PostMappingpublic Type submitPayment(@RequestBody String paymentInfo) {return paymentService.submitPayment(paymentInfo);}
}
配置
server:port: 9090
spring:application:name: payment-service
management:endpoint:health:show-details: alwaysendpoints:web:exposure:include: healthhealth:ratelimiters:enabled: true
resilience4j:ratelimiter:instances:payment-service:limit-for-period: 5limit-refresh-period: 15stimeout-duration: 5sregister-health-indicator: true
- limit-for-period:一个“limit-refresh-period”期间允许的请求数
- limit-refresh-period:指定“limit-for-period”将被重置的持续时间
- timeout-duration:设置速率限制器允许后续请求的最大等待时间。
这段配置确保了payment-service服务的请求速率不会超过每15秒5次,同时如果请求超过10秒没有响应,则认为请求超时。此外,通过注册健康指标,可以对速率限制器的状态进行监控和管理。
验证

探究 Rate Limiting
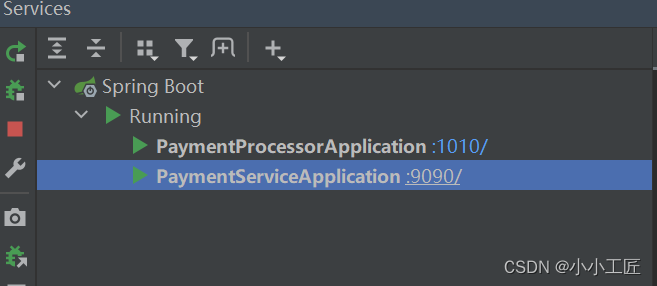
确保两个服务启动成功
访问 http://localhost:9090/actuator/health 查看速率限制器详细信息。
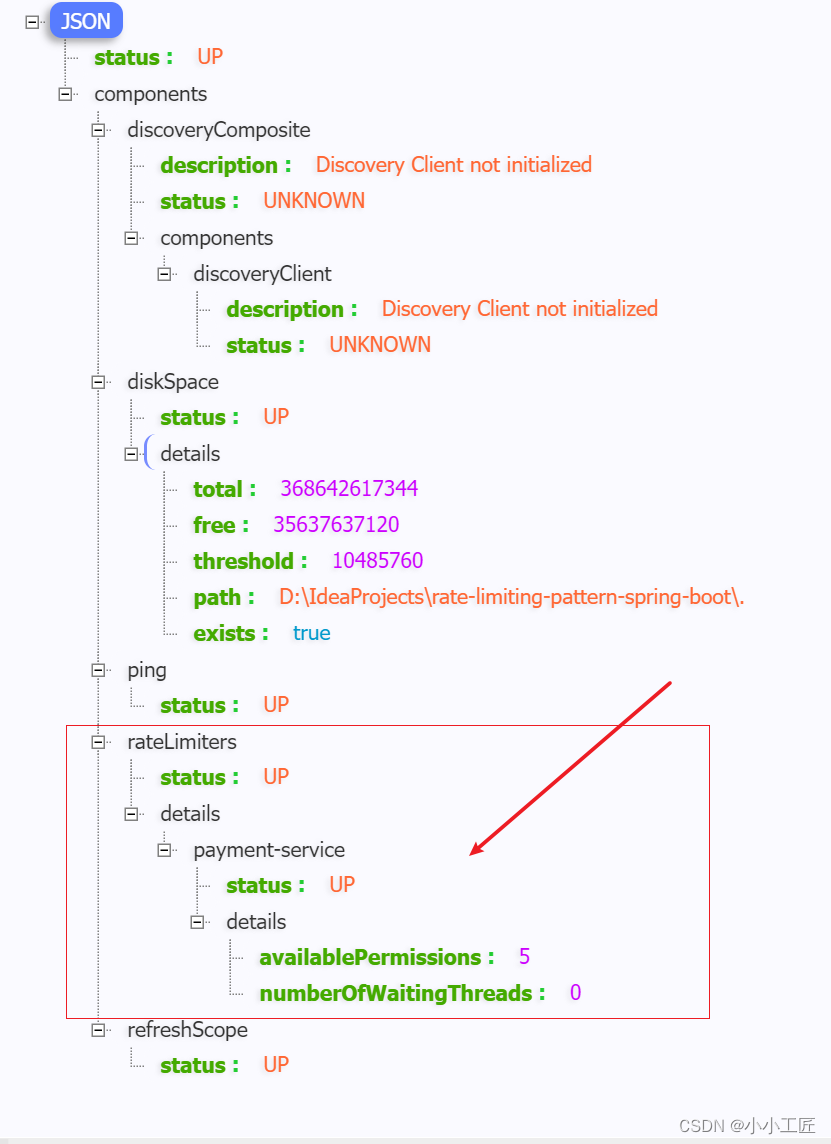
请求三次 ,观察
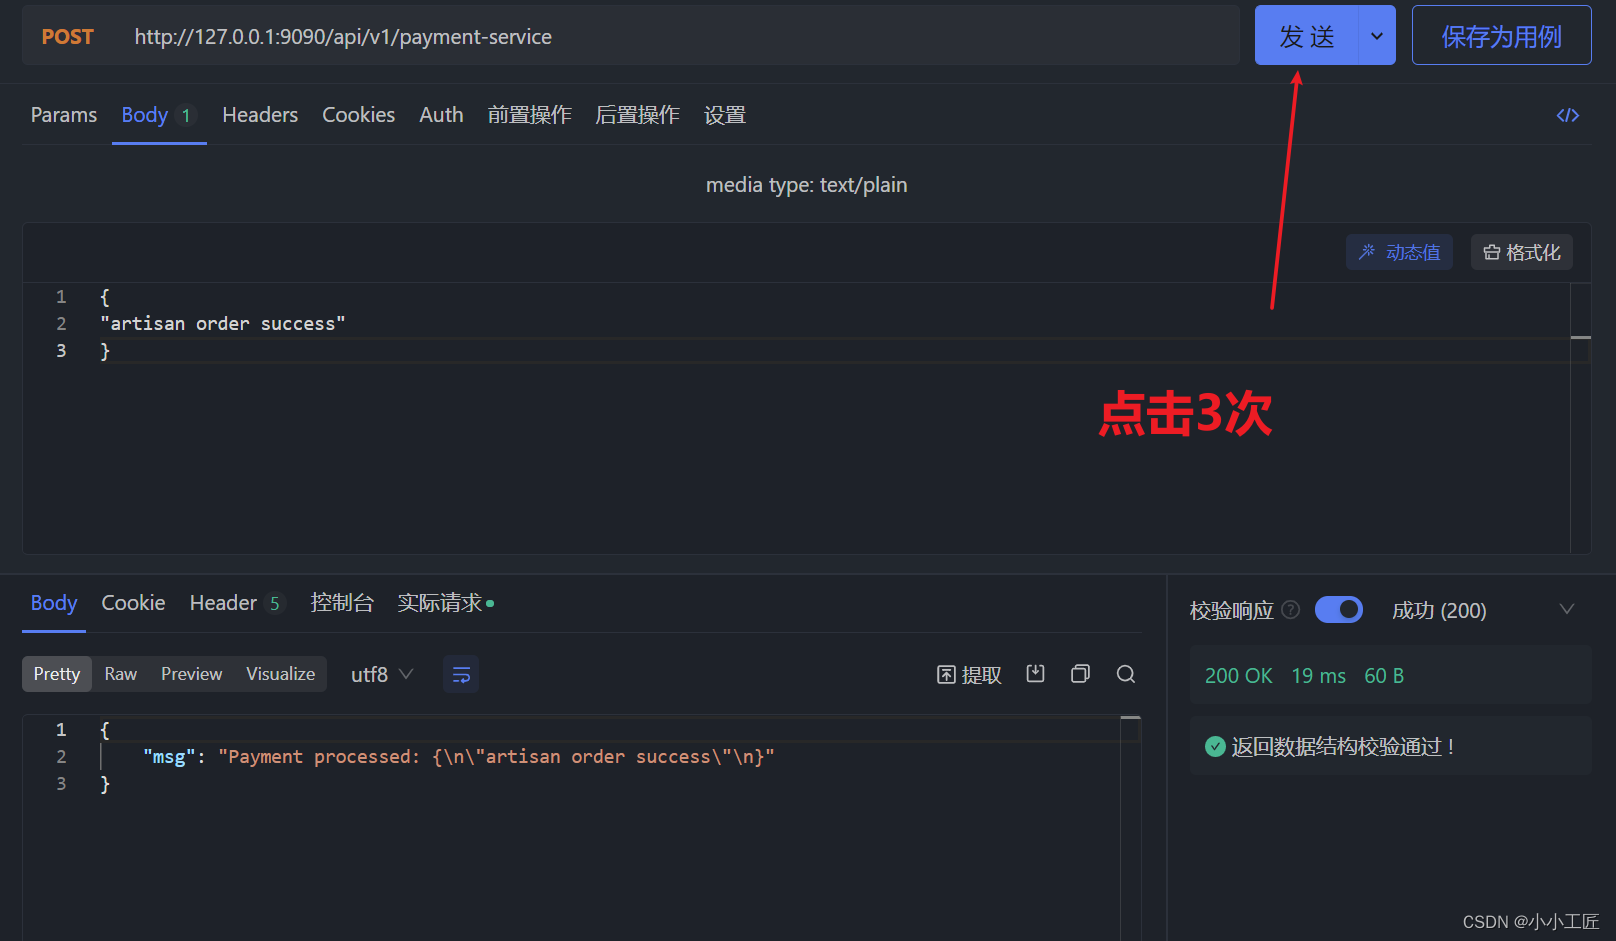
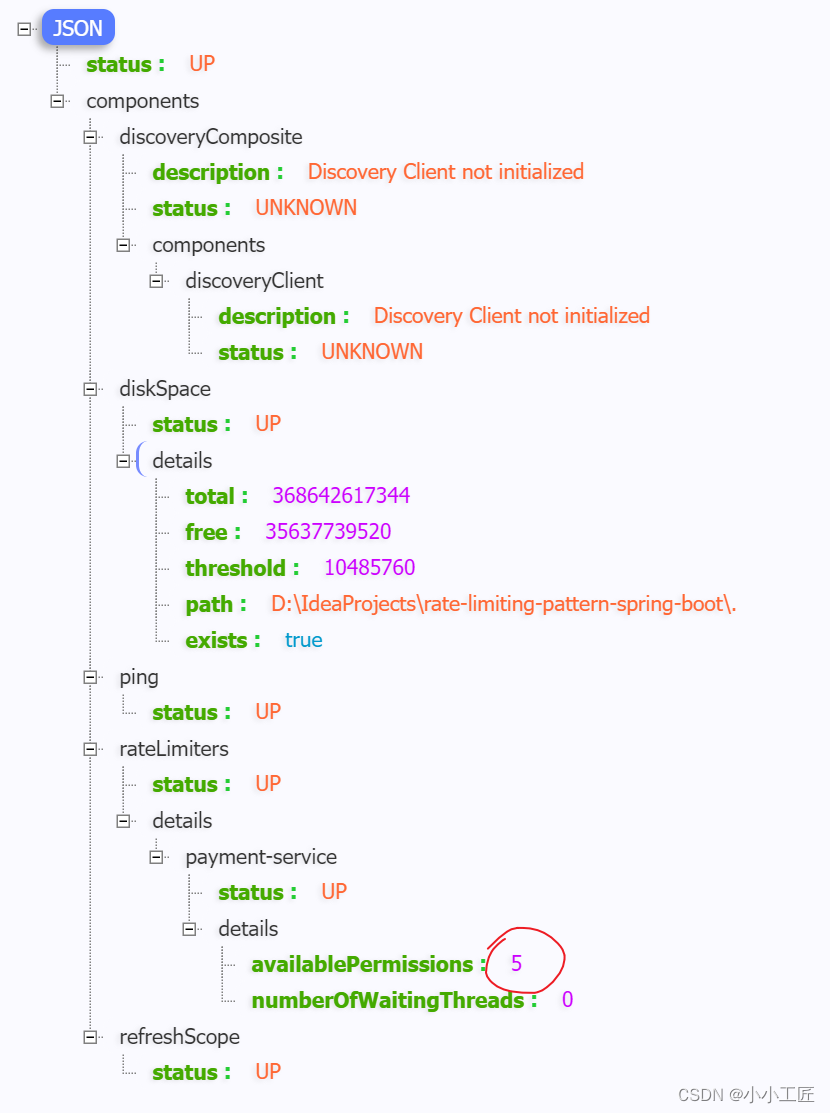
http://localhost:9090/api/v1/ payment-service 请求3次 ,然后刷新执行器链接 http://localhost:9090/actuator/health

等待15秒
等待 15 秒(如果在 API 访问之前开始,时间可能会更短),然后刷新执行器链接 http://localhost:9090/actuator/health,我们将观察到允许的请求重置为 5。
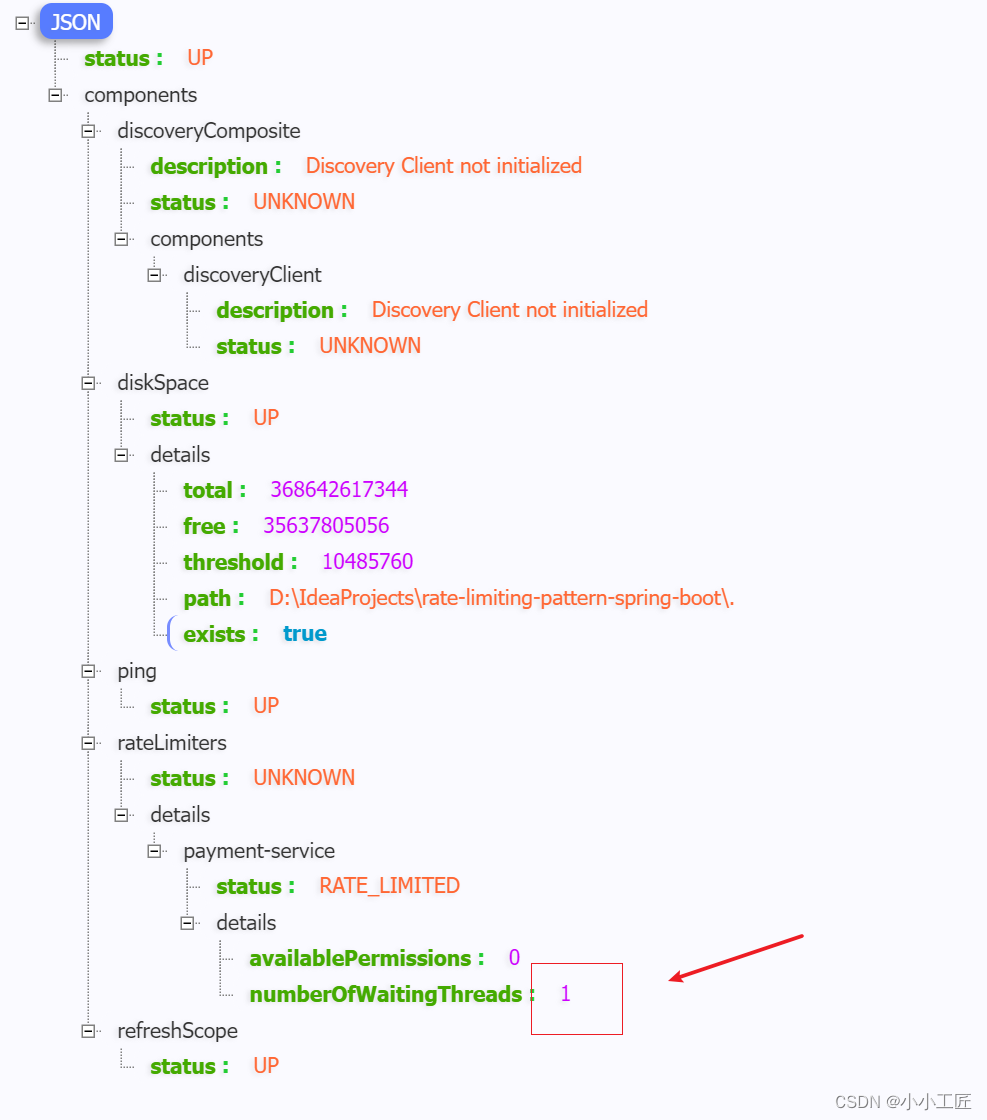
连续访问6次
API 访问 6 次 http://localhost:9090/api/v1/ payment-service。第 6 个请求将因超出限制而延迟 5 秒。等待期间,刷新 http://localhost:9090/actuator/health 以获取以下详细信息
相关文章:
Spring Boot - 利用Resilience4j-RateLimiter进行流量控制和服务降级
文章目录 Resilience4j概述Resilience4j官方地址Resilience4j-RateLimiter微服务演示Payment processorPOM配置文件ServiceController Payment servicePOMModelServiceRestConfigController配置验证 探究 Rate Limiting请求三次 ,观察等待15秒连续访问6次 Resilienc…...
概率论与数理统计————1.随机事件与概率
一、随机事件 随机试验:满足三个特点 (1)可重复性:可在相同的条件下重复进行 (2)可预知性:每次试验的可能不止一个,事先知道试验的所有可能结果 (3)不确定…...
【生存技能】git操作
先下载git https://git-scm.com/downloads 我这里是win64,下载了相应的直接安装版本 64-bit Git for Windows Setup 打开git bash 设置用户名和邮箱 查看设置的配置信息 获取本地仓库 在git bash或powershell执行git init,初始化当前目录成为git仓库…...

docker 将镜像打包为 tar 包
目录 1 实现 1 实现 要将镜像导出为.tar包,可以使用Docker命令行工具进行操作。下面是导出镜像的步骤: 首先,使用以下命令列出当前系统上的镜像,并找到要导出的镜像的ID或名称: docker images使用以下命令将镜像导出为…...
)
341. 最优贸易(dp思想运用,spfa,最短路)
341. 最优贸易 - AcWing题库 C 国有 n 个大城市和 m 条道路,每条道路连接这 n 个城市中的某两个城市。 任意两个城市之间最多只有一条道路直接相连。 这 m 条道路中有一部分为单向通行的道路,一部分为双向通行的道路,双向通行的道路在统计…...
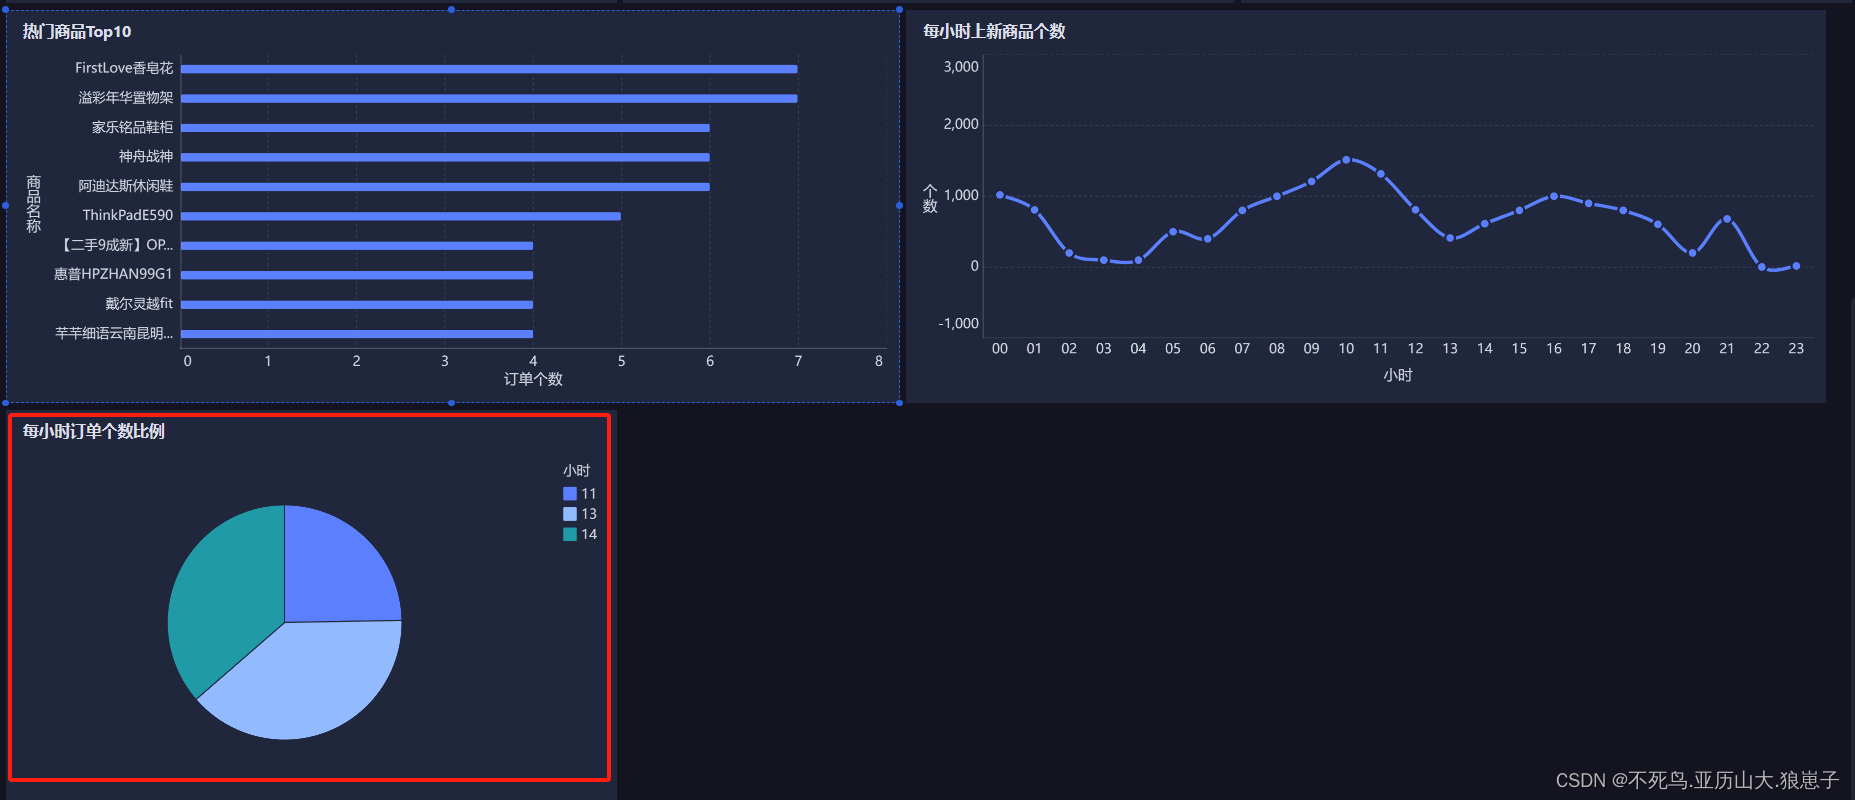
FineBI实战项目一(19):每小时订单笔数分析开发
点击新建组件,创建下每小时订单笔数组件。 选择饼图,拖拽cnt(总数)到角度,拖拽hourstr到颜色,调节内径。 修改现在的文字 拖拽组件到仪表盘。 效果如下:...

What is `@RequestBody ` does?
RequestBody 是SpringMVC框架中的注解,通常与POST、PUT等方法配合使用。当客户端发送包含JSON或XML格式数据的请求时,可以通过该注解将请求体内容绑定到Controller方法参数上 作用 自动反序列化: SpringMVC会根据RequestBody注解的参数类型&…...

Windows安装Rust环境(详细教程)
一、 安装mingw64(C语言环境) Rust默认使用的C语言依赖Visual Studio,但该工具占用空间大安装也较为麻烦,可以选用轻便的mingw64包。 1.1 安装地址 (1) 下载地址1-GitHub:Releases niXman/mingw-builds-binaries GitHub (2) 下载地址2-W…...

Marin说PCB之传输线损耗---趋肤效应和导体损耗01
大家在做RF上的PCB走线或者是车载相机的上走线的时候经常会听那些硬件工程师们说你这个走线一定要保证50欧姆的阻抗匹配啊,还有就是记得加粗走做隔层参考。 有的公司的EE硬件同事会很贴心的把RF走线的注意事项给你备注在原理图上或者是layoutguide上,遇到…...

八:分布式锁
1、为什么要使用分布式锁 锁是多线程代码中的概念,只有多任务访问同一个互斥的共享资源时才需要锁。单机应用开发时一般使用synchronized或lock。多线程的运行都是在同一个JVM之下。应用是分布式集群,属于多JVM的工作环境,JVM之间已经无法通过…...
)
示例:php将文本内容写入一个文件(面向过程写法)
一、封装2个函数,读写文件 /*** desc 读取文件内容* param string $filename* return array*/ private function readContent(string $filename): array {$text file_get_contents($filename);if (!$text) {return [];}$result json_decode($text,true);return…...

Flutter开发进阶之并发操作数据库
Flutter开发进阶之并发操作数据库 尽管 Flutter 本身不包含任何数据库功能,但可以使用各种第三方库和插件来在 Flutter 应用程序中实现数据库功能; 以下将使用sqflite作为例子,sqflite允许在 Flutter 应用程序中执行 SQL 查询,创…...
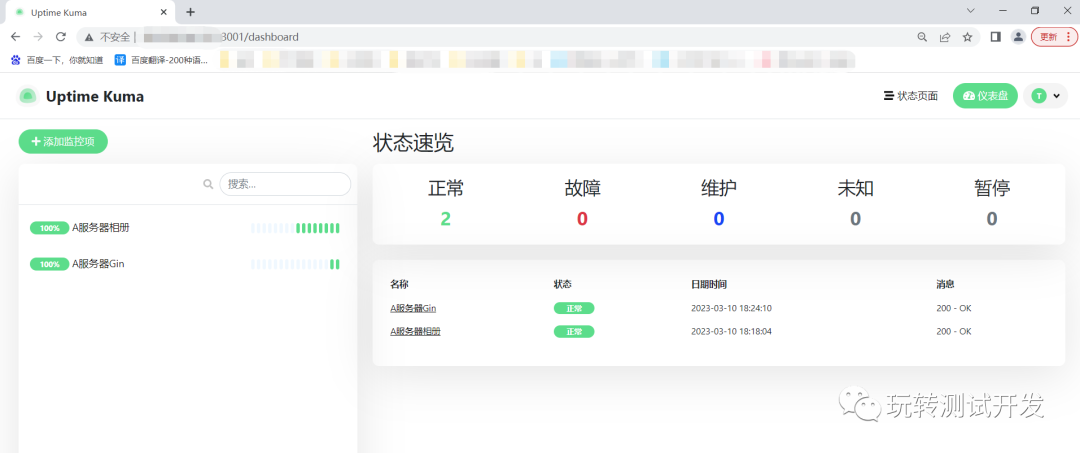
docker应用:搭建uptime-kuma监控站点
简介:Uptime Kuma是一个易于使用的自托管监控工具,它的界面干净简洁,部署和使用都非常方便。 历史攻略: docker:可视化工具portainer docker-compose:搭建自动化运维平台Spug 开源地址: ht…...

在illustrator中按大小尺寸选择物体 <脚本 018>
在Illustrator中我们可以依据对象的属性 如:填充颜色、描边颜色或描边宽度来选择相同属性的对象,但是Illustrator中没有根据不同大小尺寸来选择对象的功能,下面介绍的就是根据大小尺寸选择对象的脚本。 1、下面是当前画板中的所有对象&#…...

leetcode - 934. Shortest Bridge
Description You are given an n x n binary matrix grid where 1 represents land and 0 represents water. An island is a 4-directionally connected group of 1’s not connected to any other 1’s. There are exactly two islands in grid. You may change 0’s to 1…...
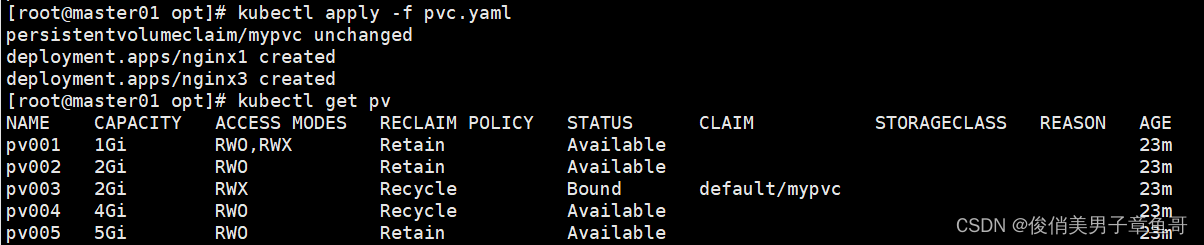
k8s的存储卷、数据卷
容器内的目录和宿主机目录进行挂载。 容器在系统上的生命周期是短暂的。 k8s用控制器创建的pod。delete相当于重启。容器的状态也会恢复到初始状态。一旦恢复到初始状态,所有的后天编辑的文件都会消失 容器和节点之间创建一个可以持久化保存容器内文件的存储卷。…...

流星全自动网页生成系统重构版源码
流星全自动网页生成系统重构版源码分享,所有模板经过精心审核与修改,完美兼容小屏手机大屏手机,以及各种平板端、电脑端和360浏览器、谷歌浏览器、火狐浏览器等等各大浏览器显示。 为用户使用方便考虑,全自动网页制作系统无需繁琐…...
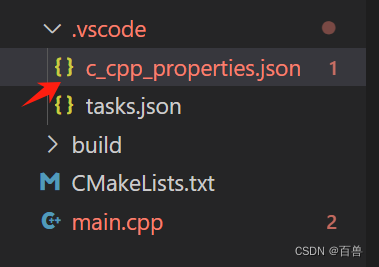
vscode打开c_cpp_properties.json文件的一种方式
步骤一 点击win32 步骤二 点击json 自动生成了...
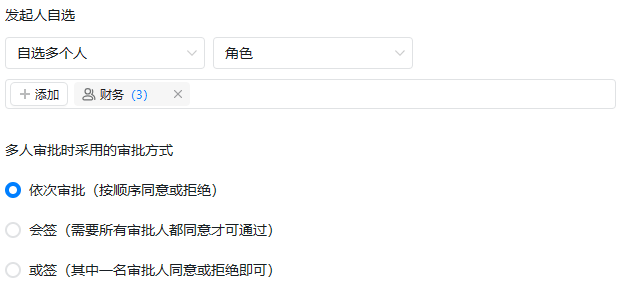
发起人自选-钉钉审批
场景描述 配置一个审批流程,在某些审批节点,不能确定谁具体来审批,所以需要手工选择一个人或者多个人保证流程能得以顺利通过。有些审批流程的做法是,上一个节点来选择指定的人,而钉钉的做法是发起人来指定。 钉钉设…...

电脑DIY-显卡
显卡 英伟达(NVIDIA)RTX系列 英伟达(NVIDIA) 英伟达(NVIDIA)是一家知名的图形处理器制造商,其显卡产品系列众多。以下是英伟达显卡的主要系列: 系列面向客户说明产品GeForce系列个…...

3个技巧快速掌握加密压缩包密码找回:ArchivePasswordTestTool新手指南
3个技巧快速掌握加密压缩包密码找回:ArchivePasswordTestTool新手指南 【免费下载链接】ArchivePasswordTestTool 利用7zip测试压缩包的功能 对加密压缩包进行自动化测试密码 项目地址: https://gitcode.com/gh_mirrors/ar/ArchivePasswordTestTool 你是否曾…...

终极AMD锐龙处理器调试指南:深度掌握硬件性能调优的完整解决方案
终极AMD锐龙处理器调试指南:深度掌握硬件性能调优的完整解决方案 【免费下载链接】SMUDebugTool A dedicated tool to help write/read various parameters of Ryzen-based systems, such as manual overclock, SMU, PCI, CPUID, MSR and Power Table. 项目地址: …...

基于Nuxt 4与Shadcn/ui的现代化全栈仪表板模板开发指南
1. 项目概述:一个现代化的全栈仪表板起点如果你正在寻找一个能快速启动企业级后台管理、数据可视化或内容管理系统的技术栈,那么你很可能已经厌倦了从零开始配置的繁琐。每次新项目,都要重新折腾 Nuxt 的配置、UI 组件库的集成、样式工具链、…...

086、Python数据压缩与归档:zipfile与tarfile实战笔记
086、Python数据压缩与归档:zipfile与tarfile实战笔记 一、从线上故障说起 上周排查一个生产环境问题:某服务每天生成的日志文件把磁盘撑满了。 查看代码发现,开发同事用 open().write() 直接写文本,一年下来积累了上千个文件。 其实这类场景最适合用压缩归档——既节省空…...

终极解决方案:一键将LaTeX PDF幻灯片转换为PowerPoint格式
终极解决方案:一键将LaTeX PDF幻灯片转换为PowerPoint格式 【免费下载链接】pdf2pptx Convert your (Beamer) PDF slides to (Powerpoint) PPTX 项目地址: https://gitcode.com/gh_mirrors/pd/pdf2pptx 还在为LaTeX Beamer制作的精美幻灯片无法在PowerPoint中…...

福特技术复兴:用户体验整合如何重塑汽车行业竞争格局
1. 福特的技术复兴之路:一次深度拆解十年前,当大多数传统汽车制造商还在为金融危机后的生存而挣扎时,福特汽车做出了一个在当时看来颇具前瞻性的决定:将技术,而非仅仅是马力或造型,作为品牌复兴的核心驱动力…...

低代码平台表单设计器 unione form editor 组件介绍--文件上传
低代码平台表单设计器 unione form editor 组件介绍--文件上传 在企业级低代码表单开发中,文件上传组件是实现“附件提交、资料归档、证据留存”的核心组件,广泛应用于合同上传、简历提交、凭证上传、图片上传等场景。不同于其他输入类组件,文…...

《心核驱动:基于本质定义的AI性格自进化架构》
前言:拒绝表面调参,直击AI性格本质当前市面上的AI性格定制,大多停留在“表层调参”阶段——试图通过调整温度、Top-p等概率参数来模拟情感,结果往往顾此失彼,要么机械生硬,要么逻辑崩塌。真正的智能性格&am…...

简化OpenAI API调用:轻量级封装库实践指南
1. 项目概述:一个极简的OpenAI API封装库 如果你正在开发一个需要集成AI能力的应用,比如一个聊天机器人、一个内容生成工具,或者一个代码助手,那么你大概率绕不开OpenAI的API。它的功能强大,文档也还算清晰࿰…...
TrguiNG汉化版:三招彻底改变你的Transmission远程管理体验
TrguiNG汉化版:三招彻底改变你的Transmission远程管理体验 【免费下载链接】TrguiNG Transmission WebUI 基于 openscopeproject/TrguiNG 汉化和改进 项目地址: https://gitcode.com/gh_mirrors/tr/TrguiNG 你是否还在忍受Transmission原生的简陋Web界面&…...