机器学习:分类决策树(Python)
一、各种熵的计算
entropy_utils.py
import numpy as np  # 数值计算
import math  # 标量数据的计算class EntropyUtils:"""决策树中各种熵的计算,包括信息熵、信息增益、信息增益率、基尼指数。统一要求:按照信息增益最大、信息增益率最大、基尼指数增益最大"""@staticmethoddef _set_sample_weight(sample_weight, n_samples):"""扩展到集成学习,此处为样本权重的设置:param sample_weight: 各样本的权重:param n_samples: 样本量:return:"""if sample_weight is None:sample_weight = np.asarray([1.0] * n_samples)return sample_weightdef cal_info_entropy(self, y_labels, sample_weight=None):"""计算样本的信息熵:param y_labels: 递归样本子集中类别集合或特征取值:param sample_weight: 各样本的权重:return:"""y = np.asarray(y_labels)sample_weight = self._set_sample_weight(sample_weight, len(y))y_values = np.unique(y)  # 样本中不同类别值ent_y = 0.0for val in y_values:p_i = len(y[y == val]) * np.mean(sample_weight[y == val]) / len(y)ent_y += -p_i * math.log2(p_i)return ent_ydef conditional_entropy(self, feature_x, y_labels, sample_weight=None):"""计算条件熵,给定特征属性的情况下,信息熵的计算:param feature_x: 某个样本特征:param y_labels: 递归样本子集中的类别集合:param sample_weight: 各样本的权重:return:"""x, y = np.asarray(feature_x), np.asarray(y_labels)sample_weight = self._set_sample_weight(sample_weight, len(y))cond_ent = 0.0for x_val in np.unique(x):x_idx = np.where(x == x_val)  # 某个特征取值的样本索引集合sub_x, sub_y = x[x_idx], y[x_idx]sub_sample_weight = sample_weight[x_idx]p_k = len(sub_y) / len(y)cond_ent += p_k * self.cal_info_entropy(sub_y, sub_sample_weight)return cond_entdef info_gain(self, feature_x, y_labels, sample_weight=None):"""计算信息增益:param feature_x::param y_labels::param sample_weight::return:"""return self.cal_info_entropy(y_labels, sample_weight) - \self.conditional_entropy(feature_x, y_labels, sample_weight)def info_gain_rate(self, feature_x, y_labels, sample_weight=None):"""计算信息增益率:param feature_x::param y_labels::param sample_weight::return:"""return self.info_gain(feature_x, y_labels, sample_weight) / \self.cal_info_entropy(feature_x, sample_weight)def cal_gini(self, y_label, sample_weight=None):"""计算当前特征或类别集合的基尼值:param y_label: 递归样本子集中类别集合或特征取值:param sample_weight::return:"""y = np.asarray(y_label)sample_weight = self._set_sample_weight(sample_weight, len(y))y_values = np.unique(y)gini_val = 1.0for val in y_values:p_k = len(y[y == val]) * np.mean(sample_weight[y == val]) / len(y)gini_val -= p_k ** 2return gini_valdef conditional_gini(self, feature_x, y_labels, sample_weight=None):"""计算条件基尼指数:param feature_x::param y_labels::param sample_weight::return:"""x, y = np.asarray(feature_x), np.asarray(y_labels)sample_weight = self._set_sample_weight(sample_weight, len(y))cond_gini = 0.0for x_val in np.unique(x):x_idx = np.where(x == x_val)  # 某个特征取值的样本索引集合sub_x, sub_y = x[x_idx], y[x_idx]sub_sample_weight = sample_weight[x_idx]p_k = len(sub_y) / len(y)cond_gini += p_k * self.cal_gini(sub_y, sub_sample_weight)return cond_ginidef gini_gain(self, feature_x, y_labels, sample_weight=None):"""计算基尼指数增益:param feature_x::param y_labels::param sample_weight::return:"""return self.cal_gini(y_labels, sample_weight) - \self.conditional_gini(feature_x, y_labels, sample_weight)# if __name__ == '__main__':
#     y = np.random.randint(0, 2, 50)
#     entropy = EntropyUtils()
#     ent = entropy.cal_info_entropy(y)
#     print(ent)
二、连续特征数据的离散分箱
data_bin_wrapper.py
import numpy as npclass DataBinsWrapper:"""连续特征数据的离散化,分箱(分段)操作,根据用户传参max_bins,计算分位数,以分位数分箱(分段)然后根据样本特征取值所在区间段(哪个箱)位置索引标记当前值1. fit(x)根据样本进行分箱2. transform(x)根据已存在的箱,把数据分成max_bins类"""def __init__(self, max_bins=10):self.max_bins = max_bins  # 分箱数:10%,20%,...,90%self.XrangeMap = None  # 箱(区间段)def fit(self, x_samples):"""根据样本进行分箱:param x_samples: 样本(二维数组 n * k),或一个特征属性的数据(二维 n * 1):return:"""if x_samples.ndim == 1:  # 一个特征属性,转换为二维数组n_features = 1x_samples = x_samples[:, np.newaxis]  # 添加一个轴,转换为二维数组else:n_features = x_samples.shape[1]# 构建分箱,区间段self.XrangeMap = [[] for _ in range(n_features)]for idx in range(n_features):x_sorted = sorted(x_samples[:, idx])  # 按特征索引取值,并从小到大排序for bin in range(1, self.max_bins):p = (bin / self.max_bins) * 100 // 1p_val = np.percentile(x_sorted, p)self.XrangeMap[idx].append(p_val)self.XrangeMap[idx] = sorted(list(set(self.XrangeMap[idx])))def transform(self, x_samples, XrangeMap=None):"""根据已存在的箱,把数据分成max_bins类:param x_samples: 样本(二维数组 n * k),或一个特征属性的数据(二维 n * 1):return:"""if x_samples.ndim == 1:if XrangeMap is not None:return np.asarray(np.digitize(x_samples, XrangeMap[0])).reshape(-1)else:return np.asarray(np.digitize(x_samples, self.XrangeMap[0])).reshape(-1)else:return np.asarray([np.digitize(x_samples[:, i], self.XrangeMap[i])for i in range(x_samples.shape[1])]).T# if __name__ == '__main__':
#     x = np.random.randn(10, 5)
#     print(x)
#     dbw = DataBinsWrapper(max_bins=5)
#     dbw.fit(x)
#     print(dbw.XrangeMap)
#     print(dbw.transform(x))
三、可视化分类边界函数
plt_decision_funtion.py
import matplotlib.pylab as plt
import numpy as npdef plot_decision_function(X, y, clf, acc=None, title_info=None, is_show=True, support_vectors=None):"""可视化分类边界函数:param X, y: 测试样本与类别:param clf: 分类模型:param acc: 模型分类正确率:param title_info: 可视化标题title的额外信息:param is_show: 是否在当前显示图像,用于父函数绘制子图:param support_vectors: 扩展支持向量机:return:"""if is_show:plt.figure(figsize=(7, 5))# 根据特征变量的最小值和最大值,生成二维网络,用于绘制等值线x_min, x_max = X[:, 0].min() - 1, X[:, 0].max() + 1y_min, y_max = X[:, 1].min() - 1, X[:, 1].max() + 1xi, yi = np.meshgrid(np.arange(x_min, x_max, 0.02),np.arange(y_min, y_max, 0.02))y_pred = clf.predict(np.c_[xi.ravel(), yi.ravel()])  # 模型预测值y_pred = y_pred.reshape(xi.shape)plt.contourf(xi, yi, y_pred, alpha=0.4)plt.scatter(X[:, 0], X[:, 1], alpha=0.8, c=y, edgecolors="k")plt.xlabel("Feature 1", fontdict={"fontsize": 12})plt.ylabel("Feature 2", fontdict={"fontsize": 12})if acc:if title_info:plt.title("Model Classification Boundary %s \n(accuracy = %.5f)"% (title_info, acc), fontdict={"fontsize": 14})else:plt.title("Model Classification Boundary (accuracy = %.5f)"% acc, fontdict={"fontsize": 14})else:if title_info:plt.title("Model Classification Boundary %s"% title_info, fontdict={"fontsize": 14})else:plt.title("Model Classification Boundary", fontdict={"fontsize": 14})if support_vectors is not None:  # 可视化支持向量,针对SVMplt.scatter(X[support_vectors, 0], X[support_vectors, 1],s=50, c="None", alpha=0.7, edgecolors="red")if is_show:plt.show()
四、熵计算的测试
test_entropy.py
import numpy as np
import pandas as pd
from utils.entropy_utils import EntropyUtils
from utils.data_bin_wrapper import DataBinsWrapperdata = pd.read_csv("data/watermelon.csv").iloc[:, 1:]
feat_names = data.columns[:6]
y = data.iloc[:, -1]
ent_obj = EntropyUtils()print("各特征的信息增益如下:")
for feat in feat_names:print(feat, ":", ent_obj.info_gain(data.loc[:, feat], y))print("=" * 60)
print("各特征的信息增益率如下:")
for feat in feat_names:print(feat, ":", ent_obj.info_gain_rate(data.loc[:, feat], y))print("=" * 60)
print("各特征的基尼指数增益如下:")
for feat in feat_names:print(feat, ":", ent_obj.gini_gain(data.loc[:, feat], y))print("=" * 60)
x1 = np.asarray(data.loc[:, ["密度", "含糖率"]])
print(x1)
dbw = DataBinsWrapper(max_bins=8)
dbw.fit(x1)
print(dbw.transform(x1))
五、树的结点信息封装
tree_node.py
class TreeNode_C:"""决策树分类算法,树的结点信息封装,实体类:setXXX()、getXXX()"""def __init__(self, feature_idx: int = None, feature_val=None, criterion_val: float = None,n_samples: int = None, target_dist: dict = None, weight_dist: dict = None,left_child_Node=None, right_child_Node=None):"""决策树结点信息封装:param feature_idx: 特征索引,如果指定特征属性的名称,可以按照索引取值:param feature_val: 特征取值:param criterion_val: 划分结点的标准:信息增益(率)、基尼指数增益:param n_samples: 当前结点所包含的样本量:param target_dist: 当前结点类别分布:0-25%,1-50%,2-25%:param weight_dist: 当前结点所包含的样本权重分布:param left_child_Node: 左子树:param right_child_Node: 右子树"""self.feature_idx = feature_idxself.feature_val = feature_valself.criterion_val = criterion_valself.n_samples = n_samplesself.target_dist = target_distself.weight_dist = weight_distself.left_child_Node = left_child_Node # 递归self.right_child_Node = right_child_Node # 递归def level_order(self):"""按层次遍历树...:return:"""pass# def get_feature_idx(self):# return self.get_feature_idx()## def set_feature_idx(self, feature_idx):# self.feature_idx = feature_idx六、分类决策树算法的实现
decision_tree_C.py
import numpy as np
from utils.entropy_utils import EntropyUtils
from utils.tree_node import TreeNode_C
from utils.data_bin_wrapper import DataBinsWrapperclass DecisionTreeClassifier:"""分类决策树算法实现:无论是ID3、C4.5或CART,统一按照二叉树构造1. 划分标准:信息增益(率)、基尼指数增益,都按照最大值选择特征属性2. 创建决策树fit(),递归算法实现,注意出口条件3. 预测predict_proba()、predict() --> 对树的搜索4. 数据的预处理操作,尤其是连续数据的离散化,分箱5. 剪枝处理"""def __init__(self, criterion="CART", is_feature_all_R=False, dbw_feature_idx=None,max_depth=None, min_sample_split=2, min_sample_leaf=1,min_impurity_decrease=0, max_bins=10):self.utils = EntropyUtils()  # 结点划分类self.criterion = criterion  # 结点的划分标准if criterion.lower() == "cart":self.criterion_func = self.utils.gini_gain  # 基尼指数增益elif criterion.lower() == "c45":self.criterion_func = self.utils.info_gain_rate  # 信息增益率elif criterion.lower() == "id3":self.criterion_func = self.utils.info_gain  # 信息增益else:raise ValueError("参数criterion仅限cart、c45或id3...")self.is_feature_all_R = is_feature_all_R  # 所有样本特征是否全是连续数据self.dbw_feature_idx = dbw_feature_idx  # 混合类型数据,可指定连续特征属性的索引self.max_depth = max_depth  # 树的最大深度,不传参,则一直划分下去self.min_sample_split = min_sample_split  # 最小的划分结点的样本量,小于则不划分self.min_sample_leaf = min_sample_leaf  # 叶子结点所包含的最小样本量,剩余的样本小于这个值,标记叶子结点self.min_impurity_decrease = min_impurity_decrease  # 最小结点不纯度减少值,小于这个值,不足以划分self.max_bins = max_bins  # 连续数据的分箱数,越大,则划分越细self.root_node: TreeNode_C() = None  # 分类决策树的根节点self.dbw = DataBinsWrapper(max_bins=max_bins)  # 连续数据离散化对象self.dbw_XrangeMap = {}  # 存储训练样本连续特征分箱的端点self.class_values = None  # 样本的类别取值def _data_bin_wrapper(self, x_samples):"""针对特定的连续特征属性索引dbw_feature_idx,分别进行分箱,考虑测试样本与训练样本使用同一个XrangeMap:param x_samples: 样本:即可以是训练样本,也可以是测试样本:return:"""self.dbw_feature_idx = np.asarray(self.dbw_feature_idx)x_samples_prop = []  # 分箱之后的数据if not self.dbw_XrangeMap:# 为空,即创建决策树前所做的分箱操作for i in range(x_samples.shape[1]):if i in self.dbw_feature_idx:  # 说明当前特征是连续数值self.dbw.fit(x_samples[:, i])self.dbw_XrangeMap[i] = self.dbw.XrangeMapx_samples_prop.append(self.dbw.transform(x_samples[:, i]))else:x_samples_prop.append(x_samples[:, i])else:  # 针对测试样本的分箱操作for i in range(x_samples.shape[1]):if i in self.dbw_feature_idx:  # 说明当前特征是连续数值x_samples_prop.append(self.dbw.transform(x_samples[:, i], self.dbw_XrangeMap[i]))else:x_samples_prop.append(x_samples[:, i])return np.asarray(x_samples_prop).Tdef fit(self, x_train, y_train, sample_weight=None):"""决策树的创建,递归操作前的必要信息处理:param x_train: 训练样本:ndarray,n * k:param y_train: 目标集:ndarray,(n, ):param sample_weight: 各样本的权重,(n, ):return:"""x_train, y_train = np.asarray(x_train), np.asarray(y_train)self.class_values = np.unique(y_train)  # 样本的类别取值n_samples, n_features = x_train.shape  # 训练样本的样本量和特征属性数目if sample_weight is None:sample_weight = np.asarray([1.0] * n_samples)self.root_node = TreeNode_C()  # 创建一个空树if self.is_feature_all_R:  # 全部是连续数据self.dbw.fit(x_train)x_train = self.dbw.transform(x_train)elif self.dbw_feature_idx:x_train = self._data_bin_wrapper(x_train)self._build_tree(1, self.root_node, x_train, y_train, sample_weight)# print(x_train)def _build_tree(self, cur_depth, cur_node: TreeNode_C, x_train, y_train, sample_weight):"""递归创建决策树算法,核心算法。按先序(中序、后序)创建的:param cur_depth: 递归划分后的树的深度:param cur_node: 递归划分后的当前根结点:param x_train: 递归划分后的训练样本:param y_train: 递归划分后的目标集合:param sample_weight: 递归划分后的各样本权重:return:"""n_samples, n_features = x_train.shape  # 当前样本子集中的样本量和特征属性数目target_dist, weight_dist = {}, {}  # 当前样本类别分布和权重分布  0-->30%,1-->70%class_labels = np.unique(y_train)  # 不同的类别值for label in class_labels:target_dist[label] = len(y_train[y_train == label]) / n_samplesweight_dist[label] = np.mean(sample_weight[y_train == label])cur_node.target_dist = target_distcur_node.weight_dist = weight_distcur_node.n_samples = n_samples# 递归出口判断if len(target_dist) <= 1:  # 所有的样本全属于同一个类别,递归出口1# 如果为0,则表示当前样本集合为空,递归出口3returnif n_samples < self.min_sample_split:  # 当前结点所包含的样本量不足以划分returnif self.max_depth is not None and cur_depth > self.max_depth:  # 树的深度达到最大深度return# 划分标准,选择最佳的划分特征及其取值best_idx, best_val, best_criterion_val = None, None, 0.0for k in range(n_features):  # 对当前样本集合中每个特征计算划分标准for f_val in np.unique(x_train[:, k]):  # 当前特征的不同取值feat_k_values = (x_train[:, k] == f_val).astype(int)  # 是当前取值f_val就是1,否则就是0criterion_val = self.criterion_func(feat_k_values, y_train, sample_weight)if criterion_val > best_criterion_val:best_criterion_val = criterion_val  # 最佳的划分标准值best_idx, best_val = k, f_val  # 当前最佳特征索引以及取值# 递归出口的判断if best_idx is None: # 当前属性为空,或者所有样本在所有属性上取值相同,无法划分returnif best_criterion_val <= self.min_impurity_decrease:  # 小于最小不纯度阈值,不划分returncur_node.criterion_val = best_criterion_valcur_node.feature_idx = best_idxcur_node.feature_val = best_val# print("当前划分的特征索引:", best_idx, "取值:", best_val, "最佳标准值:", best_criterion_val)# print("当前结点的类别分布:", target_dist)# 创建左子树,并递归创建以当前结点为子树根节点的左子树left_idx = np.where(x_train[:, best_idx] == best_val)  # 左子树所包含的样本子集索引if len(left_idx) >= self.min_sample_leaf:  # 小于叶子结点所包含的最少样本量,则标记为叶子结点left_child_node = TreeNode_C()  # 创建左子树空结点# 以当前结点为子树根结点,递归创建cur_node.left_child_Node = left_child_nodeself._build_tree(cur_depth + 1, left_child_node, x_train[left_idx],y_train[left_idx], sample_weight[left_idx])right_idx = np.where(x_train[:, best_idx] != best_val)  # 右子树所包含的样本子集索引if len(right_idx) >= self.min_sample_leaf:  # 小于叶子结点所包含的最少样本量,则标记为叶子结点right_child_node = TreeNode_C()  # 创建右子树空结点# 以当前结点为子树根结点,递归创建cur_node.right_child_Node = right_child_nodeself._build_tree(cur_depth + 1, right_child_node, x_train[right_idx],y_train[right_idx], sample_weight[right_idx])def _search_tree_predict(self, cur_node: TreeNode_C, x_test):"""根据测试样本从根结点到叶子结点搜索路径,判定类别搜索:按照后续遍历:param x_test: 单个测试样本:return:"""if cur_node.left_child_Node and x_test[cur_node.feature_idx] == cur_node.feature_val:return self._search_tree_predict(cur_node.left_child_Node, x_test)elif cur_node.right_child_Node and x_test[cur_node.feature_idx] != cur_node.feature_val:return self._search_tree_predict(cur_node.right_child_Node, x_test)else:# 叶子结点,类别,包含有类别分布# print(cur_node.target_dist)class_p = np.zeros(len(self.class_values))  # 测试样本的类别概率for i, c in enumerate(self.class_values):class_p[i] = cur_node.target_dist.get(c, 0) * cur_node.weight_dist.get(c, 1.0)class_p / np.sum(class_p)  # 归一化return class_pdef predict_proba(self, x_test):"""预测测试样本x_test的类别概率:param x_test: 测试样本ndarray、numpy数值运算:return:"""x_test = np.asarray(x_test)  # 避免传递DataFrame、list...if self.is_feature_all_R:if self.dbw.XrangeMap is not None:x_test = self.dbw.transform(x_test)else:raise ValueError("请先创建决策树...")elif self.dbw_feature_idx is not None:x_test = self._data_bin_wrapper(x_test)prob_dist = []  # 用于存储测试样本的类别概率分布for i in range(x_test.shape[0]):prob_dist.append(self._search_tree_predict(self.root_node, x_test[i]))return np.asarray(prob_dist)def predict(self, x_test):"""预测测试样本的类别:param x_test: 测试样本:return:"""x_test = np.asarray(x_test)  # 避免传递DataFrame、list...return np.argmax(self.predict_proba(x_test), axis=1)def _prune_node(self, cur_node: TreeNode_C, alpha):"""递归剪枝,针对决策树中的内部结点,自底向上,逐个考察方法:后序遍历:param cur_node: 当前递归的决策树的内部结点:param alpha: 剪枝阈值:return:"""# 若左子树存在,递归左子树进行剪枝if cur_node.left_child_Node:self._prune_node(cur_node.left_child_Node, alpha)# 若右子树存在,递归右子树进行剪枝if cur_node.right_child_Node:self._prune_node(cur_node.right_child_Node, alpha)# 针对决策树的内部结点剪枝,非叶结点if cur_node.left_child_Node is not None or cur_node.right_child_Node is not None:for child_node in [cur_node.left_child_Node, cur_node.right_child_Node]:if child_node is None:# 可能存在左右子树之一为空的情况,当左右子树划分的样本子集数小于min_samples_leafcontinueif child_node.left_child_Node is not None or child_node.right_child_Node is not None:return# 计算剪枝前的损失值,2表示当前结点包含两个叶子结点pre_prune_value = 2 * alphafor child_node in [cur_node.left_child_Node, cur_node.right_child_Node]:# 计算左右叶子结点的经验熵  if child_node is None:# 可能存在左右子树之一为空的情况,当左右子树划分的样本子集数小于min_samples_leafcontinuefor key, value in child_node.target_dist.items():  # 对每个叶子结点的类别分布pre_prune_value += -1 * child_node.n_samples * value * np.log(value) * \child_node.weight_dist.get(key, 1.0)# 计算剪枝后的损失值,当前结点即是叶子结点after_prune_value = alphafor key, value in cur_node.target_dist.items():  # 当前待剪枝的结点的类别分布after_prune_value += -1 * cur_node.n_samples * value * np.log(value) * \cur_node.weight_dist.get(key, 1.0)if after_prune_value <= pre_prune_value:  # 进行剪枝操作cur_node.left_child_Node = Nonecur_node.right_child_Node = Nonecur_node.feature_idx, cur_node.feature_val = None, Nonedef prune(self, alpha=0.01):"""决策树后剪枝算法(李航)C(T) + alpha * |T|:param alpha: 剪枝阈值,权衡模型对训练数据的拟合程度与模型的复杂度:return:"""self._prune_node(self.root_node, alpha)return self.root_node
七、分类决策树算法的测试
test_decision_tree_C.py
import pandas as pd
from decision_tree_C import DecisionTreeClassifier
from sklearn.datasets import load_iris, load_breast_cancer
from sklearn.model_selection import train_test_split
from sklearn.metrics import classification_report, accuracy_score
import numpy as np
import matplotlib.pyplot as plt
from sklearn.preprocessing import LabelEncoder# data = pd.read_csv("data/watermelon.csv").iloc[:, 1:]
# X = data.iloc[:, :-1]
# y = data.iloc[:, -1]# iris = load_iris()
# X, y = iris.data, iris.target# bc_data = load_breast_cancer()
# X, y = bc_data.data, bc_data.targetnursery = pd.read_csv("data/nursery.csv").dropna()
X, y = np.asarray(nursery.iloc[:, :-1]), np.asarray(nursery.iloc[:, -1])y = LabelEncoder().fit_transform(y)X_train, X_test, y_train, y_test = train_test_split(X, y, test_size=0.2, random_state=0, stratify=y)depth = np.linspace(2, 12, 11, dtype=np.int64)
accuracy = []for d in depth:dtc = DecisionTreeClassifier(is_feature_all_R=False, max_depth=d)dtc.fit(X_train, y_train)y_pred_labels = dtc.predict(X_test)acc = accuracy_score(y_test, y_pred_labels)# print(acc)accuracy.append(acc)
# dtc = DecisionTreeClassifier(dbw_feature_idx=[6, 7], max_bins=8, max_depth=2)
# dtc.fit(X, y)
# y_pred_prob = dtc.predict_proba(X)
# print(y_pred_prob)# print(classification_report(y_test, y_pred_labels))plt.figure(figsize=(7, 5))
plt.plot(depth, accuracy, "ko-", lw=1)
plt.show()
test_decision_tree_C_2.py
import numpy as np
import matplotlib.pyplot as plt
from decision_tree_C import DecisionTreeClassifier
from sklearn.datasets import make_classification
from sklearn.metrics import classification_report, accuracy_score
from utils.plt_decision_function import plot_decision_function# 生成数据
data, target = make_classification(n_samples=100, n_features=2, n_classes=2, n_informative=1, n_redundant=0,n_clusters_per_class=1, class_sep=0.8, random_state=21)
# print(data)
# print(target)cart_tree = DecisionTreeClassifier(is_feature_all_R=True)
cart_tree.fit(data, target)
y_test_pred = cart_tree.predict(data)
print(classification_report(target, y_test_pred))
plt.figure(figsize=(14, 10))
plt.subplot(221)
acc = accuracy_score(target, y_test_pred)
plot_decision_function(data, target, cart_tree, acc=acc, is_show=False, title_info="By CART UnPrune")# 剪枝处理
alpha = [1, 3, 5]
for i in range(3):cart_tree.prune(alpha=alpha[i])y_test_pred = cart_tree.predict(data)acc = accuracy_score(target, y_test_pred)plt.subplot(222 + i)plot_decision_function(data, target, cart_tree, acc=acc, is_show=False,title_info="By CART Prune α = %.1f" % alpha[i])
plt.tight_layout()
plt.show()

test_decision_tree_C_3.py
import copyimport numpy as np
import matplotlib.pyplot as plt
from decision_tree_C import DecisionTreeClassifier
from sklearn.datasets import load_breast_cancer, load_iris
from sklearn.metrics import classification_report, accuracy_score
from utils.plt_decision_function import plot_decision_function
from sklearn.model_selection import StratifiedKFoldbc_data = load_breast_cancer()
X, y = bc_data.data, bc_data.target
alphas = np.linspace(0, 10, 30)
accuracy_scores = []  # 存储每个alpha阈值下的交叉验证均分
cart = DecisionTreeClassifier(criterion="cart", is_feature_all_R=True, max_bins=10)
for alpha in alphas:scores = []k_fold = StratifiedKFold(n_splits=10).split(X, y)for train_idx, test_idx in k_fold:tree = copy.deepcopy(cart)tree.fit(X[train_idx], y[train_idx])tree.prune(alpha=alpha)y_test_pred = tree.predict(X[test_idx])scores.append(accuracy_score(y[test_idx], y_test_pred))del treeprint(alpha, ":", np.mean(scores))accuracy_scores.append(np.mean(scores))plt.figure(figsize=(7, 5))
plt.plot(alphas, accuracy_scores, "ko-", lw=1)
plt.grid(ls=":")
plt.xlabel("Alpha", fontdict={"fontsize": 12})
plt.ylabel("Accuracy Scores", fontdict={"fontsize": 12})
plt.title("Cross Validation Scores under different Prune Alpha", fontdict={"fontsize": 14})
plt.show()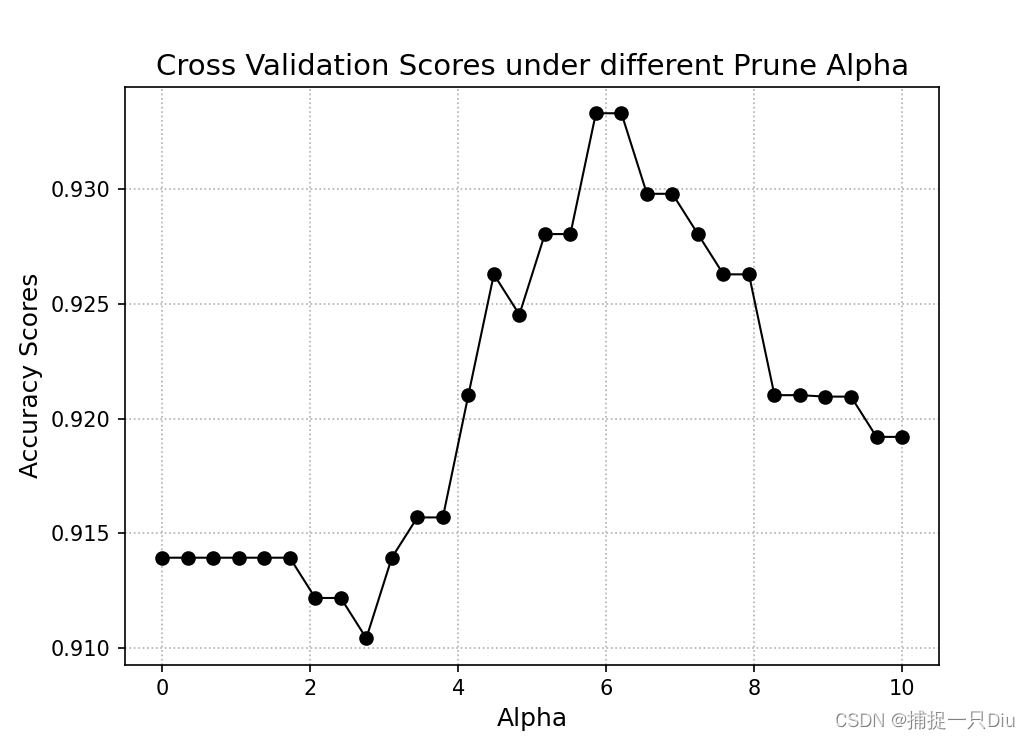
相关文章:
机器学习:分类决策树(Python)
一、各种熵的计算 entropy_utils.py import numpy as np # 数值计算 import math # 标量数据的计算class EntropyUtils:"""决策树中各种熵的计算,包括信息熵、信息增益、信息增益率、基尼指数。统一要求:按照信息增益最大、信息增益率…...

红队打靶练习:HACK ME PLEASE: 1
信息收集 1、arp ┌──(root㉿ru)-[~/kali] └─# arp-scan -l Interface: eth0, type: EN10MB, MAC: 00:0c:29:69:c7:bf, IPv4: 192.168.61.128 Starting arp-scan 1.10.0 with 256 hosts (https://github.com/royhills/arp-scan) 192.168.61.2 00:50:56:f0:df:20 …...

《VulnHub》GoldenEye:1
title: 《VulnHub》GoldenEye:1 date: 2024-02-16 14:53:49 updated: 2024-02-16 15:08:49 categories: WriteUp:Cyber-Range excerpt: 主机发现、目标信息扫描、源码 js 文件泄露敏感信息、hydra 爆破邮件服务(pop3)、邮件泄露敏…...
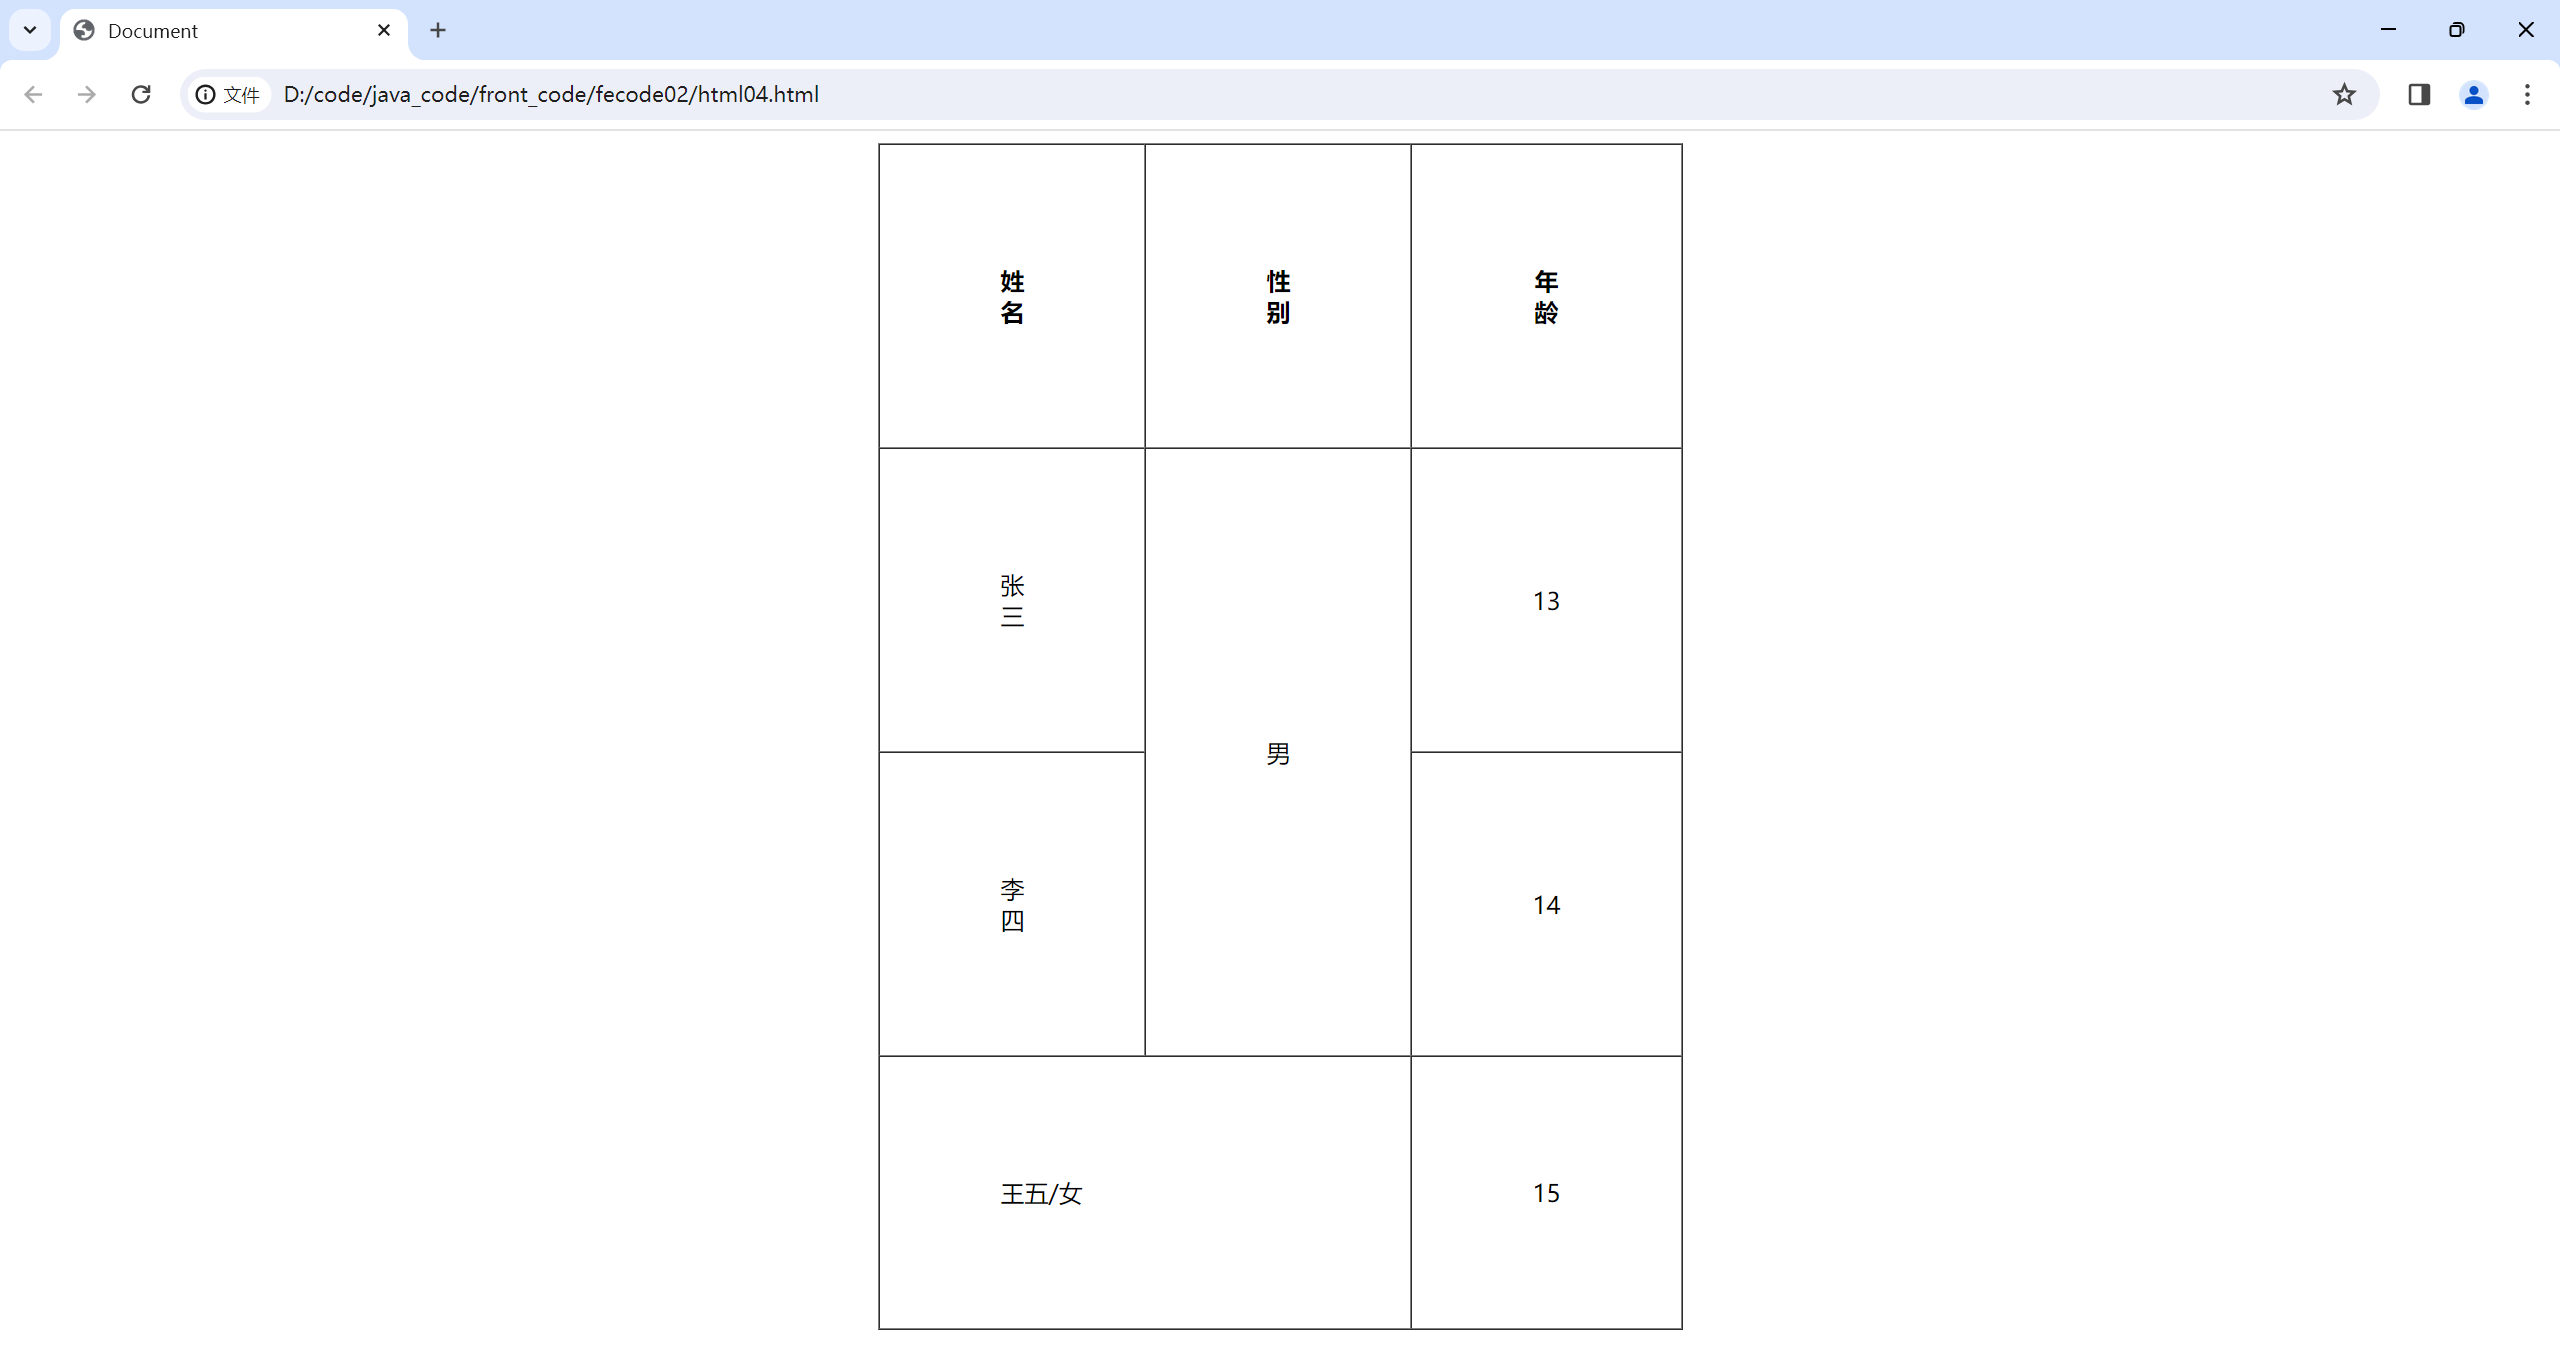
html的表格标签
html的表格标签 table标签:表示整个表格tr:表示表格的一行td:表示一个单元格th:表示表头单元格.会居中加粗thead:表格的头部区域 (注意和th区分,范围是比th要大的).tbody:表格得到主体区域. table包含tr , tr包含td或者th. 表格标签有一些属性,可以用于设置大小边…...
2022省赛真题:展开你的扇子)
蓝桥杯(Web大学组)2022省赛真题:展开你的扇子
思路: transform-origin: center bottom;使盒子旋转时,以底部的中心为坐标原点(题目已给出) 对每个盒子使用transform: rotate();实现旋转 笔记: 设置悬浮旋转时, #box div:hover #item6{ } 为什…...
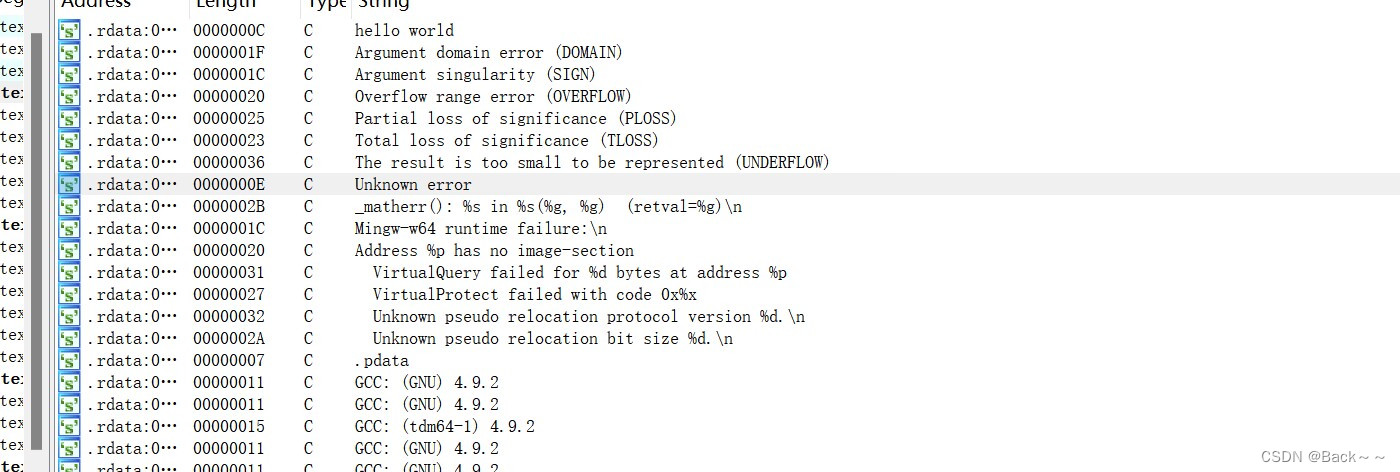
复习基础知识1
局部变量 写程序时,程序员经常会用到局部变量 汇编中寄存器、栈,可写区段、堆,函数的局部变量该存在哪里呢? 注意:局部变量有易失性 一旦函数返回,则所有局部变量会失效。 考虑到这种特性,人们…...

java8-用流收集数据-6
本章内容口用co1lectors类创建和使用收集器 口将数据流归约为一个值 口汇总:归约的特殊情况 数据分组和分区口 口 开发自己的自定义收集器 我们在前一章中学到,流可以用类似于数据库的操作帮助你处理集合。你可以把Java8的流看作花哨又懒惰的数据集迭代器。它们…...

[前端开发] JavaScript基础知识 [上]
下篇:JavaScript基础知识 [下] JavaScript基础知识 [上] 引言语句、标识符和变量JavaScript引入注释与输出数据类型运算符条件语句与循环语句 引言 JavaScript是一种广泛应用于网页开发的脚本语言,具有重要的前端开发和部分后端开发的应用。通过JavaSc…...

初识Qt | 从安装到编写Hello World程序
文章目录 1.前端开发简单分类2.Qt的简单介绍3.Qt的安装和环境配置4.创建简单的Qt项目 1.前端开发简单分类 前端开发,这里是一个广义的概念,不单指网页开发,它的常见分类 网页开发:前端开发的主要领域,使用HTML、CSS …...
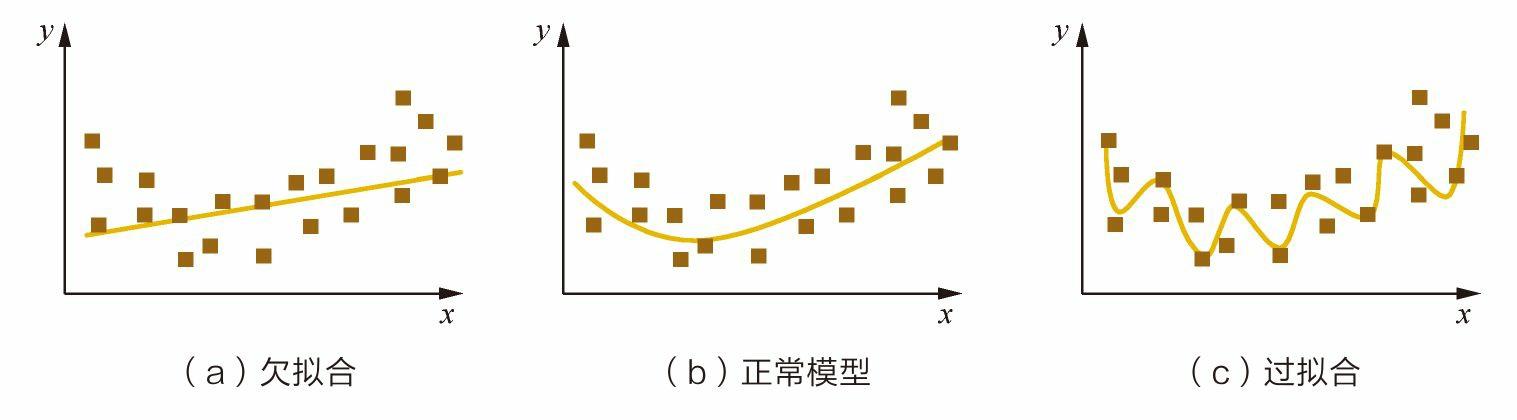
机器学习:过拟合和欠拟合的介绍与解决方法
过拟合和欠拟合的表现和解决方法。 其实除了欠拟合和过拟合,还有一种是适度拟合,适度拟合就是我们模型训练想要达到的状态,不过适度拟合这个词平时真的好少见。 过拟合 过拟合的表现 模型在训练集上的表现非常好,但是在测试集…...
变分自编码器(VAE)PyTorch Lightning 实现
✅作者简介:人工智能专业本科在读,喜欢计算机与编程,写博客记录自己的学习历程。 🍎个人主页:小嗷犬的个人主页 🍊个人网站:小嗷犬的技术小站 🥭个人信条:为天地立心&…...

设备驱动开发_1
可加载模块如何工作的 主要内容 描述可加载模块优势使用模块命令效率使用和定义模块密钥和模块工作1 描述可加载模块优势 开发周期优势: 静态模块在/boot下的vmlinuz中,需要配置、编译、重启。 开发周期长。 LKM 不需要重启。 开发周期优于静态模块。 2 使用模块命令效率…...
知识点精要解析)
C语言位域(Bit Fields)知识点精要解析
在C语言中,位域(Bit Field)是一种独特的数据结构特性,它允许程序员在结构体(struct)中定义成员变量,并精确指定其占用的位数。通过使用位域,我们可以更高效地利用存储空间࿰…...

离散数学——图论(笔记及思维导图)
离散数学——图论(笔记及思维导图) 目录 大纲 内容 参考 大纲 内容 参考 笔记来自【电子科大】离散数学 王丽杰...

opencv图像像素的读写操作
void QuickDemo::pixel_visit_demo(Mat & image) {int w image.cols;//宽度int h image.rows;//高度int dims image.channels();//通道数 图像为灰度dims等于一 图像为彩色时dims等于三 for (int row 0; row < h; row) {for (int col 0; col < w; col) {if…...

Java学习第十四节之冒泡排序
冒泡排序 package array;import java.util.Arrays;//冒泡排序 //1.比较数组中,两个相邻的元素,如果第一个数比第二个数大,我们就交换他们的位置 //2.每一次比较,都会产生出一个最大,或者最小的数字 //3.下一轮则可以少…...

第1章 计算机网络体系结构-1.1计算机网络概述
1.1.1计算机网络概念 计算机网络是将一个分散的,具有独立功能的计算机系统通过通信设备与路线连接起来,由功能完善的软件实现资源共享和信息传递的系统。(计算机网络就是一些互连的,自治的计算机系统的集合) 1.1.2计算机网络的组成 从不同角…...
蓝桥杯:C++排序
排序 排序和排列是算法题目常见的基本算法。几乎每次蓝桥杯软件类大赛都有题目会用到排序或排列。常见的排序算法如下。 第(3)种排序算法不是基于比较的,而是对数值按位划分,按照以空间换取时间的思路来排序。看起来它们的复杂度更好,但实际…...
数据结构-堆
1.容器 容器用于容纳元素集合,并对元素集合进行管理和维护. 传统意义上的管理和维护就是:增,删,改,查. 我们分析每种类型容器时,主要分析其增,删,改ÿ…...
奔跑吧小恐龙(Java)
前言 Google浏览器内含了一个小彩蛋当没有网络连接时,浏览器会弹出一个小恐龙,当我们点击它时游戏就会开始进行,大家也可以玩一下试试,网址:恐龙快跑 - 霸王龙游戏. (ur1.fun) 今天我们也可以用Java来简单的实现一下这…...

Unity加载倾斜摄影模型踩坑记:从3MX/OSGB文件到流畅渲染,我解决了这几个问题
Unity倾斜摄影模型加载实战:从3MX/OSGB到跨平台渲染的深度解决方案 第一次在Unity中加载倾斜摄影模型时,那种期待和忐忑交织的心情至今难忘。作为智慧城市项目的核心展示环节,我们需要将航拍生成的3MX和OSGB格式模型无缝集成到Unity场景中。本…...

【NotebookLM戏剧研究辅助实战指南】:20年戏剧学者亲授AI赋能文本细读的5大黄金工作流
更多请点击: https://intelliparadigm.com 第一章:NotebookLM戏剧研究辅助的底层逻辑与学科适配性 NotebookLM 以“语义锚点驱动”为核心机制,将用户上传的原始文本(如莎士比亚手稿影印本OCR结果、梅兰芳口述史转录稿、《奥尼尔书…...

更换背景图用什么工具?8个月来我测试过50+款产品,这是真实体验分享
买了新手机,想给证件照换个背景;电商运营需要批量处理商品图;自媒体博主要给头像去个背景……这些场景下,"更换背景图用什么工具"可能是你Google搜索框里最常打的一句话。说实话,这个问题看似简单࿰…...

魔兽争霸III终极优化指南:7个实用方案让经典游戏完美适配现代硬件
魔兽争霸III终极优化指南:7个实用方案让经典游戏完美适配现代硬件 【免费下载链接】WarcraftHelper Warcraft III Helper , support 1.20e, 1.24e, 1.26a, 1.27a, 1.27b 项目地址: https://gitcode.com/gh_mirrors/wa/WarcraftHelper 魔兽争霸III作为一款经典…...

2026年公司文化专题片拍摄公司排行榜:行业深度解析
引言随着企业对品牌传播和文化建设的重视程度不断提升,公司文化专题片成为展示企业形象、传递核心价值观的重要手段。越来越多的企业开始关注如何通过高质量的专题片来提升品牌形象和企业文化影响力。本文将深入分析2026年公司文化专题片拍摄行业的趋势,…...

Claude Code Skill 最佳实践:5 分钟封一个,6 条要点 + 团队共享
👉 这是一个或许对你有用的社群🐱 一对一交流/面试小册/简历优化/求职解惑,欢迎加入「芋道快速开发平台」知识星球。下面是星球提供的部分资料: 《项目实战(视频)》:从书中学,往事上…...

设计师核心能力框架:从思维策略到工程落地的系统化成长路径
1. 项目概述:一个设计师的“内功”修炼场如果你是一名设计师,或者对设计工作感兴趣,那么你一定有过这样的时刻:面对一个设计任务,脑子里有无数想法,但打开软件却不知从何下手;或者看到别人的优秀…...

量子电路反编译技术:原理、实现与应用
1. 量子电路反编译技术概述量子计算领域近年来快速发展,但量子算法的可解释性始终是一个关键挑战。当我们面对一段量子汇编代码(QASM)时,往往难以直观理解其对应的算法逻辑。这就如同拿到一段机器码却不知道它实现的是什么功能。量子电路反编译技术正是为…...

AI行业的“新风口”:大模型时代下AI从业者的职业新机遇
在AI大模型技术飞速发展的当下,全球AI市场规模正以惊人速度扩张。据IDC预测,2025年全球AI大模型市场规模突破1200亿美元,中国占比超35%。这股浪潮不仅重塑了软件开发行业格局,也为软件测试从业者带来了前所未有的职业新机遇。对于…...

对比Taotoken与直接购买官方API在账单清晰度上的差异
🚀 告别海外账号与网络限制!稳定直连全球优质大模型,限时半价接入中。 👉 点击领取海量免费额度 对比Taotoken与直接购买官方API在账单清晰度上的差异 效果展示类,从个人开发者或小团队的实际使用经历出发,…...