View->Bitmap缩放到自定义ViewGroup的任意区域
Bitmap缩放和平移
- 加载一张
Bitmap可能为宽高相同的正方形,也可能为宽高不同的矩形 - 缩放方向可以为中心缩放,左上角缩放,右上角缩放,左下角缩放,右下角缩放
Bitmap中心缩放,包含了缩放和平移两个操作,不可拆开Bitmap其余四个方向的缩放,可以单独缩放不带平移,也可以缩放带平移
XML文件
<?xml version="1.0" encoding="utf-8"?>
<LinearLayout xmlns:android="http://schemas.android.com/apk/res/android"android:layout_width="match_parent"android:layout_height="match_parent"android:orientation="vertical"><com.yang.app.MyRelativeLayoutandroid:id="@+id/real_rl"android:layout_width="match_parent"android:layout_height="0dp"android:layout_weight="1"android:layout_marginTop="30dp"android:layout_marginBottom="30dp"android:layout_marginLeft="30dp"android:layout_marginRight="30dp"android:background="@color/gray"><com.yang.app.MyImageViewandroid:id="@+id/real_iv"android:layout_width="match_parent"android:layout_height="match_parent"android:layout_marginTop="30dp"android:layout_marginBottom="30dp"android:layout_marginLeft="30dp"android:layout_marginRight="30dp" /></com.yang.app.MyRelativeLayout><ImageViewandroid:layout_width="match_parent"android:layout_height="200dp"android:layout_weight="0"android:background="#00ff00" />
</LinearLayout>
Activity代码
const val TAG = "Yang"
class MainActivity : AppCompatActivity() {var mRealView : MyImageView ?= nullvar mRelativeLayout : MyRelativeLayout ?= nullvar tempBitmap : Bitmap ?= nullvar mHandler = Handler(Looper.getMainLooper())var screenWidth = 0var screenHeight = 0var srcRect = RectF()var destRect = RectF()override fun onCreate(savedInstanceState: Bundle?) {super.onCreate(savedInstanceState)setContentView(R.layout.activity_main)mRealView = findViewById(R.id.real_iv)mRelativeLayout = findViewById(R.id.real_rl)// 屏幕宽高的一半作为临时RectF, 用于压缩BitmapscreenWidth = resources.displayMetrics.widthPixelsscreenHeight = resources.displayMetrics.heightPixelsval tempRect = RectF(0f, 0f, screenWidth.toFloat() / 2, screenHeight.toFloat() / 2)CoroutineScope(Dispatchers.IO).launch {tempBitmap = getBitmap(resources, tempRect, R.drawable.fake)withContext(Dispatchers.Main) {mRelativeLayout?.post {// 获取初始区域的RectFsrcRect.set(0f,0f,mRelativeLayout?.width?.toFloat()!!,mRelativeLayout?.height?.toFloat()!!)// 获取结束区域的RectFmRelativeLayout?.forEach { childView ->if (childView is MyImageView) {destRect.set(0f,0f,childView.width.toFloat(),childView.height.toFloat())}}scaleRectFun(tempBitmap, srcRect, destRect)}}}}fun scaleRectFun(tempBitmap: Bitmap?, srcRect : RectF, destRect: RectF){tempBitmap?.let { bitmap->mRelativeLayout?.setBitmap(bitmap)val animator = ValueAnimator.ofFloat(0f, 1f)animator.duration = 5000Lanimator.interpolator = DecelerateInterpolator()animator.addUpdateListener {val value = it.animatedValue as Float// 中心缩放mRelativeLayout?.setDestRectCenterWithTranslate(srcRect, destRect, value)// 左上角不带平移缩放// mRelativeLayout?.setDestRectLeftTopNoTranslate(srcRect, destRect, value)// 左上角平移缩放// mRelativeLayout?.setDestRectLeftTopWithTranslate(srcRect, destRect, value)// 右上角不带平移缩放// mRelativeLayout?.setDestRectRightTopNoTranslate(srcRect, destRect, value)// 右上角平移缩放// mRelativeLayout?.setDestRectRightTopWithTranslate(srcRect, destRect, value)// 左下角不带平移缩放// mRelativeLayout?.setDestRectLeftBottomNoTranslate(srcRect, destRect, value)// 左下角平移缩放// mRelativeLayout?.setDestRectLeftBottomWithTranslate(srcRect, destRect, value)// 右下角不带平移缩放// mRelativeLayout?.setDestRectRightBottomNoTranslate(srcRect, destRect, value)// 右下角平移缩放// mRelativeLayout?.setDestRectRightBottomWithTranslate(srcRect, destRect, value)}animator.start()}}
}
fun getBitmap(resources : Resources, destRect : RectF, imageId: Int): Bitmap? {var imageWidth = -1var imageHeight = -1val preOption = BitmapFactory.Options().apply {// 只获取图片的宽高inJustDecodeBounds = trueBitmapFactory.decodeResource(resources, imageId, this)}imageWidth = preOption.outWidthimageHeight = preOption.outHeight// 计算缩放比例val scaleMatrix = Matrix()// 确定未缩放Bitmap的RectFvar srcRect = RectF(0f, 0f, imageWidth.toFloat(), imageHeight.toFloat())// 通过目标RectF, 确定缩放数值,存储在scaleMatrix中scaleMatrix.setRectToRect(srcRect, destRect, Matrix.ScaleToFit.CENTER)// 缩放数值再映射到原始Bitmap上,得到缩放后的RectFscaleMatrix.mapRect(srcRect)val finalOption = BitmapFactory.Options().apply {if (imageHeight > 0 && imageWidth > 0) {inPreferredConfig = Bitmap.Config.RGB_565inSampleSize = calculateInSampleSize(imageWidth,imageHeight,srcRect.width().toInt(),srcRect.height().toInt())}}return BitmapFactory.decodeResource(resources, imageId, finalOption)
}fun calculateInSampleSize(fromWidth: Int, fromHeight: Int, toWidth: Int, toHeight: Int): Int {var bitmapWidth = fromWidthvar bitmapHeight = fromHeightif (fromWidth > toWidth|| fromHeight > toHeight) {var inSampleSize = 2// 计算最大的inSampleSize值,该值是2的幂,并保持原始宽高大于目标宽高while (bitmapWidth >= toWidth && bitmapHeight >= toHeight) {bitmapWidth /= 2bitmapHeight /= 2inSampleSize *= 2}return inSampleSize}return 1
}
自定义ViewGroup和View代码
class MyImageView @JvmOverloads constructor(context: Context, attrs: AttributeSet? = null, defStyleAttr: Int = 0
) : AppCompatImageView(context, attrs, defStyleAttr)class MyRelativeLayout @JvmOverloads constructor(context: Context, attrs: AttributeSet? = null, defStyleAttr: Int = 0
) : RelativeLayout(context, attrs, defStyleAttr) {var mBitmap : Bitmap ?= nullvar mScaleMatrix = Matrix()var mDestRect = RectF()fun setBitmap(bitmap: Bitmap?) {mBitmap = bitmap}override fun onDraw(canvas: Canvas?) {super.onDraw(canvas)mBitmap?.let {canvas?.drawBitmap(it, mScaleMatrix, Paint().apply {isAntiAlias = true})}}
}
中心缩放
ValueAnimator动画的初始值为0,开始区域为外层MyRelativeLayout区域,结束区域为内层MyImageView区域,缩放区域在这两个区域大小之间变化- 缩放比例取决于当前缩放区域
mDestRect和Bitmap宽高的最小宽高比
fun setDestRectCenterWithTranslate(srcRect: RectF, destRect: RectF, value : Float) {mDestRect = RectF(srcRect.left + (destRect.left - srcRect.left) * value,srcRect.top  + (destRect.top - srcRect.top) * value,srcRect.right + (destRect.right - srcRect.right) * value,srcRect.bottom + (destRect.bottom - srcRect.bottom) * value)val scale = Math.min(mDestRect.width() / mBitmap?.width!!, mDestRect.height() / mBitmap!!.height)val dx = (srcRect.width() - mBitmap?.width!! * scale) / 2val dy = (srcRect.height() - mBitmap?.height!! * scale) / 2mScaleMatrix.reset()mScaleMatrix.postScale(scale, scale)mScaleMatrix.postTranslate(dx, dy)invalidate()
}
- 中心缩放效果图

左上角缩放
- 左上角不带平移缩放
fun setDestRectLeftTopNoTranslate(srcRect: RectF, destRect: RectF, value : Float) {mDestRect = RectF(srcRect.left + (destRect.left - srcRect.left) * value,srcRect.top + (destRect.top - srcRect.top) * value,srcRect.right + (destRect.right - srcRect.right) * value,srcRect.bottom + (destRect.bottom - srcRect.bottom) * value)val scale = Math.min(mDestRect.width() / mBitmap?.width!!, mDestRect.height() / mBitmap!!.height)mScaleMatrix.setScale(scale, scale)invalidate()
}
-
左上角不带平移缩放效果图
-
左上角带平移缩放
fun setDestRectLeftTopWithTranslate(srcRect: RectF, destRect: RectF, value : Float) {mDestRect = RectF(srcRect.left + (destRect.left - srcRect.left) * value,srcRect.top + (destRect.top - srcRect.top) * value,srcRect.right + (destRect.right - srcRect.right) * value,srcRect.bottom + (destRect.bottom - srcRect.bottom) * value)val scale = Math.min(mDestRect.width() / mBitmap?.width!!, mDestRect.height() / mBitmap!!.height)val dx = ((srcRect.width() - destRect.width())/2) * value + (destRect.left - srcRect.left) * valueval dy = ((srcRect.height() - destRect.height())/2) * value + (destRect.top - srcRect.top) * valuemScaleMatrix.reset()mScaleMatrix.postScale(scale, scale)mScaleMatrix.postTranslate(dx, dy)invalidate()
}
- 左上角带平移缩放效果图

右上角缩放
- 右上角不带平移缩放
fun setDestRectRightTopNoTranslate(srcRect: RectF, destRect: RectF, value : Float) {mDestRect = RectF(srcRect.left  + (destRect.left - srcRect.left) * value,srcRect.top + (destRect.top - srcRect.top) * value,srcRect.right + (destRect.right - srcRect.right) * value,srcRect.bottom + (destRect.bottom - srcRect.bottom) * value)val scale = Math.min(mDestRect.width() / mBitmap?.width!!, mDestRect.height() / mBitmap!!.height)val dx = srcRect.width() - mBitmap!!.width * scaleval dy = 0fmScaleMatrix.reset()mScaleMatrix.postScale(scale, scale)mScaleMatrix.postTranslate(dx, dy)invalidate()
}
- 右上角不带平移缩放效果图
- 右上角带平移缩放
fun setDestRectRightTopWithTranslate(srcRect: RectF, destRect: RectF, value : Float) {mDestRect = RectF(srcRect.left  + (destRect.left - srcRect.left) * value,srcRect.top + (destRect.top - srcRect.top) * value,srcRect.right + (destRect.right - srcRect.right) * value,srcRect.bottom + (destRect.bottom - srcRect.bottom) * value)val scale = Math.min(mDestRect.width() / mBitmap?.width!!, mDestRect.height() / mBitmap!!.height)val dx = ((srcRect.width() - destRect.width())/2) * value + (destRect.left - srcRect.left) * valueval dy = ((srcRect.height() - destRect.height())/2) * value + (destRect.top - srcRect.top) * valuemScaleMatrix.reset()mScaleMatrix.postScale(scale, scale)mScaleMatrix.postTranslate(dx, dy)invalidate()
}
- 右上角不带平移缩放效果图
左下角缩放
- 左下角不带平移缩放
fun setDestRectLeftBottomNoTranslate(srcRect: RectF, destRect: RectF, value : Float) {mDestRect = RectF(srcRect.left + (destRect.left - srcRect.left) * value,srcRect.top  + (destRect.top - srcRect.top) * value,srcRect.right + (destRect.right - srcRect.right) * value,srcRect.bottom + (destRect.bottom - srcRect.bottom) * value)val scale = Math.min(mDestRect.width() / mBitmap?.width!!, mDestRect.height() / mBitmap!!.height)val dx = 0fval dy = srcRect.height() - mBitmap?.height!! * scalemScaleMatrix.reset()mScaleMatrix.postScale(scale, scale)mScaleMatrix.postTranslate(dx, dy)invalidate()
}
- 左下角不带平移缩放效果图

- 左下角平移缩放
fun setDestRectLeftBottomWithTranslate(srcRect: RectF, destRect: RectF, value : Float) {mDestRect = RectF(srcRect.left + (destRect.left - srcRect.left) * value,srcRect.top  + (destRect.top - srcRect.top) * value,srcRect.right + (destRect.right - srcRect.right) * value,srcRect.bottom + (destRect.bottom - srcRect.bottom) * value)val scale = Math.min(mDestRect.width() / mBitmap?.width!!, mDestRect.height() / mBitmap!!.height)val dx = ((srcRect.width() - destRect.width())/2 )* valueval dy = ((srcRect.height() - destRect.height())/2 )* value + (destRect.bottom - srcRect.bottom) * value + (srcRect.height()- mBitmap?.height!! * scale)mScaleMatrix.reset()mScaleMatrix.postScale(scale, scale)mScaleMatrix.postTranslate(dx, dy)invalidate()
}
- 左下角平移缩放效果图
右下角缩放
- 右下角不带平移缩放
fun setDestRectRightBottomNoTranslate(srcRect: RectF, destRect: RectF, value : Float) {mDestRect = RectF(srcRect.left + (destRect.left - srcRect.left) * value,srcRect.top  + (destRect.top - srcRect.top) * value,srcRect.right + (destRect.right - srcRect.right) * value,srcRect.bottom + (destRect.bottom - srcRect.bottom) * value)val scale = Math.min(mDestRect.width() / mBitmap?.width!!, mDestRect.height() / mBitmap!!.height)val dx = srcRect.width() - mBitmap!!.width * scaleval dy = srcRect.height() - mBitmap?.height!! * scalemScaleMatrix.reset()mScaleMatrix.postScale(scale, scale)mScaleMatrix.postTranslate(dx, dy)invalidate()
}
- 右下角不带平移缩放效果图
- 右下角平移缩放
fun setDestRectRightBottomWithTranslate(srcRect: RectF, destRect: RectF, value : Float) {mDestRect = RectF(srcRect.left + (destRect.left - srcRect.left) * value,srcRect.top  + (destRect.top - srcRect.top) * value,srcRect.right + (destRect.right - srcRect.right) * value,srcRect.bottom + (destRect.bottom - srcRect.bottom) * value)val scale = Math.min(mDestRect.width() / mBitmap?.width!!, mDestRect.height() / mBitmap!!.height)val dx = ((srcRect.width() - destRect.width())/2 )* valueval dy = ((srcRect.height() - destRect.height())/2 )* value + (destRect.bottom - srcRect.bottom) * value + (srcRect.height()- mBitmap?.height!! * scale)mScaleMatrix.reset()mScaleMatrix.postScale(scale, scale)mScaleMatrix.postTranslate(dx, dy)invalidate()
}
- 右下角平移缩放效果图
相关文章:
View->Bitmap缩放到自定义ViewGroup的任意区域
Bitmap缩放和平移 加载一张Bitmap可能为宽高相同的正方形,也可能为宽高不同的矩形缩放方向可以为中心缩放,左上角缩放,右上角缩放,左下角缩放,右下角缩放Bitmap中心缩放,包含了缩放和平移两个操作…...

十种常用数据分析方法
描述性统计分析(Descriptive Statistics) 使用场景:用来总结数据的基本特征,如平均值、中位数、标准差等。 优势:简单易懂,快速总结数据。 劣势:无法深入挖掘数据的潜在关系。 模拟数据及示例…...
拉格朗日插值及牛顿差商方法的实现(Matlab)
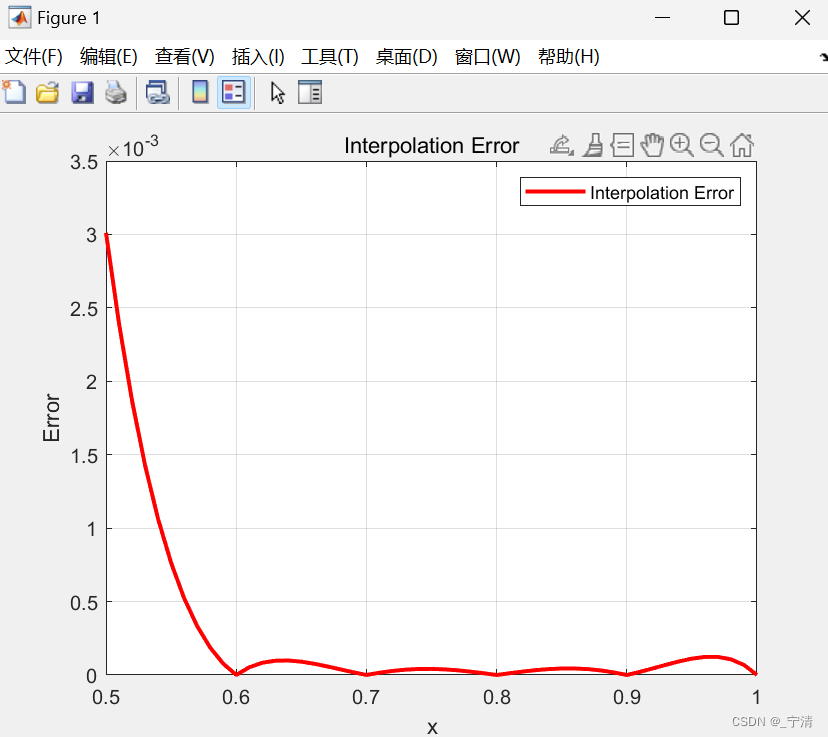
一、问题描述 拉格朗日插值及牛顿差商方法的实现。 二、实验目的 掌握拉格朗日插值和牛顿差商方法的原理,能够编写代码实现两种方法;能够分析多项式插值中的误差。 三、实验内容及要求 利用拉格朗日插值及牛顿差商方法估计1980 年的人口,并…...

【InternLM实战营第二期笔记】02:大模型全链路开源体系与趣味demo
文章目录 00 环境设置01 部署一个 chat 小模型作业一 02 Lagent 运行 InternLM2-chat-7B运行一个工具调用解方程 03 浦语灵笔2进阶作业 第二节课程视频与文档: https://www.bilibili.com/video/BV1AH4y1H78d/ https://github.com/InternLM/Tutorial/blob/camp2/hell…...

Postgresql源码(134)优化器针对volatile函数的排序优化分析
相关 《Postgresql源码(133)优化器动态规划生成连接路径的实例分析》 上一篇对路径的生成进行了分析,通过make_one_rel最终拿到了一个带着路径的RelOptInfo。本篇针对带volatile函数的排序场景继续分析subquery_planner的后续流程。 subquer…...

DES加密算法笔记
【DES加密算法|密码学|信息安全】https://www.bilibili.com/video/BV1KQ4y127AT?vd_source7ad69e0c2be65c96d9584e19b0202113 根据此视频学习 DES是对称密码中的分组加密算法 (分组加密对应流加密算法) 流加密算法就是一个字节一个字节加密 分组加…...
C语⾔:内存函数
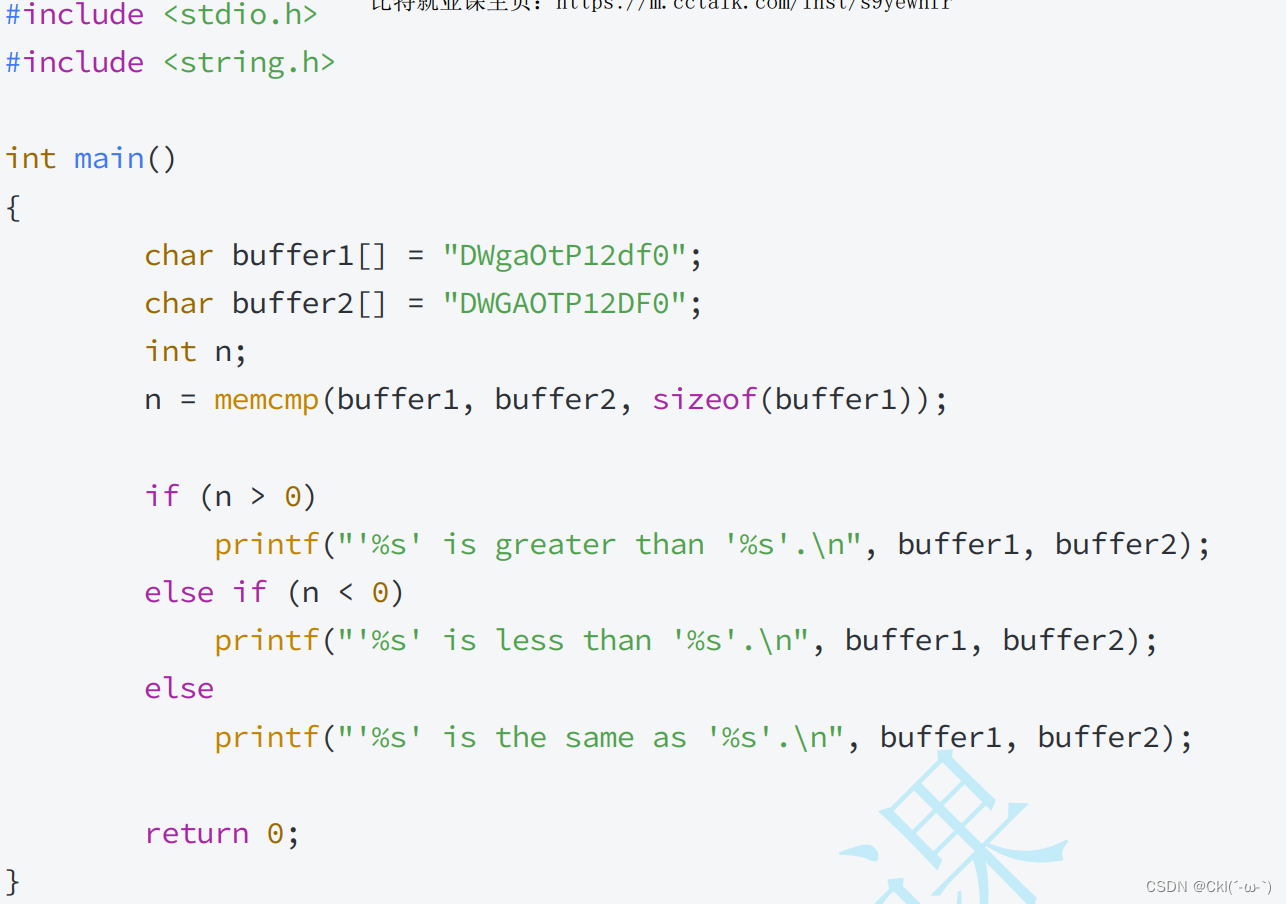
1. memcpy使⽤和模拟实现(对内存块的复制,不在乎类型) void * memcpy ( void * destination, const void * source, size_t num ); • 函数memcpy从source的位置开始向后复制num个字节的数据到destination指向的内存位置。 • 这个函数在遇…...
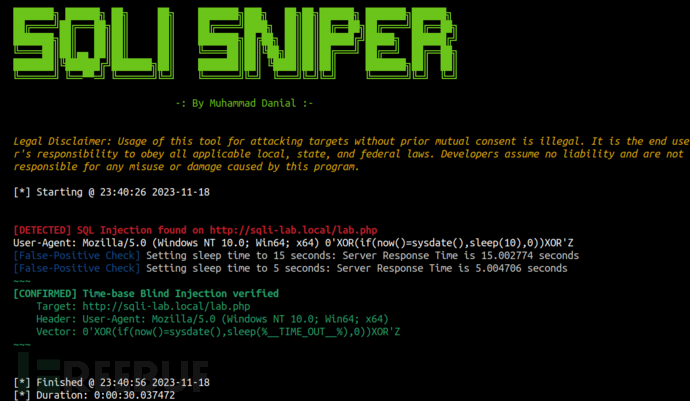
SqliSniper:针对HTTP Header的基于时间SQL盲注模糊测试工具
关于SqliSniper SqliSniper是一款基于Python开发的强大工具,该工具旨在检测HTTP请求Header中潜在的基于时间的SQL盲注问题。 该工具支持通过多线程形式快速扫描和识别目标应用程序中的潜在漏洞,可以大幅增强安全评估过程,同时确保了速度和效…...

3W 1.5KVDC 隔离 宽范围输入,双隔离双输出 DC/DC 电源模块——TPD-3W系列
TPD-3W系列产品是专门针对线路板上分布式电源系统中需要产生一组与输入电源隔离的双隔离双电源的应用场合而设计。该产品适用于:1)输入电源的电压变化范围≤2:1 ;2)输入输出之间要求隔离≤1500VDC;3&#x…...
[java基础揉碎]文件IO流
目录 文件 什么是文件 文件流编辑 常用的文件操作 创建文件方式一 创建文件方式二 创建文件方式三 tip:为什么new file 了还有执行createNewFile?new File的时候其实是在内存中创建了文件对象, 还没有在磁盘中, 当执行createNewFile的时候才是往磁盘中写入编辑 …...
)
[面经] 西山居非正式面试(C++)
前言 这次面试是我第一次面试,而且我也并没有做好准备,应该说几乎就是临场发挥,面试的时间与我推测的相差太大,几乎就是做完简历的下一天就马上去面试了,有不少地方自己没能很好的答出,故做此记录。 关于…...
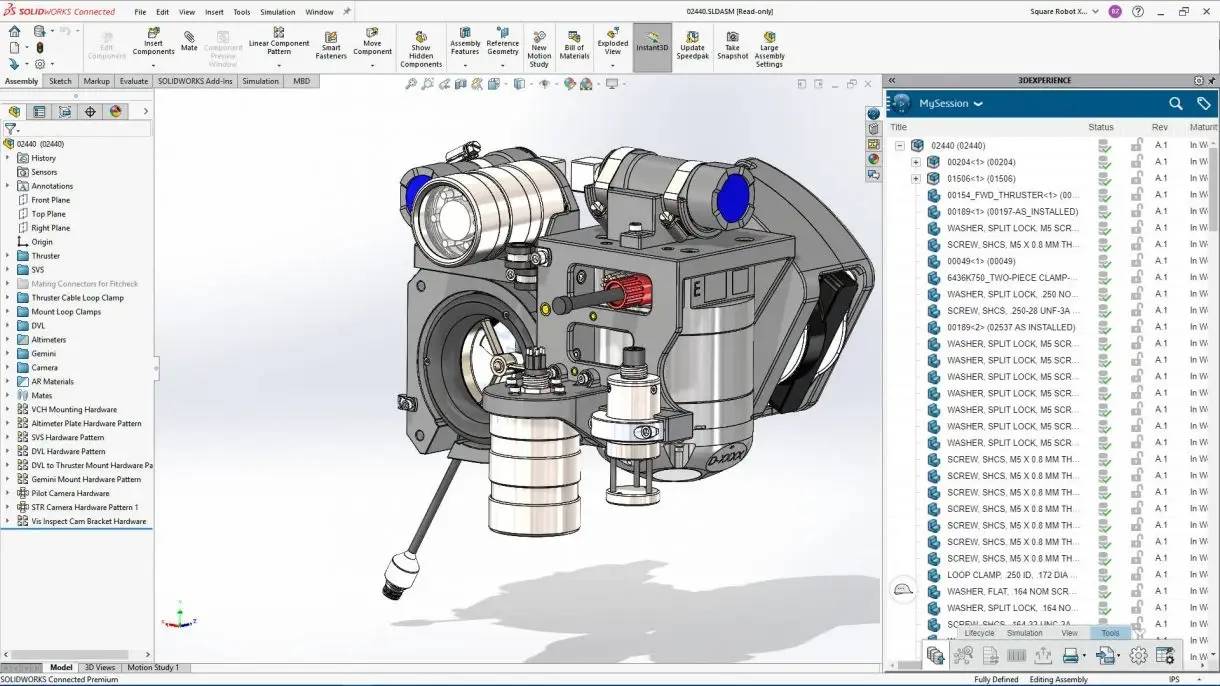
SOLIDWORKS教育版代理商应该如何选择?
SOLIDWORKS作为目前流行的三维设计软件在工程设计,制造和建筑中有着广泛的应用前景。教育版SOLIDWORKS软件是学生及教育机构学习教学的理想平台。 下面介绍几个挑选SOLIDWORKS教育版代理的关键要素: 1、专业知识与经验:代理商应掌握SOLIDWORKS等软件的丰…...
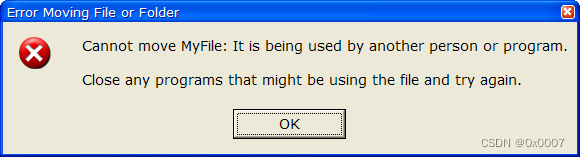
翻译《Use FILE_SHARE_DELETE in your shell extension》
在写 《翻译《The Old New Thing》- What did MakeProcInstance do?》 文章时,了解到了 Michael Geary ,他也有不少优秀的技术文章,现翻译一篇关于文件操作的细节的文章 原文 Use FILE_SHARE_DELETE in your shell extension | mg.tohttps:…...

使用Python发送电子邮件
大家好,当我们需要迅速、方便地与他人沟通时,电子邮件是无疑是一种不可或缺的通信工具。无论是在个人生活中还是工作场合,电子邮件都是我们日常生活中的重要组成部分。它不仅能够传递文字信息,还可以发送附件、链接和嵌入式多媒体…...
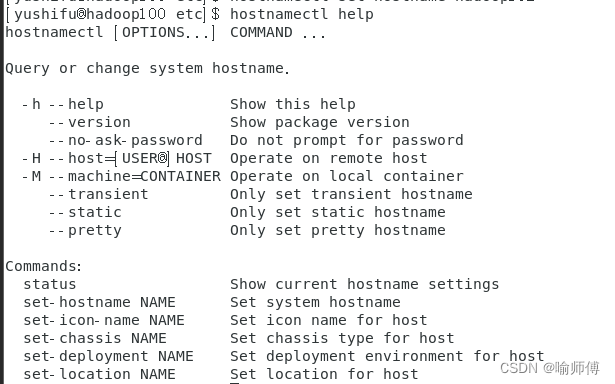
Linux-CentOS7-解决vim修改不了主机名称(无法打开并写入文件)
Linux-CentOS7-修改主机名称 修改之后使用强制保存退出也不行。 解决办法: 使用hostnamectl命令进行修改 查看系统主机名和信息: hostnamectl这条命令会显示当前系统的主机名、操作系统信息、内核版本、架构信息等相关信息。 修改系统主机名࿱…...

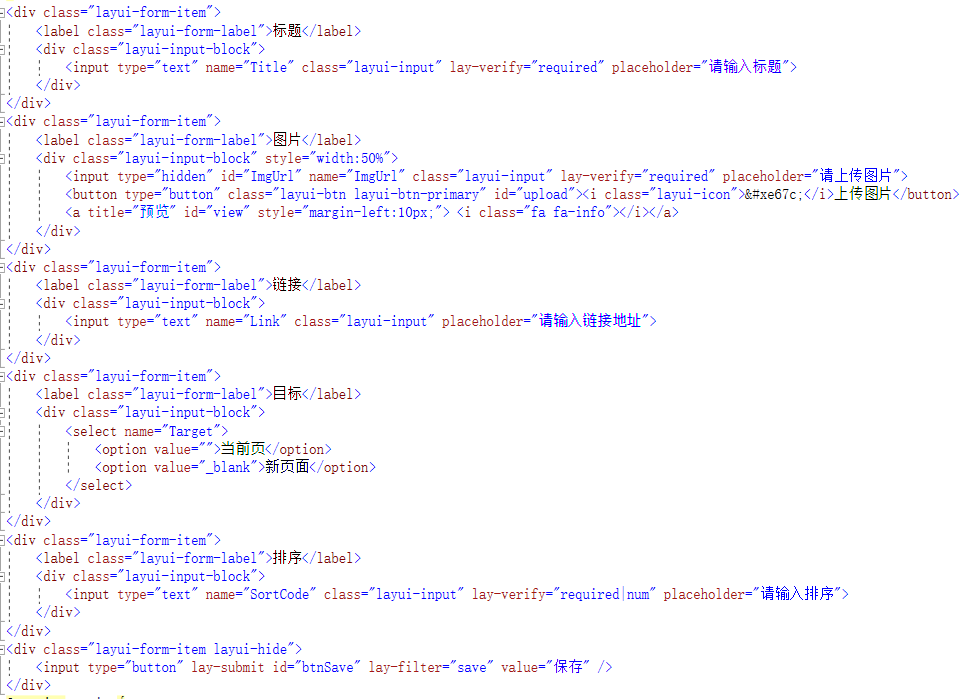
【RuoYi】使用代码生成器完成CRUD操作
一、前言 前面,介绍了如何下载和启动我们的RuoYi框架。为了让小伙伴们认识到ruoyi的强大,那么这篇博客就介绍一下如何使用ruoyi的代码生成器,自动生成前端页面以及后端的对应数据库表的CRUD操作!!!真的很强…...

七个很酷的GenAI LLM技术性面试问题
不同于互联网上随处可见的传统问题库,这些问题需要跳出常规思维。 大语言模型(LLM)在数据科学、生成式人工智能(GenAI)和人工智能领域越来越重要。这些复杂的算法提升了人类的技能,并在诸多行业中推动了效率和创新性的提升,成为企业保持竞争…...

SARscape雷达图像处理软件简介
合成孔径雷达(SAR)拥有独特的技术魅力和优势,渐成为国际上的研究热点之一,其应用领域越来越广泛。SAR数据可以全天候对研究区域进行量测、分析以及获取目标信息。高级雷达图像处理工具SARscape,能让您轻松将原始SAR数据…...
开源博客项目Blog .NET Core源码学习(23:App.Hosting项目结构分析-11)
本文学习并分析App.Hosting项目中后台管理页面的标签管理页面、轮播图维护页面。 标签管理页面 标签管理页面用于显示、检索、新建、编辑、删除标签数据,以便在前台页面的首页及文章专栏等页面显示标签数据。标签管理页面附带一新建及编辑页面,以支撑新…...

一.ffmpeg 将内存中的H264跟PCM 数据流合成多媒体文件
在有一些嵌入式平台中,H264数据流一般来自芯片内部的硬编码器, AAC音频数据则是通过采集PCM进行软编码,但是如何对它实时进行封装多媒体文件 ,参考ffmpeg example,花了一些时间终于实现了该功能。 流程图如下…...

在微服务架构中利用 Taotoken 实现多模型 API 的动态切换与调用
🚀 告别海外账号与网络限制!稳定直连全球优质大模型,限时半价接入中。 👉 点击领取海量免费额度 在微服务架构中利用 Taotoken 实现多模型 API 的动态切换与调用 面向后端架构师或开发负责人,当微服务系统需要集成多种…...

MySQL 8.3远程连接踩坑记:Navicat提示caching_sha2_password错误的完整修复流程
MySQL 8.3远程连接认证插件问题深度解析与实战修复指南 1. 问题现象与背景分析 那天下午,当我正尝试用Navicat Premium 16连接新部署的MySQL 8.3数据库时,屏幕上突然弹出的红色错误框让我的咖啡杯悬在了半空: Authentication plugin caching_…...

魔兽争霸3终极优化指南:如何用WarcraftHelper解决Windows兼容性问题
魔兽争霸3终极优化指南:如何用WarcraftHelper解决Windows兼容性问题 【免费下载链接】WarcraftHelper Warcraft III Helper , support 1.20e, 1.24e, 1.26a, 1.27a, 1.27b 项目地址: https://gitcode.com/gh_mirrors/wa/WarcraftHelper 还在为魔兽争霸3在Win…...

Spring Validation嵌套校验踩坑实录:用@Valid搞定订单里商品列表的深度验证
Spring Validation嵌套校验实战:用Valid解决订单商品列表的深度验证难题 电商系统中订单创建接口的复杂性往往体现在数据结构的嵌套层级上。一个典型的订单对象不仅包含基础订单信息,还会内嵌商品列表、优惠券、收货地址等多个子对象。当后端接收到这样的…...

如何快速配置PlotSquared:Minecraft领地管理完整教程
如何快速配置PlotSquared:Minecraft领地管理完整教程 【免费下载链接】PlotSquared PlotSquared - Reinventing the plotworld 项目地址: https://gitcode.com/gh_mirrors/pl/PlotSquared 你是否厌倦了Minecraft服务器中混乱的建筑和领地冲突?想要…...

Creo二次开发避坑:用ProAsmcomppathInit搞定装配体遍历,别再卡在ProFeature转ProAsmcomppath了
Creo二次开发实战:高效构建装配体遍历路径的深度解析 在Creo二次开发领域,装配体遍历是许多高级功能的基础操作,但开发者常常会在ProFeature到ProAsmcomppath的转换过程中遭遇瓶颈。本文将从底层数据结构入手,揭示一种被多数文档忽…...

AI Agent Harness Engineering 与组织结构重塑:未来公司将变成什么样
AI Agent Harness Engineering 与组织结构重塑:未来公司将变成什么样 摘要/引言 你有没有在深夜刷到过这样的“科技黑话式”创业视频?创始人拍着桌子喊:“我们公司90%的活都是AI干的!产品上线从3个月缩短到3天!利润率翻了10倍!”旁边的工位要么是空的,要么坐着手忙脚乱…...

Python金融预测实战:CNN-BiLSTM模型在沪深300指数预测中的调参与对比分析
1. 为什么选择CNN-BiLSTM预测沪深300指数? 在金融时间序列预测领域,传统统计方法(如ARIMA)往往难以捕捉市场中的非线性关系。我最初尝试用单一LSTM模型预测沪深300指数收盘价时,发现两个明显问题:一是对价格…...
)
一线大厂AI开发笔记本清单(万元内)
人机协作,AI模型:Deepseek仅供参考一线大厂AI开发笔记本清单(万元内)机型CPUGPU(显存)内存SSD散热Linux兼容性风险等级性能星级参考价华硕 天选7 Pro 酷睿版Ultra 9 290HX Plus (24核)RTX 5070 (8GB)32GB1T…...

Google关键词能带来多少流量?大词和长尾词的真实流量比例
一家销售软件的公司耗费六个月将“CRM”排至谷歌首页第五名。该词每月产生50万次搜索。网页获得2100次点击。跳出率高达89%。停留时间仅12秒。投入资金4万美元。获得零份询盘。做“外贸企业定制管理软件”排名首页第一。此词汇每月搜索量150次。每月收获62次点击。停留时间4分3…...