安卓开发学习记录(持续学习)
文章目录
- 前言
- 工具
- 创建项目
- 简单控件即UI
- 一、界面显示与逻辑处理
- 二、文本
- 三、布局
- 四、按钮
- 五、控件综合训练(简易计算器)
- 六、Activity
- 七. 中级控件
前言
最近在有在持续学习Java的安卓开发,不断的把知识记录下。
工具
- Android Studio安装
[Studio安装][1]
[1]: https://developer.android.google.cn/studio “Studio安装”
- SDK下载
SDK即软件开发工具包,可将App源码编译成可执行的App应用
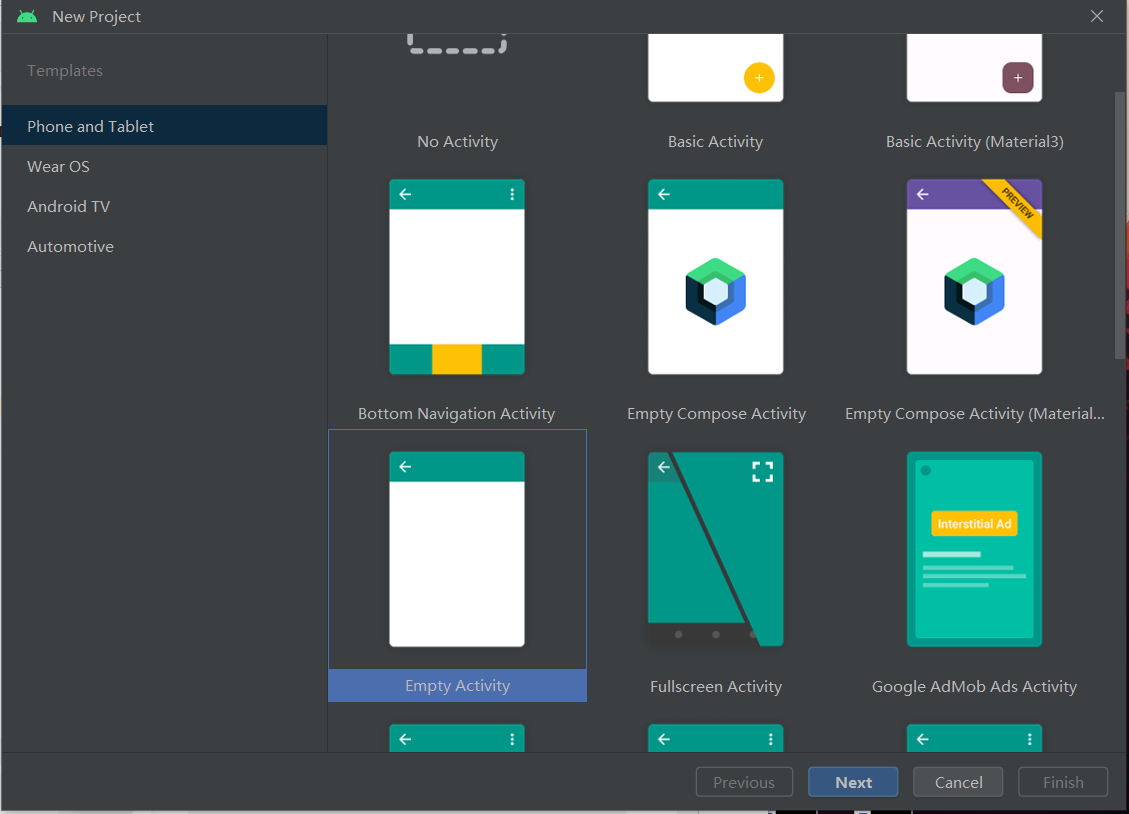
创建项目
- 创建项目
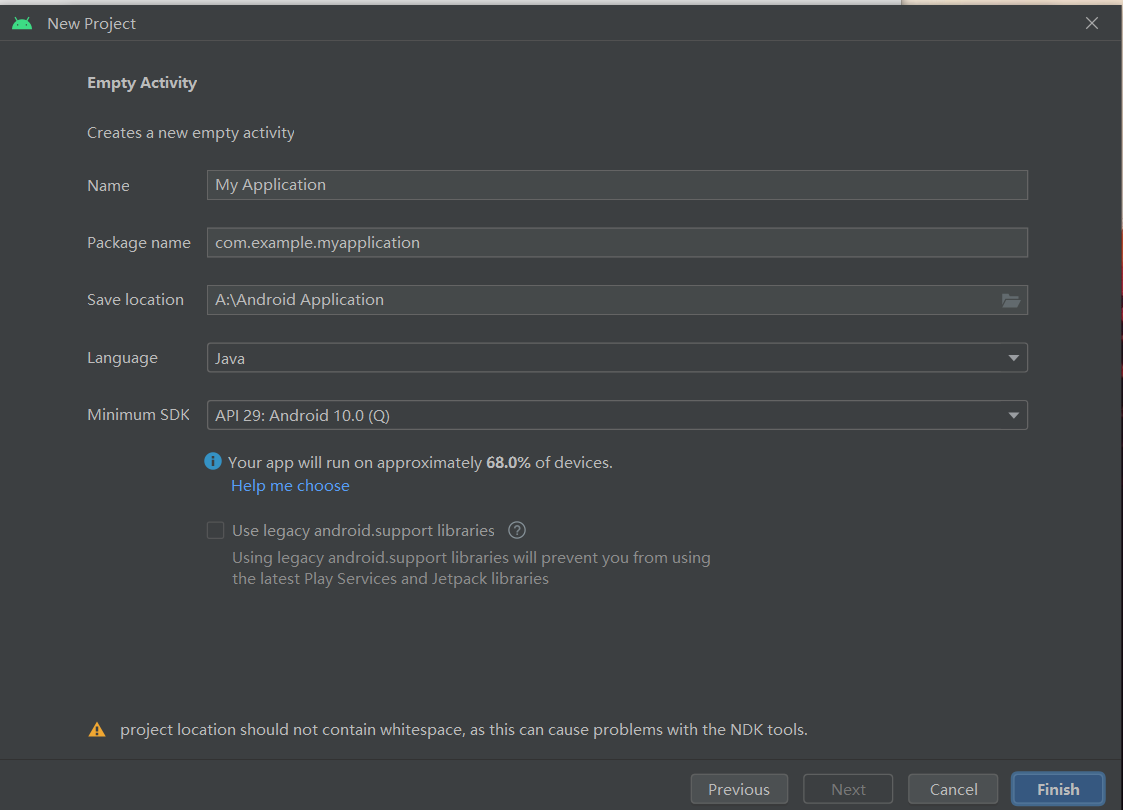
这里Minimum SDK后面指的是兼容到安卓几,表示你的应用支持的最低版本,看百分比选,一般目前的都是9.0-10.0。
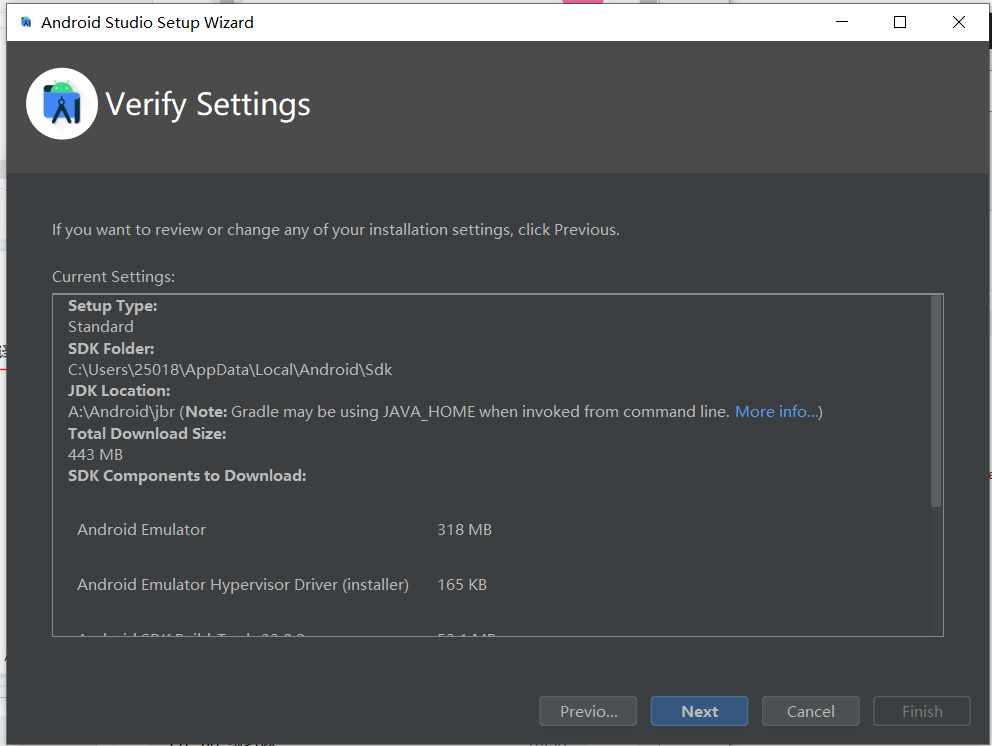
- 内置模拟器
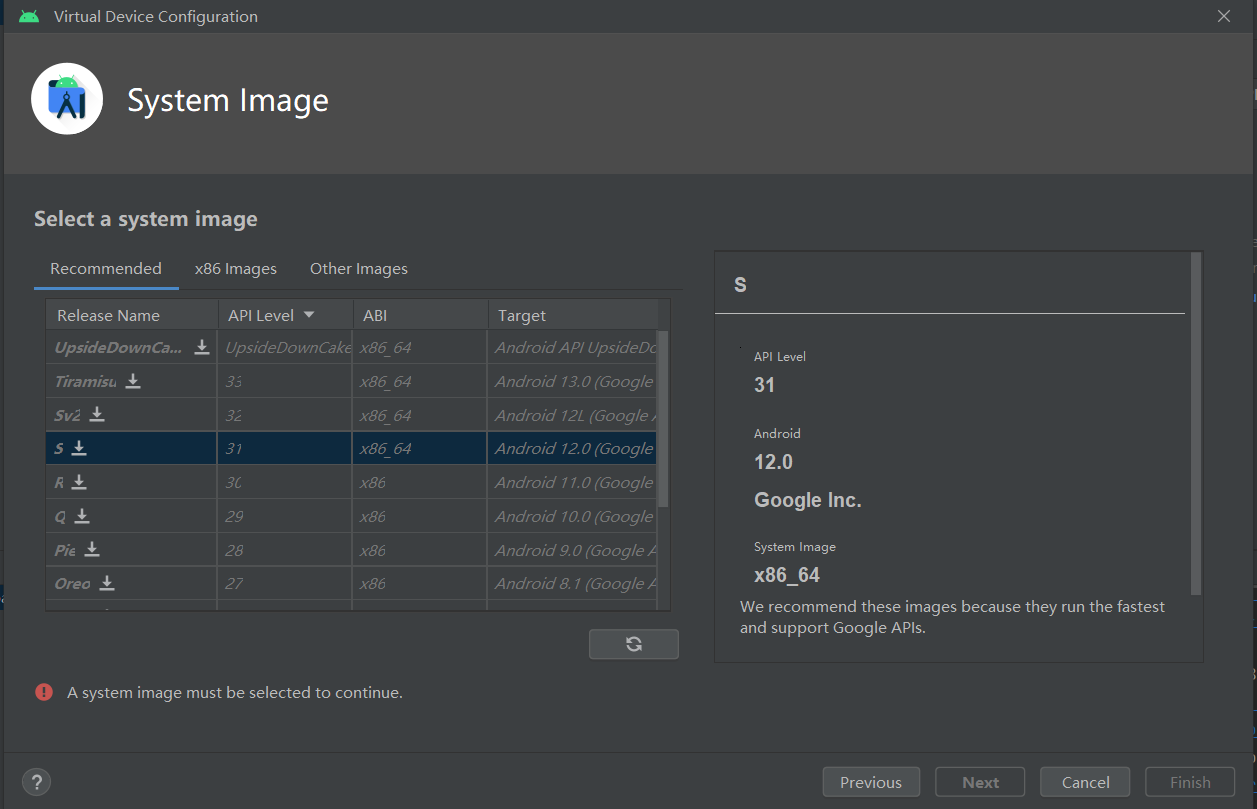
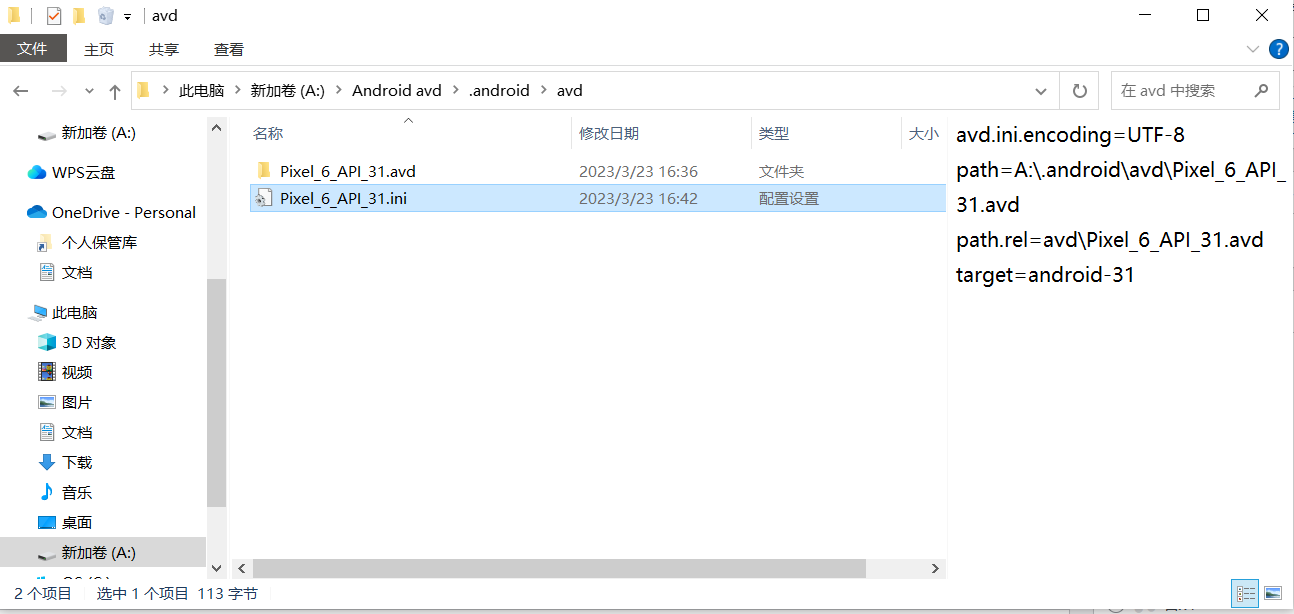
初始化Gradle要下载半小时,内置模拟器也有十多G,默认在C盘很不爽,可以移动,
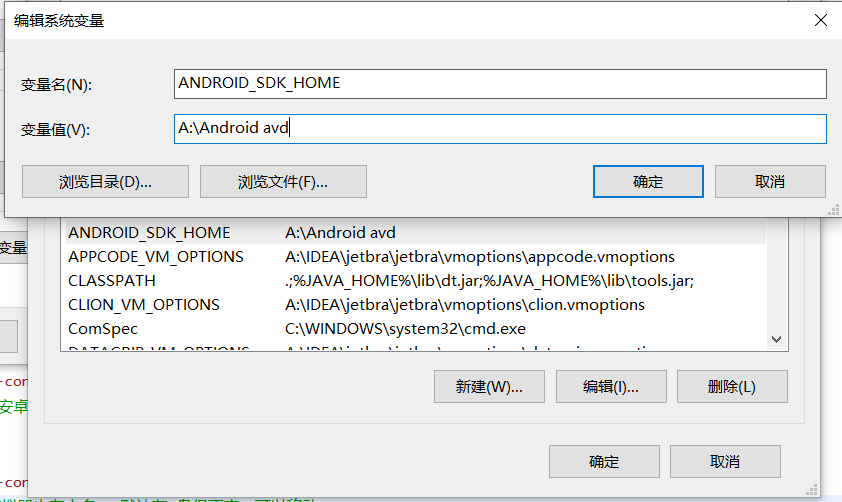
注册环境变量,然后修改下面的配置,直接把目录移动到想存的位置即可。
- 观察App运行日志
Android采用Log日志打印日志,各类日志划分:
Log.e 表示错误信息,可能导致程序崩溃
Log.w:表示警告信息
Log.i:表示一般消息
Log.d:表示调试信息,可把程序运行变量值打印,方便跟踪调试
Log.v:表示冗余信息
- 真机调试
1、使用数据库连接到电脑
2、电脑上会自动安装USB存储设备驱动
3、打开手机的开发者选项并开启USB调试
4、将连接的手机设备文件传输模式,并允许计算机进行USB调试
-
关于安卓开发语言
App开发分为两大技术路线,分别为原生开发和混合开发,官方的编程语言包括Java和Kotlin。
混合开发渲染性能没有原生开发好,但是混合开发可以跨平台,版本更新不需要重新下载API文件。
关于C和C++,Java是解释型语言,在处理图像和音视频时性能显然就有瓶颈,而C和C++是编译型语言,会
先翻译成机器语言,在图像和音视频处理时可以调用java的JNI接口调用C和C++程序进行处理,也称NDK。 -
目录结构
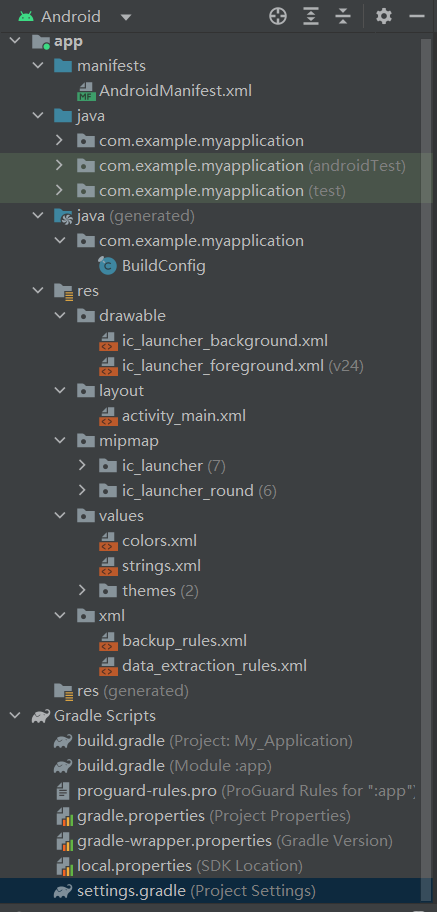
mainfests:App运行配置文件
java子目录:存放java源代码,后面两个包存放测试用的代码
res目录下:
drawable:存放图形描述和图片文件
Layout:App页面的布局文件
mipmap:App的启动图标
values:存放常量的文件,如样式风格等
Gradle Scripts目录下:
build.gradle:描述项目级和模块级的App工程编译规则
proguard-rules.pro:java代码的混淆规则,保证安全性
gradle.properties:用于编译工程的命令行参数
local.properties:本地配置文件,描述开发者电脑的环境配置
settings.gradle:配置了需要编译的模块
- build.gradle的文件概述解释
plugins {//使用的插件id 'com.android.application'
}android {namespace 'com.example.myapplication'compileSdk 33 //编译使用的SDK版本号,33表示使用Android13defaultConfig {// App的包名applicationId "com.example.myapplication"//指定App适合运行的最小的SDK版本号,28表示最小在Android9上运行minSdk 28//目标设备的版本号,表示App最希望在那个版本的Android上运行targetSdk 33//App的应用版本号versionCode 1versionName "1.0"testInstrumentationRunner "androidx.test.runner.AndroidJUnitRunner"}//跟单元测试相关buildTypes {release {minifyEnabled falseproguardFiles getDefaultProguardFile('proguard-android-optimize.txt'), 'proguard-rules.pro'}}compileOptions {sourceCompatibility JavaVersion.VERSION_1_8targetCompatibility JavaVersion.VERSION_1_8}
}
//指定App编译的依赖包信息
dependencies {//指定编译的Android高版本支持库implementation 'androidx.appcompat:appcompat:1.4.1'implementation 'com.google.android.material:material:1.5.0'implementation 'androidx.constraintlayout:constraintlayout:2.1.3'//指定单元测试编译用的junit版本号testImplementation 'junit:junit:4.13.2'androidTestImplementation 'androidx.test.ext:junit:1.1.3'androidTestImplementation 'androidx.test.espresso:espresso-core:3.4.0'
}
- 清单文件
<?xml version="1.0" encoding="utf-8"?>
<manifest xmlns:android="http://schemas.android.com/apk/res/android"xmlns:tools="http://schemas.android.com/tools"><applicationandroid:allowBackup="true"android:dataExtractionRules="@xml/data_extraction_rules"android:fullBackupContent="@xml/backup_rules"android:icon="@mipmap/ic_launcher"android:label="@string/app_name"android:supportsRtl="true"android:theme="@style/Theme.MyApplication"tools:targetApi="31"><activityandroid:name=".MainActivity"android:exported="true"><intent-filter><action android:name="android.intent.action.MAIN" /><category android:name="android.intent.category.LAUNCHER" /></intent-filter></activity></application></manifest>
android:icon:App手机屏幕显示的图标
android:label:App手机屏幕显示的名称
android:allowBackup:是否允许数据备份,数据丢失时恢复应用
android:theme:指定App显示的风格
android:supportsRtl:是否支持波斯语等从右向左的文字排列顺序语言
activity应用程序组件,提供屏幕,用来交互完成某项任务
android:exported:当前Activity是否可以被另一个Application的组件启动
android:name:启动应用首先启动那个Applicaiton
简单控件即UI
一、界面显示与逻辑处理
- 创建新的activity页面
<?xml version="1.0" encoding="utf-8"?>
<LinearLayoutxmlns:android="http://schemas.android.com/apk/res/android"android:layout_width="match_parent"android:layout_height="match_parent"android:orientation="vertical"android:gravity="center"><TextViewandroid:id="@+id/tv"android:layout_width="wrap_content"android:layout_height="wrap_content"android:text="@string/text2" /></LinearLayout>
- 创建新的MainActivity类,并将类加入Mainifest
package com.example.myapplication;import android.os.Bundle;import androidx.annotation.Nullable;
import androidx.appcompat.app.AppCompatActivity;public class MainActivity2 extends AppCompatActivity {@Overrideprotected void onCreate(@Nullable Bundle savedInstanceState) {super.onCreate(savedInstanceState);setContentView(R.layout.activity_main2);}
}
<activity android:name=".MainActivity2"/>
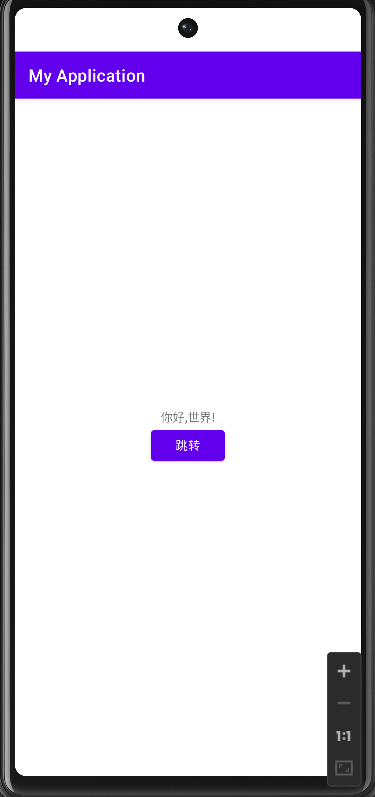
- 设置跳转按钮
<?xml version="1.0" encoding="utf-8"?>
<LinearLayoutxmlns:android="http://schemas.android.com/apk/res/android"android:layout_width="match_parent"android:layout_height="match_parent"android:orientation="vertical"android:gravity="center"><TextViewandroid:id="@+id/tv"android:layout_width="wrap_content"android:layout_height="wrap_content"android:text="Hello World!"/><Buttonandroid:id="@+id/button"android:layout_width="wrap_content"android:layout_height="wrap_content"android:text="跳转"/></LinearLayout>
- 写跳转方法
package com.example.myapplication;import androidx.appcompat.app.AppCompatActivity;import android.content.Intent;
import android.os.Bundle;
import android.util.Log;
import android.view.View;
import android.widget.Button;
import android.widget.TextView;public class MainActivity extends AppCompatActivity {@Overrideprotected void onCreate(Bundle savedInstanceState) {super.onCreate(savedInstanceState);setContentView(R.layout.activity_main);TextView tv=findViewById(R.id.tv);tv.setText("你好,世界!");Button button=findViewById(R.id.button);button.setOnClickListener(new View.OnClickListener() {@Overridepublic void onClick(View view) {Intent intent=new Intent();intent.setClass(MainActivity.this,MainActivity2.class);startActivity(intent);}});}
}
二、文本
- 文本大小
px :图像元素,跟随屏幕大小和像素数量关系变化。
resolution:屏幕垂直和水平方向的像素数量。
dpi:像素密度,指屏幕上每英寸距离中有多少个像素点。
Density:指定每平方英寸含有的像素点数量。
dip/dp:长度单位,同一个单位在不同设备中有不同显示效果。
sp:专门用于设置字体,大小会根据系统的字体大小改变而改变。
dip是开发中的长度单位,最后也要转换为px,px=dip*dpi/160
例:如 320*480分辨率 3.6寸的手机:
dpi=(3202+4802)^(1/2)/3.6=160 所以 1dp=1px
对于相同尺寸的手机,即使分辨率不同,占用屏幕比例也相同
- 设置文本颜色
设置文本的颜色一般可直接设置,也可以通过十六进制设置,如0xFFFFEEDD, 其中先
后十六进制顺序为透明度,红色,绿色,蓝色。
<?xml version="1.0" encoding="utf-8"?>
<LinearLayoutxmlns:android="http://schemas.android.com/apk/res/android"android:layout_width="match_parent"android:layout_height="match_parent"android:orientation="vertical"android:gravity="center"><TextViewandroid:id="@+id/text_color"android:layout_width="wrap_content"android:layout_height="wrap_content"android:textSize="30sp"android:text="直接设置文本颜色" /><TextViewandroid:id="@+id/text_hex_color"android:layout_width="wrap_content"android:layout_height="wrap_content"android:textSize="30sp"android:textColor="@color/purple_200"android:text="十六进制设置文本颜色"/><TextViewandroid:id="@+id/text_code_color"android:layout_width="wrap_content"android:layout_height="wrap_content"android:textSize="30sp"android:text="代码中设置文本颜色"/><TextViewandroid:id="@+id/text_background"android:layout_width="wrap_content"android:layout_height="wrap_content"android:textSize="30sp"android:text="设置文本背景颜色"android:background="#ff00ff00"/></LinearLayout>
public class MainTextActivity extends AppCompatActivity {@Overrideprotected void onCreate(Bundle savedInstanceState) {super.onCreate(savedInstanceState);setContentView(R.layout.activity_main_text);TextView text_color=findViewById(R.id.text_color);text_color.setTextColor(Color.GREEN);TextView text_code_color=findViewById(R.id.text_code_color);text_code_color.setTextColor(0xff00ff00);}
}
- 视图
wrap_content:自适应大小,刚好能包含内容
match_parent:当前控件的大小和父布局的大小一样
dp:自行设置dp大小
在代码中设置视图宽高。
调用控件对象getLayoutParams方法获取控件的布局参数。
调用控件对象的setLayoutParams方法,填入修改后布局参数使之生效。
public class ViewBorderActivity extends AppCompatActivity {@Overrideprotected void onCreate(Bundle savedInstanceState) {super.onCreate(savedInstanceState);setContentView(R.layout.activity_view_border);TextView text_borer=findViewById(R.id.text_view_border);ViewGroup.LayoutParams params=text_borer.getLayoutParams();params.width= Utils.dip2px(this,300);text_borer.setLayoutParams(params);}
}public class Utils {//根据分辨率dp转化为像素pxpublic static int dip2px(Context context, float dpValue){//获取当前像素密度,1个dp对应多少个像素float scale=context.getResources().getDisplayMetrics().density;return (int)(dpValue*scale+0.5f);}
}
三、布局
- 线性布局LinearLayout
orientation为horizontal,内部视图水平方向排列
oritentation为vertical,内部视图竖着排列
- 相对布局RelativeLayout
相对布局的下级视图位置由其他视图决定,确定位置参照物分两种:
(1)与该视图自身评级的视图
(2)该视图的上级视图
不设定,默认在左上角
<?xml version="1.0" encoding="utf-8"?>
<RelativeLayout xmlns:android="http://schemas.android.com/apk/res/android"android:layout_width="match_parent"android:layout_height="match_parent"><TextViewandroid:id="@+id/center"android:layout_width="wrap_content"android:layout_height="wrap_content"android:layout_centerInParent="true"android:background="#ffffff"android:text="我在中间"android:textColor="#000000"android:textSize="10sp" /><TextViewandroid:layout_width="wrap_content"android:layout_height="wrap_content"android:layout_alignParentLeft="true"android:background="#ffffff"android:text="我在上级左边中间"android:textColor="#000000"android:textSize="10sp" /><TextViewandroid:layout_width="wrap_content"android:layout_height="wrap_content"android:background="#ffffff"android:layout_alignParentBottom="true"android:text="我在上级底部对齐"android:textSize="10sp"android:textColor="#000000"/><TextViewandroid:layout_width="wrap_content"android:layout_height="wrap_content"android:layout_toLeftOf="@id/center"android:layout_alignTop="@id/center"android:background="#ffffff"android:text="我在中间左边"android:textColor="#000000"android:textSize="10sp" />
</RelativeLayout>
- 网格布局GridLayout,支持多行多列的表格排列
网格布局默认从左往右,从上到下,属性如下
columnCount,指定网格列数,即每行能放多少视图
rowCount,指定网格行数,每列能放多少个视图
<?xml version="1.0" encoding="utf-8"?>
<GridLayout xmlns:android="http://schemas.android.com/apk/res/android"android:layout_width="match_parent"android:layout_height="match_parent"android:columnCount="2"android:rowCount="2"><TextViewandroid:layout_width="0dp"android:layout_columnWeight="1"android:layout_height="60dp"android:text="红色"android:background="#ff0000"android:textSize="20sp"android:gravity="center"android:textColor="#000000"/><TextViewandroid:layout_width="0dp"android:layout_columnWeight="1"android:layout_height="60dp"android:text="橙色"android:background="#ffaa00"android:textSize="20sp"android:gravity="center"android:textColor="#000000"/><TextViewandroid:layout_width="0dp"android:layout_columnWeight="1"android:layout_height="60dp"android:text="绿色"android:background="#00ff00"android:textSize="20sp"android:gravity="center"android:textColor="#000000"/><TextViewandroid:layout_width="0dp"android:layout_columnWeight="1"android:layout_height="60dp"android:text="紫色"android:background="#660066"android:textSize="20sp"android:gravity="center"android:textColor="#000000"/></GridLayout>
- 滚动视图ScrollView
ScrollView,垂直方向滚动,垂直方向滚动时,layout_width属性值设置为math_parent,layout_height属性设置为wrap_content
HorizontalScrollView,水平方向滚动,layout_width属性值设置为wrap_content,layout_height属性设置为match_parent
<?xml version="1.0" encoding="utf-8"?>
<LinearLayout xmlns:android="http://schemas.android.com/apk/res/android"android:layout_width="match_parent"android:layout_height="match_parent"android:orientation="vertical"><HorizontalScrollViewandroid:layout_width="wrap_content"android:layout_height="200dp"><LinearLayoutandroid:layout_width="wrap_content"android:layout_height="match_parent"android:orientation="horizontal"><Viewandroid:layout_width="300dp"android:layout_height="match_parent"android:background="#00ff00"></View><Viewandroid:layout_width="300dp"android:layout_height="match_parent"android:background="#00aaff"></View></LinearLayout></HorizontalScrollView><ScrollViewandroid:layout_width="match_parent"android:layout_height="wrap_content"><LinearLayoutandroid:layout_width="wrap_content"android:layout_height="match_parent"android:orientation="vertical"><Viewandroid:layout_width="match_parent"android:layout_height="400dp"android:background="#ff0000"></View><Viewandroid:layout_width="match_parent"android:layout_height="400dp"android:background="#aa00ff"></View></LinearLayout></ScrollView></LinearLayout>
四、按钮
Button由TextView派生,区别在于:
Button拥有默认按钮背景(紫色),而TextView无背景。
Button的内部文本默认居中对齐。
Button会默认将英文字母转为大写,testAllCaps可以设置是否转换。
ImageButton显示图片的图像按钮,继承自ImageView
ImageButton只能显示图片,不能显示文本
ImageButton的图像可按比例缩放,Button背景设置的图像会拉伸变形
Button只能靠背景显示一张图片,ImageButton可在前景和背景显示图片,从而实现两张图片叠加效果
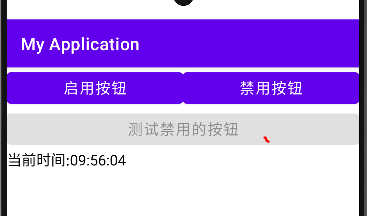
例子:设置三个按钮,分别启动和禁用第三个按钮,禁用按钮需要长按才能禁用,第三个按钮点击则显示时间。
<?xml version="1.0" encoding="utf-8"?>
<LinearLayout xmlns:android="http://schemas.android.com/apk/res/android"android:layout_width="match_parent"android:layout_height="match_parent"android:orientation="vertical"><LinearLayoutandroid:layout_width="match_parent"android:layout_height="wrap_content"android:orientation="horizontal"><Buttonandroid:id="@+id/button_begin_click"android:layout_width="0dp"android:layout_weight="1"android:layout_height="wrap_content"android:text="启用按钮"android:textSize="17sp"/><Buttonandroid:id="@+id/button_disable_click"android:layout_width="0dp"android:layout_height="wrap_content"android:layout_weight="1"android:text="禁用按钮"android:textSize="17sp" /></LinearLayout><Buttonandroid:id="@+id/button_test_click"android:layout_width="match_parent"android:layout_height="wrap_content"android:text="测试禁用的按钮"android:textSize="17sp"android:enabled="false"/><TextViewandroid:id="@+id/button_text_view"android:layout_width="wrap_content"android:layout_height="wrap_content"android:text="查看测试禁用按钮的结果"android:textSize="17sp"android:textColor="#000000"/></LinearLayout>
package com.example.myapplication.utils;import java.text.SimpleDateFormat;
import java.util.Date;public class DateTime {public static String getNowTime(){SimpleDateFormat simpleDateFormat=new SimpleDateFormat("HH:mm:ss");return  simpleDateFormat.format(new Date());}
}
package com.example.myapplication;import androidx.appcompat.app.AppCompatActivity;
import android.os.Bundle;
import android.view.View;
import android.widget.Button;
import android.widget.TextView;import com.example.myapplication.utils.DateTime;public class ButtonTextActivity extends AppCompatActivity {private Button button_test_click;private TextView button_view;@Overrideprotected void onCreate(Bundle savedInstanceState) {super.onCreate(savedInstanceState);setContentView(R.layout.activity_button_text);Button button_begin_click=findViewById(R.id.button_begin_click);Button button_disable_click= findViewById(R.id.button_disable_click);button_test_click = findViewById(R.id.button_test_click);button_view = findViewById(R.id.button_text_view);button_begin_click.setOnClickListener(new MyOnclickListener());button_test_click.setOnClickListener(new MyOnclickListener());button_disable_click.setOnLongClickListener(new MyOnclickLongListener());}class MyOnclickListener implements View.OnClickListener{@Overridepublic void onClick(View view) {switch (view.getId()){case R.id.button_begin_click:button_test_click.setEnabled(true);break;case R.id.button_test_click:String time=String.format("当前时间:%s", DateTime.getNowTime());button_view.setText(time);}}}class MyOnclickLongListener implements View.OnLongClickListener{@Overridepublic boolean onLongClick(View view) {button_test_click.setEnabled(false);return true;}}}
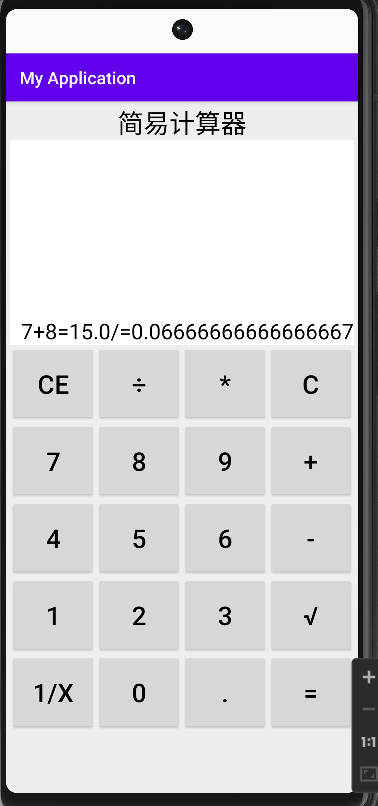
五、控件综合训练(简易计算器)
- Strings.xml
<resources><string name="app_name">My Application</string><string name="text2">Activity Main</string><string name="simple_calculator">简易计算器</string><string name="cancel">CE</string><string name="divide">÷</string><string name="clear">C</string><string name="multiply">+</string><string name="ride">*</string><string name="minus">-</string><string name="nine">9</string><string name="eight">8</string><string name="seven">7</string><string name="six">6</string><string name="five">5</string><string name="four">4</string><string name="three">3</string><string name="two">2</string><string name="one">1</string><string name="zero">0</string><string name="reciprocal">1/X</string><string name="doc">.</string><string name="equal">=</string><string name="root">√</string>
</resources>
- dimens.xml
<?xml version="1.0" encoding="utf-8"?>
<resources><dimen name="button_font_size">30sp</dimen><dimen name="button_height">90dp</dimen></resources>
- layout.xml
<?xml version="1.0" encoding="utf-8"?>
<LinearLayout xmlns:android="http://schemas.android.com/apk/res/android"android:layout_width="match_parent"android:layout_height="match_parent"android:background="#EEEEEE"android:orientation="vertical"android:padding="5dp"><ScrollViewandroid:layout_width="match_parent"android:layout_height="wrap_content"><LinearLayoutandroid:layout_width="match_parent"android:layout_height="wrap_content"android:orientation="vertical"><TextViewandroid:layout_width="match_parent"android:layout_height="wrap_content"android:text="@string/simple_calculator"android:textColor="@color/black"android:gravity="center"android:textSize="30sp"/><TextViewandroid:id="@+id/tv_result"android:layout_width="match_parent"android:layout_height="wrap_content"android:background="@color/white"android:text="0"android:textColor="@color/black"android:lines="8"android:textSize="25sp"android:gravity="right|bottom"/><GridLayoutandroid:layout_width="match_parent"android:layout_height="wrap_content"android:columnCount="4"android:rowCount="5"><Buttonandroid:id="@+id/btn_cancel"android:layout_width="0dp"android:layout_height="@dimen/button_height"android:layout_columnWeight="1"android:text="@string/cancel"android:textColor="@color/black"android:textSize="@dimen/button_font_size"/><Buttonandroid:id="@+id/btn_divide"android:layout_width="0dp"android:layout_height="@dimen/button_height"android:layout_columnWeight="1"android:text="@string/divide"android:textColor="@color/black"android:textSize="@dimen/button_font_size"/><Buttonandroid:id="@+id/btn_ride"android:layout_width="0dp"android:layout_height="@dimen/button_height"android:layout_columnWeight="1"android:text="@string/ride"android:textColor="@color/black"android:textSize="@dimen/button_font_size"/><Buttonandroid:id="@+id/btn_clear"android:layout_width="0dp"android:layout_height="@dimen/button_height"android:layout_columnWeight="1"android:text="@string/clear"android:textColor="@color/black"android:textSize="@dimen/button_font_size"/><Buttonandroid:id="@+id/btn_seven"android:layout_width="0dp"android:layout_height="@dimen/button_height"android:layout_columnWeight="1"android:text="@string/seven"android:textColor="@color/black"android:textSize="@dimen/button_font_size"/><Buttonandroid:id="@+id/btn_eight"android:layout_width="0dp"android:layout_height="@dimen/button_height"android:layout_columnWeight="1"android:text="@string/eight"android:textColor="@color/black"android:textSize="@dimen/button_font_size"/><Buttonandroid:id="@+id/btn_nine"android:layout_width="0dp"android:layout_height="@dimen/button_height"android:layout_columnWeight="1"android:text="@string/nine"android:textColor="@color/black"android:textSize="@dimen/button_font_size"/><Buttonandroid:id="@+id/btn_multi"android:layout_width="0dp"android:layout_height="@dimen/button_height"android:layout_columnWeight="1"android:text="@string/multiply"android:textColor="@color/black"android:textSize="@dimen/button_font_size"/><Buttonandroid:id="@+id/btn_four"android:layout_width="0dp"android:layout_height="@dimen/button_height"android:layout_columnWeight="1"android:text="@string/four"android:textColor="@color/black"android:textSize="@dimen/button_font_size"/><Buttonandroid:id="@+id/btn_five"android:layout_width="0dp"android:layout_height="@dimen/button_height"android:layout_columnWeight="1"android:text="@string/five"android:textColor="@color/black"android:textSize="@dimen/button_font_size"/><Buttonandroid:id="@+id/btn_six"android:layout_width="0dp"android:layout_height="@dimen/button_height"android:layout_columnWeight="1"android:text="@string/six"android:textColor="@color/black"android:textSize="@dimen/button_font_size"/><Buttonandroid:id="@+id/btn_minus"android:layout_width="0dp"android:layout_height="@dimen/button_height"android:layout_columnWeight="1"android:text="@string/minus"android:textColor="@color/black"android:textSize="@dimen/button_font_size"/><Buttonandroid:id="@+id/btn_one"android:layout_width="0dp"android:layout_height="@dimen/button_height"android:layout_columnWeight="1"android:text="@string/one"android:textColor="@color/black"android:textSize="@dimen/button_font_size"/><Buttonandroid:id="@+id/btn_two"android:layout_width="0dp"android:layout_height="@dimen/button_height"android:layout_columnWeight="1"android:text="@string/two"android:textColor="@color/black"android:textSize="@dimen/button_font_size"/><Buttonandroid:id="@+id/btn_three"android:layout_width="0dp"android:layout_height="@dimen/button_height"android:layout_columnWeight="1"android:text="@string/three"android:textColor="@color/black"android:textSize="@dimen/button_font_size"/><Buttonandroid:id="@+id/btn_root"android:layout_width="0dp"android:layout_height="@dimen/button_height"android:layout_columnWeight="1"android:text="@string/root"android:textColor="@color/black"android:textSize="@dimen/button_font_size"/><Buttonandroid:id="@+id/btn_reciprocal"android:layout_width="0dp"android:layout_height="@dimen/button_height"android:layout_columnWeight="1"android:text="@string/reciprocal"android:textColor="@color/black"android:textSize="@dimen/button_font_size"/><Buttonandroid:id="@+id/btn_zero"android:layout_width="0dp"android:layout_height="@dimen/button_height"android:layout_columnWeight="1"android:text="@string/zero"android:textColor="@color/black"android:textSize="@dimen/button_font_size"/><Buttonandroid:id="@+id/btn_doc"android:layout_width="0dp"android:layout_height="@dimen/button_height"android:layout_columnWeight="1"android:text="@string/doc"android:textColor="@color/black"android:textSize="@dimen/button_font_size"/><Buttonandroid:id="@+id/btn_equal"android:layout_width="0dp"android:layout_height="@dimen/button_height"android:layout_columnWeight="1"android:text="@string/equal"android:textColor="@color/black"android:textSize="@dimen/button_font_size"/></GridLayout></LinearLayout></ScrollView>
</LinearLayout>
- 主类
package com.example.myapplication;import androidx.appcompat.app.AppCompatActivity;import android.os.Bundle;
import android.view.View;
import android.widget.Button;
import android.widget.TextView;public class CalculatorActivity extends AppCompatActivity implements View.OnClickListener {private TextView tv_result;//第一个操作数private String firstNum="";//操作符号private String operator="";//第二个操作数private String secodeNum="";//计算结果private String result="";//显示的文本private String showText="";@Overrideprotected void onCreate(Bundle savedInstanceState) {super.onCreate(savedInstanceState);setContentView(R.layout.activity_calculator);tv_result = findViewById(R.id.tv_result);findViewById(R.id.btn_cancel).setOnClickListener(this);findViewById(R.id.btn_divide).setOnClickListener(this);findViewById(R.id.btn_ride).setOnClickListener(this);findViewById(R.id.btn_clear).setOnClickListener(this);findViewById(R.id.btn_seven).setOnClickListener(this);findViewById(R.id.btn_eight).setOnClickListener(this);findViewById(R.id.btn_nine).setOnClickListener(this);findViewById(R.id.btn_multi).setOnClickListener(this);findViewById(R.id.btn_four).setOnClickListener(this);findViewById(R.id.btn_five).setOnClickListener(this);findViewById(R.id.btn_six).setOnClickListener(this);findViewById(R.id.btn_minus).setOnClickListener(this);findViewById(R.id.btn_one).setOnClickListener(this);findViewById(R.id.btn_two).setOnClickListener(this);findViewById(R.id.btn_three).setOnClickListener(this);findViewById(R.id.btn_root).setOnClickListener(this);findViewById(R.id.btn_reciprocal).setOnClickListener(this);findViewById(R.id.btn_zero).setOnClickListener(this);findViewById(R.id.btn_doc).setOnClickListener(this);findViewById(R.id.btn_equal).setOnClickListener(this);}@Overridepublic void onClick(View view) {String inputText;inputText=((TextView) view).getText().toString();switch (view.getId()){case R.id.btn_cancel:if(operator.equals("")) {showText = showText.substring(0, showText.length() - 1);refreshOperate(showText);refreshText(showText);break;}if(secodeNum.equals("")&&!operator.equals("")){showText = showText.substring(0, showText.length() - 1);CE();refreshText(showText);break;}else{showText = showText.substring(0, showText.length() - 1);refreshOperate(showText);refreshText(result);break;}case R.id.btn_clear:clear();break;case R.id.btn_multi:case R.id.btn_divide:case R.id.btn_ride:case R.id.btn_minus:operator=inputText;refreshText(showText+operator);break;case R.id.btn_equal:double calculate_result=calculateFour();refreshOperate(String.valueOf(calculate_result));refreshText(showText+"="+result);break;//开根号case R.id.btn_root:double sqrt_result=Math.sqrt(Double.parseDouble(firstNum));refreshOperate(String.valueOf(sqrt_result));refreshText(showText+"√="+result);break;//求导数case R.id.btn_reciprocal:double reciprocal_result=1.0/Double.parseDouble(firstNum);refreshOperate(String.valueOf(reciprocal_result));refreshText(showText+"/="+result);break;default:if (result.length()>0&&operator.equals("")){clear();}if(operator.equals("")){firstNum=firstNum+inputText;}else{secodeNum=secodeNum+inputText;}if(showText.equals("0")&&!inputText.equals(".")){refreshText(inputText);}else {refreshText(showText + inputText);}break;}}private  void cancel(){}private void clear(){refreshOperate("");refreshText("");}private double calculateFour(){switch (operator){case "+":return Double.parseDouble(firstNum)+Double.parseDouble(secodeNum);case "-":return Double.parseDouble(firstNum)-Double.parseDouble(secodeNum);case "*":return Double.parseDouble(firstNum)*Double.parseDouble(secodeNum);default:return Double.parseDouble(firstNum)/Double.parseDouble(secodeNum);}}private void CE(){ //7+operator="";}private void refreshOperate(String new_result){result=new_result;firstNum=result;secodeNum="";operator="";}private void refreshText(String text){showText=text;tv_result.setText(showText);}
}
并非是什么完美计算器,仅是复习以上知识操作使用。
六、Activity
从当前页面跳转到新页面:
startActivity(new intent(源页面.this,目标页面.class))
当前页面返回上一个页面:
finish();
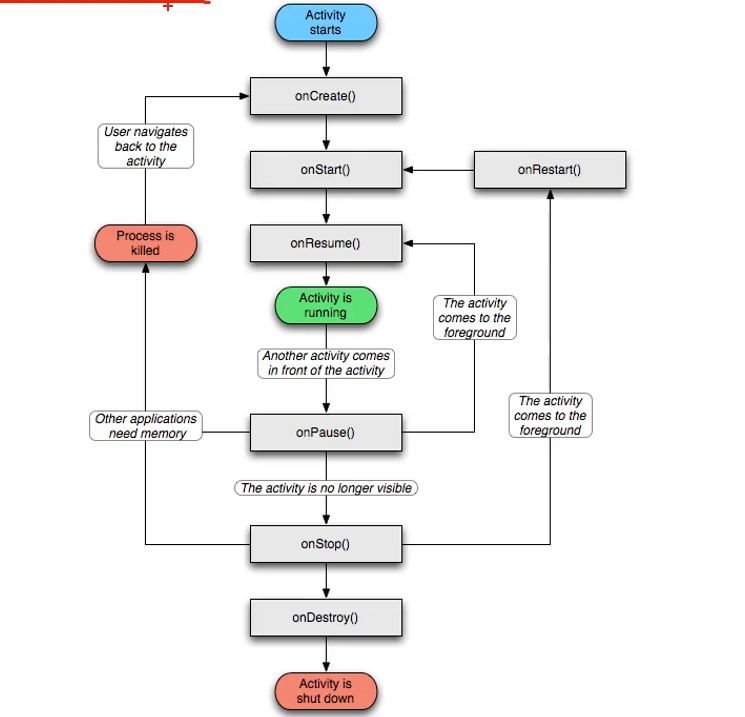
activity的生命周期:
onCreate 创建活动,把页面加载进内存,进入初始状态
onStart 开始活动,把活动页面显示到屏幕,就绪态
onResume 恢复活动,活动页面进入活跃状态
onPause 暂停活动,页面不能正常交互
onStop 停止活动,页面不在屏幕
onDestroy 销毁活动,回收系统资源,从内存清除
onRestart 重启活动,重新加载内存的页面数据
onNewIntent 重用已有的实例
Activity启动模式(栈)
默认启动模式standard,启动的Activity依照顺序被依次压入Task栈。
栈顶复用模式singleTop,栈顶Activity为我们新建的Activity,不会重新创建新的Activity。
栈内复用模式singleTask,栈内存在目标Activity实例,则将task内对应Activity实例之上的Activity出栈,并
将对应Activity置于栈顶。
全局唯一模式singleInstance,为目标Activity创建新的Task栈,新的Task栈只有这一个Activity,如
已经创建目标Activity,则不创建新的Task,将以前的Activity唤醒。
启动模式的设置:intent.setFlags()代码中启动,Mainfest.xml中动态设置launch。
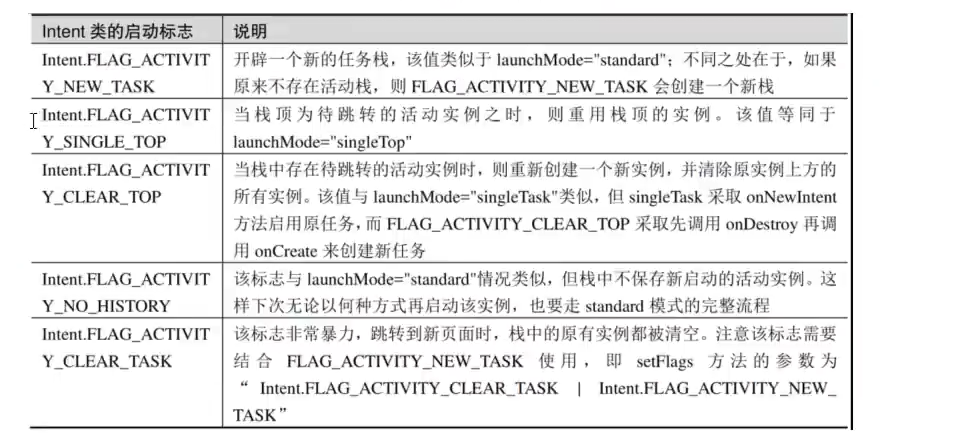
例子:登录页面进行登录成功后,即使后退,也不能返回登录页面,而是直接退出程序。
package com.example.activity;import androidx.appcompat.app.AppCompatActivity;import android.content.Intent;
import android.os.Bundle;
import android.view.View;
import android.widget.Button;public class LoginInputActivity extends AppCompatActivity {@Overrideprotected void onCreate(Bundle savedInstanceState) {super.onCreate(savedInstanceState);setContentView(R.layout.activity_login_input);Button btn_login=findViewById(R.id.btn_login);btn_login.setOnClickListener(new MyOnclickListen());}class MyOnclickListen implements View.OnClickListener{@Overridepublic void onClick(View view) {Intent intent=new Intent(LoginInputActivity.this,LoginSuccessActivity.class);intent.setFlags(Intent.FLAG_ACTIVITY_CLEAR_TASK|Intent.FLAG_ACTIVITY_NEW_TASK);startActivity(intent);}}
}
通过设置启动模式来完成,一旦登录则会清空当前活动栈中的所有实例,然后再同时启动开辟新任务的活动栈,这样登录后,再点击返回则会直接退出程序。
- Intent
Intent各个组件之间信息沟通桥梁,用于组件之间通信,主要完成工作是本次通信请求从哪来,到哪去,要怎么走
发起方携带本次通信需要的数据,接收方从收到的意图中解析数据。
发起方若判断接收方处理结果,意图就要负责让接收方回应答数据。
显示Intent,直接指定来源活动与目标活动,精确匹配,三种方式
直接Intent函数中指定:new Intent()
调用意图对象:setClass()
调用意图对象setComponent()
隐式Intent,没有明确指定要跳转的目标活动,只给出一个动作字符串匹配,属于模糊匹配
通过setAction,url,setData()指定动作和数据
常见的隐式动作有:
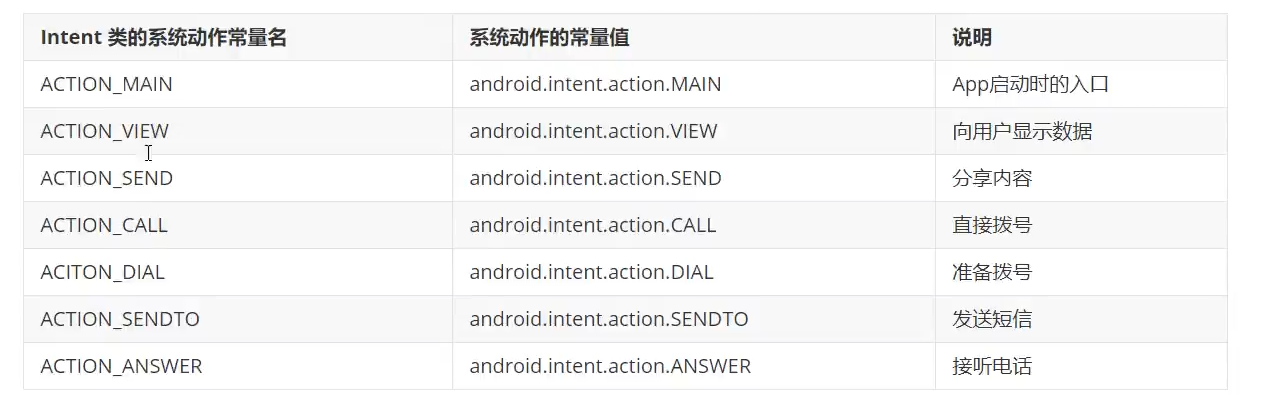
例子1:使用隐式Intent直接进行拨号,发送短信,或跳转到其它APP
package com.example.activity;import androidx.appcompat.app.AppCompatActivity;import android.content.Intent;
import android.net.Uri;
import android.os.Bundle;
import android.view.View;
import android.widget.Button;public class IntentActivity extends AppCompatActivity implements View.OnClickListener{@Overrideprotected void onCreate(Bundle savedInstanceState) {super.onCreate(savedInstanceState);setContentView(R.layout.activity_intent);Button btn_dail=findViewById(R.id.btn_dail);Button btn_cms=findViewById(R.id.btn_cms);Button btn_my=findViewById(R.id.btn_mypage);btn_dail.setOnClickListener(this);btn_cms.setOnClickListener(this);btn_my.setOnClickListener(this);}@Overridepublic void onClick(View view) {String phone="123456";Intent intent=new Intent();switch (view.getId()){case R.id.btn_dail:intent.setAction(Intent.ACTION_DIAL);Uri uri=Uri.parse("tel:"+phone);intent.setData(uri);startActivity(intent);break;case R.id.btn_cms:intent.setAction(Intent.ACTION_SENDTO);Uri uri2=Uri.parse("smsto:"+phone);intent.setData(uri2);startActivity(intent);break;case R.id.btn_mypage:intent.setAction("android.intent.action.Aiwin");intent.addCategory(Intent.CATEGORY_DEFAULT);startActivity(intent);break;}}
}<intent-filter><action android:name="android.intent.action.Aiwin" /><category android:name="android.intent.category.DEFAULT" /></intent-filter>
最后跳转自己的APP,需要在mainfestxml中添加intent-filter
例子2:A页面发送信息给B页面,B页面再返回回应信息给A页面,需要通过registerForActivityResult()
package com.example.activity;import androidx.activity.result.ActivityResult;
import androidx.activity.result.ActivityResultCallback;
import androidx.activity.result.ActivityResultLauncher;
import androidx.activity.result.contract.ActivityResultContract;
import androidx.activity.result.contract.ActivityResultContracts;
import androidx.appcompat.app.AppCompatActivity;import android.app.Activity;
import android.content.Intent;
import android.os.Bundle;
import android.view.View;
import android.widget.Button;
import android.widget.TextView;public class ActRequestActivity extends AppCompatActivity implements View.OnClickListener{private ActivityResultLauncher<Intent> register;@Overrideprotected void onCreate(Bundle savedInstanceState) {super.onCreate(savedInstanceState);setContentView(R.layout.activity_act_request);Button btn_send=findViewById(R.id.btn_request);TextView btn_receive=findViewById(R.id.btn_receive);btn_send.setOnClickListener(this);register = registerForActivityResult(new ActivityResultContracts.StartActivityForResult(), new ActivityResultCallback<ActivityResult>() {@Overridepublic void onActivityResult(ActivityResult result) {if(result!=null){Intent intent=result.getData();if(intent!=null&result.getResultCode()== Activity.RESULT_OK){Bundle bundle=intent.getExtras();String message=bundle.getString("response");btn_receive.setText(message);}}}});}@Overridepublic void onClick(View view) {Intent intent=new Intent(this,ActResponseActivity.class);Bundle bundle=new Bundle();bundle.putString("message","你睡了吗?");intent.putExtras(bundle);register.launch(intent);}
}
package com.example.activity;import androidx.appcompat.app.AppCompatActivity;import android.content.Intent;
import android.os.Bundle;
import android.view.View;
import android.widget.Button;
import android.widget.TextView;public class ActResponseActivity extends AppCompatActivity implements View.OnClickListener {@Overrideprotected void onCreate(Bundle savedInstanceState) {super.onCreate(savedInstanceState);setContentView(R.layout.activity_act_response);TextView request=findViewById(R.id.btn_request);Button btn_response=findViewById(R.id.btn_response);Bundle bundle=getIntent().getExtras();String request_content=bundle.getString("message");request.setText(request_content);btn_response.setOnClickListener(this);}@Overridepublic void onClick(View view) {Intent intent=new Intent();Bundle bundle=new Bundle();bundle.putString("response","我没睡,我爸妈不在家");intent.putExtras(bundle);setResult(ActRequestActivity.RESULT_OK,intent);finish();}
}
- 应用页面注册快捷方式
在安卓7以后,可以长按页面图标,弹出一些快捷方式,比如长按微信会弹出扫一扫,付款码等
点击即可直接跳转到该页面。
例子:在xml目录创建shortcuts.xml,先修改Mainfest.xml文件
<activityandroid:name=".ActStartActivity"android:exported="true"><intent-filter><action android:name="android.intent.action.MAIN" /><category android:name="android.intent.category.LAUNCHER" /></intent-filter><meta-dataandroid:name="android.app.shortcuts"android:resource="@xml/shortcuts" /></activity>
配置shortcuts.xml文件
<shortcuts xmlns:android="http://schemas.android.com/apk/res/android"><shortcutandroid:enabled="true"android:icon="@mipmap/ic_launcher"android:shortcutId="first"android:shortcutLongLabel="@string/shortcutLongLabel_first"android:shortcutShortLabel="@string/shortcutShortLabel_first"><!-- targetClass指定了点击该项菜单后要打开哪个活动页面 --><intentandroid:action="android.intent.action.VIEW"android:targetClass="com.example.activity.ActStartActivity"android:targetPackage="com.example.activity" /><categoriesandroid:name="android.shortcut.conversation" /></shortcut><shortcutandroid:enabled="true"android:icon="@mipmap/ic_launcher"android:shortcutId="second"android:shortcutLongLabel="@string/shortcutLongLabel_second"android:shortcutShortLabel="@string/shortcutShortLabel_second"><!-- targetClass指定了点击该项菜单后要打开哪个活动页面 --><intentandroid:action="android.intent.action.VIEW"android:targetClass="com.example.activity.ActStartActivity"android:targetPackage="com.example.activity" /><categoriesandroid:name="android.shortcut.conversation" /></shortcut></shortcuts>效果:

七. 中级控件
- Shape图
形状图形 Shape,形状图形的定义文件是以shape标签为根节点的XML描述文件,一般有四种类型的形状:
rectangle 矩形,默认值
oval 椭圆,corners节点失效
line 直线,必须设置stroke节点
ring 圆环
其中XML中能设置的有:size尺寸,stroker描边,corners圆角,solid填充,padding间隔,gradient渐变
如设置一个椭圆形:
<?xml version="1.0" encoding="utf-8"?>
<shape xmlns:android="http://schemas.android.com/apk/res/android"android:shape="oval"><solid android:color="#ff66aa"/><stroke android:width="1dp" android:color="#aaaaaa"/></shape>
- 九宫格图片
在Android Stdio中,可以直接把PNG图片转成九宫格图片,利用九宫格图片,能够使图片被拉伸但是不变形,
能够用于适应不同的手机屏幕。
- 状态列表图形
简单来说,就是按钮被按下和没被按下显示不同的颜色或者形状等,以便于用户区分按了哪一个按钮,可通过StateListDrawable完成。状态的取值常用的有pressed、checked、focused、selected
<?xml version="1.0" encoding="utf-8"?>
<selector xmlns:android="http://schemas.android.com/apk/res/android"><item android:state_pressed="true" android:drawable="@android:drawable/button_onoff_indicator_on"/><item android:drawable="@android:drawable/button_onoff_indicator_off"/></selector>
<?xml version="1.0" encoding="utf-8"?>
<LinearLayout xmlns:android="http://schemas.android.com/apk/res/android"android:layout_width="match_parent"android:layout_height="match_parent"android:orientation="vertical"android:gravity="center"><Buttonandroid:layout_width="wrap_content"android:layout_height="wrap_content"android:text="默认样式按钮"/><Buttonandroid:layout_width="wrap_content"android:layout_height="wrap_content"android:layout_marginTop="5dp"android:background="@drawable/drawable_nine_selector"android:padding="5dp"android:text="定制样式按钮"/></LinearLayout>

- checkbox
<?xml version="1.0" encoding="utf-8"?>
<LinearLayout xmlns:android="http://schemas.android.com/apk/res/android"android:layout_width="match_parent"android:layout_height="match_parent"android:orientation="vertical"android:padding="5dp"><CheckBoxandroid:id="@+id/ck_system"android:layout_width="match_parent"android:layout_height="wrap_content"android:padding="5dp"android:text="系统的CheckBox" /><CheckBoxandroid:id="@+id/ck_custom"android:layout_width="match_parent"android:layout_height="wrap_content"android:layout_marginTop="10dp"android:button="@drawable/checkbox_selector"android:padding="5dp"android:text="CheckBox换图标"/></LinearLayout>
package com.example.middlecontrolactivity;import androidx.appcompat.app.AppCompatActivity;import android.os.Bundle;
import android.widget.CheckBox;
import android.widget.CompoundButton;public class CheckBoxAcivity extends AppCompatActivity implements CompoundButton.OnCheckedChangeListener {@Overrideprotected void onCreate(Bundle savedInstanceState) {super.onCreate(savedInstanceState);setContentView(R.layout.activity_check_box_acivity);CheckBox ck_system=findViewById(R.id.ck_system);CheckBox ck_custom=findViewById(R.id.ck_custom);ck_system.setOnCheckedChangeListener(this);ck_custom.setOnCheckedChangeListener(this);}@Overridepublic void onCheckedChanged(CompoundButton compoundButton, boolean b) {String desc=String.format("您%s了这个CheckBox",b ? "勾选":"没勾选");compoundButton.setText(desc);}
}
- Switch
与checkbox使用是一致的,都是从Compuound类继承而来
textOn:设置右侧开启时文本
textOff:设置左侧关闭时文本
track:设置开关轨道的背景
thumb:设置开关标识图标
- RadioButton
一般单选按钮只允许选择一个,需要放在RadioGroup里面,对RadioGroup进行监听
<?xml version="1.0" encoding="utf-8"?>
<LinearLayout xmlns:android="http://schemas.android.com/apk/res/android"android:layout_width="match_parent"android:layout_height="match_parent"android:orientation="vertical"><TextViewandroid:layout_width="match_parent"android:layout_height="wrap_content"android:text="请选择你的性别"android:textColor="@color/black"android:textSize="17sp"/><RadioGroupandroid:id="@+id/rg_rb"android:layout_width="match_parent"android:layout_height="wrap_content"android:orientation="horizontal"><RadioButtonandroid:id="@+id/rb_male"android:layout_width="0dp"android:layout_weight="1"android:layout_height="wrap_content"android:text="男"/><RadioButtonandroid:id="@+id/rb_female"android:layout_width="0dp"android:layout_height="wrap_content"android:layout_weight="1"android:text="女"/></RadioGroup><TextViewandroid:id="@+id/tv_result"android:layout_width="wrap_content"android:layout_height="wrap_content"android:textSize="17sp"android:textColor="@color/black"/></LinearLayout>
package com.example.middlecontrolactivity;import androidx.appcompat.app.AppCompatActivity;import android.os.Bundle;
import android.widget.CompoundButton;
import android.widget.RadioGroup;
import android.widget.TextView;public class RadioButtonActivity extends AppCompatActivity implements RadioGroup.OnCheckedChangeListener {private TextView tv_result;@Overrideprotected void onCreate(Bundle savedInstanceState) {super.onCreate(savedInstanceState);setContentView(R.layout.activity_radio_button);RadioGroup rg_rb=findViewById(R.id.rg_rb);tv_result=findViewById(R.id.tv_result);rg_rb.setOnCheckedChangeListener(this);}@Overridepublic void onCheckedChanged(RadioGroup radioGroup, int i) {switch (i){case R.id.rb_male:tv_result.setText("你选择的是男性");break;case R.id.rb_female:tv_result.setText("你选择的女性");break;}}
}
- EditText
hint:指定提示文本的内容
maxLength:指定文件允许输入的最大长度
inputType:指定输入的文本类型
| 输入类型 | 说明 |
|---|---|
| text | 文本 |
| testPassword | 文本密码 |
| number | 整型数 |
| numberSigned | 带符号的数字 |
| numberDecimal | 带小数点的数字 |
| numberPassword | 数字密码 |
| datetime | 时间日期格式,数字,横线,斜杆,空格,冒号 |
| date | 日期格式,数字,横线,斜杠 |
| time | 时间格式 |
例子:简单的登录判断程序
<?xml version="1.0" encoding="utf-8"?>
<LinearLayout xmlns:android="http://schemas.android.com/apk/res/android"android:layout_width="match_parent"android:layout_height="match_parent"android:padding="5dp"android:orientation="vertical"><EditTextandroid:id="@+id/phone"android:layout_width="match_parent"android:layout_height="wrap_content"android:hint="请输入手机号"android:inputType="phone"android:textColorHint="@color/black"
/><EditTextandroid:id="@+id/password"android:layout_width="match_parent"android:layout_height="wrap_content"android:hint="请输入密码"android:inputType="textPassword"android:textColorHint="@color/black"/><Buttonandroid:id="@+id/button"android:layout_width="wrap_content"android:layout_height="wrap_content"android:text="提交"android:textSize="17sp"android:layout_gravity="right" /><TextViewandroid:id="@+id/text"android:layout_width="match_parent"android:layout_height="wrap_content"android:textSize="17sp"/></LinearLayout>
package com.example.middlecontrolactivity;import androidx.appcompat.app.AppCompatActivity;import android.os.Bundle;
import android.view.View;
import android.widget.Button;
import android.widget.EditText;
import android.widget.TextView;public class EditTextActivity extends AppCompatActivity implements View.OnClickListener {private  Button button;private  EditText phone;private  EditText password;private TextView v;@Overrideprotected void onCreate(Bundle savedInstanceState) {super.onCreate(savedInstanceState);setContentView(R.layout.activity_edit_text);v=findViewById(R.id.text);button =findViewById(R.id.button);phone=findViewById(R.id.phone);password=findViewById(R.id.password);button.setOnClickListener(this);}@Overridepublic void onClick(View view) {String p=phone.getText().toString();String pass=password.getText().toString();if(p.equals("123456") && pass.equals("123456")){v.setText("登录成功");}else{v.setText("登录失败");}}
}
相关文章:
安卓开发学习记录(持续学习)
文章目录前言工具创建项目简单控件即UI一、界面显示与逻辑处理二、文本三、布局四、按钮五、控件综合训练(简易计算器)六、Activity七. 中级控件前言 最近在有在持续学习Java的安卓开发,不断的把知识记录下。 工具 Android Studio安装 [Studio安装][1] [1]: https…...
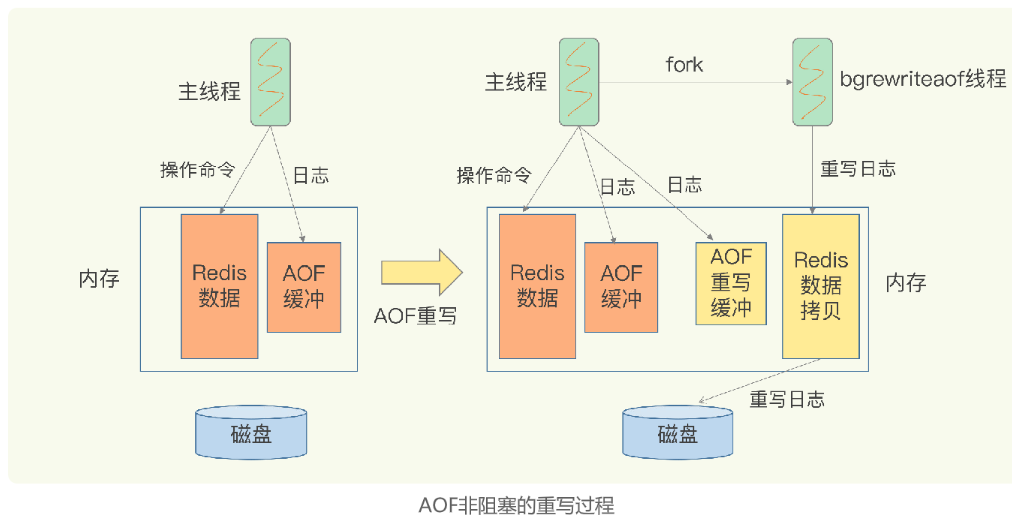
【redis】AOF日志:宕机了,Redis如何避免数据丢失
专题3-AOF日志:宕机了,Redis如何避免数据丢失 因为redis的数据是存在内存中的,一旦服务器宕机,内存中的数据会全部丢失。 AOF:redis先执行命令,把数据写入内存,然后才记录日志。 AOF优点&…...

第三章Vue中的Ajax
文章目录Vue脚手架配置代理为什么要配置代理服务器什么是跨域?代理跨域CORS跨域利用Vue-CLI配置代理服务器GitHub用户搜索案例本案例需要下载axios库: npm install axiosVue脚手架配置代理 为什么要配置代理服务器 什么是跨域? 跨域资源共…...

在 Python3 中使用 JSON
在 Python3版本中使用 JSON 本教程将会教我们如何使用 Python 编程语言编码和解码 JSON。 环境 在python3中(以及python2.6版本后的python2版本)内置了JSON模块,无需额外安装另外的JSON模块。 简介 JSON模块是python内置的用来进行pytho…...
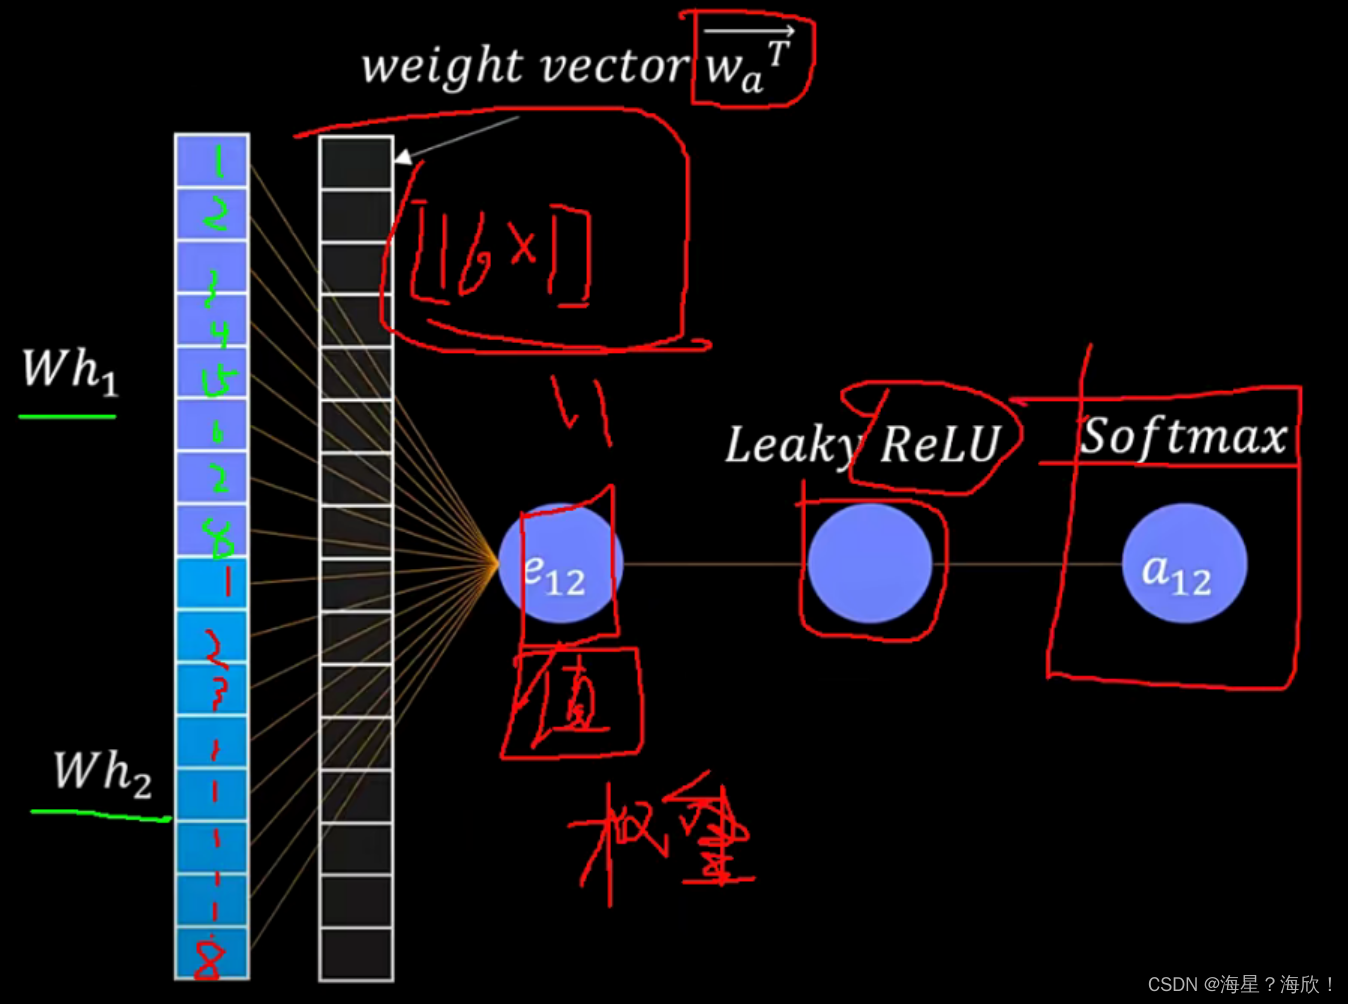
图神经网络GNN介绍
目录标题图神经网络基础图基本模块定义图的邻接矩阵点特征的更新(重构)多层GNN图卷积GCN模型GCN基本思想网络层数:基本计算图注意力机制graph attention networkT-GCN序列图神经网络图相似度图神经网络基础 图基本模块定义 三个特征&#x…...
【面试】TCP、UDP、Socket、HTTP网络编程面试题
文章目录什么是网络编程网络编程中两个主要的问题网络协议是什么为什么要对网络协议分层计算机网络体系结构1 TCP / UDP1.1 什么是TCP/IP和UDP1.2 TCP与UDP区别:1.3 TCP和UDP的应用场景:1.4 形容一下TCP和UDP1.5 运行在TCP 或UDP的应用层协议分析。什么是…...
Python语言的文件读写
🥑高级语言有很多共同之处,在文件读写这一部分我们就可以类比着之前我们过的C语言的文件读写的操作进行处理。 🥑还记得我们C语言当中的文件进行操作时所需要的哪些步骤吗?文件打开,文件读/写操作,文件关闭。我们的Py…...
面向对象 ( 上 )
Java面向对象 ( 上 ) 观看b站尚硅谷视频做的笔记 1、 面向过程 (POP) 与面向对象 (OOP) 2、类和对象 2.1、Java 类及类的成员 属性:对应类中的成员变量 行为:对应类中的成员方法。 2.2、类与对象的创建及使用 一、设计类,就是设计类的…...
Node.js学习笔记——会话控制
一、介绍 所谓会话控制就是对会话进行控制 HTTP 是一种无状态的协议,它没有办法区分多次的请求是否来自于同一个客户端, 无法区分用户 而产品中又大量存在的这样的需求,所以我们需要通过 会话控制 来解决该问题 常见的会话控制技术有三种&a…...
tsconfig.json参数详解
tsconfig.json是ts编译器的配置文件,ts编译器可以根据他的信息来对代码进行编译。 想要学习这篇文章小伙伴,可以先去看看下面文章,可以明白tsconfig.json的由来以及如何编译: 在vscode中使用Typescript并运行_typescript vscode…...

Pyecharts Geo绘制可视化地图并展示坐标位置
文章目录 Pyecharts Geo绘制可视化地图安装需要的模块绘制出地图生成空白地图修改参数,调整地图输出格式地图上展示坐标位置输入坐标点将坐标点添加入系列并配置系列完整代码参考文献Pyecharts Geo绘制可视化地图 安装需要的模块 pip install pyecharts绘制出地图 生成空白…...

什么是Hbuilder?--前端工具IDE
一,简介HBuilder 1.1HBuilder HBuilder是DCloud(数字天堂)推出的一款支持HTML5的Web开发IDE。HBuilder的编写用到了Java、C、Web和Ruby。HBuilder本身主体是由Java编写。它基于Eclipse,所以顺其自然地兼容了Eclipse的插件从Fron…...
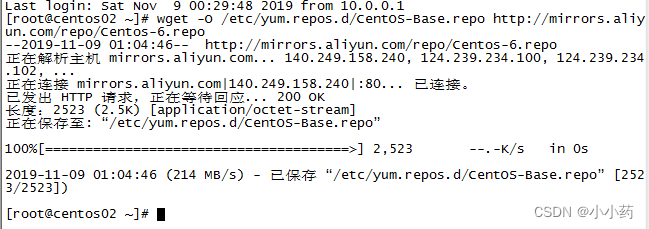
07-centos-更改数据源、打补丁、查看内核
本文主要是介绍linux-centos的常用操作 更改数据源 wget -O /etc/yum.repos.d/CentOS-Base.repo http://mirrors.aliyun.com/repo/Centos-6.repo 查看内核 [rootcentos02 ~]# uname -a Linux centos02 2.6.32-642.el6.x86_64 #1 SMP Tue May 10 17:27:01 UTC 2016 x86_64 …...
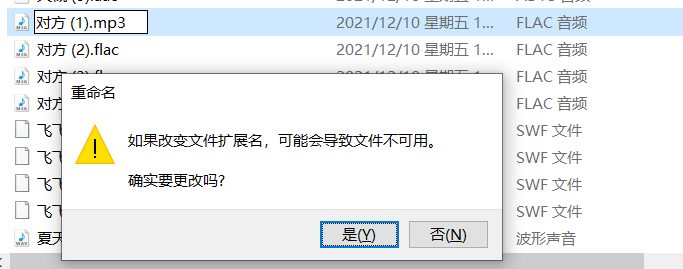
flac格式如何转mp3,3种简单方法值得收藏
flac格式如何转mp3?mp3是小伙伴们所熟知的音频格式,相信flac格式也一定有小伙伴知道,它是一种无损音频压缩格式,是目前流行的数字音乐文件格式之一。那么为什么要将flac格式转换成mp3格式呢,这里小编就给大家讲一讲fla…...

停车位 蓝桥杯模拟
【问题描述】 小蓝要在路边划分停车位。 他将路边可停车的区域划分为L个整数小块,编号1至L。一个车位需要连续的K 个小块,停车位不能重 叠。有的小块属于井盖、消防通道等区域,不能停车。 请问小蓝最多划分出多少个停车位? 【输入…...

ftrace使用实战
诉求:遇到一个问题 echo blocked > /sys/class/block/sdb/device/state 报非法参数,想要知道根因,但是对这块内核代码不熟悉,不知道从哪里下手,那就先用ftrace看看内核调用栈,如下所示。 rootrlk:/home…...
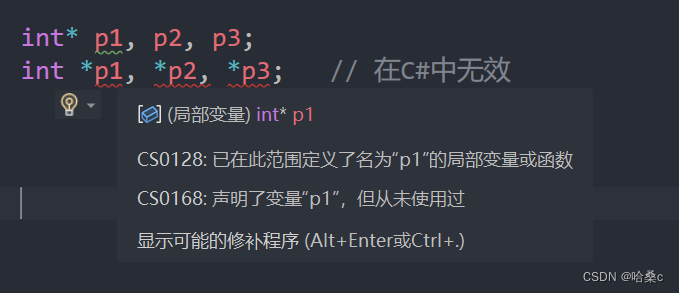
【C#进阶】C# 不安全代码
序号系列文章20【C#进阶】C# 泛型21【C#进阶】C# 匿名方法22【C#进阶】C# 多线程文章目录前言1、什么是不安全代码?2、如何编译不安全代码?3、指针类型4、指针执行的运算符和语句5、固定大小的缓冲区6、函数指针7、不安全代码的总结结语前言 Ὅ…...

Docker安装部署ElasticSearch
1.部署单点ElasticSearch 1.1.创建网络 因为我们还需要部署kibana容器,因此需要让ElasticSearch和kibana容器互联。这里先创建一个网络: docker network create es-net1.2.拉取镜像 考虑到ElasticSearch的兼容性,这里ElasticSearch、kiba…...

【新2023Q2模拟题JAVA】华为OD机试 - 快递业务站
最近更新的博客 华为od 2023 | 什么是华为od,od 薪资待遇,od机试题清单华为OD机试真题大全,用 Python 解华为机试题 | 机试宝典【华为OD机试】全流程解析+经验分享,题型分享,防作弊指南华为od机试,独家整理 已参加机试人员的实战技巧本篇题解:快递业务站 题目 快递业务范…...
OpenCV入门(二十四)快速学会OpenCV 23 傅里叶变换
OpenCV入门(二十四)快速学会OpenCV 23 傅里叶变换1.傅里叶变换理论概述2.Numpy实现傅里叶变换2.1 傅里叶变换2.2 傅里叶逆变换2.3 高通滤波3.OpenCV实现傅里叶变换3.1 实现傅里叶变换3.2 实现傅里叶逆变换3.3 低通滤波作者:Xiou 1.傅里叶变换…...

程序员副业指南:从技术到收入的10种变现路径
CSDN程序员副业图谱技术文章大纲副业方向概览技术博客与内容创作:分享技术经验、教程、行业见解在线教育与课程开发:录制视频课程、开设直播讲座开源项目与工具开发:参与或主导开源项目,开发实用工具自由职业与远程工作࿱…...

STM32移植LVGL图形库实战指南
1. LVGL图形库概述与STM32移植价值LittlevGL(简称LVGL)作为当前最受欢迎的嵌入式开源图形库之一,其设计哲学完美契合了资源受限的嵌入式环境。我在多个STM32项目中采用LVGL后发现,相比传统GUI方案,它具有三个显著优势&…...

算法部署设计,Sm3国密算法的硬件ip设计,纯v手写代码,图一为ip接口,图二为资源消耗
算法部署设计,Sm3国密算法的硬件ip设计,纯v手写代码,图一为ip接口,图二为资源消耗,图三四为封装为axilite接口并在开发版下板测试,图五为开发版实测结果 直接联系内容包括:sm3的软件python实现代码…...

2.2.2.3 Spark实战:词频统计
本次实战涵盖了Spark词频统计(WordCount)的两种主流实现方式。首先,利用Scala在spark-shell中完成从读取文件、flatMap分词、map映射到reduceByKey聚合的完整流程,并实现结果的降序排序。其次,针对Spark 3.3.2版本的需…...

VOOHU沃虎:从SFP到SFP28不同光模块如何选笼子?
在高速通信设备的设计中,SFP光模块笼子是一个看似简单却至关重要的组件。随着数据传输速率从1G演进到10G、25G乃至更高,光模块对笼子的要求也在发生质的变化。SFP(1G)、SFP(10G)、SFP28(25G&…...

GLM-OCR完整教程:部署、使用、API、案例,一篇搞定所有
GLM-OCR完整教程:部署、使用、API、案例,一篇搞定所有 1. GLM-OCR简介与核心优势 GLM-OCR是一款基于先进多模态架构的OCR识别工具,专为解决复杂文档理解问题而设计。与市面上大多数OCR工具不同,它不仅能识别文字,还能…...

【论文速递】BubbleRAG:为“黑盒”知识图谱打造高召回、高精度的证据检索引擎
黑盒知识图谱检索中的三个挑战:语义实例化不确定性、结构路径不确定性、证据比较不确定性 01 研究背景 在复杂问答(如多跳推理、专家识别)任务中,基于知识图谱(KG)的检索增强生成(RAG&#x…...

3个高效功能让视频创作者轻松生成专业字幕
3个高效功能让视频创作者轻松生成专业字幕 【免费下载链接】video-srt-windows 这是一个可以识别视频语音自动生成字幕SRT文件的开源 Windows-GUI 软件工具。 项目地址: https://gitcode.com/gh_mirrors/vi/video-srt-windows 工具概述 VideoSrt是一款基于Golang开发的…...
)
告别CANoe依赖:手把手教你用Visual Studio 2019为UDS $27服务开发通用DLL(附Python调用脚本)
从零构建UDS安全访问DLL:Visual Studio 2019实战指南与Python无缝集成 在汽车电子诊断领域,UDS(Unified Diagnostic Services)协议的安全访问服务($27服务)是保护ECU敏感操作的核心机制。传统方案往往依赖C…...

Miri最佳实践清单:构建安全Rust代码的20条黄金法则
Miri最佳实践清单:构建安全Rust代码的20条黄金法则 【免费下载链接】miri An interpreter for Rusts mid-level intermediate representation 项目地址: https://gitcode.com/GitHub_Trending/mi/miri Miri是Rust的中级中间表示解释器,它能帮助开…...