linux源码安装slurm以及mung和openssl
一、源码安装munge
1、编译安装munge
(1)下载munge地址:https://github.com/dun/munge/releases
(2)解压编译安装:
| 1 2 3 4 5 6 7 8 | 创建/data目录 复制文件
进入源文件目录 cd /data/
|
2、创建用户并修改权限
| 1 2 3 4 5 6 7 8 9 |
|
3、配置文件及服务
(1)创建munge.key文件
执行以下命令完成以后,在/usr/local/munge/etc/munge/下面会生成munge.key,需修改munge.key的权限
| 1 2 |
|
![]()
【注意】:如果有多台服务器,需将服务端的munge.key发给客户端,客户端无需自己生成
(2)生成链接文件并启动服务
| 1 2 3 4 5 |
|
注:若是service服务
| 1 2 3 4 |
|
4、安装中会出现的问题
(1)configure报错
![]()
【解决方式】:apt -y install openssl-devel openssl
这里采用符合GPL许可的Open SSL加密库,如果是源码编译的此库环境,编译时需要通过--with-crypto-lib选择指定
或者源码安装openssl后--with-openssl-prefix=/usr/local/openssl
(2)文件权限和所有者有问题

/usr/local的文件权限和所有者有问题
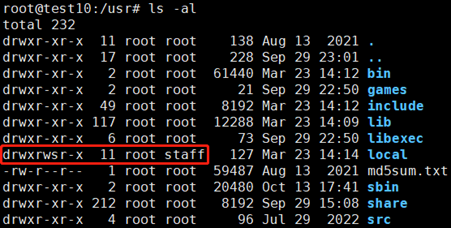
【解决方式】:修改/usr/local的文件权限和所有者
| 1 2 |
|
二、源码安装slurm
| 1 |
|
1、下载并安装
(1)下载地址:Download Slurm - SchedMD
| 1 2 3 |
|
(2)编译安装
| 1 2 3 4 5 6 |
|
查看vim config.log文件是否有错误
![]()

如果下面显示no,则需要重新./configure并指定,--with-mysql_config=/usr/bin

| 1 |
|
2、配置数据库
mysql -u root -p 登录到数据库进行下面操作
| 1 2 3 4 5 6 7 8 9 10 11 12 13 14 15 |
|
3、配置slurm文件及服务
(1)编辑配置文件(示例配置文件在源码包中的etc下)
| 1 2 3 4 5 6 |
|
【注意】:客户端只需要把服务端修改好的slurm.conf发过去即可,具体配置内容可在文末参考
(2)配置环境变量
| 1 2 3 |
|
(3)启动服务(服务启动文件在源码包中的etc下)
| 1 2 3 4 5 |
|
【注意】:客户端只需要slurmd
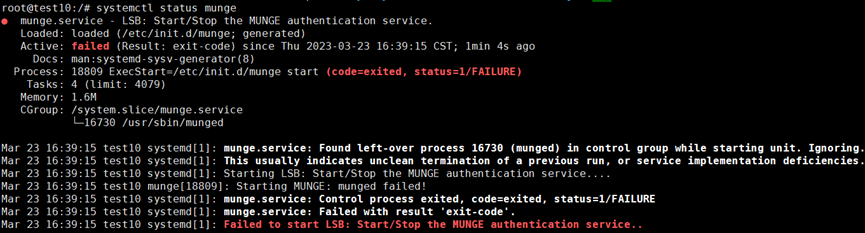
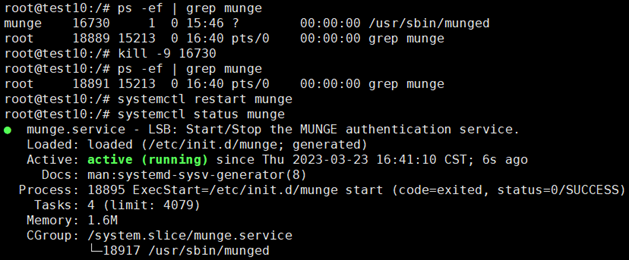
正常情况下显示绿色的active状态;如果失败,则用下面命令查看错误日志
| 1 |
|
启动后如果节点状态是down,可用下面命令启动节点:
| 1 |
|
4、slurm排错
重启slurmctld服务
| 1 2 3 4 |
|
(1)错误:mysql_real_connect failed: 2003 Can't connect to MySQL server on 'Intel:3306' (111)

数据库连接失败
查看3306端口是否开放远程连接

没有开放3306端口
修改vim /etc/my.cnf,添加port=3306,然后重启mysql;
(2)slurm_load_partitions: Zero Bytes were transmitted or received
客户端sinfo查看时出现x上面错误,一般是时间不一致,可用date查看时间日期。
解决:节点时间未同步,安装NTP后,启动ntpd服务即可。
三、openssl源码安装
1、下载安装openssl
(1)查看openssl版本
| 1 |
|

(2)下载相应版本openssl
下载地址:Old Releases | Library
| 1 2 3 4 |
|
2、测试验证
| 1 |
|
如果正确显示版本号,则安装成功。某些版本的操作系统会报下列错误
openssl: symbol lookup error: openssl: undefined symbol: EVP_mdc2, version OPENSSL_1_1_0

| 1 2 3 4 |
|
3、切换openssl版本
| 1 2 3 4 5 6 7 8 9 10 11 12 13 |
|
4、解决openssl报错
源码安装完OpenSSL后,打开一个新的窗口执行openssl version命令报错(一定要新开窗口执行openssl version)
(i)error while loading shared libraries: libssl.so.1.1: cannot open shared object file: No such file or directory
(ii)error while loading shared libraries: libcrypto.so.1.1: cannot open shared object file: No such file or directory

(1)方法一:
链接或拷贝/lib(lib64)和/usr/lib(lib64)和/usr/local/lib(lib64)存在的相应动态库
| 1 2 |
|
(2)方法二:
不指定安装目录,一般so会存放在/usr/local/lib这个目录底下,去这个目录底下找,果然发现自己所需要的.so文件

所以,在/etc/ld.so.conf中加入/usr/local/lib这一行,保存之后,再运行:/sbin/ldconfig -v更新一下配置即可。
| 1 2 |
|
其作用是将文件/etc/ld.so.conf列出的路径下的库文件缓存到/etc/ld.so.cache以供使用,因此当安装完一些库文件,或者修改/etc/ld.so.conf增加了库的新搜索路径,需要运行一下ldconfig,使所有的库文件都被缓存到文件/etc/ld.so.cache中,如果没做,可能会找不到刚安装的库。
四、连网yum安装munge
1、配置并安装munge
(1)添加munge用户
| 1 2 |
|
(2)安装munge
| 1 |
|
(3)执行以下命令,创建munge.key文件:
| 1 |
|
2、修改文件权限
执行完以后,在/etc/munge/下面会生成munge.key,需修改munge.key的权限以及所属用户,把所属用户改成munge(/etc和/usr应为root权限)
| 1 2 |
|
| 1 2 |
|
五、Slurm常用命令以及基本用法
1、查看可用资源sinfo
| idle | 节点空闲,可接受作业 |
| alloacted | 该节点已经分配作业且所有核心用满,在作业释放前不能再被分配作业 |
| mix | 使用部分核心,仍可以被分配作业 |
| drain | 对应节点已经下线 |
| drng | 节点已下线但仍有作业在运行 |
2、slurm提交作业命令
(1)交互式作业srun
srun命令属于交互式提交作业,有屏幕输出,但容易受网络波动影响,断网或关闭窗口会导致作业中断。
| 1 |
|

| 1 2 3 4 5 6 7 8 9 10 |
|
(2)批处理作业脚本sbatch
sbatch一般情况下与srun一起提交作业到后台运行,需要将srun写到脚本中,再用sbatch 提交脚本。这种方式不受本地网络波动影响,提交作业后可以关闭本地电脑。sbatch命令没有屏幕输出,默认输出日志为提交目录下的slurm-xxx.out文件,可以使用tail -f slurm-xxx.out实时查看日志,其中xxx为作业号。
<i、一个简单的Slurm脚本(job_run.sh)如下:
| 1 2 3 4 5 6 7 8 9 10 11 12 13 14 15 16 17 18 19 20 21 22 23 |
|
<ii、sbatch提交作业
| 1 |
|
![]()
3、查看作业状态squeue

| 1 2 3 4 5 6 7 |
|
4、删除作业scancel
| 1 |
|

| 1 2 3 4 5 |
|
5、查看任务信息scontrol
| 1 2 3 4 |
|
(1)scontrol对节点进行控制
scontrol命令可以管理Slurm集群中的节点,例如关机、重启和修改属性等操作。例如,要关闭节点x86b,可以使用以下命令:
| 1 |
|
(2)scontrol修改队列属性
scontrol命令可以管理Slurm队列,例如修改队列的最大CPU数、最大内存大小等属性。例如,要将q_x86队列最大CPU数更改为48,可以使用以下命令:
| 1 |
|
6、查询包括已完成作业信息sacct
输出内容会包括,作业号,作业名,分区,计费账户,申请的CPU数量,状态,结束代码
| 1 2 3 4 5 6 7 8 9 10 11 12 |
|
7、调度配置信息sacctmgr
主要负责管理账号,用户,集群分区等资源
| 1 2 3 4 5 6 7 8 9 10 11 12 13 14 15 16 17 18 |
|
六、slurm配置文件
(1)slurm.conf配置文件
| 1 2 3 4 5 6 7 8 9 10 11 12 13 14 15 16 17 18 19 20 21 22 23 24 25 26 27 28 29 30 31 32 33 34 35 36 37 38 39 40 41 42 43 44 45 46 47 48 49 50 51 52 53 54 55 56 57 58 59 60 61 62 63 64 65 66 67 68 69 70 71 72 73 74 75 76 77 78 79 80 81 82 83 84 85 86 87 88 89 90 91 92 93 94 95 96 97 98 99 100 101 102 103 104 105 106 107 108 109 110 111 112 113 114 115 116 117 118 119 120 121 122 123 124 125 126 127 128 129 130 131 132 133 134 135 136 137 138 139 140 141 142 143 144 145 146 147 148 149 150 151 152 153 154 155 156 157 158 159 160 161 162 163 164 165 166 167 168 169 170 171 172 173 174 175 176 177 178 179 180 181 182 183 184 185 186 187 188 189 190 191 192 193 194 195 196 197 198 199 200 201 202 203 204 205 206 207 208 209 210 211 212 213 214 215 216 217 218 219 220 221 222 223 224 225 226 227 228 229 230 231 232 233 234 235 236 237 238 239 240 241 242 243 244 245 246 247 248 249 250 251 252 253 254 255 256 257 258 259 260 261 |
|
(2)slurmdbd.conf配置文件
| 1 2 3 4 5 6 7 8 9 10 11 12 13 14 15 16 17 18 19 20 21 22 23 24 25 26 27 28 29 30 31 32 33 34 35 36 37 38 39 40 41 42 |
|
(2)
| 1 2 3 4 5 6 7 8 9 10 11 12 13 14 15 16 17 18 19 20 21 22 23 24 25 26 27 28 29 30 31 32 33 34 35 36 37 38 39 40 41 42 43 44 45 46 47 48 49 50 51 52 53 54 55 56 57 58 59 60 61 62 63 64 65 66 67 68 69 70 71 72 73 74 75 76 77 78 79 80 81 82 83 84 85 86 87 88 89 90 91 92 93 94 95 96 97 98 99 100 101 102 103 104 105 106 107 108 109 110 111 112 113 114 115 116 117 118 119 120 121 122 123 124 125 126 127 128 129 130 131 132 133 134 135 136 137 138 139 140 141 142 143 144 145 146 147 148 149 150 151 152 153 154 155 156 157 158 159 160 161 162 163 164 165 166 167 168 169 170 171 172 173 174 175 176 177 178 179 180 181 182 183 184 185 186 187 188 189 190 191 192 193 194 195 196 197 198 199 200 201 202 203 204 205 206 207 208 209 210 211 212 213 214 215 216 217 218 219 220 221 222 223 224 225 226 227 228 229 230 231 232 233 234 235 236 237 238 239 240 241 242 243 244 245 246 247 248 249 250 251 252 253 254 255 256 257 258 259 260 261 262 263 264 265 266 267 268 |
|
-
相关文章:
linux源码安装slurm以及mung和openssl
一、源码安装munge 1、编译安装munge (1)下载munge地址:https://github.com/dun/munge/releases (2)解压编译安装: 1 2 3 4 5 6 7 8 创建/data目录 复制文件munge-0.5.15.tar.xz 到/data目录下 tar -Jx…...

分享蓝牙耳机A2DP音频卡顿原因及解决思路
背景 最近一直在更新博客,我觉得写博客有三个好处,一是很多东西时间久了就会忘,记下来方便自己以后回忆和总结,二是记下来可以加深自己对知识的理解,三是可以知识分享,方便他人。 言归正传,今天…...

Mac 下编译 libaom 源码教程
AV1 AV1是一种开放、免版税的视频编码格式,由开放媒体联盟(AOMedia)开发,旨在提供高压缩效率和优秀的视频质量。AV1支持多种分辨率,包括SD、HD、4K和8K,并适用于视频点播(VOD)、直播…...

【成品设计】基于Arduino平台的物联网智能灯
《基于Arduino平台的物联网智能灯》 整体功能: 这个任务中要求实现一个物联网智能灯。实际测试环境中要求设备能够自己创建一个热点,连接这个热点后能自动弹出控制界面(强制门户)。 功能点 基础功能 (60分) 要求作品至少有2个灯…...

安装和配置k8s可视化UI界面dashboard-1.20.6
安装和配置k8s可视化UI界面dashboard-1.20.6 1.环境规划2.初始化服务器1)配置主机名2)设置IP为静态IP3)关闭selinux4)配置主机hosts文件5)配置服务器之间免密登录6)关闭交换分区swap,提升性能7&…...

VLAN:虚拟局域网
VLAN:虚拟局域网 交换机和路由器协同工作后,将原先的一个广播域,逻辑上,切分为多个广播域。 第一步:创建VLAN [SW1]dispaly vlan 查询vlan VID(VLAN ID):用来区分和标定不同的vlan 由12位二进制构成 范围: 0-4…...

利用可解释性技术增强制造质量预测模型
概述 论文地址:https://arxiv.org/abs/2403.18731 本研究提出了一种利用可解释性技术提高机器学习(ML)模型性能的方法。该方法已用于铣削质量预测,这一过程首先训练 ML 模型,然后使用可解释性技术识别不需要的特征并去…...

FlexMatch: Boosting Semi-Supervised Learning with Curriculum Pseudo Labeling
FlexMatch: Boosting Semi-Supervised Learning with Curriculum Pseudo Labeling 摘要:引言:背景3 flexMatch3.1 Curriculum Pseudo Labeling3.2 阈值预热3.3非线性映射函数实验4.1 主要结果4.2 ImageNet上的结果4.3收敛速度加速4.4 消融研究5 相关工作摘要: 最近提出的Fi…...
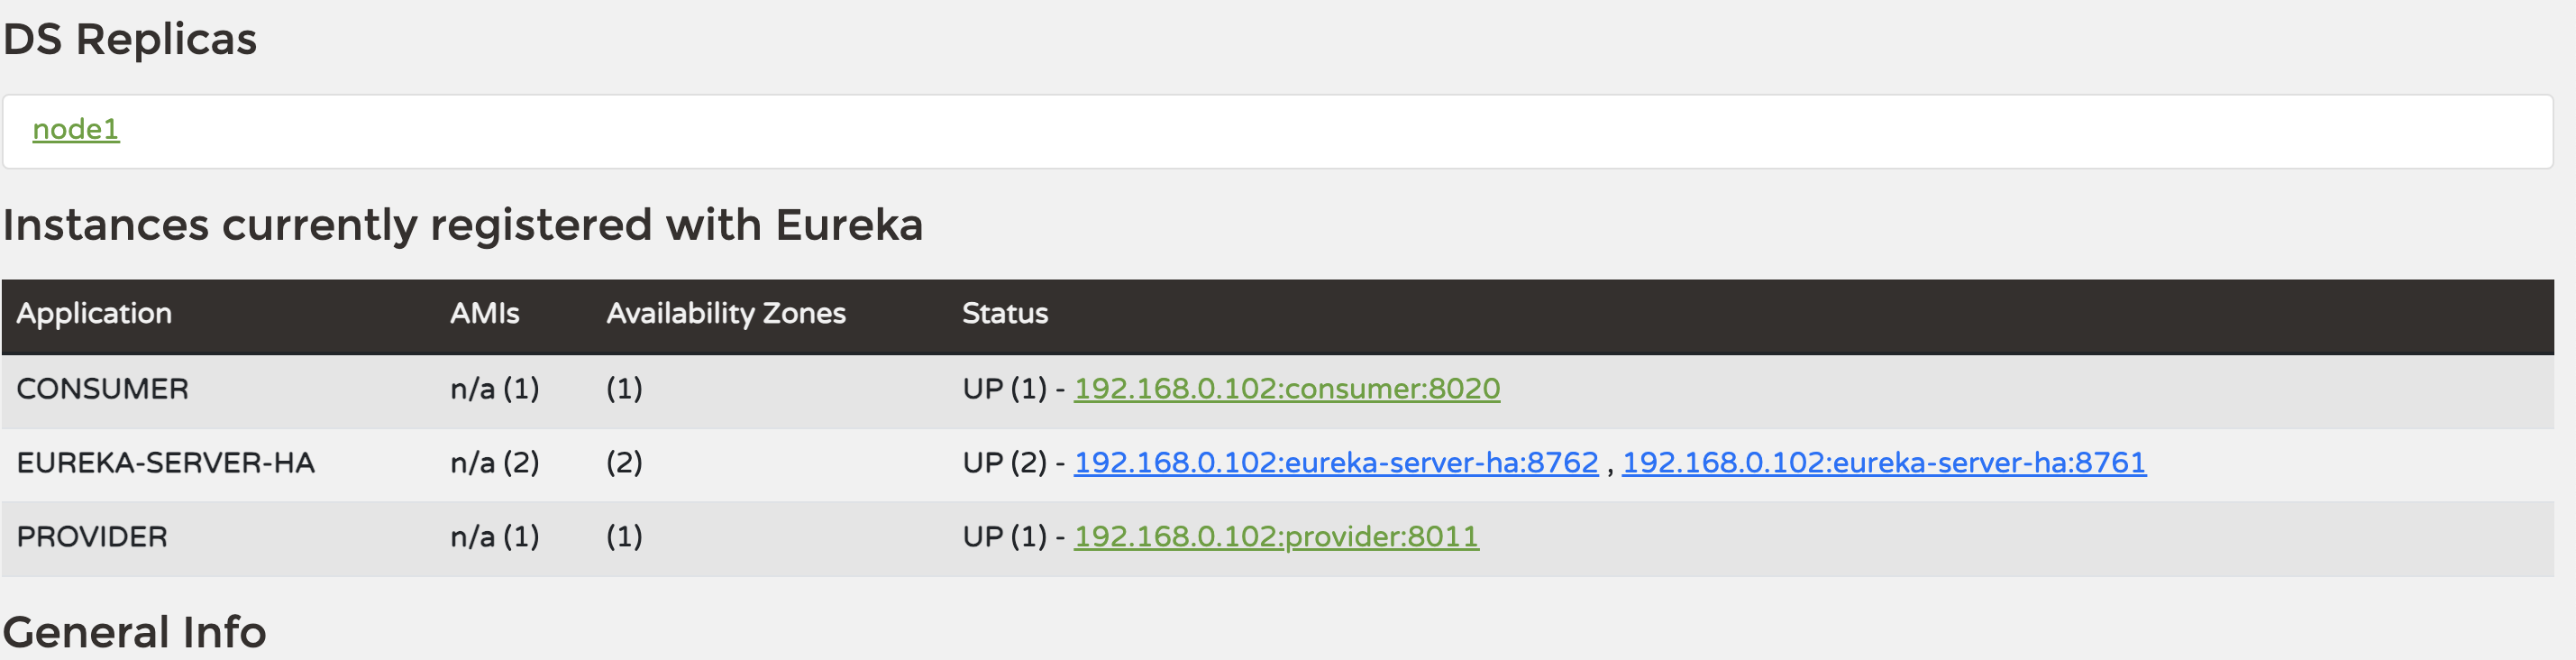
Spring Cloud 3.x 集成eureka快速入门Demo
1.什么是eureka? Eureka 由 Netflix 开发,是一种基于REST(Representational State Transfer)的服务,用于定位服务(服务注册与发现),以实现中间层服务的负载均衡和故障转移ÿ…...
线性代数 矩阵
一、矩阵基础 1、定义 一组数按照矩形排列而成的数表;形似行列式,区别点是 矩阵行列式符号()或[]| |形状方阵或非方阵方阵本质数表数属性A|A|是A诸多属性中的一种维度m *n (m 与n可以相等也可以不相等)n*n 同型矩阵 若A、B两个矩阵都是mn 矩阵&#x…...

【C语言】使用结构体实现位段
文章目录 一、什么是位段二、位段的内存分配1.位段内存分配规则练习1练习2 三、位段的跨平台问题四、位段的应用五、位段使用的注意事项 一、什么是位段 在上一节中我们讲解了结构体,而位段的声明和结构是类似的,它们有两个不同之处,如下&…...

univer实现excel协同
快速入门 <!DOCTYPE html> <html lang"en"> <head><meta charset"UTF-8"><meta name"viewport" content"widthdevice-width, initial-scale1.0"><title>Document</title><script src&q…...

JavaScript进阶笔记--深入对象-内置构造函数及案例
深入对象 创建对象三种方式 利用对象字面量new Object({…})利用构造函数 // 1. 字面量创建对象const obj1 {name: pig,age: 18};console.log(obj1); // {name: "pig", age: 18}// 2. 构造函数创建对象function Pig(name, age) {this.name…...

网络爬虫自动化Selenium模拟用户操作
自动化测试和网络爬虫在现代软件开发中占据着重要的位置。它们通过自动化用户操作,减少了人工重复操作的时间成本。Selenium作为一个功能强大且应用广泛的自动化工具,不仅能在不同的浏览器中运行自动化测试,还能进行跨平台测试,并允许与多种编程语言集成。本教程将介绍如何…...

尚硅谷rabbitmq 2024 流式队列2024指定偏移量 第55节答疑
rabbitmq的stream: 4、对比 autoTrackingstrategy方式:始终监听Stream中的新消息(狗狗看家,忠于职守)指定偏移量方式:针对指定偏移量的消息消费之后就停止(狗狗叼飞盘,回来就完) 这两种分别怎么写?java 在 RabbitMQ 中,…...

NSSCTF-WEB-pklovecloud
目录 前言 正文 思路 尝试 结尾 前言 许久未见,甚是想念. 今天来解一道有意思的序列化题 正文 思路 <?php include flag.php; class pkshow {function echo_name(){return "Pk very safe^.^";} }class acp {protected $cinder;public $neutron;public $…...
深入Postman- 自动化篇
前言 在前两篇博文《Postman使用 - 基础篇》《玩转Postman:进阶篇》中,我们介绍了 Postman 作为一款专业接口测试工具在接口测试中的主要用法以及它强大的变量、脚本功能,给测试工作人员完成接口的手工测试带来了极大的便利。其实在自动化测试上,Postman 也能进行良好的支…...

react-JSX
JSX理念 jsx在编译的时候会被babel编译为react.createELement方法 在使用jsx的文件中,需要引入react。import React from "react" jsx会被编译为React.createElement,所有jsx的运行结果都是react element React Component 在react中,常使用…...

深度对比:IPguard与Ping32在企业网络管理中的应用
随着网络安全形势日益严峻,企业在选择网络管理工具时需慎之又慎。IPguard与Ping32是目前市场上两款颇具代表性的产品,它们在功能、性能以及应用场景上各有优势。本文将对这两款产品进行深度对比,以帮助企业找到最合适的解决方案。 IPguard以其…...
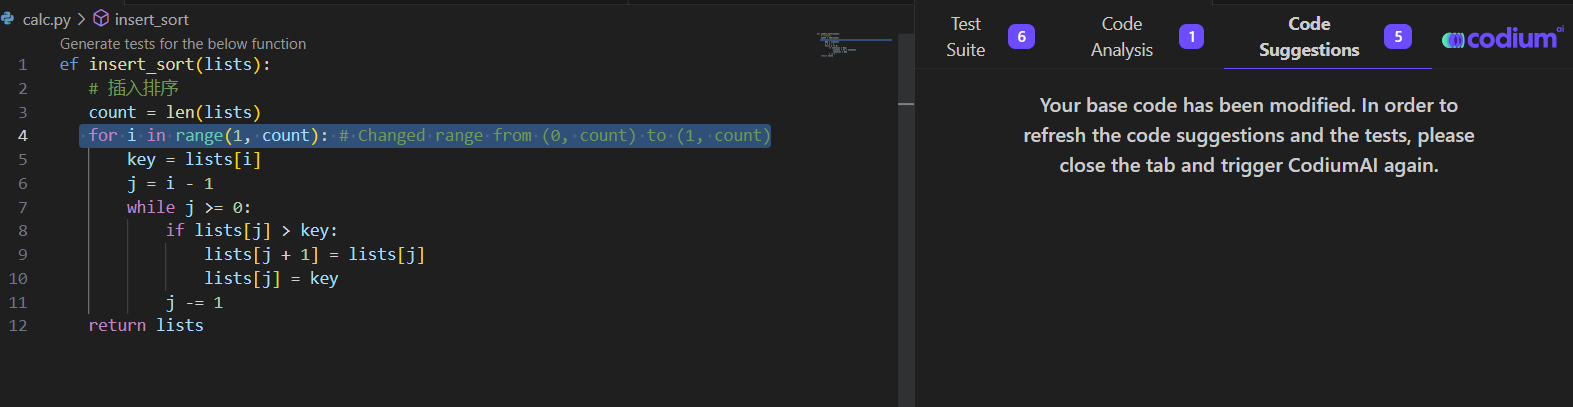
AI测试之 TestGPT
如今最火热的技术莫非OpenAI的ChatGPT莫属,AI技术也在很多方面得到广泛应用。今天我们要介绍的TestGPT就是一个软件测试领域中当红的应用。 TestGPT是什么? TestGPT是一家总部位于以色列特拉维夫的初创公司 CodiumAI Ltd.,发布的一款用于测…...
)
告别数据错位:用Verilog在Xilinx FPGA上搞定AD7961回声时钟模式(附完整代码)
告别数据错位:用Verilog在Xilinx FPGA上搞定AD7961回声时钟模式(附完整代码) 高速数据采集系统中,时序同步问题往往是工程师的噩梦。当AD7961工作在回声时钟模式时,数据信号与时钟信号的微妙相位关系可能导致采样结果出…...

将HermesAgent项目接入Taotoken的详细配置步骤与注意事项
🚀 告别海外账号与网络限制!稳定直连全球优质大模型,限时半价接入中。 👉 点击领取海量免费额度 将HermesAgent项目接入Taotoken的详细配置步骤与注意事项 本文旨在为开发者提供一份清晰的指南,帮助你将HermesAgent项…...

罗技PUBG鼠标宏终极教程:告别压枪烦恼,轻松提升射击稳定性
罗技PUBG鼠标宏终极教程:告别压枪烦恼,轻松提升射击稳定性 【免费下载链接】logitech-pubg PUBG no recoil script for Logitech gaming mouse / 绝地求生 罗技 鼠标宏 项目地址: https://gitcode.com/gh_mirrors/lo/logitech-pubg 还在为《绝地求…...

英雄联盟智能助手Seraphine:告别手动查询,实现高效游戏决策自动化
英雄联盟智能助手Seraphine:告别手动查询,实现高效游戏决策自动化 【免费下载链接】Seraphine 英雄联盟战绩查询工具 项目地址: https://gitcode.com/gh_mirrors/se/Seraphine 在英雄联盟排位赛中,你是否曾因错过接受对局而懊恼不已&a…...

如何3步获取百度网盘真实下载地址实现满速下载
如何3步获取百度网盘真实下载地址实现满速下载 【免费下载链接】baidu-wangpan-parse 获取百度网盘分享文件的下载地址 项目地址: https://gitcode.com/gh_mirrors/ba/baidu-wangpan-parse 你是否曾被百度网盘的非会员下载速度困扰?当下载重要的工作文件、学…...

Apex Legends进阶指南:结构化训练框架与技能模块化拆解
1. 项目概述:一个面向Apex Legends玩家的成长型技能库如果你是一位《Apex Legends》的玩家,并且对提升自己的游戏水平有持续的热情,那么你很可能和我一样,经历过一个漫长的摸索期。从最初落地成盒,到逐渐熟悉地图、枪械…...

树莓派机械爪项目实战:从硬件连接到Python控制全解析
1. 项目概述:当树莓派遇上机械爪最近在折腾一个挺有意思的小项目,叫Demwunz/openclaw-pi-installation。光看这个名字,就能猜到个大概:这是一个为树莓派(Raspberry Pi)准备的机械爪(Claw&#x…...

从零构建可定制对话系统:架构设计、RAG与智能体实战
1. 项目概述:从零构建一个可定制的对话系统最近在折腾一个挺有意思的东西,我把它叫做“customized-chat”。这名字听起来可能有点泛,但它的核心目标非常明确:打造一个完全由你自己掌控、能深度融入你特定业务逻辑或知识体系的对话…...

数据中心碳足迹与可靠性优化框架解析
1. 数据中心碳足迹与可靠性优化的挑战 现代数据中心已成为数字经济的动力引擎,但伴随算力需求的爆炸式增长,其能源消耗与碳排放问题日益凸显。根据最新统计,全球数据中心年耗电量已达4600亿度,占全球总用电量的2%。随着大语言模型…...

Excalidraw草图AI技能:从图形解析到自动化代码生成实战
1. 项目概述:一个能“读懂”你草图的AI技能如果你经常用Excalidraw画流程图、架构图或者UI草图,那你一定遇到过这样的场景:画完一张图,想把它整理成文档,或者想基于这张图生成一些代码,又或者想让它自己动起…...