Python :冬至快乐
第1部分:基础设置
首先创建一个新的 Python 文件,命名为 fireworks.py。
步骤 1.1: 导入必要的库
import pygame
import random
import sys
from pygame.locals import *
import math
import time
这些库的作用:
pygame: 用于创建游戏和图形界面random: 生成随机数sys: 系统相关功能math: 数学计算time: 时间相关功能
步骤 1.2: 初始化基本设置
# 初始化Pygame
pygame.init()# 设置窗口大小
WINDOW_WIDTH = 1200
WINDOW_HEIGHT = 800
window = pygame.display.set_mode((WINDOW_WIDTH, WINDOW_HEIGHT))
pygame.display.set_caption("烟花特效")# 定义颜色(RGB格式)
BLACK = (0, 0, 0)    # 黑色
WHITE = (255, 255, 255)  # 白色
PURPLE = (255, 0, 255)   # 紫色
GREEN = (0, 255, 0)      # 绿色
步骤 1.3: 创建基本游戏循环
# 创建时钟对象来控制帧率
clock = pygame.time.Clock()# 游戏主循环
while True:# 处理事件for event in pygame.event.get():# 如果点击关闭窗口,则退出游戏if event.type == QUIT:pygame.quit()sys.exit()# 填充黑色背景window.fill(BLACK)# 更新显示pygame.display.update()# 控制帧率为60帧每秒clock.tick(60)
运行这段代码,你应该能看到一个黑色的窗口,可以正常关闭。
第2部分:创建基础粒子系统
步骤 2.1: 创建粒子类
class Particle:def __init__(self, x, y):# 位置self.x = xself.y = y# 基本属性self.size = random.randint(1, 3) # 随机大小self.color = WHITE# 运动属性self.speed_x = random.uniform(-0.5, 0.5) # 随机水平速度self.speed_y = random.uniform(2, 4.5) # 随机垂直速度self.lifetime = random.randint(400, 600) # 生命周期# 特效属性self.angle = random.uniform(0, 360) # 旋转角度self.spin = random.uniform(-1, 1) # 旋转速度# 脉冲效果self.pulse = random.uniform(0, math.pi * 2)self.pulse_speed = random.uniform(0.02, 0.05)# 彩虹效果(20%概率)self.rainbow_effect = random.random() < 0.2
步骤 2.2: 添加粒子更新方法
def update(self):# 更新位置self.x += self.speed_x + random.uniform(-0.3, 0.3) # 添加一些随机移动self.y += self.speed_yself.lifetime -= 1 # 减少生命值# 如果粒子超出屏幕,重置位置if self.x < 0 or self.x > WINDOW_WIDTH or self.y > WINDOW_HEIGHT:self.x = random.randint(0, WINDOW_WIDTH)self.y = random.randint(-100, -50)
步骤 2.3: 添加粒子绘制方法
def draw(self, surface):# 计算当前大小(带脉冲效果)size = self.size * (1.5 + 0.5 * math.sin(self.pulse))x, y = int(self.x), int(self.y)# 更新角度和脉冲self.angle += self.spinself.pulse += self.pulse_speed# 创建临时表面来绘制带透明度的效果temp_surface = pygame.Surface((size * 4, size * 4), pygame.SRCALPHA)# 绘制发光效果glow_radius = size * (2 + math.sin(self.pulse) * 0.5)for r in range(int(glow_radius), 0, -1):glow_alpha = int(60 * (r / glow_radius))glow_color = (255, 255, 255, glow_alpha)pygame.draw.circle(temp_surface, glow_color, (int(size * 2), int(size * 2)), r)# 将临时表面绘制到主表面surface.blit(temp_surface, (x - size * 2, y - size * 2))
步骤 2.4: 在主循环中使用粒子
# 创建粒子列表
particles = []# 在主循环中添加:
while True:# ... (之前的事件处理代码)# 保持粒子数量if len(particles) < 200:particles.append(Particle(random.randint(0, WINDOW_WIDTH), -10))# 更新和绘制所有粒子particles = [p for p in particles if p.lifetime > 0]for particle in particles:particle.update()particle.draw(window)
第3部分:创建烟花系统
步骤 3.1: 创建烟花粒子类
这是烟花爆炸后产生的个别粒子:
class FireworkParticle:def __init__(self, x, y, dx, dy, color):# 位置self.x = xself.y = y# 速度self.dx = dx # x方向速度self.dy = dy # y方向速度# 外观self.color = color# 生命周期self.lifetime = random.randint(30, 90)self.original_lifetime = self.lifetime # 保存初始生命值用于计算透明度# 轨迹self.trail = [] # 存储粒子运动轨迹def update(self):# 添加重力效果self.dy += 0.1 # 重力加速度# 更新位置self.x += self.dxself.y += self.dy# 减少生命值self.lifetime -= 1# 更新轨迹self.trail.append((self.x, self.y))if len(self.trail) > 10: # 保持最多10个轨迹点self.trail.pop(0)def draw(self, surface):if self.lifetime <= 0:return# 绘制轨迹for i in range(len(self.trail) - 1):# 计算轨迹点的透明度alpha = int(255 * (i / len(self.trail)) * (self.lifetime / self.original_lifetime))color = (*self.color, alpha)# 绘制轨迹线pygame.draw.line(surface,color,(int(self.trail[i][0]), int(self.trail[i][1])),(int(self.trail[i+1][0]), int(self.trail[i+1][1])),2)
步骤 3.2: 创建主烟花类
这是控制烟花发射和爆炸的主类:
class Firework:def __init__(self, x, y):# 起始位置和目标位置self.x = xself.y = WINDOW_HEIGHT + 10 # 从屏幕底部开始self.target_y = y # 目标高度# 运动属性self.speed = random.uniform(8, 12)self.thickness = random.randint(2, 4)# 状态self.exploded = Falseself.dead = False# 粒子列表self.particles = []# 颜色self.color = (random.randint(150, 255),random.randint(150, 255),random.randint(150, 255))# 轨迹self.trail = []def explode(self):self.exploded = True# 创建爆炸粒子for _ in range(100): # 创建100个粒子angle = random.uniform(0, math.pi * 2)speed = random.uniform(2, 8)# 根据角度和速度计算粒子的运动方向self.particles.append(FireworkParticle(self.x, self.y,speed * math.cos(angle), # x方向速度speed * math.sin(angle), # y方向速度self.color))def update(self):if not self.exploded:# 烟花上升阶段self.trail.append((self.x, self.y))if len(self.trail) > 10:self.trail.pop(0)self.y -= self.speed# 到达目标高度时爆炸if self.y <= self.target_y:self.explode()else:# 爆炸后更新所有粒子for particle in self.particles:particle.update()# 检查是否所有粒子都消失if all(p.lifetime <= 0 for p in self.particles):self.dead = Truedef draw(self, surface):if not self.exploded:# 绘制上升轨迹for i in range(len(self.trail) - 1):alpha = int(255 * (i / len(self.trail)))color = (*self.color, alpha)pos1 = self.trail[i]pos2 = self.trail[i + 1]pygame.draw.line(surface, color, pos1, pos2, self.thickness)# 绘制烟花本体的发光效果glow_surface = pygame.Surface((20, 20), pygame.SRCALPHA)pygame.draw.circle(glow_surface, (*self.color, 255), (10, 10), 3)surface.blit(glow_surface, (self.x - 10, self.y - 10))else:# 绘制爆炸后的所有粒子for particle in self.particles:particle.draw(surface)
步骤 3.3: 在主循环中整合烟花系统
# 在主程序开始处添加烟花列表
fireworks = []# 在主循环中添加烟花逻辑
while True:# ... (之前的代码保持不变)# 随机发射新烟花if random.random() < 0.1:  # 10%的概率发射新烟花fireworks.append(Firework(random.randint(100, WINDOW_WIDTH - 100),random.randint(100, WINDOW_HEIGHT // 2)))# 更新和绘制烟花for firework in fireworks[:]:  # 使用切片创建副本以避免删除时的问题firework.update()firework.draw(window)if firework.dead:fireworks.remove(firework)
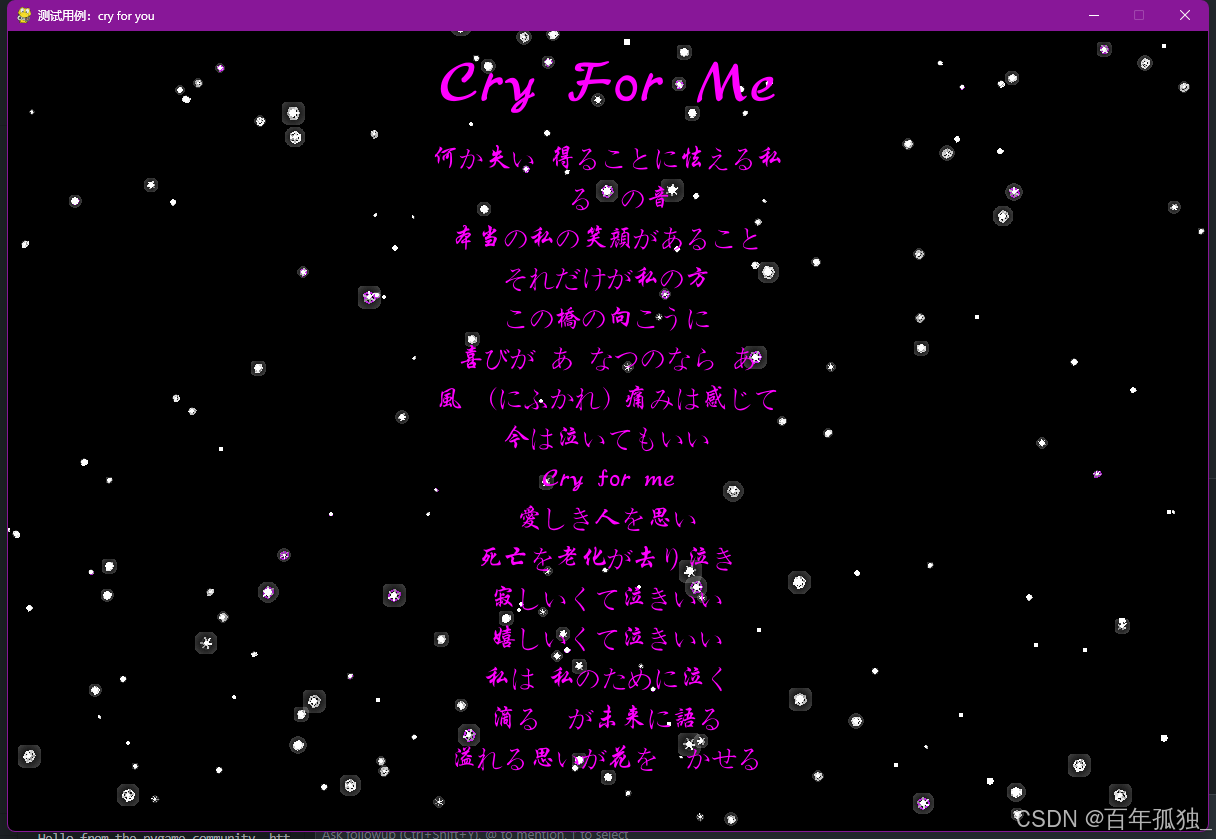
第4部分:添加文字效果
def draw_scrolling_lyrics(window, song_text, offset, particles):# 设置字体title_font = pygame.font.Font("./test.ttf", 60) # 确保有这个字体文件lyrics_font = pygame.font.Font("./test.ttf", 26)# 绘制标题title_string = "Cry For Me"title_surface = title_font.render(title_string, True, PURPLE)title_rect = title_surface.get_rect(center=(WINDOW_WIDTH // 2, 50))window.blit(title_surface, title_rect)# 绘制歌词lines = song_text.split('\n')line_height = 40for i, line in enumerate(lines):if line.strip():# 计算每行文字的位置y = (i * line_height + offset) % (len(lines) * line_height) + 90x = WINDOW_WIDTH // 2# 粒子与文字的互动for particle in particles:if (particle.x >= x - 100 and particle.x <= x + 100 andparticle.y >= y - 10 and particle.y <= y + 10):particle.color = BLACK# 渲染文字text = lyrics_font.render(line.strip(), True, PURPLE)text_rect = text.get_rect(center=(x, y))# 只绘制在屏幕范围内的文字if y < WINDOW_HEIGHT - 50:window.blit(text, text_rect)
最后,在主循环中添加滚动文字的控制:
# 在主程序开始处添加
SCROLL_SPEED = 1
current_offset = 0# 在主循环中添加
current_offset -= SCROLL_SPEED
draw_scrolling_lyrics(window, songs_text, current_offset, particles)# 检查是否需要显示结束信息
if current_offset < -WINDOW_HEIGHT:window.fill(BLACK)message_font = pygame.font.Font("./test.ttf", 60)message_text = "冬至快乐! 愿我如星君如月,夜夜流光相皎洁"message_surface = message_font.render(message_text, True, PURPLE)message_rect = message_surface.get_rect(center=(WINDOW_WIDTH // 2, WINDOW_HEIGHT // 2))window.blit(message_surface, message_rect)
运行提示:
- 确保所有需要的字体文件都在正确的位置
- 运行程序时,你应该能看到:
- 背景中飘动的粒子
- 随机发射的烟花
- 滚动的歌词文本
- 最后显示的祝福语
如果遇到任何问题,可以:
- 检查是否所有导入的模块都已安装
- 确认字体文件路径是否正确
- 逐步调试每个部分的功能
特定部分详解
让我详细解释一些关键部分的实现原理和细节。
1. 粒子发光效果详解
让我们深入了解粒子的发光效果是如何实现的:
def draw(self, surface):# 计算当前大小(带脉冲效果)size = self.size * (1.5 + 0.5 * math.sin(self.pulse))x, y = int(self.x), int(self.y)# 创建临时透明表面temp_surface = pygame.Surface((size * 4, size * 4), pygame.SRCALPHA)# 绘制发光效果glow_radius = size * (2 + math.sin(self.pulse) * 0.5)for r in range(int(glow_radius), 0, -1):# 计算每层光晕的透明度glow_alpha = int(60 * (r / glow_radius))glow_color = (255, 255, 255, glow_alpha)# 从外到内绘制递减半径的圆形pygame.draw.circle(temp_surface, glow_color, (int(size * 2), int(size * 2)), r)
发光效果的原理:
- 创建一个带透明通道的临时表面
- 通过多层叠加的圆形实现发光效果:
- 外层圆形透明度低
- 内层圆形透明度高
- 使用 sin 函数创造脉冲效果
- 最终将临时表面绘制到主表面上
2. 烟花爆炸效果详解
烟花爆炸是通过创建多个具有不同运动方向的粒子来实现的:
def explode(self):self.exploded = Truefor _ in range(100): # 创建100个粒子# 随机角度(0-360度)angle = random.uniform(0, math.pi * 2)# 随机初始速度speed = random.uniform(2, 8)# 根据角度和速度计算x和y方向的分量dx = speed * math.cos(angle) # x方向速度dy = speed * math.sin(angle) # y方向速度# 创建新的爆炸粒子particle = FireworkParticle(self.x, # 爆炸位置xself.y, # 爆炸位置ydx, # x方向速度dy, # y方向速度self.color # 继承烟花颜色)self.particles.append(particle)
爆炸效果的原理:
- 使用极坐标系统创建360度的粒子分布
- 每个粒子具有:
- 随机的初始速度
- 基于角度计算的运动方向
- 重力影响(在更新函数中添加)
3. 粒子轨迹系统详解
轨迹效果的实现是通过存储和绘制粒子的历史位置:
class FireworkParticle:def __init__(self, x, y, dx, dy, color):# ... 其他初始化代码 ...self.trail = [] # 存储位置历史self.trail_length = 10 # 轨迹长度def update(self):# 更新位置self.x += self.dxself.y += self.dyself.dy += 0.1 # 重力效果# 更新轨迹self.trail.append((self.x, self.y))if len(self.trail) > self.trail_length:self.trail.pop(0) # 移除最老的位置def draw(self, surface):if self.lifetime <= 0:return# 绘制轨迹for i in range(len(self.trail) - 1):# 计算轨迹段的透明度progress = i / len(self.trail)life_factor = self.lifetime / self.original_lifetimealpha = int(255 * progress * life_factor)# 创建带透明度的颜色color = (*self.color, alpha)# 绘制轨迹线段start_pos = (int(self.trail[i][0]), int(self.trail[i][1]))end_pos = (int(self.trail[i+1][0]), int(self.trail[i+1][1]))pygame.draw.line(surface, color, start_pos, end_pos, 2)
轨迹系统的原理:
- 维护一个固定长度的位置历史列表
- 每次更新时:
- 添加新位置
- 移除最老的位置
- 绘制时:
- 连接相邻的历史位置点
- 使用渐变透明度创造淡出效果
4. 文字交互效果详解
def draw_scrolling_lyrics(window, song_text, offset, particles):# ... 前面的代码 ...for i, line in enumerate(lines):if line.strip():# 计算文字位置y = (i * line_height + offset) % (len(lines) * line_height) + 90x = WINDOW_WIDTH // 2# 粒子与文字交互for particle in particles:# 检查粒子是否在文字附近if (particle.x >= x - 100 and particle.x <= x + 100 andparticle.y >= y - 10 and particle.y <= y + 10):particle.color = BLACK # 改变粒子颜色# 渲染文字text = lyrics_font.render(line.strip(), True, PURPLE)text_rect = text.get_rect(center=(x, y))# 只绘制在屏幕范围内的文字if y < WINDOW_HEIGHT - 50:window.blit(text, text_rect)
文字交互的原理:
- 文字滚动:
- 使用 offset 控制垂直位置
- 循环显示文本内容
- 粒子交互:
- 检测粒子是否在文字区域
- 改变进入文字区域的粒子颜色
- 优化显示:
- 只渲染屏幕可见区域的文字
- 使用矩形碰撞检测优化交互
高阶了解
5. 粒子物理系统详解
5.1 基础物理模拟
class Particle:def __init__(self, x, y):# 基础物理属性self.x = xself.y = yself.velocity_x = random.uniform(-0.5, 0.5)self.velocity_y = random.uniform(2, 4.5)self.acceleration = 0.1 # 重力加速度# 运动控制参数self.damping = 0.98 # 阻尼系数self.wind = random.uniform(-0.1, 0.1) # 风力效果def apply_physics(self):# 应用重力self.velocity_y += self.acceleration# 应用风力self.velocity_x += self.wind# 应用阻尼self.velocity_x *= self.dampingself.velocity_y *= self.damping# 更新位置self.x += self.velocity_xself.y += self.velocity_y
物理系统原理:
- 重力模拟:持续向下的加速度
- 风力效果:随机的水平推力
- 阻尼效果:模拟空气阻力
- 位置更新:基于速度和加速度
6. 高级视觉效果系统
6.1 颜色渐变和混合效果
class VisualEffects:@staticmethoddef create_color_gradient(color1, color2, steps):"""创建两个颜色之间的渐变"""r1, g1, b1 = color1r2, g2, b2 = color2gradient = []for i in range(steps):ratio = i / (steps - 1)r = int(r1 * (1 - ratio) + r2 * ratio)g = int(g1 * (1 - ratio) + g2 * ratio)b = int(b1 * (1 - ratio) + b2 * ratio)gradient.append((r, g, b))return gradient@staticmethoddef apply_bloom_effect(surface, intensity=1.5):"""添加泛光效果"""bloom_surface = pygame.Surface(surface.get_size(), pygame.SRCALPHA)# 创建模糊效果for offset in range(1, 5):bloom_layer = surface.copy()bloom_layer.set_alpha(int(255 / (offset * 2)))bloom_surface.blit(bloom_layer, (offset, offset))bloom_surface.blit(bloom_layer, (-offset, -offset))return bloom_surface
6.2 高级粒子效果
class AdvancedParticle(Particle):def __init__(self, x, y):super().__init__(x, y)self.glow_colors = []self.initialize_glow_effects()def initialize_glow_effects(self):"""初始化发光效果"""base_color = (255, 220, 100) # 金色基调self.glow_colors = VisualEffects.create_color_gradient(base_color,(255, 255, 255), # 白色5 # 渐变步数)def draw_advanced(self, surface):"""绘制带有复杂视觉效果的粒子"""# 创建临时表面用于混合temp_surface = pygame.Surface((40, 40), pygame.SRCALPHA)center = (20, 20)# 绘制多层发光效果for i, color in enumerate(self.glow_colors):radius = 10 - i * 2alpha = int(255 * (1 - i/len(self.glow_colors)))glow_color = (*color, alpha)pygame.draw.circle(temp_surface, glow_color, center, radius)# 添加动态光晕pulse = (math.sin(time.time() * 5) + 1) / 2 # 0到1之间的脉冲值glow_surface = VisualEffects.apply_bloom_effect(temp_surface, pulse)# 将效果绘制到主表面pos = (int(self.x - 20), int(self.y - 20))surface.blit(glow_surface, pos)
7. 碰撞检测系统
class CollisionSystem:@staticmethoddef check_particle_collision(particle1, particle2):"""检查两个粒子之间的碰撞"""dx = particle1.x - particle2.xdy = particle1.y - particle2.ydistance = math.sqrt(dx*dx + dy*dy)return distance < (particle1.size + particle2.size)@staticmethoddef resolve_collision(particle1, particle2):"""解决粒子碰撞"""# 计算碰撞法线nx = particle2.x - particle1.xny = particle2.y - particle1.ydist = math.sqrt(nx*nx + ny*ny)if dist == 0:returnnx, ny = nx/dist, ny/dist# 计算相对速度rel_vel_x = particle1.velocity_x - particle2.velocity_xrel_vel_y = particle1.velocity_y - particle2.velocity_y# 计算碰撞响应response = 2.0 * (rel_vel_x*nx + rel_vel_y*ny)# 更新速度particle1.velocity_x -= response * nxparticle1.velocity_y -= response * nyparticle2.velocity_x += response * nxparticle2.velocity_y += response * ny
8. 性能优化系统
class PerformanceOptimizer:def __init__(self):self.particle_count = 0self.last_frame_time = time.time()self.frame_times = []def update(self, particles):"""更新性能统计"""self.particle_count = len(particles)current_time = time.time()frame_time = current_time - self.last_frame_timeself.frame_times.append(frame_time)# 保持最近100帧的记录if len(self.frame_times) > 100:self.frame_times.pop(0)self.last_frame_time = current_timedef get_fps(self):"""计算当前FPS"""if not self.frame_times:return 0return 1.0 / (sum(self.frame_times) / len(self.frame_times))def should_reduce_particles(self):"""判断是否需要减少粒子数量"""return self.get_fps() < 30def optimize_particle_count(self, particles):"""优化粒子数量"""if self.should_reduce_particles():# 移除20%的粒子reduction = int(len(particles) * 0.2)particles = particles[reduction:]return particles
9. 主循环优化
def main():# 初始化系统performance_optimizer = PerformanceOptimizer()particles = []fireworks = []while True:# 时间控制current_time = time.time()# 事件处理for event in pygame.event.get():if event.type == QUIT:return# 更新性能统计performance_optimizer.update(particles)# 优化粒子数量if performance_optimizer.should_reduce_particles():particles = performance_optimizer.optimize_particle_count(particles)# 更新和绘制window.fill(BLACK)# 使用四叉树优化碰撞检测quad_tree = QuadTree(Rect(0, 0, WINDOW_WIDTH, WINDOW_HEIGHT))for particle in particles:quad_tree.insert(particle)# 更新粒子for particle in particles:nearby = quad_tree.query(Rect(particle.x - 20,particle.y - 20,40, 40))for other in nearby:if other != particle:if CollisionSystem.check_particle_collision(particle, other):CollisionSystem.resolve_collision(particle, other)particle.update()particle.draw_advanced(window)# 显示性能信息fps = performance_optimizer.get_fps()draw_debug_info(window, fps, len(particles))pygame.display.flip()clock.tick(60)
完整代码(整体实现)
import pygame
import random
import sys
from pygame.locals import *
import math
import timepygame.init()
WINDOW_WIDTH = 1200
WINDOW_HEIGHT = 800
window = pygame.display.set_mode((WINDOW_WIDTH, WINDOW_HEIGHT))
pygame.display.set_caption("测试用例:cry for you")
BLACK = (0, 0, 0)
WHITE = (255, 255, 255)
PURPLE = (255, 0, 255)
GREEN = (0, 255, 0)# Global variables
SCROLL_SPEED = 1
current_offset = 0class Particle:def __init__(self, x, y):self.x = xself.y = yself.size = random.randint(1, 3)self.color = WHITEself.speed_x = random.uniform(-0.5, 0.5)self.speed_y = random.uniform(2, 4.5)self.lifetime = random.randint(400, 600)self.angle = random.uniform(0, 360)self.spin = random.uniform(-1, 1)self.pulse = random.uniform(0, math.pi * 2)self.pulse_speed = random.uniform(0.02, 0.05)self.rainbow_effect = random.random() < 0.2def update(self):self.x += self.speed_x + random.uniform(-0.3, 0.3)self.y += self.speed_yself.lifetime -= 1if self.x < 0 or self.x > WINDOW_WIDTH or self.y > WINDOW_HEIGHT:self.x = random.randint(0, WINDOW_WIDTH)self.y = random.randint(-100, -50)def draw(self, surface):size = self.size * (1.5 + 0.5 * math.sin(self.pulse))x, y = int(self.x), int(self.y)self.angle += self.spinself.pulse += self.pulse_speedif self.rainbow_effect:hue = (time.time() * 50) % 360base_color = pygame.Color(0, 0, 0)base_color.hsva = (hue, 80, 100, 100)alpha = random.randint(180, 255)flicker_color = (base_color.r, base_color.g, base_color.b, alpha)else:base_color = (min(self.color[0] + 50, 255),min(self.color[1] + 50, 255),min(self.color[2] + 50, 255))alpha = random.randint(180, 255)flicker_color = (base_color[0], base_color[1], base_color[2], alpha)temp_surface = pygame.Surface((size * 4, size * 4), pygame.SRCALPHA)glow_radius = size * (2 + math.sin(self.pulse) * 0.5)for r in range(int(glow_radius), 0, -1):glow_alpha = int(60 * (r / glow_radius))glow_color = (255, 255, 255, glow_alpha)pygame.draw.circle(temp_surface, glow_color, (int(size * 2), int(size * 2)), r)points = []inner_points = []for i in range(6):angle = math.pi / 3 * i + self.anglepx = x + size * math.cos(angle)py = y + size * math.sin(angle)points.append((int(px), int(py)))px_inner = x + size * 0.5 * math.cos(angle)py_inner = y + size * 0.5 * math.sin(angle)inner_points.append((int(px_inner), int(py_inner)))pygame.draw.polygon(temp_surface, flicker_color,[(p[0] - x + size * 2, p[1] - y + size * 2) for p in points], 2)pygame.draw.polygon(temp_surface, flicker_color,[(p[0] - x + size * 2, p[1] - y + size * 2) for p in inner_points], 1)for i in range(6):line_alpha = int(200 + 55 * math.sin(self.pulse + i))line_color = (255, 255, 255, line_alpha)pygame.draw.line(temp_surface, line_color,(size * 2, size * 2),(points[i][0] - x + size * 2, points[i][1] - y + size * 2),max(1, int(2 + math.sin(self.pulse) * 1)))glow_size = random.randint(2, 4) + math.sin(self.pulse)bright_color = (255, 255, 255, 255)pygame.draw.circle(temp_surface, bright_color, (int(size * 2), int(size * 2)), glow_size)surface.blit(temp_surface, (x - size * 2, y - size * 2))class Firework:def __init__(self, x, y):self.x = xself.y = WINDOW_HEIGHT + 10self.target_y = yself.speed = random.uniform(8, 12)self.thickness = random.randint(2, 4)self.exploded = Falseself.particles = []self.color = (random.randint(150, 255),random.randint(150, 255),random.randint(150, 255))self.trail = []self.dead = Falsedef update(self):if not self.exploded:self.trail.append((self.x, self.y))if len(self.trail) > 10:self.trail.pop(0)self.y -= self.speedif self.y <= self.target_y:self.explode()else:for particle in self.particles:particle.update()if all(p.lifetime <= 0 for p in self.particles):self.dead = Truedef explode(self):self.exploded = Truefor _ in range(100):angle = random.uniform(0, math.pi * 2)speed = random.uniform(2, 8)self.particles.append(FireworkParticle(self.x, self.y,speed * math.cos(angle),speed * math.sin(angle),self.color))def draw(self, surface):if not self.exploded:for i in range(len(self.trail) - 1):alpha = int(255 * (i / len(self.trail)))color = (*self.color, alpha)pos1 = self.trail[i]pos2 = self.trail[i + 1]pygame.draw.line(surface, color, pos1, pos2, self.thickness)glow_surface = pygame.Surface((20, 20), pygame.SRCALPHA)pygame.draw.circle(glow_surface, (*self.color, 255), (10, 10), 3)surface.blit(glow_surface, (self.x - 10, self.y - 10))else:for particle in self.particles:particle.draw(surface)class FireworkParticle:def __init__(self, x, y, dx, dy, color):self.x = xself.y = yself.dx = dxself.dy = dyself.color = colorself.lifetime = random.randint(30, 90)self.original_lifetime = self.lifetimeself.trail = []def update(self):self.dy += 0.1self.x += self.dxself.y += self.dyself.lifetime -= 1self.trail.append((self.x, self.y))if len(self.trail) > 10:self.trail.pop(0)def draw(self, surface):if self.lifetime <= 0:returnfor i in range(len(self.trail) - 1):alpha = int(255 * (i / len(self.trail)) * (self.lifetime / self.original_lifetime))color = (*self.color, alpha)pygame.draw.line(surface,color,(int(self.trail[i][0]), int(self.trail[i][1])),(int(self.trail[i + 1][0]), int(self.trail[i + 1][1])),2)def draw_scrolling_lyrics(window, song_text, offset, particles):title_font = pygame.font.Font("./test.ttf", 60)title_string = "Cry For Me"title_surface = title_font.render(title_string, True, PURPLE)title_rect = title_surface.get_rect(center=(WINDOW_WIDTH // 2, 50))window.blit(title_surface, title_rect)lyrics_font = pygame.font.Font("./test.ttf", 26)lines = song_text.split('\n')line_height = 40for i, line in enumerate(lines):if line.strip():y = (i * line_height + offset) % (len(lines) * line_height) + 90x = WINDOW_WIDTH // 2for particle in particles:if (particle.x >= x - 100 and particle.x <= x + 100 andparticle.y >= y - 10 and particle.y <= y + 10):particle.color = BLACKtext = lyrics_font.render(line.strip(), True, PURPLE)text_rect = text.get_rect(center=(x, y))if y < WINDOW_HEIGHT - 50:window.blit(text, text_rect)particles = []
fireworks = []
clock = pygame.time.Clock()  # Moved clock initialization outside the loop
while True:for event in pygame.event.get():if event.type == QUIT:pygame.quit()sys.exit()if len(particles) < 200:particles.append(Particle(random.randint(0, WINDOW_WIDTH), -10))window.fill(BLACK)particles = [p for p in particles if p.lifetime > 0]for particle in particles:particle.update()particle.draw(window)songs_text = """この橋の向こうに喜びが あ なつのなら あ風縁(にふかれ) 痛みは感じて今は泣いてもいいCry for meTime goes though痛みは次々と私の胸を裂いてゆくのふもう根羽のを 失った希望をただ未来は違う私でいたい孤独を背負い 心に自らかけた鍵何か失い 得ることに怯える私辿る雫の音本当の私の笑顔があることそれだけが私の方この橋の向こうに喜びが あ なつのなら あ風縁(にふかれ) 痛みは感じて今は泣いてもいいCry for me愛しき人を思い死亡を老化が去り泣き寂しいくて泣きいい嬉しいくて泣きいい私は 私のために泣く滴る涙が未来に語る溢れる思いが花を咲かせるその日まで 飛ばあげ嵐がさわってゆくまでこの橋の向こうに喜びが あ なつのなら あ風縁(にふかれ) 痛みは感じて今は泣いてもいいCry for meこの橋の向こうに喜びが あ なつのならJust for me"""current_offset -= SCROLL_SPEEDdraw_scrolling_lyrics(window, songs_text, current_offset, particles)if current_offset < -WINDOW_HEIGHT:window.fill(BLACK)message_font = pygame.font.Font("./test.ttf", 60)message_text = "冬至快乐! 愿我如星君如月,夜夜流光相皎洁"message_surface = message_font.render(message_text, True, PURPLE)message_rect = message_surface.get_rect(center=(WINDOW_WIDTH // 2, WINDOW_HEIGHT // 2))window.blit(message_surface, message_rect)# 随机发射烟花if random.random() < 0.1:fireworks.append(Firework(random.randint(100, WINDOW_WIDTH - 100),random.randint(100, WINDOW_HEIGHT // 2)))# 更新和绘制烟花for firework in fireworks[:]:firework.update()firework.draw(window)if firework.dead:fireworks.remove(firework)pygame.display.update()clock.tick(60)  # Moved clock tick to the end of the loop
相关文章:
Python :冬至快乐
第1部分:基础设置 首先创建一个新的 Python 文件,命名为 fireworks.py。 步骤 1.1: 导入必要的库 import pygame import random import sys from pygame.locals import * import math import time这些库的作用: pygame: 用于创建游戏和图…...
重拾设计模式--状态模式
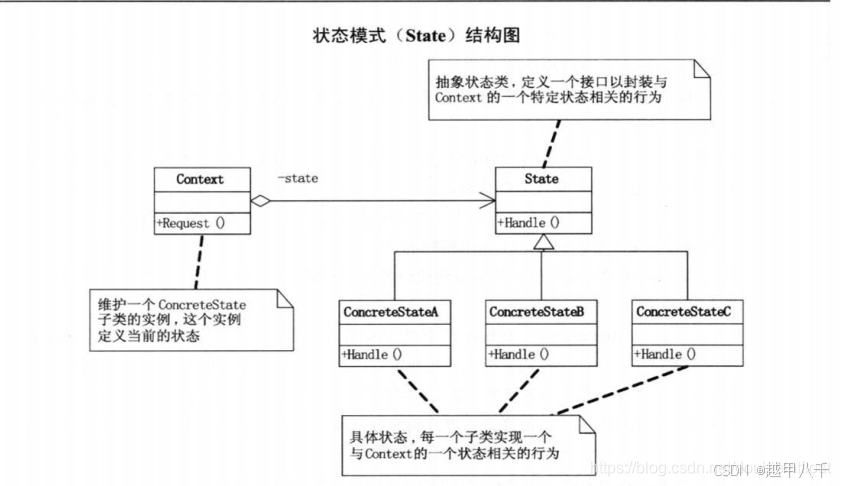
文章目录 状态模式(State Pattern)概述状态模式UML图作用:状态模式的结构环境(Context)类:抽象状态(State)类:具体状态(Concrete State)类&#x…...
稀疏矩阵的存储与计算 gaxpy
1, gaxpy 数学公式 其中: , , 2, 具体实例 3,用稠密矩阵的方法 本节将用于验证第4节中的稀疏计算的结果 hello_gaxpy_dense.cpp #include <stdio.h> #include <stdlib.h>struct Matrix_SP {float* val; //…...
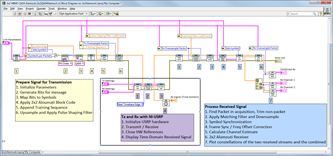
基于LabVIEW的USRP信道测量开发
随着无线通信技术的不断发展,基于软件无线电的设备(如USRP)在信道测量、无线通信测试等领域扮演着重要角色。通过LabVIEW与USRP的结合,开发者可以实现信号生成、接收及信道估计等功能。尽管LabVIEW提供了丰富的信号处理工具和图形…...
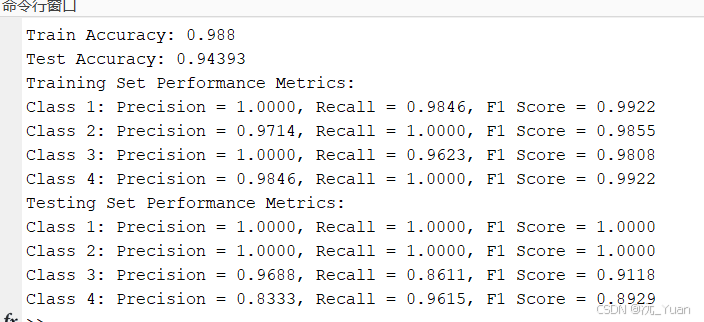
基于LSTM长短期记忆神经网络的多分类预测【MATLAB】
在深度学习中,长短期记忆网络(LSTM, Long Short-Term Memory)是一种强大的循环神经网络(RNN)变体,专门为解决序列数据中的长距离依赖问题而设计。LSTM因其强大的记忆能力,广泛应用于自然语言处理…...
物联网:全面概述、架构、应用、仿真工具、挑战和未来方向
中文论文标题:物联网:全面概述、架构、应用、仿真工具、挑战和未来方向 英文论文标题:Internet of Things: a comprehensive overview, architectures, applications, simulation tools, challenges and future directions 作者信息&#x…...
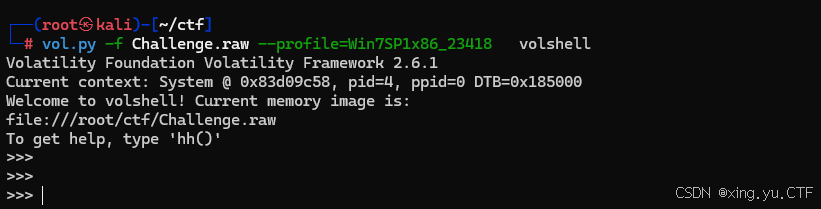
volatility2工具的使用vol2工具篇
vol2工具 命令格式:vol.py -f [image] --profile[profile] [plugin] 1、查看系统的操作版本,系统镜像信息 2.查看用户名密码信息,当前操作系统中的password hash,例如SAM文件内容 3.从注册表提取LSA密钥信息(已解密&…...

R 基础运算
R 基础运算 R 是一种广泛使用的统计编程语言,它提供了强大的数据操作和分析功能。基础运算在 R 中非常重要,因为它们是进行更复杂计算和数据分析的基础。本文将详细介绍 R 中的基础运算,包括算术运算、逻辑运算、向量化和矩阵运算。 一、算…...
javaScriptBOM
1.1、BOM概述 1.1.1、BOM简介 BOM(browser Object)即浏览器对象模型,它提供了独立于内容而与浏览器窗口进行交互的对象,其核心对象是window。 BOM由一系列的对象构成,并且每个对象都提供了很多方法与属性 BOM缺乏标准…...

Godot RPG 游戏开发指南
Godot RPG 游戏开发指南 一、基础准备 1. 开发环境 下载并安装最新版 Godot 4.x选择使用 GDScript 或 C# 作为开发语言准备基础美术资源(角色、地图、道具等) 2. 项目结构 project/ ├── scenes/ # 场景文件 ├── scripts/ # 脚…...

目标检测数据集图片及标签同步旋转角度
前言 在深度学习领域,尤其是目标检测任务中,数据集的质量直接影响模型的性能。为了提升模型的鲁棒性和对各种场景的适应能力,数据增强技术被广泛应用于图像数据集处理。旋转角度是常见的数据增强方法,通过对图像及其对应的标签&am…...

2025前端面试热门题目——计算机网络篇
计算机网络篇——面试 1. 到底什么是 TCP 连接? TCP 连接的定义 TCP(传输控制协议)是一个面向连接的传输层协议。TCP 连接是通过 三次握手 确立的可靠数据通信链路,保证了在不可靠网络(如互联网)上的数据传输的准确…...

LEAST-TO-MOST PROMPTING ENABLES COMPLEX REASONING IN LARGE LANGUAGE MODELS---正文
题目 最少到最多的提示使大型语言模型能够进行复杂的推理 论文地址:https://arxiv.org/abs/2205.10625 摘要 思路链提示在各种自然语言推理任务中表现出色。然而,它在需要解决比提示中显示的示例更难的问题的任务上表现不佳。为了克服这种由易到难的概括…...

Java开发经验——日志治理经验
摘要 本文主要介绍了Java开发中的日志治理经验,包括系统异常日志、接口摘要日志、详细日志和业务摘要日志的定义和目的,以及错误码规范和异常处理规范。强调了日志治理的重要性和如何通过规范化错误码和日志格式来提高系统可观测性和问题排查效率。 1. …...
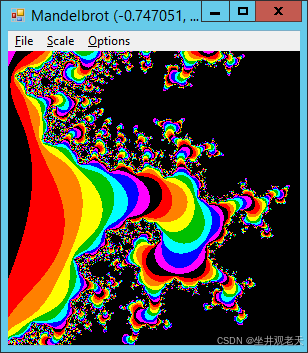
使用复数类在C#中轻松绘制曼德布洛集分形
示例在 C# 中绘制曼德布洛特集分形解释了如何通过迭代以下方程来绘制曼德布洛特集: 其中 Z(n) 和 C 是复数。程序迭代此方程,直到 Z(n) 的大小至少为 2 或程序执行最大迭代次数。 该示例在单独的变量中跟踪数字的实部和虚部。此示例使用Complex类来更轻松…...
VSCode 启用免费 Copilot
升级VSCode到 1.96版本,就可以使用每个月2000次免费额度了,按照工作日每天近80次免费额度,满足基本需求。前两天一直比较繁忙,今天周六有时间正好体验一下。 引导插件安装GitHub Copilot - Visual Studio Marketplace Extension f…...

常见问题整理
DevOps 和 CICD DevOps 全称Development & Operation 一种实现开发和运维一体化的协同模式,提供快速交付应用和服务的能力 用于协作:开发,部署,质量测试 整体生命周期工作内容,最终实现持续继承,持续部…...

使用Vue创建前后端分离项目的过程(前端部分)
前端使用Vue.js作为前端开发框架,使用Vue CLI3脚手架搭建项目,使用axios作为HTTP库与后端API交互,使用Vue-router实现前端路由的定义、跳转以及参数的传递等,使用vuex进行数据状态管理,后端使用Node.jsexpress…...

【Springboot知识】Redis基础-springboot集成redis相关配置
文章目录 1. 添加依赖2. 配置Redis连接3. 配置RedisTemplate(可选)4. 使用RedisTemplate或StringRedisTemplate5. 测试和验证 集群配置在application.properties中配置在application.yml中配置 主从配置1. 配置Redis服务器使用配置文件使用命令行 2. 配置…...

网络安全概论——身份认证
一、身份证明 身份证明可分为以下两大类 身份验证——“你是否是你所声称的你?”身份识别——“我是否知道你是谁?” 身份证明系统设计的三要素: 安全设备的系统强度用户的可接受性系统的成本 实现身份证明的基本途径 所知:个…...

在 AMD Ryzen AI 7 H350 Radeon 860M 上使用 Ollama 运行 GPU 加速
本文介绍了如何在搭载 AMD Ryzen AI 7 H350 及 Radeon 860M 显卡的系统上,配置 Ollama 以利用 GPU 运行 AI 模型。 一、安装 AMD 驱动程序 首先,请安装最新的 AMD 驱动程序,以确保系统能够正确识别并调用显卡硬件。 驱动程序下载地址&…...

保姆级教程:用Keil5将你的STM32F103工程无缝迁移到国民技术N32G45X
从STM32F103到N32G45X:嵌入式工程师的国产MCU迁移实战指南 在嵌入式开发领域,芯片选型往往决定着项目的成败。随着国产微控制器的崛起,越来越多的工程师开始考虑将原有基于STM32的项目迁移到国产平台。国民技术的N32G45X系列以其出色的性价比…...

5分钟上手Velocity动态主题动画:让界面动效随用户偏好智能切换
5分钟上手Velocity动态主题动画:让界面动效随用户偏好智能切换 【免费下载链接】velocity Accelerated JavaScript animation. 项目地址: https://gitcode.com/gh_mirrors/ve/velocity Velocity是一款高性能的JavaScript动画库,专注于提供流畅、高…...

本地AI模型开发终极指南:从零开始构建智能应用社区
本地AI模型开发终极指南:从零开始构建智能应用社区 【免费下载链接】gallery A gallery that showcases on-device ML/GenAI use cases and allows people to try and use models locally. 项目地址: https://gitcode.com/GitHub_Trending/gallery44/gallery …...

嵌入式工程师职业发展:原厂与方案商技术深度对比
1. 嵌入式工程师的职业抉择:原厂与方案商深度对比最近一位工作三年的嵌入式工程师朋友分享了他的求职经历,让我感触颇深。他在方案商做了三年应用开发后,最终选择跳槽到芯片原厂。这个决定背后,反映了很多嵌入式工程师都会面临的职…...

EF Core 原生 SQL 实战:FromSql、SqlQuery 与对象映射边界
先唠两句:参数就像餐厅点单 把API想象成一家餐厅的“后厨系统”。 ? 路径参数/dishes/{dish_id} -> 好比你要点“宫保鸡丁”这道具体的菜,它是菜单(资源路径)的一部分。查询参数/dishes?spicytrue&typeSichuan -> 好比…...

002、零基础搭建你的第一个AI开发环境
昨天帮隔壁组实习生看代码,小伙子对着屏幕发愁:“环境都跑不起来,一训练就报cuda版本不匹配。”我凑过去一看,好家伙,系统里装了三个Python版本,conda环境混着pip装,torch版本和cuda差了两位小数…...

电子工程师必读:假芯片识别与防范全指南
1. 芯片造假现象深度解析作为一名在电子行业摸爬滚打十余年的工程师,我见过太多因为假芯片导致的惨痛教训。记得2018年我们团队做一个工业控制器项目,就因为一批假冒的STM32芯片导致整批产品返工,直接损失超过50万元。这件事让我深刻意识到&a…...

龙迅LT9211D芯片解析:如何实现MIPI与双端口LVDS的高效转换
1. 龙迅LT9211D芯片的核心价值 第一次接触龙迅LT9211D芯片是在一个车载显示项目上,当时客户要求实现4K视频从主控芯片到双屏显示的无损传输。这个看似简单的需求背后,其实隐藏着MIPI和LVDS两种信号标准的转换难题。LT9211D的出现完美解决了这个问题&…...

2025届毕业生推荐的六大AI学术工具推荐榜单
Ai论文网站排名(开题报告、文献综述、降aigc率、降重综合对比) TOP1. 千笔AI TOP2. aipasspaper TOP3. 清北论文 TOP4. 豆包 TOP5. kimi TOP6. deepseek 智能写作工具DeepSeek,于论文写作里有着显著辅助价值,用户能够输入研…...