oneplus3t-lineageos-16.1编译-android9, oneplus3t-lineage-14编译-android7
oneplus3t-lineage-14编译-android7
1
清华linageos镜像
x
lineage-14.1-20180223-nightly-oneplus3-signed.zip
ntfs分区挂载为普通用户目录 , ext4分区挂载为普通用户目录
bfsu/lineageOS镜像
ts/lingeageOS镜像
oneplus3/lineage-build-simple-manual.md, manifest-parser/git-repo#6_build, LineageOS16_oneplus3t_gitRepoLs_clone_desc.pdf
LineageOS/android.git/cm-14.1 : 改为bfsu镜像
高通私有驱动 TheMuppets/proprietary_vendor_oneplus.git/cm-14.1/oneplus3 == TheMuppets/proprietary_vendor_oneplus/.git/8b8001
1. 仓库群下载工具准备
D=/OP3Los14Build
cd $Dgit clone -b v2.50.1 https://mirrors.tuna.tsinghua.edu.cn/git/git-repo
#file /OP3Los14Build/git-repo/.git/config
#file  /OP3Los14Build/git-repo/repoexport GitRepoD=/OP3Los14Build/git-repo
export PATH_BASE=/usr/local/sbin:/usr/local/bin:/usr/sbin:/usr/bin:/sbin:/bin
export PATH=$PATH_BASE:$GitRepoDwhich repo  # == /OP3Los14Build/git-repo/repo
2. 仓库群下载
LosVer=cm-14.1#repo init -u https://mirrors.tuna.tsinghua.edu.cn/git/lineageOS/LineageOS/android.git -b cm-14.1 --git-lfsexport REPO_URL='https://mirrors.tuna.tsinghua.edu.cn/git/git-repo'
#manifest_repo=https://mirrors.tuna.tsinghua.edu.cn/git/lineageOS/LineageOS/android.git
#manifest_repo=https://mirrors.bfsu.edu.cn/git/lineageOS/LineageOS/android.git
manifest_repo=https://gitlab.com/cm-14/android.git #已修改AOSP为国内镜像
repo init --manifest-url $manifest_repo --manifest-branch $LosVer --git-lfsrepo sync
3. 下载oneplus3相关仓库
packages/resources/devicesettings
git clone -b $LosVer https://githubfast.com/LineageOS/android_packages_resources_devicesettings.git $D/packages/resources/devicesettingsoneplus3高通私有驱动(vendor)下载 方法1: 不用此法
下载 git仓库,但仓库有将近10个GB,因此不用此方法
注意: 目录TheMuppets-proprietary_vendor_oneplus 不要放在 /OP3Los14Build 下, 否则 会被 mka showcommands bacon认为和 软链接/OP3Los14Build/vendor/oneplus/oneplus3 重复了。 这可能是cm-14.1的问题, 貌似 LinageOS-16无此问题.
#命令目标: 构造软链接:  $D/vendor/oneplus/oneplus3 --> /app/TheMuppets-proprietary_vendor_oneplus/oneplus3#D=/OP3Los14Build
#LosVer=cm-14.1
proprD=/app
proprietary_vendor_oneplus=$proprD/TheMuppets-proprietary_vendor_oneplus
git clone https://githubfast.com/TheMuppets/proprietary_vendor_oneplus.git -b  $LosVer $proprietary_vendor_oneplus
#命令展开: git clone https://githubfast.com/TheMuppets/proprietary_vendor_oneplus.git -b  cm-14.1  /app/TheMuppets-proprietary_vendor_oneplus
ln -s $proprietary_vendor_oneplus/oneplus3  $D/vendor/oneplus/oneplus3
#命令展开:ln -s /app/TheMuppets-proprietary_vendor_oneplus/oneplus3  /OP3Los14Build/vendor/oneplus/oneplus3
oneplus3高通私有驱动(vendor)下载: 方法2: git仓库给定版本包
注意: 目录proprietary_vendor_oneplus-cm-14.1 不要放在 /OP3Los14Build 下, 否则 会被 mka showcommands bacon认为和 软链接/OP3Los14Build/vendor/oneplus/oneplus3 重复了。 这可能是cm-14.1的问题, 貌似 LinageOS-16无此问题.
#命令目标: 构造软链接:  $D/vendor/oneplus/oneplus3 --> /app/proprietary_vendor_oneplus-cm-14.1/oneplus3#D=/OP3Los14Build
#LosVer=cm-14.1
proprD=/app
wget --output-document=$D/cm-14.1.zip    https://github.com/TheMuppets/proprietary_vendor_oneplus/archive/refs/heads/$LosVer.zip
#命令展开: wget https://github.com/TheMuppets/proprietary_vendor_oneplus/archive/refs/heads/cm-14.1.zip
sha256sum  $D/cm-14.1.zip   #==f008b553dceac26b0feb26fdbda15c7c620ec4e3103c67b749a32900c83a55ec
unzip $D/$LosVer.zip -d $proprD
#命令展开: unzip /OP3Los14Build/cm-14.1.zip -d /app/
#解压产物目录为 /app/proprietary_vendor_oneplus-cm-14.1
file /app/proprietary_vendor_oneplus-cm-14.1/oneplus3/Android.mk  #解压产物列举
mkdir -p $D/vendor/oneplus
ln -s $proprD/proprietary_vendor_oneplus-cm-14.1/oneplus3 $D/vendor/oneplus/oneplus3
#命令展开: ln -s /app/proprietary_vendor_oneplus-cm-14.1/oneplus3 /OP3Los14Build/vendor/oneplus/oneplus3
device/oneplus/oneplus3, device/oppo/common, kernel/oneplus/msm8996, packages/resources
git clone -b $LosVer  https://github.com/LineageOS/android_device_oneplus_oneplus3.git  $D/device/oneplus/oneplus3
git clone -b $LosVer  https://github.com/LineageOS/android_device_oppo_common.git       $D/device/oppo/common
git clone -b $LosVer  https://github.com/LineageOS/android_kernel_oneplus_msm8996.git   $D/kernel/oneplus/msm8996
git clone -b $LosVer  https://github.com/LineageOS/android_packages_resources_devicesettings.git  $D/packages/resources
4. 编译错误解决
1.multiple definition of ‘yylloc’
解决编译错误, /usr/bin/ld: scripts/dtc/dtc-parser.tab.o:(.bss+0x50): multiple definition of 'yylloc'; scripts/dtc/dtc-lexer.lex.o:(.bss+0x0): first defined here
#D=/OP3Los14Build
grep url  $D/kernel/oneplus/msm8996/.git/config
#	url = https://github.com/LineageOS/android_kernel_oneplus_msm8996.git
echo 'HOSTCFLAGS += -fcommon' >> $D/kernel/oneplus/msm8996/Makefile
2. Jack server
解决报错 Communication error with Jack server (56). Try 'jack-diagnose'
export ANDROID_JACK_VM_ARGS="-Dfile.encoding=UTF-8 -XX:+TieredCompilation -Xmx4G"
5A. 编译依赖工具安装
#所用linux发行版
cat /etc/issue #Ubuntu 22.04.4 LTS \n \l#查找deb包
sudo apt install -y apt-file
sudo apt-file update
lunch lineage_oneplus3-userdebug需要的
sudo apt install -y build-essential
sudo apt install -y python2.7
sudo ln -s /usr/bin/python2.7 /usr/bin/python
mka bacon 需要的
1
apt-file search "/schedtool"
#schedtool: /usr/bin/schedtool
sudo apt install -y schedtool
2
apt-file search "/libncurses.so.5"
#libncurses5: /lib/x86_64-linux-gnu/libncurses.so.5
sudo apt install -y libncurses5
3
下载 https://static.azul.com/zulu/bin?C=S/zulu8.82.0.21-ca-jdk8.0.432-linux_x64.tar.gz
#查找jdk8的最新版本为  zulu8.82.0.21-ca-jdk8.0.432-linux_x64.tar.gz
pageUrl_azul_jdkLs="https://static.azul.com/zulu/bin?C=S"
alias alias_grep_jdk8_linux_x64_tar_gz_sort_head_n='grep jdk8 | grep linux_x64.tar.gz | sort  --reverse  | head -n'
w3m -T text/html $pageUrl_azul_jdkLs   -dump | alias_grep_jdk8_linux_x64_tar_gz_sort_head_n 2
#[ ]         zulu8.82.0.21-ca-jdk8.0.432-linux_x64.tar.gz               2024-10-10 102M
#[ ]         zulu8.82.0.21-ca-fx-jdk8.0.432-linux_x64.tar.gz            2024-10-23 173M#下载zulu8.82.0.21-ca-jdk8.0.432-linux_x64.tar.gz
( cd /app/pack/ &&  wget https://static.azul.com/zulu/bin/zulu8.82.0.21-ca-jdk8.0.432-linux_x64.tar.gz  )#解压
tar -xf zulu8.82.0.21-ca-jdk8.0.432-linux_x64.tar.gz  -C /app/#测试
/app/zulu8.82.0.21-ca-jdk8.0.432-linux_x64/bin/javac -version
#javac 1.8.0_432
4
apt-file  search "/ImageMagick"
sudo apt install -y imagemagick
#不是  libmagickcore-dev libmagick++-dev
5
prebuilts/misc/linux-x86/bison/bison 是32位ELF,
而ubuntu22 默认只支持64位ELF, 因此 要安装32位兼容库
prebuilts/misc/linux-x86/bison/bison --help #报错 说找不到 此文件, 实际是因为没有32位ELF加载器ldsudo dpkg --add-architecture i386
sudo apt updatesudo apt install -y libc6:i386  libstdc++6:i386
prebuilts/misc/linux-x86/bison/bison --help #正常运行
5B. github加速
加速githubusercontent(可选)
githubusercontent 后加s
#D=/OP3Los14Build
sed -i 's/raw.githubusercontent.com/raw.githubusercontents.com/g' $D/vendor/cm/vendorsetup.sh
提高 source build/envsetup.sh速度
5. 编译
screen -L  -Logfile ~/OP3-cm14_1-screen-$(date +%Y-%m-%d-%H-%M-%S).log -S OP3#编译步骤正文 开始
D=/OP3Los14Build
cd $Djdk8_d=/app/zulu8.82.0.21-ca-jdk8.0.432-linux_x64
export PATH_BASE=/usr/local/sbin:/usr/local/bin:/usr/sbin:/usr/bin:/sbin:/bin
export PATH=$PATH_BASE:$jdk8_d/bin#单行编译命令 开始
source build/envsetup.shexport ANDROID_JACK_VM_ARGS="-Dfile.encoding=UTF-8 -XX:+TieredCompilation -Xmx4G"
#export V=1
export LC_ALL=C
export ALLOW_MISSING_DEPENDENCIES=true
#export DEBUG_MODULE_android_runtime=true
#export TARGET_CUSTOM_DEBUG_CFLAGS="-O0 -g"
#export MAKE_OPTS="-j8"
#export TARGET_ARCH=arm
lunch lineage_oneplus3-userdebug && mka showcommands bacon  # lineage_oneplus3-eng
#单行编译命令 结束#编译步骤正文 结束#离开screen但不退出快捷键: ctrl+ad#进入screen :  screen -r OP3
编译步骤 中 不同用途 的 单行编译命令
完整编译
source build/envsetup.sh && export LC_ALL=C && export ALLOW_MISSING_DEPENDENCIES=true && lunch lineage_oneplus3-userdebug && export MAKE_OPTS="-j8" && export TARGET_ARCH=arm && mka showcommands bacon
备注
一般备注
grep url  $D/.repo/manifests/.git/config
#	url = https://gitlab.com/cm-14/android.git#查看screen日志
tail -f ~/OP3-screen-*.log#关机命令
sleep 60 ;  cd /tmp; echo z |sudo -S umount /OP3Los14Build ; echo z |sudo -S umount /mnt/OP3Los14Build ;  echo z |sudo -S  poweroff
确认版本号 为 cm-14.1
cd /tmp/
git clone https://mirrors.bfsu.edu.cn/git/lineageOS/LineageOS/android.git
cd /tmp/android/git --no-pager branch  --all  | grep cm-14.1  # == remotes/origin/cm-14.1
git --no-pager tag --list  | grep cm-14.1 #无
oneplus3t-lineageos-16.1编译-android9
oneplus3t 前提
-
救砖线刷 OnePlus3t android9
-
OTA卡刷 OnePlus3t android9
-
APatch root
-
debian11(标准GNU工具集) arm 工具盘(chroot 风格rootfs, 含有 比如sshd 、gdb) : tinan/eadb.git
本仓库开发已经完毕,使用请直接从4.2开始
** LineageOS16_oneplus3t仓库群克隆 、 编译 、 刷机**
- 编译过程若
ctrl+c强制终止,请重新从头编译
LineageOS16_oneplus3t仓库群克隆过程
LineageOS16_oneplus3t仓库群克隆过程描述: LineageOS16_oneplus3t_gitRepoLs_clone_desc.pdf
0_clone_me
git clone --branch zzz-stable https://gitlab.com/lineage16_oneplus3t/manifest-parser/git-repo.git /app4/git-repo
#/app4/git-repo/.git/config
1_lineageOS16_android9_repo_pull
仅开发时执行,产物已在本仓库,用户无需执行
此步骤执行了修改的repo命令,从而获得LineageOS-16.0–oneplus3t仓库群
执行内容
bash -x <(curl https://gitlab.com/lineage16_oneplus3t/manifest-parser/git-repo/-/raw/zzz-stable/projGit_ls/lineageOS16_android9_repo_pull.sh)
lineageOS16(android9)代码仓库拉取 ( 执行展开 ),
输入
manifest/lineageos-android–oneplus3t/lineage-16.0/default.xml
产物
-
仓库群描述 : projGit_ls/gen
/[projGit_ls.*.json|projGit_ls.*.md] -
本地目录下仓库群 中 的 软链接命令、复制文件命令 : projGit_ls/gen
/[projCopyAndSoftLinkLs_ls.*.sh]
2_gitlabWebBatchImportReqXmlFile_gen
仅开发时执行,产物已在本仓库,用户无需执行
gitlab网页端批量导入请求生成
执行内容
bash /app4/git-repo/projGit_ls/json__to__gitlabWebBatchImportReqXmlFile/main.sh ( main.sh )
输入
即上一步产物: projGit_ls/gen/[projGit_ls.*.json|projGit_ls.*.md]
产物
gitlabWebBatchImportReq/*.xml
3_gitlabWebBatchImport
仅开发时执行, 产物已在本仓库,用户无需执行
gitlab网页批量导入LineageOS-16.0–oneplus3t仓库群**
执行内容
浏览器人工打开此网页批量导入仓库: gitlab网页批量导入
文档和例子manifest.xml
输入
即上一步产物: gitlabWebBatchImportReq/*.xml
产物
https://gitlab.com/lineage16_mirror
4_lineage16_clone
4.1
准备
仓库群描述 转换为 仓库群克隆文件
仅开发时执行, 产物已在本仓库,用户无需执行
产物 projGit_ls/gen/gitCloneCmd.sh 已在本仓库 。
bash /app4/git-repo/projGit_ls/json__to__cloneCmd/main.sh
4.2
执行内容
克隆LineageOS-16.0–oneplus3t仓库群
#克隆LineageOS-16.0--oneplus3t仓库群 , gitCloneCmd.sh 中 已写明 --depth=1 (只要以指定分支为起点的1个提交,以减小仓库尺寸)
root_dir=/app4/lineage16_oneplus3t_newdir   bash /app4/git-repo/projGit_ls/gen/gitCloneCmd.sh
projGit_ls/json__to__cloneCmd/main.sh
projGit_ls/gen/gitCloneCmd.sh
输入
即 步骤2_gitlabWebBatchImportReqXmlFile_gen的产物: gitlabWebBatchImportReq/*.xml
产物
projGit_ls/gen/gitCloneCmd.sh
5_projCopyAndSoftLinkLs
本地目录下仓库群 中 的 软链接命令、复制文件命令 执行
root_dir=/app4/lineage16_oneplus3t_new bash -x /app4/git-repo/projGit_ls/gen/projCopyAndSoftLinkLs_ls.*.sh
#比如 projCopyAndSoftLinkLs_ls.1730372866.43542.sh
projGit_ls/gen//projCopyAndSoftLinkLs_ls.*.sh
LineageOS16_oneplus3t仓库群 编译
6_build
已在前几步完成 保留注释作为警醒
本文中注释掉的部分 都已在前几步完成了,保留注释只是为了保持警醒
主要由以下几处 完成了注释中的内容
- https://gitlab.com/lineage16_oneplus3t/manifest/lineageos-android/-/blob/lineage-16.0/default.xml
- https://gitlab.com/lineage16_oneplus3t/resource
### '已在前几步完成 保留注释作为警醒' 开始
#curl https://mirrors.tuna.tsinghua.edu.cn/git/git-repo -o /app/bin/repo#export REPO_URL='https://mirrors.tuna.tsinghua.edu.cn/git/git-repo'
#repo init --manifest-url https://mirrors.tuna.tsinghua.edu.cn/git/lineageOS/LineageOS/android.git --manifest-branch $GitBranch # GitBranch=lineage-16.0#解决报错, resource layout/preference_category_material_settings (aka org.lineageos.settings.device:layout/preference_category_material_settings) not found
#git clone -b lineage-16.0  https://githubfast.com/LineageOS/android_packages_resources_devicesettings.git    $D/packages/resources/devicesettings#git clone https://github.com/TheMuppets/proprietary_vendor_oneplus.git/oneplus3 -b  lineage-16.0 $D/vendor/oneplus/oneplus3#$D/repo/manifests/default.xml
#<remote  name="aosp" fetch="https://android.googlesource.com"  fetch替换为 "https://mirrors.tuna.tsinghua.edu.cn/git/AOSP"#repo sync --current-branch --no-tags --prune#oneplus3t linux内核、第三方厂商vendor
#git clone -b $GitBranch  https://github.com/LineageOS/android_device_oneplus_oneplus3.git  $D/device/oneplus/oneplus3
#git clone -b $GitBranch  https://github.com/LineageOS/android_device_oppo_common.git       $D/device/oppo/common
#git clone -b $GitBranch  https://github.com/LineageOS/android_kernel_oneplus_msm8996.git   $D/kernel/oneplus/msm8996
#git clone -b $GitBranch  https://github.com/LineageOS/android_packages_resources_devicesettings.git  $D/packages/resources#解决编译错误, /usr/bin/ld: scripts/dtc/dtc-parser.tab.o:(.bss+0x50): multiple definition of `yylloc'; scripts/dtc/dtc-lexer.lex.o:(.bss+0x0): first defined here### '已在前几步完成 保留注释作为警醒' 结束
编译步骤正文
#编译步骤正文开始export PATH_BASE=/usr/local/sbin:/usr/local/bin:/usr/sbin:/usr/bin:/sbin:/bin:/app/bin/
export PATH=$PATH_BASED=/app4/lineage16_oneplus3t_new
cd $D
#GitBranch=lineage-16.0source build/envsetup.sh#export V=1
export LC_ALL=C
export ALLOW_MISSING_DEPENDENCIES=true
lunch lineage_oneplus3-userdebug && mka showcommands bacon  # lineage_oneplus3-eng
#编译步骤正文结束
参考: gitee/android_framework/oneplus3/lineage-build-simple-manual.md
某次编译产物举例
-
编译完成消耗时长为 53分钟(电脑配置: intel-12代i7+16GB内存),
-
获得的OTA全量卡刷包
lineage-16.0-20241101-UNOFFICIAL-oneplus3.zip尺寸为630MB -
/app4占据空间128GB,out目录大小为77GB, 源码目录大小为50GB
cat /proc/cpuinfo  | grep 'model name' | uniq
#model name	: 12th Gen Intel(R) Core(TM) i7-12650Hsudo dmidecode -t memory #16GB内存#Package Complete: /app4/lineage16_oneplus3t/out/target/product/oneplus3/lineage-16.0-20241101-UNOFFICIAL-oneplus3.zip# build completed successfully (53:32 (mm:ss)) ####ls -lh /app4/lineage16_oneplus3t/out/target/product/oneplus3/lineage-16.0-20241101-UNOFFICIAL-oneplus3.zip
#-rwxrwxrwx   630M  2024年11月1日 22点18分 /app4/lineage16_oneplus3t/out/target/product/oneplus3/lineage-16.0-20241101-UNOFFICIAL-oneplus3.zipdf -h  /app4
#Filesystem      Size  Used Avail Use% Mounted on
#/dev/nvme0n1p1  239G  128G  111G  54% /app4###编译产物中的调试符号 比如 libandroid_runtime.so.debug
find out/ -type f -path "*/oneplus3*/*/libandroid_runtime.so*"
#out/target/product/oneplus3/obj/SHARED_LIBRARIES/libandroid_runtime_intermediates/libandroid_runtime.so.debug
#out/target/product/oneplus3/obj/SHARED_LIBRARIES/libandroid_runtime_intermediates/libandroid_runtime.so#pwd==/app4/lineage16_oneplus3t/
#out目录大小为77GB
du --threshold=1G --max-depth=1 --human-readable out/
#4.9G	out/host
#30G	out/soong
#42G	out/target
#77G	out/#源码目录大小为50GB
du --exclude=out --threshold=1G --max-depth=1 --human-readable .
#1.4G	./cts
#8.3G	./external
#2.5G	./frameworks
#31G	./prebuilts
#2.3G	./tools
#50G	.
LineageOS16_oneplus3t仓库群 刷机
7_OTA_package_flush
刷机(OTA全量卡刷包)
前提: 已获得root 、 已解锁OEM
adb reboot bootloader
fastboot boot /app4/twrp-3.5.2_9-0-oneplus3.img #twrp界面 进入 sideload等待: Advance -> 'adb sideload' -> 清除 'davld cache' 、 `user cache' (双请) -> 底部进度条拉到右端
adb sideload /app4/lineage16_oneplus3t/out/target/product/oneplus3/lineage-16.0-20241101-UNOFFICIAL-oneplus3.zip
缺少依赖的报错解决记录
libncurses.so.5: cannot open shared object file
报错现象
m V=1 -j 1 bacon # 或mka showcommands bacon 报错如下
prebuilts/clang/host/linux-x86/clang-3289846/bin/clang.real: error while loading shared libraries: libncurses.so.5: cannot open shared object file: No such file or directory
报错解决
apt-file search libncurses.so.5
#libncurses5: /lib/x86_64-linux-gnu/libncurses.so.5sudo apt install libncurses5
m4: command not found
sudo apt install -y build-essential m4
libtinfo.so.5: cannot open shared object file
报错现象
m V=1 -j 1 bacon # 或mka showcommands bacon 报错如下
prebuilts/clang/host/linux-x86/clang-4691093/bin/clang++.real: error while loading shared libraries: libtinfo.so.5: cannot open shared object file: No such file or directory
报错解决
apt-file search libtinfo.so.5
#libtinfo5: /lib/x86_64-linux-gnu/libtinfo.so.5
sudo apt install -y libtinfo5
The boot animation could not be generated, as ImageMagick is not installed in your system.
报错现象
m V=1 -j 1 bacon # 或mka showcommands bacon 报错如下
The boot animation could not be generated
as ImageMagick is not installed in your system.
报错解决
apt-file search ImageMagick
sudo apt install -y imagemagick
其他报错解决记录
aarch64-linux-android-gcc: No such file or directory
报错现象
m V=1 -j 1 bacon # 或mka showcommands bacon 报错如下
/OP3TLos16Build/kernel/oneplus/msm8996/Makefile:671: Cannot use CONFIG_CC_STACKPROTECTOR_STRONG: -fstack-protector-strong not supported by compiler
make[1]: aarch64-linux-android-gcc: No such file or directory
报错分析
aarch64-linux-android-gcc是个python2.7脚本,且指定了需要解释器路径为#!/usr/bin/python
head -n 1 /OP3TLos16Build/prebuilts/gcc/linux-x86/aarch64/aarch64-linux-android-4.9/bin/aarch64-linux-android-gcc
##!/usr/bin/python/OP3TLos16Build/prebuilts/gcc/linux-x86/aarch64/aarch64-linux-android-4.9/bin/aarch64-linux-android-gcc
#-bash: /OP3TLos16Build/prebuilts/gcc/linux-x86/aarch64/aarch64-linux-android-4.9/bin/aarch64-linux-android-gcc: /usr/bin/python: bad interpreter: No such file or directory
报错解决
sudo apt install -y python2.7
sudo ln -s /usr/bin/python2.7 /usr/bin/python
which python #/usr/bin/python
cp: preserving permissions for
报错现象
m V=1 -j 1 bacon # 或mka showcommands bacon 报错如下
/bin/bash -c "(rm -f /app4/lineage16_oneplus3t/out/target/common/obj/JAVA_LIBRARIES/apache-xml_intermediates//classes*.dex ) && (cp -fp /app4/lineage16_oneplus3t/out/target/common/obj/JAVA_LIBRARIES/apache-xml_intermediates/dex-hiddenapi//classes*.dex /app4/lineage16_oneplus3t/out/target/common/obj/JAVA_LIBRARIES/apache-xml_intermediates/ )"
cp: preserving permissions for '/app4/lineage16_oneplus3t/out/target/common/obj/JAVA_LIBRARIES/apache-xml_intermediates/classes.dex': Operation not permitted
报错解决
/app4所在分区挂载选项中增加 uid=1000,gid=1000, ,其中的数值是举例(表示ubuntu22当前登陆的用户的)
相关文章:

oneplus3t-lineageos-16.1编译-android9, oneplus3t-lineage-14编译-android7
oneplus3t-lineage-14编译-android7 1 清华linageos镜像 x lineage-14.1-20180223-nightly-oneplus3-signed.zip ntfs分区挂载为普通用户目录 , ext4分区挂载为普通用户目录 bfsu/lineageOS镜像 ts/lingeageOS镜像 oneplus3/lineage-build-simple-manual.md, manifest-p…...

HTML中最基本的东西
本文内容的标签,将是看懂HTML的最基本之基本 ,是跟您在写文章时候一样内容。一般想掌握极其容易,但是也要懂得如何使用,过目不忘,为手熟尔。才是我们学习的最终目的。其实边看边敲都行,或者是边看边复制粘贴…...
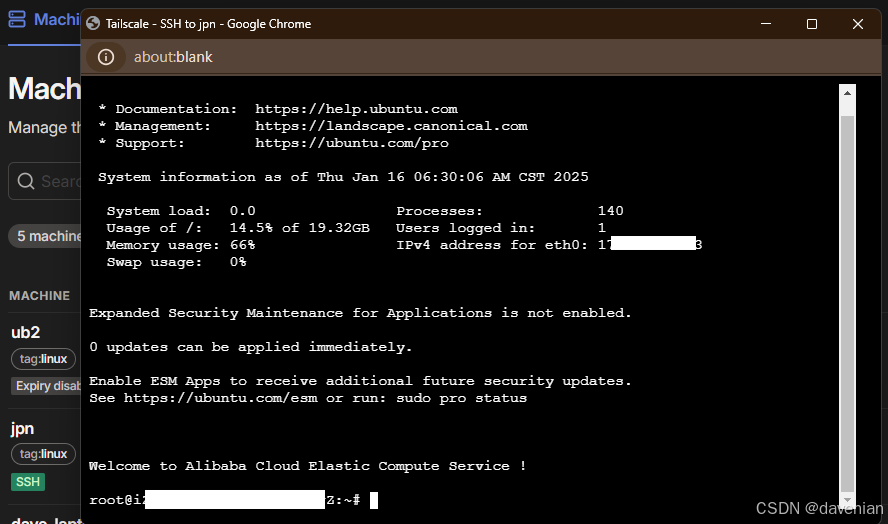
<OS 有关>Ubuntu 24 安装 openssh-server, tailscale+ssh 慢增加
更新日志: Created on 14Jan.2025 by Dave , added openssh-server, tailescape Updated on 15Jan.2025, added "tailescape - tailscape ssh" 前期准备: 1. 更新可用软件包的数据库 2. 升级系统中所有已安装的软件包到最新版本 3. 安装 cur…...
输入输出)
神经网络常见操作(卷积)输入输出
卷积 dimd的tensor可以进行torch.nn.Convnd(in_channels,out_channels),其中nd-1,d-2对于torch.nn.Convnd(in_channels,out_channels),改变的是tensor的倒数n1维的大小 全连接 使用torch.nn.Linear(in_features,out_features,bias)实现YXWT b,其中X 的形状为 (ba…...
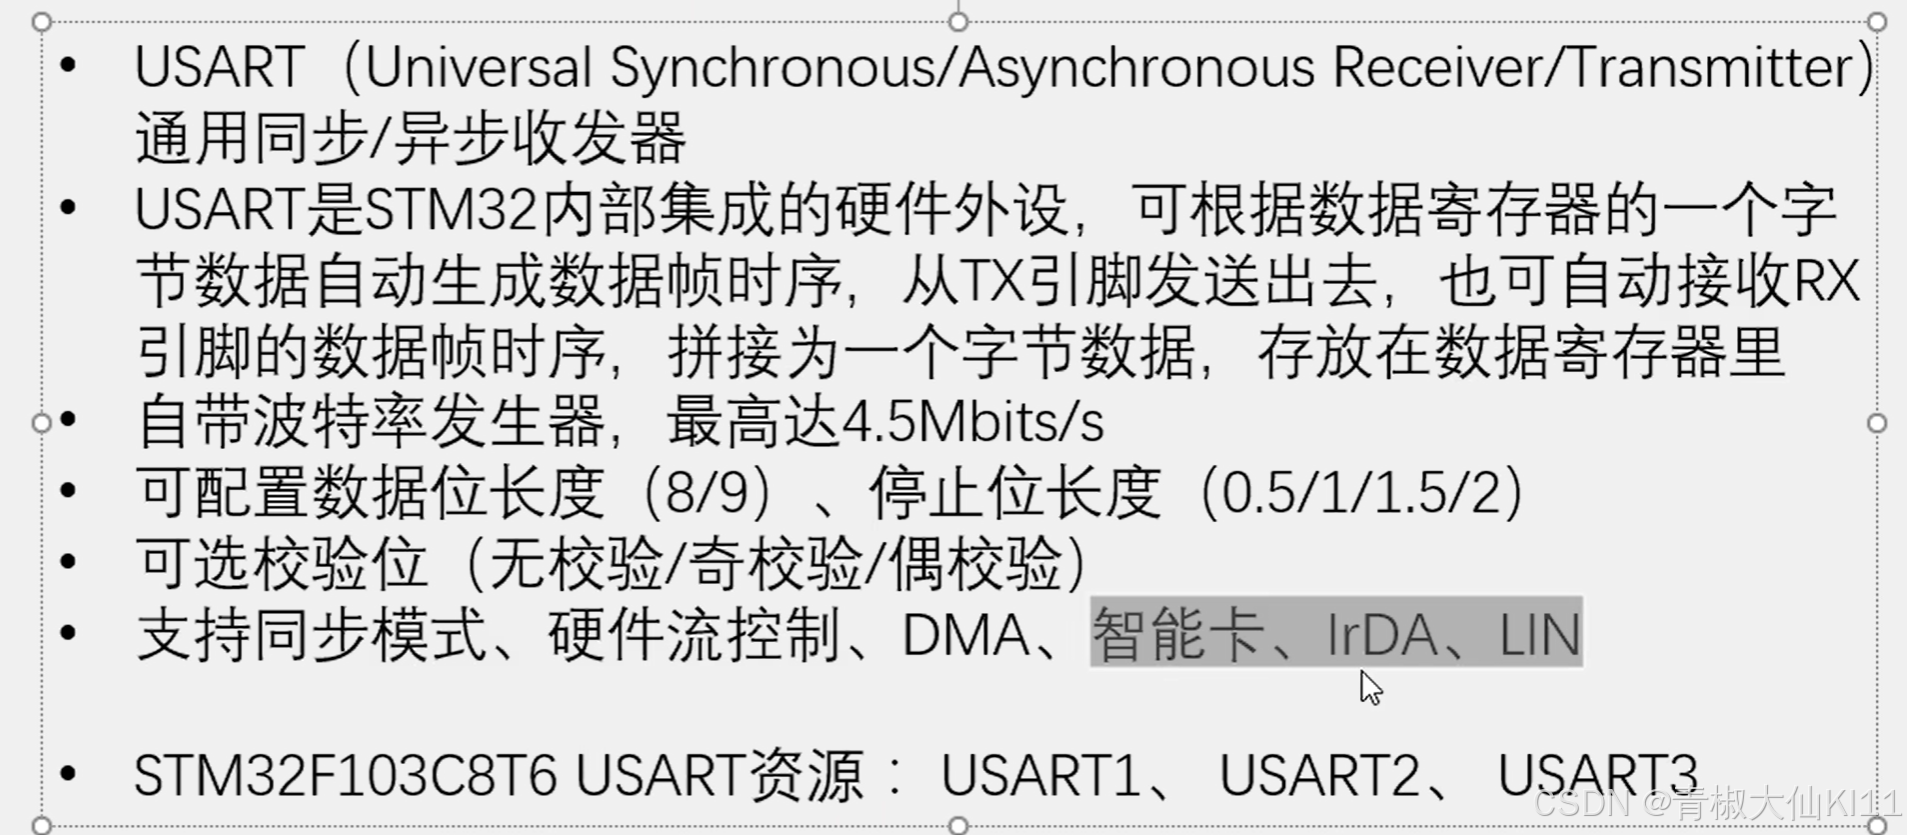
25/1/16 嵌入式笔记 STM32F108
输入捕获 TIM_TimeBaseInitTypeDef TIM_TimeBaseStruct; TIM_TimeBaseStruct.TIM_Period 0xFFFF; // 自动重装载值 TIM_TimeBaseStruct.TIM_Prescaler 71; // 预分频值 TIM_TimeBaseStruct.TIM_ClockDivision 0; TIM_TimeBaseStruct.TIM_CounterMode TIM_CounterMode_Up…...

mac 安装 node
brew versions node // 安装 node brew versions node14 // 安装指定版本 卸载node: sudo npm uninstall npm -g sudo rm -rf /usr/local/lib/node /usr/local/lib/node_modules /var/db/receipts/org.nodejs.* sudo rm -rf /usr/local/include/node /Users/$USER/.npm su…...

mysql常用运维命令
mysql常用运维命令 查看当前所有连接 -- 查看当前所有连接 SHOW FULL PROCESSLIST;说明: 关注State状态列,是否有锁。如果大量状态是waiting for handler commit检查磁盘是否占满关注Time耗时列,是否有慢查询关注Command列,如果…...

正则表达式学习网站
网上亲测好用的网站: Regexlearn 这个网站可以从0开始教会正则表达式的使用。 mklab 包含常用表达式,车次,超链接,号码等提取。...

gradle,adb命令行编译备忘
追踪依赖(为了解决duplicateClass…错误) gradlew.bat app:dependencies > dep-tree.txt # 分析dep-tree.txt的依赖结构,找到对应的包,可能需要做exclude控制,或者查看库issueverbose编译(我一直需要verbose) gradlew.bat assembleDebug -Dhttps.pr…...

C++:工具VSCode的编译和调试文件内容:
ubuntu24.04, vscode 配置文件 C 的环境 下载的gcc,使用命令为 sudo aptitude update sudo aptitude install build-essential -f- sudo: 以超级用户权限运行命令。 - aptitude: 包管理工具,用于安装、更新和删除软件包。 - install: 安装指…...
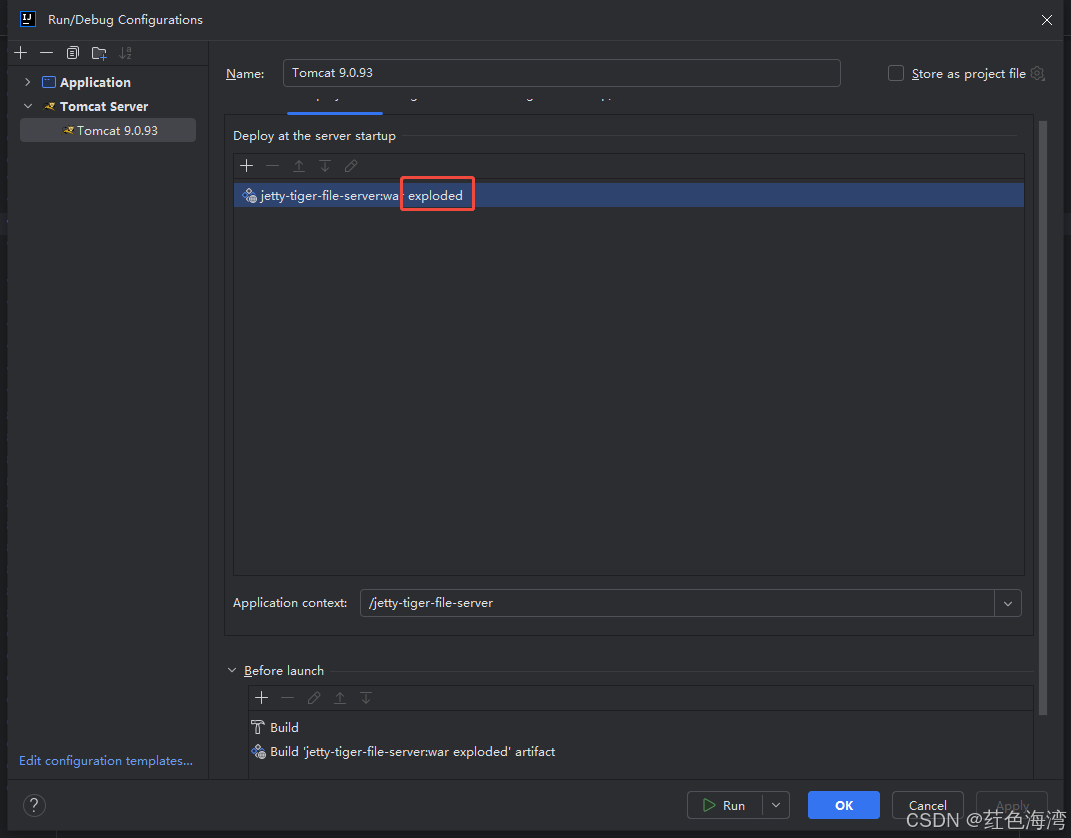
SpringMVC Idea 搭建 部署war
1.创建 Idea项目 使用Maven模板 创建 webApp模板项目 2.导入依赖 <project xmlns"http://maven.apache.org/POM/4.0.0" xmlns:xsi"http://www.w3.org/2001/XMLSchema-instance"xsi:schemaLocation"http://maven.apache.org/POM/4.0.0 http://ma…...

YOLOv10-1.1部分代码阅读笔记-loaders.py
loaders.py ultralytics\data\loaders.py 目录 loaders.py 1.所需的库和模块 2.class SourceTypes: 3.class LoadStreams: 4.class LoadScreenshots: 5.class LoadImagesAndVideos: 6.class LoadPilAndNumpy: 7.class LoadTensor: 8.def autocast_list(source…...

Windows的Redis查看自己设置的密码并更改设置密码
查看密码 由于我的Redis安装很久了,所以忘记是否有设置密码,查看步骤如下: 启动redis,启动流程可以看这篇文章:https://blog.csdn.net/changyana/article/details/127679871 在redis安装目录下打开redis-cli.exe&…...

【Linux】sed编辑器二
一、处理多行命令 sed编辑器有3种可用于处理多行文本的特殊命令。 N:加入数据流中的下一行,创建一个多行组进行处理;D:删除多行组中的一行;P:打印多行组中的一行。 1、next命令:N 单行next命…...

docker 部署 Kafka 单机和集群
一、准备工作 安装 Docker 确保本机已安装 Docker。可以通过以下命令检查 Docker 是否已安装:docker --version如果未安装,可以访问 Docker 官网下载并安装 Docker Desktop(Windows 和 Mac)或使用包管理器安装(Linux&…...

PHP语言的软件开发工具
PHP语言的软件开发工具 在当今数字化的时代,软件开发已经成为一种常见的职业。无论是企业级应用、网站开发还是移动应用,开发者们都需要用到各种各样的工具。PHP作为一种广泛使用的服务器端脚本语言,因其简单、灵活与强大的功能,…...

前端【3】--CSS布局,CSS实现横向布局,盒子模型
盒子分类 1、块级盒子 2、内联级盒子 3、内联块级盒子 4、弹性盒子 5、盒子内部分区 方法一:使用 float 普通盒子实现横向布局 方法二:使用 display: inline-block 内联块级元素实现横向布局 方法三:使用弹性盒子 flexbox࿰…...

SQL语句IN和OR的区别
在SQL中,IN和OR都用于筛选条件,但它们的用途和性能上有一些区别。以下是两者的对比: 1. 语法 IN SELECT * FROM table_name WHERE column_name IN (value1, value2, value3);IN用于检查某列的值是否在一个给定的值列表中。 OR SELECT * FRO…...

OCP使用中的常见问题与解决方法
OCP的常见问题 页面卡顿: 遇到页面卡顿的问题时,首先需要区分是全局性的卡顿,即所有页面都出现延迟或响应缓慢,还是仅限于特定的监控页面。 监控数据看不到: 需要明确是全部数据都无法查看,还是仅限于特定集群的数…...

Git 版本控制:.gitignore 文件完全指南
.gitignore 文件是 Git 版本控制系统中的一个重要配置文件,用于告诉 Git 哪些文件和目录应该被忽略,不需要纳入版本控制。以下是关于 .gitignore 的完整笔记。 基本概念 .gitignore 文件可以放在项目的任何目录下,其作用范围包括所在目录及…...

量子计算中Loschmidt回声相位测量的创新方法
1. 量子计算中的Loschmidt回声相位测量方法概述Loschmidt回声是量子动力学中一个重要的概念,它描述了量子系统在时间反演演化后与初始状态的相似程度。在量子计算领域,精确测量Loschmidt回声的相位信息对于理解量子系统的非平衡态行为、计算能量本征值以…...

三十岁想从零转行现实吗?带你分辨真正有前景的好工作
我是29岁那年,完成从转行裸辞副业的职业转型。 如果你把职业生涯看成是从现在开始30岁,到你退休那年,中间这么漫长的30年,那么30岁转行完全来得及…...

基于ATmega2560与ISD1700的智能语音时钟:硬件选型、软件架构与避坑指南
1. 项目概述与核心价值去年折腾那个用ATMega328驱动三块显示屏的时钟时,我主要精力都花在了如何在320x240的TFT屏幕上把时间、日期和图标画得又准又好看上。项目在《Elektor》杂志上发表后,一位热心的读者给我提了个新想法:能不能做个会“说话…...

为什么软件开发偏爱 Linux?深度剖析 Linux 相较于 Windows 的核心优势
引言 在软件开发的世界里,一个有趣的现象是:无论是大型互联网公司的服务器集群,还是资深程序员的个人开发机,Linux 操作系统的身影无处不在。与之形成鲜明对比的是,尽管 Windows 在个人消费市场占据绝对主导地位&…...

从RD、CS到WK:一文讲透SAR主流成像算法的演进与选型实战
从RD、CS到WK:SAR成像算法选型实战指南 当无人机掠过灾区上空,或卫星扫描地球表面时,合成孔径雷达(SAR)正通过电磁波穿透云层和黑暗,将地面信息转化为高分辨率图像。而决定图像质量的关键,在于工…...

基于Netburner NANO54415构建工业级嵌入式Web服务器:从硬件选型到广域监控实战
1. 项目概述:一个为广域与本地监控而生的嵌入式Web服务器如果你正在寻找一个能部署在野外、工厂角落或者任何需要远程数据采集与控制场景下的嵌入式Web服务器方案,并且对市面上那些要么性能孱弱、要么开发门槛极高的开发板感到厌倦,那么这个基…...
)
CentOS 8.5最小化安装后,这5个必做的安全与效率优化设置(附一键脚本)
CentOS 8.5最小化安装后的5个必做安全与效率优化刚完成CentOS 8.5最小化安装的系统就像一张白纸——干净但缺乏生产力。作为运维老手,我见过太多人跳过基础优化直接部署应用,结果在后续使用中频繁遇到权限混乱、软件安装慢、SSH爆破等问题。本文将分享我…...

避坑指南:Unity动态加载模型时,TriLib插件材质丢失、缩放异常的5个常见问题解决
Unity动态加载模型避坑指南:TriLib插件材质丢失与缩放异常的深度解决方案当你在Unity项目中尝试使用TriLib插件动态加载外部模型时,是否遇到过这些令人抓狂的情况:模型加载后材质全部变成刺眼的粉红色,贴图神秘消失,或…...

智能烹饪助手:基于传感器融合与AI的厨房自动化实践
1. 项目概述:一个让厨房小白也能自信下厨的智能伙伴每次站在灶台前,你是不是也经历过这样的场景:一边手忙脚乱地翻着菜谱,一边担心锅里的菜是不是快糊了,还要分心去计算各种调料该放多少?对于很多刚接触烹饪…...

如何让旧款Mac运行最新系统:OpenCore Legacy Patcher完整指南
如何让旧款Mac运行最新系统:OpenCore Legacy Patcher完整指南 【免费下载链接】OpenCore-Legacy-Patcher Experience macOS just like before 项目地址: https://gitcode.com/GitHub_Trending/op/OpenCore-Legacy-Patcher 想让你的老旧Mac设备重新焕发活力&a…...