Huatuo热更新--如何使用
在安装完huatuo热更新插件后就要开始学习如何使用了。
1.创建主框渐Main
新建文件夹Main(可自定义),然后按下图创建文件,注意名称与文件夹名称保持一致

然后新建场景(Init场景),添加3个空物体分别为LoadDllManager,SceneLoadManager以及PrefabsLoadManager(这部分可根据实际开发需求拓展,此教程只做简单演示,只有切换场景,创建预制体,加载Dll需求),然后在Main文件夹下创建对应名称脚本文件并挂在相应物体上。
注意,Main里的脚本是框架类脚本,不做具体功能需求,所以不支持热更新,一般实现后不会再做修改,一旦修改了就需要重新Build。
下面是3个脚本具体实现。
注意,需要用到一个BetterStreamingAssets加载AB包的类,下载地址:Huatuo热更新使用教程-BetterStreamingAssets资源-CSDN文库
解压后放到Plugins文件夹下即可。
实现Manager脚本时会发现BetterStreamingAssets类提示报错,这是因为Main中没有添加BetterStreamingAssets,进行如下图所示操作即可,之后就会发现报错解决了。同理,其他Assembly Definition文件在使用其他Assembly Definition文件中的类时,也需要进行同样设置,比如之后添加的UIPart需要添加Main。

LoadDllManager
using System;
using System.Collections;
using System.IO;
using System.Linq;
using System.Reflection;
using UnityEngine;
using UnityEngine.Events;/// <summary>
/// 加载Dll的管理器
/// </summary>
public class LoadDllManager : MonoBehaviour
{private static LoadDllManager _instance;/// <summary>/// 单例/// </summary>public static LoadDllManager Instance{get{return _instance;}}private void Awake(){_instance = this;}void Start(){Debug.Log("LoadDllManager start");BetterStreamingAssets.Initialize();DontDestroyOnLoad(gameObject);//加载初始Dll-UIPartLoadDll("UIPart", (value) =>{//找到MainScript脚本,执行LoadMainScene方法Type type = value.GetType("MainScript");type.GetMethod("LoadMainScene").Invoke(null, null);});}/// <summary>/// 加载dll/// </summary>/// <param name="dllName">dll名称</param>/// <param name="callBack">回调</param>public void LoadDll(string dllName, UnityAction<Assembly> callBack){
#if !UNITY_EDITORStartCoroutine(OnLoadDll(dllName, callBack));
#elsevar assembly = AppDomain.CurrentDomain.GetAssemblies().First(assembly => assembly.GetName().Name == dllName);callBack?.Invoke(assembly);
#endif}/// <summary>/// 协程加载dll/// </summary>/// <param name="dllName"></param>/// <param name="callBack"></param>/// <returns></returns>private IEnumerator OnLoadDll(string dllName, UnityAction<Assembly> callBack){//判断ab包是否存在if (File.Exists($"{Application.streamingAssetsPath}/common")){//加载ab包var dllAB = BetterStreamingAssets.LoadAssetBundleAsync("common");yield return dllAB;if(dllAB.assetBundle != null){//加载dllTextAsset dllBytes = dllAB.assetBundle.LoadAsset<TextAsset>($"{dllName}.dll.bytes");var assembly = System.Reflection.Assembly.Load(dllBytes.bytes);//卸载ab包dllAB.assetBundle.Unload(false);//回调callBack?.Invoke(assembly);}}}
}
SceneLoadManager
using System.Collections;
using System.Collections.Generic;
using System.IO;
using UnityEngine;
using UnityEngine.Events;
using UnityEngine.SceneManagement;/// <summary>
/// 加载场景的管理器
/// </summary>
public class SceneLoadManager : MonoBehaviour
{private static SceneLoadManager _instance;public static SceneLoadManager Instance{get{return _instance;}}private void Awake(){_instance = this;}private void Start(){Debug.Log("SceneLoadManager start");BetterStreamingAssets.Initialize();DontDestroyOnLoad(gameObject);}/// <summary>/// 加载场景/// </summary>/// <param name="sceneName"></param>/// <param name="callBack"></param>public void LoadScene(string sceneName, UnityAction callBack = null){
#if !UNITY_EDITORStartCoroutine(OnLoadScene(sceneName, callBack));
#elseStartCoroutine(OnLoadScene_Noab(sceneName, callBack));
#endif}/// <summary>/// 通过ab包加载场景/// </summary>/// <param name="sceneName"></param>/// <param name="callBack"></param>/// <returns></returns>private IEnumerator OnLoadScene(string sceneName, UnityAction callBack){//判断场景ab包是否存在if(File.Exists($"{Application.streamingAssetsPath}/scenes")){//加载ab包var dllAB = BetterStreamingAssets.LoadAssetBundleAsync("scenes");yield return dllAB;if(dllAB.assetBundle != null){//异步加载场景var sceneLoadRequest = SceneManager.LoadSceneAsync(sceneName);yield return sceneLoadRequest;if(sceneLoadRequest.isDone){//获取加载的场景Scene loadScene = SceneManager.GetSceneByName(sceneName);//跳转场景SceneManager.SetActiveScene(loadScene);//回调callBack?.Invoke();}//卸载AB包dllAB.assetBundle.Unload(false);}}}/// <summary>/// 加载场景--无需加载ab/// </summary>/// <param name="sceneName"></param>/// <param name="callBack"></param>/// <returns></returns>private IEnumerator OnLoadScene_Noab(string sceneName, UnityAction callBack){//异步加载场景var sceneLoadRequest = SceneManager.LoadSceneAsync(sceneName);yield return sceneLoadRequest;if (sceneLoadRequest.isDone){//获取加载的场景Scene loadScene = SceneManager.GetSceneByName(sceneName);//跳转场景SceneManager.SetActiveScene(loadScene);//回调callBack?.Invoke();}}
}
PrefabsLoadManager
using System.Collections;
using System.Collections.Generic;
using System.IO;
using UnityEditor;
using UnityEngine;
using UnityEngine.Events;/// <summary>
/// 加载预制体的管理器
/// </summary>
public class PrefabsLoadManager : MonoBehaviour
{private static PrefabsLoadManager _instance;public static PrefabsLoadManager Instance{get{return _instance;}}private void Awake(){_instance = this;}private void Start(){Debug.Log("PrefabsLoadManager start");BetterStreamingAssets.Initialize();DontDestroyOnLoad(gameObject);}/// <summary>/// 加载预制体/// </summary>/// <param name="prefabPath"></param>/// <param name="callBack"></param>public void LoadABPrefab(string prefabPath, UnityAction<GameObject> callBack){
#if !UNITY_EDITORstring[] paths = prefabPath.Split('/');string prefabName = paths[paths.Length - 1];StartCoroutine(OnLoadPrefab(prefabName, callBack));
#elseprefabPath += ".prefab";GameObject loadedPrefab = AssetDatabase.LoadAssetAtPath<GameObject>(prefabPath);GameObject obj = GameObject.Instantiate(loadedPrefab);callBack?.Invoke(obj);
#endif}/// <summary>/// 通过AB包加载预制体/// </summary>/// <param name="prefabName"></param>/// <param name="callBack"></param>/// <returns></returns>private IEnumerator OnLoadPrefab(string prefabName, UnityAction<GameObject> callBack){//判断预制体的ab包是否存在if (File.Exists($"{Application.streamingAssetsPath}/prefabs")){//加载ab包var dllAB = BetterStreamingAssets.LoadAssetBundleAsync("prefabs");yield return dllAB;if(dllAB.assetBundle != null){//创建预制体GameObject loadedPrefab = GameObject.Instantiate(dllAB.assetBundle.LoadAsset<UnityEngine.GameObject>($"{prefabName}.prefab"));//卸载ab包dllAB.assetBundle.Unload(false);callBack?.Invoke(loadedPrefab);}}}
}
后续根据需求还会有图集的AB包,材质的AB包等,在此不做详细扩展。
至此一个主要的框架就好了,下面就要开始实现热更新的部分了。
2.实现UIPart热更新部分功能
创建UIPart文件夹(名称及内部脚本名称,方法名称可随意修改,但需要相应修改LoadDllManager对应名称字段),然后创建同名Assembly Definition文件。
创建MainScript脚本,实现如下
MainScript脚本为加载Main场景,创建Main场景,场景中添加一个Canvas,创建MainCanvas脚本,实现如下,创建MainView预制体
using UnityEngine;
using System;
using System.Linq;public class MainCanvas : MonoBehaviour
{public GameObject lay_1;public GameObject lay_2;public GameObject lay_3;public static AssetBundle dllAB;private System.Reflection.Assembly gameAss;void Start(){PrefabsLoadManager.Instance.LoadABPrefab("Assets/UIPart/Prefabs/UI/MainView", (mainView) =>{if (mainView != null)mainView.transform.SetParent(lay_1.transform, false);});}
}
然后创建MainView预制体及脚本,实现自己想实现的测试功能,在此就不具体实现了。注意上述预制体,脚本都需要放在UIPart文件夹下,可自行创建区分的文件夹。
这些都完成后,需要在HybridCLR中配置一下,如图

之后就可以进行生成DLL,打包AB包等操作
3.生成Dll文件
如图,自行选择平台


生成Dll文件所在路径为Assets同级目录\HybridCLRData\HotUpdateDlls下对应平台内。
4.复制Dll,方便打AB包
然后就是打包AB包,打包前先将生成的Dll及部分依赖的Dll先复制到Assets内,方便打包成AB包,此处提供一个我简单实现的复制工具(使用UIToolkit实现)
using UnityEditor;
using UnityEngine;
using UnityEngine.UIElements;
using UnityEditor.UIElements;
using System.Collections.Generic;
using System.IO;public class CopyDllEditor : EditorWindow
{public static readonly List<string> aotDlls = new List<string>(){"mscorlib.dll","System.dll","System.Core.dll",// 如果使用了Linq,需要这个// "Newtonsoft.Json.dll",// "protobuf-net.dll",// "Google.Protobuf.dll",// "MongoDB.Bson.dll",// "DOTween.Modules.dll",// "UniTask.dll",};/// <summary>/// 复制dll相关数据/// </summary>CopyDllData dllData = null;/// <summary>/// 用于初始化的json文件路径/// </summary>private string DllFileJsonPath = "";[MenuItem("CopyDllEditor/Settings")]public static void ShowExample(){CopyDllEditor wnd = GetWindow<CopyDllEditor>();wnd.titleContent = new GUIContent("CopyDllEditor");wnd.minSize = new Vector2(810, 540);wnd.maxSize = new Vector2(1910, 810);//wnd.position = new Rect(new Vector2(1920, 540), new Vector2(1600, 540));}public void CreateGUI(){DllFileJsonPath = $"{Application.dataPath}/Editor/CopyDll/DllFile.json";//初始化Init();if(dllData == null){dllData = new CopyDllData();dllData.Files = new List<string>();}if (!File.Exists(DllFileJsonPath)){File.Create(DllFileJsonPath);}VisualElement root = rootVisualElement;//添加平台选择EnumField toType = new EnumField("选择平台");toType.Init(BuildTarget.StandaloneWindows64);//初始化平台选择if (!string.IsNullOrEmpty(dllData.PingTaiType)){//toType.value = (BuildTarget)System.Enum.Parse(typeof(BuildTarget), dllData.PingTaiType);}else{dllData.PingTaiType = toType.value.ToString();}//平台改变监听toType.RegisterCallback<ChangeEvent<string>>((evt) =>{dllData.PingTaiType = evt.newValue;});root.Add(toType);//dll原始文件所在路径输入框TextField formPathInput = new TextField("dll原始文件路径(无需加平台文件夹名称,末尾加\\)");//初始化if(!string.IsNullOrEmpty(dllData.FromPath)){formPathInput.value = dllData.FromPath;}//监听原始文件路径改变formPathInput.RegisterCallback<ChangeEvent<string>>((evt) =>{dllData.FromPath = evt.newValue;});root.Add(formPathInput);//复制到目标目录路径输入框TextField toPathInput = new TextField("dll保存文件路径(无需加平台文件夹名称,最好为工程Assets内路径,末尾加\\)");//初始化if (!string.IsNullOrEmpty(dllData.ToPath)){toPathInput.value = dllData.ToPath;}//监听目标路径改变toPathInput.RegisterCallback<ChangeEvent<string>>((evt) =>{dllData.ToPath = evt.newValue;});root.Add(toPathInput);//设置dll文件数量的输入框IntegerField filescount = new IntegerField("dll文件数量");//初始化filescount.value = dllData.Files.Count;root.Add(filescount);//滑动界面ScrollView scrollView = new ScrollView();root.Add(scrollView);//所有文件名称输入框List<TextField> dllFileField = new List<TextField>();//初始化文件名称输入框foreach (var item in dllData.Files){TextField fileName = new TextField("dll文件名称(带后缀)");scrollView.Add(fileName);fileName.value = item;dllFileField.Add(fileName);}//监听文件数量变化filescount.RegisterCallback<ChangeEvent<int>>((evt) =>{//若资源数量增加if (evt.newValue > evt.previousValue){int count = evt.newValue - evt.previousValue;for (int i = 0; i < count; i++){TextField fileName = new TextField("dll文件名称(带后缀)");scrollView.Add(fileName);dllFileField.Add(fileName);}}else{int count = evt.previousValue - evt.newValue;int index = evt.previousValue - 1;//若减少,曾从后往前删除for (int i = 0; i < count; i++){scrollView.RemoveAt(index);dllFileField.RemoveAt(index);index--;}}});//复制dll文件按钮Button copyBtn = new Button(() =>{BuildTarget v = (BuildTarget)System.Enum.Parse(typeof(BuildTarget), toType.value.ToString());string yuanshiPath = GetHotFixDllsOutputDirByTarget(v);dllData.Files.Clear();foreach (var item in dllFileField){//去除未输入的和重复的if(!string.IsNullOrEmpty(item.value) && !dllData.Files.Contains(item.value)){//去除文件不存在的string filePath = $"{yuanshiPath}/{item.value}";if(File.Exists(filePath))dllData.Files.Add(item.value);}}//保存当前设置结果到json文件中,用于下次打开初始化string fileValue = JsonUtility.ToJson(dllData);File.WriteAllText(DllFileJsonPath, fileValue);//选择平台进行文件复制switch(v){case BuildTarget.StandaloneWindows:CopeByStandaloneWindows32();break;case BuildTarget.StandaloneWindows64:CopeByStandaloneWindows64();break;case BuildTarget.Android:CopeByAndroid();break;case BuildTarget.iOS:CopeByIOS();break;}});copyBtn.text = "复制dll文件";root.Add(copyBtn);}private void Init(){string value = File.ReadAllText(DllFileJsonPath);dllData = JsonUtility.FromJson<CopyDllData>(value);}private void CopeByStandaloneWindows32(){Copy(BuildTarget.StandaloneWindows);}private void CopeByStandaloneWindows64(){Copy(BuildTarget.StandaloneWindows64);}private void CopeByAndroid(){Copy(BuildTarget.Android);}private void CopeByIOS(){Copy(BuildTarget.iOS);}private void Copy(BuildTarget target){//复制的dll文件列表List<string> copyDlls = dllData.Files;//dll原始路径string outDir = GetHotFixDllsOutputDirByTarget(target);//目标路径string exportDir = GetDllToPath(target);if (!Directory.Exists(exportDir)){Directory.CreateDirectory(exportDir);}//复制foreach (var copyDll in copyDlls){File.Copy($"{outDir}/{copyDll}", $"{exportDir}/{copyDll}.bytes", true);}//复制固定需要的依赖dll文件,路径固定string AssembliesPostIl2CppStripDir = Application.dataPath.Remove(Application.dataPath.Length - 6, 6) + "HybridCLRData/AssembliesPostIl2CppStrip";string aotDllDir = $"{AssembliesPostIl2CppStripDir}/{target}";foreach (var dll in aotDlls){string dllPath = $"{aotDllDir}/{dll}";if (!File.Exists(dllPath)){Debug.LogError($"ab中添加AOT补充元数据dll:{dllPath} 时发生错误,文件不存在。需要构建一次主包后才能生成裁剪后的AOT dll");continue;}string dllBytesPath = $"{exportDir}/{dll}.bytes";File.Copy(dllPath, dllBytesPath, true);}AssetDatabase.Refresh();Debug.Log("热更Dll复制成功!");}/// <summary>/// 获取热更新时输出dll文件的路径/// </summary>/// <param name="target"></param>/// <returns></returns>public string GetHotFixDllsOutputDirByTarget(BuildTarget target){string path = dllData.FromPath;switch (target){case BuildTarget.StandaloneWindows:path += "StandaloneWindows";break;case BuildTarget.StandaloneWindows64:path += "StandaloneWindows64";break;case BuildTarget.Android:path += "Android";break;case BuildTarget.iOS:path += "iOS";break;}return path;}/// <summary>/// 获取复制文件目标路径/// </summary>/// <param name="target"></param>/// <returns></returns>public string GetDllToPath(BuildTarget target){string path = dllData.ToPath;switch (target){case BuildTarget.StandaloneWindows:path += "StandaloneWindows";break;case BuildTarget.StandaloneWindows64:path += "StandaloneWindows64";break;case BuildTarget.Android:path += "Android";break;case BuildTarget.iOS:path += "iOS";break;}return path;}
}[SerializeField]
public class CopyDllData
{public string FromPath;public string ToPath;public string PingTaiType;public List<string> Files;
}
放到Editor/CopyDll文件夹下即可,打开如下

先选择平台,然后设置原始Dll文件所在路径,再设置输出路径,填入dll文件数量并设置好dll文件名+后缀,最后点击复制即可完成复制。
5.打AB包
此处同样提供一个我简单实现的打包工具(使用UIToolkit实现),也可使用其他打包的插件。
using UnityEditor;
using UnityEngine.UIElements;
using UnityEditor.UIElements;
using UnityEngine;
using System.Collections.Generic;
using System.IO;
using System;
using Object = UnityEngine.Object;public class AssetBundle : EditorWindow
{private Dictionary<string, List<Object>> bundles = new Dictionary<string, List<Object>>();/// <summary>/// ab包设置部分的滑动界面/// </summary>ScrollView abScr = null;[MenuItem("AssetBundle/Setting")]public static void ShowExample(){AssetBundle wnd = GetWindow<AssetBundle>();wnd.titleContent = new GUIContent("AssetBundle");wnd.minSize = new Vector2(810, 540);wnd.maxSize = new Vector2(1910, 810);//wnd.position = new Rect(new Vector2(1920, 540), new Vector2(1600, 540));}public void CreateGUI(){VisualElement root = rootVisualElement;//创建打包按钮,用于打出AB包Button btn_Add = new Button(() =>{//ab包List<AssetBundleBuild> abs = new List<AssetBundleBuild>();//记录当前打包的ab包信息,用于下次打开时初始化ABSaveJsonData saveData = new ABSaveJsonData();saveData.ABSave = new List<ABSaveData>();//遍历设置的ab包数据foreach (var item in bundles){//单个ab包文件名与资源文件数据ABSaveData data = new ABSaveData();data.ABName = item.Key;data.ABFilePath = new List<string>();List<string> assets = new List<string>();foreach (var v in item.Value){if (v == null)continue;//获取资源路径,文件中存储路径信息string filePath = AssetDatabase.GetAssetPath(v);Debug.LogError(filePath);if (assets.Contains(filePath))continue;assets.Add(filePath);data.ABFilePath.Add(filePath);}AssetBundleBuild abFile = new AssetBundleBuild{//包名assetBundleName = item.Key,//资源assetNames = assets.ToArray(),};abs.Add(abFile);//添加每个ab包信息saveData.ABSave.Add(data);}//ab包保存位置string streamingAssetPathDst = $"{Application.streamingAssetsPath}";CreateDirIfNotExists(streamingAssetPathDst);BuildPipeline.BuildAssetBundles(streamingAssetPathDst, abs.ToArray(), BuildAssetBundleOptions.None, BuildTarget.StandaloneWindows64);AssetDatabase.Refresh(ImportAssetOptions.ForceUpdate);//ab包信息文件string bundleFilePath = $"{Application.dataPath}/Editor/AssetBundleEditor/ABFile.json";if (!File.Exists(bundleFilePath)){File.Create(bundleFilePath);}//序列化ab包信息string value = JsonUtility.ToJson(saveData);File.WriteAllText(bundleFilePath, value);});btn_Add.text = "打包";root.Add(btn_Add);CreatAddABBtn(root);}/// <summary>/// 创建添加ab包名的按钮/// </summary>/// <param name="root"></param>private void CreatAddABBtn(VisualElement root){abScr = new ScrollView();abScr.style.width = rootVisualElement.style.width;abScr.style.height = rootVisualElement.style.height;Button btn_Add = new Button(() =>{VisualElement abVi = CreataABNameField();abScr.Add(abVi);});btn_Add.text = "添加ab包名称";root.Add(btn_Add);root.Add(abScr);OnInitBundles(abScr);}/// <summary>/// 初始化上次设置的资源数据/// </summary>/// <param name="root"></param>private void OnInitBundles(VisualElement root){string bundleFilePath = $"{Application.dataPath}/Editor/AssetBundleEditor/ABFile.json";//反序列化文件数据string value = File.ReadAllText(bundleFilePath);ABSaveJsonData data = JsonUtility.FromJson<ABSaveJsonData>(value);foreach (var item in data.ABSave){//初始化bundlesif (!bundles.ContainsKey(item.ABName)){bundles.Add(item.ABName, new List<Object>());foreach (var path in item.ABFilePath){//通过资源路径获取到资源文件bundles[item.ABName].Add(AssetDatabase.LoadAssetAtPath(path, typeof(Object)));}}}foreach (var item in bundles){//初始化编辑器界面VisualElement abVi = CreataABNameField(item.Key, item.Value);root.Add(abVi);}}/// <summary>/// 创建ab包名称的输入框/// </summary>/// <param name="root"></param>/// <param name="defaultValue">初始包名</param>/// <param name="objects">初始资源</param>private VisualElement CreataABNameField(string defaultValue = "", List<Object> objects = null){VisualElement abVi = new VisualElement();TextField field = new TextField("输入ab包名称");field.style.width = 610;abVi.Add(field);//监听内容修改field.RegisterCallback<ChangeEvent<string>>((evt) =>{//修改bundlesif (bundles.ContainsKey(evt.previousValue)){bundles.Remove(evt.previousValue);}if(!bundles.ContainsKey(evt.newValue))bundles.Add(evt.newValue, new List<Object>());});//初始化包名if (string.IsNullOrEmpty(defaultValue))field.value = $"Default_{bundles.Count}";elsefield.value = defaultValue;CreateABCountField(abVi, field, objects);return abVi;}/// <summary>/// 创建ab包资源数量的输入框/// </summary>/// <param name="abVi"></param>/// <param name="field">用于设置bundles的key值</param>/// <param name="objects">初始资源对象</param>private void CreateABCountField(VisualElement abVi, TextField field, List<Object> objects = null){//资源数量输入框IntegerField field_Count = new IntegerField("输入ab资源数量");field_Count.style.width = 200;field.Add(field_Count);Button delBtn = new Button(() =>{if(bundles.ContainsKey(field.value)){bundles.Remove(field.value);}abScr.Remove(abVi);});delBtn.style.width = 60;delBtn.text = "删除ab包";field.Add(delBtn);VisualElement objVisE = new VisualElement();objVisE.style.width = rootVisualElement.style.width;//objVisE.style.maxHeight = 100;//初始化资源对象if (objects != null){//初始化数量field_Count.value = objects.Count;for (int i = 0; i < objects.Count; i++){VisualElement objField = CreataABFile(field, objects[i]);objVisE.Add(objField);}}//监听数量修改field_Count.RegisterCallback<ChangeEvent<int>>((evt) =>{//若资源数量增加if(evt.newValue > evt.previousValue){int count = evt.newValue - evt.previousValue;for (int i = 0; i < count; i++){VisualElement objField = CreataABFile(field);objVisE.Add(objField);}}else{int count = evt.previousValue - evt.newValue;int index = evt.previousValue - 1;//若减少,曾从后往前删除for (int i = 0; i < count; i++){objVisE.RemoveAt(index);if (bundles.ContainsKey(field.value) && bundles[field.value].Count > index){bundles[field.value].RemoveAt(index);}index--;}}});abVi.Add(objVisE);}/// <summary>/// 创建ab包资源的输入框/// </summary>/// <param name="root"></param>/// <param name="field">用于设置bundles的key值</param>/// <param name="obj">初始资源对象</param>/// <returns></returns>private VisualElement CreataABFile(TextField field, Object obj = null){//资源设置框ObjectField objField = new ObjectField();objField.objectType = typeof(Object);//初始化对象内容if(obj != null)objField.value = obj;//监听资源对象改变objField.RegisterCallback<ChangeEvent<Object>>((evt) =>{if (bundles.ContainsKey(field.value)){var objs = bundles[field.value];objs.Remove(evt.previousValue);objs.Add(evt.newValue);}});return objField;}//创建文件夹private static void CreateDirIfNotExists(string dirName){if (!Directory.Exists(dirName)){Directory.CreateDirectory(dirName);}}
}[Serializable]
public class ABSaveData
{[SerializeField]public string ABName;[SerializeField]public List<string> ABFilePath;
}[Serializable]
public class ABSaveJsonData
{[SerializeField]public List<ABSaveData> ABSave;
}
放到Editor/AssetBundleEditor文件夹下即可,界面如图

点击添加ab包名称即可添加一个ab包设置,输入ab包名称及资源数量,设置资源对象最后点击打包即可,ab包输出在StreamingAssets文件夹下。
至此一个简单的热更新就实现了,最后Build工程(Build时只需要Build Init场景即可,无需勾选Main场景等AB包中的场景,当然在编辑器中运行时,需要勾选上其他场景,否则无法跳转),然后修改UIPart中的部分代码,之后依次执行生成dll,复制dll,打ab包,最后将StreamingAssets下的ab包替换到Build的工程中运行,就会发现修改的代码生效了。
下面为我实现的演示工程,地址为:Huatuo热更新演示工程资源-CSDN文库
相关文章:

Huatuo热更新--如何使用
在安装完huatuo热更新插件后就要开始学习如何使用了。 1.创建主框渐Main 新建文件夹Main(可自定义),然后按下图创建文件,注意名称与文件夹名称保持一致 然后新建场景(Init场景),添加3个空物体…...

Flask实现高效日志记录模块
目录 一. 简介: 1. 为什么需要请求日志 二. 日志模块组成 1. 对应日志表创建(包含日志记录的关键字段) 2. 编写日志记录静态方法 3. 在Flask中捕获请求日志 4. 捕获异常并记录错误日志 5. 编写日志接口数据展示 6. 写入数据展…...

scroll、offset、client三大家族和getBoundingClientRect方法
scroll、offset、client三大家族和getBoundingClientRect方法 1.offset(只能读,不能修改)2.client(只能读,不能修改)3.scroll滚动家族4.getBoundingClientRect方法 1.offset(只能读,不能修改) offsetParent:离当前元素最近的有定位的祖先元素…...

JWT 令牌
目录 一、JWT 1、什么是JWT 2、JWT的组成 3、JJWT签发与验证token 1、创建token 2、解析token 3、设置过期时间 4、自定义claims 前言: 在现代Web应用和微服务架构中,用户身份验证和信息安全传输是核心问题。JSON Web Token(J…...

Python基于Flask的豆瓣Top250电影数据可视化分析与评分预测系统(附源码,技术说明)
博主介绍:✌IT徐师兄、7年大厂程序员经历。全网粉丝15W、csdn博客专家、掘金/华为云//InfoQ等平台优质作者、专注于Java技术领域和毕业项目实战✌ 🍅文末获取源码联系🍅 👇🏻 精彩专栏推荐订阅👇dz…...

JavaScript数组-遍历数组
在JavaScript中,数组是一种非常常用的数据结构,用于存储一系列有序的数据项。无论是处理简单的列表还是复杂的数据集合,遍历数组都是我们经常需要执行的操作之一。本文将详细介绍几种常见的遍历数组的方法,并讨论它们各自的优缺点…...

基于Flask的第七次人口普查数据分析系统的设计与实现
【Flask】基于Flask的第七次人口普查数据分析系统的设计与实现(完整系统源码开发笔记详细部署教程)✅ 目录 一、项目简介二、项目界面展示三、项目视频展示 一、项目简介 基于Flask的人口普查可视化分析系统 二、项目界面展示 登录/注册 首页/详情 …...

解决DeepSeek服务器繁忙的有效方法
全球42%的企业遭遇过AI工具服务器过载导致内容生产中断(数据来源:Gartner 2025)。当竞品在凌晨3点自动发布「智能家居安装指南」时,你的团队可能正因DeepSeek服务器繁忙错失「净水器保养教程」的流量黄金期⏳。147SEO智能调度系统…...

分词器(Tokenizer) | 有了分词器,为什么还需要嵌入模型
文章目录 什么是tokenizer有了分词器,为什么还需要嵌入模型分词器为什么在transformers 里Hugging Face的Tokenizer大模型不同tokenizer训练效果对比分词器库选择当前顶尖大模型所采用的 Tokenizer 方法与词典大小 参考 什么是tokenizer Tokenizers huggingface官方…...
VisionTransformer(ViT)与CNN卷积神经网络的对比
《------往期经典推荐------》 一、AI应用软件开发实战专栏【链接】 项目名称项目名称1.【人脸识别与管理系统开发】2.【车牌识别与自动收费管理系统开发】3.【手势识别系统开发】4.【人脸面部活体检测系统开发】5.【图片风格快速迁移软件开发】6.【人脸表表情识别系统】7.【…...

计算机视觉+Numpy和OpenCV入门
Day 1:Python基础Numpy和OpenCV入门 Python基础 变量与数据类型、函数与类的定义、列表与字典操作文件读写操作(读写图像和数据文件) 练习任务:写一个Python脚本,读取一个图像并保存灰度图像。 import cv2 img cv2.im…...
)
Vue 3 工程化打包工具:从理论到实践 (下篇)
引言 在前端开发中,打包工具是工程化的重要组成部分。Vue 3 作为当前流行的前端框架,其工程化离不开高效的打包工具。打包工具不仅能够将代码、样式、图片等资源进行优化和压缩,还能通过模块化、代码分割等功能提升应用的性能。本文将深入探…...

java经验快速学习python!
title: java经验快速学习python! date: 2025-02-19 01:52:05 tags: python学习路线 java经验快速学习python! 本篇文档会一直更新!!!变量、分支结构、循环结构、数据结构【列表、元组、集合字典】python常用内置函数元…...

爬虫破解网页禁止F12
右击页面显示如下 先点击f12再输入网址,回车后没有加载任何数据 目前的一种解决方法: 先 AltD ,再 CtrlShifti...

从零开始构建一个语言模型中vocab_size(词汇表大小)的设定规则
从零开始构建一个语言模型就要设计一个模型框架,其中要配置很多参数。在自然语言处理任务中,vocab_size(词汇表大小) 的设定是模型设计的关键参数之一,它直接影响模型的输入输出结构、计算效率和内存消耗。 本文是在我前文的基础上讲解的:从零开始构建一个小型字符级语言…...

Jenkins插件管理切换国内源地址
安装Jenkins 插件时,由于访问不了国外的插件地址,会导致基本插件都安装失败。 不用着急,等全部安装失败后,进入系统,修改插件源地址,重启后在安装所需插件。 替换国内插件更新地址 选择:系统…...

Q - learning 算法是什么
Q - learning 算法是什么 Q - learning 算法是一种经典的无模型强化学习算法,由克里斯沃特金斯(Chris Watkins)在 1989 年提出。它被广泛应用于解决各种决策问题,尤其适用于智能体在环境中通过与环境交互来学习最优策略的场景。下面从基本概念、核心公式、算法流程和特点几…...

nasm - console 32bits
文章目录 nasm - console 32bits概述笔记my_build.batnasm_main.asm用VS2019写个程序,按照win32方式编译,比较一下。备注END nasm - console 32bits 概述 看到一个nasm的例子(用nasm实现一个32bits控制台的程序架子) 学习一下 笔记 my_build.bat ec…...

11.编写前端内容|vscode链接Linux|html|css|js(C++)
vscode链接服务器 安装VScode插件 Chinese (Simplified) (简体中⽂) Language Pack for Visual Studio CodeOpen in BrowserRemote SSH 在命令行输入 remote-ssh接着输入 打开配置文件,已经配置好主机 点击远程资源管理器可以找到 右键链接 输入密码 …...

【deepseek-r1模型】linux部署deepseek
1、快速安装 Ollama 下载:Download Ollama on macOS Ollama 官方主页:https://ollama.com Ollama 官方 GitHub 源代码仓库:https://github.com/ollama/ollama/ 官网提供了一条命令行快速安装的方法。 (1)下载Olla…...
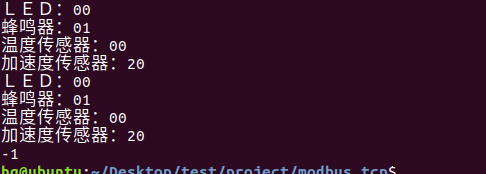
网络编程(Modbus进阶)
思维导图 Modbus RTU(先学一点理论) 概念 Modbus RTU 是工业自动化领域 最广泛应用的串行通信协议,由 Modicon 公司(现施耐德电气)于 1979 年推出。它以 高效率、强健性、易实现的特点成为工业控制系统的通信标准。 包…...
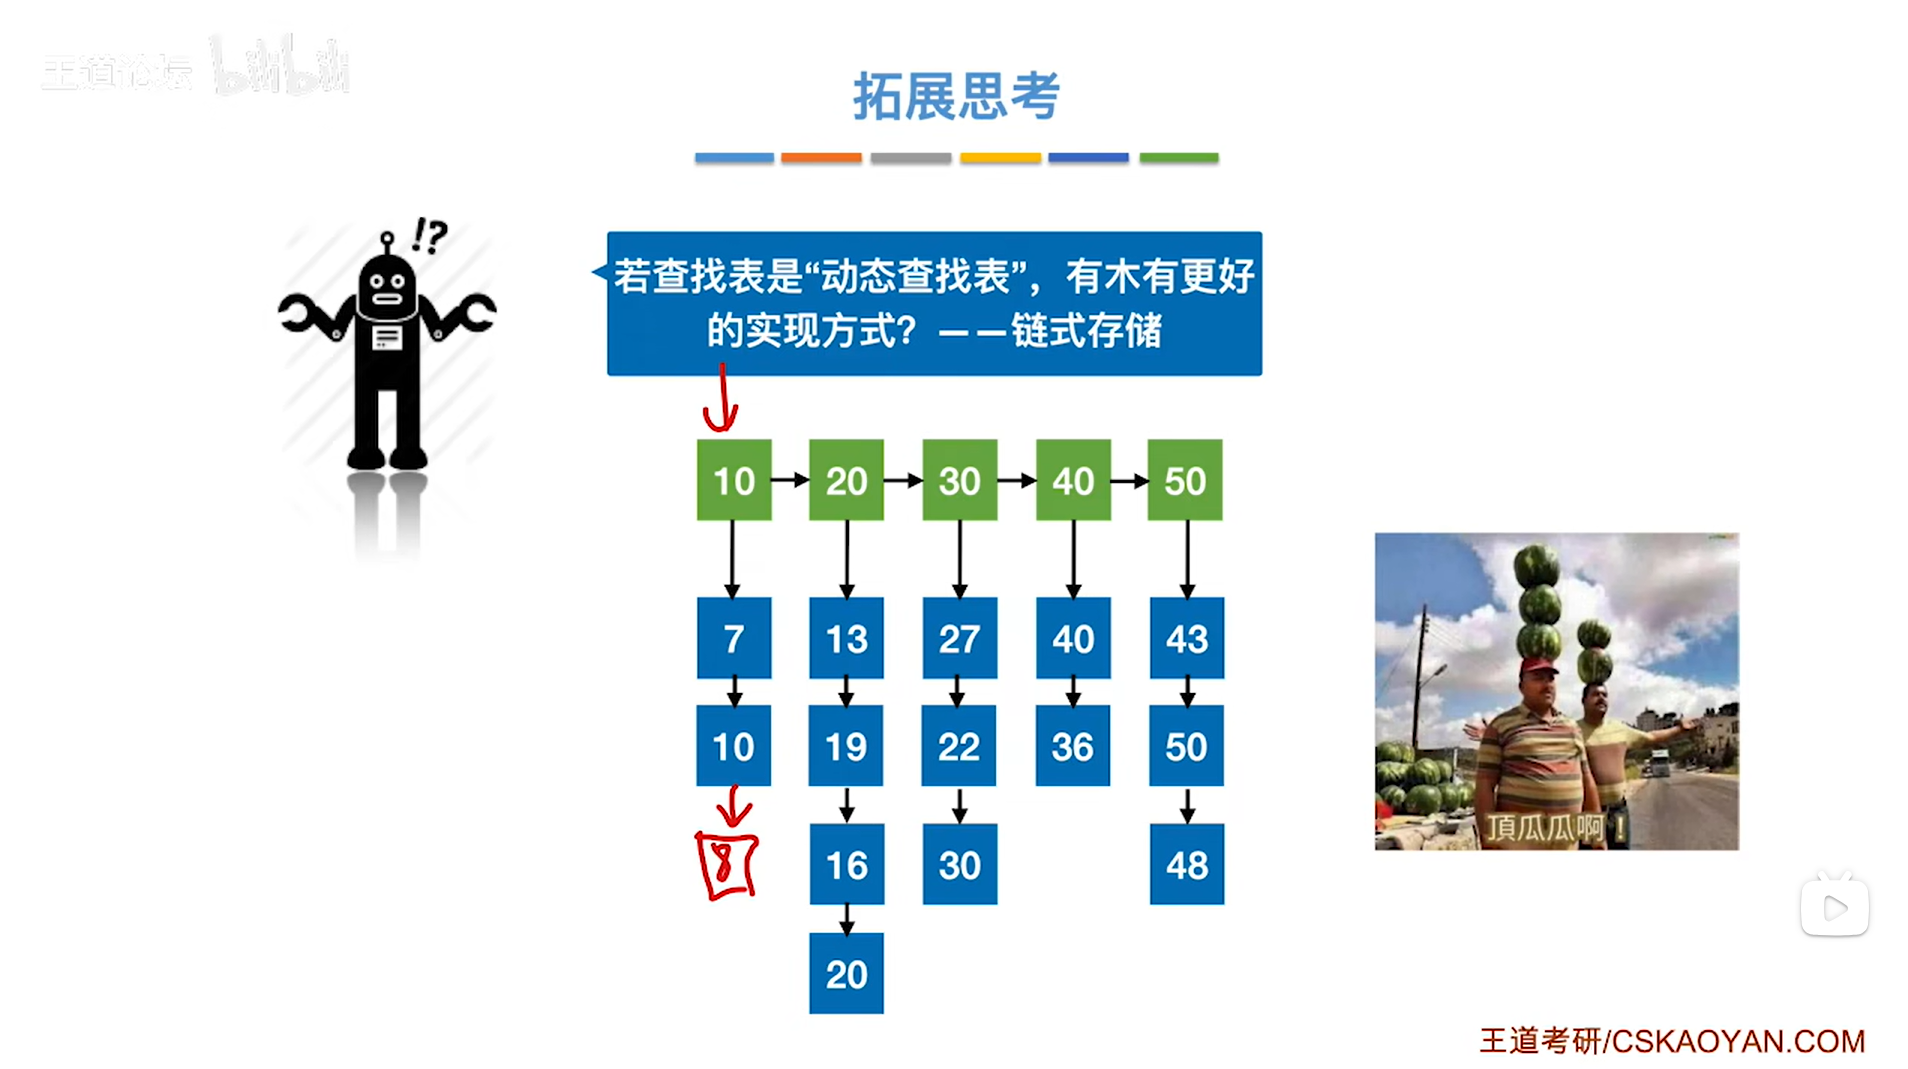
7.4.分块查找
一.分块查找的算法思想: 1.实例: 以上述图片的顺序表为例, 该顺序表的数据元素从整体来看是乱序的,但如果把这些数据元素分成一块一块的小区间, 第一个区间[0,1]索引上的数据元素都是小于等于10的, 第二…...

Qt Widget类解析与代码注释
#include "widget.h" #include "ui_widget.h"Widget::Widget(QWidget *parent): QWidget(parent), ui(new Ui::Widget) {ui->setupUi(this); }Widget::~Widget() {delete ui; }//解释这串代码,写上注释 当然可以!这段代码是 Qt …...

关于iview组件中使用 table , 绑定序号分页后序号从1开始的解决方案
问题描述:iview使用table 中type: "index",分页之后 ,索引还是从1开始,试过绑定后台返回数据的id, 这种方法可行,就是后台返回数据的每个页面id都不完全是按照从1开始的升序,因此百度了下,找到了…...
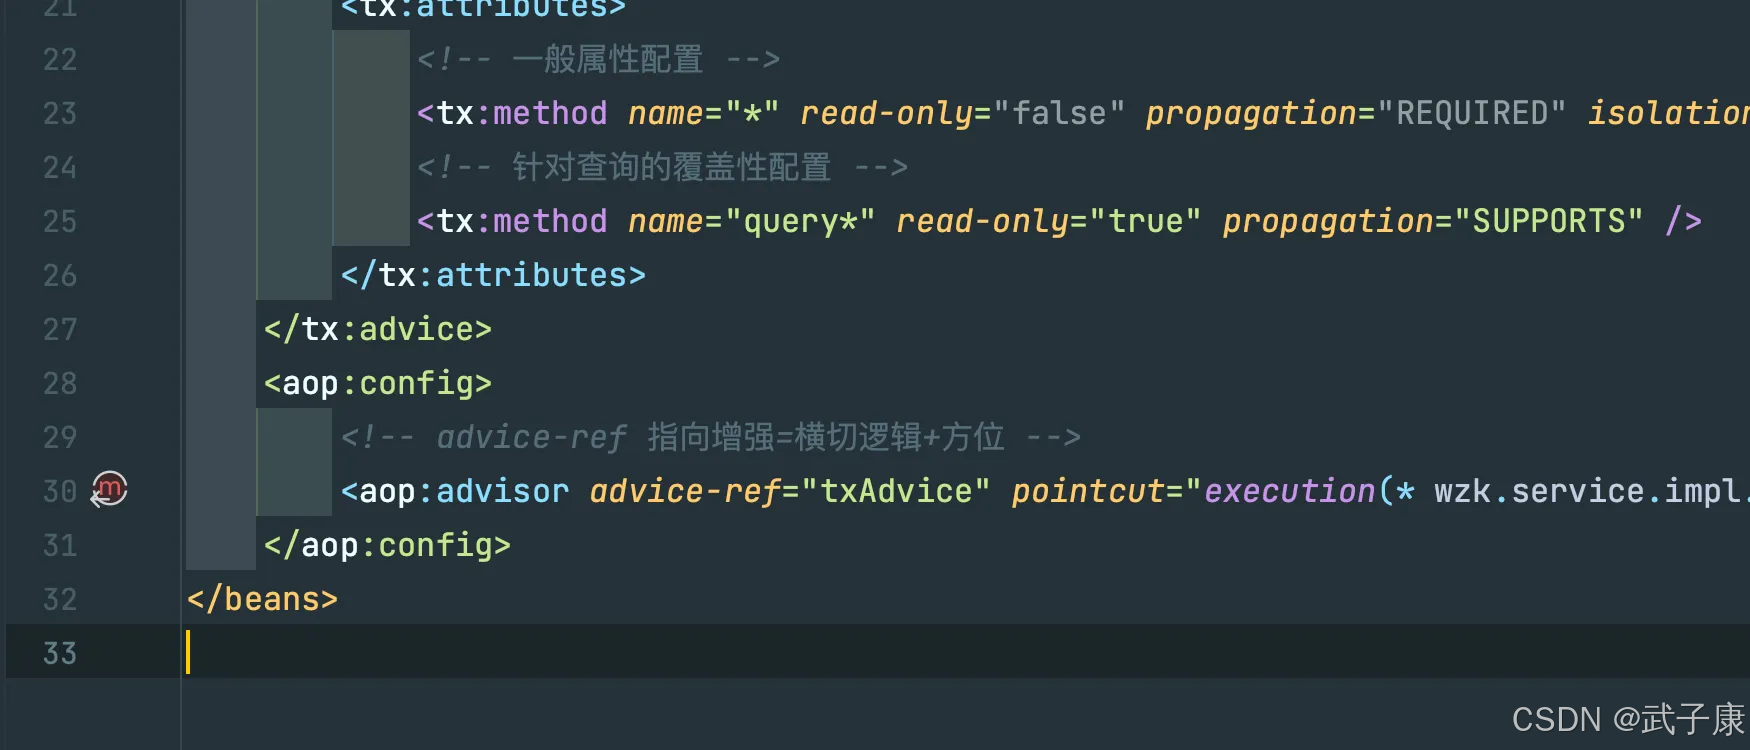
Java-41 深入浅出 Spring - 声明式事务的支持 事务配置 XML模式 XML+注解模式
点一下关注吧!!!非常感谢!!持续更新!!! 🚀 AI篇持续更新中!(长期更新) 目前2025年06月05日更新到: AI炼丹日志-28 - Aud…...

高防服务器能够抵御哪些网络攻击呢?
高防服务器作为一种有着高度防御能力的服务器,可以帮助网站应对分布式拒绝服务攻击,有效识别和清理一些恶意的网络流量,为用户提供安全且稳定的网络环境,那么,高防服务器一般都可以抵御哪些网络攻击呢?下面…...

Device Mapper 机制
Device Mapper 机制详解 Device Mapper(简称 DM)是 Linux 内核中的一套通用块设备映射框架,为 LVM、加密磁盘、RAID 等提供底层支持。本文将详细介绍 Device Mapper 的原理、实现、内核配置、常用工具、操作测试流程,并配以详细的…...
短视频矩阵系统文案创作功能开发实践,定制化开发
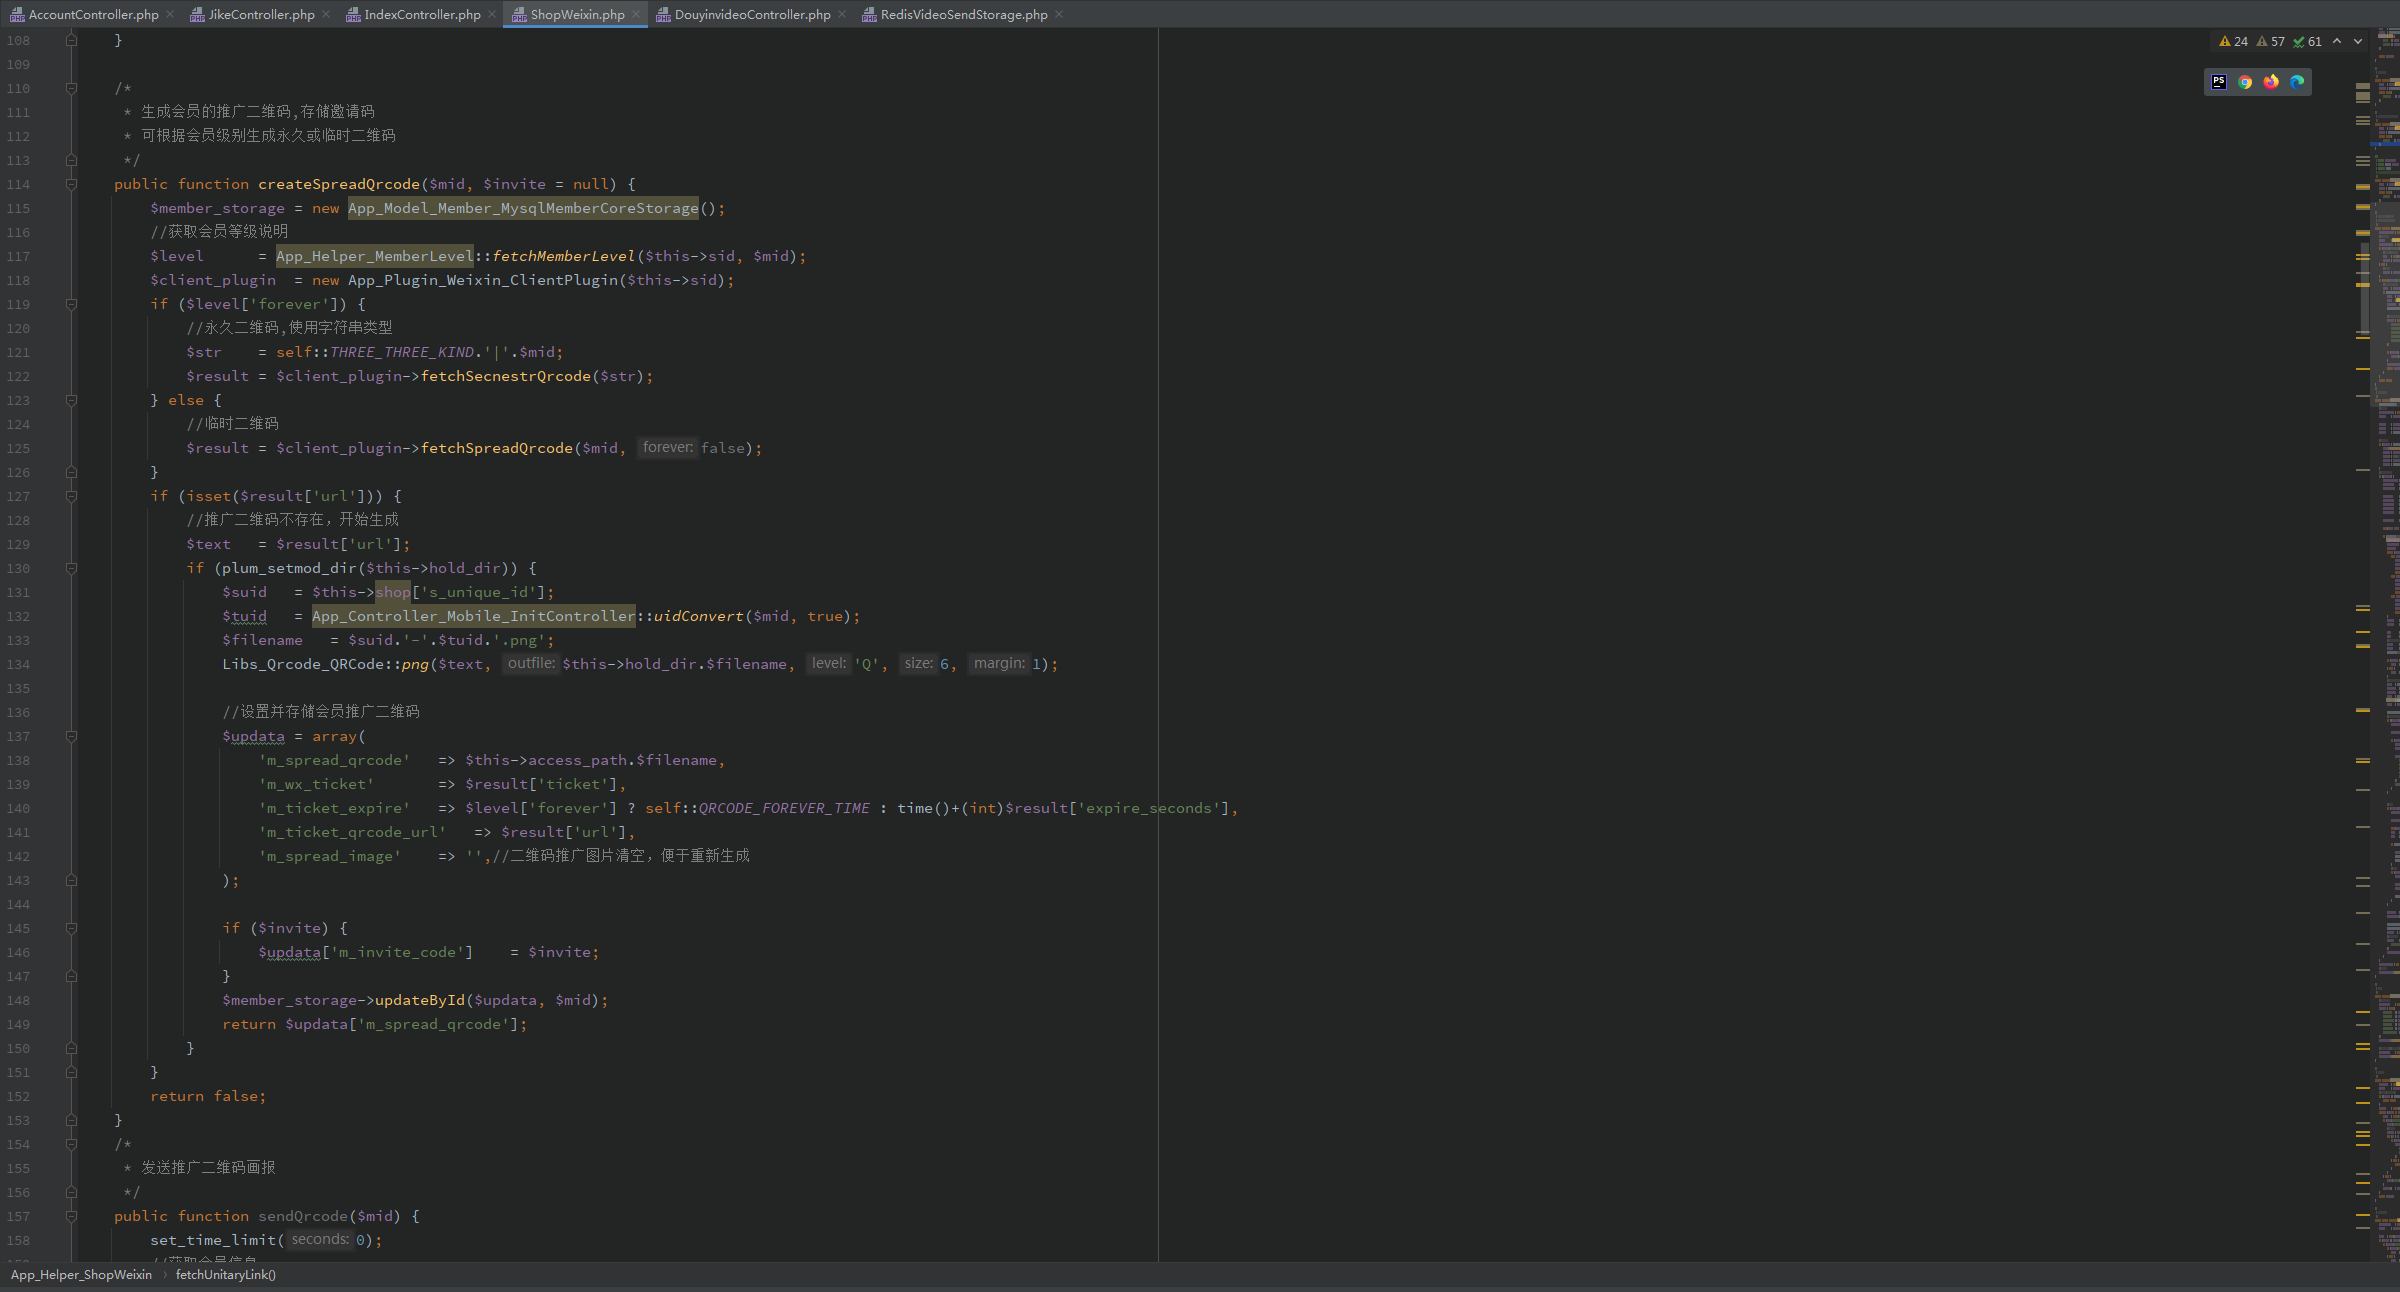
在短视频行业迅猛发展的当下,企业和个人创作者为了扩大影响力、提升传播效果,纷纷采用短视频矩阵运营策略,同时管理多个平台、多个账号的内容发布。然而,频繁的文案创作需求让运营者疲于应对,如何高效产出高质量文案成…...

A2A JS SDK 完整教程:快速入门指南
目录 什么是 A2A JS SDK?A2A JS 安装与设置A2A JS 核心概念创建你的第一个 A2A JS 代理A2A JS 服务端开发A2A JS 客户端使用A2A JS 高级特性A2A JS 最佳实践A2A JS 故障排除 什么是 A2A JS SDK? A2A JS SDK 是一个专为 JavaScript/TypeScript 开发者设计的强大库ÿ…...
Python Ovito统计金刚石结构数量
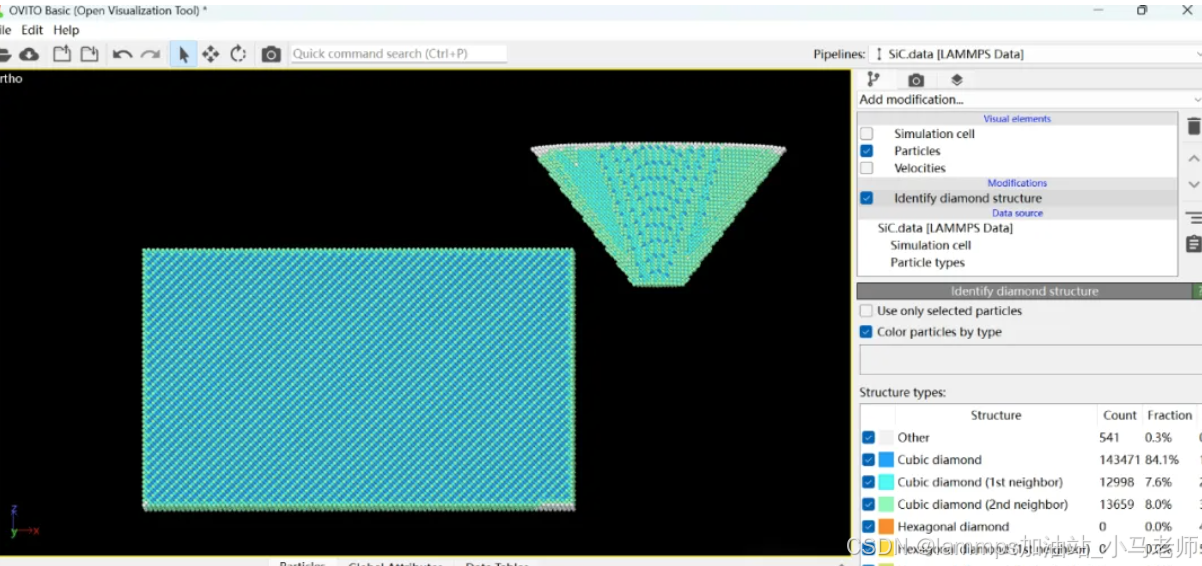
大家好,我是小马老师。 本文介绍python ovito方法统计金刚石结构的方法。 Ovito Identify diamond structure命令可以识别和统计金刚石结构,但是无法直接输出结构的变化情况。 本文使用python调用ovito包的方法,可以持续统计各步的金刚石结构,具体代码如下: from ovito…...
