【Git版本控制 01】基本操作
目录
一、初始配置
二、添加文件
三、查看日志
四、修改文件
五、版本回退
六、撤销修改
七、删除文件
一、初始配置
Git版本控制器:记录每次的修改以及版本迭代的一个管理系统。
# 初始化本地仓库:git init(base) [root@localhost gitcode]# git init
重新初始化现存的 Git 版本库于 /root/gitee/gitcode/.git/
(base) [root@localhost gitcode]# ls -a
.  ..  .git
(base) [root@localhost gitcode]# tree .git
.git
├── branches
├── config
├── description
├── HEAD
├── hooks
│   ├── applypatch-msg.sample
│   ├── commit-msg.sample
│   ├── post-update.sample
│   ├── pre-applypatch.sample
│   ├── pre-commit.sample
│   ├── prepare-commit-msg.sample
│   ├── pre-push.sample
│   ├── pre-rebase.sample
│   └── update.sample
├── info
│   └── exclude
├── objects
│   ├── info
│   └── pack
└── refs├── heads└── tags9 directories, 13 files
(base) [root@localhost gitcode]#
# 查看本地仓库配置(base) [root@localhost gitcode]# git config -l
push.default=matching
core.repositoryformatversion=0
core.filemode=true
core.bare=false
core.logallrefupdates=true
(base) [root@localhost gitcode]## 配置当前仓库(base) [root@localhost gitcode]# git config user.name "ljc"
(base) [root@localhost gitcode]# git config user.email "1210451061@qq.com"
(base) [root@localhost gitcode]# git config -l
push.default=matching
core.repositoryformatversion=0
core.filemode=true
core.bare=false
core.logallrefupdates=true
user.name=ljc
user.email=1210451061@qq.com
(base) [root@localhost gitcode]# # 删除当前仓库配置(base) [root@localhost gitcode]# git config --unset user.name
(base) [root@localhost gitcode]# git config --unset user.email
(base) [root@localhost gitcode]# git config -l
push.default=matching
core.repositoryformatversion=0
core.filemode=true
core.bare=false
core.logallrefupdates=true
(base) [root@localhost gitcode]## 配置当前机器的全部仓库(base) [root@localhost gitcode]# git config --global user.name "ljc"
(base) [root@localhost gitcode]# git config --global user.email "1210451061@qq.com"
(base) [root@localhost gitcode]# git config -l
push.default=matching
user.name=ljc
user.email=1210451061@qq.com
core.repositoryformatversion=0
core.filemode=true
core.bare=false
core.logallrefupdates=true# 删除当前机器的全部仓库配置(base) [root@localhost gitcode]# git config --global --unset user.name
(base) [root@localhost gitcode]# git config --global --unset user.email
(base) [root@localhost gitcode]# git config -l
push.default=matching
core.repositoryformatversion=0
core.filemode=true
core.bare=false
core.logallrefupdates=true
(base) [root@localhost gitcode]#二、添加文件
⼯作区:是在电脑上你要写代码或⽂件的⽬录。
暂存区:英⽂叫 stage 或 index 。⼀般存放在 .git ⽬录下的 index ⽂件(.git/index)中,我们把暂存区有时也叫作索引(index)。
版本库:⼜名仓库,英⽂名 repository 。⼯作区有⼀个隐藏⽬录 .git ,它不算⼯作区,⽽是 Git 的版本库。这个版本库⾥⾯的所有⽂件都可以被 Git 管理起来,每个⽂件的修改、删除,Git 都能跟踪,以便任何时刻都可以追踪历史,或者在将来某个时刻可以“还原”。

- 创建 Git 版本库时,Git会为我们⾃动创建⼀个唯⼀的 master 分⽀,以及指向 master 的⼀个指针叫 HEAD。
- 对⼯作区修改(或新增)的⽂件执⾏ git add 命令时,暂存区⽬录树的⽂件索引会被更新。
- 执⾏提交操作 git commit 时,master 分⽀会做相应的更新,可以简单理解为暂存区的⽬录树才会被真正写到版本库中。
# 添加一个文件(base) [root@localhost gitcode]# ls
(base) [root@localhost gitcode]# touch file1
(base) [root@localhost gitcode]# vim file1
(base) [root@localhost gitcode]# cat file1
hello git(base) [root@localhost gitcode]# git add file1
(base) [root@localhost gitcode]# git commit -m "Add first file"
[master(根提交) fc3a350] Add first file1 file changed, 2 insertions(+)create mode 100644 file1
(base) [root@localhost gitcode]#
# 添加多个文件(base) [root@localhost gitcode]# touch file2 file3 file4
(base) [root@localhost gitcode]# git add .
(base) [root@localhost gitcode]# git commit -m "Add three files"
[master f2e9210] Add three files3 files changed, 0 insertions(+), 0 deletions(-)create mode 100644 file2create mode 100644 file3create mode 100644 file4
(base) [root@localhost gitcode]# git log
commit f2e92108d0fe7ec01a6c49d1372e4907cac6d96b
Author: ljc <1210451061@qq.com>
Date: Wed Feb 7 05:13:08 2024 +0800Add three filescommit fc3a3507b30d2f4374a71245a034e00f94ea8363
Author: ljc <1210451061@qq.com>
Date: Wed Feb 7 05:11:56 2024 +0800Add first file
(base) [root@localhost gitcode]#三、查看日志
# git log 命令显⽰从最近到最远的提交⽇志
# 加上 --pretty=online 参数会将日志简洁显示(base) [root@localhost gitcode]# git log --pretty=oneline
f2e92108d0fe7ec01a6c49d1372e4907cac6d96b Add three files
fc3a3507b30d2f4374a71245a034e00f94ea8363 Add first file
(base) [root@localhost gitcode]## 通过 git log 可以看到的长字符串是每次提交的commit id(版本号),是一个哈希值
# 查看 .git(base) [root@localhost gitcode]# tree .git
.git
├── branches
├── COMMIT_EDITMSG
├── config
├── description
├── HEAD
├── hooks
│ ├── applypatch-msg.sample
│ ├── commit-msg.sample
│ ├── post-update.sample
│ ├── pre-applypatch.sample
│ ├── pre-commit.sample
│ ├── prepare-commit-msg.sample
│ ├── pre-push.sample
│ ├── pre-rebase.sample
│ └── update.sample
├── index
├── info
│ └── exclude
├── logs
│ ├── HEAD
│ └── refs
│ └── heads
│ └── master
├── objects
│ ├── 2c
│ │ └── 0f71d14208bc896178ce4eb92870c659c04202
│ ├── 74
│ │ └── cbb01783907aa0807236331230386d5e1241cf
│ ├── 7f
│ │ └── 112b196b963ff72675febdbb97da5204f9497e
│ ├── e6
│ │ └── 9de29bb2d1d6434b8b29ae775ad8c2e48c5391
│ ├── f2
│ │ └── e92108d0fe7ec01a6c49d1372e4907cac6d96b
│ ├── fc
│ │ └── 3a3507b30d2f4374a71245a034e00f94ea8363
│ ├── info
│ └── pack
└── refs├── heads│ └── master└── tags18 directories, 24 files
(base) [root@localhost gitcode]## index 是暂存区,add 后的内容会添加进缓存区
# HEAD 是默认指向 master 分支的指针
# 默认的 master 保存的就是最新的 commit id(base) [root@localhost gitcode]# cat .git/HEAD
ref: refs/heads/master
(base) [root@localhost gitcode]# cat .git/refs/heads/master
f2e92108d0fe7ec01a6c49d1372e4907cac6d96b
(base) [root@localhost gitcode]# # objects 为Git的对象库,里面包含了创建的各个版本的对象及内容。
# 当执行 git add 的时候,暂存区的对象树被更新,
# 同时工作区修改(或新增)的文件内容被写入到对象库中的一个新的对象中,
# 就位于 ./git/objects 目录下(base) [root@localhost gitcode]# ls .git/objects/
2c 74 7f e6 f2 fc info pack# 查找 object 要将 commit id 分为两部分,前2位是目录名称,后38位文件名称# 使用 git cat-file 查看版本库对象的内容
# <类型> 可以是其中之一:blob、tree、commit、tag
# -t 显示对象类型
# -s 显示对象大小
# -e 当没有错误时退出并返回零
# -p 美观地打印对象的内容
# --textconv 对于数据(blob)对象,对其内容执行 textconv
# --batch 显示从标准输入提供的对象的信息和内容
# --batch-check 显示从标准输入提供的对象的信息(base) [root@localhost gitcode]# git cat-file -p f2e92108d0fe7ec01a6c49d1372e4907cac6d96b
tree 74cbb01783907aa0807236331230386d5e1241cf
parent fc3a3507b30d2f4374a71245a034e00f94ea8363
author ljc <1210451061@qq.com> 1707253988 +0800
committer ljc <1210451061@qq.com> 1707253988 +0800Add three files
(base) [root@localhost gitcode]# git cat-file -p 74cbb01783907aa0807236331230386d5e1241cf
100644 blob 7f112b196b963ff72675febdbb97da5204f9497e file1
100644 blob e69de29bb2d1d6434b8b29ae775ad8c2e48c5391 file2
100644 blob e69de29bb2d1d6434b8b29ae775ad8c2e48c5391 file3
100644 blob e69de29bb2d1d6434b8b29ae775ad8c2e48c5391 file4
(base) [root@localhost gitcode]# # 查看 file1 对应的 commit id[root@localhost gitcode]# git cat-file -p 7f112b196b963ff72675febdbb97da5204f9497e
hello git(base) [root@localhost gitcode]# 四、修改文件
Git版本控制器的本质:跟踪并管理文件的修改,而非文件本身。
# 对file1文件内容进行修改,此时工作区和暂存区的文件版本不一致
# 用 git status 查看在你上次提交之后是否有对文件进行再次修改(base) [root@localhost gitcode]# vim file1
(base) [root@localhost gitcode]# cat file1
hello git
hello world
(base) [root@localhost gitcode]# git status
# 位于分支 master
# 尚未暂存以备提交的变更:
#   (使用 "git add <file>..." 更新要提交的内容)
#   (使用 "git checkout -- <file>..." 丢弃工作区的改动)
#
#       修改:      file1
#
修改尚未加入提交(使用 "git add" 和/或 "git commit -a")
(base) [root@localhost gitcode]#
# git diff [file] 查看暂存区和工作区文件的具体差异
# git diff HEAD -- [file] 查看版本库和工作区文件的具体差异(base) [root@localhost gitcode]# git diff file1
diff --git a/file1 b/file1
index 7f112b1..05fe86c 100644
--- a/file1
+++ b/file1
@@ -1,2 +1,2 @@hello git
-
+hello world
(base) [root@localhost gitcode]# git diff HEAD -- file1
diff --git a/file1 b/file1
index 7f112b1..05fe86c 100644
--- a/file1
+++ b/file1
@@ -1,2 +1,2 @@hello git
-
+hello world
(base) [root@localhost gitcode]# (base) [root@localhost gitcode]# git add file1
(base) [root@localhost gitcode]# git status
# 位于分支 master
# 要提交的变更:
# (使用 "git reset HEAD <file>..." 撤出暂存区)
#
# 修改: file1
#
(base) [root@localhost gitcode]# git commit -m "modify: file1"
[master 7df1e32] modify: file11 file changed, 1 insertion(+), 1 deletion(-)
(base) [root@localhost gitcode]# git status
# 位于分支 master
无文件要提交,干净的工作区
(base) [root@localhost gitcode]# 五、版本回退

Git将所有提交过的版本串成一条时间线,若只有一条时间线,则这个分支就是主分支,即master分支。
对于master分支,每一次提交master分⽀都会向前移动⼀步,这样,随着你不断提交,master分⽀的线也越来越⻓,⽽HEAD只要⼀直指向master分⽀即可指向当前分⽀。
当进行版本回退的时候,只需要改变master指针的指向,就完成了版本回退,非常高效。
# 给 file1 新增 vertion1 和 vertion2 两个版本并分别提交(base) [root@localhost gitcode]# vim file1
(base) [root@localhost gitcode]# cat file1
hello git
hello world
add vertion1
(base) [root@localhost gitcode]# git add file1
(base) [root@localhost gitcode]# git commit -m "modify: add vertion1"
[master 167def0] modify: add vertion11 file changed, 1 insertion(+)
(base) [root@localhost gitcode]# vim file1
(base) [root@localhost gitcode]# cat file1
hello git
hello world
add vertion1
add vertion2
(base) [root@localhost gitcode]# git add file1
(base) [root@localhost gitcode]# git commit -m "modigy: add vertion2"
[master c31b56a] modigy: add vertion21 file changed, 1 insertion(+)
(base) [root@localhost gitcode]#
# 通过 git reset 回退版本
# 在进行版本回退之前,通常先用 git log 查看历史版本(base) [root@localhost gitcode]# git log --pretty=oneline
c31b56a87a6387873d7db9a16f7d1c81b4b2339e modigy: add vertion2
167def04692b8f6fa68cc835f41a81584ca31b7e modify: add vertion1
7df1e322e9d267964f51e91dac900bb1a77f171d modify: file1
f2e92108d0fe7ec01a6c49d1372e4907cac6d96b Add three files
fc3a3507b30d2f4374a71245a034e00f94ea8363 Add first file
(base) [root@localhost gitcode]# git reset 167def04692b8f6fa68cc835f41a81584ca31b7e
重置后撤出暂存区的变更:
M file1
(base) [root@localhost gitcode]# cat file1
hello git
hello world
add vertion1
add vertion2
(base) [root@localhost gitcode]# git reset --hard 167def04692b8f6fa68cc835f41a81584ca31b7e
HEAD 现在位于 167def0 modify: add vertion1
(base) [root@localhost gitcode]# cat file1
hello git
hello world
add vertion1
(base) [root@localhost gitcode]# # 由上可见,直接使用 git reset 回退版本,工作区的文件内容并未修改
# 因为回退版本的完整命令格式为:git reset [--soft | --mixed | --hard] [HEAD]# 不同的参数代表不同的回退方式:
# --soft 对于工作区和暂存区的内容都不变,只将版本库回退到指定版本
# --mixed 对于工作区的内容不变,暂存区和版本库回退到指定版本,默认参数
# --hard 对于工作区、暂存区和版本库都回退到指定版本# [HEAD] 说明:
# 1. 可直接写成 commid id,表示特定的版本
# 2. HEAD 表示当前版本
# 3. HEAD^ 表示上一个版本
# 4. HEAD^^ 表示上上个版本
# 5. ... 依此类推# 当我回退到 vertion1 之后后悔,我想再回到 vertion2 怎么办?
# 1. 直接用 vertion2 的 commit id 进行回退
# 2. 如果找不到 vertion2 的 commit id 了,通过 git reflog 查看本地的历史命令,
# 可以得到 vertion2 的部分 commit id,也可直接回退(base) [root@localhost gitcode]# git reflog
167def0 HEAD@{0}: reset: moving to 167def04692b8f6fa68cc835f41a81584ca31b7e
c31b56a HEAD@{1}: commit: modigy: add vertion2
167def0 HEAD@{2}: commit: modify: add vertion1
7df1e32 HEAD@{3}: reset: moving to 7df1e322e9d267964f51e91dac900bb1a77f171d
3d8c2fe HEAD@{4}: commit: modify: add vertion1
7df1e32 HEAD@{5}: commit: modify: file1
f2e9210 HEAD@{6}: commit: Add three files
fc3a350 HEAD@{7}: commit (initial): Add first file
(base) [root@localhost gitcode]# git reset --hard c31b56a
HEAD 现在位于 c31b56a modigy: add vertion2
(base) [root@localhost gitcode]# cat file1
hello git
hello world
add vertion1
add vertion2
(base) [root@localhost gitcode]#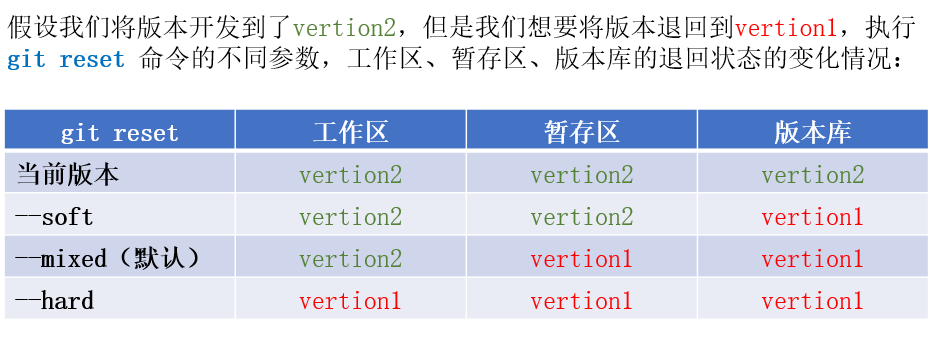
六、撤销修改
版本回退是我们已经提交了版本,更新了版本库之后再进行回退操作,但是如果我们在开发过程中,新写了很多代码但是没有 add ,这时候忽然发现自己写的代码全是屎山代码,想要回到新增代码前的版本,该怎么做呢?是先提交更新版本再版本回退吗?
上述方式虽然也行,但是太麻烦了,可以直接用 git checkout -- [file] 命令让工作区的文件回到最近一次 add 和 commit 时的状态。
(base) [root@localhost gitcode]# vim file1
(base) [root@localhost gitcode]# cat file1
hello git
hello world
add vertion1
add vertion2
too much shit code!!!
(base) [root@localhost gitcode]# git status
# 位于分支 master
# 尚未暂存以备提交的变更:
#   (使用 "git add <file>..." 更新要提交的内容)
#   (使用 "git checkout -- <file>..." 丢弃工作区的改动)
#
#       修改:      file1
#
修改尚未加入提交(使用 "git add" 和/或 "git commit -a")
(base) [root@localhost gitcode]# git checkout -- file1
(base) [root@localhost gitcode]# cat file1
hello git
hello world
add vertion1
add vertion2
(base) [root@localhost gitcode]## 如果代码已经 add 但还没 commit 呢?怎么处理?
# 方法1:先 git reset [file] 再 git checkout --[file]
# 方法2:直接 git reset --hard [file](base) [root@localhost gitcode]# vim file1
(base) [root@localhost gitcode]# cat file1
hello git
hello world
add vertion1
add vertion2
too much shit code
(base) [root@localhost gitcode]# git add file1
(base) [root@localhost gitcode]# git status
# 位于分支 master
# 要提交的变更:
#   (使用 "git reset HEAD <file>..." 撤出暂存区)
#
#       修改:      file1
#
(base) [root@localhost gitcode]# git log --pretty=oneline
c31b56a87a6387873d7db9a16f7d1c81b4b2339e modigy: add vertion2
167def04692b8f6fa68cc835f41a81584ca31b7e modify: add vertion1
7df1e322e9d267964f51e91dac900bb1a77f171d modify: file1
f2e92108d0fe7ec01a6c49d1372e4907cac6d96b Add three files
fc3a3507b30d2f4374a71245a034e00f94ea8363 Add first file
(base) [root@localhost gitcode]# git reset --hard c31b56a87a6387873d7db9a16f7d1c81b4b2339e
HEAD 现在位于 c31b56a modigy: add vertion2
(base) [root@localhost gitcode]# cat file1
hello git
hello world
add vertion1
add vertion2
(base) [root@localhost gitcode]#
七、删除文件
删除的本质也是修改,如果我们在工作区用 rm 命令删除了一个文件,那么可能是两种原因:
- 误删
- 确定要删除该文件
# 如果是误删,那么我们需要取消删除操作,也就是撤销修改操作。
# 如果是确认要删除该文件,那么通过 rm 删除之后,工作区和暂存区、版本库就不一致了。
# 我们该如何处理呢?
# 我们需要先将删除后的工作区更新到暂存区,再将暂存区提交到版本库。(base) [root@localhost gitcode]# ls
file1  file2  file3  file4
(base) [root@localhost gitcode]# rm -rf file4
(base) [root@localhost gitcode]# ls
file1  file2  file3
(base) [root@localhost gitcode]# git status
# 位于分支 master
# 尚未暂存以备提交的变更:
#   (使用 "git add/rm <file>..." 更新要提交的内容)
#   (使用 "git checkout -- <file>..." 丢弃工作区的改动)
#
#       删除:      file4
#
修改尚未加入提交(使用 "git add" 和/或 "git commit -a")
(base) [root@localhost gitcode]# git add .
warning: 您在运行 'git add' 时没有指定 '-A (--all)' 或 '--ignore-removal',
针对其中本地移除路径的行为将在 Git 2.0 版本库发生变化。
像本地工作区移除的路径 'file4'
在此版本的 Git 中被忽略。* 'git add --ignore-removal <pathspec>',是当前版本的默认操作,忽略您本地工作区中移除的文件。* 'git add --all <pathspec>' 将让您同时对删除操作进行记录。运行 'git status' 来检查您本地工作区中移除的路径。(base) [root@localhost gitcode]# git add --all file4
(base) [root@localhost gitcode]# git commit -m "delete file4"
[master 0f28717] delete file41 file changed, 0 insertions(+), 0 deletions(-)delete mode 100644 file4
(base) [root@localhost gitcode]# git status
# 位于分支 master
无文件要提交,干净的工作区
(base) [root@localhost gitcode]# ls
file1  file2  file3
(base) [root@localhost gitcode]# # 由上可得,我们需要处理不一致问题,也就是将删除后的新版本再次提交到版本库
# 我们可以也通过 git rm 进行文件删除,这样直接就删除了工作区和暂存区的文件
# 我们只需要接着 git commit -m 更新删除后的版本就行了(base) [root@localhost gitcode]# ls
file1  file2  file3
(base) [root@localhost gitcode]# git rm file3
rm 'file3'
(base) [root@localhost gitcode]# ls
file1  file2
(base) [root@localhost gitcode]# git status
# 位于分支 master
# 要提交的变更:
#   (使用 "git reset HEAD <file>..." 撤出暂存区)
#
#       删除:      file3
#
(base) [root@localhost gitcode]# git commit -m "delete file3"
[master 84b615b] delete file31 file changed, 0 insertions(+), 0 deletions(-)delete mode 100644 file3
(base) [root@localhost gitcode]#
相关文章:
【Git版本控制 01】基本操作
目录 一、初始配置 二、添加文件 三、查看日志 四、修改文件 五、版本回退 六、撤销修改 七、删除文件 一、初始配置 Git版本控制器:记录每次的修改以及版本迭代的一个管理系统。 # 初始化本地仓库:git init(base) [rootlocalhost gitcode]# gi…...
)
Spring 开发 pom.xml 配置文件(通用配置)
因为在打 jar 包时总会出现各种各样莫名其妙的问题,所以本篇博客提供了含有 Java8.0 ,mybatis,mysql,lombok 以及打 jar 包的完整 pom.xml 配置文件,直接复制使用即可 <project xmlns"http://maven.apache.or…...

LabVIEW高精度主动模拟肺系统的开发与应用
在医疗设备的研发与测试中,高精度主动模拟肺系统扮演了不可或缺的角色。这种系统能够精确模拟人体的呼吸过程,对于呼吸机性能的测试、医疗人员的培训以及临床研究具有极其重要的意义。通过利用先进的硬件控制技术和软件算法,主动模拟肺系统能…...

打包 iOS 的 IPA 文件
目录 摘要 引言 准备 选择证书类型 创建应用程序 设置应用程序标识和证书 配置构建设置 构建应用程序 导出IPA 签名和导出 代码案例演示 完成 总结 参考资料 摘要 本篇博客将为您介绍如何打包iOS的IPA文件。从APP提交、创建应用程序、设置应用程序标识和证书、配…...

[Vulnhub靶机] DriftingBlues: 2
[Vulnhub靶机] DriftingBlues: 2靶机渗透思路及方法(个人分享) 靶机下载地址: https://download.vulnhub.com/driftingblues/driftingblues2.ova 靶机地址:192.168.67.21 攻击机地址:192.168.67.3 一、信息收集 1.…...
)
鸿蒙 WiFi 扫描流程(1)
上一篇记录了WiFi 的打开流程,这里我们继续看,WiFi使能后,如何发起扫描?代码还是用的 鸿蒙OpenHarmony4.0基线代码。 foundation/communication/wifi/wifi/services/wifi_standard/wifi_hal/wifi_hal_sta_interface.c WifiError…...
基于YOLOv8的暗光低光环境下(ExDark数据集)检测,加入多种优化方式---DCNv4结合SPPF ,助力自动驾驶(一)
💡💡💡本文主要内容:详细介绍了暗光低光数据集检测整个过程,从数据集到训练模型到结果可视化分析,以及如何优化提升检测性能。 💡💡💡加入 DCNv4结合SPPF mAP0.5由原始的0.682提升至…...
(十三)springboot实战——springboot前后端分离方式项目集成spring securtity安全框架
前言 Spring Security 是一款强大且高度可定制的认证和访问控制框架,它是为了保护基于Spring的应用程序提供安全性支持。Spring Security提供了全面的安全服务,主要针对企业级应用程序的需求。其核心组件主要包含:Authentication(…...
XCTF:3-1[WriteUP]
从题目中获取文件 使用file命令查看文件类型 修改后缀为.rar后进行解压缩 再次使用file命令查询该文件的类型 再次修改后缀为.pcap或者.pcapng 使用wireshark打开,直接搜索flag字样 在多个数据包里发现了flag.rar、flag.txt等文件 尝试使用http导出文件 有一个fl…...
常用ES技巧二
文章目录 一、Object.entries()和Object.fromEntries()1.1、Object.entries()1.2、Object.fromEntries() 二、Symbol类型和Symbol属性三、WeakMap和WeakSet四、Promise.allSettled()五、BigInt六、Array.of和Array.from七、.at和.flat八、总结九、最后 一、Object.entries()和O…...
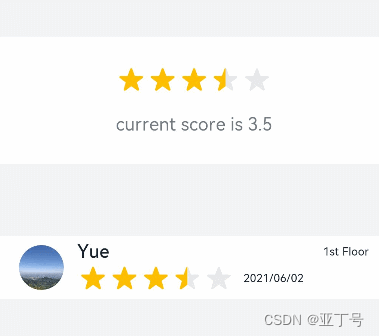
鸿蒙(HarmonyOS)项目方舟框架(ArkUI)之Rating组件
鸿蒙(HarmonyOS)项目方舟框架(ArkUI)之Rating组件 一、操作环境 操作系统: Windows 10 专业版、IDE:DevEco Studio 3.1、SDK:HarmonyOS 3.1 二、Rating组件 提供在给定范围内选择评分的组件。 子组件 无。 接口 Rating(opt…...
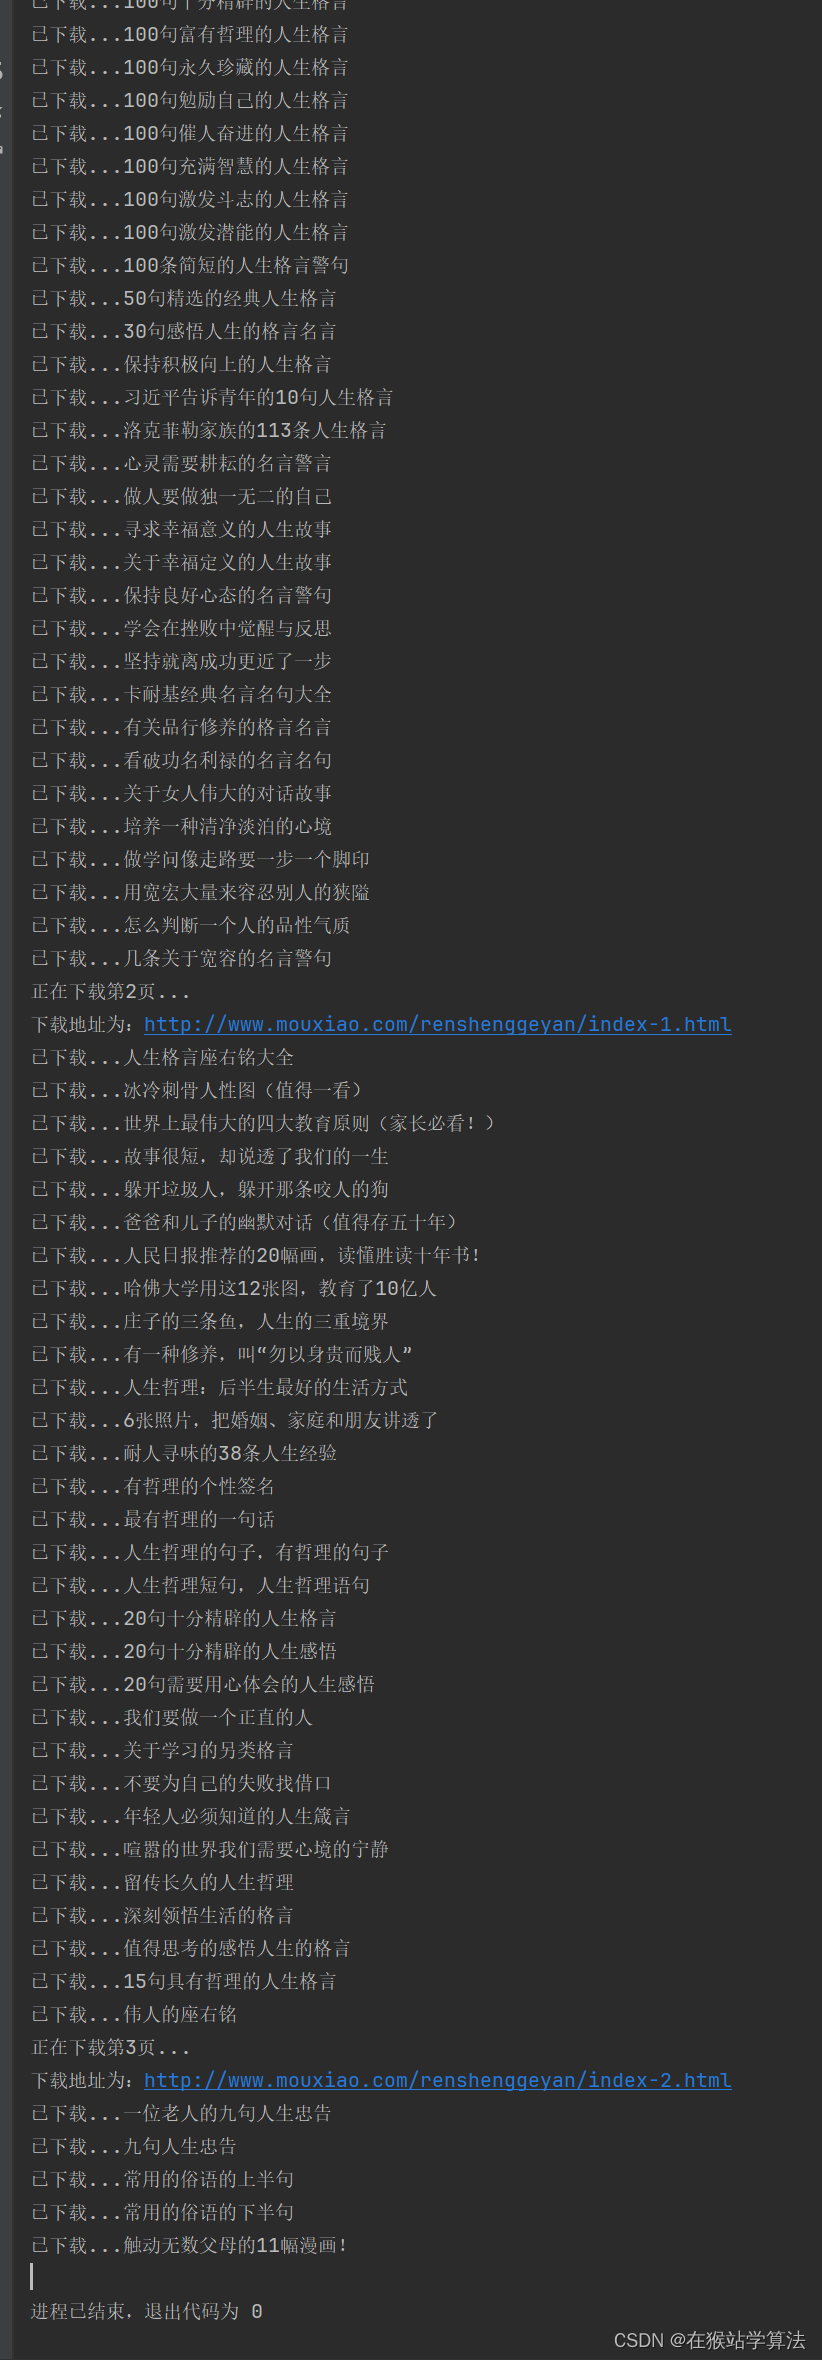
Python进阶--爬取下载人生格言(基于格言网的Python3爬虫)
目录 一、此处需要安装第三方库: 二、抓包分析及Python代码 1、打开人生格言网(人生格言-人生格言大全_格言网)进行抓包分析 2、请求模块的代码 3、抓包分析人生格言界面 4、获取目录页中各种类型的人生格言链接 5、获取下一页的链接 5、获取人生…...

FastAdmin
PHP 推荐链接FastAdmin禁用模板布局后台不需要验证权限的接口配置 推荐链接 链接目录 FastAdmin 禁用模板布局 /** 在application/common/controller/Backend.php里面的 _initialize() 方法里面有// 如果有使用模板布局if ($this->layout) {$this->view->engine-…...

Java设计模式大全:23种常见的设计模式详解(一)
本系列文章简介: 设计模式是在软件开发过程中,经过实践和总结得到的一套解决特定问题的可复用的模板。它是一种在特定情境中经过验证的经验和技巧的集合,可以帮助开发人员设计出高效、可维护、可扩展和可复用的软件系统。设计模式提供了一种在…...

SaperaCamExpert(相机专家)中文使用指南
参考:SaperaCamExpert中文使用指南.PDF 文章目录 软件介绍安装首次打开资源占用率功能主界面布局菜单栏FileViewPre-Processing:预处理 Tools: 快捷键:新建;打开;保存;帮助Device窗体属性树图像…...

ES鉴权设计以及相关探讨
文章目录 1. es的鉴权设计2. es鉴权应用范围3. es鉴权的常用方法3.1 认证体系3.2 x-pack认证3.2.1 开启并配置 X-Pack 的认证与鉴权3.2.2 默认用户和角色3.2.3 创建用户和角色3.2.4 通过用户名和密码访问es 4. 参考文档 鉴权,分别由鉴和权组成 鉴: 表示…...

为什么SpringBoot胖Jar不好
公平地说,我有时会怀念 JavaEE 流行的日子。 当然,当时的情况很复杂,但整个 JavaEE 平台设计合理,符合企业开发的需要。 我可以很轻松地将当时的 JavaEE 应用服务器与现代 Kubernetes 架构进行比较,后者现在也有同样…...

Java学习笔记2024/2/6
练习三:验证码 需求: 定义方法实现随机产生一个5位的验证码 验证码格式: 长度为5 前四位是大写字母或者小写字母 最后一位是数字 package com.angus.comprehensiveExercise; import java.util.Random; public class test3 {publ…...

2024 高级前端面试题之 前端安全模块 「精选篇」
该内容主要整理关于 前端安全模块 的相关面试题,其他内容面试题请移步至 「最新最全的前端面试题集锦」 查看。 前端安全模块精选篇 1. 代码注入XSS如何攻击如何防御cookie 如何防范 XSS 攻击 2. 跨站请求伪造CSRF3. 浏览器同源策略 SOP4. 跨域资源共享 CORS5. 密码…...

SpringBoot Security安全认证框架初始化流程认证流程之源码分析
SpringBoot Security安全认证框架初始化流程&认证流程之源码分析 以RuoYi-Vue前后端分离版本为例分析SpringBoot Security安全认证框架初始化流程&认证流程的源码分析 目录 SpringBoot Security安全认证框架初始化流程&认证流程之源码分析一、SpringBoot Security安…...

S32K3XX车载以太网驱动:从硬件接口到数据收发的全链路解析
1. S32K3XX车载以太网驱动的硬件架构解析 第一次接触S32K3XX系列芯片的车载以太网驱动时,最让我头疼的就是那一堆专业术语:MAC、PHY、MII、MDIO... 后来在实际项目中摸爬滚打才发现,理解硬件架构就像拆解汽车的发动机,只要搞清各个…...

UE5伤害系统避坑指南:Damage Type没用好?你的Apply Damage可能白写了
UE5伤害系统深度解析:如何用Damage Type构建高扩展性战斗机制 在虚幻引擎5的游戏开发中,伤害系统是战斗机制的核心支柱。许多开发者习惯性地将注意力集中在Damage Amount这个数值上,却忽视了Damage Type这个能够赋予游戏深度和多样性的强大工…...

别只改.prettierrc了!从Git配置到CI/CD,一劳永逸解决团队换行符冲突
从Git配置到CI/CD:彻底解决团队协作中的换行符冲突 跨平台协作开发时,换行符问题就像鞋里的一粒沙子——看似微不足道,却能让整个团队步履维艰。当Windows的CRLF遇上Unix的LF,不仅会导致Prettier报出恼人的Delete ␍错误ÿ…...

ESP32/ESP8266轻量级HA MQTT自动发现C++库
1. 项目概述 HA MQTT Discovery 是一个专为嵌入式平台(特别是 ESP32/ESP8266)设计的轻量级 C 库,用于实现与 Home Assistant 的原生 MQTT 自动发现(Auto-Discovery)协议兼容的设备与实体注册。其核心目标并非替代完整…...

WiX Toolset 安装全攻略:从命令行到Visual Studio的三种方法对比
WiX Toolset 安装全攻略:从命令行到Visual Studio的三种方法对比 在Windows应用开发领域,安装包的制作一直是项目交付的关键环节。WiX Toolset作为微软官方推荐的安装包创建工具,凭借其开源特性和强大的灵活性,已经成为众多开发团…...

MCP服务器开发踩坑实录,深度解析asyncio+FastAPI+MCPv0.5兼容性难题及热修复方案
第一章:MCP服务器开发踩坑实录,深度解析asyncioFastAPIMCPv0.5兼容性难题及热修复方案在基于MCP(Model Context Protocol)v0.5规范构建异步AI服务代理时,我们发现FastAPI 0.115 与标准asyncio事件循环存在隐式冲突&…...
:Dream Recorder - 用 AI 把梦境变成视频的物理设备)
一天一个开源项目(第59篇):Dream Recorder - 用 AI 把梦境变成视频的物理设备
引言 “Record your dreams. Wake up. Speak. Watch them come to life.” 这是「一天一个开源项目」系列的第 59 篇文章。今天介绍的项目是 Dream Recorder(GitHub)。 想把梦境变成可回放的视频?Dream Recorder 是 Modem 开源的物理梦境记录…...
)
从医院呼叫器到智能家居:用Multisim 14.2复刻经典八路呼叫器(附完整仿真文件)
从医院呼叫器到智能家居:用Multisim 14.2复刻经典八路呼叫器(附完整仿真文件) 在电子技术发展的历史长河中,经典电路设计往往蕴含着跨越时代的智慧。八路呼叫器作为数字电子技术的经典教学案例,其核心模块——编码、锁…...

QT:Tab Widget的进阶应用与实战技巧
1. Tab Widget的动态管理技巧 第一次用QT做带标签页的界面时,我习惯在设计器里把Tab页都固定好。直到接手一个需要动态加载配置文件的仪表盘项目,才发现动态增删Tab才是真实开发中的常态。比如用户点击"新建图表"按钮时,我们需要实…...
到模型预测控制(MPC)的Matlab代码详解)
自动驾驶避障算法实战:从动态规划(DP)到模型预测控制(MPC)的Matlab代码详解
自动驾驶避障算法实战:从动态规划到模型预测控制的Matlab实现 自动驾驶技术的核心挑战之一是如何在复杂环境中实现安全避障。本文将深入探讨两种主流算法——动态规划(DP)与模型预测控制(MPC)的代码级实现,通过Matlab示例展示它们如何协同工作来解决这一…...