浅谈WPF之利用RichTextBox实现富文本编辑器
在实际应用中,富文本随处可见,如留言板,聊天软件,文档编辑,特定格式内容等,在WPF开发中,如何实现富文本编辑呢?本文以一个简单的小例子,简述如何通过RichTextBox实现富文本编辑功能,主要实现复制,剪切,粘贴,撤销,重做,保存,打开,文本加粗,斜体,下划线,删除线,左对齐,居中对齐,右对齐,两端对齐,缩进,减少缩进,项目符号,数字符号,上标,下标,背景色,前景色,图片,打印等功能,仅供学习分享使用,如有不足之处,还请指正。
什么是RichTextBox?
使用RichTextBox可以显示或编辑流内容,如文本,图片,表格等,TextBox和RichTextBox都可以用于编辑文本,但使用场景不同。如果是单纯的无格式的纯文本,建议使用TextBox;如果是需要编辑带格式的文本、图像、表格或其他多种格式的内容时,RichTextBox 是更好的选择。
什么是流内容和流文档?
通常情况下,所有在富文本编辑器中呈现的内容,都是流内容(FlowContent),而为了呈现流内容的构建块,称为流内容元素(Element)。不同的流内容元素,组成了流文档(FlowDocument),RichTextBox是流文档的托管对象之一。
流文档旨在根据窗口大小、设备分辨率和其他环境变量来“重排内容”。 此外,流文档还具有很多内置功能,包括搜索、能够优化可读性的查看模式以及更改字体大小和外观的功能。 当易读性是文档的主要使用要求时,最适合使用流文档。
涉及知识点
在通过RichTextBox实现富文本编辑器时,涉及到的知识点如下所示:
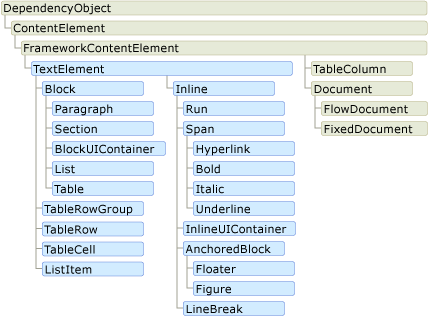
根据流内容的用途,可分为两个重要类别:
-
Block 派生类:也称为“Block 内容元素”,或简称为“Block 元素”。 继承自 Block 的元素可用于将元素分组到一个公用父级下,或将公用属性应用于某个组。
-
Inline 派生类:也称为“Inline 内容元素”,或简称为“Inline 元素”。 继承自 Inline 的元素要么包含在 Block 元素中,要么包含在另一个 Inline 元素中。 Inline 元素通常用作在屏幕上呈现的内容的直接容器。 例如,Paragraph(Block 元素)可包含 Run(Inline 元素),而 Run 实际包含在屏幕上呈现的文本。
在实现富文本编辑器时,需要用到图标实现,主要内容如下:
- 在本示例中图标主要通过自定义路径Path实现,其中Data属性是Geometry类型,用于接收自定以的图形。而用到的图标类型数据,可以通过iconfont官网进行获取。
- 在本示例中,用到很多图标,为了统一管理,创建资源字典,图标数据作为一种资源引入。
操作流文档时,常见使用到的类,如下所示:
创建RichTextBox
RichTextBox托管流文档对象,流文档包含流内容,包括文本,段落,图像,表格,等内容,创建语法如下所示:
<RichTextBox x:Name="richTextBox" AcceptsTab="True" Grid.Row="1" BorderThickness="1" BorderBrush="LightBlue" Margin="2" Padding="2" ScrollViewer.CanContentScroll="True" ScrollViewer.VerticalScrollBarVisibility="Auto"><RichTextBox.Document><FlowDocument><Paragraph>I am a sunny boy. My name is xxxx. I am from xxxx Primary School. I am over 1.5 meters old when I just turned 12. Alas, I may be a little fat because of eating too much sugar. A pair of pretty big eyes are inlaid under the dark hair and curved eyebrows. There is also a thin mouth.</Paragraph><Paragraph>I like to play computer games. I play online whenever I have time, and my mother scolds me all day. I also like reading. Once, when I went to the library to read, I was fascinated by it. I was immersed in the ocean of knowledge and didn't remember to go home for dinner. I didn't want to leave until the library closed. I also like to play basketball. Every Saturday and Sunday, I will invite some friends to play basketball for a few hours.</Paragraph><Paragraph>My advantage is that I love to move. Every morning I go outside to exercise, run, play the horizontal bar, etc. My math scores are also very good, but my Chinese and English scores are average, so my face is always filled with joy. My shortcoming is that I can't play table tennis, and I don't know what is going on. I just don't like it. This is me. If your hobbies are the same as mine, you can find me.</Paragraph><Paragraph>thank you.</Paragraph></FlowDocument></RichTextBox.Document>
</RichTextBox>
编辑命令
为了方便起见,WPF 提供由 ApplicationCommands、MediaCommands、ComponentCommands、NavigationCommands 和 EditingCommands 组成的常用命令库,你也可以定义自己的命令。在实现富文本编辑器时,用到的命令主要有三种:
- ApplicationCommands,主要是应用程序中常见的命令,如:复制Copy,剪切Cut,粘贴Paste,重做Redo,撤销Undo等。
- EditingCommands 提供了一组常见的编辑相关的命令,如:加粗Bold,斜体Italic,下划线UnderLine,左对齐,右对齐,居中对齐,两端对齐,缩进,减少缩进,项目符号,数字符号等。
- 自定义命令,默认RichTextBox并没有提供相应的命令,所以需要根据功能自行定义,如:背景色,前景色,打印,打开,保存,上标,下标,图像等。
编辑命令页面布局和绑定
使用WPF自带的命令,需要指定Command和CommandTarget两个属性,否则将不起作用。其中Command直接使用Commnad="命令名称",CommandTarget=“{Binding ElementName=控件名称}”的格式进行绑定。
自定义命令,需要通过Command="{Binding 命令名称}"的格式进行绑定。具体如下所示:
<StackPanel Orientation="Horizontal" Grid.Row="0"><Button ToolTip="打开" Command="{Binding OpenCommand}"><Path Data="{StaticResource icon_open}" Stretch="Fill" Fill="#1296db"></Path></Button><Button ToolTip="保存" Command="{Binding SaveCommand}"><Path Data="{StaticResource icon_save}" Stretch="Fill" Fill="#1296db"></Path></Button><GridSplitter Width="1" Margin="3 2 3 2" Background="LightGray" IsEnabled="False"></GridSplitter><Button ToolTip="剪切" Command="ApplicationCommands.Cut" CommandTarget="{Binding ElementName=richTextBox}"><Path Data="{StaticResource icon_cut}" Stretch="Fill" Fill="Black"></Path></Button><Button ToolTip="复制" Command="ApplicationCommands.Copy" CommandTarget="{Binding ElementName=richTextBox}"><Path Data="{StaticResource icon_copy}" Stretch="Fill" Fill="#1296db"></Path></Button><Button ToolTip="粘贴" Command="ApplicationCommands.Paste" CommandTarget="{Binding ElementName=richTextBox}"><Path Data="{StaticResource icon_paste}" Stretch="Fill" Fill="#1296db"></Path></Button><Button ToolTip="撤销" Command="ApplicationCommands.Undo" CommandTarget="{Binding ElementName=richTextBox}"><Path Data="{StaticResource icon_undo}" Stretch="Fill" Fill="#8a8a8a"></Path></Button><Button ToolTip="重做" Command="ApplicationCommands.Redo" CommandTarget="{Binding ElementName=richTextBox}"><Path Data="{StaticResource icon_redo}" Stretch="Fill" Fill="#8a8a8a"></Path></Button><GridSplitter Width="1" Margin="3 2 3 2" Background="LightGray" IsEnabled="False"></GridSplitter><Button ToolTip="加粗" Command="EditingCommands.ToggleBold" CommandTarget="{Binding ElementName=richTextBox}"><Path Data="{StaticResource icon_bold}" Stretch="Fill" Fill="Black"></Path></Button><Button ToolTip="斜体" Command="EditingCommands.ToggleItalic" CommandTarget="{Binding ElementName=richTextBox}"><Path Data="{StaticResource icon_italic}" Stretch="Fill" Fill="LightGray"></Path></Button><Button ToolTip="下划线" Command="EditingCommands.ToggleUnderline" CommandTarget="{Binding ElementName=richTextBox}"><Path Data="{StaticResource icon_underline}" Stretch="Fill" Fill="Gray"></Path></Button><Button ToolTip="删除线" Command="{Binding SettingCommand}" CommandParameter="StrikeLine"><Path Data="{StaticResource icon_strikeline}" Stretch="Fill" Fill="Black"></Path></Button><Button ToolTip="左对齐" Command="EditingCommands.AlignLeft" CommandTarget="{Binding ElementName=richTextBox}"><Path Data="{StaticResource icon_left}" Stretch="Fill" Fill="Black" Stroke="LimeGreen"></Path></Button><Button ToolTip="居中对齐" Command="EditingCommands.AlignCenter" CommandTarget="{Binding ElementName=richTextBox}"><Path Data="{StaticResource icon_center}" Stretch="Fill" Fill="Black" Stroke="LimeGreen"></Path></Button><Button ToolTip="右对齐" Command="EditingCommands.AlignRight" CommandTarget="{Binding ElementName=richTextBox}"><Path Data="{StaticResource icon_right}" Stretch="Fill" Fill="Black" Stroke="LimeGreen"></Path></Button><Button ToolTip="两端对齐" Command="EditingCommands.AlignJustify" CommandTarget="{Binding ElementName=richTextBox}"><Path Data="{StaticResource icon_justify}" Stretch="Fill" Fill="Black" Stroke="LimeGreen"></Path></Button><Button ToolTip="缩进" Command="EditingCommands.IncreaseIndentation" CommandTarget="{Binding ElementName=richTextBox}"><Path Data="{StaticResource icon_addident}" Stretch="Fill" Fill="DimGray"></Path></Button><Button ToolTip="减少缩进" Command="EditingCommands.DecreaseIndentation" CommandTarget="{Binding ElementName=richTextBox}"><Path Data="{StaticResource icon_lessident}" Stretch="Fill" Fill="DimGray"></Path></Button><Button ToolTip="项目编号" Command="EditingCommands.ToggleBullets" CommandTarget="{Binding ElementName=richTextBox}"><Path Data="{StaticResource icon_bullets}" Stretch="Fill" Fill="DimGray"></Path></Button><Button ToolTip="数字编号" Command="EditingCommands.ToggleNumbering" CommandTarget="{Binding ElementName=richTextBox}"><Path Data="{StaticResource icon_numbering}" Stretch="Fill" Fill="DimGray"></Path></Button><Button ToolTip="上标" Command="{Binding SettingCommand}" CommandParameter="Super"><Path Data="{StaticResource icon_upper}" Stretch="Fill" Fill="CadetBlue"></Path></Button><Button ToolTip="下标" Command="{Binding SettingCommand}" CommandParameter="Sub"><Path Data="{StaticResource icon_down}" Stretch="Fill" Fill="CadetBlue"></Path></Button><GridSplitter Width="1" Margin="3 2 3 2" Background="LightGray" IsEnabled="False"></GridSplitter><Grid Background="White" Width="42" Height="30" Margin="3"><ComboBox Width="42" Height="30" BorderThickness="0" HorizontalAlignment="Left" VerticalAlignment="Center" SelectedIndex="0" BorderBrush="White" Background="White" Name="combBackground"><ComboBoxItem Background="#000000" Content="#000000"></ComboBoxItem><ComboBoxItem Background="#FF0000" Content="#FF0000"></ComboBoxItem><ComboBoxItem Background="#00FF00" Content="#00FF00"></ComboBoxItem><ComboBoxItem Background="#0000FF" Content="#0000FF"></ComboBoxItem><ComboBoxItem Background="#00AA00" Content="#00AA00"></ComboBoxItem><ComboBoxItem Background="#AA0000" Content="#AA0000"></ComboBoxItem><ComboBoxItem Background="#0000AA" Content="#0000AA"></ComboBoxItem><ComboBoxItem Background="#AA00CC" Content="#AA00CC"></ComboBoxItem><ComboBoxItem Background="#00BBCC" Content="#00BBCC"></ComboBoxItem><ComboBoxItem Background="#555555" Content="#555555"></ComboBoxItem><ComboBoxItem Background="#AAAAAA" Content="#AAAAAA"></ComboBoxItem><ComboBoxItem Background="#BBBBBB" Content="#BBBBBB"></ComboBoxItem><ComboBoxItem Background="#CCCCCC" Content="#CCCCCC"></ComboBoxItem><ComboBoxItem Background="#DDDDDD" Content="#DDDDDD"></ComboBoxItem><ComboBoxItem Background="#EEEEEE" Content="#EEEEEE"></ComboBoxItem><ComboBoxItem Background="#FFFFFF" Content="#FFFFFF"></ComboBoxItem><i:Interaction.Triggers><i:EventTrigger EventName="SelectionChanged"><i:InvokeCommandAction Command="{Binding BgColorCommand}" CommandParameter="{Binding ElementName=combBackground, Path=SelectedItem}"/></i:EventTrigger></i:Interaction.Triggers></ComboBox><Button ToolTip="背景色" Width="30" Height="30" Padding="0" Margin="0" HorizontalAlignment="Left" VerticalAlignment="Center"><Path Data="{StaticResource icon_background}" Stretch="Fill" Fill="{Binding ElementName=combBackground, Path=SelectedItem.Background}" ></Path></Button></Grid><Grid Background="White" Width="42" Height="30" Margin="3"><ComboBox Width="42" Height="30" BorderThickness="0" HorizontalAlignment="Left" VerticalAlignment="Center" SelectedIndex="0" BorderBrush="White" Background="White" Name="combForeground"><ComboBoxItem Background="#000000" Content="#000000"></ComboBoxItem><ComboBoxItem Background="#FF0000" Content="#FF0000"></ComboBoxItem><ComboBoxItem Background="#00FF00" Content="#00FF00"></ComboBoxItem><ComboBoxItem Background="#0000FF" Content="#0000FF"></ComboBoxItem><ComboBoxItem Background="#00AA00" Content="#00AA00"></ComboBoxItem><ComboBoxItem Background="#AA0000" Content="#AA0000"></ComboBoxItem><ComboBoxItem Background="#0000AA" Content="#0000AA"></ComboBoxItem><ComboBoxItem Background="#AA00CC" Content="#AA00CC"></ComboBoxItem><ComboBoxItem Background="#00BBCC" Content="#00BBCC"></ComboBoxItem><ComboBoxItem Background="#555555" Content="#555555"></ComboBoxItem><ComboBoxItem Background="#AAAAAA" Content="#AAAAAA"></ComboBoxItem><ComboBoxItem Background="#BBBBBB" Content="#BBBBBB"></ComboBoxItem><ComboBoxItem Background="#CCCCCC" Content="#CCCCCC"></ComboBoxItem><ComboBoxItem Background="#DDDDDD" Content="#DDDDDD"></ComboBoxItem><ComboBoxItem Background="#EEEEEE" Content="#EEEEEE"></ComboBoxItem><ComboBoxItem Background="#FFFFFF" Content="#FFFFFF"></ComboBoxItem><i:Interaction.Triggers><i:EventTrigger EventName="SelectionChanged"><i:InvokeCommandAction Command="{Binding ForeColorCommand}" CommandParameter="{Binding ElementName=combForeground, Path=SelectedItem}"/></i:EventTrigger></i:Interaction.Triggers></ComboBox><Button ToolTip="前景色" Width="30" Height="30" Padding="0" Margin="0" HorizontalAlignment="Left" VerticalAlignment="Center"><Path Data="{StaticResource icon_foreground}" Stretch="Fill" Fill="{Binding ElementName=combForeground, Path=SelectedItem.Background}" ></Path></Button></Grid><Button ToolTip="图像" Command="{Binding SettingCommand}" CommandParameter="Image"><Path Data="{StaticResource icon_img}" Stretch="Fill" Fill="Goldenrod"></Path></Button><Button ToolTip="打印" Command="{Binding SettingCommand}" CommandParameter="Print"><Path Data="{StaticResource icon_print}" Stretch="Fill" Fill="Tomato"></Path></Button></StackPanel>
自定义命令
在本示例中,后台命令使用和属性绑定,使用CommunityToolkit.Mvvm库实现。后台实现业务主要分为三种:
1. 打开,保存命令
打开,保存主要实现对RichTextBox中的流文档对象的序列化和反序列化,具体如下所示:
private IRelayCommand saveCommand;public IRelayCommand SaveCommand
{get{if (saveCommand == null){saveCommand = new RelayCommand(Save);}return saveCommand;}
}private void Save()
{SaveFileDialog saveFileDialog = new SaveFileDialog();saveFileDialog.Title = "请选择要保存的路径";saveFileDialog.Filter = "富文本格式|*.xaml";bool? flag = saveFileDialog.ShowDialog();if (flag == true){string _fileName=saveFileDialog.FileName;TextRange range;FileStream fStream;range = new TextRange(this.richTextBox.Document.ContentStart, this.richTextBox.Document.ContentEnd);fStream = new FileStream(_fileName, FileMode.Create);range.Save(fStream, DataFormats.XamlPackage);fStream.Close();}
}private IRelayCommand openCommand;public IRelayCommand OpenCommand
{get{if (openCommand == null){openCommand = new RelayCommand(Open);}return openCommand;}
}private void Open()
{TextRange range;FileStream fStream;OpenFileDialog openFileDialog = new OpenFileDialog();openFileDialog.Title = "请选择要加载的文件";openFileDialog.Filter = "富文本格式|*.xaml";bool? flag = openFileDialog.ShowDialog();if (flag == true){string _fileName = openFileDialog.FileName;if (File.Exists(_fileName)){range = new TextRange(this.richTextBox.Document.ContentStart, this.richTextBox.Document.ContentEnd);fStream = new FileStream(_fileName, FileMode.OpenOrCreate);range.Load(fStream, DataFormats.XamlPackage);fStream.Close();}}
}
2. 颜色设置命令
颜色设置,主要用于将用户选择的颜色,赋值给用于选择的流内容元素对象。如下所示:
private IRelayCommand<object> bgColorCommand;public IRelayCommand<object> BgColorCommand
{get{if(bgColorCommand == null){bgColorCommand = new RelayCommand<object>(BgColor);}return bgColorCommand;}
}private void BgColor(object obj)
{if (obj == null){return;}var item = obj as ComboBoxItem;if (item != null){var color = item.Background;var buttonType = "Background";SetColor(buttonType, color);}
}private IRelayCommand<object> foreColorCommand;public IRelayCommand<object> ForeColorCommand
{get{if (foreColorCommand == null){foreColorCommand = new RelayCommand<object>(ForeColor);}return foreColorCommand;}
}private void ForeColor(object obj)
{if (obj == null){return;}var item = obj as ComboBoxItem;if (item != null){var color = item.Background;var buttonType = "Foreground";SetColor(buttonType, color);}
}private void SetColor(string buttonType, Brush brush)
{var textSelection = this.richTextBox.Selection;if (textSelection == null){return;}if (buttonType == "Background"){var propertyValue = textSelection.GetPropertyValue(TextElement.BackgroundProperty);var bgBrush = (Brush)propertyValue;if (bgBrush == brush){textSelection.ApplyPropertyValue(TextElement.BackgroundProperty, Colors.White);}else{textSelection.ApplyPropertyValue(TextElement.BackgroundProperty, brush);}}if (buttonType == "Foreground"){var propertyValue = textSelection.GetPropertyValue(TextElement.ForegroundProperty);var foreground = (Brush)propertyValue;if (foreground == brush){textSelection.ApplyPropertyValue(TextElement.ForegroundProperty, Colors.Black);}else{textSelection.ApplyPropertyValue(TextElement.ForegroundProperty, brush);}}
}
3. 其他设置命令
其他设置命令,如删除线,上标,下标,图像插入,打印等命令,如下所示:
private IRelayCommand<string> settingCommand;public IRelayCommand<string> SettingCommand
{get{if(settingCommand == null){settingCommand = new RelayCommand<string>(Setting);}return settingCommand;}
}private void Setting(string buttonType)
{var textSelection = this.richTextBox.Selection;if (textSelection == null){return;}if (buttonType == "StrikeLine"){var propertyValue = textSelection.GetPropertyValue(Inline.TextDecorationsProperty);var textDecorationCollection = (TextDecorationCollection)propertyValue;if (textDecorationCollection == TextDecorations.Strikethrough){textSelection.ApplyPropertyValue(Inline.TextDecorationsProperty, null);}else{textSelection.ApplyPropertyValue(Inline.TextDecorationsProperty, TextDecorations.Strikethrough);}}else if (buttonType == "Super"){var propertyValue = textSelection.GetPropertyValue(Inline.BaselineAlignmentProperty);var supper = (BaselineAlignment)propertyValue;if (supper == BaselineAlignment.Superscript){textSelection.ApplyPropertyValue(Inline.BaselineAlignmentProperty, BaselineAlignment.Top);}else{textSelection.ApplyPropertyValue(Inline.BaselineAlignmentProperty, BaselineAlignment.Superscript);}}else if(buttonType == "Sub"){var propertyValue = textSelection.GetPropertyValue(Inline.BaselineAlignmentProperty);var sub = (BaselineAlignment)propertyValue;if (sub == BaselineAlignment.Subscript){textSelection.ApplyPropertyValue(Inline.BaselineAlignmentProperty, BaselineAlignment.Top);}else{textSelection.ApplyPropertyValue(Inline.BaselineAlignmentProperty, BaselineAlignment.Subscript);}}else if (buttonType == "Image"){OpenFileDialog openFileDialog = new OpenFileDialog();openFileDialog.Title = "请选择需要插入的图片";openFileDialog.Filter = "图片文件|*.png";bool? flag = openFileDialog.ShowDialog();if (flag ==true){var fileName = openFileDialog.FileName;var img = new Image() { Source = new BitmapImage(new Uri(fileName)), Stretch = Stretch.Uniform, Width = this.richTextBox.ActualWidth - 50 };var imgContainer = new BlockUIContainer(img);this.richTextBox.CaretPosition.InsertParagraphBreak();this.richTextBox.Document.Blocks.InsertBefore(this.richTextBox.CaretPosition.Paragraph, imgContainer);}}else if(buttonType == "Print"){PrintDialog pd = new PrintDialog();if ((pd.ShowDialog() == true)){//use either one of the belowpd.PrintVisual(this.richTextBox as Visual, "打印富文本1");pd.PrintDocument((((IDocumentPaginatorSource)this.richTextBox.Document).DocumentPaginator), "打印富文本2");}}
}
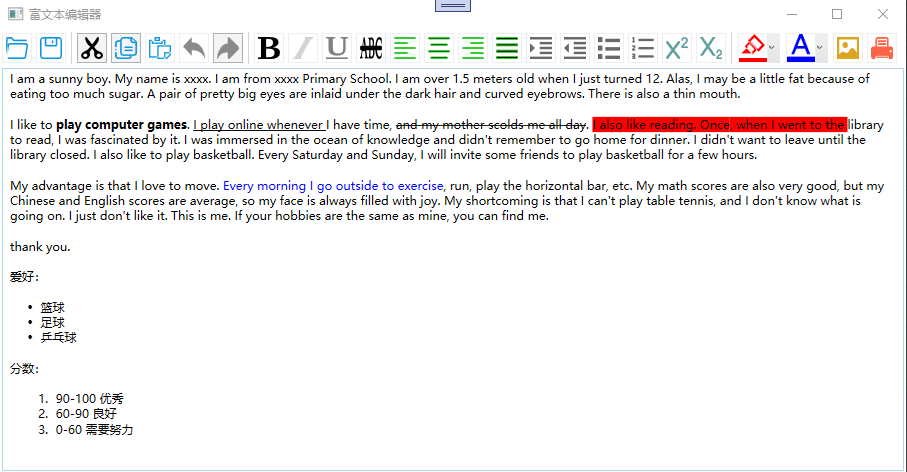
示例截图
主要实现复制,剪切,粘贴,撤销,重做,保存,打开,文本加粗,斜体,下划线,删除线,左对齐,居中对齐,右对齐,两端对齐,缩进,减少缩进,项目符号,数字符号,上标,下标,背景色,前景色,图片,打印等功能,效果如下:
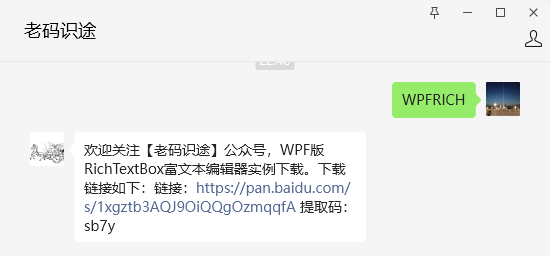
源码下载
关于源码下载,可关注公众号,回复WPFRICH进行下载,如下所示:
参考文献
流文档介绍:https://learn.microsoft.com/zh-cn/dotnet/desktop/wpf/advanced/flow-document-overview?view=netframeworkdesktop-4.8
RichTextBox介绍:https://learn.microsoft.com/zh-cn/dotnet/desktop/wpf/controls/richtextbox-overview?view=netframeworkdesktop-4.8
ApplicationCommands介绍:https://learn.microsoft.com/zh-cn/dotnet/api/system.windows.input.applicationcommands?view=windowsdesktop-8.0
EditingCommands介绍:https://learn.microsoft.com/zh-cn/dotnet/api/system.windows.documents.editingcommands?view=windowsdesktop-8.0
以上就是【浅谈WPF之利用RichTextBox实现富文本编辑器】的全部内容。
相关文章:
浅谈WPF之利用RichTextBox实现富文本编辑器
在实际应用中,富文本随处可见,如留言板,聊天软件,文档编辑,特定格式内容等,在WPF开发中,如何实现富文本编辑呢?本文以一个简单的小例子,简述如何通过RichTextBox实现富文…...
w29pikachu-ssrf实例
SSRF简介 SSRF是服务器端请求伪造 危害: 1.可以对服务器所在内网、本地进行端口扫描,获取一些服务的信息等 2.目标网站本地敏感数据的读取 3.内外网主机应用程序漏洞的利用 4.内外网web站点漏洞的利用 ssrf常用的相关协议: gopher://: 发…...

使用 openssl 进行哈希计算
版本:OpenSSL 3.0.2 15 Mar 2022 (Library: OpenSSL 3.0.2 15 Mar 2022) SHAx 系列 如果对象完全存储在内存中,可以使用以下函数: #include <openssl/sha.h>unsigned char *SHA1(const unsigned char *data, size_t count, unsigned…...

深度学习基础——SSD目标检测
SSD网络介绍 使用多个特征图作为特征预测层。 SSD (Single Shot MultiBox Detector)于2016年提出。当网络输入为300300大小时,在VOC2007测试集上达到74.3%的mAP;当输入是512512大小时,达到了76.9%的mAP SSD_Backbone部分介绍 不变的部分 特征提取网…...
鸿蒙系统优缺点,能否作为开发者选择
凡是都有对立面,就直接说说鸿蒙的优缺点吧。 鸿蒙的缺点: 鸿蒙是从2019年开始做出来的,那时候是套壳Android大家都知晓。从而导致大家不看鸿蒙系统,套壳Android就是多次一举。现在鸿蒙星河版已经是纯血鸿蒙,但是它的…...
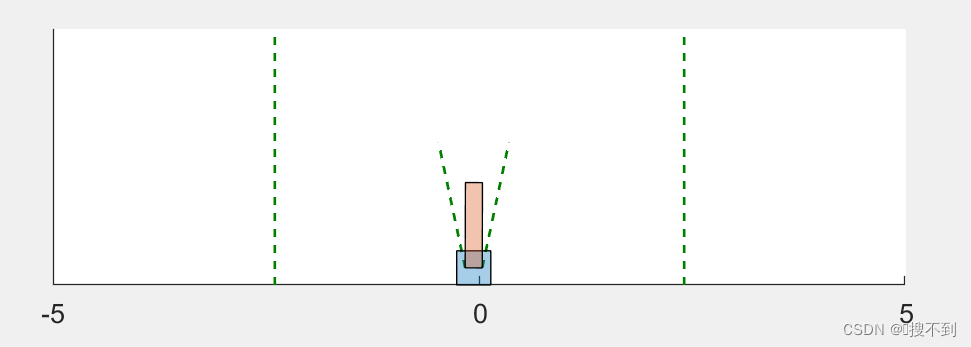
强化学习入门(Matlab2021b)-创建环境【2】
目录 1 前言2 利用step和reset函数创建自定义环境2.1 对象描述2.2 reset函数2.3 step函数2.3 构建自定义环境3 使用匿名函数传递额外的参数4 可视化检查自定义函数的输出参考链接1 前言 本文介绍如何基于MATLAB编写step、reset函数,创建自己的强化学习环境(Environment)。 使…...

OkHttp 相关问题
1、OkHttp请求整体流程是怎么样? Request-》OkHttpClient-》RealCall 同步 -》 在调用线程 执行五大拦截器 异步 -》 使用分发器将任务在线程池执行 五大拦截器 ---首先AsyncCall --加到等待队列readyAsyncCalls--》判断host有没有 已经存在。有,就赋值原来的。(reuseC…...

html的表单标签(上):form标签和input标签
表单标签 表单是让用户输入信息的重要途径。 用表单标签来完成与服务器的一次交互,比如你登录QQ账号时的场景。 表单分成两个部分: 表单域:包含表单元素的区域,用form标签来表示。表单控件:输入框,提交按…...
)
网页数据的解析提取(XPath的使用----lxml库详解)
在提取网页信息时,最基础的方法是使用正则表达式,但过程比较烦琐且容易出错。对于网页节点来说,可以定义id、class或其他属性,而且节点之间还有层次关系,在网页中可以通过XPath或CSS选择器来定位一个或多个节点。那么&…...
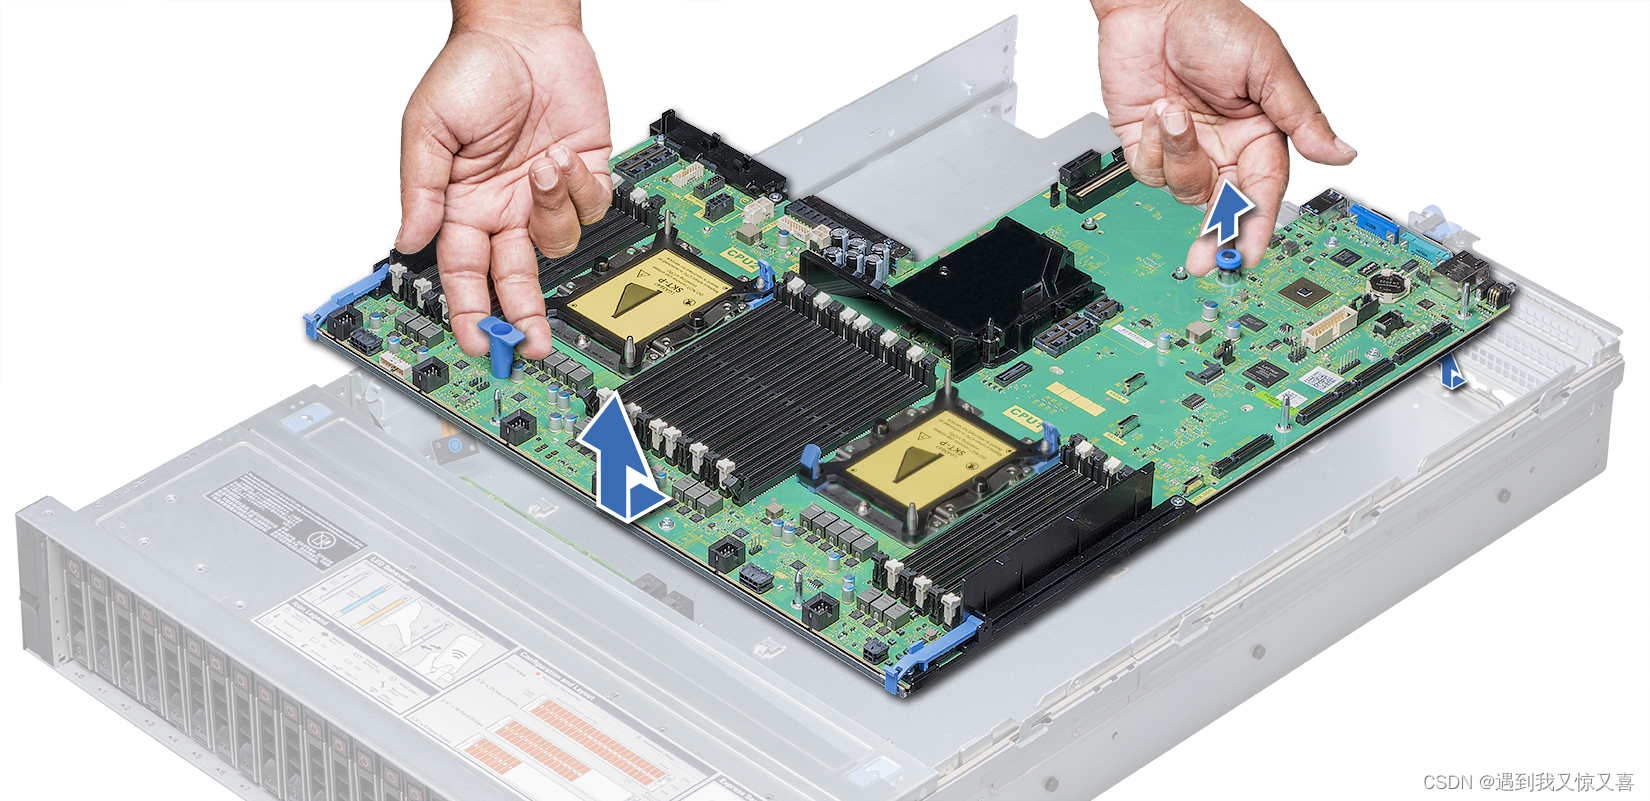
dell r740服务器黄灯闪烁维修现场解决
1:首先看一下这款DELL非常主力的PowerEdge R740服务器长啥样,不得不说就外观来说自从IBM抛弃System X系列服务器后,也就戴尔这个外观看的比较顺眼。 图一:是DELL R740前视图(这款是8盘机型) 图二ÿ…...

202426读书笔记|《尼采诗精选》——高蹈于生活之上,提升自己向下观望
202426读书笔记|《尼采诗精选》——高蹈于生活之上,提升自己向下观望 第一辑 早期尼采诗歌选辑(1858—1869年)第二辑 前期尼采遗著中的诗歌选辑(1871—1882年)第五辑 戏谑、狡计与复仇——德语韵律短诗序曲(…...
【PX4学习笔记】13.飞行安全与炸机处理
目录 文章目录 目录使用QGC地面站的安全设置、安全绳安全参数在具体参数中的体现安全绳 无人机炸机处理A:无人机异常时控操作B:无人机炸机现场处理C:无人机炸机后期维护和数据处理D:无人机再次正常飞行测试 无人机飞行法律宣传 使…...
Puppeteer 使用实战:如何将自己的 CSDN 专栏文章导出并用于 Hexo 博客(二)
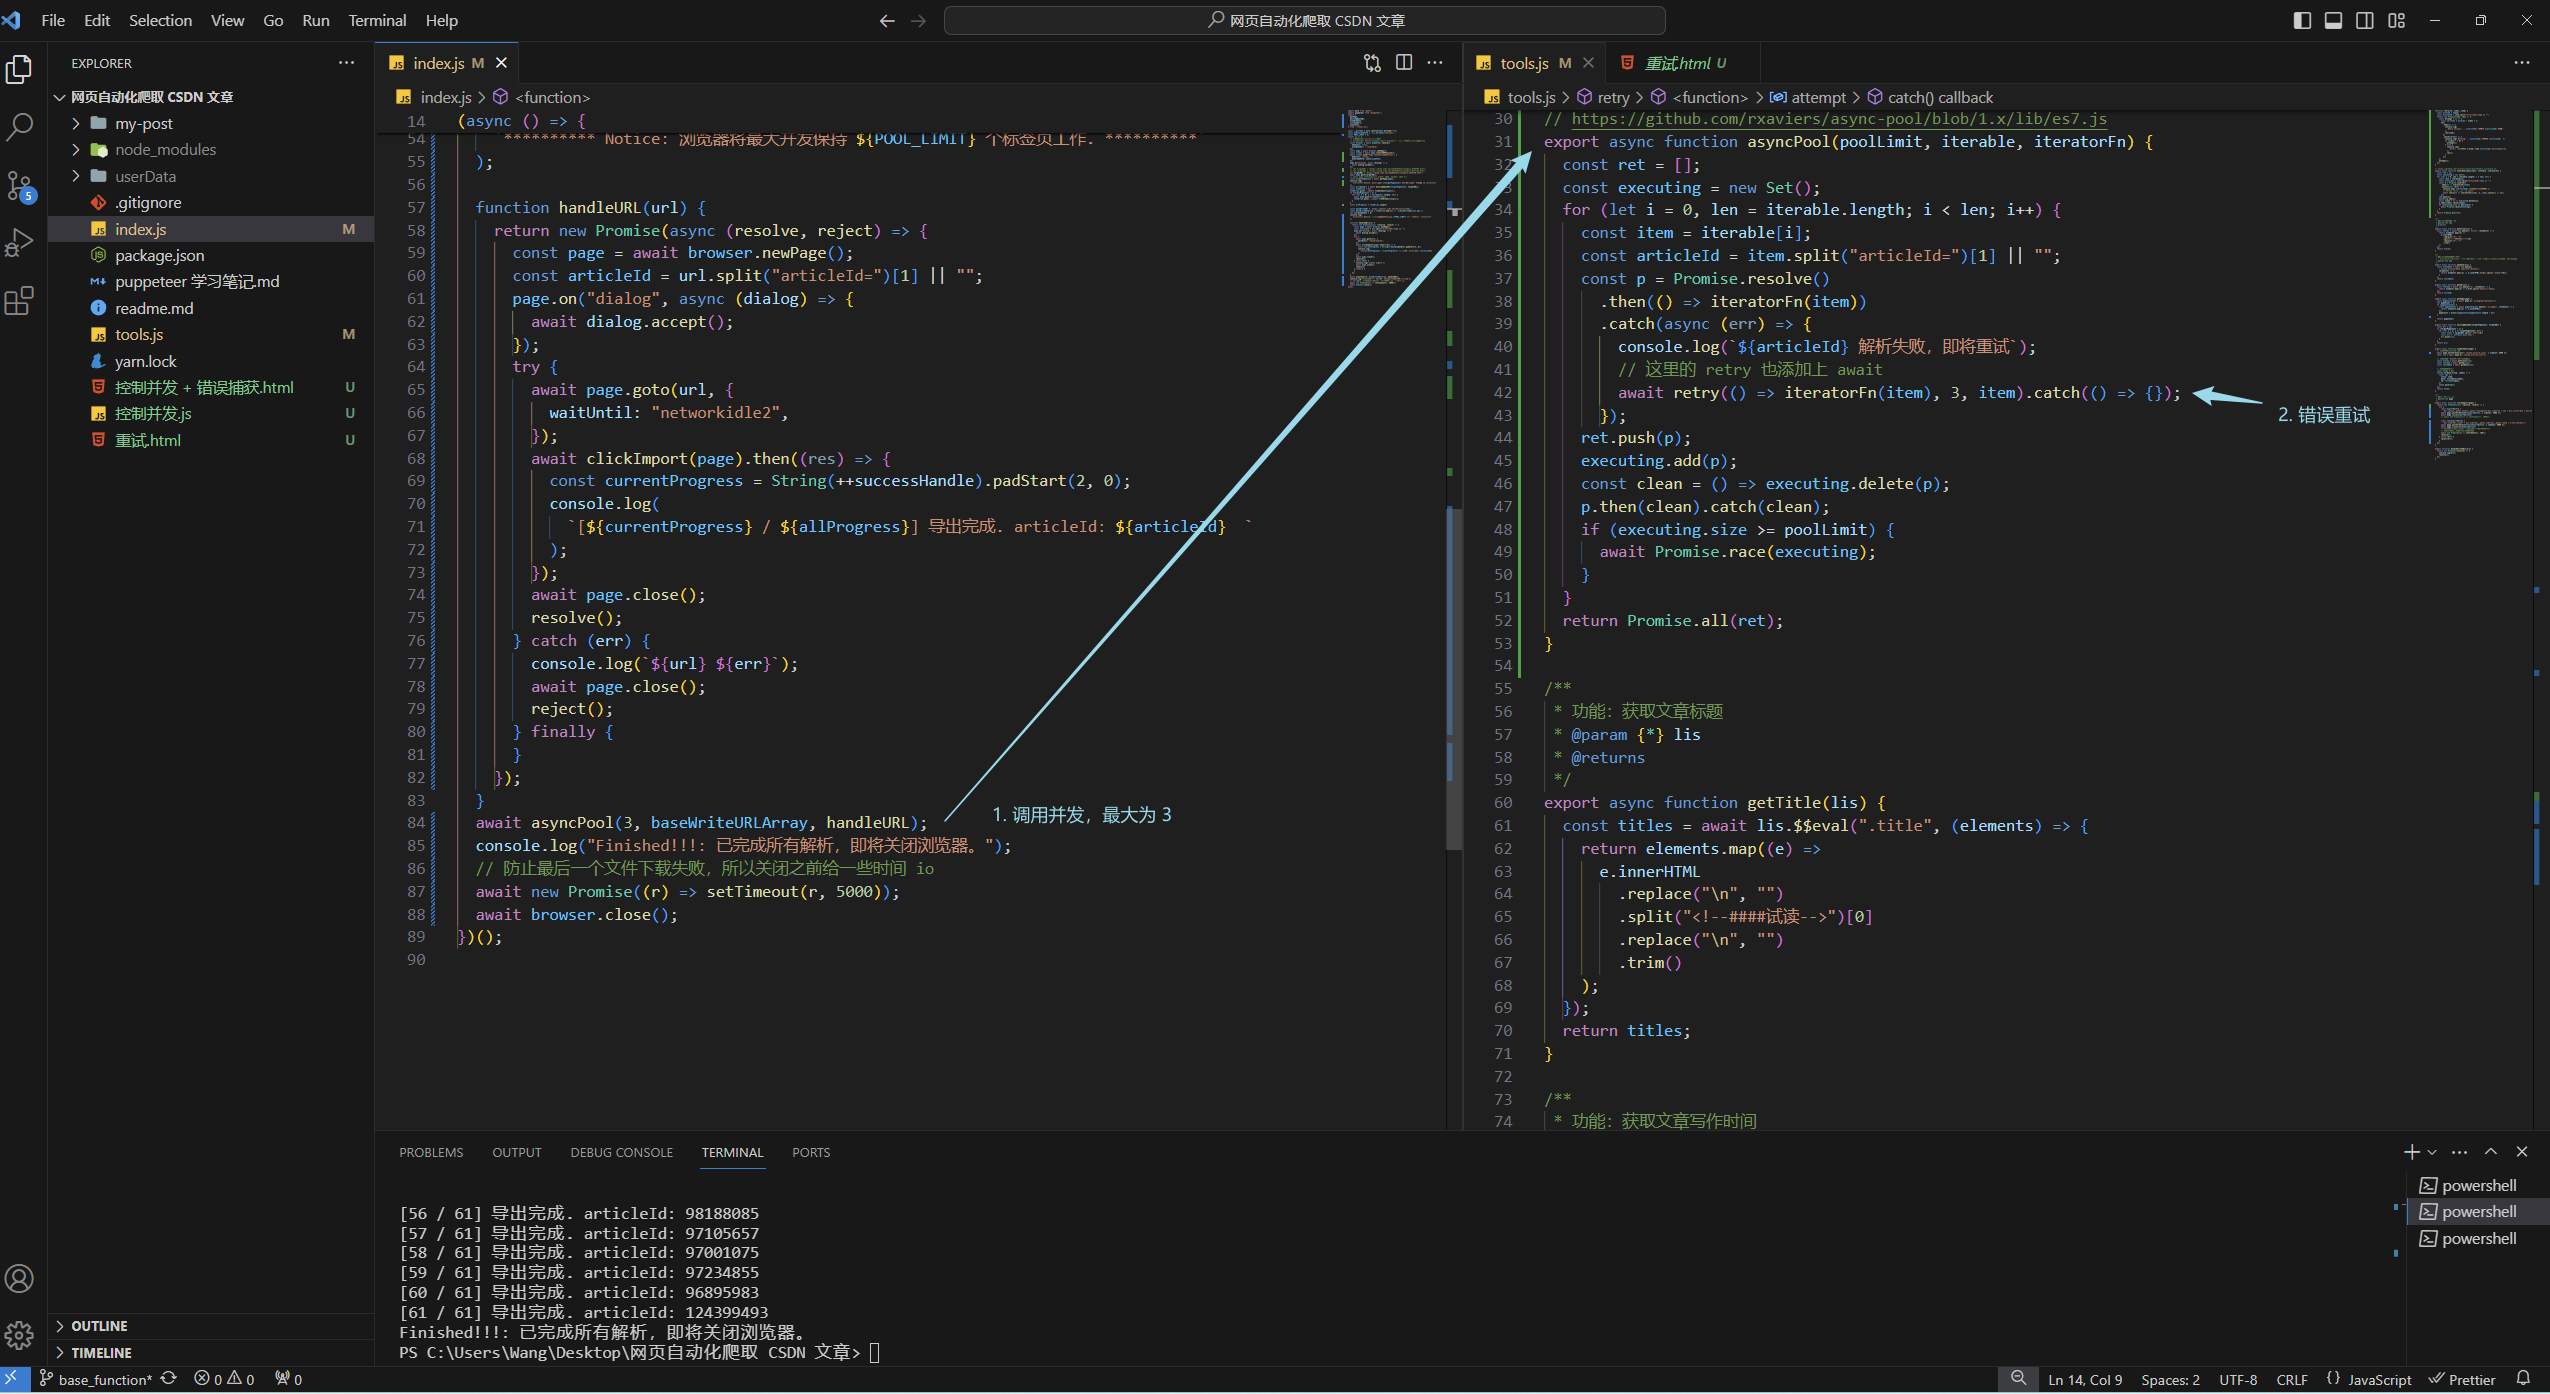
文章目录 上一篇效果演示Puppeteer 修改浏览器的默认下载位置控制并发数错误重试并发控制 错误重试源码 上一篇 Puppeteer 使用实战:如何将自己的 CSDN 专栏文章导出并用于 Hexo 博客(一) 效果演示 上一篇实现了一些基本功能,…...

[ 2024春节 Flink打卡 ] -- 优化(draft)
2024,游子未归乡。工作需要,flink coding。觉知此事要躬行,未休,特记 资源配置调优内存设置 TaskManager内存模型 https://nightlies.apache.org/flink/flink-docs-release-1.18/docs/deployment/config/ TaskManager 内存模型…...

电脑进水无法开机怎么办 电脑进水开不了机的解决方法
意外总是会不定时打破你的计划,电脑这类电器最怕遇到的除了火还有水,设备进水会导致数据丢失,那么我们遇到电脑进水怎么办?进水之后不正确处理也会引起很多不必要的麻烦. 解决办法 第一步:关机 如果您的电脑是在开…...
【Flutter】底部导航BottomNavigationBar的使用
常用基本属性 属性名含义是否必须items底部导航栏的子项List是currentIndex当前显示索引否onTap底部导航栏的点击事件, Function(int)否type底部导航栏类型,定义 [BottomNavigationBar] 的布局和行为否selectedItemColor选中项图标和label的颜色否unsel…...

Vue封装全局公共方法
有的时候,我们需要在多个组件里调用一个公共方法,这样我们就能将这个方法封装成全局的公共方法。 我们先在src下的assets里新建一个js文件夹,然后建一个common.js的文件,如下图所示: 然后在common.js里写我们的公共方法,比如这里我们写了一个testLink的方法,然后在main…...

雪花算法生成分布式主键ID
直接上代码,复制即可使用 public class SnowflakeIdGenerator {private static final long START_TIMESTAMP 1624000000000L; // 设置起始时间戳,2021-06-18 00:00:00private static final long DATA_CENTER_ID_BITS 5L;private static final long WO…...

第三百五十九回
文章目录 1. 概念介绍2. 使用方法3. 代码与效果3.1 示例代码3.2 运行效果 4. 内容总结 013pickers2.gif 我们在上一章回中介绍了"如何实现Numberpicker"相关的内容,本章回中将介绍wheelChoose组件.闲话休提,让我们一起Talk Flutter吧。 1. 概念…...
vue3 用xlsx 解决 excel 低版本office无法打开问题
需求背景解决思路解决效果将json导出为excel将table导为excel导出样式 需求背景 原使用 vue3-json-excel ,导致在笔记本office环境下,出现兼容性问题 <vue3-json-excel class"export-btn" :fetch"excelGetList" :fields"js…...

从过采样到Σ-Δ调制:采样技术如何成为提升信噪比的秘密武器
1. 项目概述:从“听不清”到“听得清”的底层博弈 在信号处理、音频工程、通信系统乃至生物医学检测的日常工作中,我们总会遇到一个共同的“敌人”——噪声。无论你是在调试一段录音,分析一组传感器数据,还是试图从遥远的深空接收…...

Triton Ascend 代码生成 Skill
【免费下载链接】cannbot-skills CANNBot 是面向 CANN 开发的用于提升开发效率的系列智能体,本仓库为其提供可复用的 Skills 模块。 项目地址: https://gitcode.com/cann/cannbot-skills name: triton-op-coding description: > Triton Ascend 算子代码生…...

ViGEmBus终极指南:如何在Windows上轻松实现游戏手柄兼容性
ViGEmBus终极指南:如何在Windows上轻松实现游戏手柄兼容性 【免费下载链接】ViGEmBus Windows kernel-mode driver emulating well-known USB game controllers. 项目地址: https://gitcode.com/gh_mirrors/vi/ViGEmBus ViGEmBus是一个开源的Windows内核模式…...

【求职】衡量你职场流通性的,从来不是你的能力
衡量你职场流通性的,从来不是你的能力先问你一个问题。 你上一次被猎头主动联系,是什么时候? 如果你需要认真回忆,那这篇文章,你需要认真读完。一、"流通性"是个被严重低估的职场变量 大多数人谈职业发展&am…...

2026年京东云OpenClaw/Hermes Agent配置Token Plan详细方法汇总
2026年京东云OpenClaw/Hermes Agent配置Token Plan详细方法汇总。OpenClaw是开源的个人AI助手,Hermes Agent则是一个能自我进化的AI智能体框架。阿里云提供计算巢、轻量服务器及无影云电脑三种部署OpenClaw 与 Hermes Agent的方案、百炼Token Plan兼容主流 AI 工具&…...

从‘管理模式’到‘监听模式’:一张无线网卡在Kali Linux下的四种工作模式详解与切换实战
从‘管理模式’到‘监听模式’:一张无线网卡在Kali Linux下的四种工作模式详解与切换实战 当你第一次在Kali Linux中插入无线网卡时,它默认处于"管理模式"——就像普通笔记本电脑连接WiFi一样温顺。但在这张小小的硬件里,其实藏着四…...

Redis对象类型与底层数据结构
一、Redis对象类型概述 1.1 Redis数据类型总览 Redis提供了丰富的数据类型,用于不同的业务场景:对象类型说明典型场景String字符串缓存、计数器、分布式锁List双向链表队列、消息队列、最新列表Hash哈希表存储对象、购物车Set无序集合好友关系、抽奖Zset…...

Augmentoolkit事实数据生成管道:打造精准问答AI的终极方法
Augmentoolkit事实数据生成管道:打造精准问答AI的终极方法 【免费下载链接】augmentoolkit Create Custom LLMs 项目地址: https://gitcode.com/gh_mirrors/au/augmentoolkit 想要创建专属的领域专家AI吗?Augmentoolkit事实数据生成管道为您提供了…...

Delphi二进制迷宫破解:IDR交互式重构器的逆向工程革命
Delphi二进制迷宫破解:IDR交互式重构器的逆向工程革命 【免费下载链接】IDR Interactive Delphi Reconstructor 项目地址: https://gitcode.com/gh_mirrors/id/IDR 在逆向工程的世界里,Delphi编译的程序犹如一座座精心设计的迷宫——结构复杂、入…...

别再只问哪个大模型更强了,2026年真正决定AI Agent上限的,是向量引擎
别再只问哪个大模型更强了,2026年真正决定AI Agent上限的,是向量引擎 这两年做AI的人,最容易掉进一个坑。 每天盯着模型榜单看。 今天这个模型会写代码了。 明天那个模型会看视频了。 后天又有一个模型说自己推理能力更强了。 看久了以后&…...