ruoyi-cloud登录接口实现滑块验证码
一、前言
ruoyi项目默认的验证码是这样的
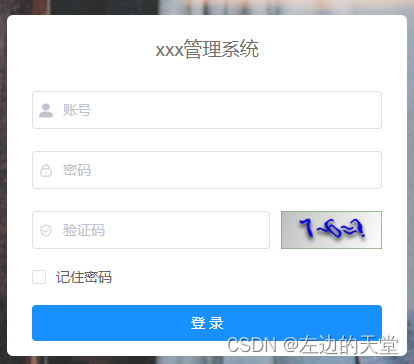
今天来尝试增加滑块验证码,我们用到的是tianai-captcha。
文档地址:http://doc.captcha.tianai.cloud/
源码地址:https://gitee.com/tianai/tianai-captcha
下面来看具体的步骤。
二、后端
在gateway中引入依赖
<dependency><groupId>cloud.tianai.captcha</groupId><artifactId>tianai-captcha-springboot-starter</artifactId><version>1.4.1</version>
</dependency>
并增加相应的配置
# 客户端验证码
captcha:cache:enabled: truecache-size: 20# 二次验证secondary:enabled: false# 是否初始化默认资源init-default-resource: false
在gateway中新增加一个SliderCaptchaHandler处理类
import cloud.tianai.captcha.spring.application.ImageCaptchaApplication;
import cloud.tianai.captcha.spring.vo.CaptchaResponse;
import cloud.tianai.captcha.spring.vo.ImageCaptchaVO;
import com.iinplus.common.core.exception.CaptchaException;
import org.springframework.http.HttpStatus;
import org.springframework.stereotype.Component;
import org.springframework.web.reactive.function.BodyInserters;
import org.springframework.web.reactive.function.server.HandlerFunction;
import org.springframework.web.reactive.function.server.ServerRequest;
import org.springframework.web.reactive.function.server.ServerResponse;
import reactor.core.publisher.Mono;import javax.annotation.Resource;/*** 验证码获取*/
@Component
public class SliderCaptchaHandler implements HandlerFunction<ServerResponse> {@Resourceprivate ImageCaptchaApplication sca;@Overridepublic Mono<ServerResponse> handle(ServerRequest serverRequest) {CaptchaResponse<ImageCaptchaVO> res;try {// 1.生成滑块验证码(该数据返回给前端用于展示验证码数据)res = sca.generateCaptcha();} catch (CaptchaException e) {return Mono.error(e);}return ServerResponse.status(HttpStatus.OK).body(BodyInserters.fromValue(res));}
}
在RouterFunctionConfiguration中新增一个路由
@Resource
private SliderCaptchaHandler sliderCaptchaHandler;@Bean
public RouterFunction routerFunc() {return RouterFunctions.route(RequestPredicates.GET("/captcha").and(RequestPredicates.accept(MediaType.TEXT_PLAIN)),            sliderCaptchaHandler);
}
新增一个filter类,用来验证图形验证码。
import cloud.tianai.captcha.common.response.ApiResponse;
import cloud.tianai.captcha.spring.application.ImageCaptchaApplication;
import cloud.tianai.captcha.validator.common.model.dto.ImageCaptchaTrack;
import com.alibaba.fastjson2.JSON;
import com.alibaba.fastjson2.JSONObject;
import com.iinplus.common.core.exception.CaptchaException;
import com.iinplus.common.core.utils.ServletUtils;
import com.iinplus.common.core.utils.StringUtils;
import com.iinplus.gateway.config.properties.CaptchaProperties;
import org.springframework.cloud.gateway.filter.GatewayFilter;
import org.springframework.cloud.gateway.filter.factory.AbstractGatewayFilterFactory;
import org.springframework.core.io.buffer.DataBuffer;
import org.springframework.core.io.buffer.DataBufferUtils;
import org.springframework.http.server.reactive.ServerHttpRequest;
import org.springframework.stereotype.Component;
import reactor.core.publisher.Flux;import javax.annotation.Resource;
import java.nio.CharBuffer;
import java.nio.charset.StandardCharsets;
import java.util.Arrays;
import java.util.List;
import java.util.concurrent.atomic.AtomicReference;/*** 验证码过滤器*/
@Component
public class ValidateCaptchaFilter extends AbstractGatewayFilterFactory<Object> {private final static String[] VALIDATE_URL = new String[]{"/system/login"};@Resourceprivate ImageCaptchaApplication sca;@Resourceprivate CaptchaProperties captchaProperties;private static final String TRACK = "sliderCaptchaTrack";private static final String UUID = "id";@Overridepublic GatewayFilter apply(Object config) {return (exchange, chain) -> {ServerHttpRequest request = exchange.getRequest();// 非登录/注册请求或验证码关闭,不处理List<String> list = Arrays.asList(VALIDATE_URL);// 请求地址String url = request.getURI().getPath();if (!StringUtils.matches(url, list) || !captchaProperties.getEnabled()) {return chain.filter(exchange);}try {String rspStr = resolveBodyFromRequest(request);if (StringUtils.isEmpty(rspStr)) {throw new CaptchaException("验证码不能为空");}JSONObject obj = JSON.parseObject(rspStr);if (!obj.containsKey(UUID) || !obj.containsKey(TRACK)) {throw new CaptchaException("验证码不能为空");}String id = obj.getString(UUID);ImageCaptchaTrack sliderCaptchaTrack = obj.getObject(TRACK, ImageCaptchaTrack.class);ApiResponse<?> match = sca.matching(id, sliderCaptchaTrack);if (!match.isSuccess()) {throw new CaptchaException(match.getMsg());}} catch (Exception e) {e.printStackTrace();return ServletUtils.webFluxResponseWriter(exchange.getResponse(), e.getMessage());}return chain.filter(exchange);};}private String resolveBodyFromRequest(ServerHttpRequest serverHttpRequest) {// 获取请求体Flux<DataBuffer> body = serverHttpRequest.getBody();AtomicReference<String> bodyRef = new AtomicReference<>();body.subscribe(buffer -> {CharBuffer charBuffer = StandardCharsets.UTF_8.decode(buffer.asByteBuffer());DataBufferUtils.release(buffer);bodyRef.set(charBuffer.toString());});return bodyRef.get();}
}
注意:其中/system/login为登录验证的路径,需要在网关中配置,并且需要加入白名单。
如果需要修改图形验证码默认的背景图
import cloud.tianai.captcha.common.constant.CaptchaTypeConstant;
import cloud.tianai.captcha.generator.common.constant.SliderCaptchaConstant;
import cloud.tianai.captcha.resource.common.model.dto.Resource;
import cloud.tianai.captcha.resource.common.model.dto.ResourceMap;
import cloud.tianai.captcha.resource.impl.DefaultResourceStore;
import cloud.tianai.captcha.resource.impl.provider.ClassPathResourceProvider;
import org.springframework.stereotype.Component;import static cloud.tianai.captcha.generator.impl.StandardSliderImageCaptchaGenerator.DEFAULT_SLIDER_IMAGE_TEMPLATE_PATH;/*** 自定义背景图片*/
@Component
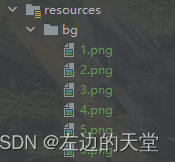
public class ResourceStore extends DefaultResourceStore {public ResourceStore() {// 滑块验证码 模板 (系统内置)ResourceMap template1 = new ResourceMap("default", 4);template1.put(SliderCaptchaConstant.TEMPLATE_ACTIVE_IMAGE_NAME, new Resource(ClassPathResourceProvider.NAME, DEFAULT_SLIDER_IMAGE_TEMPLATE_PATH.concat("/1/active.png")));template1.put(SliderCaptchaConstant.TEMPLATE_FIXED_IMAGE_NAME, new Resource(ClassPathResourceProvider.NAME, DEFAULT_SLIDER_IMAGE_TEMPLATE_PATH.concat("/1/fixed.png")));ResourceMap template2 = new ResourceMap("default", 4);template2.put(SliderCaptchaConstant.TEMPLATE_ACTIVE_IMAGE_NAME, new Resource(ClassPathResourceProvider.NAME, DEFAULT_SLIDER_IMAGE_TEMPLATE_PATH.concat("/2/active.png")));template2.put(SliderCaptchaConstant.TEMPLATE_FIXED_IMAGE_NAME, new Resource(ClassPathResourceProvider.NAME, DEFAULT_SLIDER_IMAGE_TEMPLATE_PATH.concat("/2/fixed.png")));// 1. 添加一些模板addTemplate(CaptchaTypeConstant.SLIDER, template1);addTemplate(CaptchaTypeConstant.SLIDER, template2);// 2. 添加自定义背景图片addResource(CaptchaTypeConstant.SLIDER, new Resource("classpath", "bg/1.png", "default"));addResource(CaptchaTypeConstant.SLIDER, new Resource("classpath", "bg/2.png", "default"));addResource(CaptchaTypeConstant.SLIDER, new Resource("classpath", "bg/3.png", "default"));addResource(CaptchaTypeConstant.SLIDER, new Resource("classpath", "bg/4.png", "default"));addResource(CaptchaTypeConstant.SLIDER, new Resource("classpath", "bg/5.png", "default"));addResource(CaptchaTypeConstant.SLIDER, new Resource("classpath", "bg/6.png", "default"));}
}
图片的路径如下
网关配置增加filters,把ValidateCaptchaFilter加上才生效
spring:cloud:gateway:discovery:... ...routes:# 系统模块- id: systemuri: lb://systempredicates:- Path=/system/**filters:# 验证码处理- ValidateCaptchaFilter- StripPrefix=1
system模块的登录验证
/*** 系统用户登录*/
@RestController
public class TokenController {@Autowiredprivate SysLoginService sysLoginService;@PostMapping("login")public RpcResult<?> login(@RequestBody @Validated LoginBody form) {   LoginUser userInfo = sysLoginService.login(form);... ...return RpcResult.success(rspMap);}
}
import lombok.Data;
import javax.validation.constraints.NotBlank;@Data
public class LoginBody {@NotBlank(message = "用户名不能为空")private String username;@NotBlank(message = "密码不能为空")private String password;
}
三、前端
在components下增加一个组件SliderCaptcha
<template><div class="slider rotate"><div class="content"><div class="bg-img-div"><img :src="captcha.backgroundImage" id="imgId" alt/><canvas id="canvasId" ref="canvas"></canvas></div><div class="rotate-img-div" :style="rotateImgDiv"><img :src="captcha.templateImage" alt/></div></div><div class="slider-move"><div class="slider-move-track">拖动滑块到正确位置</div><div class="slider-move-btn" :style="sliderMoveBtn" @mousedown="down" @touchstart="down"></div></div><div class="bottom"><div class="close-btn" @click="close()"></div><div class="refresh-btn" @click="refreshCaptcha"></div></div></div>
</template><script>
export default {name: "Slider",props: {captcha: {type: Object},},data() {return {currentCaptchaConfig: {},sliderMoveBtn: "",rotateImgDiv: "",checkParam: {}}},mounted() {this.initCaptcha();},methods: {refreshCaptcha() {this.$emit("init");this.initCaptcha();},initCaptcha() {this.sliderMoveBtn = "background-position: -5px 11.79625%; transform: translate(0, 0)";this.rotateImgDiv = "transform: translate(0, 0)";this.currentCaptchaConfig = {};let bgImageWidth = this.$refs.canvas.offsetWidth;let bgImageHeight = this.$refs.canvas.offsetHeight;this.checkParam = {bgImageWidth: bgImageWidth,bgImageHeight: bgImageHeight,startSlidingTime: new Date(),endSlidingTime: undefined,trackList: [],}},down(event) {let targetTouches = event.originalEvent ? event.originalEvent.targetTouches : event.targetTouches;let startX = event.pageX;let startY = event.pageY;if (startX === undefined) {startX = Math.round(targetTouches[0].pageX);startY = Math.round(targetTouches[0].pageY);}this.currentCaptchaConfig.startX = startX;this.currentCaptchaConfig.startY = startY;const pageX = this.currentCaptchaConfig.startX;const pageY = this.currentCaptchaConfig.startY;const startSlidingTime = this.checkParam.startSlidingTime;const trackList = this.checkParam.trackList;trackList.push({x: pageX - startX,y: pageY - startY,type: "down",t: (new Date().getTime() - startSlidingTime.getTime())});// pcwindow.addEventListener("mousemove", this.move);window.addEventListener("mouseup", this.up);// 手机端window.addEventListener("touchmove", this.move, false);window.addEventListener("touchend", this.up, false);this.sliderMoveBtn = `background-position:-5px 31.0092%`;},move(event) {if (event instanceof TouchEvent) {event = event.touches[0];}let pageX = Math.round(event.pageX);let pageY = Math.round(event.pageY);const startX = this.currentCaptchaConfig.startX;const startY = this.currentCaptchaConfig.startY;const startSlidingTime = this.checkParam.startSlidingTime;const end = 305;const trackList = this.checkParam.trackList;let moveX = pageX - startX;const track = {x: pageX - startX,y: pageY - startY,type: "move",t: (new Date().getTime() - startSlidingTime.getTime())};trackList.push(track);if (moveX < 0) {moveX = 0;} else if (moveX > end + 5) {moveX = end;}this.sliderMoveBtn = `transform:translate(${moveX}px, 0)`;this.rotateImgDiv = `transform:translate(${moveX}px, 0);`;},up(event) {window.removeEventListener("mousemove", this.move);window.removeEventListener("mouseup", this.up);// 手机端window.removeEventListener("touchmove", this.move);window.removeEventListener("touchend", this.up);if (event instanceof TouchEvent) {event = event.changedTouches[0];}let pageX = Math.round(event.pageX);let pageY = Math.round(event.pageY);const startX = this.currentCaptchaConfig.startX;const startY = this.currentCaptchaConfig.startY;const startSlidingTime = this.checkParam.startSlidingTime;const trackList = this.checkParam.trackList;const track = {x: pageX - startX,y: pageY - startY,type: "up",t: (new Date().getTime() - startSlidingTime.getTime())}trackList.push(track);this.checkParam.endSlidingTime = new Date();// 校验this.checkCaptcha()},close() {this.$emit("close");},checkCaptcha() {//this.checkParam = {};this.$emit("checkParam", this.checkParam)this.$emit("login");}},
}
</script>
<style scoped>
.slider {background-color: #fff;width: 380px;height: 340px;z-index: 999;box-sizing: border-box;padding: 9px;border-radius: 6px;box-shadow: 0 0 11px 0 #999999;
}.slider .content {width: 100%;height: 160px;position: relative;
}.bg-img-div {width: 100%;height: 100%;position: absolute;transform: translate(0px, 0px);
}.bg-img-div img {width: 100%;
}.bg-img-div canvas {width: 100%;position: absolute;left: 0;top: 0;
}.slider .slider-move {height: 60px;width: 100%;margin: 0;position: relative;top: 80px
}.slider .bottom {height: 25px;width: 100%;margin: 65px 10px 10px 0;
}.refresh-btn, .close-btn, .slider-move-btn {background: url(../../assets/images/sprite.1.2.4.png) no-repeat;
}.refresh-btn, .close-btn {display: inline-block;
}.slider-move .slider-move-track {line-height: 38px;font-size: 14px;text-align: center;white-space: nowrap;color: #88949d;-moz-user-select: none;-webkit-user-select: none;user-select: none;border-radius: 50px;background: #dfe1e2;width: 100%;
}.slider {user-select: none;
}.slider-move .slider-move-btn {transform: translate(0, 0);background-position: -5px 11.79625%;position: absolute;top: -12px;left: 0;width: 100%;height: 100%;
}.slider-move-btn:hover, .close-btn:hover, .refresh-btn:hover {cursor: pointer
}.bottom .close-btn {width: 25px;height: 25px;background-position: 0 44.86874%;margin: 10px 10px 10px 5px;float: left;
}.bottom .refresh-btn {width: 25px;height: 25px;background-position: 0 81.38425%;margin: 7px 10px 10px 2px;float: left;
}.rotate-img-div {height: 140%;position: absolute;transform: translate(0, 0);
}.rotate-img-div img {height: 100%;
}
</style>
修改登录和获取验证码的方法
// 登录方法
export function login(data) {return request({url: '/system/login',headers: {isToken: false},method: 'post',data: data})
}
// 获取验证码
export function captcha() {return request({url: '/captcha',headers: {isToken: false},method: 'get',timeout: 20000})
}
修改login.vue页面
<template><div class="login"><el-form ref="loginForm" :model="loginForm" :rules="loginRules" class="login-form"><h3 class="title">xxxx管理系统</h3><el-form-item prop="username"><el-inputv-model="loginForm.username"type="text"auto-complete="off"placeholder="账号"><svg-icon slot="prefix" icon-class="user" class="el-input__icon input-icon" /></el-input></el-form-item><el-form-item prop="password"><el-inputv-model="loginForm.password"type="password"auto-complete="off"placeholder="密码"><svg-icon slot="prefix" icon-class="password" class="el-input__icon input-icon" /></el-input></el-form-item><!--注释掉原来的验证码--><!--<el-form-item prop="code" v-if="captchaEnabled" style="margin: 10px 0"><el-inputv-model="loginForm.code"auto-complete="off"placeholder="验证码"style="width: 68%"@keyup.enter.native="handleLogin"><svg-icon slot="prefix" icon-class="validCode" class="el-input__icon input-icon" /></el-input><div class="login-code"><img :src="codeUrl" @click="getCode" class="login-code-img"/></div></el-form-item>--><el-form-item style="width:100%; margin: 10px 0"><el-checkbox v-model="loginForm.rememberMe">记住密码</el-checkbox></el-form-item><el-form-item style="width:100%;margin-bottom: 10px"><el-button:loading="loading"size="medium"type="primary"style="width:100%;"@click.native.prevent="initCaptcha"><span v-if="!loading">登 录</span><span v-else>登 录 中...</span></el-button></el-form-item></el-form><!-- 滑块验证码,通过show来控制显示遮蔽层--><div v-if="show" class="mask"><SliderCaptchav-if="captchaVisible"ref="sliderCaptcha":captcha="captcha"@init="initCaptcha"@close="hideCaptcha"@login="handleLogin"/></div><!--  底部  --><div class="el-login-footer"><span>Copyright © xxx All Rights Reserved.</span></div></div>
</template><script>
import {captcha} from '@/api/login'
import Cookies from "js-cookie";
import {decrypt, encrypt} from '@/utils/jsencrypt'
import SliderCaptcha from '@/components/SliderCaptcha'export default {name: "Login",components: {SliderCaptcha},data() {return {// codeUrl: "",show: false,captcha: {},captchaVisible: false,loginForm: {username: undefined,password: undefined,rememberMe: false,//code: "",//uuid: "",// 增加下面两个属性ImageCaptchaTrack: {},id: ''},loginRules: {username: [{ required: true, trigger: "blur", message: "请输入您的账号" }],password: [{ required: true, trigger: "blur", message: "请输入您的密码" }],// 不再需要这个验证// code: [{ required: true, trigger: "change", message: "请输入验证码" }]},loading: false,// 验证码开关captchaEnabled: true,redirect: undefined};},watch: {$route: {handler: function(route) {this.redirect = route.query && route.query.redirect;},immediate: true}},created() {//this.getCode();this.getCookie();},methods: {//注释原先的获取验证码方法/*getCode() {getCodeImg().then(res => {this.captchaEnabled = res.captchaEnabled === undefined ? true : res.captchaEnabled;if (this.captchaEnabled) {this.codeUrl = "data:image/gif;base64," + res.img;this.loginForm.uuid = res.uuid;}});},*/getCookie() {const username = Cookies.get("username");const password = Cookies.get("password");const rememberMe = Cookies.get('rememberMe')this.loginForm = {username: username === undefined ? this.loginForm.username : username,password: password === undefined ? this.loginForm.password : decrypt(password),rememberMe: rememberMe === undefined ? false : Boolean(rememberMe)};},hideCaptcha() {this.captchaVisible = falsethis.show = false;},// 获取图形验证码initCaptcha() {this.$refs.loginForm.validate(valid => {if (valid) {captcha().then(res => {if (res) {this.captcha = res["captcha"];this.loginForm.id = res["id"];this.captchaVisible = truethis.show = true;}})}})},// 登录方法handleLogin() {this.$refs.loginForm.validate(valid => {if (valid) {this.loading = true;if (this.loginForm.rememberMe) {Cookies.set("username", this.loginForm.username, { expires: 30 });Cookies.set("password", encrypt(this.loginForm.password), { expires: 30 });Cookies.set('rememberMe', this.loginForm.rememberMe, { expires: 30 });} else {Cookies.remove("username");Cookies.remove("password");Cookies.remove('rememberMe');}// 从子组件获取值this.loginForm.sliderCaptchaTrack = this.$refs.sliderCaptcha.checkParamthis.$store.dispatch("Login", this.loginForm).then(() => {// console.info("this.redirect", this.redirect)this.$router.push({ path: this.redirect || "/" }).catch(()=>{});}).catch(() => {this.loading = false;//调用子组件的刷新图形验证码的方法this.$refs.sliderCaptcha.refreshCaptcha()});}});}}
};
</script><style rel="stylesheet/scss" lang="scss">
<!--新增遮蔽层,其他省略-->
.mask {box-sizing: border-box;position: fixed;top: 0;left: 0;bottom: 0;right: 0;z-index: 1001;background: rgba(0, 0, 0, 0.3);transition: all 0.5s;display: flex;flex-direction: column;justify-content: center;align-items: center;
}
</style>
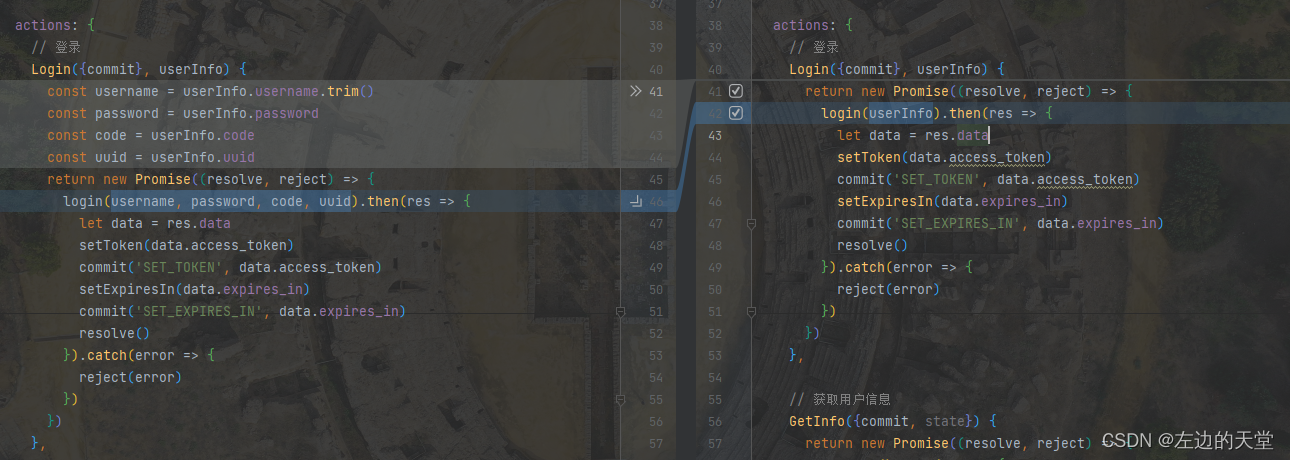
最后this.$store.dispatch("Login", this.loginForm)调用的Login也需要修改一下,在user.js里面。
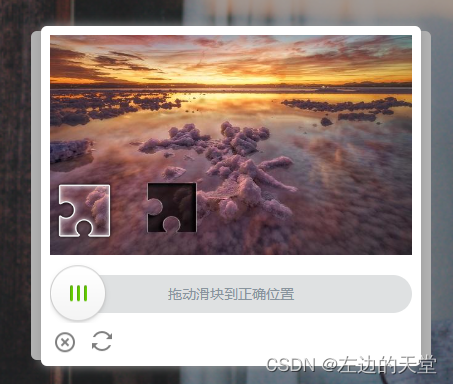
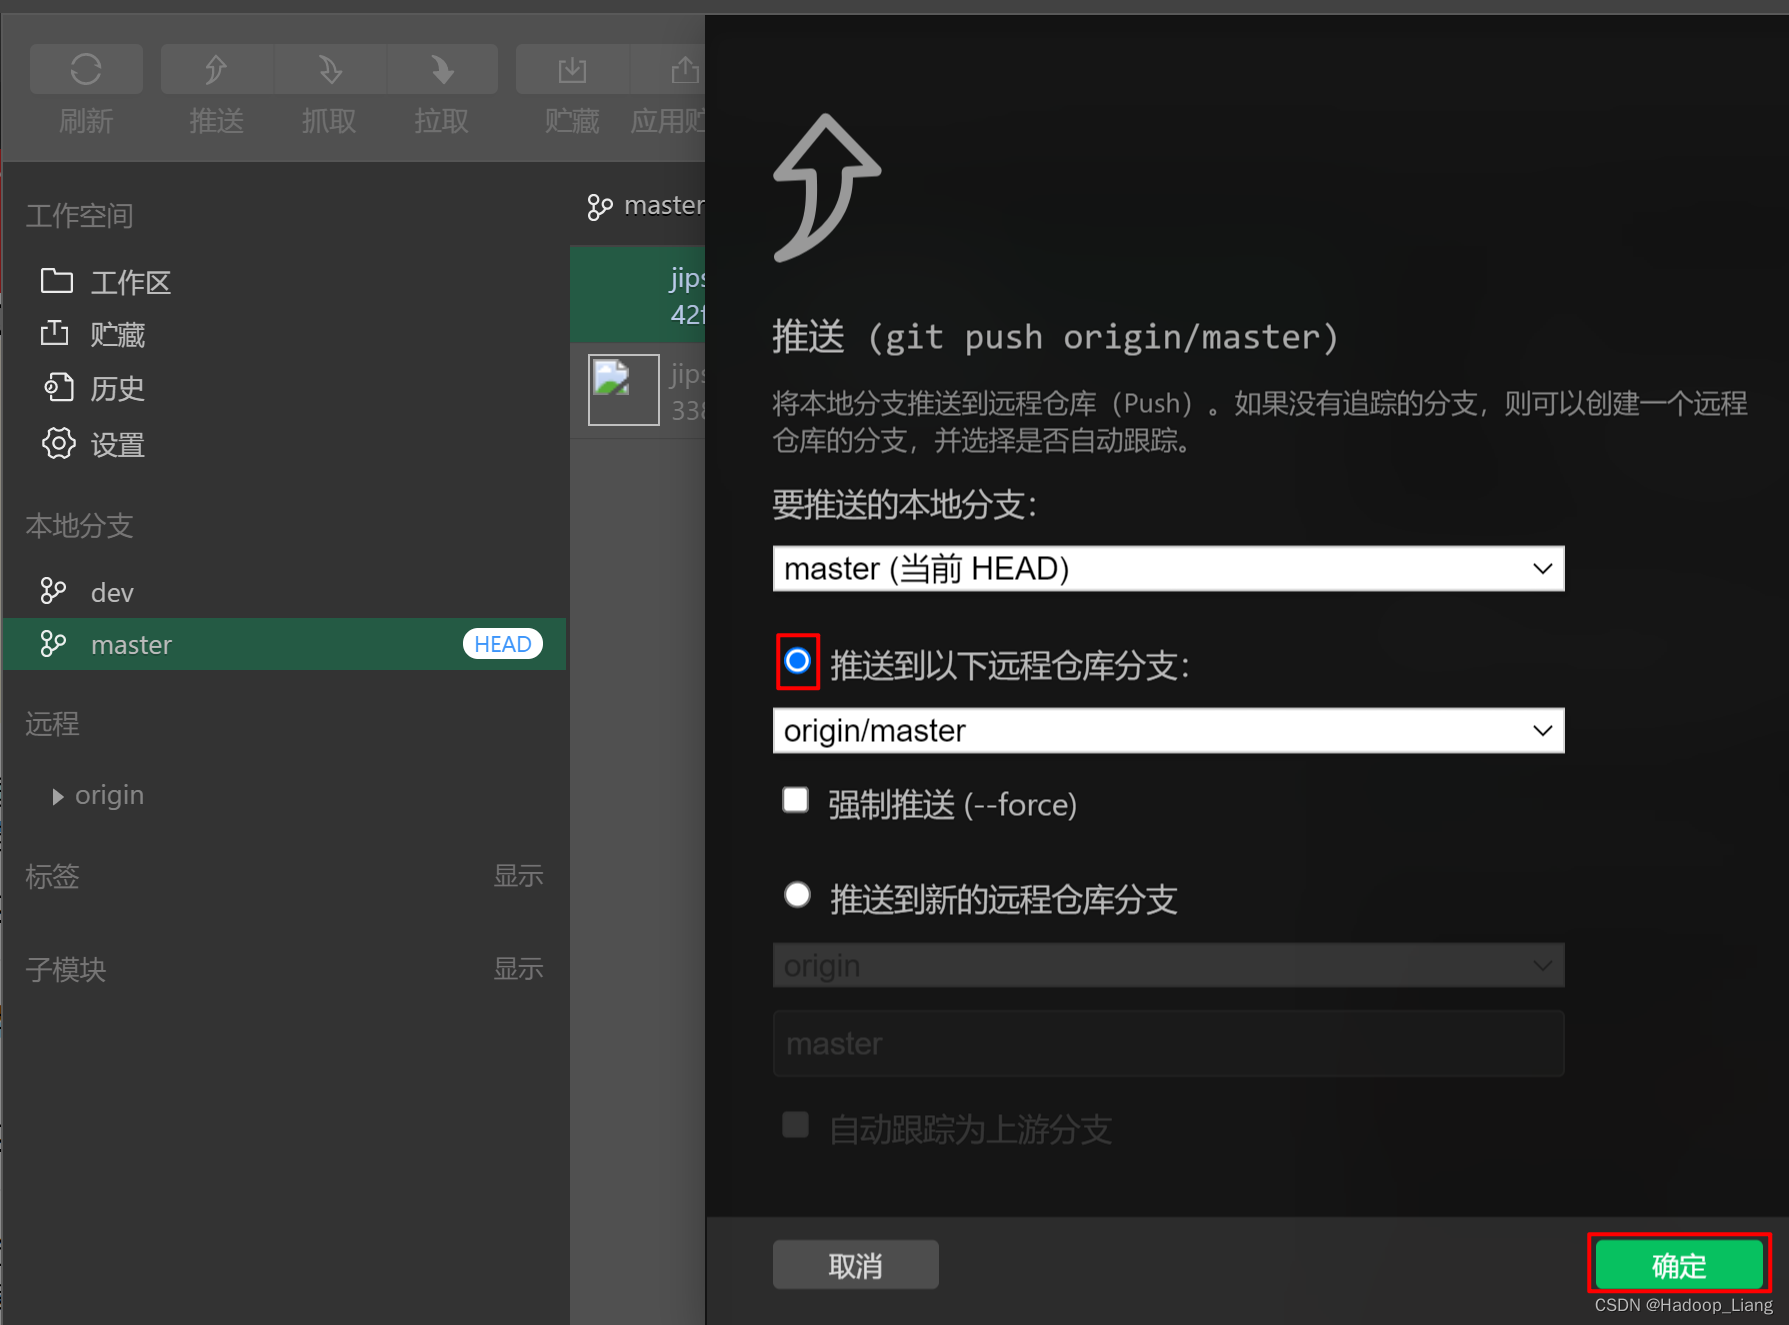
最终效果

点击【登录】按钮
相关文章:
ruoyi-cloud登录接口实现滑块验证码
一、前言 ruoyi项目默认的验证码是这样的 今天来尝试增加滑块验证码,我们用到的是tianai-captcha。 文档地址:http://doc.captcha.tianai.cloud/ 源码地址:https://gitee.com/tianai/tianai-captcha 下面来看具体的步骤。 二、后端 在g…...

三坐标测量机:柔性生产制造中的高精度测量解决方案
柔性生产制造是制造业的核心竞争力之一。它强调生产线的灵活性和适应性,以满足市场对产品多样化和个性化的需求。在当今快速变化的工业环境中,随着消费者对产品个性化和定制化需求的增加,柔性生产制造和三坐标测量机的结合,为智能…...

puppeteer 爬虫初探
1. puppeteer 和 puppeteer-core 安装 puppeteer 会默认下载一个最新版本的 chrome 浏览器; 安装 puppeteer-core ,不会安装 chrome, 若要程序打开浏览器运行时,需手动指定电脑系统安装的 chrome 浏览器路径; 2. puppeteer-core …...

Pandas 入门 15 题
Pandas 入门 15 题 1. 相关知识点1.1 修改DataFrame列名1.2 获取行列数1.3 显示前n行1.4 条件数据选取值1.5 创建新列1.6 删去重复的行1.7 删除空值的数据1.9 修改列名1.10 修改数据类型1.11 填充缺失值1.12 数据上下合并1.13 pivot_table透视表的使用1.14 melt透视表的使用1.1…...
使用微信开发者工具连接gitee
编写代码 打开微信开发者工具 编写小程序代码 提交代码 在微信开发者工具提交代码到gitee仓库的步骤: 1.在gitee创建仓库,得到仓库url 2.微信开发者工具设置远程仓库 点击版本管理-->点击设置-->网络和认证-->认证方式选择 使用用户名和…...
论文复现-基于决策树算法构建银行贷款审批预测模型(金融风控场景)
作者Toby,来源公众号:Python风控模型,基于决策树算法构建银行贷款审批预测模型 目录 1.金融风控论文复现 2.项目背景介绍 3.决策树介绍 4.数据集介绍 5.合规风险提醒 6.技术工具 7.实验过程 7.1导入数据 7.2数据预处理 7.3数据可…...
)
力扣225题解析:使用队列实现栈的三种解法(Java实现)
引言 在算法和数据结构中,如何用队列实现栈是一个常见的面试题和实际应用问题。本文将探讨力扣上的第225题,通过不同的方法来实现这一功能,并分析各种方法的优劣和适用场景。 问题介绍 力扣225题目要求我们使用队列实现栈的下列操作&#…...

网络协议与标准
协议: 语法 ;计算机的算法,二进制 语义 ;不要有出现歧义的 同步 ; 同步还原信息,收发同步 标准: ISO(国际标准化组织) IEEE(电气和电子工程师学会) 局域网技术 一.协议…...
154. 寻找旋转排序数组中的最小值 II(困难)
154. 寻找旋转排序数组中的最小值 II 1. 题目描述2.详细题解3.代码实现3.1 Python3.2 Java 1. 题目描述 题目中转:154. 寻找旋转排序数组中的最小值 II 2.详细题解 该题是153. 寻找旋转排序数组中的最小值的进阶题,在153. 寻找旋转排序数组中的最小值…...

5、MP4解复用---AAC+H264
MP4 MP4同样是一种容器格式,是由一个一个Box组成,每个Box又分为Header与Data,Data又包含很多子Box,具体的MP4文件结构也看过,内部Box结构比较复杂,一般不写MP4解释器的话,Box结构不用了解太细&a…...

计算样本之间的相似度
文章目录 前言一、距离度量1.1 欧几里得距离(Euclidean Distance)1.2 曼哈顿距离(Manhattan Distance)1.3 切比雪夫距离(Chebyshev Distance)1.4 闵可夫斯基距离(Minkowski Distance)…...

2-5 softmax 回归的简洁实现
我们发现通过深度学习框架的高级API能够使实现线性回归变得更加容易。 同样,通过深度学习框架的高级API也能更方便地实现softmax回归模型。 本节如在上节中一样, 继续使用Fashion-MNIST数据集,并保持批量大小为256。 import torch from torc…...
我 17 岁创业,今年 20 岁,月入 70 万,全靠低代码
想象一下,当你还在高中的课桌前埋头苦读时,有人告诉你三年后你将成为一家年收入超过 100 万美元的科技公司的创始人。 听起来是不是像天方夜谭? 但对于 20 岁的小伙子 Jacob Klug 来说,这就是他的真实人生。 在大多数同龄人还在为…...

【Python】已解决:urllib.error.HTTPError: HTTP Error 403: Forbidden
文章目录 一、分析问题背景二、可能出错的原因三、错误代码示例四、正确代码示例五、注意事项 已解决:urllib.error.HTTPError: HTTP Error 403: Forbidden 一、分析问题背景 在使用Python的urllib库中的urlopen或urlretrieve函数下载文件时,有时会遇到…...

昇思12天
FCN图像语义分割 1. 主题和背景 FCN是由UC Berkeley的Jonathan Long等人于2015年提出的,用于实现图像的像素级预测。 2. 语义分割的定义和重要性 语义分割是图像处理和机器视觉中的关键技术,旨在对图像中的每个像素进行分类。它在很多领域有重要应用…...
【postgresql】 基础知识学习
PostgreSQL是一个高度可扩展的开源对象关系型数据库管理系统(ORDBMS),它以其强大的功能、灵活性和可靠性而闻名。 官网地址:https://www.postgresql.org/ 中文社区:文档目录/Document Index: 世界上功能最强大的开源…...

按键控制LED流水灯模式定时器时钟
目录 1.定时器 2. STC89C52定时器资源 3.定时器框图 4. 定时器工作模式 5.中断系统 1)介绍 2)流程图:编辑 3)STC89C52中断资源 4)定时器和中断系统 5)定时器的相关寄存器 6.按键控制LED流水灯模…...

【Docker安装】OpenEuler系统下部署Docker环境
【Docker安装】OpenEuler系统下部署Docker环境 前言一、本次实践介绍1.1 本次实践规划1.2 本次实践简介二、检查本地环境2.1 检查操作系统版本2.2 检查内核版本2.3 检查yum仓库三、卸载Docker四、部署Docker环境4.1 配置yum仓库4.2 检查可用yum仓库4.3 安装Docker4.4 检查Docke…...

小程序 使用 UI 组件 Vant Weapp 、vant组件样式覆盖
注意:使用vant 包,需要把app.json 中 的"style:v2" 这句去掉 不然会出现样式混乱的问题 Vant Weapp组件库的使用 参考官网 vant官网 Vant Weapp 组件样式覆盖 Vant Weapp 基于微信小程序的机制,为开发者提供了 3 种修改组件样式…...
前端弄一个变量实现点击次数在前端页面实时更新)
(接上一篇)前端弄一个变量实现点击次数在前端页面实时更新
实现点击次数在前端页面实时更新,确实需要在前端维护一个变量来存储当前的点击次数。这个变量通常在Vue组件的data选项中定义,并在组件的生命周期方法或事件处理函数中更新。 以下是实现这一功能的基本步骤: 定义变量:在Vue组件的…...

飞书机器人集成OpenClaw与百川2-13B-4bits量化版:对话触发任务实战
飞书机器人集成OpenClaw与百川2-13B-4bits量化版:对话触发任务实战 1. 为什么选择这个技术组合 去年冬天,我接手了一个小团队的内部效率优化项目。团队每天需要从海量行业报告中提取关键数据,整理成简报表。最初尝试用传统RPA工具ÿ…...

单稳态vs双稳态电路全对比:从延时控制到状态保持的5个典型应用场景
单稳态与双稳态电路工程实战:5大应用场景深度解析与芯片选型指南 在物联网设备与自动化控制系统中,电路设计往往需要在瞬时响应与状态保持之间寻找平衡点。单稳态与双稳态电路作为两种基础却强大的电路结构,各自在特定场景下展现出独特优势。…...

OpenClaw压力测试:Qwen3-32B在RTX4090D上的连续任务稳定性
OpenClaw压力测试:Qwen3-32B在RTX4090D上的连续任务稳定性 1. 测试背景与目标 上周在本地部署了OpenClaw对接Qwen3-32B模型后,我遇到了一个现实问题:当连续执行复杂任务链时,系统会在运行2-3小时后突然崩溃。作为需要724小时运行…...
的“组合拳”)
城市峡谷里,你的车是怎么知道自己在哪的?聊聊INS、NHC和轮速计(ODO)的“组合拳”
城市峡谷里,你的车是怎么知道自己在哪的?聊聊INS、NHC和轮速计(ODO)的“组合拳” 想象一下,你正驾驶车辆穿梭在纽约曼哈顿的摩天大楼之间,或是穿越一条漫长的山体隧道。突然,车载导航屏幕上的定…...

OpenClaw+gemma-3-12b-it双剑合璧:5个提升效率的真实案例
OpenClawgemma-3-12b-it双剑合璧:5个提升效率的真实案例 1. 为什么选择这个组合? 去年我开始尝试用AI自动化处理日常工作,试过不少方案,最终锁定OpenClawgemma-3-12b-it这个组合。原因很简单:OpenClaw能像真人一样操…...

Claude Sonnet/Opus 4.6、CodeX系列、Gemini系列三大国际顶级模型到底有多强?!不服真不行!
Claude 4.6 系列、GPT-5.3 Codex 和 Gemini 3 Pro 三分天下: 维度Claude 4.6 (Sonnet/Opus)GPT-5.3 CodexGemini 3.1 Pro逻辑推理 (GPQA)Opus: 91.3% (巅峰)90.2%89.5%代码工程 (SWE-bench)Sonnet: 79.6% (最稳)56.8% (Pro 版)54.2%终端执行 (Terminal-Bench)69.9%…...
,包含: 1.MPPT模块)
光储并网直流微电网仿真模型(matlab/simulink,2018),包含: 1.MPPT模块
光储并网直流微电网仿真模型(matlab/simulink,2018),包含: 1.MPPT模块,实现光伏输入最大功率跟踪; 2.储能电池模块; 3.超级电容模块; 控制策略简介: 糸统使用…...

STM32大棚花卉物联网护养系统设计与实现
1. 项目概述这个大棚花卉护养系统是我去年为一个花卉种植基地设计的物联网解决方案。当时客户反映传统人工管理方式效率低下,经常出现浇水不及时、温度控制不精准等问题。经过三个月的开发和调试,这套系统成功将花卉产量提升了30%,同时减少了…...

ESP8266原生HomeKit接入:零桥接HAP协议实现
1. 项目概述HomeKit-ESP8266 是一个面向 ESP8266 Arduino Core 的原生 Apple HomeKit 配件实现库。它不依赖任何桥接设备(如 HomePod、Apple TV 或 Mac),可直接作为独立的 HomeKit 配件接入 iOS/macOS 的“家庭”App。该库并非基于 Apple 官方…...

好写作AI“期刊论文智造局”:解锁学术发表的通关秘籍
在学术的江湖里,期刊论文就像是一把把锋利的宝剑,是学者们披荆斩棘、开疆拓土的得力武器。然而,想要打造出一把称手的“宝剑”,从选题到撰写,再到格式调整,每一步都充满挑战。别愁啦!好写作AI化…...