spring6框架解析(by尚硅谷)
文章目录
- spring6
- 1. 一些基本的概念、优势
- 2. 入门案例实现
- maven聚合工程创建步骤
- 分析实现过程
- 3. IoC(Inversion of Control)
- 基于xml的bean环境搭建
- 获取bean
- 获取接口创建实现类
- 依赖注入 setter注入 和 构造器注入
- 原生方式的setter注入
- 原生方式的构造器注入
- 使用bean的方式进行依赖注入步骤
- 对象类型属性赋值步骤
- 引入外部属性文件步骤
- bean的八大生命周期(重要)
- 基于xml的bean自动装配
- 基于注解的bean自动装配(极其重要)
- 使用注解创建对象
- 手动实现IoC
- 实现过程
- 手动实现一个IoC反射
- 手动实现属性注入过程
- 4. 面向切面编程
- 静态代理图解
- 静态代理术语
- 动态代理
- 动态代理的实现过程
- 概念
- 相关术语
- AOP思想综述
- 基于注解方式配置AOP
- 通知类型及其使用
- bean配置文件
- 测试文件
- 报错信息解决
- 重用切入点表达式
- 5. 单元测试
- 6. 事务
- JdbcTemplate对象操作Mysql数据库(Spring事务处理前置知识)
- 准备环境
- 利用JdbcTemplate对象完成对数据库的增加、修改、删除操作
- 利用JdbcTemplate对象完成对数据库的查询操作
- 报错信息解决
- 事务处理
- 概念
- 特性
- 声明式事务管理(基于注解实现)
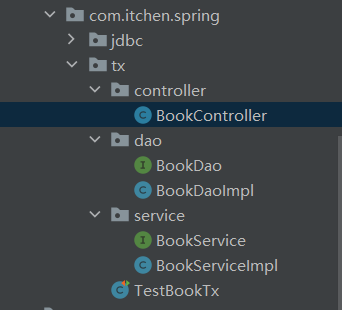
- 准备环境(基于上面的JDBC示例进行添加,目录结构如下)
- BookController
- BookDao
- BookDaoImpl
- BookService
- BookServiceImpl
- TestBookTx
- 分析
- 开启事务步骤(使用注解的方式)
- 事务注解的一些属性
- Resoource资源操作
- UrlResource实现类访问url资源
- ClassPathResourceDemo访问本地资源(项目内资源)
- loadAndReadUrlResource访问磁盘内文件
- 国际化:i18n
- 数据校验
- 通过Validator接口实现数据校验
- 基于注解校验
- 基于方法校验
- 自定义校验
- AOT
导语:感觉自己记得可能不全,所以我找了一篇优秀的笔记
(双手)奉上链接:https://lixx.cn/archives/spring6-2
https://lixx.cn/categories/spring6
spring6
1. 一些基本的概念、优势
主流,轻量级、开源 框架
广义划分:以SpringFirework为核心的Spring技术栈
狭义划分:专指SpringFireWork
两大核心:Ioc和AOP
特点:
- 非侵入式:功能组件使用注解进行标记,简洁。
- 控制反转:自动创建对象,让我们享受资源注入。
- 面向切面编程:在不修改源代码的基础上增强代码功能。
- 组件化:拆分复杂应用为多个组件共同实现
- 一站式:在集合许多依赖
2. 入门案例实现
maven聚合工程创建步骤
- 父工程 - spring6
- 子模块 - spring-first

- 引入spring相关依赖
<dependencies><!--引入spring-context依赖--><dependency><groupId>org.springframework</groupId><artifactId>spring-context</artifactId><version>6.1.10</version></dependency><!--测试依赖:junit--><dependency><groupId>org.junit.jupiter</groupId><artifactId>junit-jupiter-api</artifactId><version>5.10.2</version></dependency>
</dependencies>
- 创建类,定义属性和方法
package com.itchen.spring6;public class User {public void add(){System.out.println("add ...");}public static void main(String[] args) {User user = new User();user.add();}
}
-
按照spring要求创建一个配置文件.xml
-
在配置文件中创建相应的配置信息
<?xml version="1.0" encoding="UTF-8"?>
<!--下面是一些对标签的约束-->
<beans xmlns="http://www.springframework.org/schema/beans"xmlns:xsi="http://www.w3.org/2001/XMLSchema-instance"xsi:schemaLocation="http://www.springframework.org/schema/beans http://www.springframework.org/schema/beans/spring-beans.xsd"><!--完成对User对象的创建id属性:唯一标识 (为了方便一般使用类的首字母小写)class:要创建的类的对象的全路径(包名称 + 类名称)--><bean id="user" class="com.itchen.spring6.User"></bean>
</beans>
- 最终测试
package com.itchen.spring6;import org.junit.jupiter.api.Test;
import org.springframework.context.ApplicationContext;
import org.springframework.context.support.ClassPathXmlApplicationContext;public class TestUser {@Testpublic void testUserObject(){// 加载spring配置文件,对象创建ApplicationContext context = new ClassPathXmlApplicationContext("bean.xml");// 获取创建的对象User user = (User)context.getBean("user");System.out.println(user);// 使用对象的调用方法进行测试user.add();}
}
- 输出了user对象的全路径和user的地址
分析实现过程
- 执行了实体类的无参数构造方法
- 如何返回创建的对象
- 加载bean.xml配置文件
- 对xml文件进行解析操作
- 获取标签的属性值
- 使用反射根据类的全路径创建对象
- 对象存放在项目的一个Map集合中;格式<key,value>
3. IoC(Inversion of Control)
Spring通过loC容器来管理所有Java对象的实例化和初始化,控制对象与对象之间的依赖关系。我们将由loC容器管理的Java对象称为Spring Bean,它与使用关键字new创建的Java对象没有任何区别。
将对象的创建和对象与对象的关系都交给了容器进行管理。
基于xml的bean环境搭建
- 将子模块pom文件中的依赖放在父模块中(子模块依然可以调用相应的依赖)
- 创建资源文件(.xml)和java实体类
获取bean
- 实体类user.java
package com.itchen.spring6.iocxml;public class User {private String name;private Integer age;public void run(){System.out.println("run ...");}
}
- bean资源文件获取
- 注意:此时的class类型的bean只能有一个
<?xml version="1.0" encoding="UTF-8"?>
<beans xmlns="http://www.springframework.org/schema/beans"xmlns:xsi="http://www.w3.org/2001/XMLSchema-instance"xsi:schemaLocation="http://www.springframework.org/schema/beans http://www.springframework.org/schema/beans/spring-beans.xsd"><bean id="user" class="com.itchen.spring6.iocxml.User"></bean>
</beans>
- 测试获取bean的三种方式
package com.itchen.spring6.iocxml;import org.springframework.context.ApplicationContext;
import org.springframework.context.support.ClassPathXmlApplicationContext;public class TestUser {public static void main(String[] args) {ApplicationContext context = new ClassPathXmlApplicationContext("bean.xml");// 根据对象获取beanUser user = (User)context.getBean("user");System.out.println("根据id获取bean:" + user);// 根据类型获取beanUser user2 = (User)context.getBean(User.class);System.out.println("根据类型获取bean:" + user2);// 根据id和类型获取beanUser user3 = (User)context.getBean("user", User.class);System.out.println("根据id和类型获取bean:" + user3);}
}
获取接口创建实现类
- 创建接口,声明需要实现的方法;在实体类中实现接口。
- 在bean.xml中配置相应的impl实现类
<bean id="USerDaoImpl" class="com.itchen.spring6.iocxml.bean.USerDaoImpl"></bean>
注意:这里的bean必须是唯一的。一个接口只能由一个impl实体类来实现
依赖注入 setter注入 和 构造器注入
原生方式的setter注入
先在类中定义基本的set和get方法,然后在其他类中创建类的对象,调用其setget方法来传值。
原生方式的构造器注入
先定义基本的有参构造器和无参构造器,然后在创建对象的时候在构造器中传入相对应的值。
使用bean的方式进行依赖注入步骤
- 创建一个类,在其中定义基本属性,生成set方法
- 在spring中进行配置
<bean id="book" class="com.itchen.spring6.iocxml.di.Book"><property name="bname" value="java后端开发"></property><property name="author" value="陈志伟"></property>
</bean>
- 测试
@Test
public void testSetter(){// 1. 加载配置文件ApplicationContext context = new ClassPathXmlApplicationContext("bean-di.xml");Book book = context.getBean("book", Book.class);System.out.println(book);
}
or
- 创建类,定义属性,生成有参数的构造方法
- 进行配置
<bean id="BookConstructor" class="com.itchen.spring6.iocxml.di.Book"><constructor-arg name="bname" value="前端开发"></constructor-arg><constructor-arg name="author" value="陈志伟"></constructor-arg>
</bean>
- 测试
注意:setter注入调用的是无参构造方法,而构造器注入调用的是有参构造方法
对象类型属性赋值步骤
- 准备工作:创建两个类(班和学生),学生中定义班的对象。定义其中的构造方法、和get、set方法
- 创建bean.xml(名字任意)
<!--第一种方式:引入外部bean的方式-->
<bean id="class" class="com.itchen.spring6.iocxml.ditest.Class"><property name="cname" value="241班"></property>
</bean>
<bean id="student" class="com.itchen.spring6.iocxml.ditest.Student"><property name="sname" value="Aim"></property><property name="age" value="22"></property><property name="cls" ref="class"></property>
</bean>
<!--第二种方式:引入内部bean的方式-->
<bean id="student2" class="com.itchen.spring6.iocxml.ditest.Student"><property name="sname" value="Mary"></property><property name="age" value="20"></property><!--内部bean--><property name="cls"><bean id="class2" class="com.itchen.spring6.iocxml.ditest.Class"><property name="cname" value="242班"></property></bean></property>
</bean>
<!--第三种方式:级联属性赋值-->
<bean id="cls3" class="com.itchen.spring6.iocxml.ditest.Class"><property name="cname" value="144班"></property></bean><bean id="student3" class="com.itchen.spring6.iocxml.ditest.Student"><property name="sname" value="Tom"></property><property name="age" value="28"></property><property name="cls" ref="class"></property><!--级联再赋值--><property name="cls.cname" value="141班"></property></bean>
<!--第四种方式:数组注入-->
<!--注入数组类型的属性-->
<bean id="clss" class="com.itchen.spring6.iocxml.ditest.Class"><property name="cname" value="143班"></property>
</bean>
<bean id="student" class="com.itchen.spring6.iocxml.ditest.Student"><!--普通--><property name="sname" value="Aim"></property><property name="age" value="22"></property><!--对象--><property name="cls" ref="clss"></property><!--数组--><property name="loves"><array><value>吃饭</value><value>睡觉</value><value>玩jj</value></array></property>
</bean>
<!--第五种方式:集合类型属性的注入-->
<bean id="studen1" class="com.itchen.spring6.iocxml.ditest.Student"><property name="sname" value="Aim"></property><property name="age" value="19"></property>
</bean>
<bean id="studen2" class="com.itchen.spring6.iocxml.ditest.Student"><property name="sname" value="Mary"></property><property name="age" value="19"></property>
</bean>
<bean id="studen3" class="com.itchen.spring6.iocxml.ditest.Student"><property name="sname" value="Tom"></property><property name="age" value="19"></property>
</bean>
<bean id="cls" class="com.itchen.spring6.iocxml.ditest.Class"><property name="cname" value="142班"></property><property name="stuList"><list><ref bean="studen1"></ref><ref bean="studen2"></ref><ref bean="studen3"></ref></list></property>
</bean>
注意:因为这里的包含关系变了,需要修改一下测试方法
public static void main(String[] args) {ApplicationContext context = new ClassPathXmlApplicationContext("bean-diarr.xml");// 学生的对象Student stu = context.getBean("student",Student.class);stu.work();
}
<!--第六种方式:map类型属性注入-->
<!--1. 创建两个对象:用bean标签进行配置2. 注入它的普通类型的属性3. 在学生的bean中注入map集合的属性
-->
<bean id="teacher" class="com.itchen.spring6.iocxml.dimap.Teacher"><property name="tid" value="1000"></property><property name="tname" value="小李"></property>
</bean>
<bean id="student" class="com.itchen.spring6.iocxml.dimap.Student"><property name="sid" value="2000"></property><property name="sname" value="小明"></property><property name="teacherMap"><map><entry><key><value>10010</value></key><!--这里的(键值对的值)值如果是一个普通的值,可以使用value--><ref bean="teacher"></ref></entry></map></property>
</bean>
<!--第七种方式:集合类型的属性注入-->
<!--1. 创建三个对象2. 注入普通类型的属性3. 使用“util:类型” 定义4. 在学生bean中引入3.的bean
--><bean id="student" class="com.itchen.spring6.iocxml.dimap.Student"><property name="sid" value="10000"></property><property name="sname" value="张三"></property><!--注入list和map类型属性--><property name="lessonList" ref="lessonList"></property><property name="teacherMap" ref="teacherMap"></property>
</bean><util:list id="lessonList"><ref bean="lesson1"></ref><ref bean="lesson2"></ref>
</util:list>
<util:map id="teacherMap"><entry><key><value>10010</value></key><ref bean="teacher1"></ref></entry><entry><key><value>10086</value></key><ref bean="teacher2"></ref></entry>
</util:map><bean id="lesson1" class="com.itchen.spring6.iocxml.dimap.Lesson"><property name="lessonName" value="java开发"></property>
</bean>
<bean id="lesson2" class="com.itchen.spring6.iocxml.dimap.Lesson"><property name="lessonName" value="前端开发"></property>
</bean><bean id="teacher1" class="com.itchen.spring6.iocxml.dimap.Teacher"><property name="tname" value="西门庆"></property><property name="tid" value="1000"></property>
</bean>
<bean id="teacher2" class="com.itchen.spring6.iocxml.dimap.Teacher"><property name="tname" value="欧阳弧"></property><property name="tid" value="2000"></property>
</bean>
注意:第七种方式在使用的时候需要引入标签相应的命名空间
<?xml version="1.0" encoding="UTF-8"?>
<beans xmlns="http://www.springframework.org/schema/beans"xmlns:xsi="http://www.w3.org/2001/XMLSchema-instance"xmlns:util="http://www.springframework.org/schema/util"xsi:schemaLocation="http://www.springframework.org/schema/utilhttp://www.springframework.org/schema/util/spring-util.xsdhttp://www.springframework.org/schema/beanshttp://www.springframework.org/schema/beans/spring-beans.xsd">
引入外部属性文件步骤
- 引入外部属性文件的相关依赖【pom文件】
- 创建一个外部的属性文件。定义数据信息:用户名、密码、地址。【.properties文件】
- 创建spring的配置文件,引入context的命名空间。引入属性文件,使用表达式完成注入。
<!--引入外部文件 完成数据库的信息注入-->
<bean id="druidDataSource" class="com.alibaba.druid.pool.DruidDataSource"><property name="url" value="${jdbc.url}"></property><property name="username" value="${jdbc.user}"></property><property name="password" value="${jdbc.password}"></property><property name="driverClassName" value="${jdbc.driver}"></property>
</bean>
bean的八大生命周期(重要)
可以在配置文件中【bean.xml文件】使用参数的形式制定bean对象的初始化函数和销毁函数。
- bean对象的创建(调用无参构造方法)
- 给bean对象设置相关属性
- bean后置处理器(初始化之前)
- bean对象初始化(调用制定的初始化方法)
- bean后置处理器(初始化之后)
- bean对象创建完成了,可以使用了
- bean对象销毁(配置制定的销毁方法)
- IoC容器关闭
基于xml的bean自动装配
<!--根据类型自动装配-->
<bean id="userController" class="com.itchen.spring6.iocxml.auto.Controller.UserController" autowire="byType"></bean>
<bean id="userService" class="com.itchen.spring6.iocxml.auto.Service.UserServiceImpl" autowire="byType"></bean>
<bean id="userDao" class="com.itchen.spring6.iocxml.auto.dao.UserDaoImpl" autowire="byType"></bean>
<!--根据名称自动装配-->
<bean id="userController" class="com.itchen.spring6.iocxml.auto.Controller.UserController" autowire="byName"></bean>
<bean id="userService" class="com.itchen.spring6.iocxml.auto.Service.UserServiceImpl" autowire="byName"></bean>
<bean id="userDao" class="com.itchen.spring6.iocxml.auto.dao.UserDaoImpl" autowire="byName"></bean>
<!--这时需要保证类的名字和id的名字一模一样-->
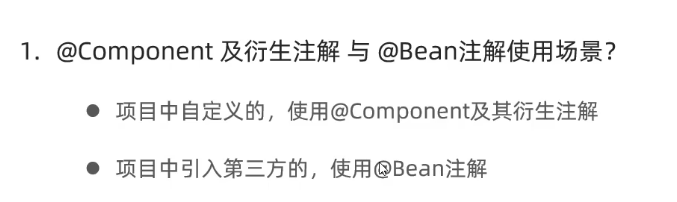
基于注解的bean自动装配(极其重要)
使用注解创建对象
- 引入依赖
- 开启组件扫描
<context:component-scan base-package="com.itchen.spring6"></context:component-scan>
- 被扫描的类用
@component修饰;自动注入的属性用@Autowired修饰;使用注解定义bean
| 注解 | 说明 |
|---|---|
| @Component | 该注解用于描述 Spring 中的 Bean,它是一个泛化的概念,仅仅表示容器中的一个组件(Bean),并且可以作用在应用的任何层次,例如 Service 层、Dao 层等。 使用时只需将该注解标注在相应类上即可。 |
| @Repository | 该注解用于将数据访问层(Dao 层)的类标识为 Spring 中的 Bean,其功能与 @Component 相同。 |
| @Service | 该注解通常作用在业务层(Service 层),用于将业务层的类标识为 Spring 中的 Bean,其功能与 @Component 相同。 |
| @Controller | 该注解通常作用在控制层(如SpringMVC 的 Controller),用于将控制层的类标识为 Spring 中的 Bean,其功能与 @Component 相同。 |
手动实现IoC
主要使用java的反射机制和注解进行实现
实现过程
- 创建子模块
- 创建测试类
- 创建两个注解
- 约定注解@Bean @Di
- 创建bean容器的接口ApplicationContext,定义方法,返回对象
- 实现bean的容器接口
- 返回对象
- 根据包的规则加载bean(设置包的扫描规则)
手动实现一个IoC反射
loadBean步骤:
// 1. 判断当前是否是文件夹
// 2. 获取文件夹里面的所有内容
// 3. 文件夹里面为空,直接返回
// 4. 如果文件夹里面不为空
// 遍历得到的每个file对象 重复3. 4.// 5. 如果是文件,得到包路径 + 类名称
// 6. 判断文件是否是.class类型,如果是,则去掉后缀
// 7. 如果有@Bean注解使用反射实例化
// 将实例化结果放入map集合中
package com.itchen.bean;import com.itchen.annotation.Bean;import java.io.File;
import java.io.IOException;
import java.net.URL;
import java.net.URLDecoder;
import java.util.Enumeration;
import java.util.HashMap;
import java.util.Map;public class AnnotationApplicationContext implements ApplicationContext{// 创建map集合用于创建bean的实例对象private static Map<Class,Object> beanFactory = new HashMap<>();private static String rootPath;// 返回对象@Overridepublic Object getBean(Class clazz) {return beanFactory.get(clazz);}// 设置包的扫描规则// 创建有参构造,传递包路径public static void pathDemo1(String basePackage){// 把点替换为反斜杠String packagePath = basePackage.replaceAll("\\.", "\\\\");// 获取包的绝对路径try {Enumeration<URL> dirs = Thread.currentThread().getContextClassLoader().getResources(packagePath);while(dirs.hasMoreElements()){URL url = dirs.nextElement();String filePath = URLDecoder.decode(url.getFile(), "utf-8");rootPath = filePath.substring(0, filePath.length() - packagePath.length());System.out.println(filePath);loadBean(new File(filePath));}} catch (IOException e) {throw new RuntimeException(e);} catch (ClassNotFoundException e) {throw new RuntimeException(e);}}// 包扫描过程,实例化beanprivate static void loadBean(File fileParent) throws ClassNotFoundException {// 1. 判断当前是否是文件夹if (fileParent.isDirectory()) {// 2. 获取文件夹里面的所有内容File[] childrenFiles = fileParent.listFiles();// 3. 文件夹里面为空,直接返回if (childrenFiles == null || childrenFiles.length == 0) {return;}// 4. 如果文件夹里面不为空// 遍历得到的每个file对象  重复3. 4.for (File child : childrenFiles) {if (child.isDirectory()) {loadBean(child);} else {// 5. 如果是文件,得到包路径 + 类名称String pathWithClass = child.getAbsolutePath().substring(rootPath.length() - 1);// 6. 判断文件是否是.class类型,如果是,则去掉后缀String fullName = pathWithClass.replaceAll("\\\\", ".").replace(".class", "");try {Class<?> aClass = Class.forName(fullName);// 7. 如果有@Bean注解使用反射实例化if (!aClass.isInterface()) {Bean annotation = aClass.getAnnotation(Bean.class);if (annotation != null) {Object instance = aClass.newInstance();if (aClass.getInterfaces().length > 0) {System.out.println("正在加载【" + aClass.getInterfaces()[0] + "】,实例对象是:" + instance.getClass().getName());beanFactory.put(aClass.getInterfaces()[0], instance);} else {System.out.println("正在加载【" + aClass.getName() + "】,实例对象是:" + instance.getClass().getName());beanFactory.put(aClass, instance);}}}// 将实例化结果放入map集合中}catch (Exception e){e.printStackTrace();}}}}}
}
手动实现属性注入过程
// 1. 实例化对象在beanFactory的map集合里面
// 遍历map集合// 2. 获取所有的value值,获取每个对象的属性// 3. 遍历对象属性的数组,得到每个属性// 4. 判断是否有@Di注解// 5. 如果有,将对象注入
package com.itchen.bean;import com.itchen.annotation.Bean;
import com.itchen.annotation.Di;
import com.itchen.bean.ApplicationContext;import java.io.File;
import java.lang.reflect.Field;
import java.net.URL;
import java.net.URLDecoder;
import java.util.Enumeration;
import java.util.HashMap;
import java.util.Map;public class AnnotationApplicationContext implements ApplicationContext {//存储bean的容器private HashMap<Class, Object> beanFactory = new HashMap<>();private static String rootPath;@Overridepublic Object getBean(Class clazz) {return beanFactory.get(clazz);}/*** 根据包扫描加载bean* @param basePackage*/public AnnotationApplicationContext(String basePackage) {try {String packageDirName = basePackage.replaceAll("\\.", "\\\\");Enumeration<URL> dirs =Thread.currentThread().getContextClassLoader().getResources(packageDirName);while (dirs.hasMoreElements()) {URL url = dirs.nextElement();String filePath = URLDecoder.decode(url.getFile(),"utf-8");rootPath = filePath.substring(0, filePath.length()-packageDirName.length());loadBean(new File(filePath));}} catch (Exception e) {throw new RuntimeException(e);}// 属性的注入loadDi();}private  void loadBean(File fileParent) {if (fileParent.isDirectory()) {File[] childrenFiles = fileParent.listFiles();if(childrenFiles == null || childrenFiles.length == 0){return;}for (File child : childrenFiles) {if (child.isDirectory()) {//如果是个文件夹就继续调用该方法,使用了递归loadBean(child);} else {//通过文件路径转变成全类名,第一步把绝对路径部分去掉String pathWithClass = child.getAbsolutePath().substring(rootPath.length() - 1);//选中class文件if (pathWithClass.contains(".class")) {//    com.xinzhi.dao.UserDao//去掉.class后缀,并且把 \ 替换成 .String fullName = pathWithClass.replaceAll("\\\\", ".").replace(".class", "");try {Class<?> aClass = Class.forName(fullName);//把非接口的类实例化放在map中if(!aClass.isInterface()){Bean annotation = aClass.getAnnotation(Bean.class);if(annotation != null){Object instance = aClass.newInstance();//判断一下有没有接口if(aClass.getInterfaces().length > 0) {//如果有接口把接口的class当成key,实例对象当成valueSystem.out.println("正在加载【"+ aClass.getInterfaces()[0] +"】,实例对象是:" + instance.getClass().getName());beanFactory.put(aClass.getInterfaces()[0], instance);}else{//如果有接口把自己的class当成key,实例对象当成valueSystem.out.println("正在加载【"+ aClass.getName() +"】,实例对象是:" + instance.getClass().getName());beanFactory.put(aClass, instance);}}}} catch (ClassNotFoundException | IllegalAccessException | InstantiationException e) {e.printStackTrace();}}}}}}// 属性注入private void loadDi() {for(Map.Entry<Class,Object> entry : beanFactory.entrySet()){//就是咱们放在容器的对象Object obj = entry.getValue();Class<?> aClass = obj.getClass();Field[] declaredFields = aClass.getDeclaredFields();for (Field field : declaredFields){Di annotation = field.getAnnotation(Di.class);if( annotation != null ){field.setAccessible(true);try {System.out.println("正在给【"+obj.getClass().getName()+"】属性【" + field.getName() + "】注入值【"+ beanFactory.get(field.getType()).getClass().getName() +"】");field.set(obj,beanFactory.get(field.getType()));} catch (IllegalAccessException e) {e.printStackTrace();}}}}}
}
4. 面向切面编程
核心业务+任务日志 – > 代码冗余
解决:用代理模式将其分离(分离任务日志) ----------------- 解耦
静态代理图解


静态代理术语
代理:将非核心代码分离出来后,封装这些非逻辑代理、对象、方法
目标:被代理套用的非核心代码类、对象、方法
动态代理
原因:因为静态代理不具备代码的灵活性,所以引入了动态代理
动态代理的实现过程
package com.itchen.spring6.aop.example;import java.lang.reflect.InvocationHandler;
import java.lang.reflect.Method;
import java.lang.reflect.Proxy;
import java.util.Arrays;public class ProxyFactory {// 目标对象private Object target;public ProxyFactory(Object obj){target = obj;}// 返回代理对象的方法public Object getProxy(){/*** 参数1. 类加载器* 参数2. 目标对象实现的所有接口* 参数3. 设置代理修改目标函数的方法* */ClassLoader classLoader = target.getClass().getClassLoader();Class<?>[] interfaces = target.getClass().getInterfaces();InvocationHandler invocationHandler = new InvocationHandler(){@Override/*** 参数1. 代理对象* 参数2. 需要重写目标对象中的方法啊* 参数3. 目标方法中的参数* */public Object invoke(Object proxy, Method method, Object[] args) throws Throwable {System.out.println("[动态代理][日志] "+method.getName()+",参数:"+ Arrays.toString(args));Object result = method.invoke(target, args);System.out.println("[动态代理][日志] "+method.getName()+",结果:"+ result);return result;}};return Proxy.newProxyInstance(classLoader,interfaces,invocationHandler);}
}
自行补充计算器的基类和计算器接口类
// 测试类
package com.itchen.spring6.aop.example;public class TestCaculator {public static void main(String[] args) {// 1. 创建代理对象ProxyFactory proxyFactory = new ProxyFactory(new CalculatorImpl());Calculator proxy = (Calculator) proxyFactory.getProxy();proxy.add(1,2);proxy.mul(2,4);}
}
概念
AOP(Aspect Oriented Programming)是一种设计思想,是软件设计领域中的面向切面编程,它是面向对象编程的一种补充和完善,它以通过预编译方式和运行期动态代理方式实现,在不修改源代码的情况下,给程序动态统一添加额外功能的一种技术。利用AOP可以对业务逻辑的各个部分进行隔离,从而使得业务逻辑各部分之间的耦合度降低,提高程序的可重用性,同时提高了开发的效率。
相关术语
- 横切关注点
- 项目中相同的需要被提取的部分
- 通知(增强)
- 需要增加的功能
- 通知方法:横切关注点的实现
- 通知类型:五种
- 切面 > 通知
- 封装通知方法的类(eg. 一个切面类包含:前置通知、返回通知、后置通知等)
- 目标
- 被代理的对象
- 代理
- 向目标对象应用通知后创建代理对象
- 连接点
- 能使用通知的地方
- 切入点
- 实际去增强方法的位置
AOP思想综述
将特定的代码封装到切面类中,将切面类用于一个新的目标方法,最终实现 方法的增强(方法的增强好抽象呀)
基于注解方式配置AOP
通知类型及其使用
package com.itchen.spring6.aop.annoaop;import org.aspectj.lang.JoinPoint;
import org.aspectj.lang.ProceedingJoinPoint;
import org.aspectj.lang.annotation.*;
import org.springframework.stereotype.Component;import java.util.Arrays;@Aspect // 切面类
@Component // 在spring的ioc容器中进行管理
public class LogAspect {// 设置切入点和通知类型@Before(value = "pointCut()")public void beforeMethod(JoinPoint joinPoint){String methodName = joinPoint.getSignature().getName();String args = Arrays.toString(joinPoint.getArgs());System.out.println("Logger-->前置通知,方法名:"+methodName+",参数:"+args);}@After("execution(* com.itchen.spring6.aop.annoaop.CalculatorImpl.*(..))")public void afterMethod(JoinPoint joinPoint){String methodName = joinPoint.getSignature().getName();System.out.println("Logger-->后置通知,方法名:"+methodName);}@AfterReturning(value = "execution(* com.itchen.spring6.aop.annoaop.CalculatorImpl.*(..))", returning = "result")public void afterReturningMethod(JoinPoint joinPoint, Object result){String methodName = joinPoint.getSignature().getName();System.out.println("Logger-->返回通知,方法名:"+methodName+",结果:"+result);}@AfterThrowing(value = "execution(* com.itchen.spring6.aop.annoaop.CalculatorImpl.*(..))", throwing = "ex")public void afterThrowingMethod(JoinPoint joinPoint, Throwable ex){String methodName = joinPoint.getSignature().getName();System.out.println("Logger-->异常通知,方法名:"+methodName+",异常:"+ex);}@Around("execution(* com.itchen.spring6.aop.annoaop.CalculatorImpl.*(..))")public Object aroundMethod(ProceedingJoinPoint joinPoint){String methodName = joinPoint.getSignature().getName();String args = Arrays.toString(joinPoint.getArgs());Object result = null;try {System.out.println("环绕通知-->目标对象方法执行之前");//目标对象(连接点)方法的执行result = joinPoint.proceed();System.out.println("环绕通知-->目标对象方法返回值之后");} catch (Throwable throwable) {throwable.printStackTrace();System.out.println("环绕通知-->目标对象方法出现异常时");} finally {System.out.println("环绕通知-->目标对象方法执行完毕");}return result;}// 重用切入点表达式@Pointcut(value = "execution(* com.itchen.spring6.aop.annoaop.CalculatorImpl.*(..))")public void pointCut(){}
}
bean配置文件
<?xml version="1.0" encoding="UTF-8"?>
<beans xmlns="http://www.springframework.org/schema/beans"xmlns:xsi="http://www.w3.org/2001/XMLSchema-instance"xmlns:context="http://www.springframework.org/schema/context"xmlns:aop="http://www.springframework.org/schema/aop"xsi:schemaLocation="http://www.springframework.org/schema/beanshttp://www.springframework.org/schema/beans/spring-beans.xsdhttp://www.springframework.org/schema/contexthttp://www.springframework.org/schema/context/spring-context.xsdhttp://www.springframework.org/schema/aophttp://www.springframework.org/schema/aop/spring-aop.xsd"><!--开启组件的扫描--><context:component-scan base-package="com.itchen.spring6.aop.annoaop"></context:component-scan><!--开启自动代理--><aop:aspectj-autoproxy />
</beans>
测试文件
package com.itchen.spring6.aop.annoaop;import org.junit.jupiter.api.Test;
import org.springframework.context.ApplicationContext;
import org.springframework.context.support.ClassPathXmlApplicationContext;public class TestAop {@Testpublic void testAdd(){ApplicationContext context = new ClassPathXmlApplicationContext("bean.xml");Calculator calculator = context.getBean(Calculator.class);calculator.add(1,1);}
}
报错信息解决
NoSuchBeanDefinitionException:没有在实现类中加入@Component注解创建bean
重用切入点表达式
通知注解后面的参数重复书写,所以可以用注解将参数定义为一个类似宏的东西
5. 单元测试
Junit依赖自动注入方便测试
整合Junit5 和 Junit4
// 不整合的时候测试
public class TestUser {public static void main(String[] args) {ApplicationContext context = new ClassPathXmlApplicationContext("bean-auto.xml");UserController userController = context.getBean("userController", UserController.class);userController.addUser();}
}
// 整合Junit5
@SpringJUnitConfig(locations = "classpath:bean.xml")
public class SpringTestJunit5 {@Autowiredprivate User user;// 测试方法@Testpublic void testUser(){System.out.println(user);user.run();}
}
// 整合Junit4
@RunWith(SpringJUnit4ClassRunner.class)
@ContextConfiguration("classpath:bean.xml")
public class SpringTestJunit4 {@Autowiredprivate User user;@Testpublic void testUser4(){System.out.println(user);user.run();}
}
6. 事务
JdbcTemplate对象操作Mysql数据库(Spring事务处理前置知识)
准备环境
- 导入依赖
<!--spring jdbc  Spring 持久化层支持jar包-->
<dependency><groupId>org.springframework</groupId><artifactId>spring-jdbc</artifactId><version>6.0.2</version>
</dependency>
<!-- MySQL驱动 -->
<dependency><groupId>mysql</groupId><artifactId>mysql-connector-java</artifactId><version>8.0.30</version>
</dependency>
<!-- 数据源 -->
<dependency><groupId>com.alibaba</groupId><artifactId>druid</artifactId><version>1.2.15</version>
</dependency>
<!--spring对junit的支持相关依赖-->
<dependency><groupId>org.springframework</groupId><artifactId>spring-test</artifactId><version>6.0.2</version>
</dependency><!--junit5测试-->
<dependency><groupId>org.junit.jupiter</groupId><artifactId>junit-jupiter-api</artifactId><version>5.9.0</version>
</dependency>
- 配置jdbc.properties配置文件连接数据库
jdbc.user=root
jdbc.password=root
jdbc.url=jdbc:mysql://localhost:3306/spring?characterEncoding=utf8&useSSL=false
jdbc.driver=com.mysql.cj.jdbc.Driver
- 配置bean.xml配置JdbcTemplate
<?xml version="1.0" encoding="UTF-8"?>
<beans xmlns="http://www.springframework.org/schema/beans"xmlns:xsi="http://www.w3.org/2001/XMLSchema-instance"xmlns:context="http://www.springframework.org/schema/context"xsi:schemaLocation="http://www.springframework.org/schema/beanshttp://www.springframework.org/schema/beans/spring-beans.xsdhttp://www.springframework.org/schema/contexthttp://www.springframework.org/schema/context/spring-context.xsd"><!-- 导入外部属性文件 --><context:property-placeholder location="classpath:jdbc.properties" /><!-- 配置数据源 --><bean id="druidDataSource" class="com.alibaba.druid.pool.DruidDataSource"><property name="url" value="${jdbc.url}"/><property name="driverClassName" value="${jdbc.driver}"/><property name="username" value="${jdbc.user}"/><property name="password" value="${jdbc.password}"/></bean><!-- 配置 JdbcTemplate --><bean id="jdbcTemplate" class="org.springframework.jdbc.core.JdbcTemplate"><!-- 装配数据源 --><property name="dataSource" ref="druidDataSource"/></bean>
</beans>
利用JdbcTemplate对象完成对数据库的增加、修改、删除操作
测试代码
package com.itchen.spring6.jdbc;import org.junit.jupiter.api.Test;
import org.springframework.beans.factory.annotation.Autowired;
import org.springframework.jdbc.core.JdbcTemplate;
import org.springframework.test.context.junit.jupiter.SpringJUnitConfig;@SpringJUnitConfig(locations = "classpath:beans.xml")
public class JdbcTemplateTest {@Autowiredprivate JdbcTemplate jdbcTemplate;// 添加、修改、删除操作@Testpublic void testUpdate(){// 添加数据String sql = "insert into t_emp values(null,?,?,?)";Object[] params = {"洛萨",32,"男"};
//        添加数据
//        int rows = jdbcTemplate.update(sql,params);
//        System.out.println("影响了" + rows + "行");String sql2 = "update t_emp set name=? where id=?";// 修改id为?行数据的名字字段
//        int row = jdbcTemplate.update(sql2,"666",3);
//        System.out.println("影响了" + row + "行");// 删除id为?的一行String sql3 = "delete from t_emp where id=?";
//        int row3 = jdbcTemplate.update(sql3,3);
//        System.out.println("影响了" + row3 + "行");}
}
利用JdbcTemplate对象完成对数据库的查询操作
package com.itchen.spring6.jdbc;import org.junit.jupiter.api.Test;
import org.springframework.beans.factory.annotation.Autowired;
import org.springframework.jdbc.core.BeanPropertyRowMapper;
import org.springframework.jdbc.core.JdbcTemplate;
import org.springframework.jdbc.core.RowMapper;
import org.springframework.test.context.junit.jupiter.SpringJUnitConfig;import java.util.List;@SpringJUnitConfig(locations = "classpath:beans.xml")
public class jdbcTemplateTest2 {@Autowiredprivate JdbcTemplate jdbcTemplate;/*** queryForObject* */// 查询并获取数据库的第一行数据@Testpublic void testSelectObject1(){String sql = "select * from t_emp where id=?";Emp person = jdbcTemplate.queryForObject(sql, (rs, rowNum) -> {Emp emp = new Emp();emp.setId(rs.getInt("id"));emp.setName(rs.getString("name"));emp.setAge(rs.getInt("age"));emp.setSex(rs.getString("sex"));return emp;}, 1);System.out.println(person);}/*** queryForObject* */@Testpublic void testSelectObject2(){String sql = "select * from t_emp where id=?";// 利用BeanPropertyRowMapper方法自动创建对象接收数据库数据Emp emp = jdbcTemplate.queryForObject(sql, new BeanPropertyRowMapper<>(Emp.class),2);System.out.println(emp);}/*** query* */@Testpublic void testSelectList(){String sql = "select * from t_emp";List<Emp> list = jdbcTemplate.query(sql, new BeanPropertyRowMapper<>(Emp.class));System.out.println(list);}/*** queryForObject* *///查询单行单列的值@Testpublic void selectCount(){String sql = "select count(id) from t_emp";Integer count = jdbcTemplate.queryForObject(sql, Integer.class);System.out.println(count);}
}
报错信息解决
BadSqlGrammarException:没有按照规定的sql语法进行传递参数信息
事务处理
概念
eg.银行转账,要成功都成功;要失败,都失败
特性
原子性:要成功,都成功
一致性:操作前和操作后总量一致
隔离性:多个事务进行操作,对各个事务之间没有影响
持久性:提交就永久保存
声明式事务管理(基于注解实现)
准备环境(基于上面的JDBC示例进行添加,目录结构如下)
BookController
package com.itchen.spring.tx.controller;import com.itchen.spring.tx.service.BookService;
import org.springframework.beans.factory.annotation.Autowired;
import org.springframework.stereotype.Controller;@Controller
public class BookController {@Autowiredprivate BookService bookService;// 买书的方法: 图书的id  、  用户的idpublic void buyBook(Integer bookId,Integer userId){// 调用Service方法bookService.buyBook(bookId,userId);}
}
BookDao
package com.itchen.spring.tx.dao;public interface BookDao {Integer getBookPriceByBookId(Integer bookId);void updateStock(Integer bookId);void updateUserBalance(Integer userId,Integer price);
}
BookDaoImpl
package com.itchen.spring.tx.dao;import org.springframework.beans.factory.annotation.Autowired;
import org.springframework.jdbc.core.JdbcTemplate;
import org.springframework.stereotype.Repository;@Repository
public class BookDaoImpl implements BookDao{@Autowiredprivate JdbcTemplate jdbcTemplate;Integer price;@Overridepublic Integer getBookPriceByBookId(Integer bookId) {String sql = "select price from t_book where book_id=?";price = jdbcTemplate.queryForObject(sql, Integer.class, bookId);return price;}@Overridepublic void updateStock(Integer bookId) {String sql = "update t_book set stock=stock-1 where book_id=?";jdbcTemplate.update(sql,bookId);}@Overridepublic void updateUserBalance(Integer userId,Integer price) {String sql = "update t_user set balance=balance-? where user_id=?";jdbcTemplate.update(sql,price,userId);}
}
BookService
package com.itchen.spring.tx.service;public interface BookService {void buyBook(Integer bookId, Integer userId);
}
BookServiceImpl
package com.itchen.spring.tx.service;import com.itchen.spring.tx.dao.BookDao;
import org.springframework.beans.factory.annotation.Autowired;
import org.springframework.stereotype.Service;@Service
public class BookServiceImpl implements BookService{@Autowiredprivate BookDao bookDao;@Overridepublic void buyBook(Integer bookId, Integer userId) {// 根据图书id查询图书的价格Integer price = bookDao.getBookPriceByBookId(bookId);// 更新图书表中的库存量bookDao.updateStock(bookId);// 更新用户余额bookDao.updateUserBalance(userId,price);}
}
TestBookTx
package com.itchen.spring.tx;import com.itchen.spring.tx.controller.BookController;
import org.junit.jupiter.api.Test;
import org.springframework.beans.factory.annotation.Autowired;
import org.springframework.test.context.junit.jupiter.SpringJUnitConfig;@SpringJUnitConfig(locations = "classpath:beans.xml")
public class TestBookTx {@Autowiredprivate BookController bookController;@Testpublic void testBuyBook(){bookController.buyBook(1,1);}
}
分析
将买书一个方法作为一个大的方法在Controller中调用。然后再Service将这个方法分解成多个数据库操作。最后将数据库的各个操作在dao层进行实现。(揉碎了喂到嘴里)
问题:这里如果用户的余额不足,仍然会执行图书出库操作,但是应为没有事物的回滚,报错的步骤不会执行。
开启事务步骤(使用注解的方式)
- 在bean中添加:开启事务的注解驱动
- 在业务逻辑层(Service层)添加事务注解@Transactional**【这个注解可以加在方法上,也可以加在类上】**
运行结果:在用户余额不足的情况下依然报错,但是不会执行图书出库操作
事务注解的一些属性
| 参数 | 描述 |
|---|---|
| readOnly | 是否只读(表示是否只能进行查询操作) |
| timeout | 设置超时时间(-1,表示永不超时;单位是秒) |
| noRollbackFor | 事务策略(设置哪些异常不回滚) |
| (见文章头连接) | 隔离级别:解决脏读、不可重读、虚读等 |
| (见文章头连接) | 传播行为:事务之间的相互调用,使用哪一个事务进行逻辑处理 |
脏读:两个都未提交,但是都能看见对方的修改
不可重复:一个提交了,另一个修改了没有提交的能看到修改完成之后的数据
虚读:一个提交了,另一个做完了添加没有提交之后能读到自己添加的数据
Resoource资源操作
Resource接口提供了对低级资源访问的抽象方法,接口有多个实现类供给给我们来访问低级资源
UrlResource实现类访问url资源
// 演示urlResource访问网络资源
public class UrlResourceDemo {public static void main(String[] args) {// http前缀loadUrlResource("https://www.baidu.com/");// file前缀 放在项目的根路径loadUrlResource("file:itchen.txt");}// 访问前缀httppublic static void loadUrlResource(String path){// 创建Resource接口的实现类的对象try {// 获取资源UrlResource url = new UrlResource(path);System.out.println(url.getFilename());System.out.println(url.getURI());System.out.println(url.getDescription());System.out.println(url.getInputStream().read());} catch (Exception e) {throw new RuntimeException(e);}// 获取资源信息}
}
ClassPathResourceDemo访问本地资源(项目内资源)
// 访问类路径下的资源
public class ClassPathResourceDemo {public static void main(String[] args) {loadClasspathResource("itchen.txt");}public static void loadClasspathResource(String path){// 创建的对象ClassPathResource resource = new ClassPathResource(path);System.out.println(resource.getFilename());System.out.println(resource.getDescription());// 获取文件内容try {InputStream in = resource.getInputStream();byte[] b = new byte[1024];while(in.read(b) != -1){System.out.println(new String(b));}} catch (IOException e) {throw new RuntimeException(e);}}
}
loadAndReadUrlResource访问磁盘内文件
public class FileSystemResourceDemo {public static void loadAndReadUrlResource(String path) throws Exception{//相对路径FileSystemResource resource = new FileSystemResource("itchen.txt");//绝对路径//FileSystemResource resource = new FileSystemResource("D:\\itchen.txt");// 获取文件名System.out.println("resource.getFileName = " + resource.getFilename());// 获取文件描述System.out.println("resource.getDescription = "+ resource.getDescription());//获取文件内容InputStream in = resource.getInputStream();byte[] b = new byte[1024];while(in.read(b)!=-1) {System.out.println(new String(b));}}public static void main(String[] args) throws Exception {loadAndReadUrlResource("itchen.txt");}
}
其他的实现类见文档头链接
国际化:i18n
调用不同的配置文件示例
@Test
public void test1(){ResourceBundle bundle = ResourceBundle.getBundle("itchen", new Locale("zh", "CN"));String value1 = bundle.getString("test");System.out.println(value1);
}
@Test
public void test2() {ResourceBundle bundle = ResourceBundle.getBundle("itchen", new Locale("en", "GB"));String value1 = bundle.getString("test");System.out.println(value1);
}
数据校验
通过Validator接口实现数据校验
public class TestMethod1 {public static void main(String[] args) {//创建person对象Person person = new Person();person.setName("lucy");person.setAge(-1);// 创建Person对应的DataBinderDataBinder binder = new DataBinder(person);// 设置校验binder.setValidator(new PersonValidator());// 由于Person对象中的属性为空,所以校验不通过binder.validate();//输出结果BindingResult results = binder.getBindingResult();System.out.println(results.getAllErrors());}
}
测试:
public class PersonValidator implements Validator {// 校验类型确认@Overridepublic boolean supports(Class<?> clazz) {return Person.class.equals(clazz);}// 校验逻辑@Overridepublic void validate(Object object, Errors errors) {ValidationUtils.rejectIfEmpty(errors, "name", "name.empty");Person p = (Person) object;if (p.getAge() < 0) {errors.rejectValue("age", "error value < 0");} else if (p.getAge() > 110) {errors.rejectValue("age", "error value too old");}}
}
基于注解校验
基于方法校验
自定义校验
其他的实现类见文档头链接
AOT
AOT先关概念
-
JIT:动态编译,边运行边编译
-
AOT:运行前编译,提前编译

相关文章:
spring6框架解析(by尚硅谷)
文章目录 spring61. 一些基本的概念、优势2. 入门案例实现maven聚合工程创建步骤分析实现过程 3. IoC(Inversion of Control)基于xml的bean环境搭建获取bean获取接口创建实现类依赖注入 setter注入 和 构造器注入原生方式的setter注入原生方式的构造器注…...

Open3D 计算点云的马氏距离
目录 一、概述 1.1原理 1.2应用 二、代码实现 三、实现效果 3.1原始点云 3.2计算后点云 一、概述 1.1原理 马氏距离(Mahalanobis Distance)是一种度量多维数据点与数据分布中心之间距离的方法。与欧几里得距离不同,马氏距离考虑了数据…...
Java事务(Transaction)
Java事务(Transaction)是数据库管理系统执行过程中的一个逻辑单位,由一个有限的数据库操作序列组成,这些操作要么全部执行,要么全部不执行,是一个不可分割的工作单位。事务的引入主要是为了解决并发操作数据…...

算法 —— 二分查找
目录 二分查找 在排序数组中查找元素的第一个和最后一个位置 搜索插入位置 x的平方根 山峰数组的峰顶索引 寻找峰值 搜索旋转排序数组中的最⼩值 点名 二分查找模板分为三种:1、朴素的二分模板 2、查找左边界的二分模板 3、查找右边界的二分模板…...

Mysql explain语句详解与实例展示
首先简单介绍sql: SQL语言共分为四大类:数据查询语言DQL,数据操纵语言DML,数据定义语言DDL,数据控制语言DCL。 1. 数据查询语言DQL 数据查询语言DQL基本结构是由SELECT子句,FROM子句,WHERE子句…...

Python基础问题汇总
为什么学习Python? 易学易用:Python语法简洁清晰,易于学习。广泛的应用领域:适用于Web开发、数据科学、人工智能、自动化脚本等多种场景。强大的库支持:拥有丰富的第三方库,如NumPy、Pandas、TensorFlow等…...

【讲解下iOS语言基础】
🌈个人主页: 程序员不想敲代码啊 🏆CSDN优质创作者,CSDN实力新星,CSDN博客专家 👍点赞⭐评论⭐收藏 🤝希望本文对您有所裨益,如有不足之处,欢迎在评论区提出指正,让我们共…...

【网络安全】实验一(网络拓扑环境的搭建)
一、本次实验的实验目的 学习利用 VMware 创建虚拟环境 学习利用 VMware 搭建各自网络拓扑环境 二、创建虚拟机 三、克隆虚拟机 选择克隆的系统必须处于关机状态。 方法一: 方法二: 需要修改克隆计算机的名字,避免产生冲突。 四、按照要求完…...
Docker-基础
一,Docker简介,功能特性与应用场景 1.1 Docker简介 Docker是一个开源的应用容器引擎,让开发者可以打包他们的应用以及依赖包到一个可移植的容器中,然后发布到任何流行的Linux机器上,也可以实现虚拟化,容器…...
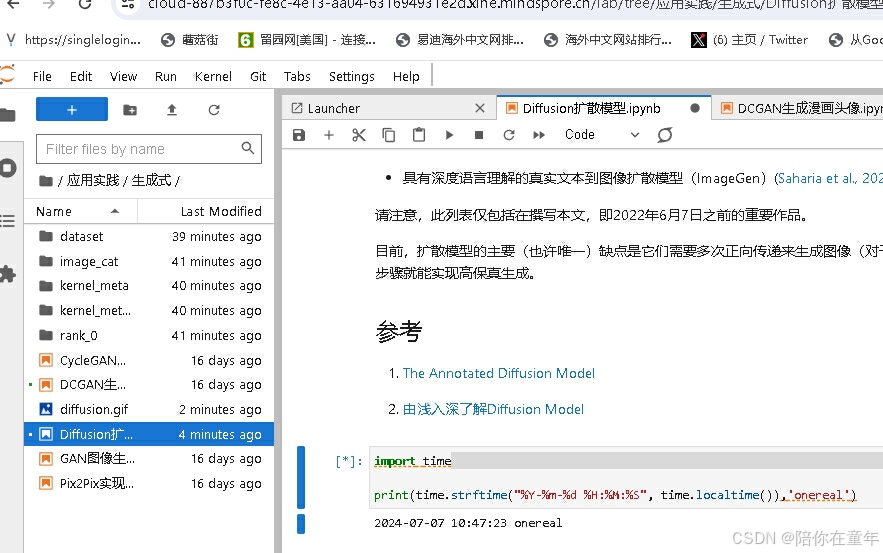
《昇思25天学习打卡营第14天|onereal》
第14天学习内容如下: Diffusion扩散模型 本文基于Hugging Face:The Annotated Diffusion Model一文翻译迁移而来,同时参考了由浅入深了解Diffusion Model一文。 本教程在Jupyter Notebook上成功运行。如您下载本文档为Python文件,…...

LeetCode 744, 49, 207
目录 744. 寻找比目标字母大的最小字母题目链接标签思路代码 49. 字母异位词分组题目链接标签思路代码 207. 课程表题目链接标签思路代码 744. 寻找比目标字母大的最小字母 题目链接 744. 寻找比目标字母大的最小字母 标签 数组 二分查找 思路 本题比 基础二分查找 难的一…...
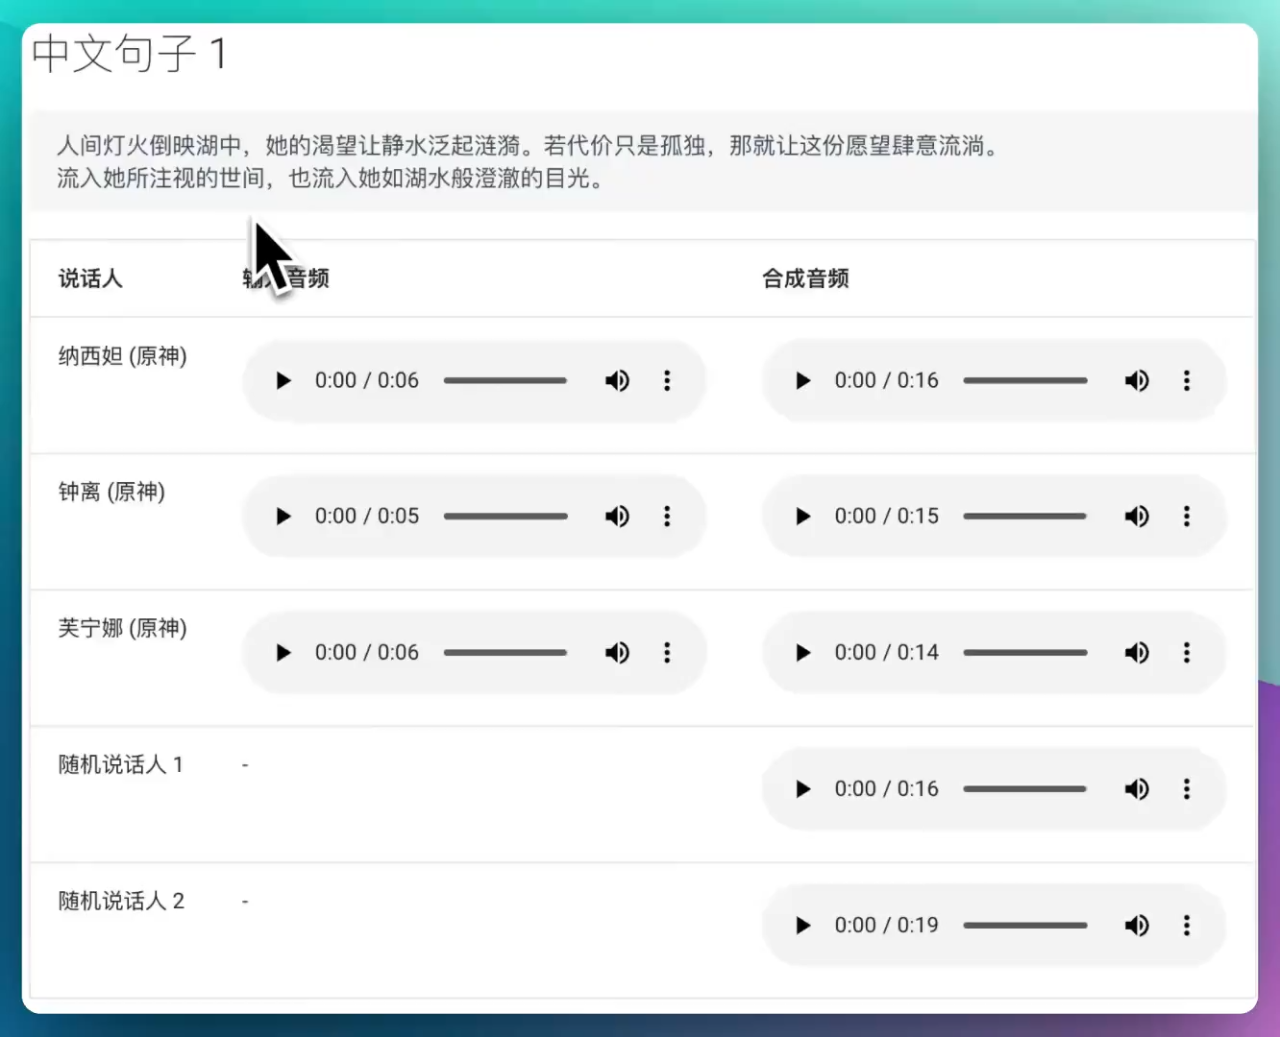
【AI资讯】可以媲美GPT-SoVITS的低显存开源文本转语音模型Fish Speech
Fish Speech是一款由fishaudio开发的全新文本转语音工具,支持中英日三种语言,语音处理接近人类水平,使用Flash-Attn算法处理大规模数据,提供高效、准确、稳定的TTS体验。 Fish Audio...

微服务数据流的协同:Eureka与Spring Cloud Data Flow集成指南
微服务数据流的协同:Eureka与Spring Cloud Data Flow集成指南 在构建基于Spring Cloud的微服务架构时,服务发现和数据流处理是两个关键的组成部分。Eureka作为服务发现工具,而Spring Cloud Data Flow提供了数据流处理的能力。本文将详细介绍…...

java生成json格式文件(包含缩进等格式)
生成json文件的同时保留原json格式,拥有良好的格式(如缩进等),提供友善阅读支持。 pom.xml依赖增加: <dependency><groupId>com.google.code.gson</groupId><artifactId>gson</artifactI…...

Python面试题:如何在 Python 中读取和写入 JSON 文件?
在 Python 中读取和写入 JSON 文件可以使用 json 模块。以下是具体的示例,展示了如何读取和写入 JSON 文件。 读取 JSON 文件 要读取 JSON 文件,可以使用 json.load() 方法。下面是一个示例代码: import json# 假设有一个名为 data.json 的…...

FlutterWeb渲染模式及提速
背景 在使用Flutter Web开发的网站过程中,常常会遇到不同浏览器之间的兼容性问题。例如,在Google浏览器中动画和交互都非常流畅,但在360浏览器中却会出现卡顿现象;在Google浏览器中动态设置图标颜色正常显示,而在Safa…...

群体优化算法----化学反应优化算法介绍,解决蛋白质-配体对接问题示例
介绍 化学反应优化算法(Chemical Reaction Optimization, CRO)是一种新兴的基于自然现象的元启发式算法,受化学反应过程中分子碰撞和反应机制的启发而设计。CRO算法模拟了分子在化学反应过程中通过能量转换和分子间相互作用来寻找稳定结构的…...

Go语言如何入门,有哪些书推荐?
Go 语言之所以如此受欢迎,其编译器功不可没。Go 语言的发展也得益于其编译速度够快。 对开发者来说,更快的编译速度意味着更短的反馈周期。大型的 Go 应用程序总是能在几秒钟之 内完成编译。而当使用 go run编译和执行小型的 Go 应用程序时,其…...
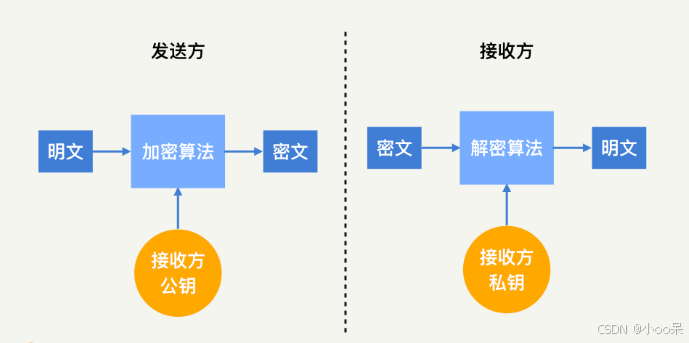
【密码学】密码学体系
密码学体系是信息安全领域的基石,它主要分为两大类:对称密码体制和非对称密码体制。 一、对称密码体制(Symmetric Cryptography) 在对称密码体制中,加密和解密使用相同的密钥。这意味着发送方和接收方都必须事先拥有这…...
Bean的管理
1.主动获取Bean spring项目在需要时,会自动从IOC容器中获取需要的Bean 我们也可以自己主动的得到Bean对象 (1)获取bean对象,首先获取SpringIOC对象 private ApplicationContext applicationContext //IOC容器对象 (2 )方法…...

Spring Cloud AWS 实战教程:构建高可用 SQS 消息队列应用 [特殊字符]
Spring Cloud AWS 实战教程:构建高可用 SQS 消息队列应用 🚀 【免费下载链接】spring-cloud-aws The New Home for Spring Cloud AWS 项目地址: https://gitcode.com/gh_mirrors/sp/spring-cloud-aws Spring Cloud AWS 是一个强大的开源框架&…...

Win10家庭版别再卡了!保姆级教程:手动修复gpedit.msc路径,彻底关闭Antimalware Service
Win10家庭版性能优化实战:精准修复组策略路径与系统服务调优每次游戏激战正酣时突然卡顿,或是视频渲染到关键时刻系统响应迟缓,很多Win10家庭版用户都遭遇过这类困扰。任务管理器里那个名为"Antimalware Service Executable"的进程…...

服务器日志分析实战:用Python追踪HTTP 404错误并可视化异常频率
作为一名爬虫开发者或网站运维人员,服务器日志就像飞机的“黑匣子”——它记录了每个请求的来龙去脉。而404错误(页面未找到)尤其值得关注:它可能是用户输错了网址,可能是你爬虫的URL构造逻辑有漏洞,也可能是网站改版后旧的链接失效了。更严重的是,大量突然涌出的404请求…...

2026智慧校园规划必读:如何在预算吃紧下选到高性价比方案
✅作者简介:合肥自友科技 📌核心产品:智慧校园平台(包括教工管理、学工管理、教务管理、考务管理、后勤管理、德育管理、资产管理、公寓管理、实习管理、就业管理、离校管理、科研平台、档案管理、学生平台等26个子平台) 。公司所有人员均有多…...

翻译 GDB 官方文档
翻译 GDB 官方文档项目地址官方文档地址下载源码包编译html运行翻译程序项目地址 https://github.com/shootercheng/gdb-translate.git 项目结构 $ tree -L 1 . ├── cmd ├── go.mod ├── input ├── internal ├── LICENSE ├── output ├── README.md ├─…...

深度解析网络设备权限管理工具:中兴光猫工厂模式与Telnet服务完整指南
深度解析网络设备权限管理工具:中兴光猫工厂模式与Telnet服务完整指南 【免费下载链接】zteOnu A tool that can open ZTE onu device factory mode 项目地址: https://gitcode.com/gh_mirrors/zt/zteOnu 在当今网络设备管理领域,获取设备完整控制…...

TorchDynamo与TorchInductor:PyTorch编译器生态的完整解析
TorchDynamo与TorchInductor:PyTorch编译器生态的完整解析 【免费下载链接】torchdynamo A Python-level JIT compiler designed to make unmodified PyTorch programs faster. 项目地址: https://gitcode.com/gh_mirrors/to/torchdynamo TorchDynamo 是一个…...

氘可来昔替尼常见副作用为鼻咽炎头痛及腹泻,如何应对
任何口服药物的临床价值,都必须在疗效与安全性的天平上找到精准的平衡点。氘可来昔替尼以PASI 75应答率的全面胜出证明了自己在银屑病治疗中的卓越地位,而其不良反应谱同样经过了严苛的临床验证。鼻咽炎、头痛和腹泻构成了这款药物最需关注的三大安全信号…...

Windows Cleaner:终极免费系统清理工具,彻底解决C盘空间不足问题
Windows Cleaner:终极免费系统清理工具,彻底解决C盘空间不足问题 【免费下载链接】WindowsCleaner Windows Cleaner——专治C盘爆红及各种不服! 项目地址: https://gitcode.com/gh_mirrors/wi/WindowsCleaner 你是否经常遇到C盘爆红、…...

【大模型聚合平台深度评测:阿里云百炼 vs 腾讯云 ADP,企业如何选型?】
大模型聚合平台深度评测:阿里云百炼 vs 腾讯云 ADP,企业如何选型? 随着大模型技术的快速发展,越来越多的企业开始将 AI 能力融入到业务流程中。然而,面对市场上众多的大模型产品,企业往往面临着 “选择困难…...