Spring IOC详解
Spring 笔记
官网:https://spring.io/
核心功能:当你的项目启动的时候,自动的将当前项目的各种 Bean 都自动的注册到 Spring 容器中,然后在项目的其他地方,如果需要用到这些 Bean,直接去 Spring 容器中查找需要的对象即可。
Spring 家族的产品:
- Spring Framework:Spring 框架的基础,我们一般所说的 Spring、SpringMVC 其实都是 Spring Framework。
- Spring Boot:简化 Spring 配置,可以一键创建一个带有各种配置的 Spring 环境。
- Spring Data:简化数据库配置/简化数据库访问。
- Spring Cloud:微服务。
- Spring Security:安全管理框架。
- Spring Session:session 共享。
Spring Framework:
- Ioc
- Aop
- JdbcTemplate
- 事务
Spring 容器注册 Bean
正常情况
-
创建一个 Maven 工程。
-
引入 Spring 依赖:
-
<dependencies><dependency><groupId>org.springframework</groupId><artifactId>spring-context</artifactId><version>5.3.20</version></dependency>
</dependencies>
-
-
加入 Spring 的配置。
-
创建一个 Bean 并注册。
public class User {public void sayHello() {System.out.println("hello zhangsan");}
}
<?xml version="1.0" encoding="UTF-8"?> <beans xmlns="http://www.springframework.org/schema/beans"xmlns:xsi="http://www.w3.org/2001/XMLSchema-instance"xsi:schemaLocation="http://www.springframework.org/schema/beans http://www.springframework.org/schema/beans/spring-beans.xsd"><!--class 指定类的全路径id 指定类的名称Spring 拿到这两个关键信息,就可以自动的创建一个 User 对象出来了--><bean class="com.qfedu.demo.model.User" id="user"/> </beans> -
启动 Spring 容器,并加载配置文件,当 Spring 容器启动之后,无论你是否跟 Spring 容器去要 User 对象,此时 User 对象都是已经创建好的状态,并保存在 Spring 容器中。
public class MainDemo01 {public static void main(String[] args) {//这里只需要写配置文件的文件名即可,系统会自动去 classpath 下查找配置文件//这个就是加载 Spring 容器,只要 Spring 容器启动了,那么配置文件中的所有 Bean 就会完成初始化ClassPathXmlApplicationContext ctx = new ClassPathXmlApplicationContext("applicationContext.xml");//根据名字去查找一个 user 对象,这个方法返回一个 Object,需要进行类型转换User u1 = (User) ctx.getBean("user");u1.sayHello();//去查找 User 类型的对象//这种方式有一个缺陷:Spring 容器中如果存在多个 User 对象,那么这个方法执行就会报错User u2 = ctx.getBean(User.class);u2.sayHello();//告诉 Spring 容器,查找一个名为 user 的 bean,并且类型是 UserUser u3 = ctx.getBean("user", User.class);u3.sayHello();}
}
异常情况
NoSuchBeanDefinitionException:
没有找到需要的 Bean:
- 先检查注册的时候,Bean 的名称是否正确。
- 检查跟 Spring 容器要的时候,Bean 的名称是否正确。
- 检查一下启动 Spring 容器时,Spring 的配置文件名称是否正确。
NoUniqueBeanDefinitionException:
这表示要查找的目标 Bean 有多个,查找异常。这种时候就不要按照类型去查找,而应该按照名字去查找。
Bean 注册的细节
属性注入方式
-
构造器注入
-
默认情况下,如果我们向 Spring 容器注入一个 Bean 的时候,不指定构造方法,那么默认使用的构造方法就是无参构造方法,所以如果你的类里边没有无参构造方法,就会出错。
-
public class Book {private Integer id;private String name;private String author;public Book(Integer id, String name, String author) {this.id = id;this.name = name;this.author = author;} } -
由于这个 Java 类没有无参构造方法,所以在注入 Bean 的时候,如果按照下面的方式注入,就会出错:
-
<bean class="com.qfedu.demo.p2.model.Book" id="book"/> -
在 bean 标签中,如果没有指定构造方法,默认就使用无参构造方法。
-
-
开发者也可以自己指定要使用哪一个构造方法:
-
<!--这里没有指定使用哪个构造方法,默认就使用无参构造方法-->
<bean class="com.qfedu.demo.p2.model.Book" id="book"/>
<!--也可以指定要用哪个构造方法-->
<bean class="com.qfedu.demo.p2.model.Book" id="book2"><constructor-arg name="id" value="1"/><constructor-arg name="name" value="三国演义"/><constructor-arg name="author" value="罗贯中"/>
</bean>
-
-
-
set 方法注入
<!-- 这里没有设置构造方法参数,所以默认使用的就是无参构造方法 --> <bean class="com.qfedu.demo.p2.model.Book" id="book3"><!--这个配置将来会调用到 setId 这个方法--><property name="id" value="2"/><property name="name" value="红楼梦"/><property name="author" value="曹雪芹"/> </bean> -
p 名称空间注入
-
p 名称空间注入,本质上其实就是 set 方法注入。
-
<!--没有指定构造方法,依然是使用默认的构造方法-->
<bean class="com.qfedu.demo.p2.model.Book" id="book4" p:id="3" p:name="水浒传" p:author="施耐庵"></bean>
-
复杂属性的注入
List、数组、对象、Map、Set、Properties 等。
首先定义 User 类:
public class User {private Integer id;private String name;private String address;private Cat cat;private List<String> favorites;private List<Cat> cats;private Book[] books;private Map<String, Object> info;private Properties school;
}
属性注入:
<?xml version="1.0" encoding="UTF-8"?>
<beans xmlns="http://www.springframework.org/schema/beans"xmlns:xsi="http://www.w3.org/2001/XMLSchema-instance"xsi:schemaLocation="http://www.springframework.org/schema/beans http://www.springframework.org/schema/beans/spring-beans.xsd"><bean class="com.qfedu.demo.model.Cat" id="cat"><property name="name" value="小白"/><property name="color" value="白色"/></bean><bean class="com.qfedu.demo.model.User" id="user"><property name="id" value="1"/><property name="name" value="zhangsan"/><property name="address" value="广州"/><!--用 set 方法给 cat 赋值的时候,有两种方式:Cat cat = new Cat();setCat(cat);setCat(new Cat());ref 表示这里的值是引用了一个提前定义好的 cat 对象--><property name="cat" ref="cat"/><property name="favorites"><!--list 标签表示数据类型是一个 List如果 list 中存放的数据是字符串,那么这里就直接使用 value如果 list 中存放的数据库是对象,那么可以使用 ref 去引用外部的 对象,也可以使用 bean 标签现场定义 Bean--><list><value>足球</value><value>篮球</value></list></property><property name="cats"><list><!--引用外部定义的 cat--><ref bean="cat"/><bean class="com.qfedu.demo.model.Cat"><property name="name" value="小黑"/><property name="color" value="黑色"/></bean></list></property><property name="books"><array><bean class="com.qfedu.demo.model.Book"><property name="id" value="1"/><property name="name" value="三国演义"/><property name="author" value="罗贯中"/></bean><bean class="com.qfedu.demo.model.Book"><property name="id" value="2"/><property name="name" value="红楼梦"/><property name="author" value="曹雪芹"/></bean></array></property><property name="info"><!--map 的定义--><map><entry key="gender" value="男"/><entry key="age" value="99"/></map></property><property name="school"><props><prop key="name">广州千锋</prop><prop key="address">广州市白云区</prop></props></property></bean>
</beans>
如果是通过构造方法注入:
<bean class="com.qfedu.demo.model.User" id="user2"><constructor-arg name="books"><!--这个标签中的内容和 set 方法注入时的一模一样--></constructor-arg>
</bean>
注意属性的名字
内省。
对于框架而言,并不是看对象定义的属性叫什么名字,而是根据对象的 get/set 方法来推断属性名称,无论是 MyBatis、Spring、SpringMVC,所有框架,只要用到反射,都是这样的。所以,定义 get/set 方法的时候,不要写错,另一方面,变量的命名要符合规范。
Java 代码配置 Spring
用一个 Java 配置类,去代替 XML 配置即可:
/*** 这个是 Java 配置类,它的作用类似于 applicationContext.xml** @Configuration 表示这是一个配置类*/
@Configuration
public class JavaConfig {/*** @Bean 就表示将当前方法的返回值注册到 Spring 容器中** 默认情况下,方法名称就是 bean 的名字** 如果需要自定义 bean 的名称,那么在注解中配置即可** @return*/@Bean("u")User user() {User user = new User();user.setAddress("广州");user.setName("zhangsan");return user;}}
启动 Spring 容器时,加载这个配置类即可:
public class Demo01 {public static void main(String[] args) {//启动 Spring 容器,加载一个 Java 配置类,构造方法中指定配置类即可AnnotationConfigApplicationContext ctx = new AnnotationConfigApplicationContext(JavaConfig.class);User user = ctx.getBean("u", User.class);System.out.println("user = " + user);}
}
参数自动注入
-
@Configuration:这个注解表示当前类是一个配置类,那么当前类中,所有添加了 @Bean 注解的方法都会被注册到 Spring 容器中,如果有其他方法调用到一个添加了 @Bean 注解的方法,那么不会立马执行对应的方法,而是先去 Spring 容器中查看是否有对应的对象,如果有,则直接从容器中获取即可,如果容器中没有的话,才回去执行对应的方法。
-
@Component 虽然也可以加在配置类上,但是,如果有其他方法调用到一个添加了 @Bean 注解的方法,那么不会先去 Spring 容器中查看是否有对应的对象,而是直接执行对应的方法。所以一般在配置类中不使用 @Component 注解。如果一定要使用 @Component 注解,可以通过依赖注入来代替方法调用,类似下面这样:
/*** 向 Spring 容器注册一个 Author 对象** @return*/
@Bean
Author author() {Author author = new Author();author.setName("鲁迅");author.setAge(55);return author;
}
/*** 向 Spring 容器中注册一个 Book 对象** book 中有一个 author 对象,book 中的 author 和 spring 容器中的 author 是否是同一个对象?* @return*/
@Bean
Book book2(Author author) {Book book = new Book();book.setName("故事新编");book.setAuthor(author);book.setPrice(18.0);return book;
}
在这里,所有的方法都是 Spring 容器调用的,当 Spring 容器调用 book2 这个方法的时候,就会发现这个方法的执行需要一个 Author 类型的参数,那么此时 Spring 容器就会去查找是否有一个 Author,如果有,则直接作为参数传进来,如果 Spring 容器中没有这个对象,那么直接抛出异常。
条件注解
条件注解是多环境配置的核心,思路就是提前准备好环境,所谓的环境,实际上就是 Condition 接口的实现类,然后在注册 Bean 的时候,通过 @Conditional 注解去指定环境,当满足某种条件的时候,bean 才会注入到 Spring 容器中。
两个非常经典的使用场景:
- 项目中的多环境配置。
- SpringBoot 中的自动化配置。
多环境切换
提前准备好生产环境、开发环境等的配置信息,将来通过 Profile 可以一键切换。
通过 Java 代码实现
主要是使用 @Profile 注解,这个注解的本质就是 @Conditional 条件注解,用到的条件实际上就是 ProfileCondition。
@Target({ElementType.TYPE, ElementType.METHOD})
@Retention(RetentionPolicy.RUNTIME)
@Documented
@Conditional(ProfileCondition.class)
public @interface Profile {/*** The set of profiles for which the annotated component should be registered.*/String[] value();}
条件注解:
class ProfileCondition implements Condition {@Overridepublic boolean matches(ConditionContext context, AnnotatedTypeMetadata metadata) {//获取 Profile 注解的所有属性,其实这个注解只有一个 value 属性,属性的值是一个数组MultiValueMap<String, Object> attrs = metadata.getAllAnnotationAttributes(Profile.class.getName());if (attrs != null) {//将属性中的 value 读取出来,这个 value 的值实际上是一个 String 数组,遍历 String 数组for (Object value : attrs.get("value")) {//判断当前环境中,有没有 value 中的值if (context.getEnvironment().acceptsProfiles(Profiles.of((String[]) value))) {return true;}}return false;}return true;}}
具体配置:
@Configuration
public class JavaConfig {/*** 开发环境的数据源** 通过 @Profile("dev") 注解可以指定当前的环境是开发环境* @return*/@Profile("dev")@Bean("ds")DataSource devDataSource() {DataSource ds = new DataSource();ds.setUsername("root");ds.setPassword("123");ds.setUrl("jdbc:mysql:///test01");return ds;}/*** 配置生产环境的数据源* @return*/@Profile("prod")@Bean("ds")DataSource prodDataSource() {DataSource ds = new DataSource();ds.setUsername("zhangsan");ds.setPassword("jdfkslajfl890324");ds.setUrl("jdbc:mysql://114.132.43.22/prod01");return ds;}
}
注册 Bean 的时候,通过 @Profile(“prod”) 注解来指定当前 Bean 在哪个环境下生效。
当启动 Spring 容器的时候,要为 Spring 容器指定当前的环境信息:
public class Demo01 {public static void main(String[] args) {//注意先不要写配置类,要先设置环境信息AnnotationConfigApplicationContext ctx = new AnnotationConfigApplicationContext();//设置当前的环境信息ctx.getEnvironment().addActiveProfile("prod");ctx.register(JavaConfig.class);ctx.refresh();DataSource ds = ctx.getBean(DataSource.class);System.out.println("ds = " + ds);}
}
通过 XML 配置实现
首先在 xml 文件中,通过 beans 标签来指定环境:
<?xml version="1.0" encoding="UTF-8"?>
<beans xmlns="http://www.springframework.org/schema/beans"xmlns:xsi="http://www.w3.org/2001/XMLSchema-instance"xsi:schemaLocation="http://www.springframework.org/schema/beans http://www.springframework.org/schema/beans/spring-beans.xsd"><beans profile="dev"><!--将来写在这个标签中的 Bean,都是在 dev 环境下才会生效的 Bean--><bean class="com.qfedu.demo.p1.model.DataSource" id="dataSource"><property name="username" value="root"/><property name="password" value="123"/><property name="url" value="jdbc:mysql:///test01"/></bean></beans><beans profile="prod"><!--将来写在这个标签中的 Bean,都是在 prod 环境下才会生效的 Bean--><bean class="com.qfedu.demo.p1.model.DataSource" id="dataSource"><property name="username" value="root"/><property name="password" value="jkld3u$%^"/><property name="url" value="jdbc:mysql://11.22.11.22/test01"/></bean></beans>
</beans>
将来 Spring 容器启动的时候,会根据当前的环境信息去注册不同的 beans 标签中的 Bean。
启动容器的时候,设置一下当前环境即可:
public class Demo02 {public static void main(String[] args) {//先不要加载配置文件ClassPathXmlApplicationContext ctx = new ClassPathXmlApplicationContext();ctx.getEnvironment().addActiveProfile("dev");//设置好当前环境之后,再去设置配置文件的位置ctx.setConfigLocation("applicationContext.xml");ctx.refresh();DataSource ds = ctx.getBean(DataSource.class);System.out.println("ds = " + ds);}
}
配置文件的注入
主要是指 properties 配置文件的注入。
Java 代码配置
主要就是两个配置:
- @PropertySource:项目启动的时候,将配置文件中的内容注册到 Spring 容器中。
- @Value:从 Spring 容器要一个字符串回来。
@Configuration
@PropertySource("classpath:db.properties")
public class DsConfig {//跟 Spring 容器要一个字符串回来@Value("${db.username}")String username;@Value("${db.password}")String password;@Value("${db.url}")String url;@BeanDataSource dataSource() {DataSource ds = new DataSource();ds.setPassword(password);ds.setUsername(username);ds.setUrl(url);return ds;}
}
要能够从 Spring 容器中要到字符串,或者对象,有一个前提,当前 Bean 必须处于 Spring 容器中,不可以自己手动 new 一个 Bean。
XML 配置
<?xml version="1.0" encoding="UTF-8"?>
<beans xmlns="http://www.springframework.org/schema/beans"xmlns:xsi="http://www.w3.org/2001/XMLSchema-instance"xmlns:context="http://www.springframework.org/schema/context"xsi:schemaLocation="http://www.springframework.org/schema/beans http://www.springframework.org/schema/beans/spring-beans.xsd http://www.springframework.org/schema/context https://www.springframework.org/schema/context/spring-context.xsd"><!--这个配置的作用类似于 @PropertySource,就是将配置文件注册到 Spring 容器中--><context:property-placeholder location="classpath:db.properties"/><!--${db.url} 表示引用 Spring 容器中,key 为 db.url 的变量--><bean class="com.qfedu.demo.p1.model.DataSource" id="dataSource"><property name="url" value="${db.url}"/><property name="password" value="${db.password}"/><property name="username" value="${db.username}"/></bean>
</beans>
包扫描
前面的 Bean 的注册方式,都是一个一个 Bean 去注册的。
Java 配置包扫描
官方推荐写法
整体上来说,三个方面:
-
将 Bean 注册到 Spring 容器中:@Repository、@Service、@Controller 以及 @Component。
/*** 将 UserDao 注册到 Spring 容器中,将来谁需要使用 UserDao,就直接跟 Spring 容器去查找即可*** @Repository:一般是加在 Dao 层* @Service:一般是加在 Service 层* @Controller:一般是加在控制层,也就是 servlet* @Component:身份不明的 Bean 注册到 Spring 容器中时,使用这个注解** 技术上来说,这四个注解并没有差异,即实际上除了 @Controller 之外,其他几个注解是可以混用的。** 实际开发中,不要混用**/ @Repository public class UserDao {public User getUserByUsername(String username) {User user = new User();user.setUsername(username);user.setAddress("广州");return user;} } -
从 Spring 容器中要一个 Bean 回来,官方推荐的方式,是通过构造器来注入。
/*** UserService 想要使用 UserDao* 1. UserService 自己需要在 Spring 容器* 2. 跟 Spring 容器去要一个 UserDao*/
@Service
public class UserService {UserDao userDao;/*** 官方推荐使用构造器注入。因为 UserService 要注册到 Spring 容器,要生成一个对象,必然就要调用它的构造方法,现在它只有这一个构造法方法,那么 Spring 容器只能通过这个构造方法来获取一个 UserService 的实例,那么 Spring 容器会自动去查找容器中是否有一个 UserDao 的实例,如果有,就作为这个方法的参数传入进来* @param userDao*/public UserService(UserDao userDao) {this.userDao = userDao;}public User getUserById(String username) {return userDao.getUserByUsername(username);}}
这里又涉及到一个问题:如果有多个构造器怎么办?
@Autowired注解可解决。@Service public class UserService {UserDao userDao;/*** 官方推荐使用构造器注入。因为 UserService 要注册到 Spring 容器,要生成一个对象,必然就要调用它的构造方法,现在它只有这一个构造法方法,那么 Spring 容器只能通过这个构造方法来获取一个 UserService 的实例,那么 Spring 容器会自动去查找容器中是否有一个 UserDao 的实例,如果有,就作为这个方法的参数传入进来* * 如果有多个构造方法,那么可以通过 @Autowired 注解来告诉 Spring 容器,应该调用哪一个构造方法去初始化当前对象* @param userDao*/@Autowiredpublic UserService(UserDao userDao) {this.userDao = userDao;}public User getUserById(String username) {return userDao.getUserByUsername(username);}} -
配置包扫描。
@ComponentScan(basePackages = "com.qfedu.demo")
@Configuration
public class JavaConfig {
}
通过
@ComponentScan注解指定组件的路径即可。
日常使用较多的写法
和前面的步骤相比,主要是第二步不一样,其他都是一样的。
@Controller
public class UserServlet {/*** @Autowired 表示根据类型去 Spring 容器中查找到相应的 Bean,并赋值给 userService 变量*/@AutowiredUserService userService;public User getUserById(String username) {return userService.getUserById(username);}
}
直接在属性上添加 @Autowired 注解就可以完成属性的注入了。
这种写法是我们在实际开发中使用较多的一种方式。
构造方法注入:
- 官方考虑的是,这个类将来使用的时候,不一定就是跟 Spring 容器去要的,可能就是用户自己 new 出来的,例如用户如果直接 new 一个 UserServlet,那么此时 userService 变量就为 null,并且用户没有办法给 userService 赋值,导致 userService 为 null。但是如果用户是 new 一个 UserService 实例的话,那么就必须传递一个 UserDao 的实例。核心思想就是:这个 Bean 既可以跟 Spring 去要,也可以直接 new。
- 大部分情况下,一个类的属性都特别多,导致类的构造方法特别长,所以这种方式在实际项目中用的少。
注解注入:
- 简单便捷。
- 如果用户使用不规范,自己 new 了一个该对象,可能会导致对象中的很多属性没有赋值,为 null。
XML 配置包扫描
XML 配置包扫描跟 Java 配置包扫描,区别在于第三步。即包扫描用 XML 文件来配置:
<?xml version="1.0" encoding="UTF-8"?>
<beans xmlns="http://www.springframework.org/schema/beans"xmlns:xsi="http://www.w3.org/2001/XMLSchema-instance"xmlns:context="http://www.springframework.org/schema/context"xsi:schemaLocation="http://www.springframework.org/schema/beans http://www.springframework.org/schema/beans/spring-beans.xsd http://www.springframework.org/schema/context https://www.springframework.org/schema/context/spring-context.xsd"><context:component-scan base-package="com.qfedu.demo"/>
</beans>
工厂 Bean
这个主要是解决一些第三方的 Bean,一些无法通过构造方法正常初始化、或者无法通过 set 方法正常为属性的赋值的 Bean,可以通过工厂 Bean 的方式将之注册到 Spring 容器中。
静态工厂
工厂方法是一个静态方法。
public class OkHttpClientFactory {private static OkHttpClient okHttpClient;public static OkHttpClient getInstance() {if (okHttpClient == null) {okHttpClient = new OkHttpClient.Builder()//设置服务端的读取超时时间.readTimeout(5000, TimeUnit.SECONDS)//连接超时.connectTimeout(5000, TimeUnit.SECONDS).build();}return okHttpClient;}
}
在 XML 文件中,直接配置工厂 Bean 即可:
<?xml version="1.0" encoding="UTF-8"?>
<beans xmlns="http://www.springframework.org/schema/beans"xmlns:xsi="http://www.w3.org/2001/XMLSchema-instance"xsi:schemaLocation="http://www.springframework.org/schema/beans http://www.springframework.org/schema/beans/spring-beans.xsd"><!--这个 Bean,将来会自动调用 getInstance 方法,并将该方法的返回值注入到 Spring 容器中--><bean class="com.qfedu.demo.OkHttpClientFactory" factory-method="getInstance" id="client01"/>
</beans>
需要注意的是,这里将来注册到 Spring 容器中的 Bean,不是 class 对应的类的对象,而是 getInstance 方法返回的对象。
实例工厂
工厂方法变为实例方法,执行的时候,必须要现有工厂对象,然后才能调用对应的方法。
public class OkHttpClientFactory2 {private OkHttpClient okHttpClient;public OkHttpClient getInstance() {if (okHttpClient == null) {okHttpClient = new OkHttpClient.Builder()//设置服务端的读取超时时间.readTimeout(5000, TimeUnit.SECONDS)//连接超时.connectTimeout(5000, TimeUnit.SECONDS).build();}return okHttpClient;}
}
Bean 的注册:
<!--
对于实例工厂方法,必须得先有一个工厂的实例,将来要通过这个实例才能调用工厂方法
-->
<bean class="com.qfedu.demo.OkHttpClientFactory2" id="clientFactory2"/>
<!--此时配置工厂的时候,既需要指定工厂的 Bean,也需要指定工厂方法-->
<bean class="okhttp3.OkHttpClient" factory-bean="clientFactory2" factory-method="getInstance" id="client02"/>
FactoryBean
这是 Spring 官方推荐的工厂 Bean 的实现方式。
public class OkHttpClientFactoryBean implements FactoryBean<OkHttpClient> {/*** 返回真正的对象* @return* @throws Exception*/@Overridepublic OkHttpClient getObject() throws Exception {return new OkHttpClient.Builder()//设置服务端的读取超时时间.readTimeout(5000, TimeUnit.SECONDS)//连接超时.connectTimeout(5000, TimeUnit.SECONDS).build();}/*** 返回对象的类型* @return*/@Overridepublic Class<?> getObjectType() {return OkHttpClient.class;}/*** 这个对象是否是单例的* @return*/@Overridepublic boolean isSingleton() {return true;}
}
然后在 XML 文件中注册即可:
<bean class="com.qfedu.demo.OkHttpClientFactoryBean" id="client03"/>
Bean 的作用域
默认情况下,注册到 Spring 容器中的 Bean 是单例的:
<?xml version="1.0" encoding="UTF-8"?>
<beans xmlns="http://www.springframework.org/schema/beans"xmlns:xsi="http://www.w3.org/2001/XMLSchema-instance"xsi:schemaLocation="http://www.springframework.org/schema/beans http://www.springframework.org/schema/beans/spring-beans.xsd"><bean class="com.qfedu.demo.User" id="user"/>
</beans>
如果不希望这个 Bean 是单例的,那么可以通过如下方式进行修改:
<?xml version="1.0" encoding="UTF-8"?>
<beans xmlns="http://www.springframework.org/schema/beans"xmlns:xsi="http://www.w3.org/2001/XMLSchema-instance"xsi:schemaLocation="http://www.springframework.org/schema/beans http://www.springframework.org/schema/beans/spring-beans.xsd"><bean class="com.qfedu.demo.User" id="user" scope="prototype"/>
</beans>
scope 有五种取值:
- singleton:表示这个 bean 是单例的,从 Spring 容器中多次获取,拿到的是同一个 Bean。
- prototype:每一次去 Spring 容器中,都可以获取到一个全新的 Bean。
- request:在同一个请求中,如果多次获取同一个 Bean,获取到的是同一个(web 环境下生效)
- session:在同一个 session 中,如果多次获取同一个 Bean,获取到的是同一个(web 环境下生效)
- application:在同一个 web 应用中,如果多次获取同一个 Bean,获取到的是同一个(web 环境下生效)(web 环境下生效)
也可以通过 Java 代码配置 scope,通过 @Scope 注解,可以指定一个 Bean 的作用域:
@Configuration
public class JavaConfig {@Bean@Scope("prototype")User user() {return new User();}
}
Bean 的初始化和销毁
主要是两个方法:
public class User {private String username;private String address;public User() {System.out.println("构造方法。。。");}/*** 假设这个方法用来初始化当前 Bean*/public void init() {System.out.println("初始化方法。。。");}/*** 当当前 Bean 销毁的时候,可以在当前方法中做一些资源回收操作*/public void destroy() {System.out.println("销毁方法。。。");}
}
如果在 Spring 容器完成注册之后,还想要做一些配置,那么可以在 init 方法中完成,当 Spring 容器销毁的时候,可以在 destroy 方法中完成一些资源回收操作。
<bean class="com.qfedu.demo.User" init-method="init" destroy-method="destroy" id="user"/>
IoC 小结
控制反转,指的是对象的控制权反转。本来,UserService 需要一个 UserDao,那么直接在 UserSerivce 中 new 一个 UserDao,那么此时 UserDao 的对象的控制权就在 UserService 中;有了 Spring 之后,系统启动的时候,UserDao 会将自己的各种信息告诉 Spring 容器,Spring 利用这些信息,就可以结合反射创建一个 UserDao 对象,此时 UserDao 对象处于 Spring 容器中,这个对象的控制权在 Spring 容器中,对象的控制权从 UserService 中转移到了 Spring 容器中,就是控制(权)反正。利用 IoC 可以实现对象之间的解耦。
相关文章:

Spring IOC详解
Spring 笔记 官网:https://spring.io/ 核心功能:当你的项目启动的时候,自动的将当前项目的各种 Bean 都自动的注册到 Spring 容器中,然后在项目的其他地方,如果需要用到这些 Bean,直接去 Spring 容器中查…...
Unity——DOTween插件使用方法简介
缓动动画既是一种编程技术,也是一种动画的设计思路。从设计角度来看,可以有以下描述 事先设计很多基本的动画样式,如移动、缩放、旋转、变色和弹跳等。但这些动画都以抽象方式表示,一般封装为程序函数动画的参数可以在使用时指定&…...

数据库——Redis 单线程模型详解
文章目录 Redis 基于 Reactor 模式来设计开发了自己的一套高效的事件处理模型 (Netty 的线程模型也基于 Reactor 模式,Reactor 模式不愧是高性能 IO 的基石),这套事件处理模型对应的是 Redis 中的文件事件处理器(file …...

leetcode 567. 字符串的排列(滑动窗口-java)
滑动窗口 字符串的排列滑动窗口代码演示进阶优化版 上期经典 字符串的排列 难度 -中等 leetcode567. 字符串的排列 给你两个字符串 s1 和 s2 ,写一个函数来判断 s2 是否包含 s1 的排列。如果是,返回 true ;否则,返回 false 。 换句…...

Git —— 分支重命名操作
在开发中,对某个分支进行重命名的操作: 1、本地分支重命名 本地分支是指:你当前这个分支还没有推送到远程的情况,这种情况修改分支名称就要方便很多 git branch -m 原始名称 新名称 //示例: 修改 test 为 newTest g…...

JavaIO流
JavaIO流 一、概念二、File类三、File类的使用1、File文件/文件夹类的创建2、File类的获取操作3、File类判断操作 - boolean4、File类对文件/文件夹的增删改5、File类的获取子文件夹以及子文件的方法 四、Java中IO流多种维度的维度1、按照流向 - Java程序2、按照流的大小分类3、…...

FlinkSql 如何实现数据去重?
摘要 很多时候flink消费上游kafka的数据是有重复的,因此有时候我们想数据在落盘之前进行去重,这在实际开发中具有广泛的应用场景,此处不说详细代码,只粘贴相应的flinksql 代码 --********************************************…...
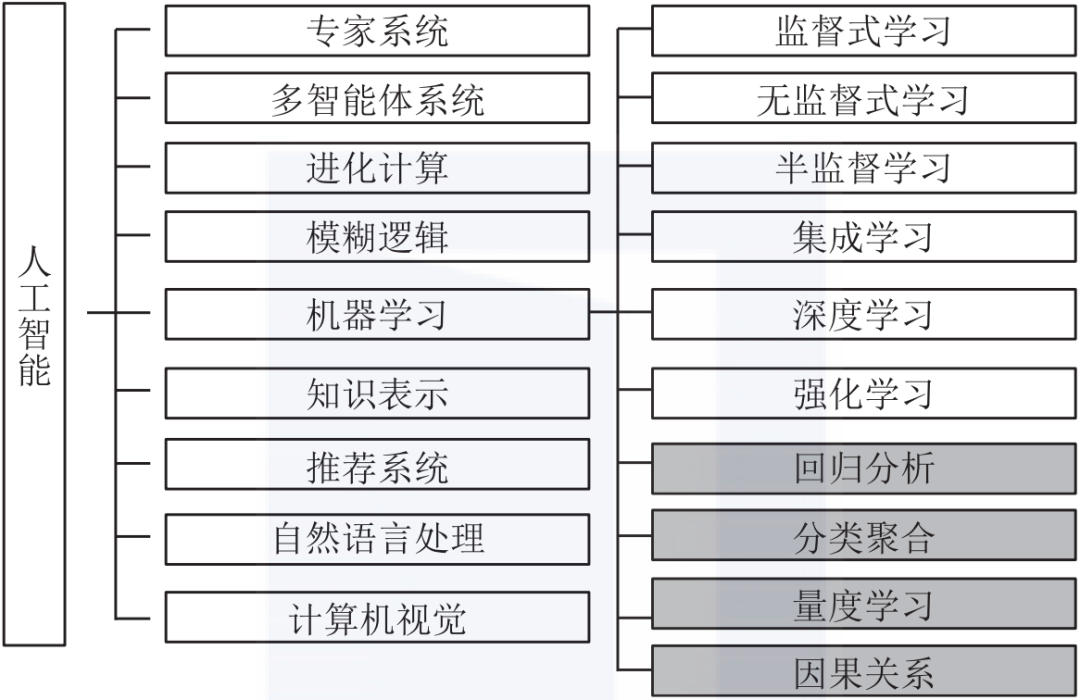
机器学习概念
目录 一、人工智能、机器学习、深度学习的关系 二、什么是深度学习? 2.1 深度学习常用算法 一、人工智能、机器学习、深度学习的关系 人工智能、机器学习和深度学习的关系如下所示。 二、什么是深度学习? 深度学习( DL, Deep Learning) 是机器学习 …...

【数据结构】排序(插入、选择、交换、归并) -- 详解
一、排序的概念及其运用 1、排序的概念 排序:所谓排序,就是使一串记录,按照其中的某个或某些关键字的大小,递增或递减的排列起来的操作。 稳定性:假定在待排序的记录序列中,存在多个具有相同的关键字的记…...
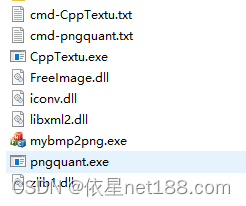
游戏中的图片打包流程,免费的png打包plist工具,一款把若干资源图片拼接为一张大图的免费工具
手机游戏开发中,为了提高图片渲染性能,经常需要将小图片合并成一张大图进行渲染。如果手工来做的话就非常耗时。TexturePacker就是一款非常不错方便的处理工具。TexturePacker虽然非常优秀,但不是免费的。 对于打包流程,做游戏的…...

Springboot实现ENC加密
Springboot实现ENC加密 1、导入依赖2、配置加密秘钥(盐)3、获取并配置密文4、重启项目测试5、自定义前缀、后缀6、自定义加密方式 1、导入依赖 关于版本,需要根据spring-boot版本,自行修改 <dependency><groupId>co…...

nginx 托管vue项目配置
server {listen 80;server_name your_domain.com;location / {root /path/to/your/vue/project;index index.html;try_files $uri $uri/ /index.html;} }奇怪的现象,在vue路由中/会跳转到/abc/def,但如果直接输入/abc/def会显示404,添加 try_files $uri…...

Vue3中如何进行封装?—组件之间的传值
用了很久一段时间Vue3Ts了,工作中对一些常用的组件也进行了一些封装,这里对封装的一些方法进行一些简单的总结。 1.props传递 首先在主组件进行定义传值 <template><div>这里是主组件<common :first"first"></common&…...
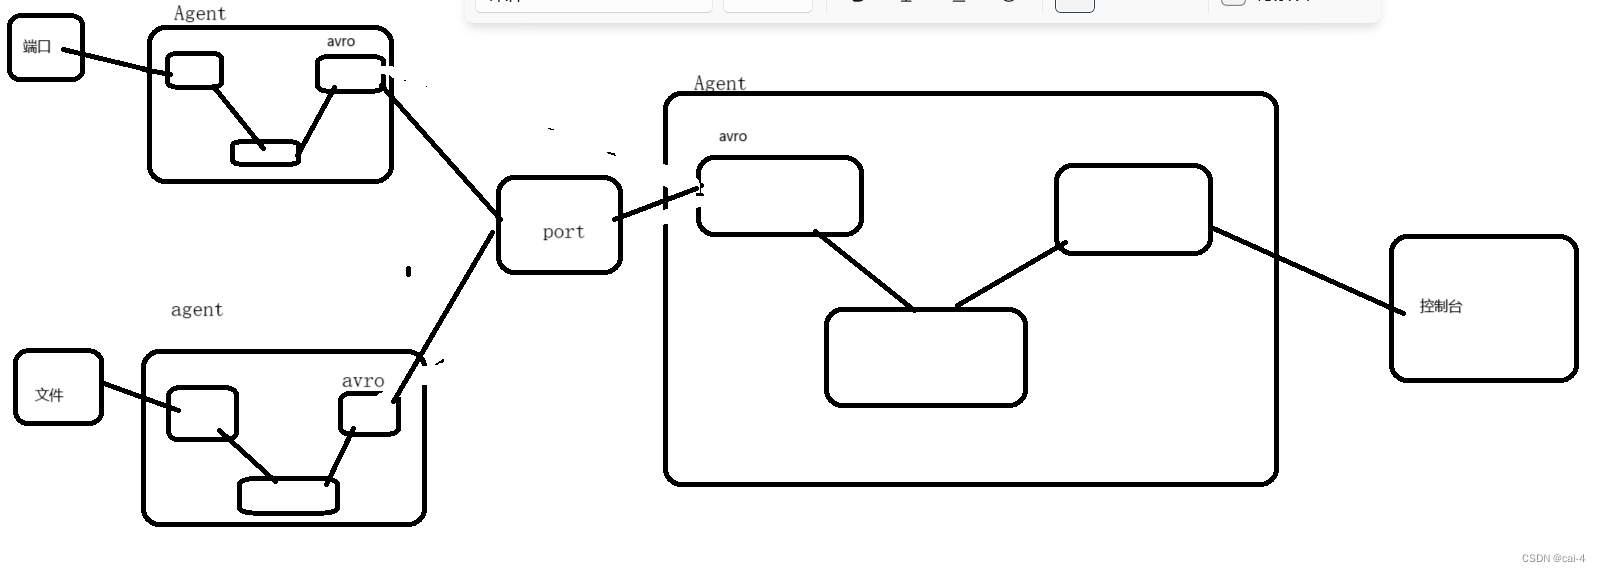
实训笔记8.25
实训笔记8.25 8.25笔记一、Flume数据采集技术1.1 Flume实现数据采集主要借助Flume的组成架构1.2 Flume采集数据的时候,核心是编写Flume的采集脚本xxx.conf1.2.1 脚本文件主要由五部分组成 二、Flume案例实操2.1 采集一个网络端口的数据到控制台2.1.1 分析案例的组件…...

vue自定义监听元素宽高指令
在 main.js 中添加 // 自定义监听元素高度变化指令 const resizerMap new WeakMap() const resizeObserver new ResizeObserver((entries) > {for (const entry of entries) {const handle resizerMap.get(entry.target)if (handle) {handle({width: entry.borderBoxSiz…...

网络爬虫到底是个啥?
网络爬虫到底是个啥? 当涉及到网络爬虫技术时,需要考虑多个方面,从网页获取到最终的数据处理和分析,每个阶段都有不同的算法和策略。以下是这些方面的详细解释: 网页获取(Web Crawling)&#x…...

前端行级元素和块级元素的基本区别
块级元素和行内元素的基本区别是, 行内元素可以与其他行内元素并排;块级元素独占一行,不能与其他任何元素并列; 下面看一下; <!DOCTYPE html> <html> <head> <meta charset"utf-8"&…...

CentOS 7用二进制安装MySQL5.7
[rootlocalhost ~]# [rootlocalhost ~]# ll 总用量 662116 -rw-------. 1 root root 1401 8月 29 19:29 anaconda-ks.cfg -rw-r--r--. 1 root root 678001736 8月 29 19:44 mysql-5.7.40-linux-glibc2.12-x86_64.tar.gz [rootlocalhost ~]# tar xf mysql-5.7.40-linux-…...
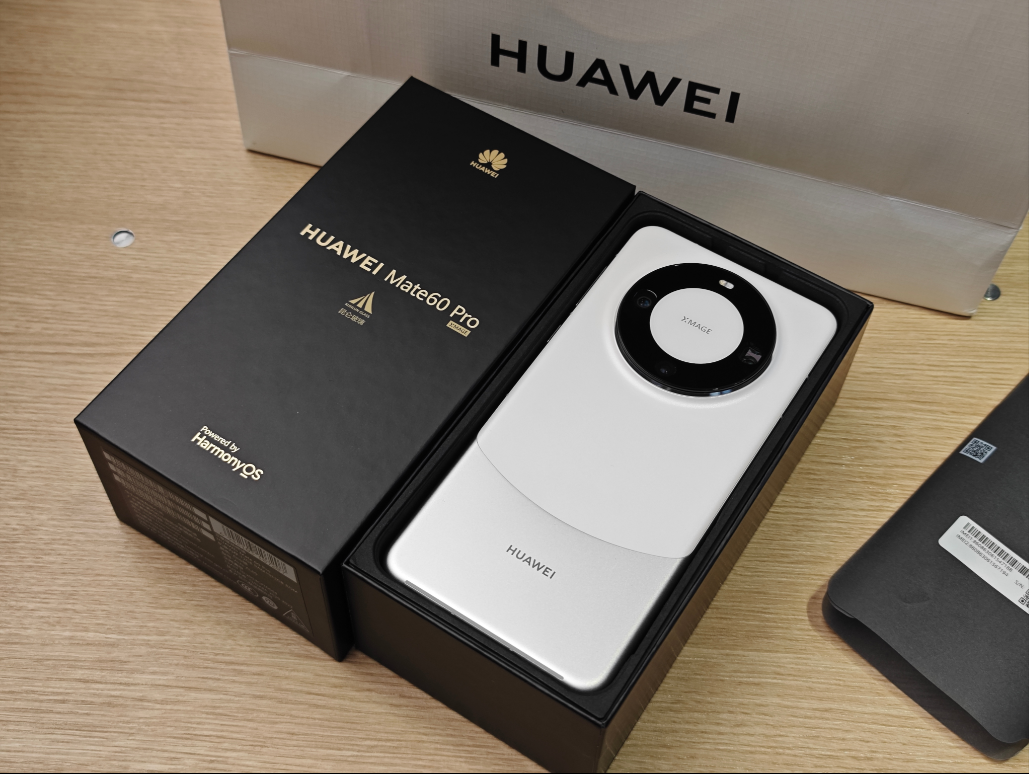
华为加速回归Mate 60发布, 7nm全自研工艺芯片
华为于今天12:08推出“HUAWEI Mate 60 Pro先锋计划”,让部分消费者提前体验。在华为商城看到,华为Mate 60 pro手机已上架,售价6999元,提供雅川青、白沙银、南糯紫、雅丹黑四种配色供选择。 据介绍,华为在卫星通信领域…...

Linux系列讲解 —— 【systemd】下载及编译记录
Ubuntu18.04的init程序合并到了systemd中,本篇文章记录一下systemd的下载和编译。 1. 下载systemd源码 (1) 查看systemd版本号,用来确定需要下载的分支 sunsun-pc:~$ systemd --version systemd 237 PAM AUDIT SELINUX IMA APPARMOR SMACK SYSVINIT UT…...

AI大模型推理并行策略:DP、TP、PP、SP、EP的基本原理
在做大模型推理部署的时候,经常会碰到模型参数量太大,一块GPU的显存装不下,或者单块GPU的算力跟不上推理速度的情况,这时候就需要用并行策略来解决这些问题。 因为计算的流程不一样,推理和训练用到的并行策略在实现上也不一样。 这篇文章就是帮大家快速搞懂常见并行策略…...

私有化视频会议平台/视频高清直播点播EasyDSS构建智慧校园音视频协作新生态
在教育数字化转型的关键阶段,智慧校园对音视频协作系统的需求,已从基础的远程沟通,升级为安全可控、体验流畅、管理智能的一体化解决方案。视频直播点播平台EasyDSS凭借技术创新与场景深耕,成为智慧校园建设的核心支撑,…...

终极实战指南:用JavaScript实现精准的天文位置计算
终极实战指南:用JavaScript实现精准的天文位置计算 【免费下载链接】suncalc A tiny JavaScript library for calculating sun/moon positions and phases. 项目地址: https://gitcode.com/gh_mirrors/su/suncalc 您是否曾经需要为Web应用添加日出日落时间功…...

企业知识资产化的三步走路线
企业知识资产化的三步走路线品质工程师老张每周一最头疼的事,就是准备品质例会的周报。上周的例会上,生产总监随口问了一句:“B12产线上个月出现的表面缺陷,之前有没有类似的案例?处理结果怎么样?”老张当场…...

【Prometheus监控Linux系统】
提示:本文原创作品,良心制作,干货为主,简洁清晰,一看就会 文章目录前言一、环境介绍二、安装node_exporter2.1 安装docker2.2 安装docker-compose2.3 安装node_exporter三、修改prometheus配置3.1 修改prometheus.yml3…...
)
占坑uvm之stop_sequence()
最近遇到个仿真报错:parent sequence * should not finish before all items from itself and items from descendent sequences are peocessed.观察log发现,目前已进去reset区间,各sequencer正在进行stop_sequences。结合仿真log错误信息提示…...

cmder设置默认打开路径
从你发的截图来看,目前没有任何一项被选中(右侧的代码框是空的,而且右下角的 Startup dir... 按钮也是灰色不可点击的状态),并且确实没有带 * 号的项。没关系,如果没有带 * 号,按照下面的步骤操…...

Adobe-GenP 3.0终极指南:三步免费解锁Adobe全家桶的完整教程
Adobe-GenP 3.0终极指南:三步免费解锁Adobe全家桶的完整教程 【免费下载链接】Adobe-GenP Adobe CC 2019/2020/2021/2022/2023 GenP Universal Patch 3.0 项目地址: https://gitcode.com/gh_mirrors/ad/Adobe-GenP 想要免费使用Adobe Creative Cloud专业软件…...
)
告别C盘爆满!VSCode插件和用户数据迁移到D盘的保姆级教程(附注册表修改)
告别C盘爆满!VSCode插件和用户数据迁移到D盘的保姆级教程 每次打开VSCode都看到C盘空间告急的红色警告?作为开发者,我们往往会在不知不觉中安装几十个甚至上百个插件,这些插件和用户数据默认都存储在C盘,日积月累就会…...

Moonlight安卓端自定义虚拟按键完全指南:从导入到高级配置
Moonlight安卓端自定义虚拟按键完全指南:从导入到高级配置 【免费下载链接】moonlight-android Moonlight安卓端 阿西西修改版 项目地址: https://gitcode.com/gh_mirrors/moo/moonlight-android 想要在手机或平板上畅玩PC游戏?🎮 Moo…...