Django 7 实现Web便签
一、效果图
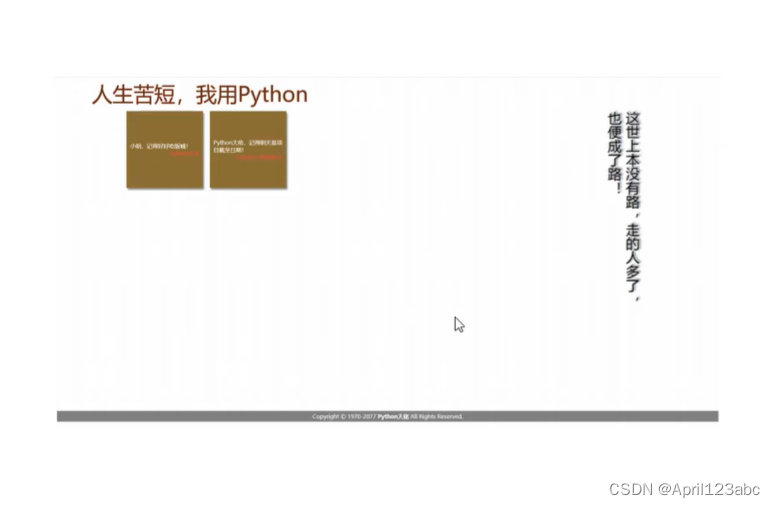
二、会用到的知识
- 目录结构与URL路由注册
- request与response对象
- 模板基础与模板继承
- ORM查询
- 后台管理
三、实现步骤
1. terminal 输入 django-admin startapp the_10回车

2. 注册, 在 tutorial子文件夹settings.py INSTALLED_APPS 中括号添加 "the_10"
INSTALLED_APPS = ['django.contrib.admin','django.contrib.auth','django.contrib.contenttypes','django.contrib.sessions','django.contrib.messages','django.contrib.staticfiles',"the_3","the_5","the_6","the_7","the_8","the_9","the_10",
]
3. 路由 tutorial子文件夹 urls.py
urlpatterns = [path('admin/', admin.site.urls),path('the_3/', include('the_3.urls')),path('the_4/', include('the_4.urls')),path('the_5/', include('the_5.urls')),path('the_7/', include('the_7.urls')),path('the_10/', include('the_10.urls')),
]
4. the_10文件夹新建子文件夹 urls.py
from django.urls import path
from .views import indexurlpatterns = [path('index/', index),
]
5. the_10文件夹内的 views.py
from django.shortcuts import render# Create your views here.def index(request):return render(request, "the_10/the_10_index.html")6. templates 文件夹创建 the_10子文件夹,再在the_10子文件夹 创建 the_10_index.html

<!DOCTYPE html>
<html lang="en">
<head><meta charset="UTF-8"><title>web便签</title>
</head>
<body><h1>hello 2024</h1>
</body>
</html>
7. 运行tutorial, 点击 http://127.0.0.1:8000/, 地址栏 https://127.0.0.1:8000/the_10/index/

8. the_10_index.html 代码
<!DOCTYPE html>
<html lang="en">
<head><meta charset="UTF-8"><title>web便签</title><style>{# 归零#}*{padding: 0;margin: 0;}.appbar{height: 100px;color: rgb(92,53,21);/*给阴影*/text-shadow: 0 0 2px red;font-size: 60px;}.main{display: flex;}.content{width: 90%;height: 700px;display: flex;}.sidebar{width: 10%;height: 400px;font-size: 30px;/*文字上下展示,从右向左读*/writing-mode: vertical-rl;text-shadow: 3px 5px 5px gray;}.footer{width: 100%;background: gray;text-align: center;color: white;padding: 5px 0;position: fixed;bottom: 0;}.card{align-content: center;display: flex;flex-wrap:wrap;align-items: center;width: 200px;height: 200px;background: rgb(138,109,53);justify-content: space-around;margin: 10px;padding: 10px;}.card .msg{width: 100%;text-align: left;color: white;}.card .username{width: 100%;text-align: right;color: red;}</style>
</head>
<body>
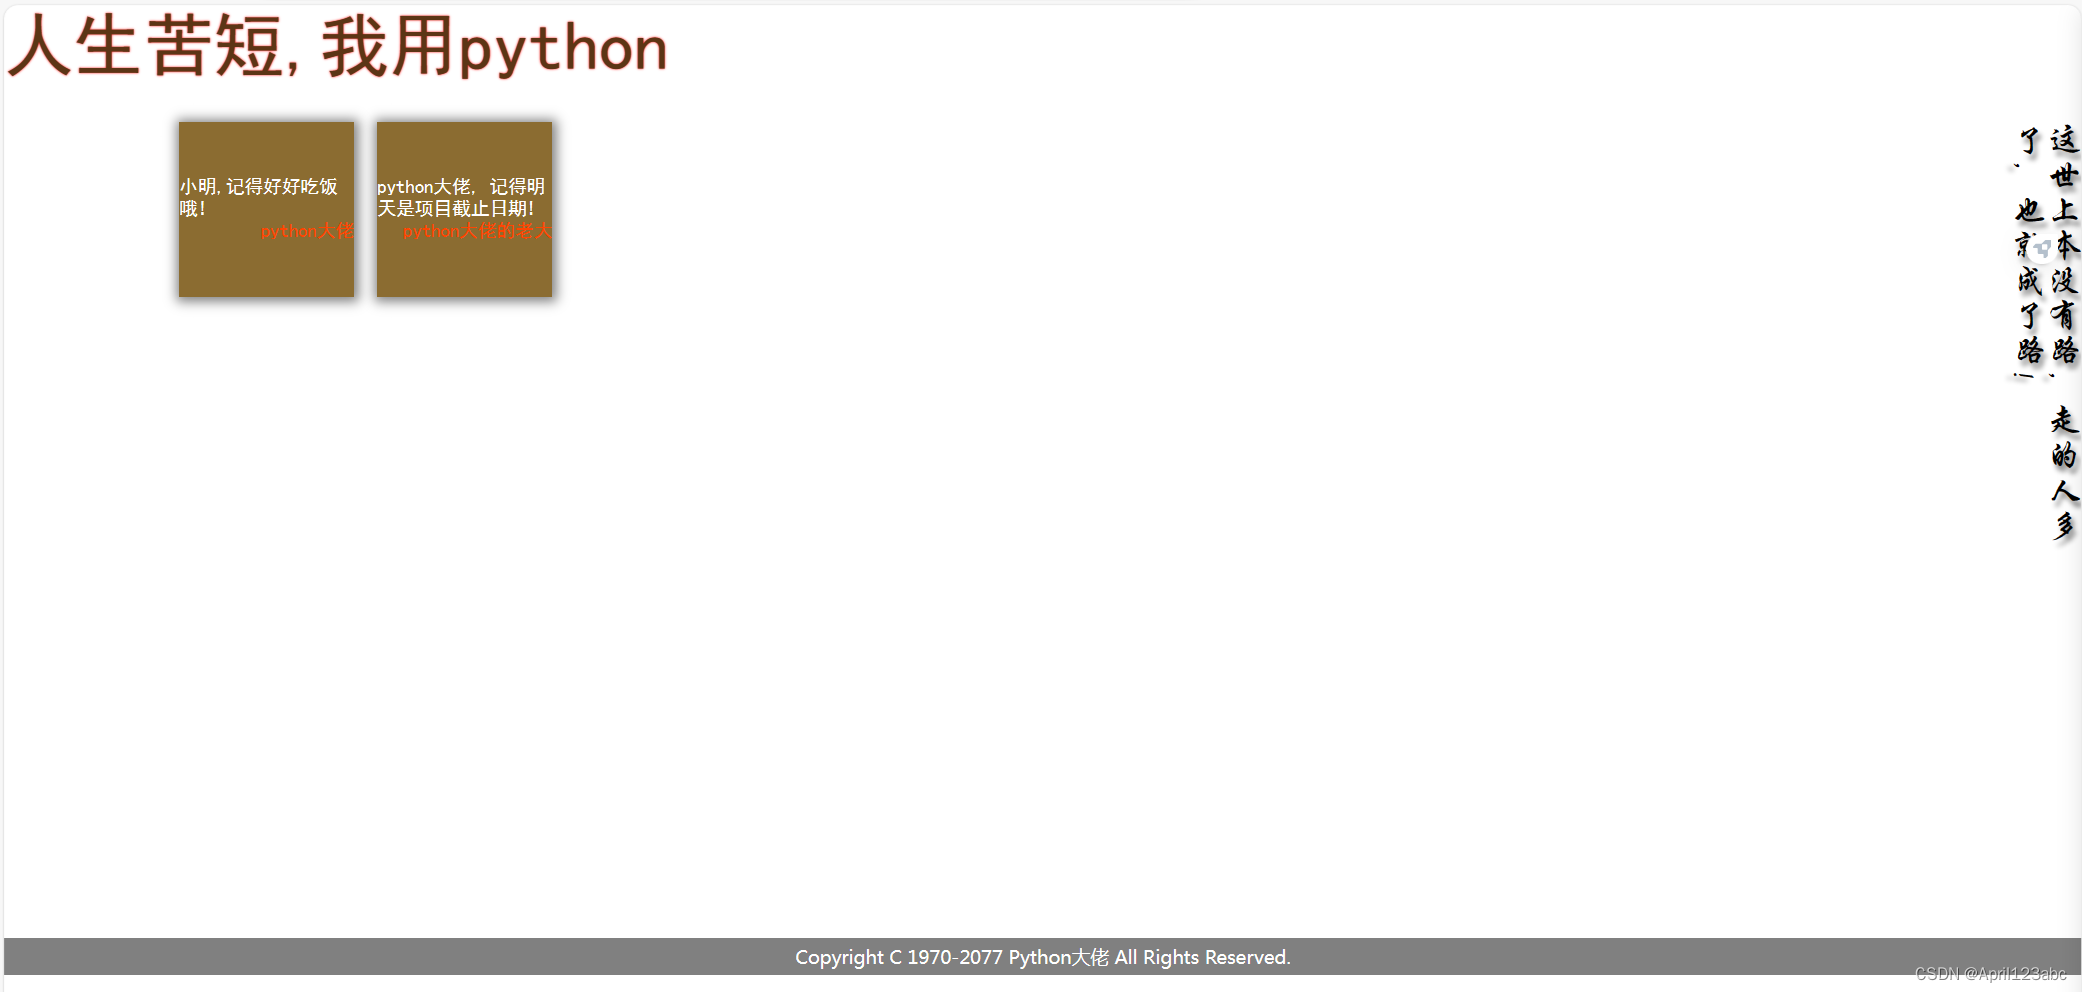
{#页眉#}<div class="appbar">人生苦短,我用python</div>
{#主体#}<div class="main">
{# 左边#}<div class="content"><div class="card"><div class="msg">小明,记得好好吃饭哦!</div><div class="username">python大佬</div></div><div class="card"><div class="msg">python大佬,记得明天是项目截止日期!</div><div class="username">python大佬的老大</div></div></div>
{# 右边#}<div class="sidebar">这世上本没有路,走的人多了,也便成了路!</div></div>
{#页脚#}<div class="footer">Copyright C 1970-2077 Python大佬 All Rights Reserved.</div>
</body>
</html>9. 刷新浏览器,实现效果
 四、继承
四、继承
1. 在templates\the_10 创建base.html

2. 把the_10_index.html里面的内容全部复制到base.html里面, 然后清空the_10_index.html里面的内容, 然后写入 {% extends 'the_10/base.html' %}
{% extends 'the_10/base.html' %}3. 刷新浏览器,发现也能打印,证明the_10/已经引入成功

4. 在最外面的tutorial文件夹创建一个static的文件夹,专门用来存放css,js等内容, 然后在static文件夹创建一个css的文件,再在css文件夹创建the_10_base.css文件

5. 把base.html里面style里面的样式内容全部剪切到the_10_base.css里面,删除style标签,然后在the_10_base.css里面改下注释
/*归零*/*{padding: 0;margin: 0;}.appbar{height: 100px;color: rgb(92,53,21);/*给阴影*/text-shadow: 0 0 2px red;font-size: 60px;}.main{display: flex;}.content{width: 90%;height: 700px;display: flex;}.sidebar{width: 10%;height: 400px;font-size: 30px;/*文字上下展示,从右向左读*/writing-mode: vertical-rl;text-shadow: 3px 5px 5px gray;}.footer{width: 100%;background: gray;text-align: center;color: white;padding: 5px 0;position: fixed;bottom: 0;}.card{align-content: center;display: flex;flex-wrap:wrap;align-items: center;width: 200px;height: 200px;background: rgb(138,109,53);justify-content: space-around;margin: 10px;padding: 10px;}.card .msg{width: 100%;text-align: left;color: white;}.card .username{width: 100%;text-align: right;color: red;}6. 我想用这个样式 需要去tutorial\settings.py里面进行配置
STATIC_URL = '/static/'
STATICFILES_DIRS = [BASE_DIR / "static",
]
7. 配置好以后需要引入, 在templates\the_10\base.html 最上面添加 {% load static %}, 然后添加link标签 <link rel="stylesheet" href="{% static 'css/the_10_base.css'%}">
{% load static %}<!DOCTYPE html>
<html lang="en">
<head><meta charset="UTF-8"><title>web便签</title><link rel="stylesheet" href="{% static 'css/the_10_base.css'%}">
</head>
<body>
{#页眉#}<div class="appbar">人生苦短,我用python</div>
{#主体#}<div class="main">
{#        左边#}<div class="content"><div class="card"><div class="msg">小明,记得好好吃饭哦!</div><div class="username">python大佬</div></div><div class="card"><div class="msg">python大佬,记得明天是项目截止日期!</div><div class="username">python大佬的老大</div></div></div>
{#        右边#}<div class="sidebar">这世上本没有路,走的人多了,也便成了路!</div></div>
{#页脚#}<div class="footer">Copyright C 1970-2077 Python大佬 All Rights Reserved.</div>
</body>
</html>
8. 刷新浏览器,样式就有了,页面如步骤3
9. 对templates\the_10\base.html里面的content内容进行挖坑

10. 把上面的内容复制到the_10_index.html里面,然后把templates\the_10\base.html里面block内的内容删掉
the_10_index.html
{% extends 'the_10/base.html' %}{% block content %}
<div class="card"><div class="msg">小明,记得好好吃饭哦!</div><div class="username">python大佬</div>
</div>
<div class="card"><div class="msg">python大佬,记得明天是项目截止日期!</div><div class="username">python大佬的老大</div>
</div>
{% endblock %}
templates\the_10\base.html

11. 刷新浏览器,效果如步骤3
五、前后端交互
1. the_10\views.py做如下修改
from django.shortcuts import render# Create your views here.def index(request):l = [{'msg':'小红,一定要记得好好吃饭哦!', 'username':'python大佬'},{'msg': 'python大佬,记得明天是项目截止日期!一定要交,不交不准下班!', 'username': 'python大佬的老大'},]return render(request, "the_10/the_10_index.html",{'cards':l})2. templates\the_10\the_10_index.html
{% extends 'the_10/base.html' %}{% block content %}{% for i in cards %}<div class="card"><div class="msg">{{ i.msg }}</div><div class="username">{{ i.username }}</div>
</div>{% endfor %}
{% endblock %}
3. 刷新网页,自定义的内容就渲染出来了,这个就叫前后端不分离。

4. 这样就可以通过后端控制前端的内容,如果我们再加一条, 刷新网页,就自动加进去了。
{'msg': '还有一个月,就到农历新年了!', 'username': 'python大佬'},

六、连接数据库
1. the_10\models.py 写入代码
from django.db import models# Create your models here.class Card(models.Model):msg = models.CharField(max_length=200)# user = models.OneToOneField('auth.User',on_delete=models.CASCADE) # 一个用户只能发一个便签user = models.ForeignKey('auth.User', on_delete=models.CASCADE) # 一个用户可以发多个便签def __str__(self):return self.msg2. 迁移 , terminal 输入 python .\manage.py makemigrations回车
Migrations for 'the_10':
the_10\migrations\0001_initial.py
- Create model Card
3. terminal 再输入 python .\manage.py migrate 回车
Operations to perform:
Apply all migrations: admin, auth, contenttypes, sessions, the_10, the_6, the_8, the_9
Running migrations:
Applying the_10.0001_initial... OK
4. the_10\admin.py加内容
from django.contrib import admin
from the_10.models import Card# Register your models here.class CardAdmin(admin.ModelAdmin):# fields = ['pub_date','question_text']fieldsets = [('日期', {'fields':['user']}),('文本', {'fields': ['msg']}),]list_display = ('user','msg')admin.site.register(Card,CardAdmin)
5. 浏览器打开 站点管理 | Django 站点管理员

6. 点击 Cards, 增加内容

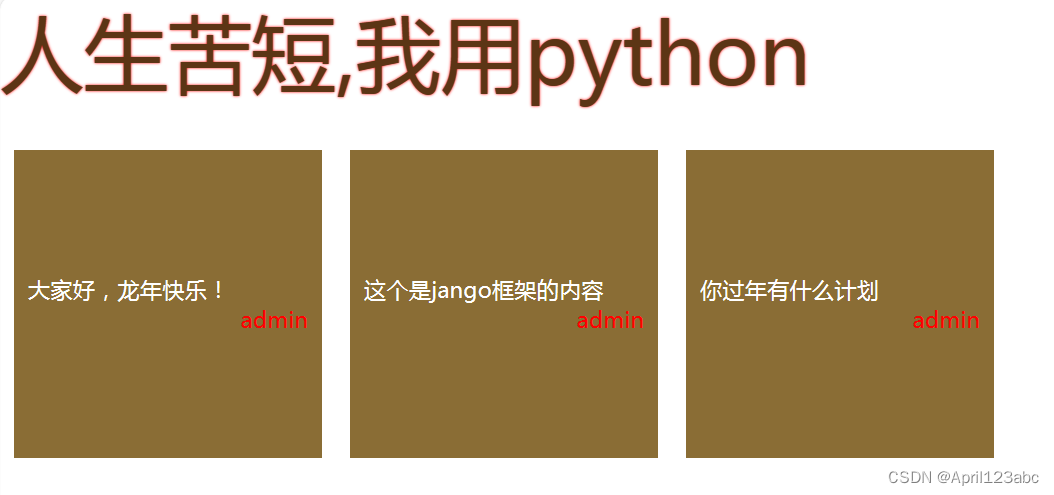
7. 从数据库中查询出来,the_10\views.py做如下更改
from django.shortcuts import render
from the_10.models import Card# Create your views here.def index(request):card = Card.objects.select_related().all()# l = [#     {'msg':'小红,一定要记得好好吃饭哦!', 'username':'python大佬'},#     {'msg': 'python大佬,记得明天是项目截止日期!一定要交,不交不准下班!', 'username': 'python大佬的老大'},#     {'msg': '还有一个月,就到农历新年了!', 'username': 'python大佬'},# ]return render(request, "the_10/the_10_index.html",{'cards':card})
8. templates\the_10\the_10_index.html 把username 改成user.username
{% extends 'the_10/base.html' %}{% block content %}{% for i in cards %}<div class="card"><div class="msg">{{ i.msg }}</div><div class="username">{{ i.user.username }}</div>
</div>{% endfor %}
9. 浏览器访问 web便签
相关文章:
Django 7 实现Web便签
一、效果图 二、会用到的知识 目录结构与URL路由注册request与response对象模板基础与模板继承ORM查询后台管理 三、实现步骤 1. terminal 输入 django-admin startapp the_10回车 2. 注册, 在 tutorial子文件夹settings.py INSTALLED_APPS 中括号添加 "the…...
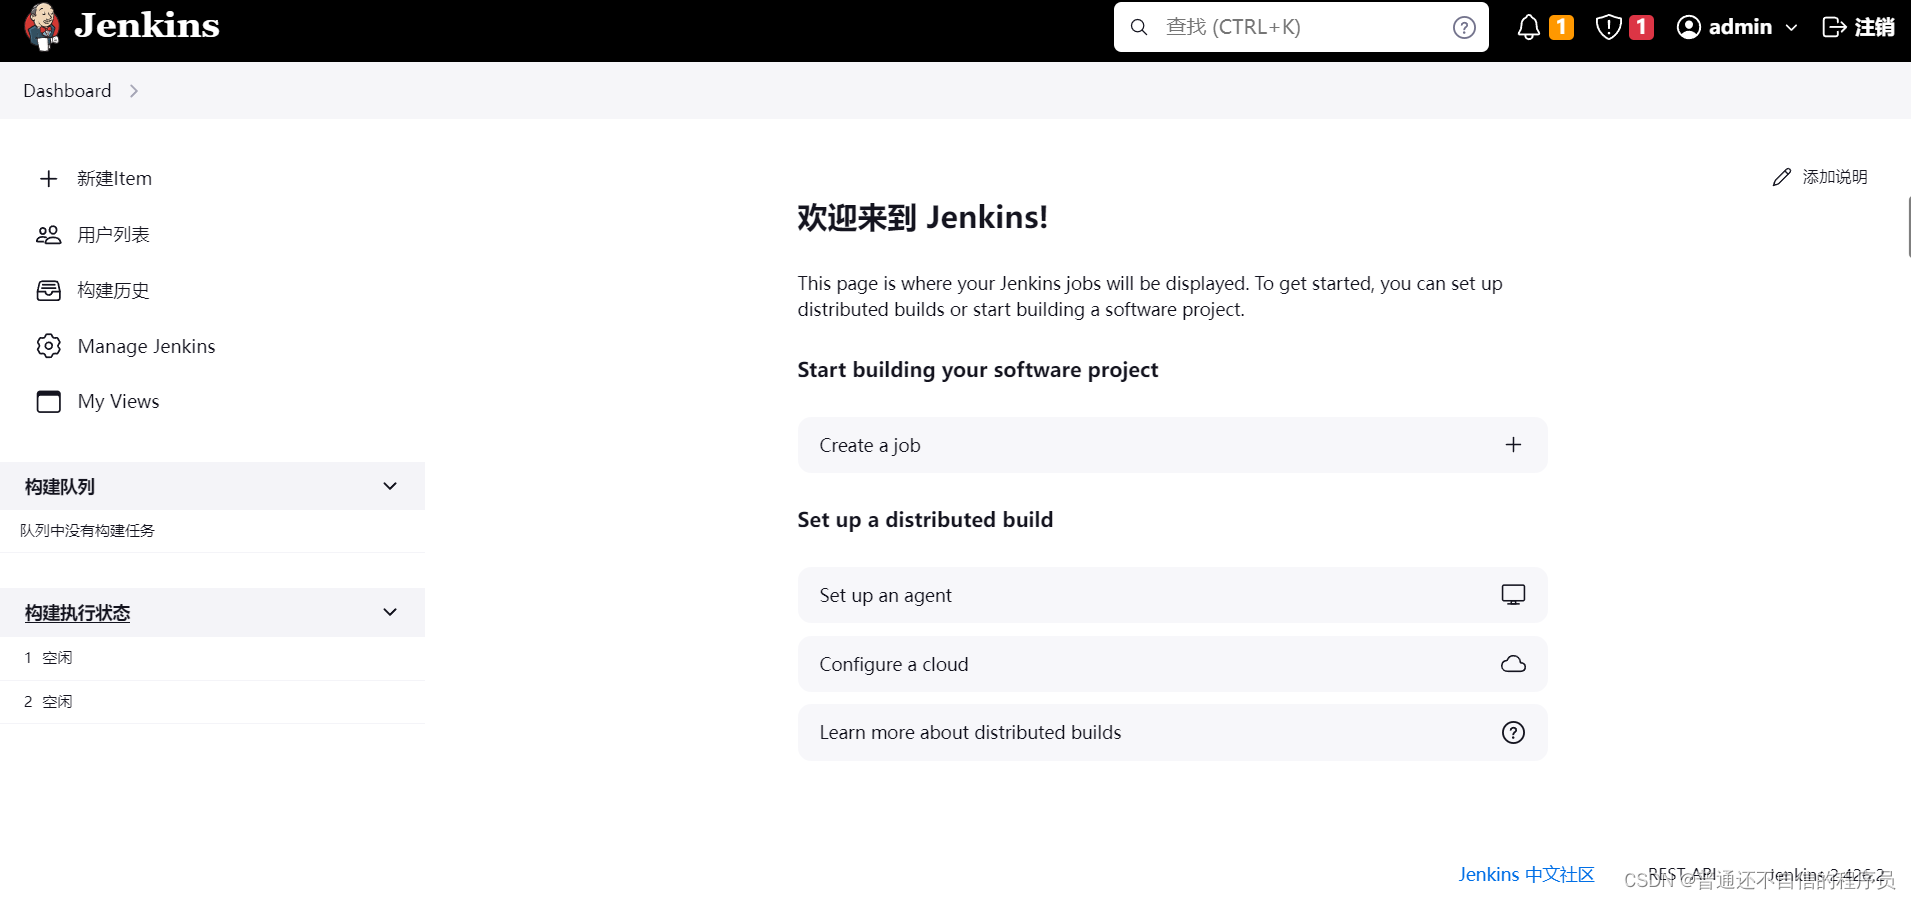
Jenkins集成部署java项目
文章目录 Jenkins简介安装 Jenkins简介 Jenkins能实时监控集成中存在的错误,提供详细的日志文件和提醒功能,还能用图表的形式形象的展示项目构建的趋势和稳定性。 官网 安装 在官网下载windows版本的Jenkins 但是我点击这里浏览器没有反应࿰…...
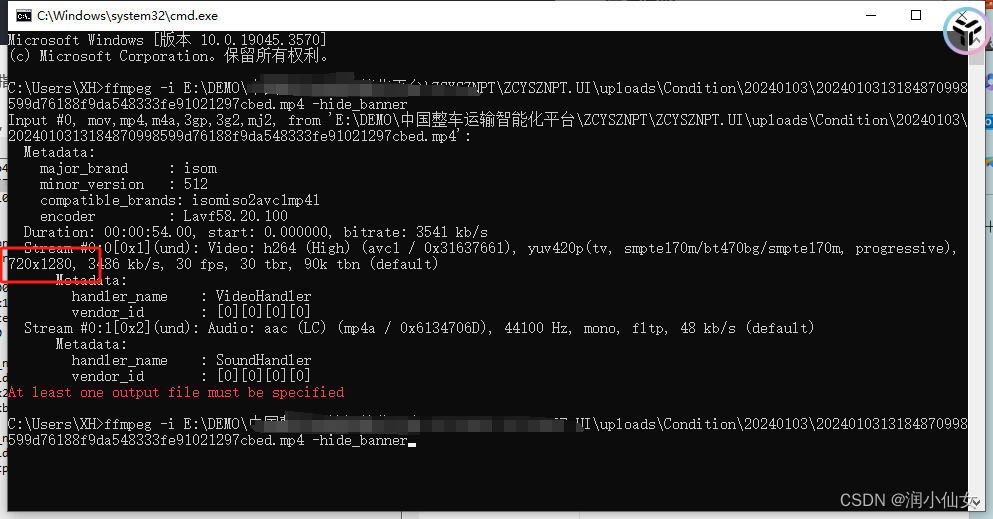
FFmpeg之——获取上传视频的尺寸(长、宽)
获取上传视频的尺寸: 获取视频尺寸通常需要借助第三方库FFmpeg。 首先,确保你的系统中已安装了FFmpeg,并且FFmpeg的可执行文件路径已经添加到你的系统环境变量中。 1.官网下载ffmpeg 进入 链接: ffmpeg官网 网址,点击下载wind…...

Ajax学习
文章目录 AjaxAjax 是什么Ajax 经典应用场景Ajax 原理示意图ajax的异步请求的方法ajax的逻辑:应用实例-验证用户名是否存在思路框架图:需求分析: 到数据库去验证用户名是否可用思路框架图大功告成:使用JQuery-Ajax实现上面相同的需求:Ajax Ajax 是什么 AJAX 即"Async…...

排序算法——关于快速排序的详解
目录 1.基本思想 2.基本原理 2.1划分思想 2.2排序过程 (1)选择基准值 (2)分割过程(Partition) (3)递归排序 (4)合并过程 2.3具体实例 2.4实现代码 2.5关键要…...

序言:《未来已来》
尊敬的读者, 你是否曾经在面对冗长的报告、繁琐的工作、沉重的生活压力时感到困扰,渴望找到一种方式来提升效率,释放压力?你是否曾经在自我创业的道路上,苦于找不到有效的市场营销方式,寻求突破?…...

【Spring实战】22 Spring Actuator 入门
文章目录 1. 定义2. 功能3. 依赖4. 配置5. 常用的应用场景1)环境监控2)运维管理3)性能优化 结论 Spring Actuator 是 Spring 框架的一个模块,为开发人员提供了一套强大的监控和管理功能。本文将深入探讨 Spring Actuator 的定义、…...

JSON安全性
确保JSON处理的安全性是现代Web开发中重要的一环。以下是一些关键的安全实践,用于防止JSON注入攻击以及确保数据在传输过程中的安全性: 1. **验证和清洗输入:** - 在将任何数据写入数据库之前,请确保验证用户输入。对于期望的JSON…...

spring-boot-maven插件repackage(goal)的那些事
前言:在打包Springboot项目成jar包时需要在pom.xml使用spring-boot-maven-plugin来增加Maven功能,在我的上一篇博客<<Maven生命周期和插件的那些事(2021版)>>中已经介绍过Maven和插件的关系,在此不再赘述&…...

ubuntu的boot分区被删除恢复
在鼓捣黑苹果的时候,误删了ubuntu的boot分区,进系统的时候出现emergency mode,那么现在来讲讲怎么恢复 首先做一个ubuntu的启动盘,然后进入启动盘的系统选择试用 呼出命令行,然后添加一个源 sudo add-apt-repository…...

【userfaultfd 条件竞争】starCTF2019 - hackme
前言 呜呜呜,这题不难,但是差不多一个多月没碰我的女朋友 kernel pwn 了,对我的 root 宝宝也是非常想念,可惜这题没有找到我的 root 宝宝,就偷了她的 flag。 哎有点生疏了,这题没看出来堆溢出,…...

深度学习中的自动化标签转换:对数据集所有标签做映射转换
在机器学习中,特别是在涉及图像识别或分类的项目中,标签数据的组织和准确性至关重要。本文探讨了一个旨在高效转换标签数据的 Python 脚本。该脚本在需要更新或更改类标签的场景中特别有用,这是正在进行的机器学习项目中的常见任务。我们将逐…...
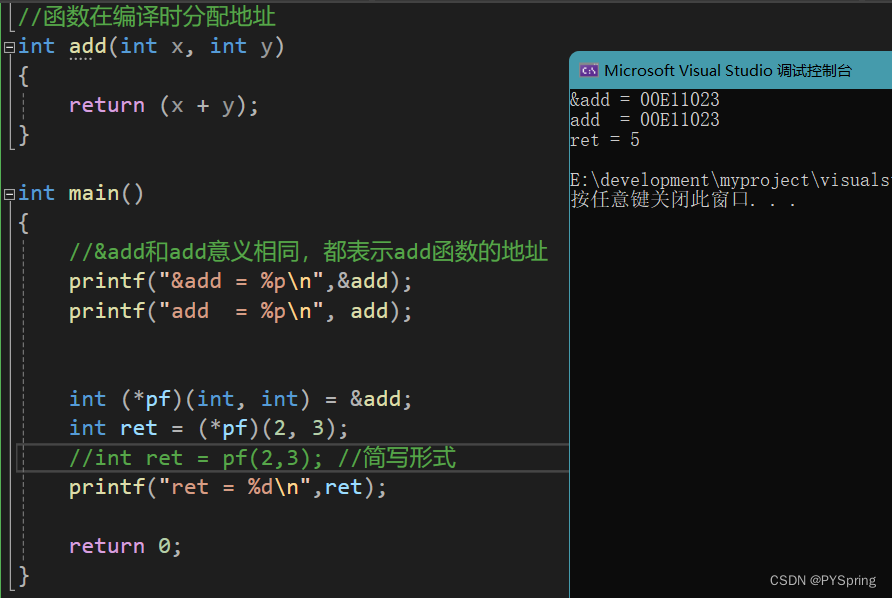
c语言-函数指针
目录 前言一、函数指针1.1 函数指针定义1.2 函数指针调用函数1.3 函数指针代码分析 总结 前言 本篇文章介绍c语言中的函数指针以及函数指针的应用。 一、函数指针 函数指针:指向函数的指针。 函数在编译时分配地址。 &函数名 和 函数名代表的意义相同…...
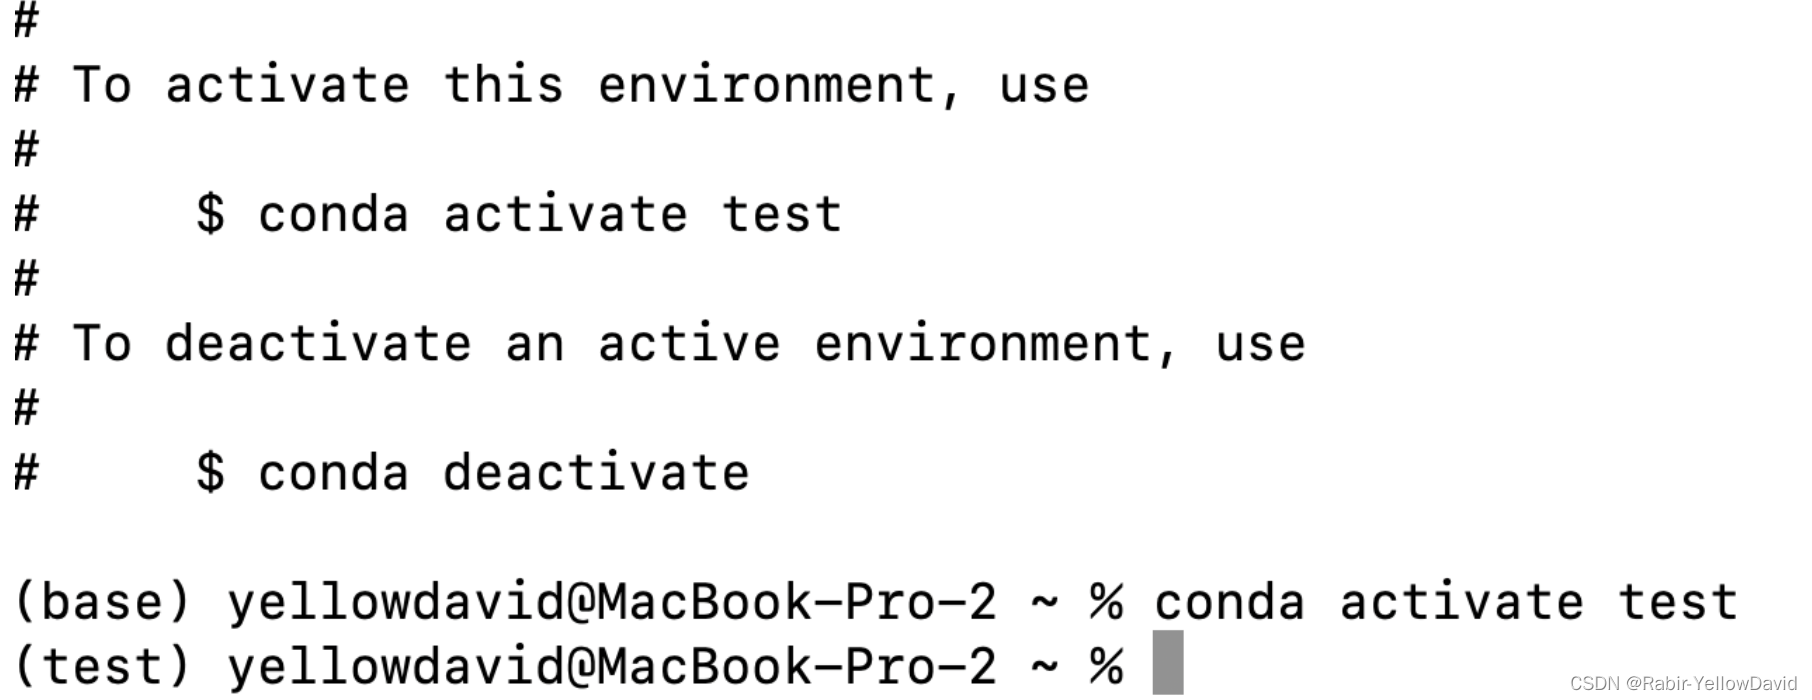
conda
一、安装 推荐清华源 https://mirrors.tuna.tsinghua.edu.cn/anaconda/miniconda/?CN&OD选择版本 Miniconda3-py39_4.12.0-MacOSX-arm64.pkg测试命令 conda help二、更换仓库 配置加速 https://mirrors.tuna.tsinghua.edu.cn/help/anaconda/没有 .condarc 文件则执行…...

【Vue】灵魂拷问
1、说说Vue的优缺点 优点:渐进式,组件化,轻量级,虚拟dom,响应式,单页面路由,数据与视图分开缺点:单页面不利于seo,不支持IE8以下,首屏加载时间长 2、为什么…...

Scrapy 1.3.0 使用简介
scrapy 1.3.0 python 2.7 创建一个项目: Before you startscraping, you will have to set up a new Scrapy project. Enter a directory whereyou’d like to store your code and run: scrapy startproject tutorial 然后就会得到一系列文件: 第一个爬…...
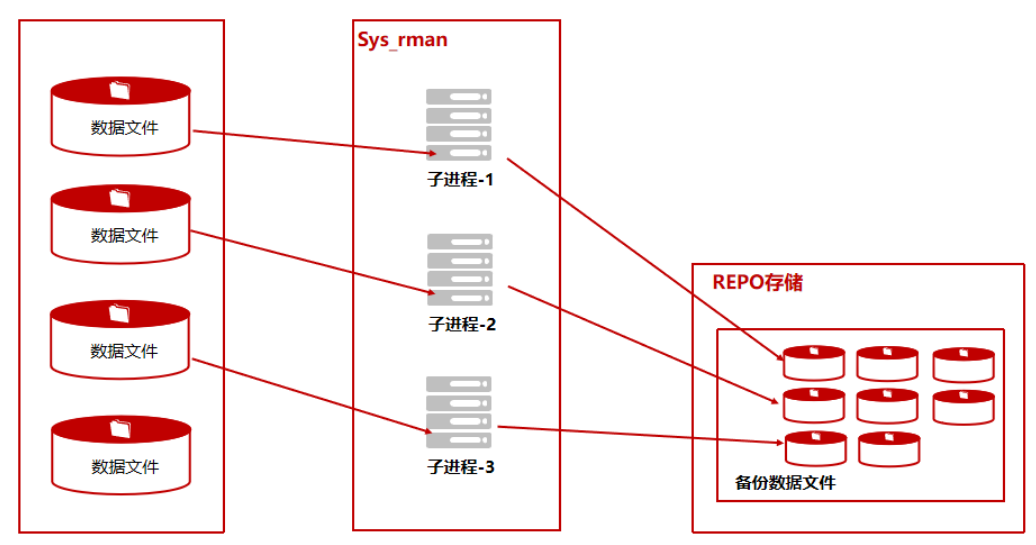
单机+内部备份_全备案例
此场景为单机数据库节点内部备份,方便部署和操作,但备份REPO与数据库实例处于同一个物理主机,冗余度较低。 前期准备 配置ksql免密登录(必须) 在Kingbase数据库运行维护中,经常用到ksql工具登录数据库,本地免密登录…...
【kettle】pdi/data-integration 打开ktr文件报错“Unable to load step info from XML“
一、报错内容: Unable to load step info from XML step nodeorg.pentaho.di.core.exception.KettleXMLException: Unable to load step info from XMLat org.pentaho.commons.launcher.Launcher.main (Launcher.java:92)at java.lang.reflect.Method.invoke (Met…...

cocos creator人开发小游戏免费素材资源
1、首先熟悉官方的手册和api文档,文档还是比较详细,游戏的方方面面都涉及到了 官方手册: http://docs.cocos.com/creator/manual/zh/官方api文档: http://docs.cocos.com/creator/api/zh/官方论坛: https://forum.coco…...

除了sd webui,compfy还有一个sd UI
GitHub - VoltaML/voltaML-fast-stable-diffusion: Beautiful and Easy to use Stable Diffusion WebUI...

Word转Markdown踩过的那些坑:Writage插件失效、Pandoc命令报错怎么办?
Word转Markdown实战避坑指南:从工具失效到完美转换的完整方案 每次技术分享会上,总有人问我:"为什么我的Word转Markdown总出问题?"这让我想起自己刚接触文档转换时踩过的无数坑——插件神秘消失、命令行报错、格式全乱套…...

Network-AI:解决多智能体协作竞态与状态冲突的协调层
1. 项目概述:Network-AI,一个解决多智能体“内讧”的协调器如果你正在用LangChain、CrewAI或者AutoGen构建AI智能体应用,大概率遇到过这样的场景:你部署了两个智能体,一个负责分析数据,一个负责生成报告。它…...

Qt 批量读取Excel数据:从性能瓶颈到优化实践
1. 为什么Qt读取Excel会卡成PPT? 第一次用Qt操作Excel表格时,我兴冲冲写了个循环读取单元格的代码。结果打开包含5000行数据的文件后,进度条像蜗牛爬坡,鼠标指针转成彩色圆圈,程序直接卡成PPT幻灯片模式——这场景估计…...

ాలుWindows上的安卓应用安装器APK Installer:打破平台壁垒的轻量级解决方案
#ాలుWindows上的安卓应用安装器APK Installer:打破平台壁垒的轻量级解决方案 【免费下载链接】APK-Installer An Android Application Installer for Windows 项目地址: https://gitcode.com/GitHub_Trending/ap/APK-Installer 在数字生态日益多元化的今天…...

iOSDeviceSupport终极指南:如何快速解决Xcode设备支持文件缺失问题
iOSDeviceSupport终极指南:如何快速解决Xcode设备支持文件缺失问题 【免费下载链接】iOSDeviceSupport All versions of iOS Device Support 项目地址: https://gitcode.com/gh_mirrors/ios/iOSDeviceSupport 你是否曾经在iOS开发中遇到过这样的困扰…...

PCB高级工艺如何降本:盲孔、微孔与HDI设计的成本优化实战
1. 项目概述:当高级PCB技术成为降本利器在硬件研发圈子里待久了,总有一个根深蒂固的印象:但凡沾上“高级”、“高密度”这些词的技术,比如盲孔、埋孔和微孔,那成本肯定是蹭蹭往上涨。我刚开始接触HDI板设计时也是这么想…...
)
手把手教你用MOS管搭建防反接电路:从原理图到PCB布局的避坑指南(以立创EDA为例)
从零构建MOS管防反接电路:立创EDA实战全流程解析 电源反接是电子设计中最常见的"低级错误"之一,却可能造成毁灭性后果。想象一下:你花费数周完成的智能家居控制器,因为电池装反而瞬间烧毁主控芯片——这种场景在创客社区…...

python网上书店系统vue
目录技术栈选择前端模块划分后端API设计关键实现细节开发流程示例代码片段项目技术支持源码获取详细视频演示 :文章底部获取博主联系方式!同行可合作技术栈选择 前端采用Vue 3(Composition API) TypeScript Vite构建工具&#…...

CANopen协议核心机制与工业自动化应用实践
1. CANopen协议的核心机制解析 CANopen协议作为工业自动化领域的通信标准,其核心在于三个关键机制:对象字典、网络管理(NMT)以及过程数据对象(PDO)/服务数据对象(SDO)。理解这些机制…...

Intel Wi-Fi 6 AX201网卡‘代码10’通病?华硕/戴尔/联想多品牌用户自救指南
Intel Wi-Fi 6 AX201网卡‘代码10’故障全解析与跨品牌解决方案 当你的笔记本突然无法连接Wi-Fi,设备管理器中那个带着黄色感叹号的Intel Wi-Fi 6 AX201网卡图标格外刺眼,显示着"该设备无法启动(代码10)"的提示——这不…...