DataBinding viewBinding(视图绑定与数据双向绑定)简单案例 (kotlin)
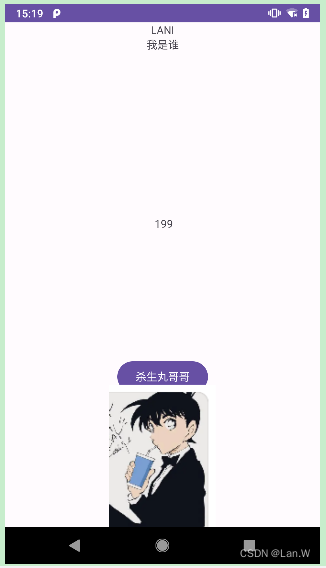
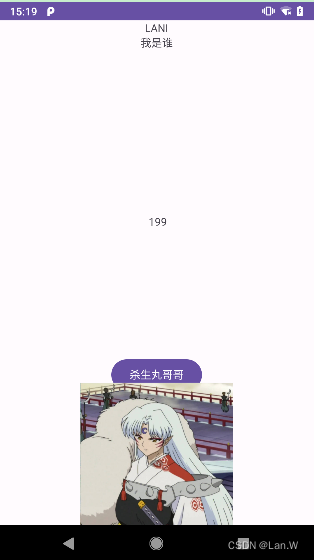
先上效果:
4个view的文字都是通过DataBinding填充的。交互事件:点击图片,切换图片
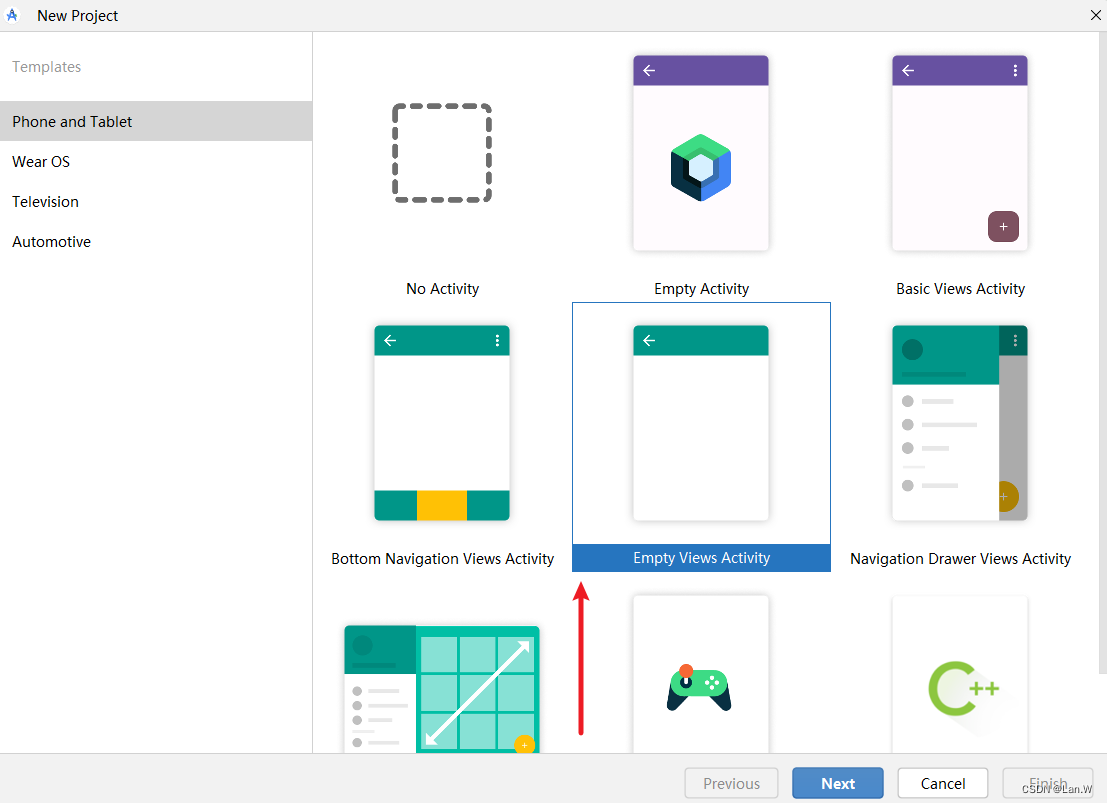
创建项目(android Studio 2023.3.1)
Build.gradle(:app) 引入依赖库(完整源码)
buildFeatures {
viewBinding true
compose true
}
dataBinding {
enabled = true
}
plugins {alias(libs.plugins.android.application)alias(libs.plugins.jetbrains.kotlin.android)id 'kotlin-kapt'
}android {namespace 'com.example.lanidemokt'compileSdk 31defaultConfig {applicationId "com.example.lanidemokt"minSdk 24targetSdk 30versionCode 1versionName "1.0"testInstrumentationRunner "androidx.test.runner.AndroidJUnitRunner"}buildTypes {release {minifyEnabled falseproguardFiles getDefaultProguardFile('proguard-android-optimize.txt'), 'proguard-rules.pro'}}compileOptions {sourceCompatibility JavaVersion.VERSION_1_8targetCompatibility JavaVersion.VERSION_1_8}kotlinOptions {jvmTarget = '1.8'}lintOptions {abortOnError false}buildFeatures {viewBinding truecompose true}dataBinding {enabled = true}
}dependencies {implementation "org.jetbrains.kotlinx:kotlinx-coroutines-core:1.3.2"implementation "org.jetbrains.kotlinx:kotlinx-coroutines-android:1.3.2"implementation "androidx.compose.ui:ui:1.0.1"implementation 'androidx.appcompat:appcompat:1.4.1'implementation 'androidx.appcompat:appcompat-resources:1.4.1'implementation 'com.google.android.material:material:1.5.0'implementation 'androidx.compose.material:material:1.0.1'implementation 'com.github.bumptech.glide:compiler:4.11.0'implementation 'com.github.bumptech.glide:glide:4.11.0'
}
1. 基本使用意向绑定数据显示在界面
MainActivity.kt (完整源码)
在MainActivity.kt里,Databinding和我们的XML文件绑定起来了,现在你点击Databinding会发现直接可以跳转到对应的XML文件里面去了,
package com.example.lanidemoktimport android.os.Bundle
import android.widget.ImageView
import androidx.appcompat.app.AppCompatActivity
import androidx.core.view.ViewCompat
import androidx.core.view.WindowInsetsCompat
import androidx.databinding.BaseObservable
import androidx.databinding.DataBindingUtil
import com.catchpig.utils.LogUtils
import com.example.lanidemokt.adapter.MainActivityBindingAdapter
import com.example.lanidemokt.databinding.ActivityMainBinding
import com.example.lanidemokt.viewmodel.ButtonClickListener
import kotlinx.coroutines.GlobalScope
import kotlinx.coroutines.delay
import kotlinx.coroutines.launch
import java.util.Dateclass MainActivity : AppCompatActivity() {/** DataBinding 对应一个Binding对象,对象名是布局文件文称加上Binding后缀* binding,activity_main.xml的布局实例* xml上所有变量与点击事件,必须是binding的成员属性或者成员方法函数,否则操作界面无效** */var binding: ActivityMainBinding? = null // 操作布局实例private var login: Login? = null  //声明一个响应式对象,用于uivar clickListener: ButtonClickListener? = null // 布局点击对象封装override fun onCreate(savedInstanceState: Bundle?) {super.onCreate(savedInstanceState) //        setContentView(R.layout.activity_main)binding = DataBindingUtil.setContentView(this, R.layout.activity_main)ViewCompat.setOnApplyWindowInsetsListener(findViewById(R.id.main)) { v, insets ->val systemBars = insets.getInsets(WindowInsetsCompat.Type.systemBars())v.setPadding(systemBars.left, systemBars.top, systemBars.right, systemBars.bottom)insets}initView()initData()corGlobalTest()}private fun initData() {LogUtils.init(this)}/* ** 在Controller层,将我们的data与model相关联* */data class Login(var name: String = "LLL", var msg: String) //意向绑定响应式data class Student(var name: String = "LLL", var score: Int) : BaseObservable() //双击绑定响应式private fun initView() {binding?.msg?.setText("我是谁")login = Login("LANI", "我是谁")//  binding?.login = Login("LANI", "我是谁")//  这一步必须要,否则点击没反应,否则界面不显示对应的名字与信息binding?.setLogin(Login("LANI", "我是谁"))binding?.setStudent(Student("LEE", 199))binding?.picture1?.setOnClickListener {println("图片点击")MainActivityBindingAdapter.loadStudentDetails(it as ImageView,"http://192.168.1.207:8080/download/88.jpg")}clickListener=ButtonClickListener()binding?.btnHandler = clickListener}/** 协程创建* */fun corGlobalTest() {GlobalScope.launch {println("|--开始global${Date()}")delay(1000)println("|--END global${Date()}")}println("|--END ${Date()}")}
}
activity_main.xml
现在我们就来看看如何给我们的XML文件里面的View设置值。
在XML文件的layout标签下,创建data标签,在data标签中再创建variable标签,variable标签主要用到的就是name属性和type属性,类似于Java语言声明变量时,需要为该变量指定类型和名称。新建一个名为Login的数据类。
在XML文件中声明好variable属性后,接下来就可以在XML使用它了。
使用variable属性时需要使用到布局表达式: @{ }。
可以在布局表达式@{ }中获取传入variable对象的
activity_main.xml (源码 )
<?xml version="1.0" encoding="utf-8"?>
<layout xmlns:android="http://schemas.android.com/apk/res/android"xmlns:app="http://schemas.android.com/apk/res-auto"xmlns:tools="http://schemas.android.com/tools"><data><variablename="login"type="com.example.lanidemokt.MainActivity.Login" /><variablename="student"type="com.example.lanidemokt.MainActivity.Student" /></data><androidx.constraintlayout.widget.ConstraintLayoutandroid:id="@+id/main"android:layout_width="match_parent"android:layout_height="match_parent"tools:context=".MainActivity"><TextViewandroid:id="@+id/msg"android:layout_width="wrap_content"android:layout_height="wrap_content"android:text="@{login.name}"app:layout_constraintEnd_toEndOf="parent"app:layout_constraintStart_toStartOf="parent"app:layout_constraintTop_toTopOf="parent"tools:text="名字" /><TextViewandroid:id="@+id/msg2"android:layout_width="wrap_content"android:layout_height="wrap_content"android:text="@{login.msg}"app:layout_constraintEnd_toEndOf="parent"app:layout_constraintStart_toStartOf="parent"app:layout_constraintTop_toBottomOf="@id/msg"tools:text="消息" /><TextViewandroid:id="@+id/msg4"android:layout_width="wrap_content"android:layout_height="wrap_content"android:text="@{ ` `+ student.score}"app:layout_constraintBottom_toBottomOf="@id/login"app:layout_constraintEnd_toEndOf="parent"app:layout_constraintStart_toStartOf="parent"app:layout_constraintTop_toBottomOf="@+id/msg2"tools:text="消息2" /></androidx.constraintlayout.widget.ConstraintLayout>
</layout>
2. 给控件View添加响应事件:
方式一:直接在Controller层通过原来的方式添加
binding?.login?.setOnClickListener {}方式二:
创建一个工具类,在类中定义响应的点击事件
第一步:创建点击的工具类 ButtonClickListener.kt
第二步:在XML文件中添加工具类 ,在XML文件中添加响应事件:
第三步:在XML文件中添加响应事件 android:onClick="@{btnHandler::click}"
第四步:在Controller里面进行关联 binding?.btnHandler = clickListener
activity_main.xml (增加点击事件的完整源码)
<?xml version="1.0" encoding="utf-8"?>
<layout xmlns:android="http://schemas.android.com/apk/res/android"xmlns:app="http://schemas.android.com/apk/res-auto"xmlns:tools="http://schemas.android.com/tools"><data><!--需要使用到响应数据类引入data标签中再创建variable标签,variable标签主要用到的就是name属性和type属性 ,类似于Java语言声明变量时,需要为该变量指定类型和名称--><import type="android.view.View" /><!--        <import type="com.example.lanidemokt.MainActivity" />--><!--        <variablename="login"type="com.example.lanidemokt.MainActivity.Login" />--><variablename="btnHandler"type="com.example.lanidemokt.viewmodel.ButtonClickListener" /><variablename="login"type="com.example.lanidemokt.MainActivity.Login" /><variablename="student"type="com.example.lanidemokt.MainActivity.Student" /></data><androidx.constraintlayout.widget.ConstraintLayoutandroid:id="@+id/main"android:layout_width="match_parent"android:layout_height="match_parent"tools:context=".MainActivity"><TextViewandroid:id="@+id/msg"android:layout_width="wrap_content"android:layout_height="wrap_content"android:text="@{login.name}"app:layout_constraintEnd_toEndOf="parent"app:layout_constraintStart_toStartOf="parent"app:layout_constraintTop_toTopOf="parent"tools:text="名字" /><TextViewandroid:id="@+id/msg2"android:layout_width="wrap_content"android:layout_height="wrap_content"android:text="@{login.msg}"app:layout_constraintEnd_toEndOf="parent"app:layout_constraintStart_toStartOf="parent"app:layout_constraintTop_toBottomOf="@id/msg"tools:text="消息" /><TextViewandroid:id="@+id/msg4"android:layout_width="wrap_content"android:layout_height="wrap_content"android:text="@{ ` `+ student.score}"app:layout_constraintBottom_toBottomOf="@id/login"app:layout_constraintEnd_toEndOf="parent"app:layout_constraintStart_toStartOf="parent"app:layout_constraintTop_toBottomOf="@+id/msg2"tools:text="消息2" /><Buttonandroid:id="@+id/login"android:layout_width="wrap_content"android:layout_height="wrap_content"android:text="杀生丸哥哥"android:onClick="@{btnHandler::msgTextClickListener}"android:layout_marginBottom="20dp"app:layout_constraintBottom_toBottomOf="@id/picture1"app:layout_constraintEnd_toEndOf="parent"app:layout_constraintStart_toStartOf="parent"app:layout_constraintTop_toBottomOf="@+id/msg4"tools:text="消息2" /><ImageViewandroid:id="@+id/picture1"android:layout_width="300dp"android:layout_height="200dp"android:layout_marginBottom="20dp"android:layout_marginTop="20dp"app:layout_constraintEnd_toEndOf="parent"app:layout_constraintStart_toStartOf="parent"app:layout_constraintTop_toBottomOf="@id/login"app:layout_constraintBottom_toBottomOf="parent"app:url="@{`http://192.168.1.207:8080/download/kn.png`}" /></androidx.constraintlayout.widget.ConstraintLayout>
</layout>
ButtonClickListener.kt 源码
package com.example.lanidemokt.viewmodelimport android.view.View
import android.widget.TextView
import com.example.lanidemokt.utils.LogSettingclass ButtonClickListener {/** 界面点击事件封装* */fun msgTextClickListener(view: View) {view.text = "杀生丸丸哥哥一直很帅"
//        view.setText( "杀生丸丸哥哥一直很帅") //Use of setter method instead of property access syntax}
}
3. XXXBindingAdapter方法实现响应
使用DataBinding库时,DataBinding会针对控件属性生成对应的XXXBindingAdapter类,如TextViewBindingAdapter类,其对TextView的每个可以使用DataBinding的属性都生成了对应的方法,而且每个方法都使用了@BindingAdapter注解,注解中的参数就是对应View的属性。
自定义BindingAdapter 编写一个处理图片的自定义BindingAdapter类。然后定义一个静态方法,主要用于添加 BindingAdapter 注解,注解值是 ImageView 控件自定义的属性名,如下所示。
MainActivityBindingAdapter.kt (源码)
图片资源是部署到本地的Nginx上的:
http://192.168.1.207:8080/download/kn.png
package com.example.lanidemokt.adapterimport android.util.Log
import android.widget.ImageView
import androidx.databinding.BindingAdapter
import com.bumptech.glide.Glide
import com.catchpig.utils.LogUtils
import com.example.lanidemokt.utils.LogSettingclass MainActivityBindingAdapter {companion object {val TAG: String = "MainActivityBindingAdapter"/** 通过默认adapter 设置自定app:xxx属性,并设置xx属性值,实现响应式修改更新** */@BindingAdapter("url")@JvmStaticfun loadStudentDetails(view: ImageView,url: String = "http://192.168.1.207:8080/download/kn.png") {Glide.with(view!!).load(url).into(view)}}
}
多个参数的话,修改@BindingAdapter有value
@BindingAdapter(value = ["url", "placeholder", "error"])
@JvmStatic
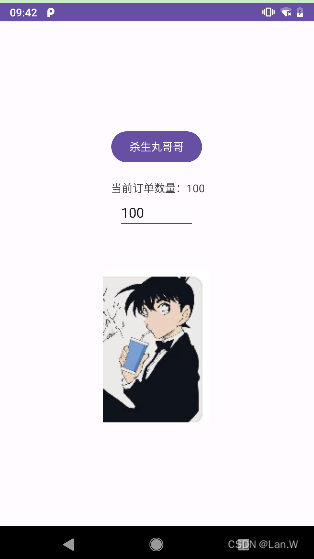
4.双向响应绑定(输入框)
输入数字时,消息text同步更新

Build.gradle(:app) 引入依赖库(完整源码)
增加自动生成BR实体的依赖库,
id 'kotlin-kapt'
kapt {generateStubs = true
}
kapt  "androidx.room:room-compiler:2.4.0"
plugins {alias(libs.plugins.android.application)alias(libs.plugins.jetbrains.kotlin.android)id 'kotlin-kapt'
}android {namespace 'com.example.lanidemokt'compileSdk 31defaultConfig {applicationId "com.example.lanidemokt"minSdk 24targetSdk 30versionCode 1versionName "1.0"testInstrumentationRunner "androidx.test.runner.AndroidJUnitRunner"}buildTypes {release {minifyEnabled falseproguardFiles getDefaultProguardFile('proguard-android-optimize.txt'), 'proguard-rules.pro'}}compileOptions {sourceCompatibility JavaVersion.VERSION_1_8targetCompatibility JavaVersion.VERSION_1_8}kotlinOptions {jvmTarget = '1.8'}lintOptions {abortOnError false}buildFeatures {viewBinding true
//        dataBinding  truecompose true}dataBinding {enabled = true}kapt {generateStubs = true}
}
dependencies {implementation "org.jetbrains.kotlinx:kotlinx-coroutines-core:1.3.2"implementation "org.jetbrains.kotlinx:kotlinx-coroutines-android:1.3.2"implementation "androidx.compose.ui:ui:1.0.1"implementation 'androidx.appcompat:appcompat:1.4.1'implementation 'androidx.appcompat:appcompat-resources:1.4.1'implementation 'com.google.android.material:material:1.5.0'implementation 'androidx.compose.material:material:1.0.1'implementation 'com.github.bumptech.glide:compiler:4.11.0'implementation 'com.github.bumptech.glide:glide:4.11.0'kapt  "androidx.room:room-compiler:2.4.0"
}
MainActivity.kt 源码
增加绑定viewmodel: binding?.order = OrderViewModel() // 绑定双向响应实体
package com.example.lanidemoktimport android.os.Bundle
import android.widget.ImageView
import androidx.appcompat.app.AppCompatActivity
import androidx.core.view.ViewCompat
import androidx.core.view.WindowInsetsCompat
import androidx.databinding.BaseObservable
import androidx.databinding.DataBindingUtil
import com.catchpig.utils.LogUtils
import com.example.lanidemokt.adapter.MainActivityBindingAdapter
import com.example.lanidemokt.databinding.ActivityMainBinding
import com.example.lanidemokt.viewmodel.ButtonClickListener
import com.example.lanidemokt.viewmodel.OrderViewModel
import kotlinx.coroutines.GlobalScope
import kotlinx.coroutines.delay
import kotlinx.coroutines.launch
import java.util.Dateclass MainActivity : AppCompatActivity() {/** DataBinding 对应一个Binding对象,对象名是布局文件文称加上Binding后缀* binding,activity_main.xml的布局实例* xml上所有变量与点击事件,必须是binding的成员属性或者成员方法函数,否则操作界面无效* 布局取响应式值 -表达式: `@{ }** */var binding: ActivityMainBinding? = null // 操作布局实例private var login: Login? = null  //声明一个响应式对象,用于uivar clickListener: ButtonClickListener? = null // 布局点击对象封装var vm: OrderViewModel = OrderViewModel()override fun onCreate(savedInstanceState: Bundle?) {super.onCreate(savedInstanceState) //        setContentView(R.layout.activity_main)binding = DataBindingUtil.setContentView(this, R.layout.activity_main)ViewCompat.setOnApplyWindowInsetsListener(findViewById(R.id.main)) { v, insets ->val systemBars = insets.getInsets(WindowInsetsCompat.Type.systemBars())v.setPadding(systemBars.left, systemBars.top, systemBars.right, systemBars.bottom)insets}initView()initData()corGlobalTest()}private fun initData() {LogUtils.init(this)}/* ** 在Controller层,将我们的data与model相关联* */data class Login(var name: String = "LLL", var msg: String) //意向绑定响应式data class Student(var name: String = "LLL", var score: Int) : BaseObservable() //双击绑定响应式private fun initView() {binding?.msg?.setText("我是谁")login = Login("LANI", "我是谁")//  binding?.login = Login("LANI", "我是谁")//  这一步必须要,否则点击没反应,否则界面不显示对应的名字与信息binding?.setLogin(Login("LANI", "我是谁"))binding?.setStudent(Student("LEE", 199))MainActivityBindingAdapter.loadStudentDetails(binding?.picture1 as ImageView,"http://192.168.1.207:8080/download/kn.png")binding?.picture1?.setOnClickListener {println("图片点击")LogUtils.d("图片点击")MainActivityBindingAdapter.loadStudentDetails(it as ImageView,"http://192.168.1.207:8080/download/88.jpg")}clickListener = ButtonClickListener()binding?.btnHandler = clickListener //给控件添加响应事件 :点击事件binding?.order = OrderViewModel() // 绑定双向响应实体}/** 协程创建* */fun corGlobalTest() {GlobalScope.launch {println("|--开始global${Date()}")delay(1000)println("|--END global${Date()}")}println("|--END ${Date()}")}
}
OrderViewModel.kt 源码
实现双向绑定 viewmodel,BaseObservable :普通的数据对象包装成一个可观察的数据对象
package com.example.lanidemokt.viewmodelimport androidx.databinding.BaseObservable
import androidx.databinding.Bindable
import com.catchpig.utils.LogUtils
import com.example.lanidemokt.BRclass OrderViewModel : BaseObservable() {/** 实现双向绑定 viewmodel,* BaseObservable :普通的数据对象包装成一个可观察的数据对象* 当使用name字段发生变更后,若想UI自动刷新,* 要求方法名必须以get开头并且标记Bindable注解* 注解才会自动在build目录BR类中生成entry* 数据模型继承 BaseObservable;* 要求获取数据方法名必须以 get 开头并且标记 @Bindable 注解;* 设置数据方法必须以 set 开头然后调用 notify() 函数既可以刷新视图。* BR 类是 BaseObservable 子类中由 @Bindable 注解修饰的函数生成;* BR 类生成位置在 //app\build\generated\source\kapt\debug\com\example\lanidemokt** */@get:Bindablevar orderCount: String? = "100"set(orderCount) {LogUtils.d("当前orderCount=${orderCount}")field = orderCountnotifyPropertyChanged(BR.orderCount)}}
activity_main.xml源码
引入viewmodel:
<variable name="order" type="com.example.lanidemokt.viewmodel.OrderViewModel" />
<?xml version="1.0" encoding="utf-8"?>
<layout xmlns:android="http://schemas.android.com/apk/res/android"xmlns:app="http://schemas.android.com/apk/res-auto"xmlns:tools="http://schemas.android.com/tools"><data><import type="android.view.View" /><variablename="order"type="com.example.lanidemokt.viewmodel.OrderViewModel" /><variablename="btnHandler"type="com.example.lanidemokt.viewmodel.ButtonClickListener" /><variablename="login"type="com.example.lanidemokt.MainActivity.Login" /><variablename="student"type="com.example.lanidemokt.MainActivity.Student" /></data><androidx.constraintlayout.widget.ConstraintLayoutandroid:id="@+id/main"android:layout_width="match_parent"android:layout_height="match_parent"tools:context=".MainActivity"><Buttonandroid:id="@+id/login"android:layout_width="wrap_content"android:layout_height="wrap_content"android:layout_marginTop="20dp"android:onClick="@{btnHandler::msgTextClickListener}"android:text="杀生丸哥哥"app:layout_constraintEnd_toEndOf="parent"app:layout_constraintStart_toStartOf="parent"app:layout_constraintTop_toBottomOf="@+id/msg4"tools:text="杀生丸哥哥" /><TextViewandroid:id="@+id/msg5"android:layout_width="wrap_content"android:layout_height="wrap_content"android:layout_marginTop="20dp"android:text="@{ ` 当前订单数量:`+order.orderCount}"app:layout_constraintEnd_toEndOf="parent"app:layout_constraintStart_toStartOf="parent"app:layout_constraintTop_toBottomOf="@+id/login"tools:text="消息2" /><!-- 双向响应数据,赋值语法  @={xx.xx}--><EditTextandroid:id="@+id/username"android:layout_width="100dp"android:layout_height="wrap_content"android:text="@={order.orderCount}"app:layout_constraintEnd_toEndOf="parent"app:layout_constraintStart_toStartOf="parent"app:layout_constraintTop_toBottomOf="@id/msg5" /><!--  XXXBindingAdapter方式设置app:url   --><ImageViewandroid:id="@+id/picture1"android:layout_width="300dp"android:layout_height="200dp"android:layout_marginTop="20dp"android:layout_marginBottom="20dp"app:layout_constraintBottom_toBottomOf="parent"app:layout_constraintEnd_toEndOf="parent"app:layout_constraintStart_toStartOf="parent"app:layout_constraintTop_toBottomOf="@id/login"app:url="@{`http://192.168.1.207:8080/download/kn.png`}" /></androidx.constraintlayout.widget.ConstraintLayout>
</layout>
双向响应完结。
-- 设置网络图片在ImageView 打开网络权限
AndroidManifest.xml
<?xml version="1.0" encoding="utf-8"?>
<manifest xmlns:android="http://schemas.android.com/apk/res/android"xmlns:tools="http://schemas.android.com/tools"><uses-permission android:name="android.permission.INTERNET"/><applicationandroid:allowBackup="true"android:dataExtractionRules="@xml/data_extraction_rules"android:fullBackupContent="@xml/backup_rules"android:icon="@mipmap/ic_launcher"android:label="@string/app_name"android:roundIcon="@mipmap/ic_launcher_round"android:supportsRtl="true"android:networkSecurityConfig="@xml/network_security_config"android:theme="@style/Theme.LaniDemoKt"tools:targetApi="31"><activityandroid:name=".MainActivity"android:usesCleartextTraffic="true"android:exported="true"><intent-filter><action android:name="android.intent.action.MAIN" /><category android:name="android.intent.category.LAUNCHER" /></intent-filter></activity></application></manifest>
app\src\main\res\xml\network_securit_config.xml
<?xml version="1.0" encoding="utf-8"?>
<network-security-config><base-config cleartextTrafficPermitted="true" />
</network-security-config>
相关文章:
DataBinding viewBinding(视图绑定与数据双向绑定)简单案例 (kotlin)
先上效果: 4个view的文字都是通过DataBinding填充的。交互事件:点击图片,切换图片 创建项目(android Studio 2023.3.1) Build.gradle(:app) 引入依赖库(完整源码) buildFeatures { vie…...

TensorFlow基于anaconda3快速构建
基于python构建太累 Installing Packages - Python Packaging User Guide 使用 pip 安装 TensorFlow 有兴趣自己学,我放弃了 -------------------------------------------------------- 下面基于anaconda 1、下载 Index of /anaconda/archive/ | 清华大学开…...

力扣72-编辑距离
题目链接 记忆化搜索: 解题关键:每次仅考虑两字符串word1、word2分别从0 - i修改成0-j下标的完全匹配(下标表示) 临界条件:当 i 或 j 小于0时,表示该字符串为空,编辑距离确定为 y1 或 x1 int dp[501][501…...

K8S 删除pod的正确步骤
在日常的k8s运维过程中,避免不了会对某些pod进行剔除,那么如何才能正确的剔除不需要的pod呢? 首先,需要查出想要删除的pod # 可通过任意方式进行查询 kubectl get pods -A |grep <podname> kubectl get pods -n <names…...

羊大师分析,羊奶健康生活的营养源泉
羊大师分析,羊奶健康生活的营养源泉 羊奶,作为一种古老的饮品,近年来因其独特的营养价值和健康益处而备受关注。今天,羊大师就来探讨一下羊奶与健康之间的紧密联系。 羊奶富含蛋白质、脂肪、维生素和矿物质等多种营养成分。羊奶…...

刷屏一天GPT-4o,发现GPT4用的都还不熟练?戳这儿
以ChatGPT、LLaMA、Gemini、DALLE、Midjourney、Stable Diffusion、星火大模型、文心一言、千问为代表AI大语言模型带来了新一波人工智能浪潮,可以面向科研选题、思维导图、数据清洗、统计分析、高级编程、代码调试、算法学习、论文检索、写作、翻译、润色、文献辅助…...

力扣HOT100 - 139. 单词拆分
解题思路: 动态规划 class Solution {public boolean wordBreak(String s, List<String> wordDict) {Set<String> wordDictSet new HashSet(wordDict);boolean[] dp new boolean[s.length() 1];dp[0] true;for (int i 1; i < s.length(); i) {…...

rush 功能特性梳理
Rush 可以让 JavaScript 开发者更轻松地同时构建、发布多个 NPM 包,即将多个包或项目放到一个大仓库下管理。 仅需一次 NPM 安装 仅需一步,Rush 便可以将你项目的所有依赖安装到一个公共文件夹下,该文件夹并不像 “package.json” 一样位于项…...
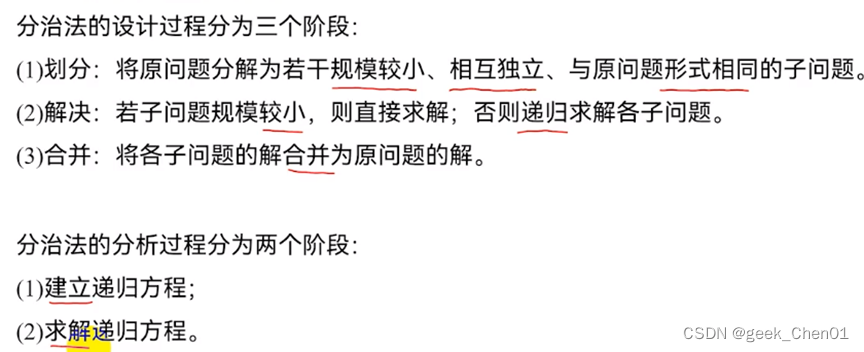
算法分析与设计复习__递归方程与分治
总结自:【算法设计与分析】期末考试突击课_哔哩哔哩_bilibili 1.递归,递归方程 1.1递归条件: 1.一个问题的解可以分解为几个子问题的解; 2.这个问题与分解之后的子问题,除了数据规模不同,求解思路完全一样; 3.存在…...

apk-parse包信息解析
最近公司做项目,需要解析apk包的基本信息,上网找了好多资料,最终决定使用apk-parse。 .yml文件 引入jar包 <dependency> <groupId>net.dongliu</groupId> <artifactId>apk-parser</artifactId> <version&…...

AI绘画进阶工具ComfyUI 傻瓜整合包安装教程!模型共享,一键安装!
哈喽大家好,今天给大家分享一下AI绘画工具Stable Diffusion的另一种UI界面,常见的有: 窗口式界面的WebUI 节点式工作流的ComfyUI ComfyUI更加进阶一些,是一个节点式工作流的AI绘画界面,它高度可定制、自定义编辑Ai生…...
无人机摄影测量数据处理、三维建模及在土方量计算
原文链接:无人机摄影测量数据处理、三维建模及在土方量计算https://mp.weixin.qq.com/s?__bizMzUzNTczMDMxMg&mid2247603776&idx2&snd96440e116900a46a71c45ff77316896&chksmfa8217a7cdf59eb15da39dd6366378b98ca39b9c836b76a473ff292b67ee37a6ff6…...
)
大模型平台后端开发(xiaomi)
文章目录 算法题 算法题 1 三数之和 (注意去重的边界条件,过几天再刷几次) 2 长度最小的子数组 (代码随想录题目,滑动窗口) 3 用链表实现栈 package mainimport ("errors""fmt" )// Node 定义链表节点 type…...
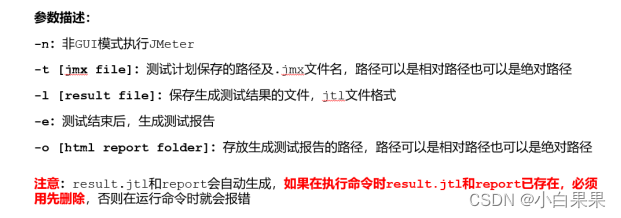
性能测试工具—jmeter的基础使用
1.Jmeter三个重要组件 1.1线程组的介绍: 特点: 模拟用户,支持多用户操作多个线程组可以串行执行,也可以并行执行 线程组的分类: setup线程组:前置处理,初始化普通线程组:编写…...

前端 JS 经典:CommonJs 规范
1. Node 环境介绍 CommonJs 简称 CMJ,CMJ 的模块标准,必须在 node 的环境中才支持。在浏览器中用,是不行的。 查看电脑是否安装 node,通过打开终端,运行 node -v 查看是否返回 node 版本。返回则已安装。 CMJ 在 no…...

三分钟速览量化交易系统:揭秘QMT与Ptrade(内附免费提供渠道)
在当今金融市场的快速发展中,量化交易系统以其独特的优势,逐渐成为投资者们追求稳定收益的重要工具。其中,QMT和Ptrade作为两大知名的量化交易平台,受到了广泛关注。本文将带您在三分钟内快速了解量化交易系统,并深入揭…...

处理QTcpSocket接收到数据的槽函数
这段代码是一个典型的用于处理QTcpSocket接收到数据的槽函数 onReadyRead()。它尝试从发出信号的QTcpSocket读取数据,并将这些数据添加到一个成员变量 recvList(假设这是一个 QList<QString> 类型)。整体上,这段代码逻辑是合…...

回归的无分布预测推理
摘要 我们利用保形推理,开发了回归中无分布预测推理的一般框架。所提出的方法允许使用回归函数的任何估计量构建响应变量的预测带。所得的预测带在标准假设下保留了原始估计量的一致性,同时保证了有限样本边际覆盖,即使这些假设不成立。我们…...

有限域中的一些概念
一、单位元: 在自然数中,任意数加上0等于本身,0则为加法的单位元,任意数乘以1等于本身,1则为乘法单位元。 有限域中单位元用e表示,即乘法,加法的单位元都用e表示,不过这两者的e不一样…...
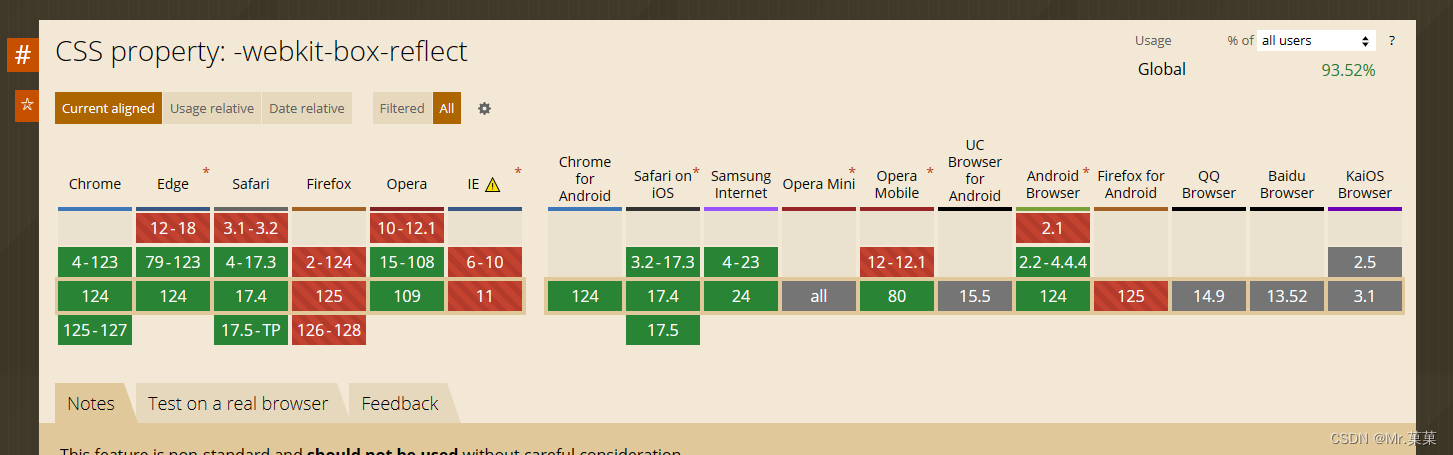
使用css的box-reflect属性制作倒影效果
box-reflect 是一个在 CSS 中创建元素倒影效果的非标准属性。尽管它在过去的一些 WebKit 浏览器中(如旧版的 Safari 和 Chrome)得到了支持,但由于它并未成为 CSS 标准的一部分,因此在现代浏览器中的兼容性较差。以下是对 box-refl…...

InsForge:基于Python的Instagram内容自动化创作与发布工具全解析
1. 项目概述与核心价值最近在折腾一个挺有意思的开源项目,叫InsForge。这名字听起来有点“工业锻造”的味道,实际上,它是一个专注于Instagram内容创作与自动化的工具集。简单来说,它试图帮你解决在Instagram上创作、发布、管理内容…...

ComfyUI Video Combine节点3个核心技巧:解决视频合并常见问题
ComfyUI Video Combine节点3个核心技巧:解决视频合并常见问题 【免费下载链接】ComfyUI-VideoHelperSuite Nodes related to video workflows 项目地址: https://gitcode.com/gh_mirrors/co/ComfyUI-VideoHelperSuite 在AI动画创作中,ComfyUI的Vi…...

百度网盘直链解析工具:3分钟突破限速实现满速下载
百度网盘直链解析工具:3分钟突破限速实现满速下载 【免费下载链接】baidu-wangpan-parse 获取百度网盘分享文件的下载地址 项目地址: https://gitcode.com/gh_mirrors/ba/baidu-wangpan-parse 你是否曾为百度网盘的下载速度而烦恼?非会员用户经常…...

从零构建现代化Web控制面板:安全架构与实时监控实践
1. 项目概述:一个为开发者设计的现代化控制面板最近在GitHub上看到一个挺有意思的项目,叫clawpanel,作者是kweephyo-pmt。光看名字,你可能会联想到“爪子”和“面板”,感觉像是个带点攻击性或工具属性的管理界面。实际…...

ViGEmBus终极指南:Windows游戏控制器模拟驱动完全解析
ViGEmBus终极指南:Windows游戏控制器模拟驱动完全解析 【免费下载链接】ViGEmBus Windows kernel-mode driver emulating well-known USB game controllers. 项目地址: https://gitcode.com/gh_mirrors/vi/ViGEmBus ViGEmBus是一款运行在Windows内核模式的驱…...

告别答辩PPT焦虑:百考通AI智能生成,高效搞定毕业答辩全流程
毕业季悄然来临,随着毕业论文定稿,答辩PPT成了不少同学面临的下一个挑战。不懂设计、不会梳理逻辑、找不到合适的学术模板……许多同学花费大量时间在排版调整、修改打磨上,不仅效率低下,还常常做出结构混乱、风格不统一的PPT&…...

CircuitPython开发进阶:从库文档解读到内存优化与异步编程实战
1. 从“能用”到“精通”:为什么你需要深入理解CircuitPython库文档刚接触CircuitPython时,我们往往是从复制粘贴示例代码开始的。这没什么问题,快速让一个LED闪烁起来,或者让传感器读出数据,那种即时反馈的成就感是驱…...

构建轻量级应用沙盒:Microverse原理与实践指南
1. 项目概述:一个轻量级、可移植的“微宇宙”开发沙盒最近在折腾一些边缘计算和嵌入式AI应用的原型验证,经常遇到一个头疼的问题:开发环境和部署环境不一致。在本地笔记本上跑得好好的Python脚本,放到树莓派或者Jetson Nano上&…...

Arm Cortex-A35 Cycle Model技术解析与SoC集成实战
1. Arm Cortex-A35 Cycle Model技术解析在SoC设计领域,虚拟平台验证已成为不可或缺的关键环节。作为Armv8-A架构中的能效比优化核心,Cortex-A35处理器通过Cycle Model提供了RTL级精度的硬件行为模拟能力。我在多个车载SoC项目中验证发现,其Cy…...

2026产品经理学数据分析对升职的价值
一、数据分析能力对产品经理升职的重要性数据分析能力已成为产品经理的核心竞争力之一。掌握数据分析技能可以帮助产品经理更精准地决策,提升产品成功率,从而在职业发展中占据优势。二、数据分析在产品经理工作中的具体应用通过数据分析优化产品功能迭代…...