Android-Glide详解
目录
一,介绍
二,使用
三,源码分析思路
四,with源码分析
五,模拟Glide生命周期管理
一,介绍
Glide目前是安卓最主流的加载图片的框架,也是源码最为复杂的框架之一。 要想完完全全吃透Glide的源码,可能需要半年甚至更多的时间。
但是如果分析过Glide的源码,不仅对我们的架构能力有很大提高,也会对面试中的关于Glide的问题知其然更知其所以然。
Glide的精髓,在于它的生命周期的管理和缓存策略。
二,使用
Glide的使用及其简单
// 项目的build.gradle添加依赖implementation 'com.github.bumptech.glide:glide:4.11.0'annotationProcessor 'com.github.bumptech.glide:compiler:4.11.0'在清单文件添加网络权限:
<uses-permission android:name="android.permission.INTERNET"/>布局文件很简单就一个imageview:
<?xml version="1.0" encoding="utf-8"?>
<androidx.constraintlayout.widget.ConstraintLayoutxmlns:android="http://schemas.android.com/apk/res/android"xmlns:app="http://schemas.android.com/apk/res-auto"xmlns:tools="http://schemas.android.com/tools"android:layout_width="match_parent"android:layout_height="match_parent"tools:context=".MainActivity"><ImageViewandroid:id="@+id/iv"android:layout_width="match_parent"android:layout_height="match_parent"/></androidx.constraintlayout.widget.ConstraintLayout>
使用:
class MainActivity : AppCompatActivity() {//图片urlprivate val url ="https://q7.itc.cn/q_70/images03/20240714/93ce0113753a4ff4b5f4e48f27ed3739.jpeg"override fun onCreate(savedInstanceState: Bundle?) {super.onCreate(savedInstanceState)setContentView(R.layout.activity_main)val iv =findViewById<ImageView>(R.id.iv)Glide.with(this).load(url).into(iv)}
}
效果:

三,源码分析思路
Glide的源码分析,我们可以从使用角度,拆分为三部分去分析。
class MainActivity : AppCompatActivity() {//图片urlprivate val url ="https://q7.itc.cn/q_70/images03/20240714/93ce0113753a4ff4b5f4e48f27ed3739.jpeg"override fun onCreate(savedInstanceState: Bundle?) {super.onCreate(savedInstanceState)setContentView(R.layout.activity_main)val iv =findViewById<ImageView>(R.id.iv)//第一步 调用with  得到RequestManagerval requestManager:RequestManager = Glide.with(this)//第二步 RequestManager调用load 得到requestBuliderval requestBulider:RequestBuilder<Drawable> =requestManager.load(url)//第三步 requestBulider调用intorequestBulider.into(iv)}
}
这样拆分的话,思路会比较清晰。
四,with源码分析
首先我们看一下with的源码:
@NonNull
public static RequestManager with(@NonNull Context context) {return getRetriever(context).get(context);
}@NonNull
public static RequestManager with(@NonNull Activity activity) {return getRetriever(activity).get(activity);
}@NonNull
public static RequestManager with(@NonNull FragmentActivity activity) {return getRetriever(activity).get(activity);
}@NonNull
public static RequestManager with(@NonNull Fragment fragment) {return getRetriever(fragment.getContext()).get(fragment);
}@SuppressWarnings("deprecation")
@Deprecated
@NonNull
public static RequestManager with(@NonNull android.app.Fragment fragment) {return getRetriever(fragment.getActivity()).get(fragment);
}@NonNull
public static RequestManager with(@NonNull View view) {return getRetriever(view.getContext()).get(view);
}
它可以接受的参数类型很多,确保多种场景下的使用
然后继续往下看getRetriever这个函数:
@NonNull
private static RequestManagerRetriever getRetriever(@Nullable Context context) {// Context could be null for other reasons (ie the user passes in null), but in practice it will// only occur due to errors with the Fragment lifecycle.Preconditions.checkNotNull(context,"You cannot start a load on a not yet attached View or a Fragment where getActivity() "+ "returns null (which usually occurs when getActivity() is called before the Fragment "+ "is attached or after the Fragment is destroyed).");return Glide.get(context).getRequestManagerRetriever();
}
判空不用看,直接看get(context)这个函数:
@NonNull
public static Glide get(@NonNull Context context) {if (glide == null) {GeneratedAppGlideModule annotationGeneratedModule =getAnnotationGeneratedGlideModules(context.getApplicationContext());synchronized (Glide.class) {if (glide == null) {checkAndInitializeGlide(context, annotationGeneratedModule);}}}return glide;
}
这个就是我们熟悉的双重检测单例模式,不了解的可以参考文章:Android 设计模式--单例模式_android开发饿汉单例-CSDN博客
然后我们看看 checkAndInitializeGlide(context, annotationGeneratedModule):
@GuardedBy("Glide.class")
private static void checkAndInitializeGlide(@NonNull Context context, @Nullable GeneratedAppGlideModule generatedAppGlideModule) {// In the thread running initGlide(), one or more classes may call Glide.get(context).// Without this check, those calls could trigger infinite recursion.if (isInitializing) {throw new IllegalStateException("You cannot call Glide.get() in registerComponents(),"+ " use the provided Glide instance instead");}isInitializing = true;initializeGlide(context, generatedAppGlideModule);isInitializing = false;
}
这里好像没有什么具体的信息,我们接着往下看initializeGlide(context,generatedAppGlideModule)这个函数:
@GuardedBy("Glide.class")
private static void initializeGlide(@NonNull Context context, @Nullable GeneratedAppGlideModule generatedAppGlideModule) {initializeGlide(context, new GlideBuilder(), generatedAppGlideModule);
}
好的,依然继续往下看initializeGlide(context, new GlideBuilder(), generatedAppGlideModule)
@GuardedBy("Glide.class")
@SuppressWarnings("deprecation")
private static void initializeGlide(@NonNull Context context,@NonNull GlideBuilder builder,@Nullable GeneratedAppGlideModule annotationGeneratedModule) {//获取应用级别的上下文Context applicationContext = context.getApplicationContext();List<com.bumptech.glide.module.GlideModule> manifestModules = Collections.emptyList();if (annotationGeneratedModule == null || annotationGeneratedModule.isManifestParsingEnabled()) {manifestModules = new ManifestParser(applicationContext).parse();}if (annotationGeneratedModule != null&& !annotationGeneratedModule.getExcludedModuleClasses().isEmpty()) {Set<Class<?>> excludedModuleClasses = annotationGeneratedModule.getExcludedModuleClasses();Iterator<com.bumptech.glide.module.GlideModule> iterator = manifestModules.iterator();while (iterator.hasNext()) {com.bumptech.glide.module.GlideModule current = iterator.next();if (!excludedModuleClasses.contains(current.getClass())) {continue;}if (Log.isLoggable(TAG, Log.DEBUG)) {Log.d(TAG, "AppGlideModule excludes manifest GlideModule: " + current);}iterator.remove();}}if (Log.isLoggable(TAG, Log.DEBUG)) {for (com.bumptech.glide.module.GlideModule glideModule : manifestModules) {Log.d(TAG, "Discovered GlideModule from manifest: " + glideModule.getClass());}}
//通过注解生成的代码拿到 RequestManagerFactoryRequestManagerRetriever.RequestManagerFactory factory =annotationGeneratedModule != null? annotationGeneratedModule.getRequestManagerFactory(): null;
//将拿到的工厂添加到 GlideBuilderbuilder.setRequestManagerFactory(factory);for (com.bumptech.glide.module.GlideModule module : manifestModules) {module.applyOptions(applicationContext, builder);}if (annotationGeneratedModule != null) {annotationGeneratedModule.applyOptions(applicationContext, builder);}
//通过 Builder 建造者模式,构建出 Glide 实例对象Glide glide = builder.build(applicationContext);
//注册组件回调for (com.bumptech.glide.module.GlideModule module : manifestModules) {try {module.registerComponents(applicationContext, glide, glide.registry);} catch (AbstractMethodError e) {throw new IllegalStateException("Attempting to register a Glide v3 module. If you see this, you or one of your"+ " dependencies may be including Glide v3 even though you're using Glide v4."+ " You'll need to find and remove (or update) the offending dependency."+ " The v3 module name is: "+ module.getClass().getName(),e);}}if (annotationGeneratedModule != null) {annotationGeneratedModule.registerComponents(applicationContext, glide, glide.registry);}applicationContext.registerComponentCallbacks(glide);
//将构建出来的 glide 赋值给 Glide 的静态变量Glide.glide = glide;
}
这个函数里面的信息量是非常大的,主要是进行了一系列的初始化操作,通过 Builder 建造者模式,构建出 Glide 实例对象,接着我们看看builder模式进行了哪些构建:
@NonNull
Glide build(@NonNull Context context) {
//网络请求的线程池if (sourceExecutor == null) {sourceExecutor = GlideExecutor.newSourceExecutor();}
//本地磁盘缓存的线程池if (diskCacheExecutor == null) {diskCacheExecutor = GlideExecutor.newDiskCacheExecutor();}
//加载图片动画的一个线程池if (animationExecutor == null) {animationExecutor = GlideExecutor.newAnimationExecutor();}
//对图片加载到内存的一个计算if (memorySizeCalculator == null) {memorySizeCalculator = new MemorySizeCalculator.Builder(context).build();}
//默认网络连接监控的工厂if (connectivityMonitorFactory == null) {connectivityMonitorFactory = new DefaultConnectivityMonitorFactory();}
//Bitmap 对象池if (bitmapPool == null) {int size = memorySizeCalculator.getBitmapPoolSize();if (size > 0) {bitmapPool = new LruBitmapPool(size);} else {bitmapPool = new BitmapPoolAdapter();}}
//数组对象池if (arrayPool == null) {arrayPool = new LruArrayPool(memorySizeCalculator.getArrayPoolSizeInBytes());}
//资源内存缓存if (memoryCache == null) {memoryCache = new LruResourceCache(memorySizeCalculator.getMemoryCacheSize());}
//磁盘缓存的工厂if (diskCacheFactory == null) {diskCacheFactory = new InternalCacheDiskCacheFactory(context);}
//构建执行缓存策略跟线程池的引擎if (engine == null) {engine =new Engine(memoryCache,diskCacheFactory,diskCacheExecutor,sourceExecutor,GlideExecutor.newUnlimitedSourceExecutor(),animationExecutor,isActiveResourceRetentionAllowed);}if (defaultRequestListeners == null) {defaultRequestListeners = Collections.emptyList();} else {defaultRequestListeners = Collections.unmodifiableList(defaultRequestListeners);}
//RequestManagerRetriever 请求管理类RequestManagerRetriever requestManagerRetriever =new RequestManagerRetriever(requestManagerFactory);return new Glide(context,engine,memoryCache,bitmapPool,arrayPool,requestManagerRetriever,connectivityMonitorFactory,logLevel,defaultRequestOptionsFactory,defaultTransitionOptions,defaultRequestListeners,isLoggingRequestOriginsEnabled,isImageDecoderEnabledForBitmaps);
}
这里就完成了Glide的构建。
然后我们回到最开始的getRetriever(activity).get(activity),看看这个函数里面都干了些什么:
@NonNull
public RequestManager get(@NonNull FragmentActivity activity) {
//首先判断当前是否在子线程中if (Util.isOnBackgroundThread()) {
//在子线程中 就通过Application级别的上下文加载return get(activity.getApplicationContext());} else {
//检查Activity是否已经销毁assertNotDestroyed(activity);
//拿到当前activity的fragmentmanagerFragmentManager fm = activity.getSupportFragmentManager();
//生成一个fragment 然后绑定一个请求管理类RequestManagerreturn supportFragmentGet(activity, fm, /*parentHint=*/ null, isActivityVisible(activity));}
}
看到这里,我们就应该意识到一个问题,如果我们在子线程中去调用Glide的话,就会使用应用级别的上下文去加载图片,这样大量使用,可能会导致内存泄漏。
然后在主线程中使用,就是Glide的精髓之一了,加载一个透明fragment来感应当前页面的生命周期的变化。
接着看看supportFragmentGet是怎么实现的:
@NonNull
private RequestManager supportFragmentGet(@NonNull Context context,@NonNull FragmentManager fm,@Nullable Fragment parentHint,boolean isParentVisible) {
//在当前的 Acitivty 添加一个 Fragment 用于管理请求的生命周期SupportRequestManagerFragment current =getSupportRequestManagerFragment(fm, parentHint, isParentVisible);
//拿到当前请求的管理类RequestManager requestManager = current.getRequestManager();
//如果为空 就创建一个if (requestManager == null) {// TODO(b/27524013): Factor out this Glide.get() call.Glide glide = Glide.get(context);requestManager =factory.build(glide, current.getGlideLifecycle(), current.getRequestManagerTreeNode(), context);current.setRequestManager(requestManager);}return requestManager;
}
这里就是添加一个fragment管理生命周期。然后返回一个RequestManager对象。
接下来再具体看看getSupportRequestManagerFragment是怎么添加的:
@NonNull
private SupportRequestManagerFragment getSupportRequestManagerFragment(@NonNull final FragmentManager fm, @Nullable Fragment parentHint, boolean isParentVisible) {
//通过tag拿到fragment实例 避免重复SupportRequestManagerFragment current =(SupportRequestManagerFragment) fm.findFragmentByTag(FRAGMENT_TAG);
//没有实例的话 就去缓存找if (current == null) {current = pendingSupportRequestManagerFragments.get(fm);
//缓存也没有 就创建一个if (current == null) {current = new SupportRequestManagerFragment();current.setParentFragmentHint(parentHint);if (isParentVisible) {current.getGlideLifecycle().onStart();}pendingSupportRequestManagerFragments.put(fm, current);fm.beginTransaction().add(current, FRAGMENT_TAG).commitAllowingStateLoss();handler.obtainMessage(ID_REMOVE_SUPPORT_FRAGMENT_MANAGER, fm).sendToTarget();}}return current;
}
这里主要是拿到fragment实例。
从上面我们可以看出Glide主要是做了一些初始化的工作,缓存,线程池,复用池的构建等等。
然后绑定了一个fragment来管理生命周期
with的源码差不多就是这些,可能比较繁琐,但是不像rxjava那样绕来绕去的,主线还是比较清晰的。
五,模拟Glide生命周期管理
首先创建一个接口,监听生命周期回调:
public interface LifecycleListener {void onCreate();void onStart();void onStop();void onDestroy();}然后创建一个用来管理生命周期监听的接口:
public interface Lifecycle {void addListener(@NonNull LifecycleListener listener);void removeListener(@NonNull LifecycleListener listener);}通过上面的分析,我们知道Glide传入的上下文有应用级别的和非应用级别的。所以我们首先创建一个应用级别的Lifecycle:
public class ApplicationLifecycle implements Lifecycle {@Overridepublic void addListener(@NonNull LifecycleListener listener) {/*** APP启动的时候,执行onCreate*/listener.onCreate();}@Overridepublic void removeListener(@NonNull LifecycleListener listener) {//APP销毁的时候,啥也不用做了}
}
然后创建一个非应用级别的lifecycle:
public class ActivityFragmentLifecycle implements Lifecycle {private final Set<LifecycleListener> lifecycleListeners =Collections.newSetFromMap(new WeakHashMap<LifecycleListener, Boolean>());private boolean isStarted; private boolean isDestroyed; @Overridepublic void addListener(@NonNull LifecycleListener listener) {lifecycleListeners.add(listener);if (isDestroyed) {listener.onDestroy();} else if (isStarted) {listener.onCreate();} else {listener.onStop();  }}@Overridepublic void removeListener(@NonNull LifecycleListener listener) {lifecycleListeners.remove(listener);}void onStart() {isStarted = true;for (LifecycleListener lifecycleListener : lifecycleListeners) {lifecycleListener.onCreate();}}void onStop() {isStarted = false;for (LifecycleListener lifecycleListener : lifecycleListeners) {lifecycleListener.onStop();}}void onDestroy() {isDestroyed = true;for (LifecycleListener lifecycleListener : lifecycleListeners) {lifecycleListener.onDestroy();}}
}
创建一个具体的RequestManager 管理生命周期:
public class RequestManager implements LifecycleListener {private Lifecycle lifecycle;public RequestManager(Lifecycle lifecycle, Context applicationContext) {this.lifecycle = lifecycle;this.lifecycle.addListener(this);}@Overridepublic void onCreate() {Log.d(LOG.TAG, "yh-----onCreate");}@Overridepublic void onStart() {Log.d(LOG.TAG, "yh-----onStart");}@Overridepublic void onStop() {Log.d(LOG.TAG, "yh-----onStop");}@Overridepublic void onDestroy() {Log.d(LOG.TAG, "yh-----onDestroy");this.lifecycle.removeListener(this);}
}
创建一个空白的fragment:
public class RequestManagerFragment extends Fragment {private final ActivityFragmentLifecycle lifecycle;@Nullableprivate RequestManager requestManager;public RequestManagerFragment() {this(new ActivityFragmentLifecycle());}@VisibleForTesting@SuppressLint("ValidFragment")public RequestManagerFragment(@NonNull ActivityFragmentLifecycle lifecycle) {this.lifecycle = lifecycle;}public void setRequestManager(@Nullable RequestManager requestManager) {this.requestManager = requestManager;}@NonNullpublic ActivityFragmentLifecycle getGlideLifecycle() {return lifecycle;}@Overridepublic void onAttach(@NonNull Context context) {super.onAttach(context);this.lifecycle.addListener(requestManager);}@Nullablepublic RequestManager getRequestManager() {return requestManager;}@Overridepublic void onDetach() {super.onDetach();}@Overridepublic void onStart() {super.onStart();lifecycle.onStart();}@Overridepublic void onStop() {super.onStop();lifecycle.onStop();}@Overridepublic void onDestroy() {super.onDestroy();lifecycle.onDestroy();}
}
简单写一个Glide管理类:
public class Glide {private static volatile Glide glide;@NonNullpublic static Glide get(@NonNull Context context) {if (glide == null) {synchronized (Glide.class) {if (glide == null) {glide = new Glide();}}}return glide;}@NonNullpublic static RequestManager with(@NonNull Context context) {return new RequestManager(new ActivityFragmentLifecycle(),context);}@NonNullpublic static RequestManager withApplication(@NonNull Context context) {return new RequestManager(new ApplicationLifecycle(),context);}}
使用也很简单:
public class DemoActivity extends AppCompatActivity {@Overrideprotected void onCreate(@Nullable Bundle savedInstanceState) {super.onCreate(savedInstanceState);setContentView(R.layout.activity_main);Glide.with(this);Glide.withApplication(this.getApplicationContext());}
}
这样当DemoActivity创建时,会创建一个ActivityFragmentLifecycle,执行它的onStart方法,从而调用RequestManager的onStart方法,onDestory也是同样的道理。这样就实现了生命周期的检测。这里只是简单写下有助于理解Glide内部是怎么做的。
关于load和into以及缓存机制 改天再写。
相关文章:

Android-Glide详解
目录 一,介绍 二,使用 三,源码分析思路 四,with源码分析 五,模拟Glide生命周期管理 一,介绍 Glide目前是安卓最主流的加载图片的框架,也是源码最为复杂的框架之一。 要想完完全全吃透Glide的源…...

2.Nuxt学习 组件使用和路由跳转相关
组件定义和使用 普通组件的使用 在Nuxt的项目中,可以直接在components文件夹下建立组件 在页面中直接使用 无需引入 多层级组件的使用 我们有时候会需要多层级组件来简化代码结构 比如我们需要给Banner组件添加一个子组件 我们直接建立其名称的文件夹 写入子组…...

代码开发相关操作
使用Vue项目管理器创建项目:(vue脚手架安装一次就可以全局使用) windowR打开命令窗口,输入vue ui,进入GUI页面,点击创建-> 设置项目名称,在初始化git下面输入:init project&…...

动态导出word文件支持转pdf
提示:文章写完后,目录可以自动生成,如何生成可参考右边的帮助文档 文章目录 前言一、功能说明二、使用步骤1.controller2.工具类 DocumentUtil 导出样式 前言 提示:这里可以添加本文要记录的大概内容: 例如ÿ…...

登陆harbor发现证书是错误的, 那么如何更新harbor的证书呢
Error response from daemon: Get "https://172.16.21.35/v2/": tls: failed to verify certificate: x509: certificate is valid for 127.0.0.1, ::1, 172.16.21.30, not 172.16.21.35 版本 v2.10.1-b7b88476 不需要从头看, 直接看最下面的成功的证书创建 这里面首…...

【Leetcode Top 100】199. 二叉树的右视图
问题背景 给定一个二叉树的 根节点 r o o t root root,想象自己站在它的右侧,按照从顶部到底部的顺序,返回从右侧所能看到的节点值。 数据约束 二叉树的节点个数的范围是 [ 0 , 100 ] [0,100] [0,100] − 100 ≤ N o d e . v a l ≤ 100…...

React自学:如何使用localStorage,以及如何实现删除笔记操作
1. 初始化notes 以下这段代码完成了这些操作: 调用 localStorage.getItem("notes") 从浏览器的本地存储中获取名为 “notes” 的数据。使用 JSON.parse 将获取到的字符串解析成数组。如果本地存储中没有 “notes” 数据(返回值为 null&#…...

go语言使用websocket发送一条消息A,持续接收返回的消息
在Go语言中实现一个WebSocket客户端,可以使用gorilla/websocket这个非常流行的库来处理WebSocket连接。下面是一个简单的示例,展示了如何创建一个WebSocket客户端,向服务器发送消息"A",并持续接收来自服务器的响应。 首…...

如何对小型固定翼无人机进行最优的路径跟随控制?
控制架构 文章继续采用的是 ULTRA-Extra无人机,相关参数如下: 这里用于guidance law的无人机运动学模型为: { x ˙ p V a cos γ cos χ V w cos γ w cos χ w y ˙ p V a cos γ sin χ V w cos γ w sin χ…...

C++常见面试题-初级2
1. C和C有什么区别? C是面向对象的语言,而C是面向过程的语言;C引入new/delete运算符,取代了C中的malloc/free库函数;C引入引用的概念,而C中没有;C引入类的概念,而C中没有࿱…...

Spring Security 6 系列之二 - 基于数据库的用户认证和认证原理
之所以想写这一系列,是因为之前工作过程中使用Spring Security,但当时基于spring-boot 2.3.x,其默认的Spring Security是5.3.x。之后新项目升级到了spring-boot 3.3.0,结果一看Spring Security也升级为6.3.0,关键是其风…...

mfc140.dll是什么东西?mfc140.dll缺失的几种具体解决方法
mfc140.dll是Microsoft Foundation Classes(MFC)库中的一个动态链接库(DLL)文件,它是微软基础类库的一部分,为Windows应用程序的开发提供了丰富的类库和接口。MFC库旨在简化Windows应用程序的开发过程&…...

【STM32 Modbus编程】-作为主设备写入多个线圈和寄存器
作为主设备写入多个线圈和寄存器 文章目录 作为主设备写入多个线圈和寄存器1、硬件准备与连接1.1 RS485模块介绍1.2 硬件配置与接线1.3 软件准备2、写入多个线圈2.1 数据格式2.2 发送数据2.3 结果3、写入多个寄存器3.1 数据格式3.2 发送数据3.3 结果本文将实现STM32作为ModBus主…...

Windows安全中心(病毒和威胁防护)的注册
文章目录 Windows安全中心(病毒和威胁防护)的注册1. 简介2. WSC注册初探3. WSC注册原理分析4. 关于AMPPL5. 参考 Windows安全中心(病毒和威胁防护)的注册 本文我们来分析一下Windows安全中心(Windows Security Center…...

微积分复习笔记 Calculus Volume 2 - 4.2 Direction Fields and Numerical Methods
4.2 Direction Fields and Numerical Methods - Calculus Volume 2 | OpenStax...
及其在大型语言模型中的应用)
深入理解旋转位置编码(RoPE)及其在大型语言模型中的应用
文章目录 前言一、 旋转位置编码原理1、RoPE概述2、 复数域内的旋转1、位置编码生成2、 应用位置编码二、RoPE的实现细节1、RotaryEmbedding类设计2、apply_rotary_pos_emb函数3、demo_apply_rotary_pos_emb函数三、完整RoPE代码Demo前言 随着自然语言处理(NLP)领域的快速发…...

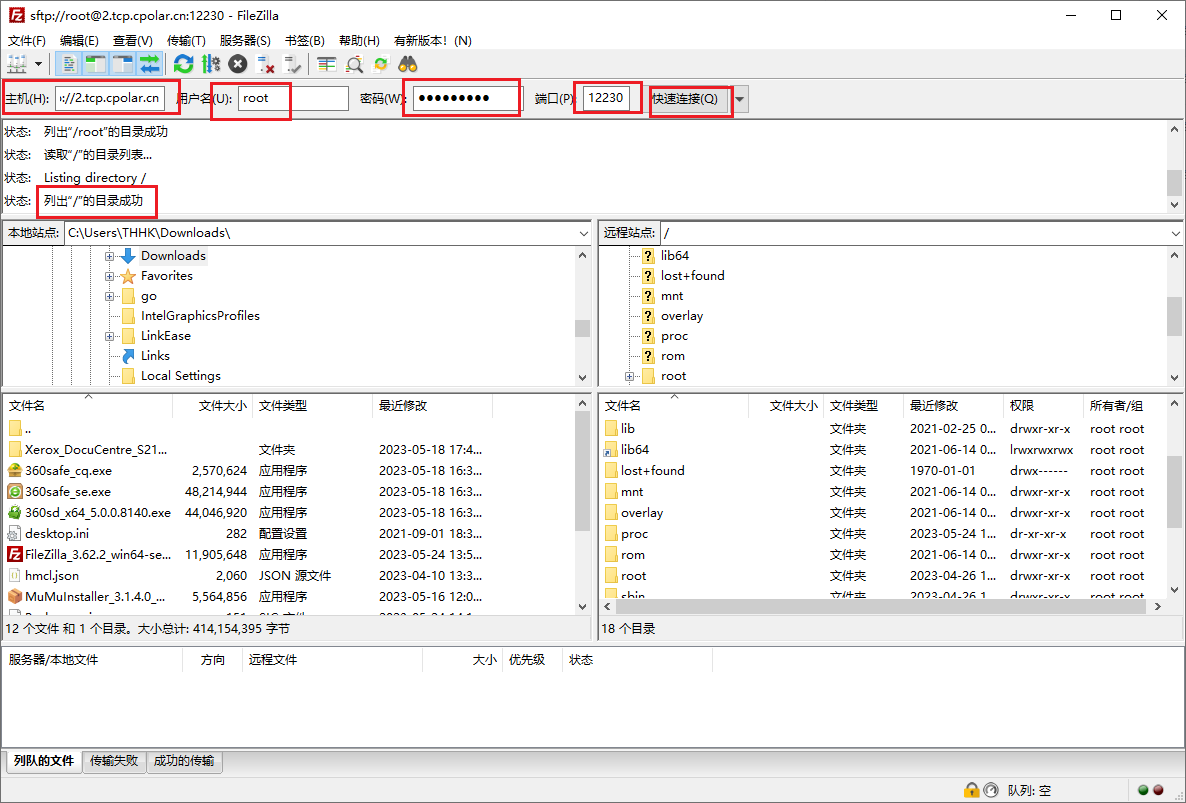
内网穿透的应用-在OpenWrt上轻松搭建SFTP服务,安全传输文件不再难!
文章目录 前言1. 安装openssh-sftp-server2. 安装cpolar工具3.配置SFTP远程访问4.固定远程连接地址 前言 本次教程我们将在OpenWRT系统上安装SFTP服务,并结合cpolar内网穿透,创建安全隧道映射22端口,实现在公网环境下远程OpenWRT SFTP&#…...

【图像处理lec3、4】空间域的图像增强
目录 1. 空间域图像增强的背景与目标 2. 空间域处理的数学描述 3. 灰度级变换 4. 幂律变换(Power-Law Transformation) 5、 分段线性变换 Case 1: 对比度拉伸 Case 2: 灰度切片 Case 3: 按位切片 6、对数变换(Logarithmic Transform…...

【算法day13】二叉树:递归与回溯
题目引用 找树左下角的值路径总和从中序与后序遍历构造二叉树 今天就简简单单三道题吧~ 1. 找到树左下角的值 给定一个二叉树的 根节点 root,请找出该二叉树的 最底层 最左边 节点的值。 假设二叉树中至少有一个节点。 示例 1: 输入: root [2,1,3] 输出: 1 我们…...

上海亚商投顾:创业板指缩量下跌 多只高位股午后跌停
上海亚商投顾前言:无惧大盘涨跌,解密龙虎榜资金,跟踪一线游资和机构资金动向,识别短期热点和强势个股。 一.市场情绪 市场全天震荡调整,创业板指领跌,高位股开始出现退潮,建设工业、星光股份、…...

MySQL 隔离级别:脏读、幻读及不可重复读的原理与示例
一、MySQL 隔离级别 MySQL 提供了四种隔离级别,用于控制事务之间的并发访问以及数据的可见性,不同隔离级别对脏读、幻读、不可重复读这几种并发数据问题有着不同的处理方式,具体如下: 隔离级别脏读不可重复读幻读性能特点及锁机制读未提交(READ UNCOMMITTED)允许出现允许…...

爬虫基础学习day2
# 爬虫设计领域 工商:企查查、天眼查短视频:抖音、快手、西瓜 ---> 飞瓜电商:京东、淘宝、聚美优品、亚马逊 ---> 分析店铺经营决策标题、排名航空:抓取所有航空公司价格 ---> 去哪儿自媒体:采集自媒体数据进…...

初学 pytest 记录
安装 pip install pytest用例可以是函数也可以是类中的方法 def test_func():print()class TestAdd: # def __init__(self): 在 pytest 中不可以使用__init__方法 # self.cc 12345 pytest.mark.api def test_str(self):res add(1, 2)assert res 12def test_int(self):r…...
)
C++课设:简易日历程序(支持传统节假日 + 二十四节气 + 个人纪念日管理)
名人说:路漫漫其修远兮,吾将上下而求索。—— 屈原《离骚》 创作者:Code_流苏(CSDN)(一个喜欢古诗词和编程的Coder😊) 专栏介绍:《编程项目实战》 目录 一、为什么要开发一个日历程序?1. 深入理解时间算法2. 练习面向对象设计3. 学习数据结构应用二、核心算法深度解析…...

GO协程(Goroutine)问题总结
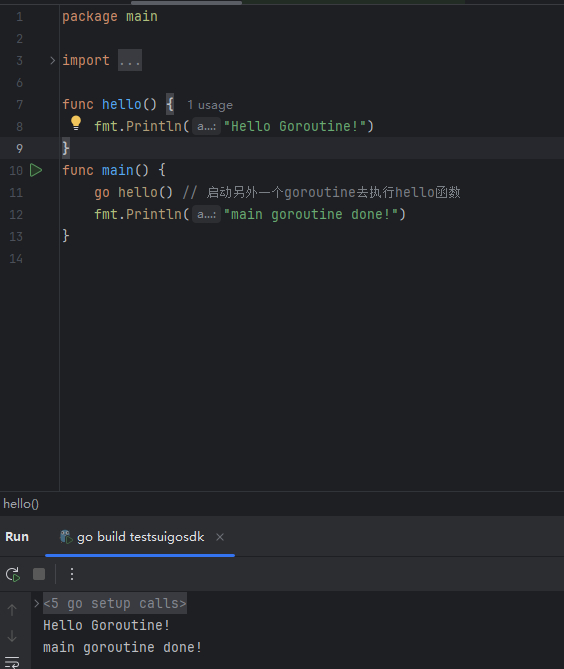
在使用Go语言来编写代码时,遇到的一些问题总结一下 [参考文档]:https://www.topgoer.com/%E5%B9%B6%E5%8F%91%E7%BC%96%E7%A8%8B/goroutine.html 1. main()函数默认的Goroutine 场景再现: 今天在看到这个教程的时候,在自己的电…...

4. TypeScript 类型推断与类型组合
一、类型推断 (一) 什么是类型推断 TypeScript 的类型推断会根据变量、函数返回值、对象和数组的赋值和使用方式,自动确定它们的类型。 这一特性减少了显式类型注解的需要,在保持类型安全的同时简化了代码。通过分析上下文和初始值,TypeSc…...

在 Spring Boot 项目里,MYSQL中json类型字段使用
前言: 因为程序特殊需求导致,需要mysql数据库存储json类型数据,因此记录一下使用流程 1.java实体中新增字段 private List<User> users 2.增加mybatis-plus注解 TableField(typeHandler FastjsonTypeHandler.class) private Lis…...

云原生周刊:k0s 成为 CNCF 沙箱项目
开源项目推荐 HAMi HAMi(原名 k8s‑vGPU‑scheduler)是一款 CNCF Sandbox 级别的开源 K8s 中间件,通过虚拟化 GPU/NPU 等异构设备并支持内存、计算核心时间片隔离及共享调度,为容器提供统一接口,实现细粒度资源配额…...

加密通信 + 行为分析:运营商行业安全防御体系重构
在数字经济蓬勃发展的时代,运营商作为信息通信网络的核心枢纽,承载着海量用户数据与关键业务传输,其安全防御体系的可靠性直接关乎国家安全、社会稳定与企业发展。随着网络攻击手段的不断升级,传统安全防护体系逐渐暴露出局限性&a…...

Qt的学习(一)
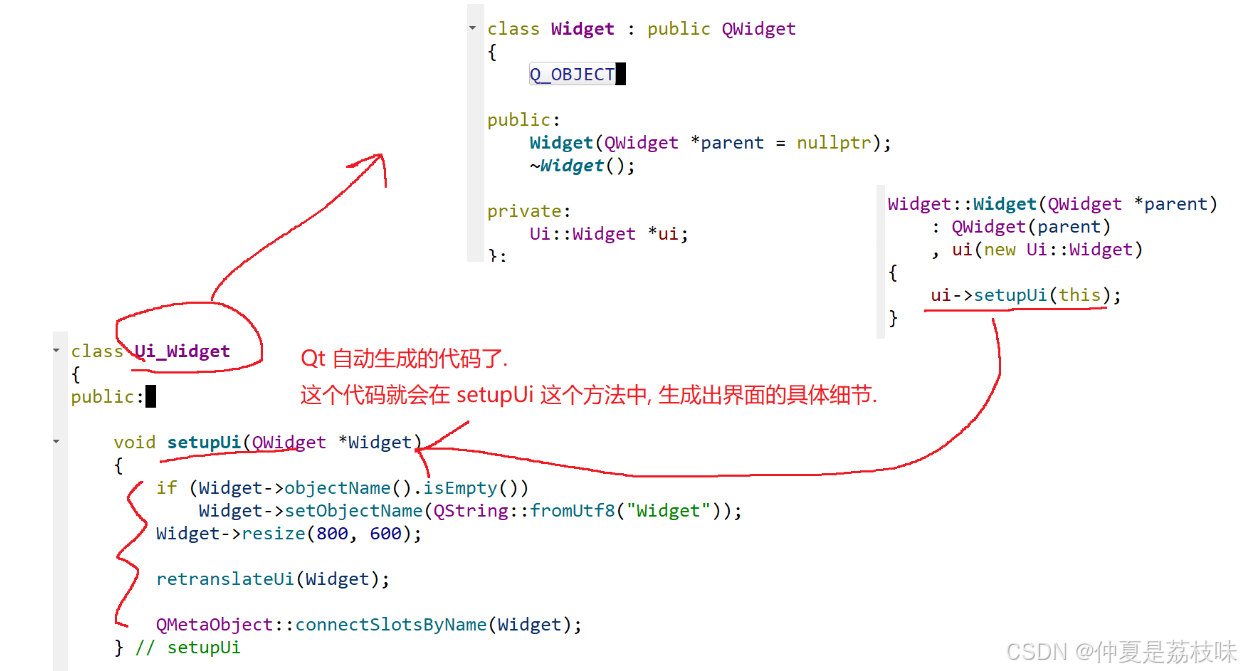
1.什么是Qt Qt特指用来进行桌面应用开发(电脑上写的程序)涉及到的一套技术Qt无法开发网页前端,也不能开发移动应用。 客户端开发的重要任务:编写和用户交互的界面。一般来说和用户交互的界面,有两种典型风格&…...
